Modern Rodding TECH

InTheGarageMedia.com

"Firewall Replacement" title
New AMD firewall
1-2. Out with the old and in with the new–firewall, that is. The Auto Metal Direct (AMD) firewall for the ’64 Ford Galaxie (PN 370-8964) is a good fit, making further firewall-related installations an easy process.
Auto Metal Direct Supplies the Sheetmetal and The Installation Center Performs Their Magic
By Brian Brennan Photography by Jason Chandler
D

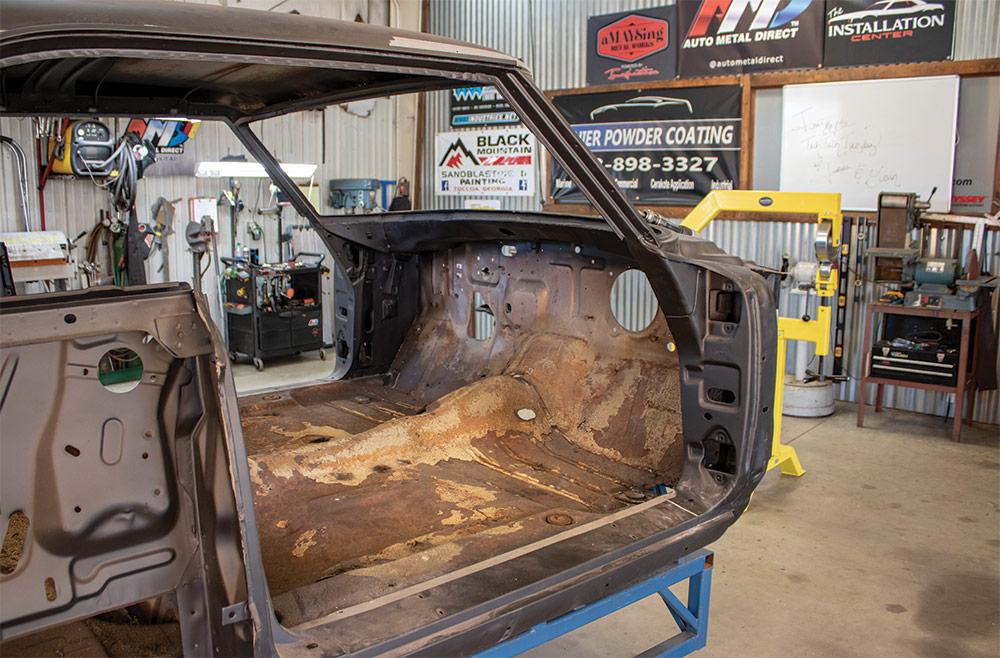
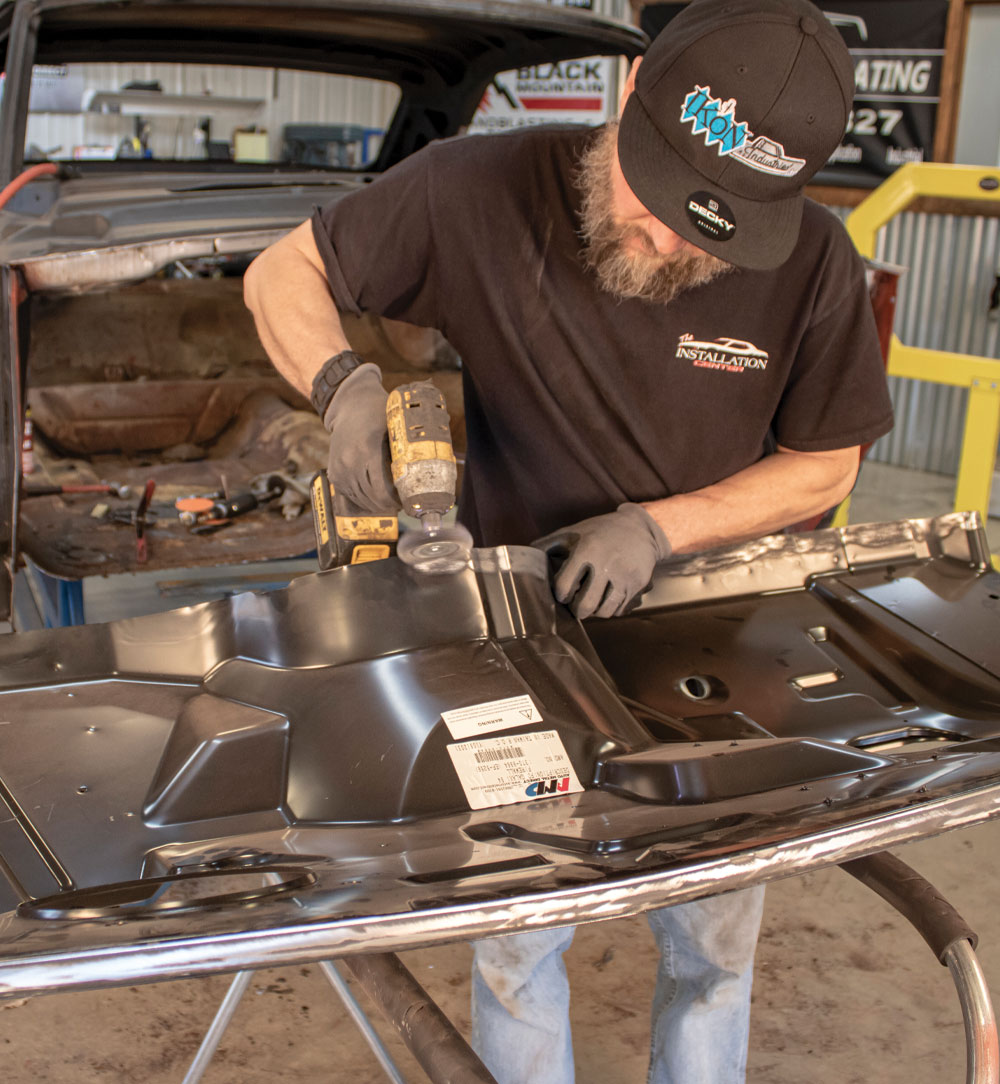
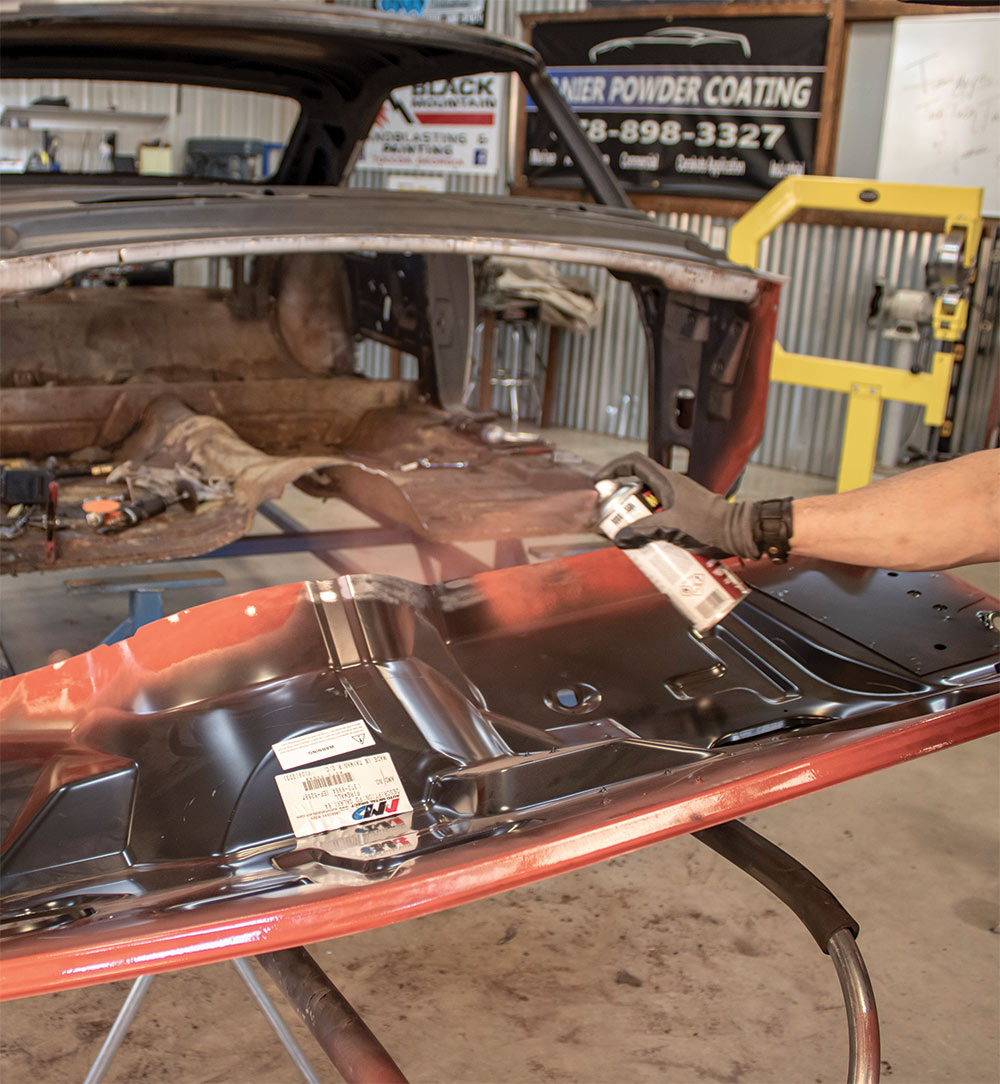
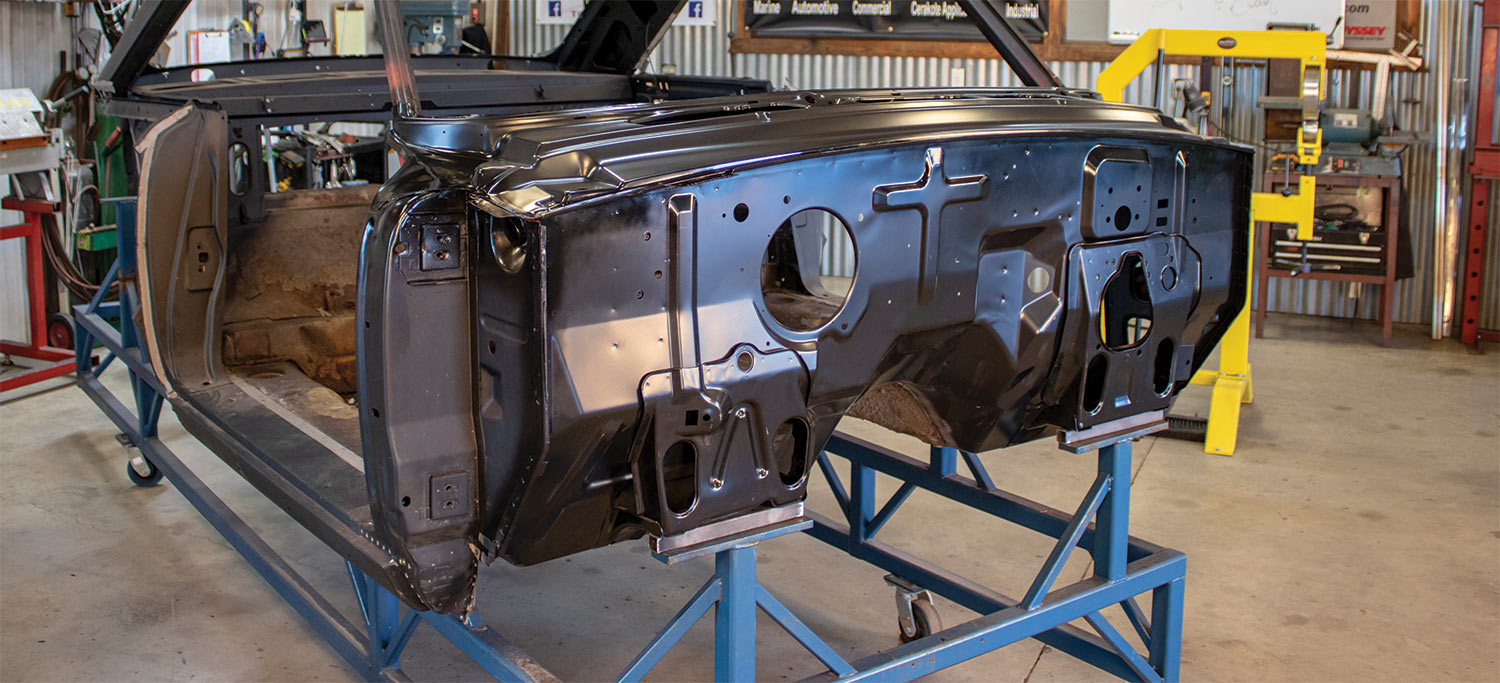
ealing with the hot rods from the ’50s and ’60s is a lot easier nowadays given there is so much reproduction sheetmetal. This month we are going to look at a ’64 Ford Galaxie and the replacement of its firewall using an Auto Metal Direct (AMD) firewall (PN 370-8964). The work for this project was done at The Installation Center (TIC).

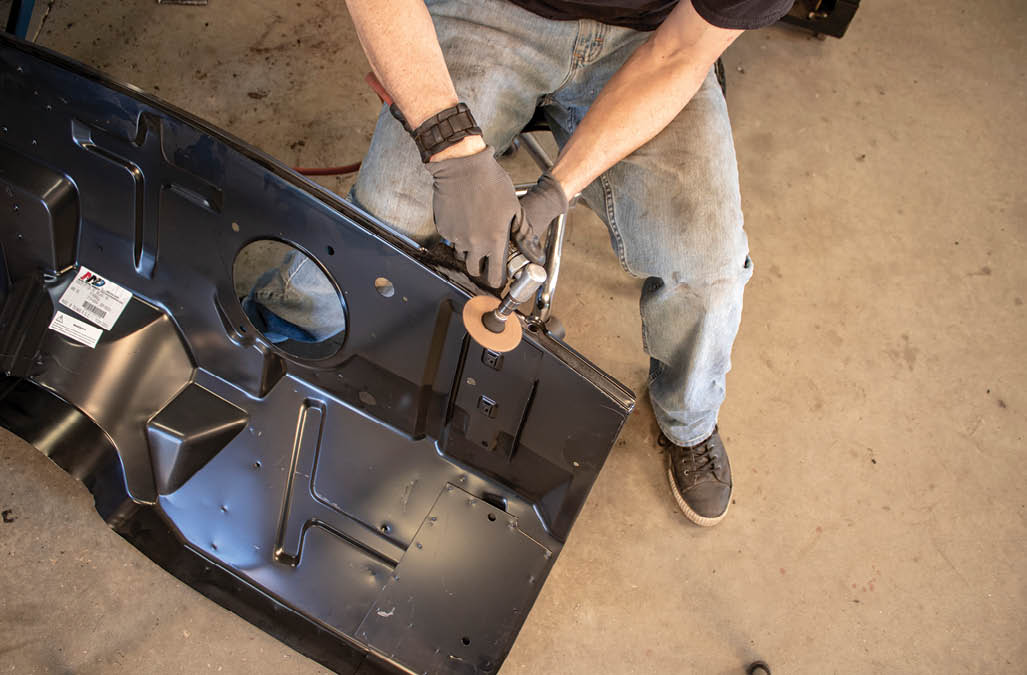
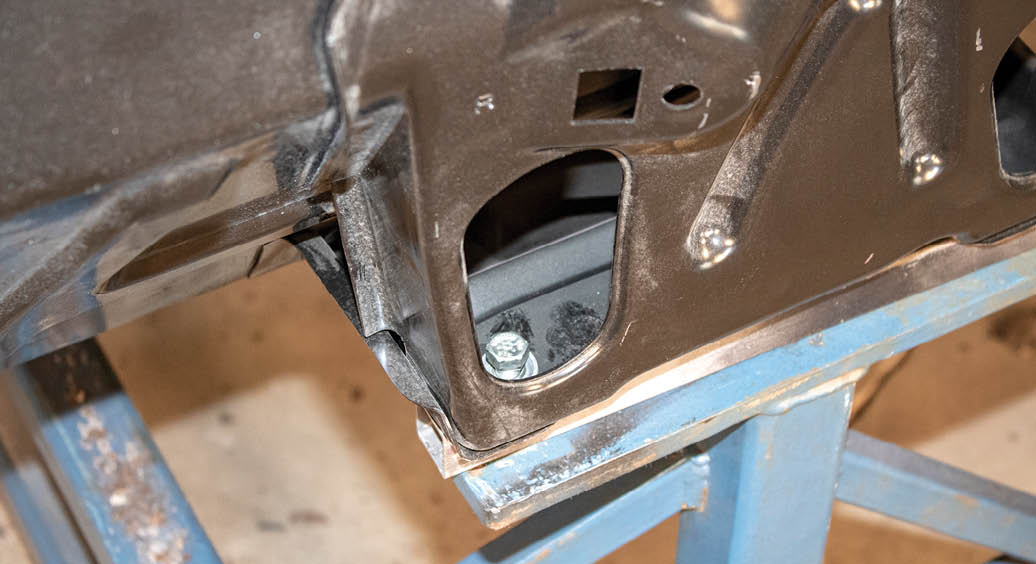
It should be noted that while our installation of our OE-style firewall (factory firewall is PN C4AZ-6201610-A) is on a ’64 Ford Galaxie, the AMD firewall shown here will fit the ’64 Ford Galaxie and the ’64 Mercury Marauder and Monterey. AMD stamps the firewalls, and other sheetmetal, from a high-quality 19-gauge steel. The firewall itself weighs 65 pounds. According to AMD, each firewall features the correct shape, size, bends, holes, ribs, and frame mounts like the original. All these sheetmetal pieces also feature EPD coating to protect against rust and corrosion.

What is EPD
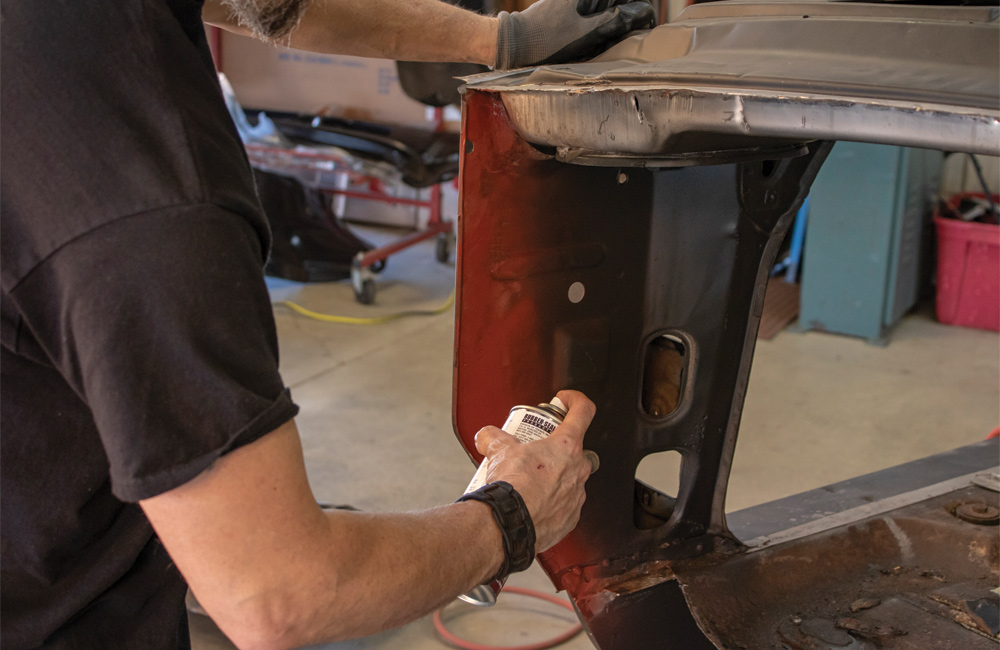
Electrophoretic Deposition (EPD) is an industrial term used for several processes intended to protect the metal from rust and corrosion. The process can be applied via an electrically conductive surface such as sheetmetal. The intent is to provide a powerful and long-lasting protective coating to the metal. Once fabrication is complete the material can be prepped, welded on, and readied for paint.

Parts in Hand, Work Begins
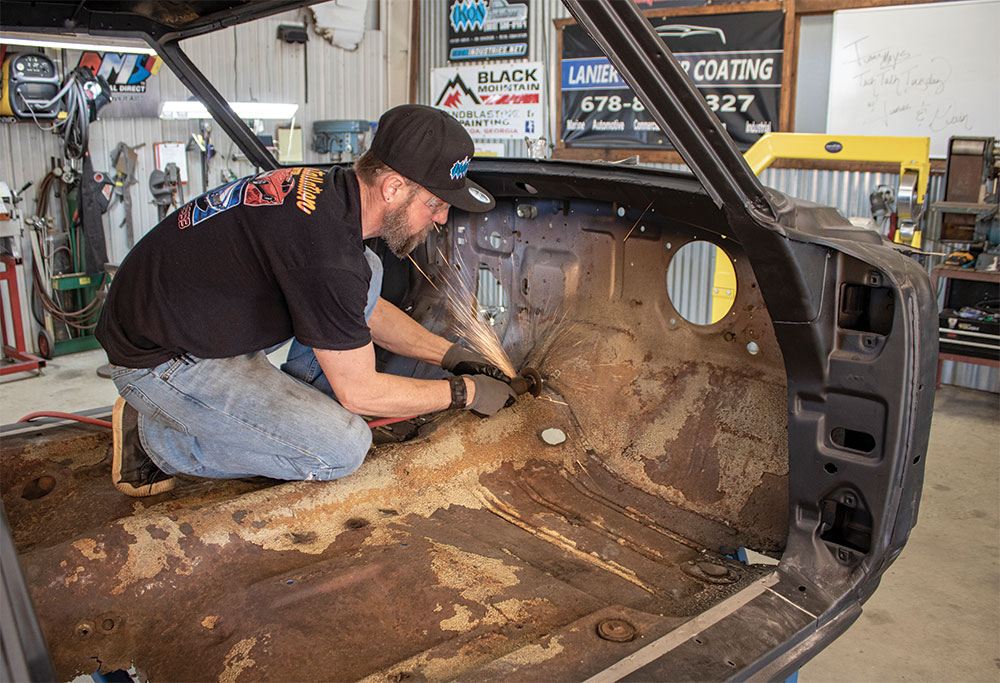
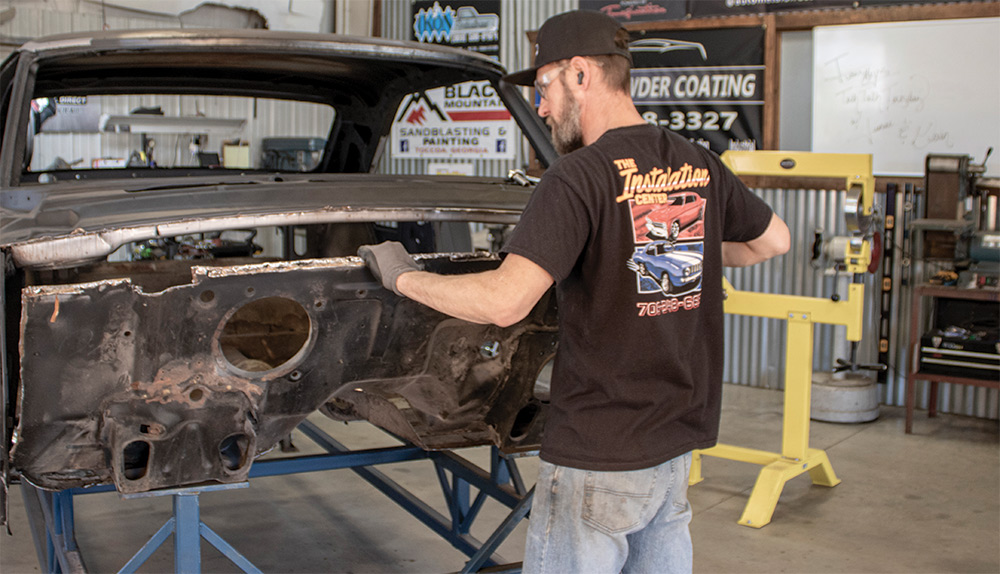
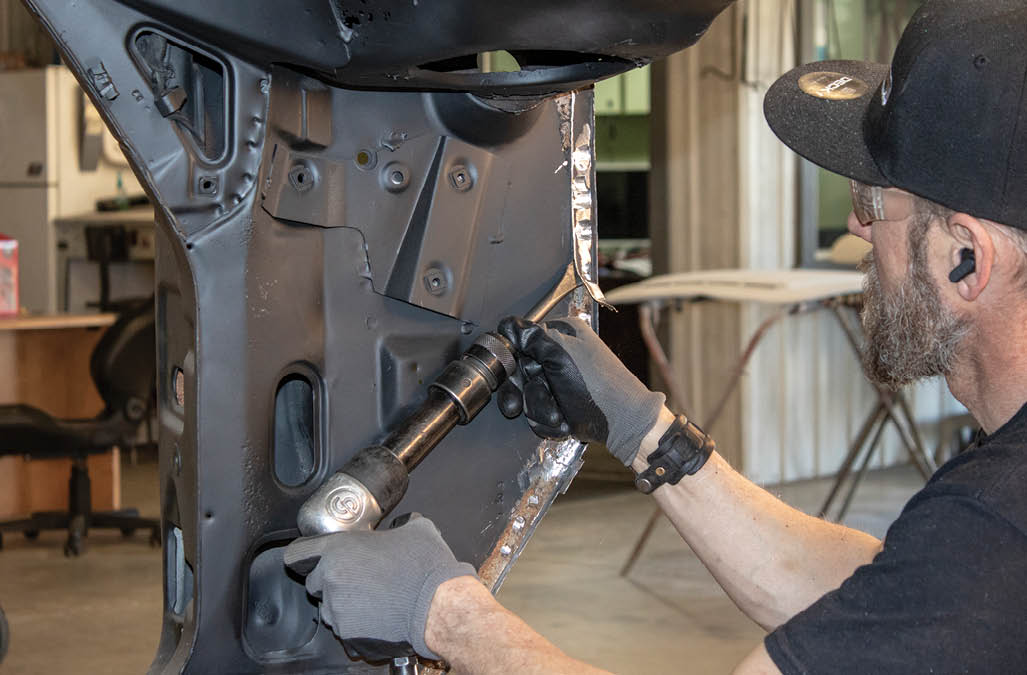
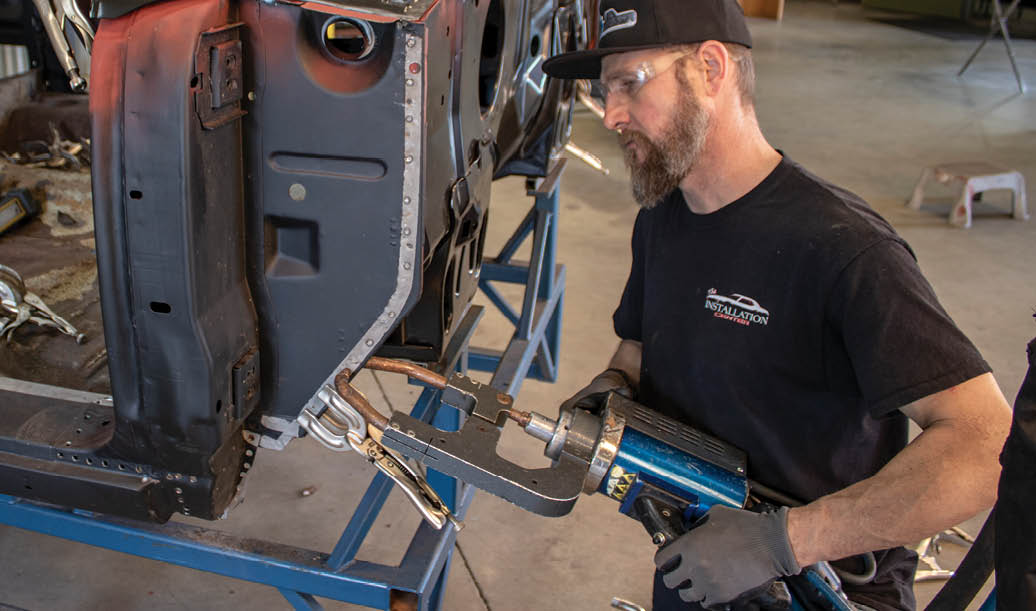
Once we had our AMD firewall in hand, we were ready to begin the installation at TIC; both AMD and TIC are in Georgia. Jubee Mays, of aMAYSing Metal Works, handled the metalwork. He agreed to come over to TIC and was present to handle this and will handle other sheetmetal projects we will have with our ’64 Galaxie over the coming months. Mays is an expert when it comes to muscle car sheetmetal, having handled numerous projects.
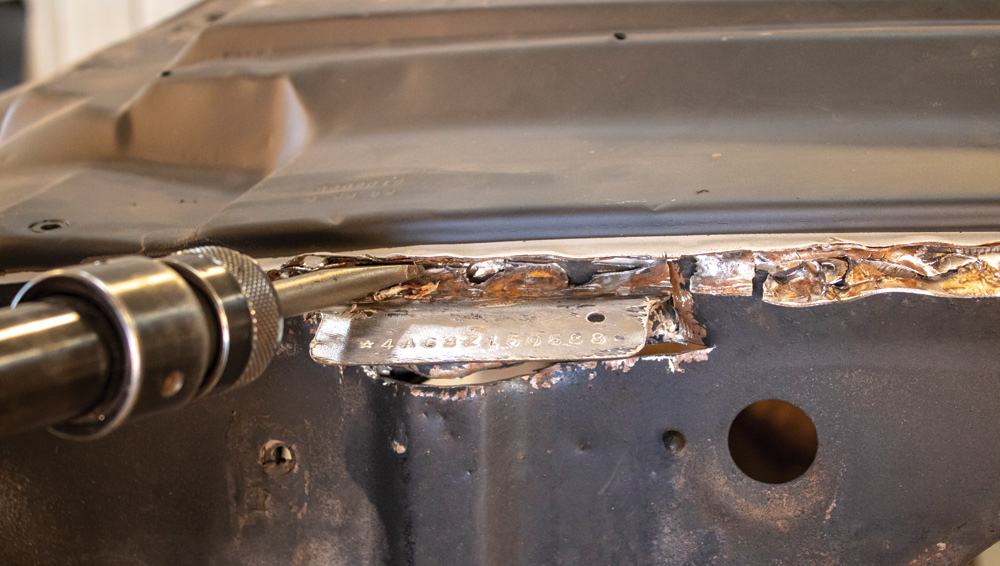
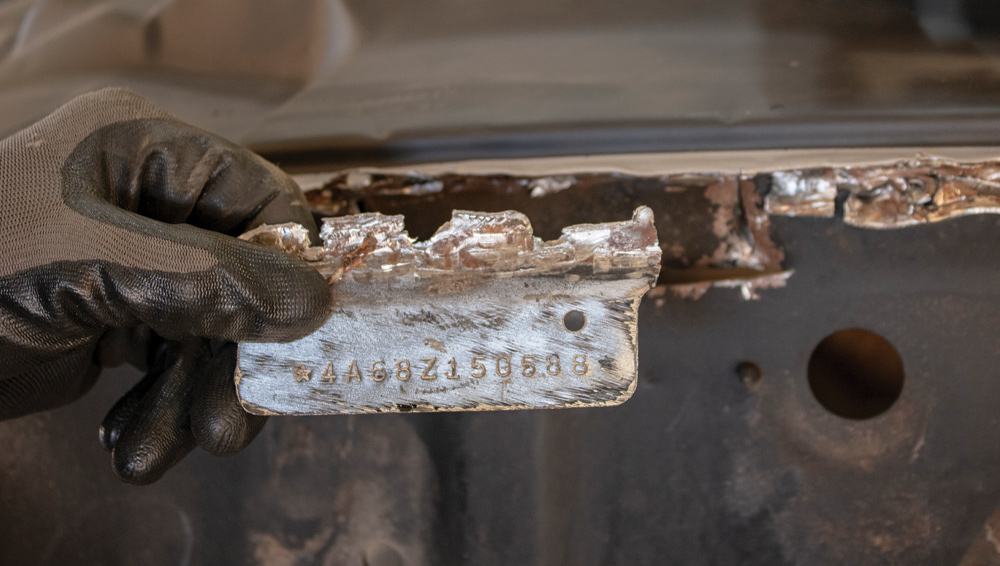
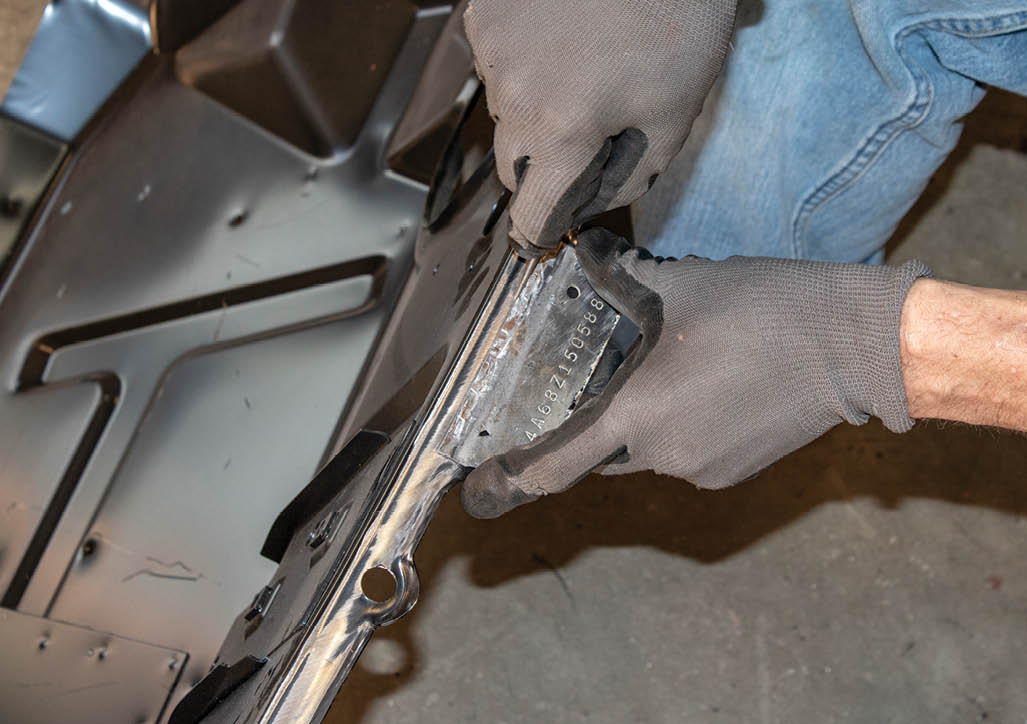
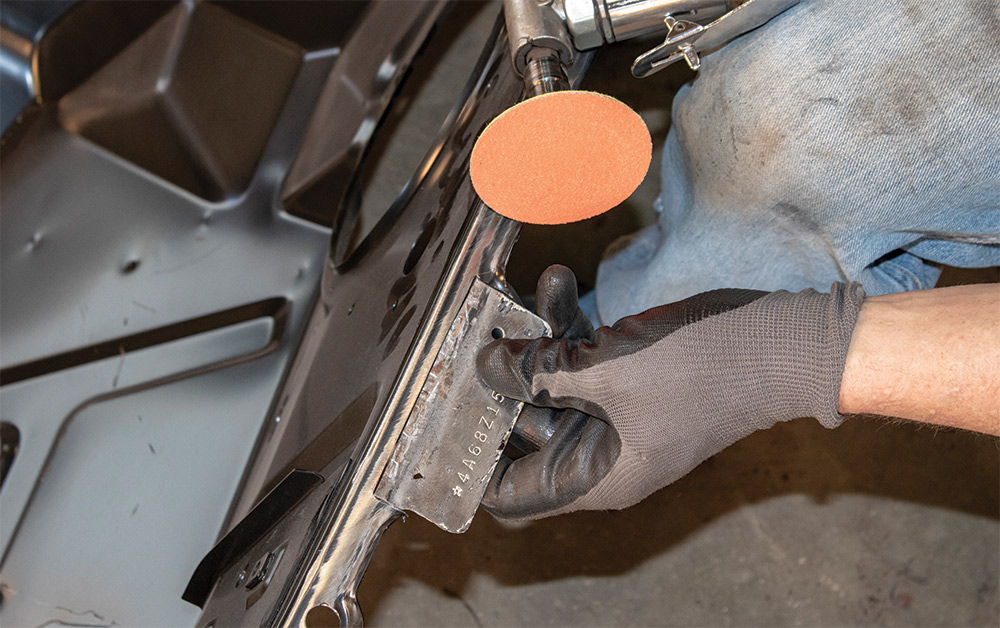
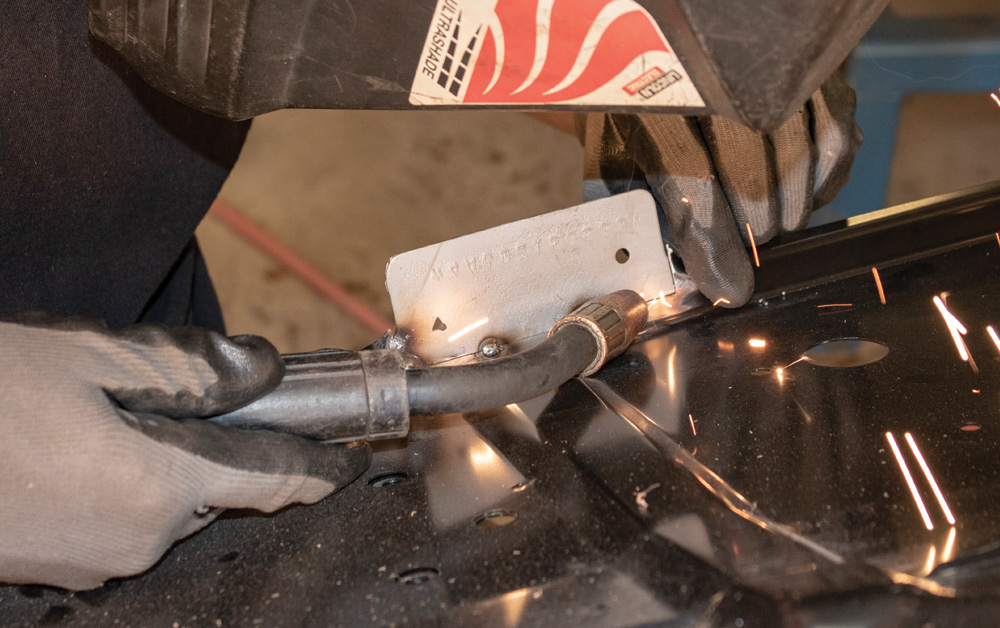
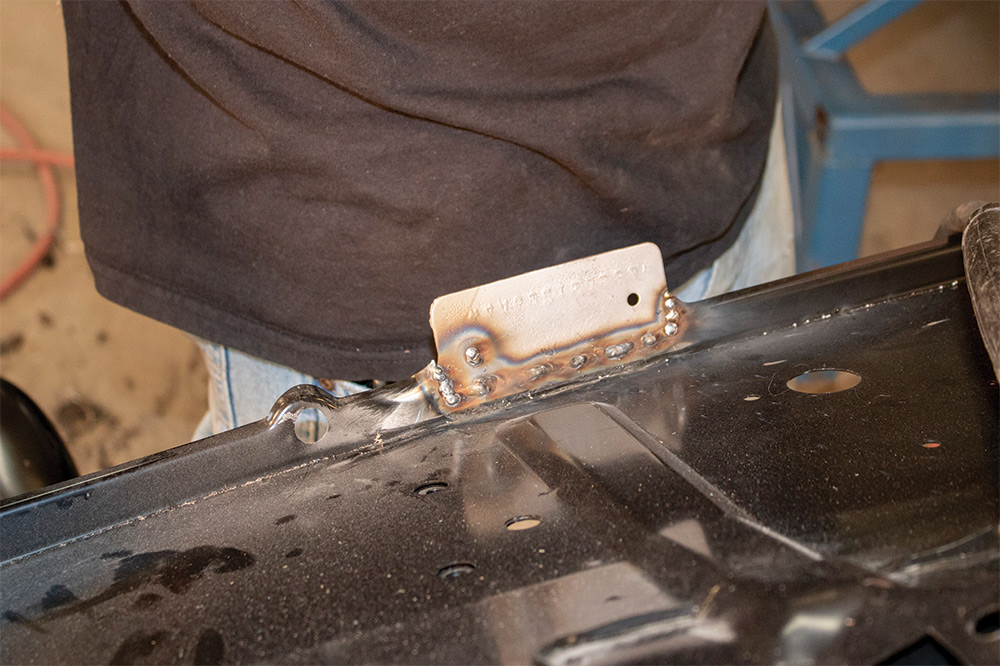
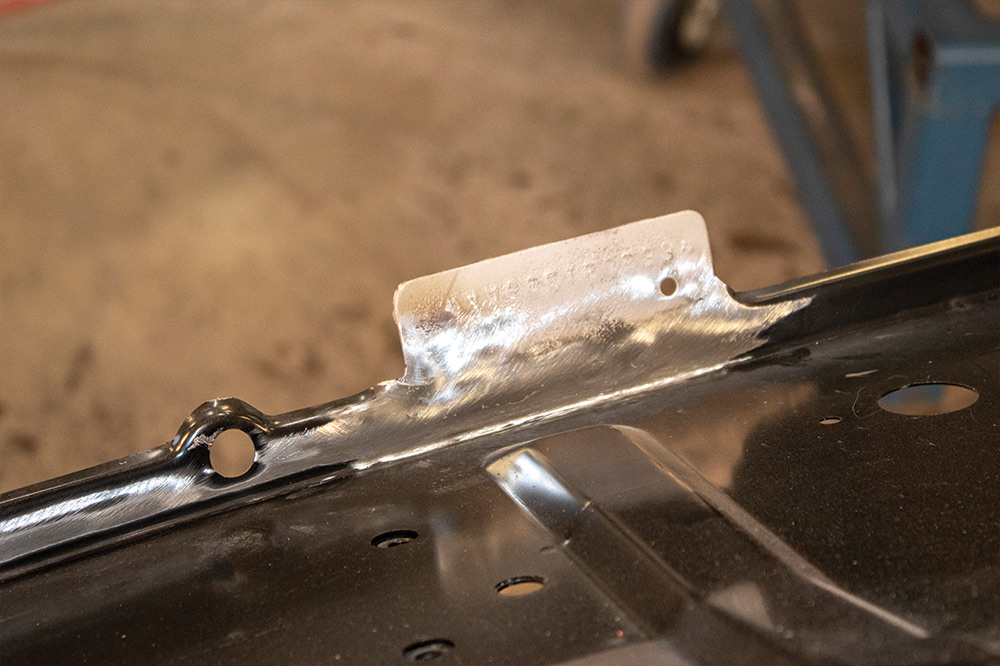
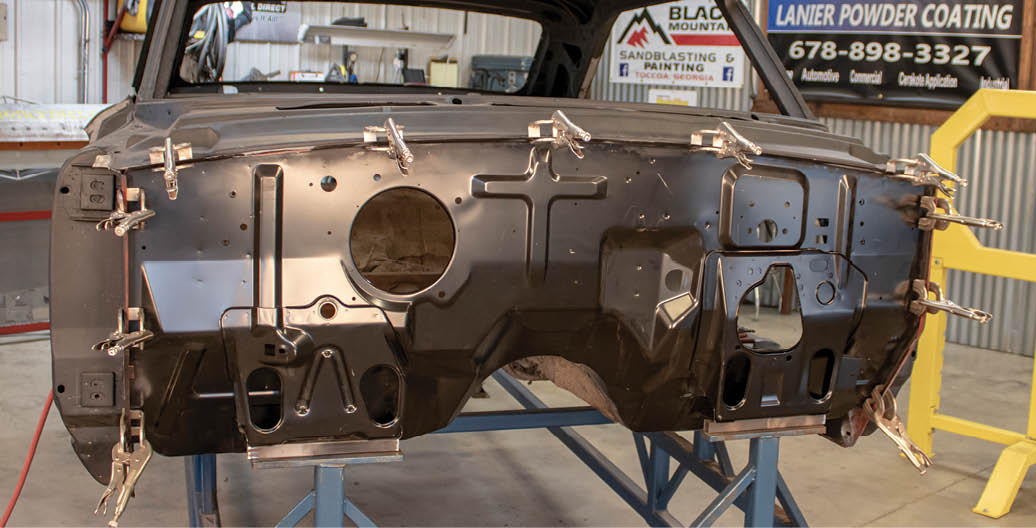
VIN Tag
There is one “sensitive” subject when dealing with the firewall/cowl area of a ’60s muscle car or any car of the era: the Vehicle Identification Number. VIN numbers have been around since 1954 and have undergone several iterations until the present system came about in the late ’80s. (Should you be interested in your vehicle’s VIN, here is a handy VIN decoder from the National Highway Traffic Administration.)

Why do we bring this up? Well, since we are removing the cowl area as well as the firewall and replacing with fresh metal we will be running smack dab into the VIN plate. For years hot rodders had to deal with the very sensitive subject of VIN plates (or stamped numbers) and what was legal or not. Fact is, for the longest time there was pretty much nothing you could do about VIN tags, plates, or stampings. You had to leave it alone. Now, with recent urging from SEMA there are states that have passed and are about to pass legislation friendly to hot rodders. It will allow you to remove the VIN tag or plate and replace it in the same location but onto “fresh” metal. (It is still illegal to alter the VIN.) Christian Robinson, SEMA director-state government affairs, tell us, “There is a lot of interest around the country in this type of legislation. A lawmaker from the Midwest contacted us about introducing similar legislation in his state. We will plan to take it national in 2023 as one of our new model bills.” In the meantime, it would be wise to check the ins and outs of what you can do legally in your state when restoring or repairing your muscle car.

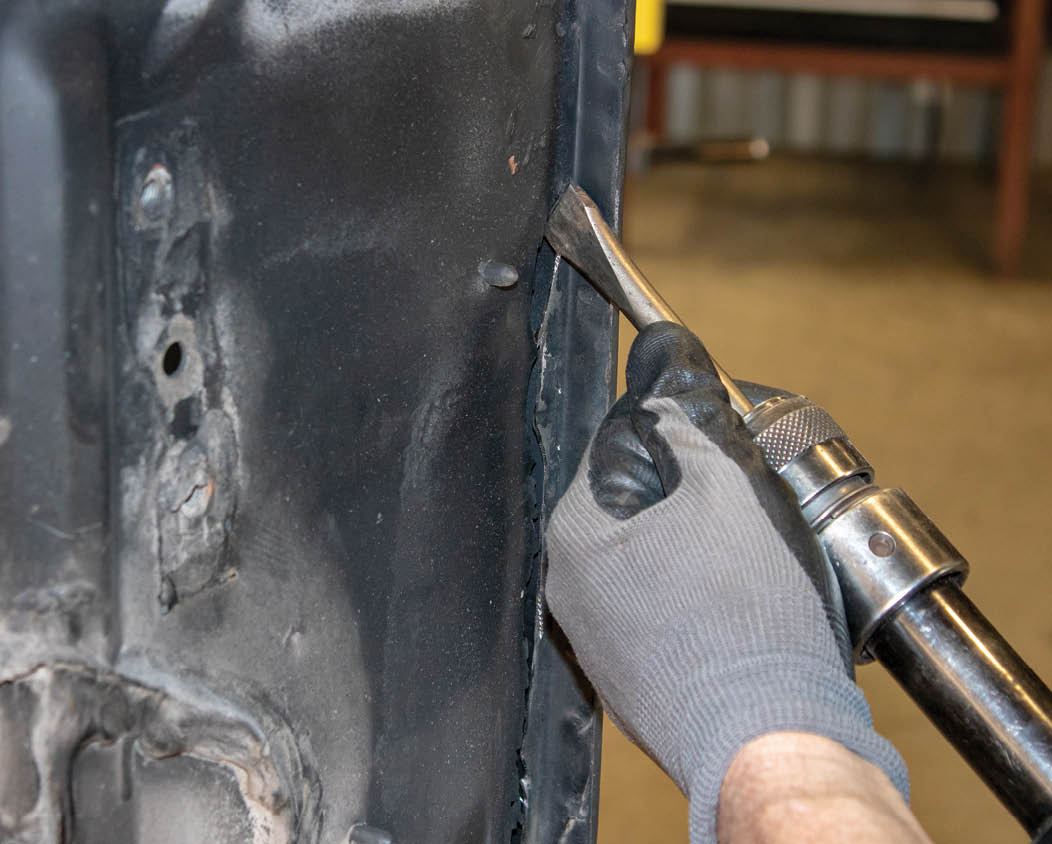
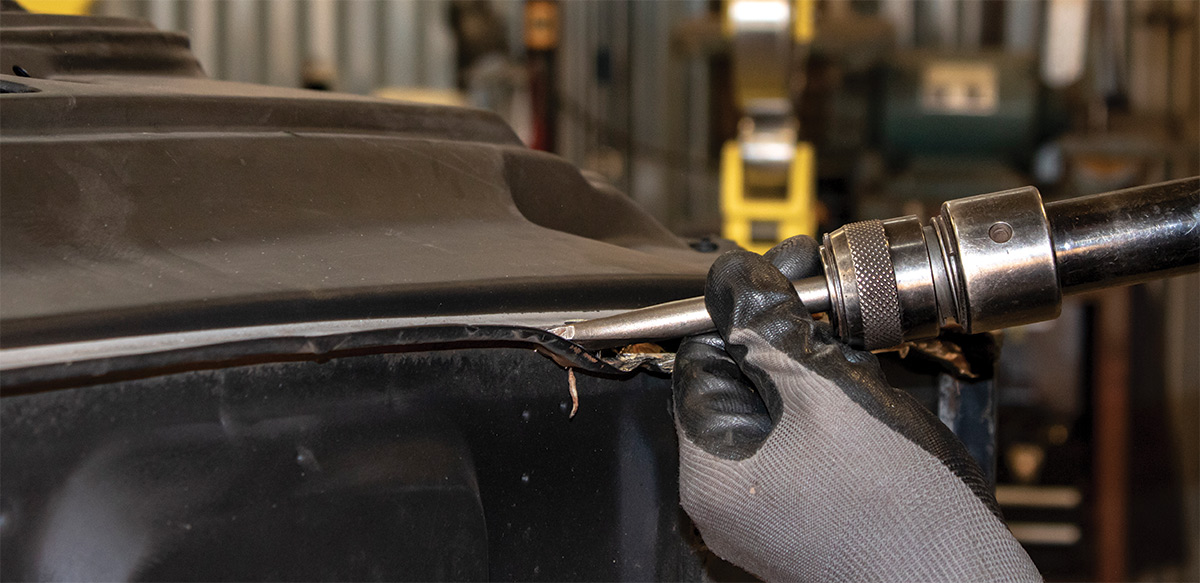
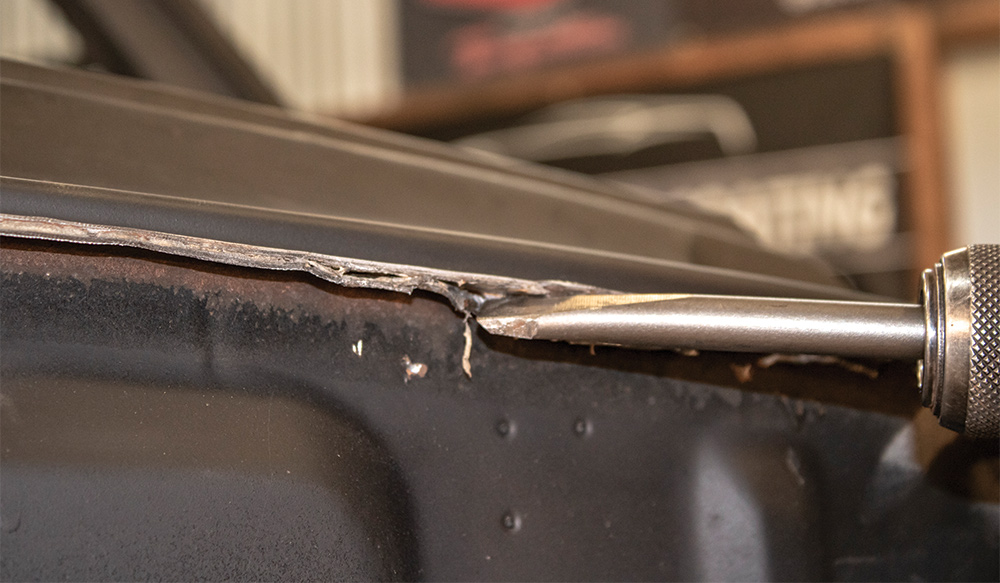
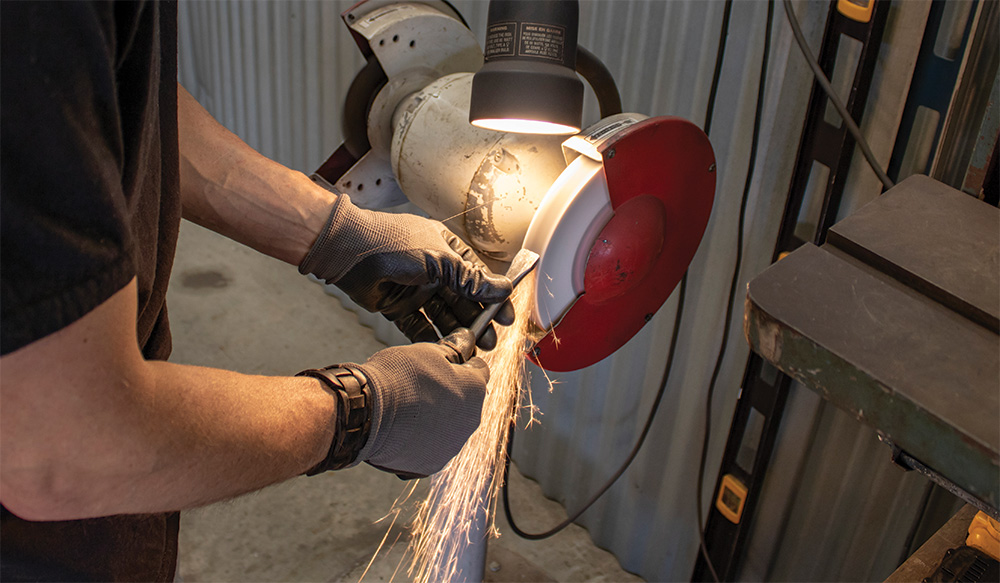
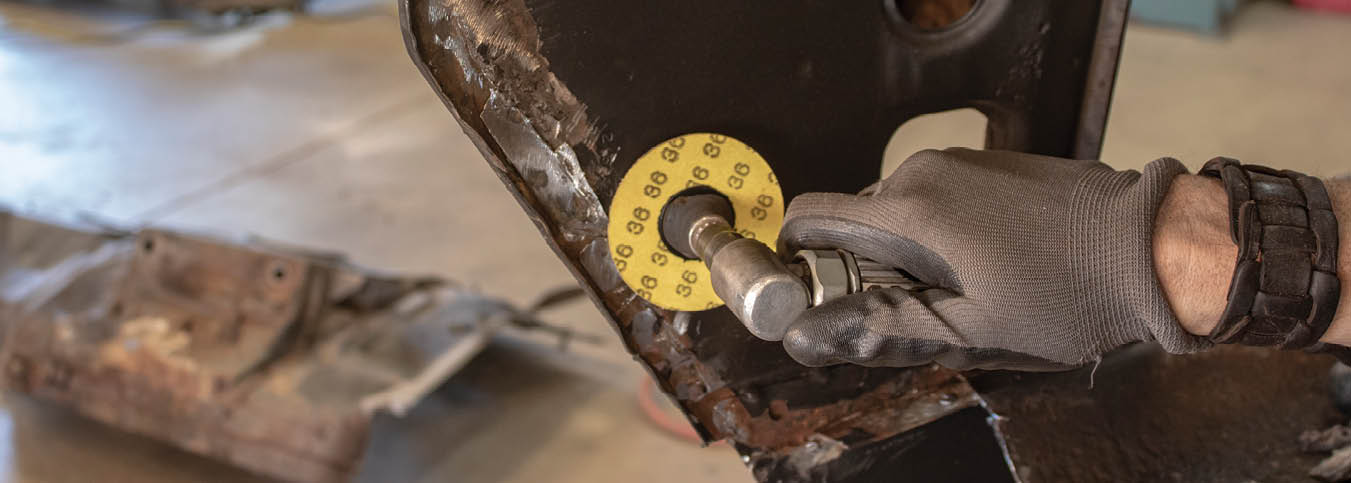
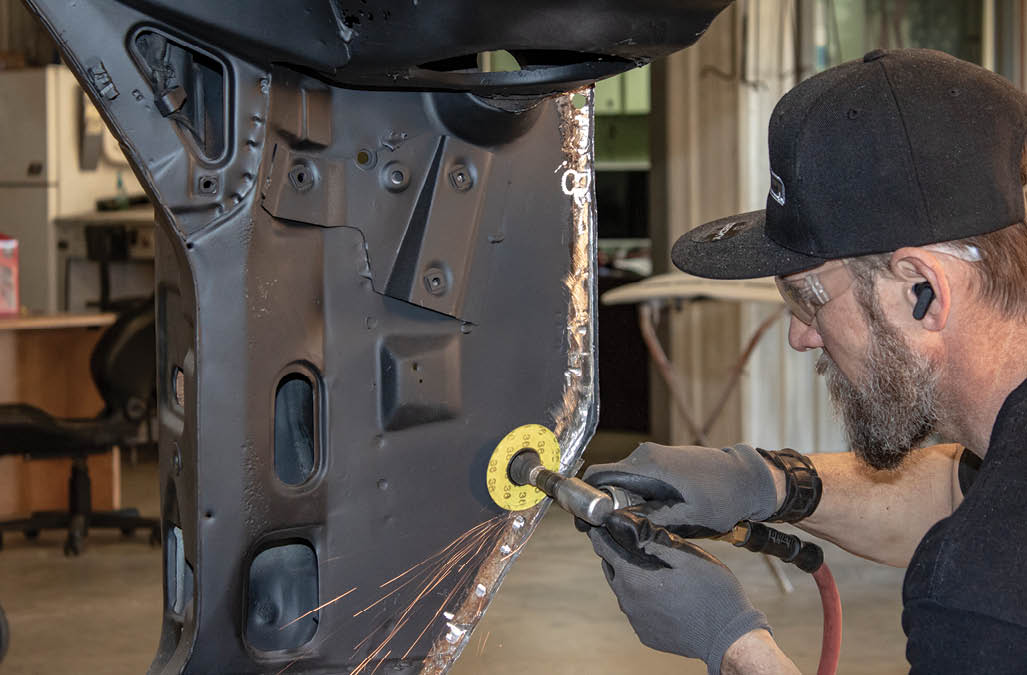
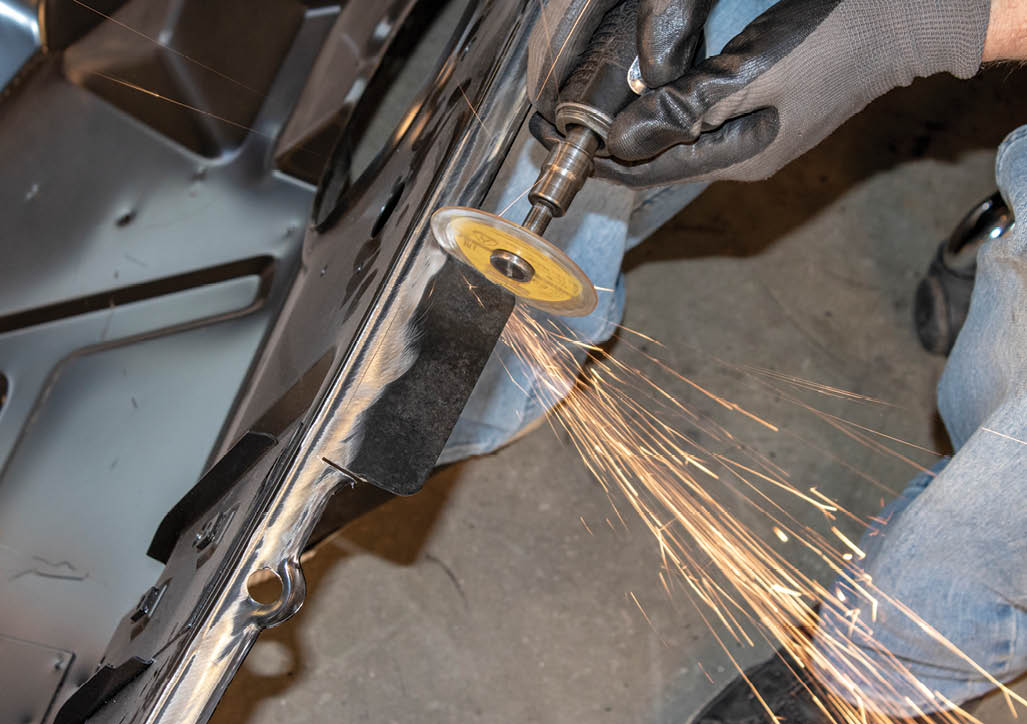
The VIN plate is welded on using 0.023-inch wire for ease of control on thinner metal. Mays tells us that he tacks into place working in different areas and cooling along the way, repeating this process until the VIN plate is fully integrated back into the panel. He also tells us, “Welding settings for this 19-gauge metal will be different for each welder but most units have a chart on them to set properly.” He also tells us that it is best to test a small section like the old firewall to make sure your settings are good to go.

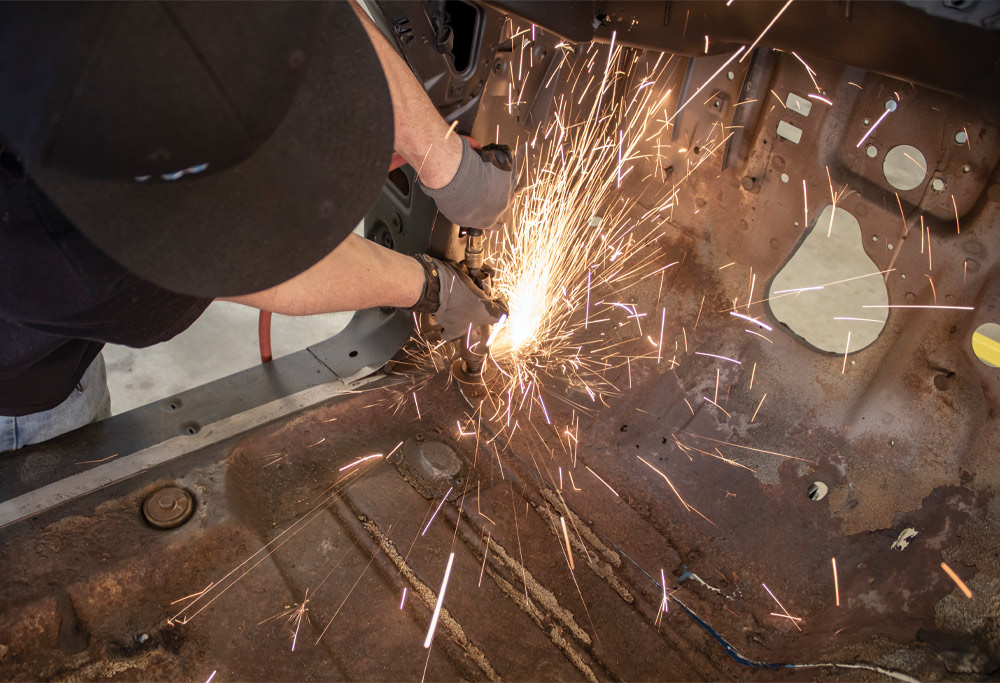
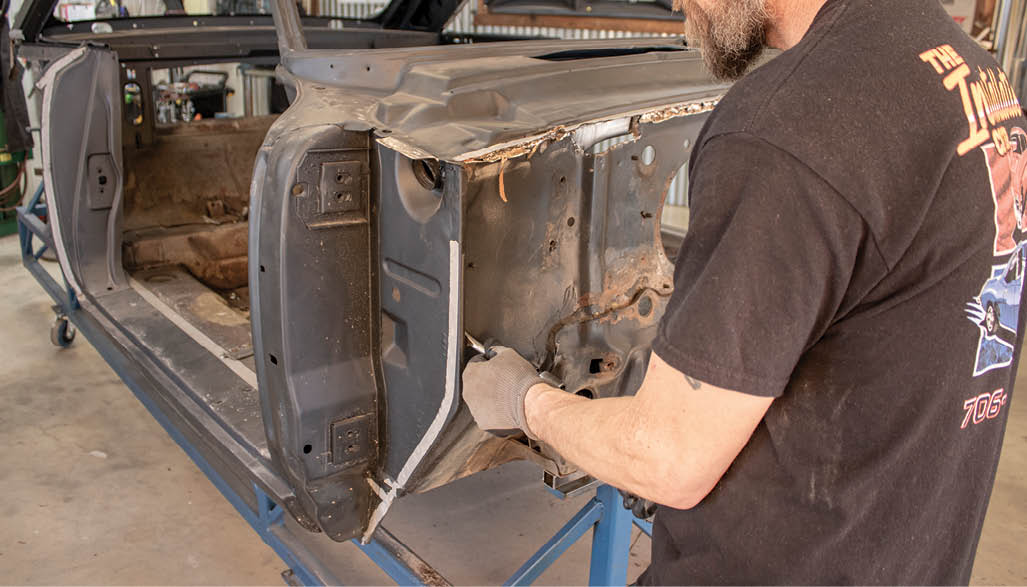
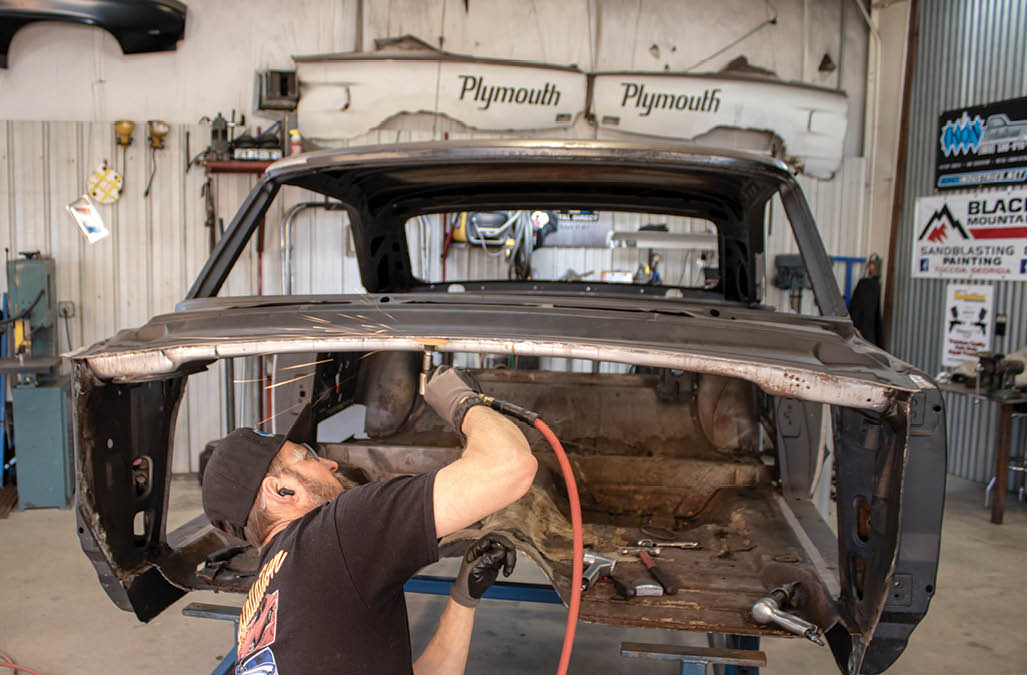
Let’s Get Into the Swap
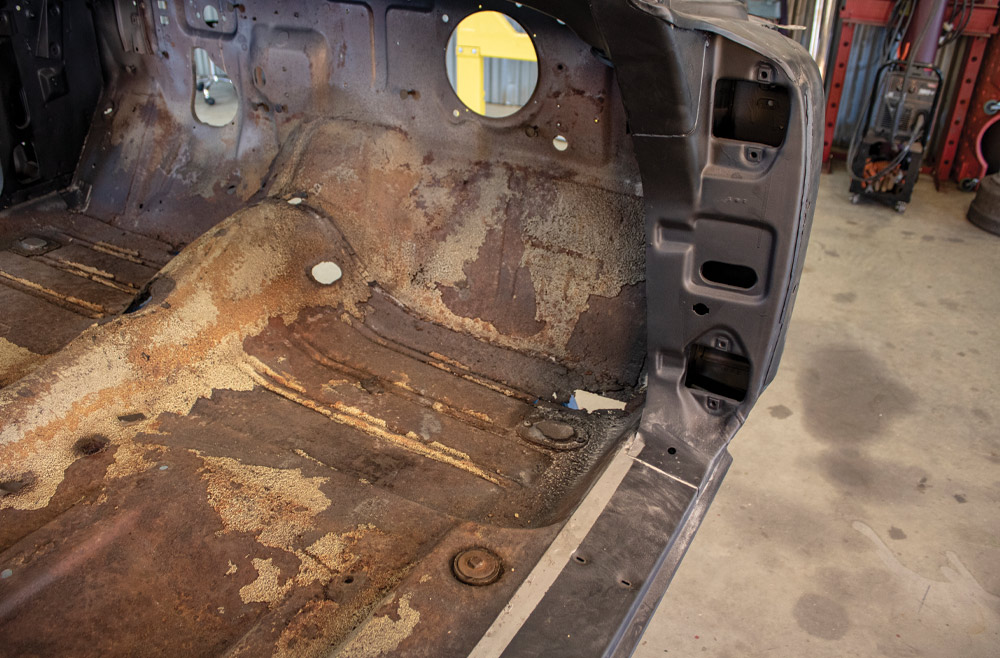
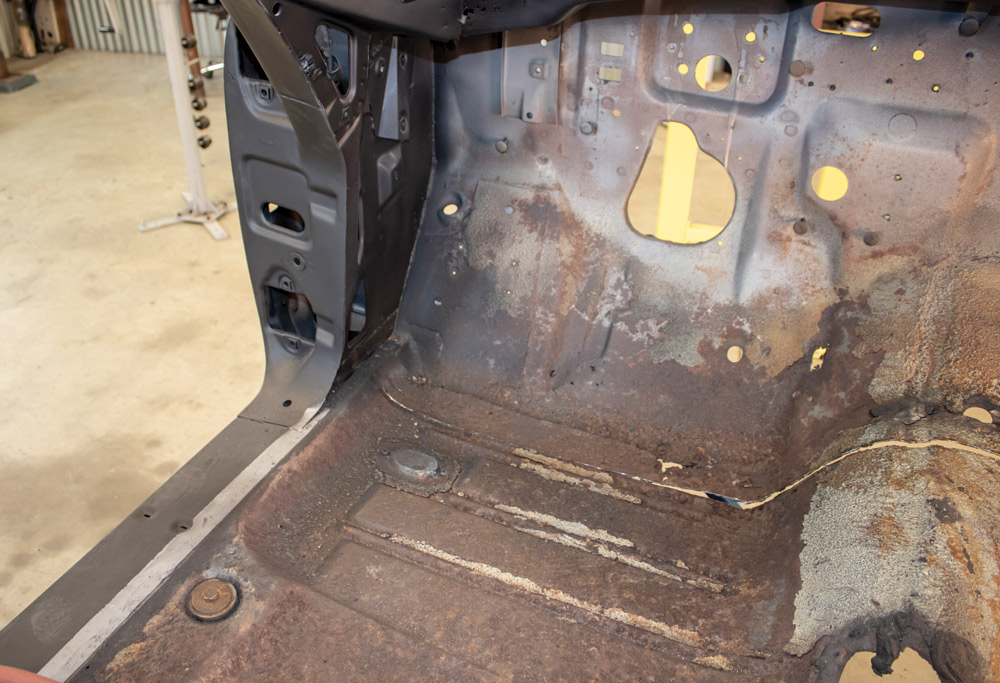
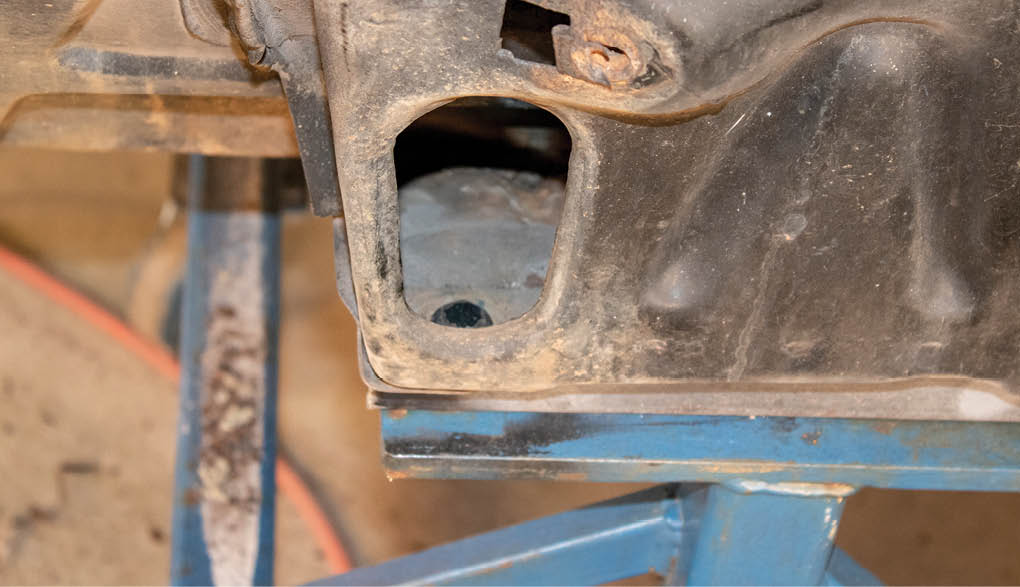
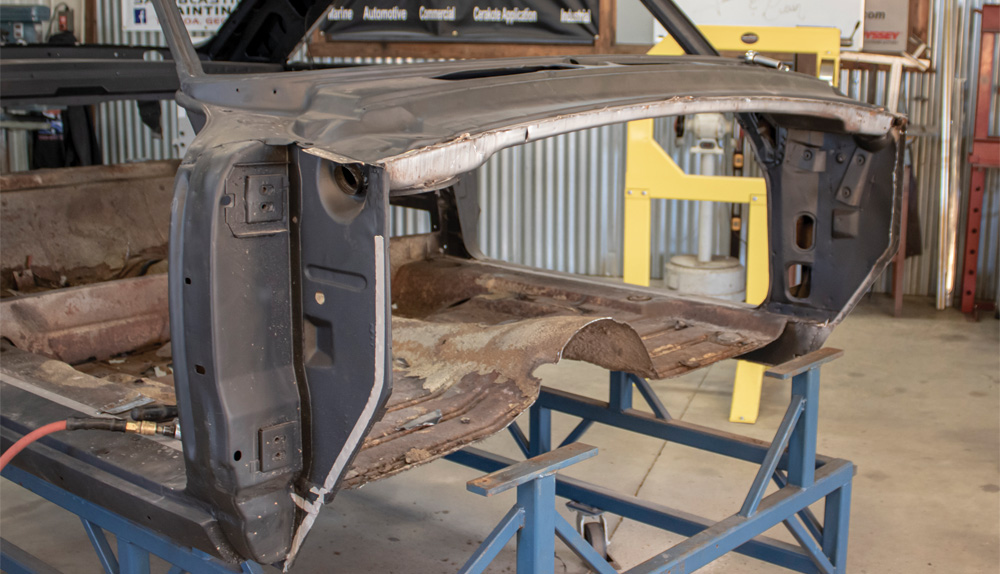
As is the case with any vintage tin (something older than 25-30 years), cars from the ’60s have seen their share of abuse. Odds are there will be lots of rusted and rotted sheetmetal. The firewall and especially the lower cowl/firewall area is a prime location to be heavily rusted.

Other areas to be especially mindful of are the rotted floorboards, rusted-out glass channels, and quarter-panel decay. Over the course of time more will need to be addressed. Well, there you have it. Let’s follow along and see just what it takes to remove and replace an AMD firewall in our ’64 Ford Galaxie.

Stripped out interior with rot and rust
Rotted floor seam in interior
3-4. Upon further review you can see there is some significant rot at the floor seam. Patching the rotted area is doable but for a few dollars more and fundamentally the same labor the entire firewall can be replaced.
Initial cutting of old firewall
5. Jubee Mays of The Installation Center (TIC) using the cut-off wheel begins the separation process of the firewall from the floor. He prefers to take out a larger section then come back and remove the remaining metal in more manageable pieces.
Cuts in floorboard
Cutting kick panels
6-7. With the firewall cut across the width of the car, Mays cuts the side flange just inside where it meets at the kick panel.
Separating firewall with air chisel
8. An air chisel is used to separate the firewall from the side cowl panel.
Air chiseling top of firewall
9. This process is continued up the sides and across the top of the firewall. A quality air hammer will give you better speed control, making this technique ideal.
Closeup of air chisel tip
Bench grinding chisel tip
10-11. The chisel tip is flat on one side and angled on the other, making it safe to separate these panels without harming the cowl section. Using a bench grinder, you can modify your chisel to perform these jobs the same way.
Removing original VIN plate with chisel
VIN plate removed
12-13. Mays wants to keep the factory VIN plate intact. Carefully removing it from the firewall, simply repairing the car shows no impropriety.
Chiseling sides of outer firewall
14. Mays follows the remaining firewall down the right side of the cowl to finish the cut.
Mounts on original firewall
15. The locating table is provisioned with mounts in the factory location as you would find in the Galaxie framerail.
Removing original firewall from body
Firewall fully removed from body
16-17. With the mounts unbolted, we can remove the firewall.
Sanding down remaining firewall sheetmetal left on body
18. Using a 36-grit sanding disc, Mays thins the spot welds to remove the remaining firewall sheetmetal. He will be spot welding the new firewall in place so there is no need to drill each spot weld.
Air chiseling leftover material
19. With the spot welds thinned out, he uses the air chisel to remove the rest of the material. Keep the flat edge of the chisel toward the metal you are saving.
Smoothing down cowl with disc sander
20. Clean up the cowl side using your 36-grit disc. You want a flush mating surface when you go to install the new AMD firewall.
Smoothing top opening of cowl
21. Follow this “clean up using 36-grit disc” in the same process around the perimeter of the opening.
Can of RS-512
Spraying inner cowl with RS-512
22-23. A weld-through primer like this one from Medallion is the choice of materials at TIC to ensure no rust can form in between the panels for years to come.
Sanding portion of new AMD firewall
24. With the new AMD firewall easily accessible, we are going to reinstall our VIN plate. Using a buffing disc, we remove the EPD coating that AMD provides on all their panels.
Mocking up original VIN plate onto new firewall
25. The AMD firewall is true to original with the VIN plate stamped into the firewall. Mays elects to keep this Galaxie as factory as possible and is marking the old VIN plate onto the new panel to weld it back into place.
Cutting off VIN plate on new firewall
26. With his lines scribed, Mays uses his cut-off wheel to remove the material.
Cleaning up VIN plate with disc sander
Tack welding original VIN onto new firewall
27-28. With a quick cleanup, Mays tacks the VIN plate into place on the new firewall.
Finished tack welds
Smoothed down tack welds
29-30. This process is way easier with the firewall not in the car; finish the welds and blend it in using your sanding disc for an OEM appearance.
Exposing metal of new firewall with wire brush on drill
Spraying coating to firewall edges
31-32. Mays preps the rest of the firewall for installation using a wire wheel on his drill and applies coating to the firewall where it meets the floor, cowl sides, and plenum.
New firewall bolted onto body
33. The AMD firewall comes with the all the bends, curves, holes, and body mounts just like the original. This makes installation a breeze mounting it back to the table.
Multiple clamps holding firewall in place
34. Mays clamps the firewall in place, starting at the center and working around each side for a perfect fit prior to welding.
Spot welding firewall to frame
35. Mays uses the spot welder along the sides and the top of the firewall to replicate the factory installation. Work from the center out to ensure a perfect fit.
Frame with new firewall fully installed
36. A quick shot of OE Coat from Medallion Refinish finishes off this install. We will cover the floor replacement and welding the firewall to the floorpan next. You will see it right here in Modern Rodding.
Auto Metal Direct
(888) 255-3907
autometaldirect.com
The Installation Center
(706) 348-6653
amdinstallation.com
Modern Rodding

VOLUME 4 • ISSUE 28 • 2023