Modern Rodding Tech
InTheGarageMedia.com
Roll-On Revolution
The rear quarter panel of a pickup truck, showing a section that has been sanded and coated with a light-colored primer, contrasting with the original reddish-brown paint and rust.
1. Once applied, the Eastwood OptiFlow looks like a professionally applied base primer.
Simplifying Laying Primer
By John Gilbert Photography by THE AUTHOR
S

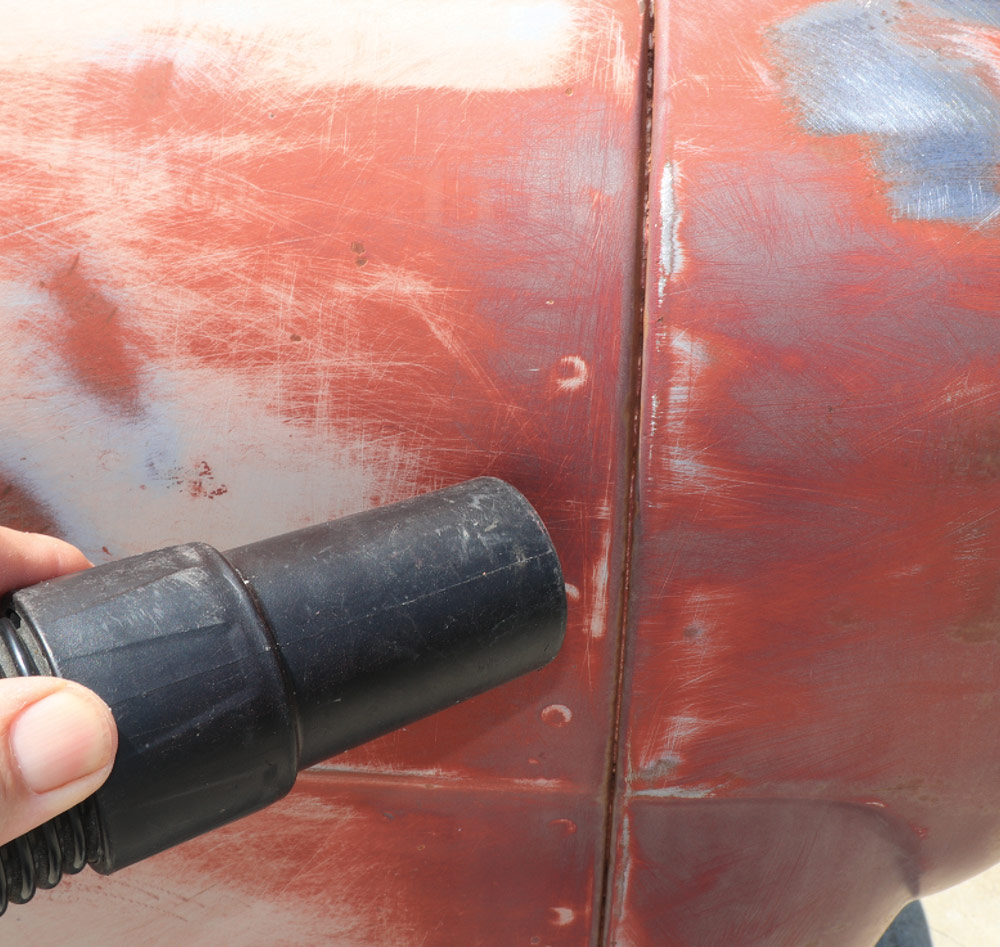
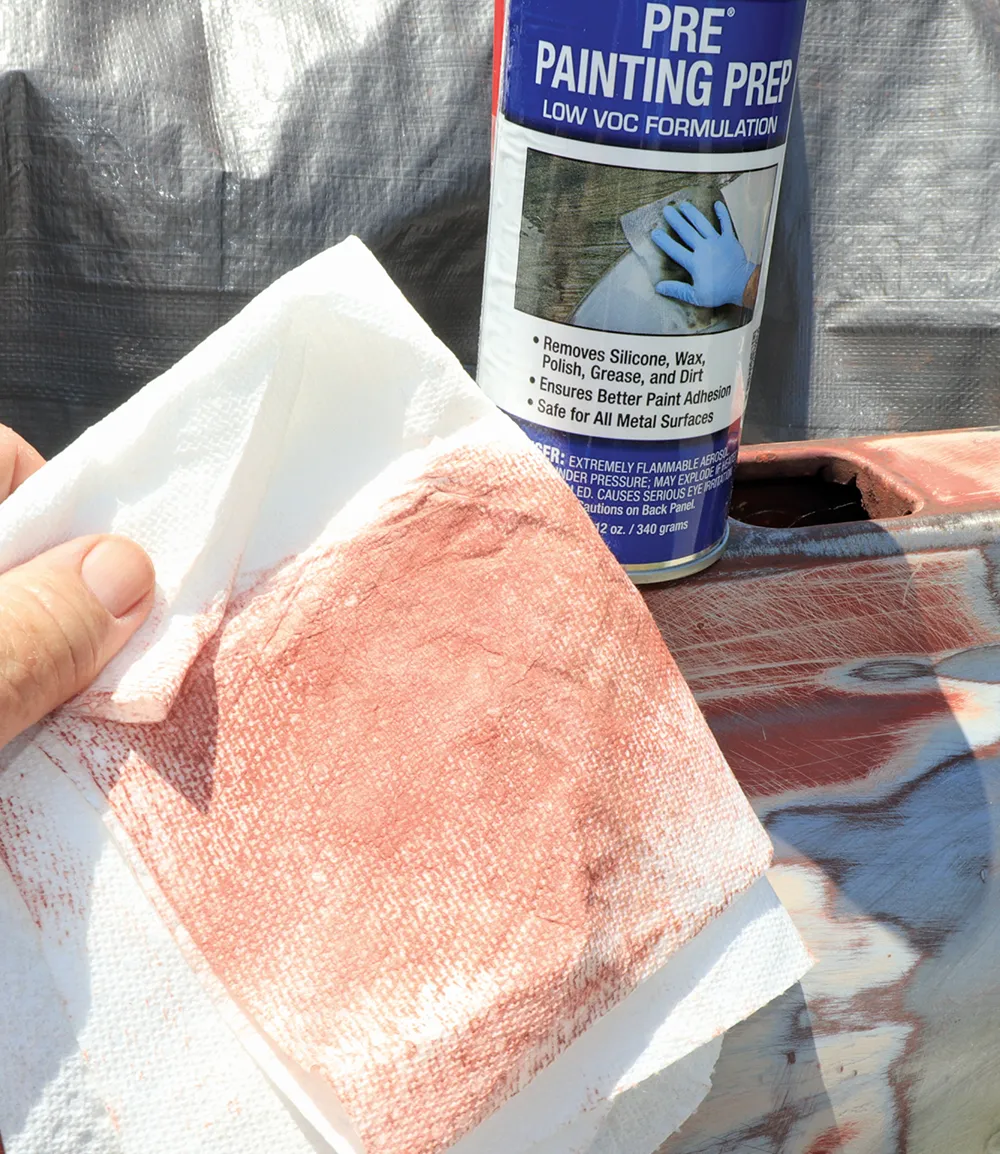
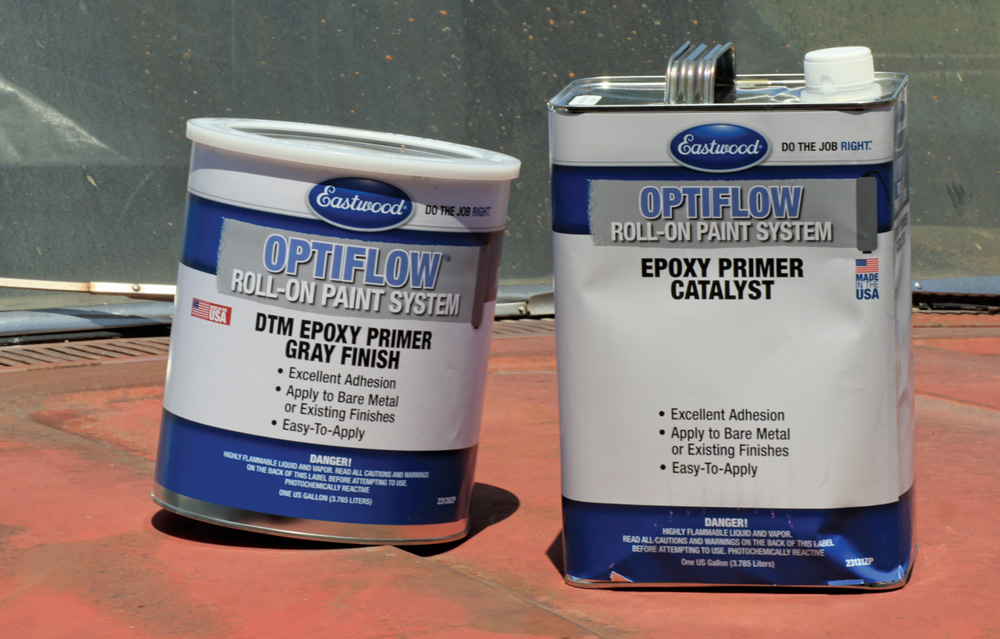
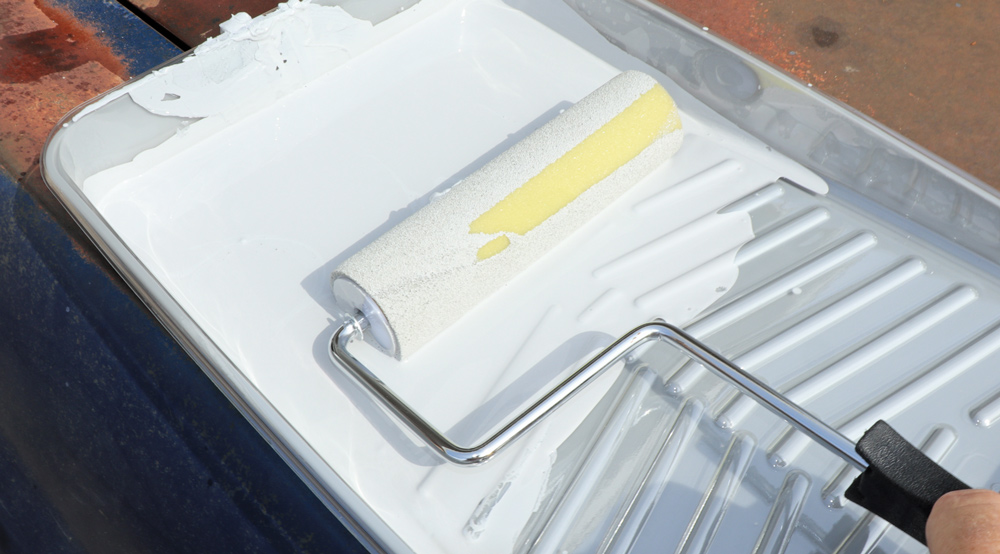
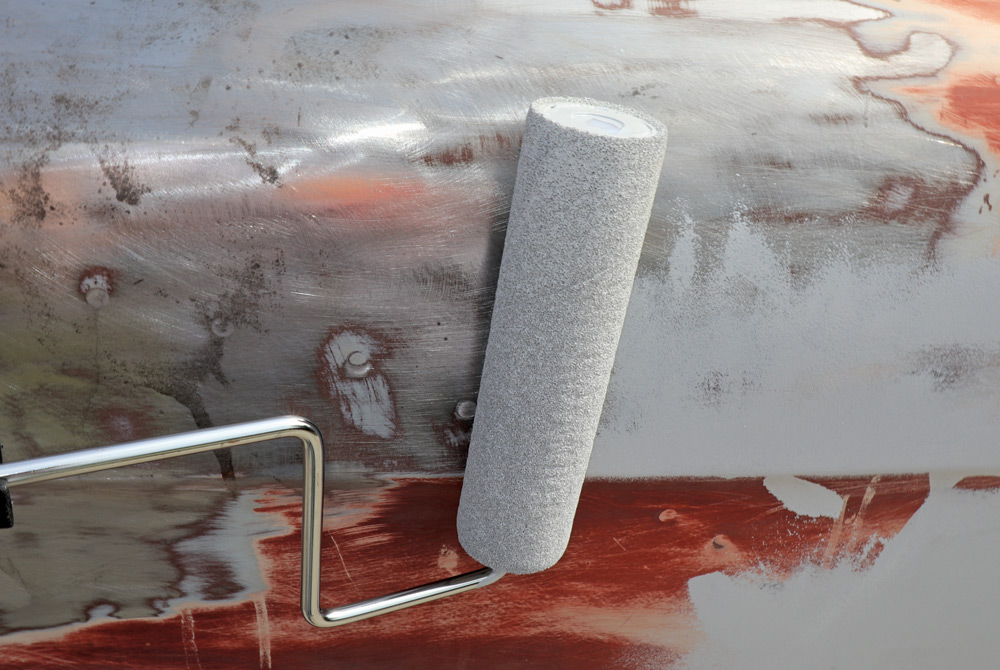
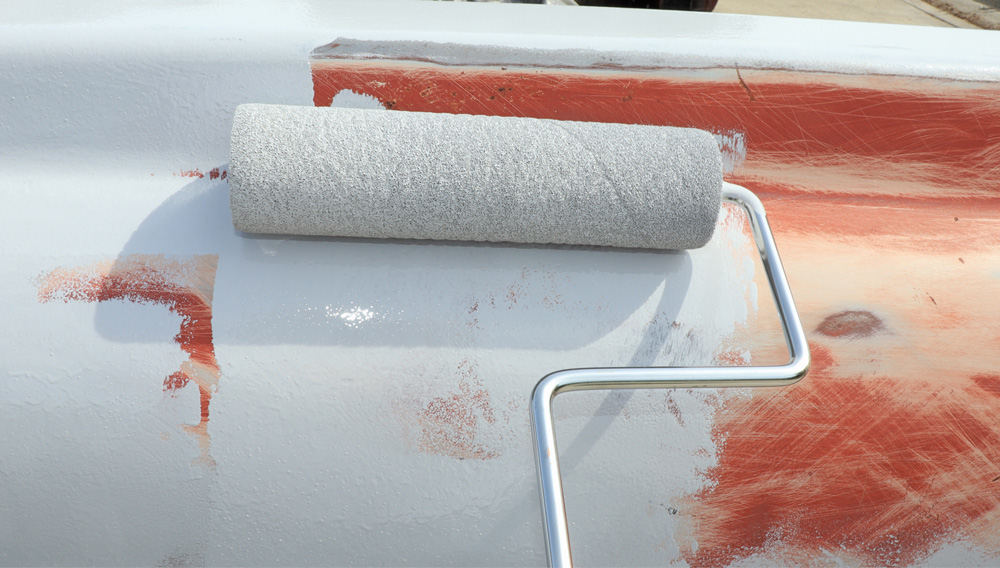
ome projects are more exciting than others. One such tedious project is bodywork leading to primer. While it’s exciting to reach that stage, it isn’t one of the more glamorous efforts. However, Eastwood has developed something that may make this task a bit easier, faster, and, arguably, more enjoyable: roll-on primer. To be accurate, Eastwood refers to this roll-on primer as OptiFlow. According to our fellow hot-rodding friends at Eastwood, this gray primer is a well-suited epoxy primer for frames, single panels, and other small projects. Once finished, you are ready for a basecoat/color.

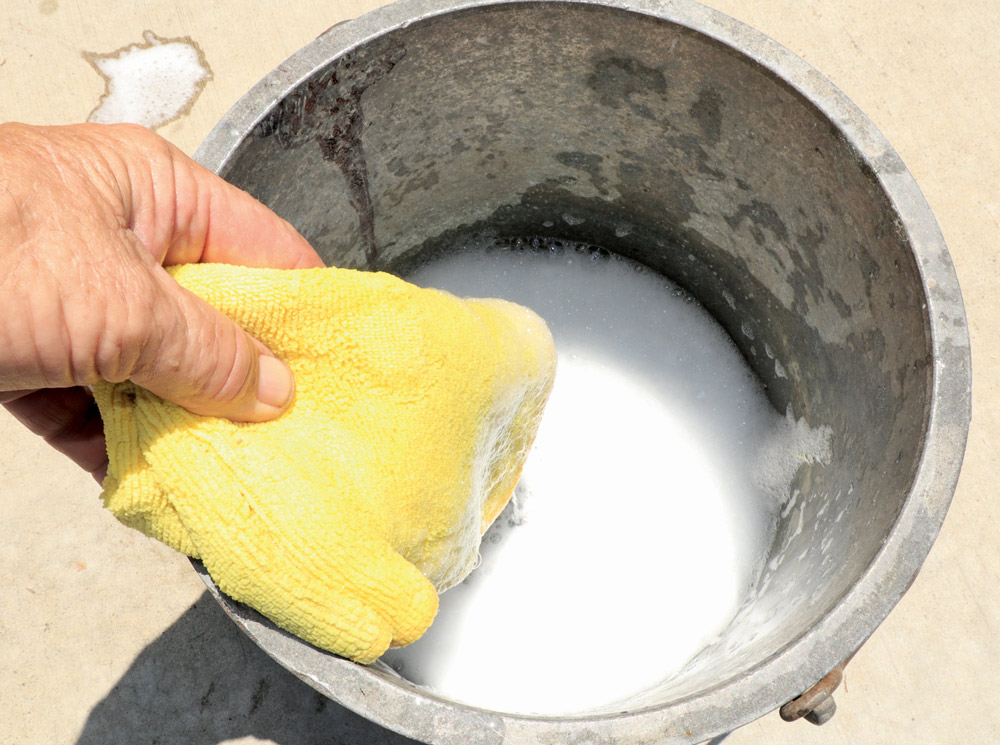
When it comes to painting, whether custom painting a car or a house, I’ve always had a knack for leaving a big mess behind. I have a professional airless setup that I bought new and have only used once to spray inside a friend’s townhouse; I haven’t touched it since. The thought of observing the 16 steps recommended to clean an airless setup makes me revert to using a paintbrush or roller every time. After painting my entire house, I have mastered the art of achieving good results with a paint roller.

It’s not quite like in Mission Impossible, where receiving the assignment means you only have 5 seconds before the taped message self-destructs. Still, I received a text on my smartphone asking if I would like to write a tech article about Eastwood’s new OptiFlow Roll-On Paint System. How timely everything in this universe seems to find its order; I’m now practically a journeyman paint roller, and then this assignment comes along. Admittedly, I’ve been among the custom painters who used to joke about how silly it would be to use a paint roller to paint a car, likening it to asking how many cases of spray cans it would take to repaint a 1959 Cadillac. That said, I have held Eastwood paint and body products in high regard for a long time, so I was intrigued to discover what they had come up with.

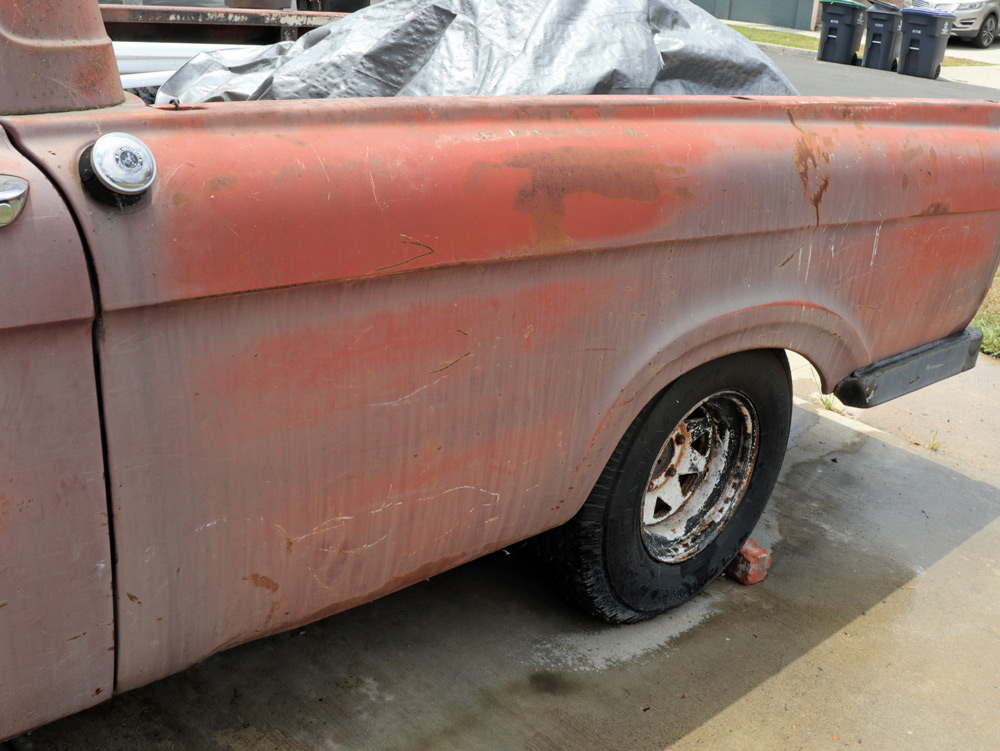
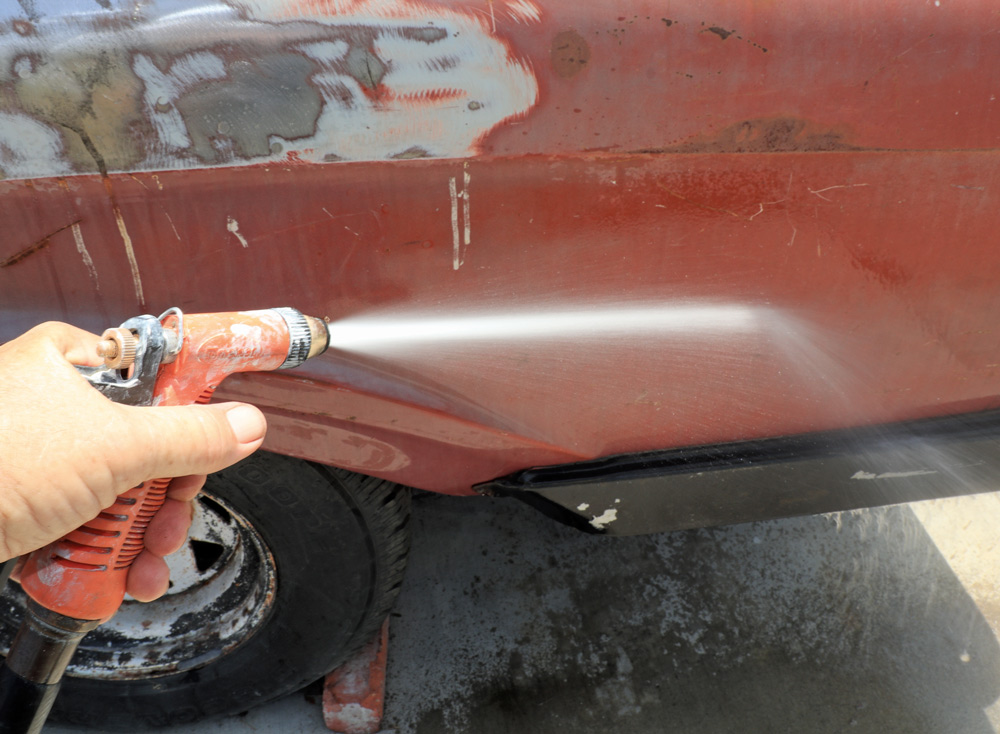
The subject vehicle is my 1962 Ford F-100 unibody, which has been stuck in my driveway for years due to a blown transmission. The truck features an impressively straight body with no dents, but, typical of that era’s F-100s, the roof is rusted out to the extent that a strong wind could blow the top off, effectively turning it into a convertible.

A friend of mine, Murray Komant, a concept illustrator in British Columbia, created the artwork for the truck as a roadster. However, its immobility has been a mental block, hindering progress. Then, along comes this tech article where I can start bodywork and paint without having to move the truck. I have an air compressor and a cabinet full of spray guns, but I also have suburban neighbors who are averse to overspray on their new Teslas and other vehicles, not to mention the early morning noise.

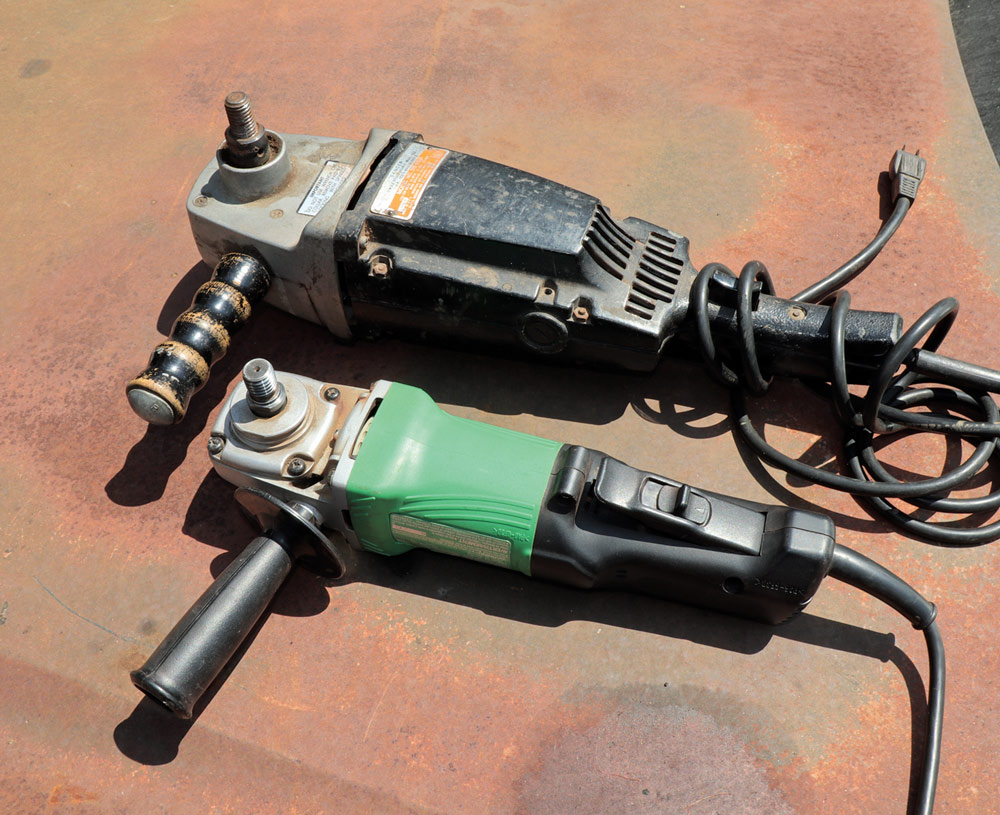
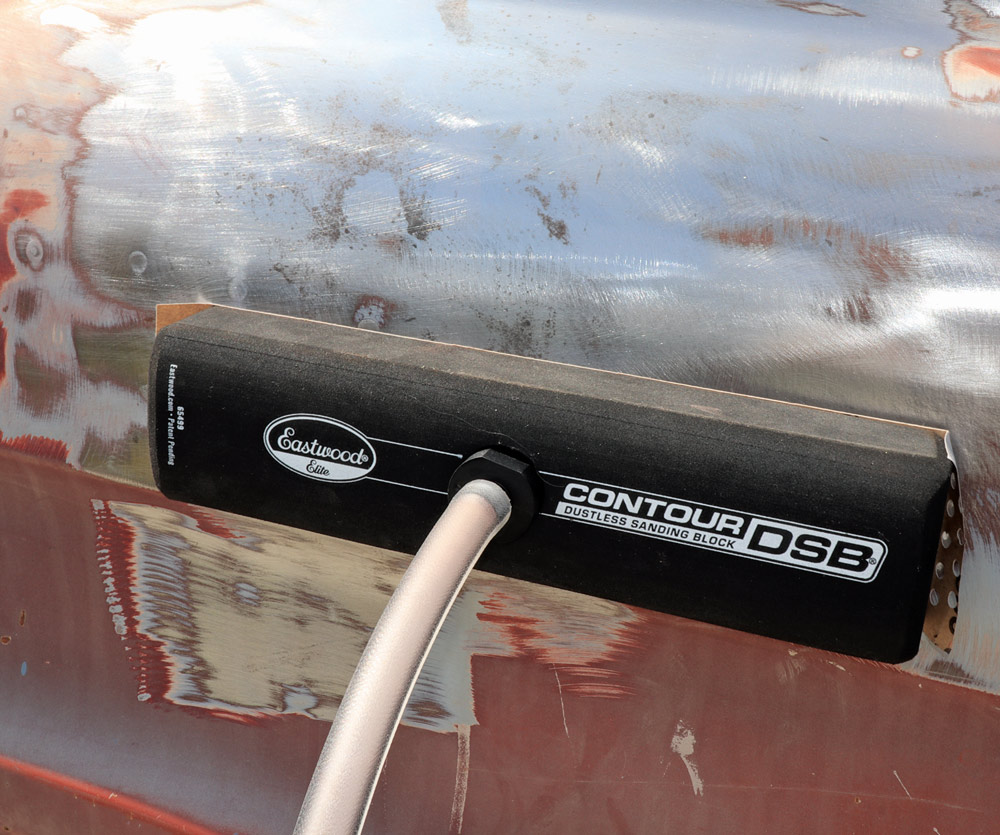
Sometimes, a DIY enthusiast has no choice but to make a significant investment in tools and equipment to satisfy their curiosity about whether they can master the skills needed to work on their car. Therefore, I approached writing this article with the DIY individual in mind, focusing on improvising with easily accessible hand-powered tools.

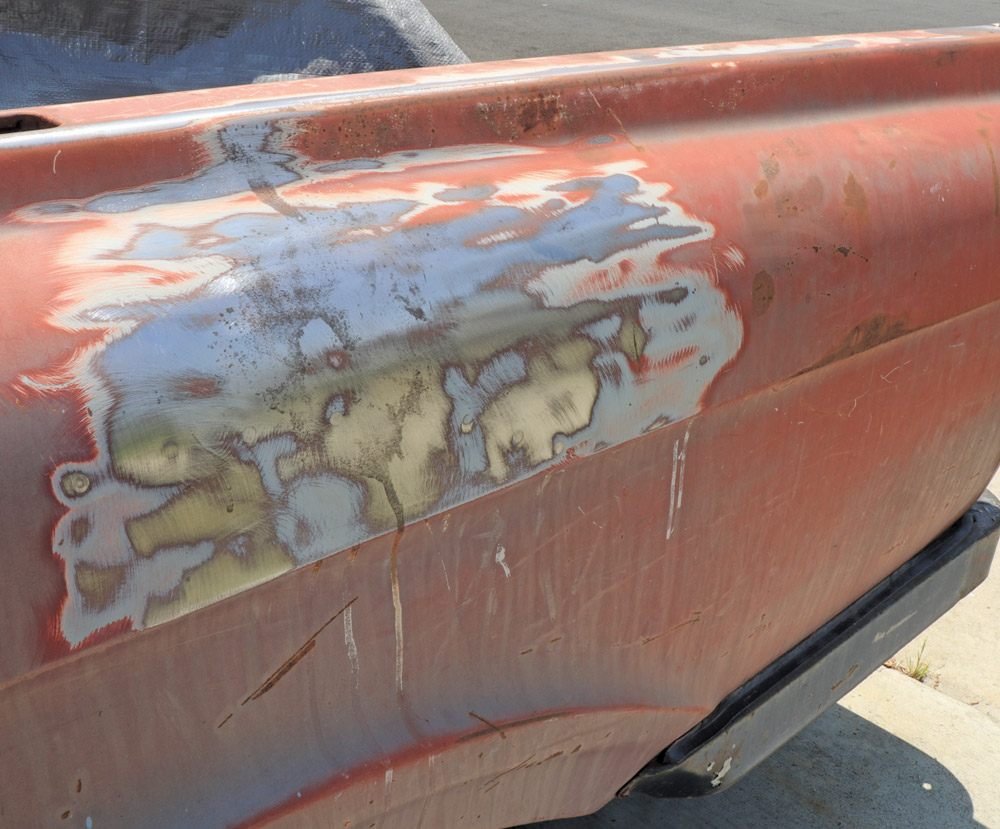
Hand-sanding the truck brought back memories of 1974 when I began working for Larry Watson at his Melrose and Gower location in Hollywood. Watson tasked me with my first complete paintjob on a 1966 Porsche 911, and he instructed me that I would have to sand it down entirely by hand. Across the street was Universal Studios, and Watson had a director friend and customer named Paul Krasny who was helping him break into acting by getting him small parts in Mission Impossible episodes. While Watson was across the street acting at Universal, one of the guys who had been working there for a while suggested I use his DA, a pneumatically powered device designed to buzz the paint off. I was just one day away from receiving my two-week paycheck when I stretched across the 911 to reach for the 80-grit loaded DA, accidentally grabbing the trigger and launching it across the roof of the Porsche, over the chrome windshield molding, and down the windshield to the hood. Watson had a policy that if you damaged any trim or glass on a car, you had to pay for it out of your check. So, without saying a word to anyone, I quit and walked out to my black 1970 340 Duster and drove home.

In summary, I’m impressed with the results achieved using Eastwood’s OptiFlow Roll-On Paint System. It provides an economical solution for both the DIY enthusiast and professionals who want to apply primer without the overspray and hassle of preparing an area for spray painting.

Side view of an old pickup truck's rusty, reddish-brown rear quarter panel. The paint is faded, and rust is visible around the wheel well and fuel filler cap.
2. Not to make a pun, but the best way to learn how to apply Eastwood’s OptiFlow Roll-On Paint System and achieve good results was to use the bedside of my 1962 Ford F-100.
A close-up of the truck's body panel, showing a distinct pattern of severe rust staining and corrosion with drips of white material running down the surface.
3. Finding a dent-free body on an old truck, with only one paintjob over the factory original, was lucky. However, in its past, a caustic chemical damaged the paint down to the bare metal, causing deep rust over time.
A green and black electric grinder lying on a rusty red surface, fitted with a large, black, coarse sanding or stripping disc for paint and rust removal.
4. To start stripping down to bare metal, I used a 7-inch, 40-grit abrasive disc on an Eastwood cushioned backing pad, attached to a 4-inch angle grinder (also known as a peanut grinder).
Safety gear, including a pair of clear plastic goggles with a perforated edge and a black disposable face mask, resting on a reddish, rusty metal surface.
5. After about a minute of grinding and being pelted with abrasive particles that can cause damage to the eyes and lungs, I reached for my safety goggles and a repurposed COVID-19 mask.
The side panel of a truck with large sections of paint removed, exposing bare metal and patchy remnants of body filler or primer, indicating prep work for restoration.
6. Eastwood’s OptiFlow Roll-On DTM epoxy primer can be applied over bare metal to guard against future rust, while also bonding effectively to a properly prepared existing painted surface.
A hand holding a wet, yellow microfiber cloth dipping into a metal bucket filled with soapy, white water, likely for cleaning the vehicle surface.
7. I got a little ahead of myself and then remembered that sanding a dirty surface is a waste of good sandpaper while abrading through a layer of dirt. So, I mixed up a bucket of Tide laundry detergent and scrubbed the surface clean.
A hand holding an orange spray nozzle, rinsing a section of the truck's side panel with a stream of water after sanding or cleaning.
8. Then, using a common garden hose equipped with a nozzle, I pressure washed the soapy suds off, towel-dried the bare metal, and let the painted area of the bedside air dry.
Two wooden-handled wire brushes of different sizes, and a small, orange-handled flathead screwdriver, resting on a rusty, reddish metal surface.
9. Without compressed air, using a pair of high-quality stiff wire brushes and a fillister blade screwdriver worked well to loosen dirt and peeling paint.
A hand uses a small, wooden-handled wire brush to aggressively scrub rust and residue out of a seam where two panels of the truck body meet.
10. I used the fillister blade screwdriver and the wire brush to dig out dried-up seam sealer and knock off flaking paint from the cracks and crevices.
Two angle grinders resting on a rusty red surface: a larger, older one with a handle attached, and a newer, smaller green and black one.
11. The intense vibration is overwhelming, and using the 7-inch disc on the 4-inch peanut grinder can lead to instant carpal tunnel. The moral of the story is to use a heavier weight grinder to dampen the vibration.
An Eastwood Contour SCT surface conditioning tool with a large wire brush wheel, sitting on the rusty red hood of a vehicle in the sun.
12. Eastwood’s SCT Contour drum sander is a metal conditioning tool that efficiently strips paint or removes rust.
A close-up of the bed rail of the pickup truck after sanding, showing the clean, bare silver metal with patches of surface rust remaining.
13. Eastwood’s SCT Contour Drum Sander performs best when allowed to work without excessive pressure, much like avoiding an angled dive with a body grinder. Keep the tool flat against the surface and apply light pressure.
A close-up of a sanding pad on an angle grinder, with a red foam interface, actively sanding the truck's metal panel down to a bright silver finish.
14. After using 40-grit abrasives, the next step was sanding and shaping with an 80-grit disc on the 4-inch peanut grinder.
A detailed view of the truck body showing an area sanded through multiple layers: a reddish top coat, a layer of white primer/filler, and bare metal underneath.
15. Before applying Eastwood’s OptiFlow Roll-On DTM epoxy primer, the paint trenches cut in with 40- and 80-grit abrasives needed to be feathered out or they would show through the primer.
A red shop vacuum and a "Dustless Sanding Block System" kit laid out on a grassy lawn, showing the block, hoses, and instruction manual.
16. The benefits of Eastwood’s OptiFlow Roll-On Paint System are twofold. In addition to not requiring a spray gun or an air compressor, there is no overspray. Similarly, Eastwood’s Contour DSB dustless sanding block system prevents sanding dust from becoming airborne.
A hand holding a shrink-wrapped roll of 80 Grit PSA sandpaper for the DSB system, with product details visible on the label.
17. The specially designed sandpaper for Eastwood’s Contour DSB dustless sanding block system is available in various grit rolls, ranging from 80- to 420-grit, and it can be unrolled and cut to length for use with the DSB sanding block.
A perforated dustless sanding block and a roll of perforated sandpaper laid next to a tape measure on a rusty metal surface for scale reference.
18. Mark the cutlines vertically between the holes, ensuring at least a 1/2-inch overlap at each end of the block. Fold the ends over and press the sandpaper firmly against the block’s face.
The Eastwood Contour DSB Dustless Sanding Block attached to a hose, being used to sand the side of the truck where paint and bare metal are exposed.
19. At full vacuum the sanding block will suck tight to the surface and resist movement. The flow control valve and the primary adapter regulator are adjusted to allow as much free movement as possible while still vacuuming sanding dust.
A close-up of the truck's body panel covered in distinct, sweeping sanding marks, revealing red paint, white primer, and light bare metal streaks.
20. Hand sanding with the DSB sanding block is performed in a cross-hatch pattern (cross blocking) to blend the more heavily sanded areas into the lightly sanded ones.
A hand uses a vacuum hose attachment to clean sanding dust and debris from a seam between two body panels on the truck.
21. Without a source for compressed air, the discharge side of the vacuum cleaner can be used to blow the area clean of dirt and sanded paint dust.
A hand sprays a can of Eastwood "Pre Painting Prep" chemical cleaner onto a sanded section of the truck's body panel.
22. Eastwood Pre Painting Prep in an aerosol can removes all contaminants, such as grease, silicone, wax, or road tar from the surface, ensuring that the OptiFlow epoxy primer bonds properly and without fisheye craters.
A dirty paper towel, stained reddish-brown from cleaning residue, held above a can of "Pre Painting Prep" and the sanded truck panel.
23. Eastwood Pre Painting Prep also removes sanded paint residue and softens the substrate (old paint) to improve adhesion, ensuring the OptiFlow epoxy bonds with maximum strength.
Two containers of Eastwood Optiflow Roll-on Paint System: the DTM Epoxy Primer Gray Finish and the Epoxy Primer Catalyst, sitting on a rusty surface.
24. Confirming that Eastwood’s OptiFlow Roll-On DTM epoxy primer is a true epoxy coating is verified by an equal parts (1:1) mixing ratio.
A measuring cup marked with red lines for mixing primer and catalyst, sitting inside a paint tray with an Epoxy Primer Catalyst can in the background.
25. The first step in achieving an accurate 1:1 mixing ratio is to stir the DTM epoxy primer thoroughly with a paint stick, ensuring it has a uniform viscosity, and then measure it in a clear beaker.
A paint roller loaded with white primer resting in a disposable paint tray filled with the mixed paint material.
26. Once thoroughly mixed, the OptiFlow Roll-On DTM epoxy primer can be rolled on immediately; there is no induction period (waiting time for activation).
A gray paint roller applies the initial coat of primer to a section of the truck's body that has been sanded down to bare metal and old paint.
27. On the first pass, rolling over bare metal and old paint, the coverage that OptiFlow Roll-On DTM epoxy primer provides is phenomenal. Long horizontal strokes work best where possible to minimize overlapping lines.
A close-up of a paint roller applying a thick coat of white primer to the top rail of the truck bed, covering the exposed red and bare metal.
28. Vertical strokes were essential for the roller to follow the contours of the bedside.
Cans of Eastwood Optiflow Urethane Primer Surfacer and Activator, a paint tray, and a mixing cup sitting on the rusty body of the truck.
29. In the near future, after I have applied epoxy primer to the entire truck using OptiFlow Roll-On DTM epoxy primer, the next step will be to roll on Eastwood OptiFlow’s urethane primer-surfacer.
SOURCE
Modern Rodding
VOLUME 6 • ISSUE 63 • 2025