
Modern Rodding Tech
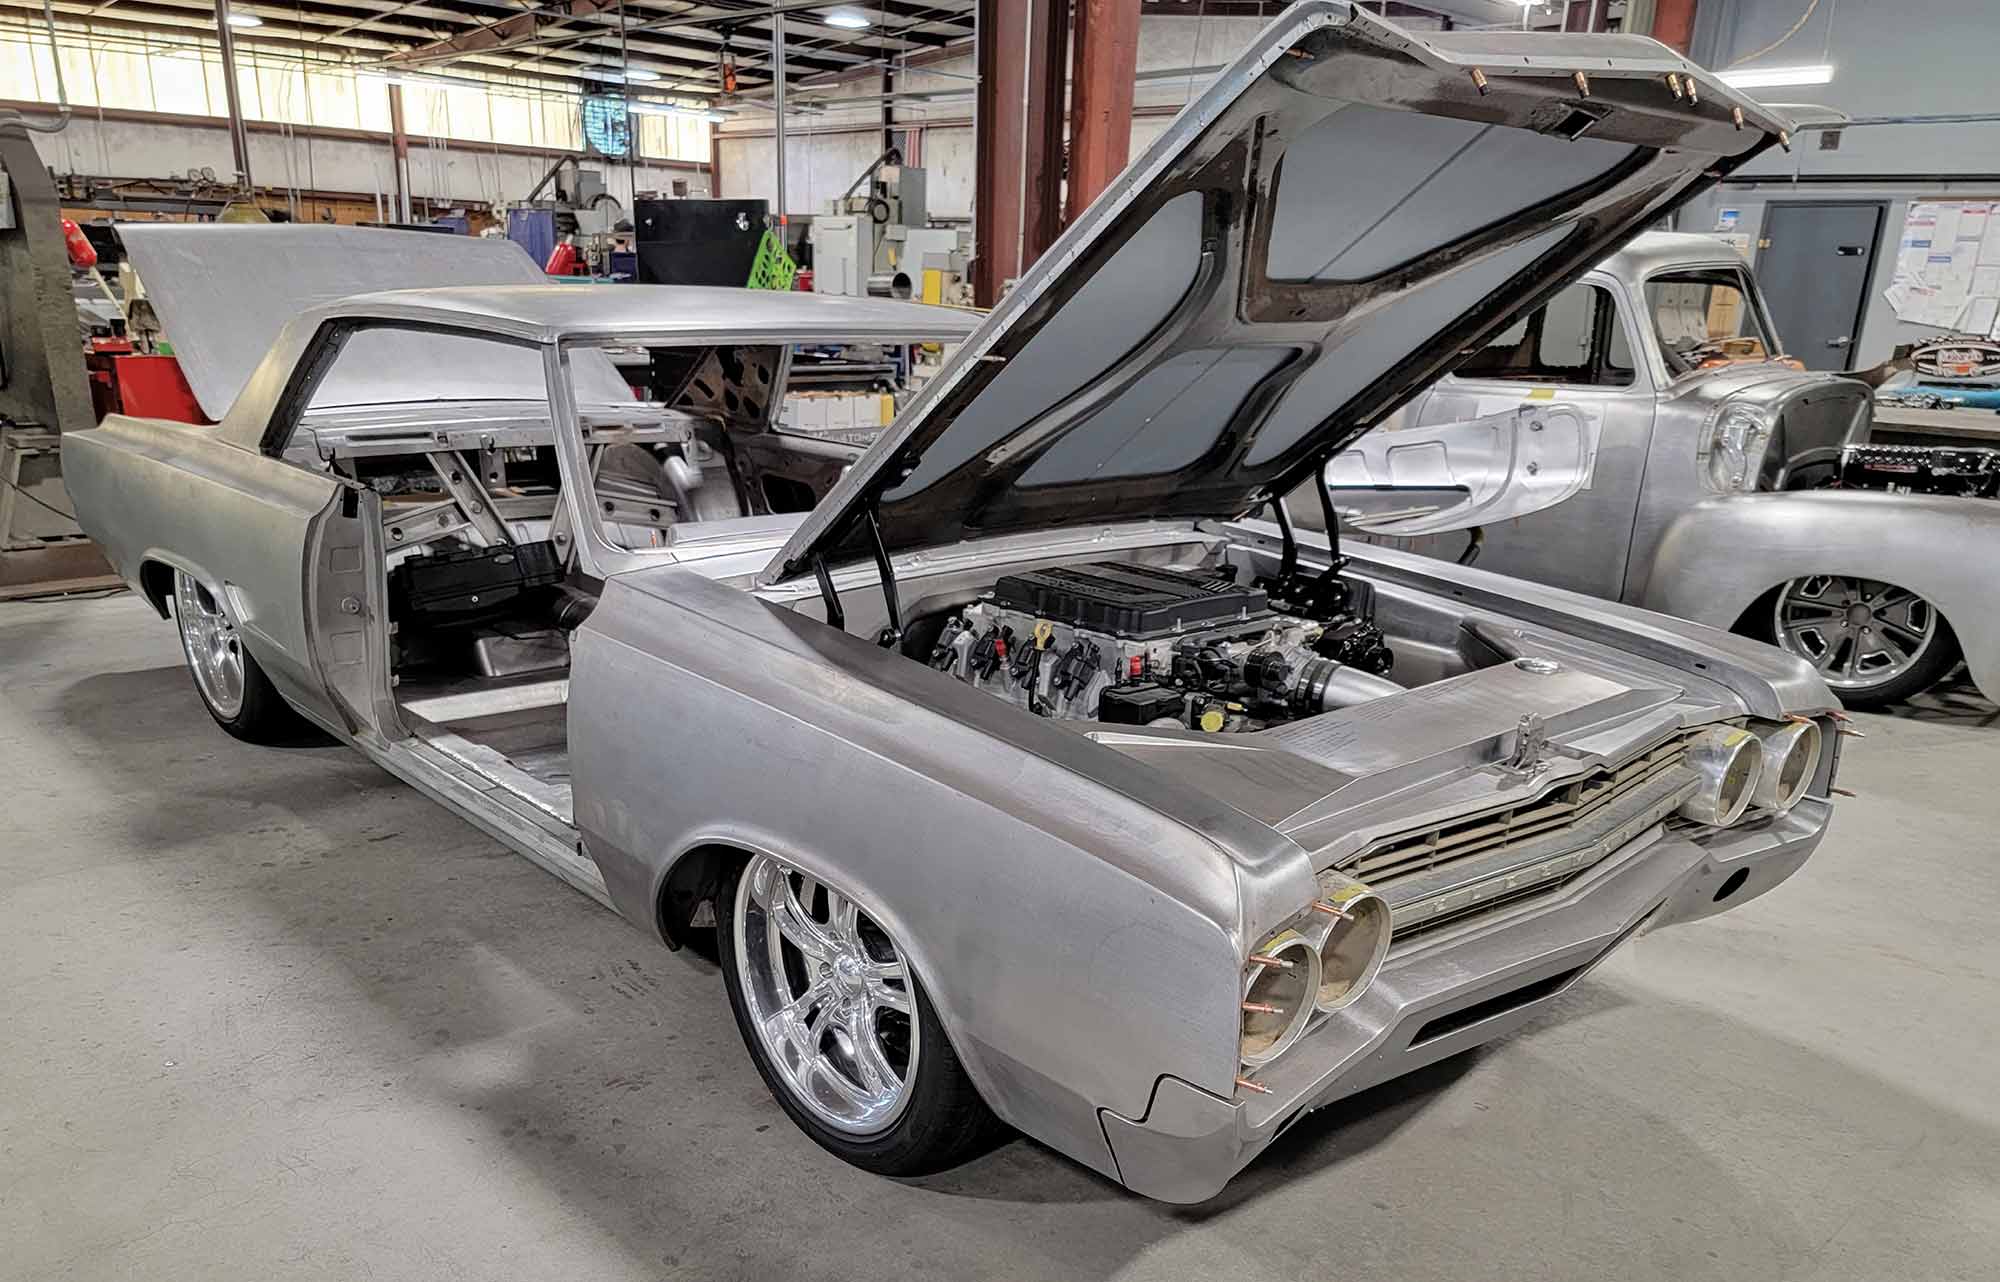
Bare metal 1965 Oldsmobile Cutlass with hood open.
1. This is the 1965 Oldsmobile Cutlass that Scott’s Hotrods ’N Customs has completely rebuilt.
Custom Dashboard & Consoles
Looking At Our Project 1965 Olds Cutlass
By RON COVELL
S

cott’s Hotrods ’N Customs has built a reputation for creating unique vehicles, often showcasing intricate and superbly finished sheet metal work. This sleek 1965 Oldsmobile Cutlass, owned by Cecil Carder, exemplifies that craftsmanship. It features some of the most extensively redesigned and beautifully crafted details we’ve seen recently. In this article, we’ll closely examine the fully custom-built dashboard and center console.

The original dashboard was completely removed, and a sturdy header panel was built to support the leading edge of the new dash. To achieve the correct shape and ensure accuracy, a temporary brace made from square tubing was installed to position the rear edge of the dashboard. In addition to supporting the panels during fabrication, this brace kept the peak along the back of the dash perfectly level—something that’s hard to do when shaping metal while fighting gravity.

A template was fabricated to define the dash top’s contour. An oversized sheet metal blank was then shaped to match this profile, and trimmed to the precise edges where it meets the new header panel at the front and the temporary brace at the rear. With the panel accurately positioned, the bend layout along the rear edge was established. The lower dashboard section was laid out and formed using the same method, with all panels temporarily secured using Clecos.

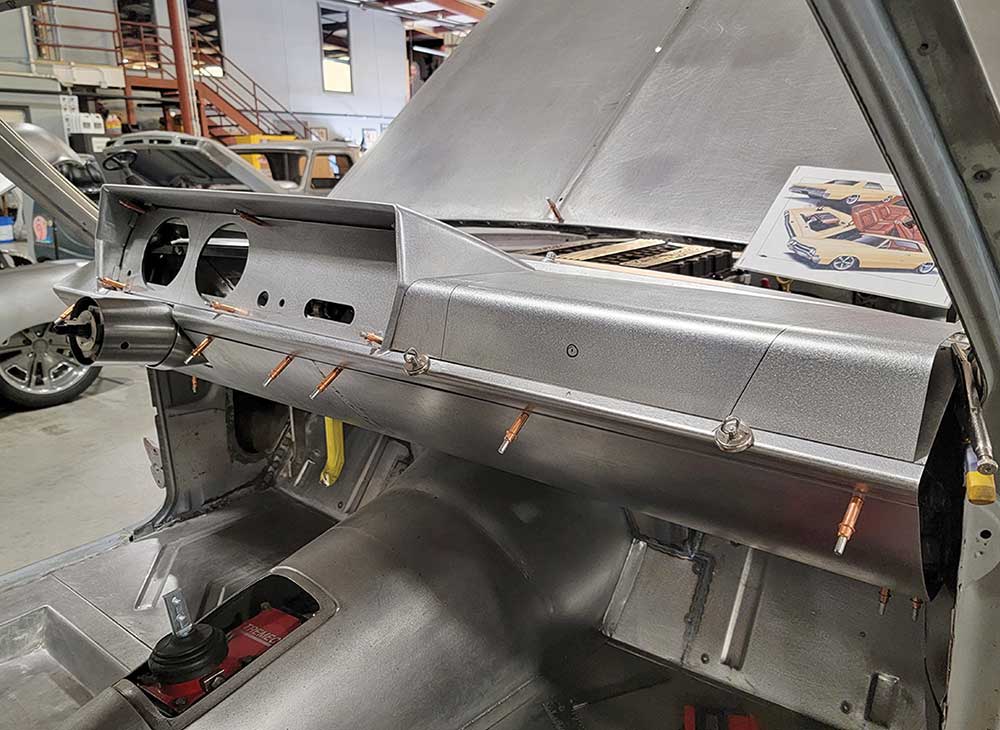
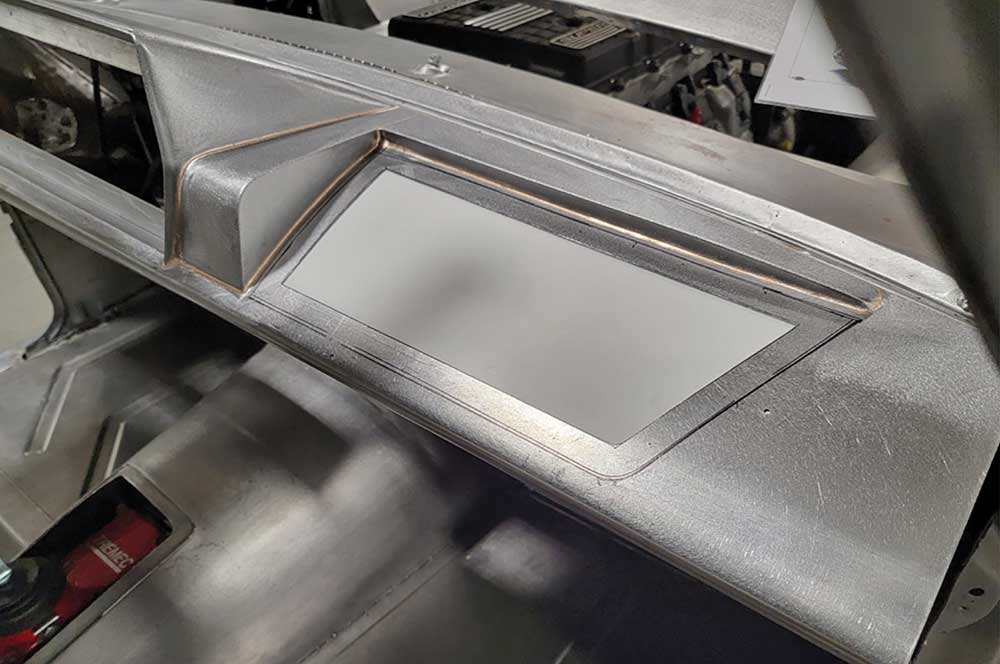
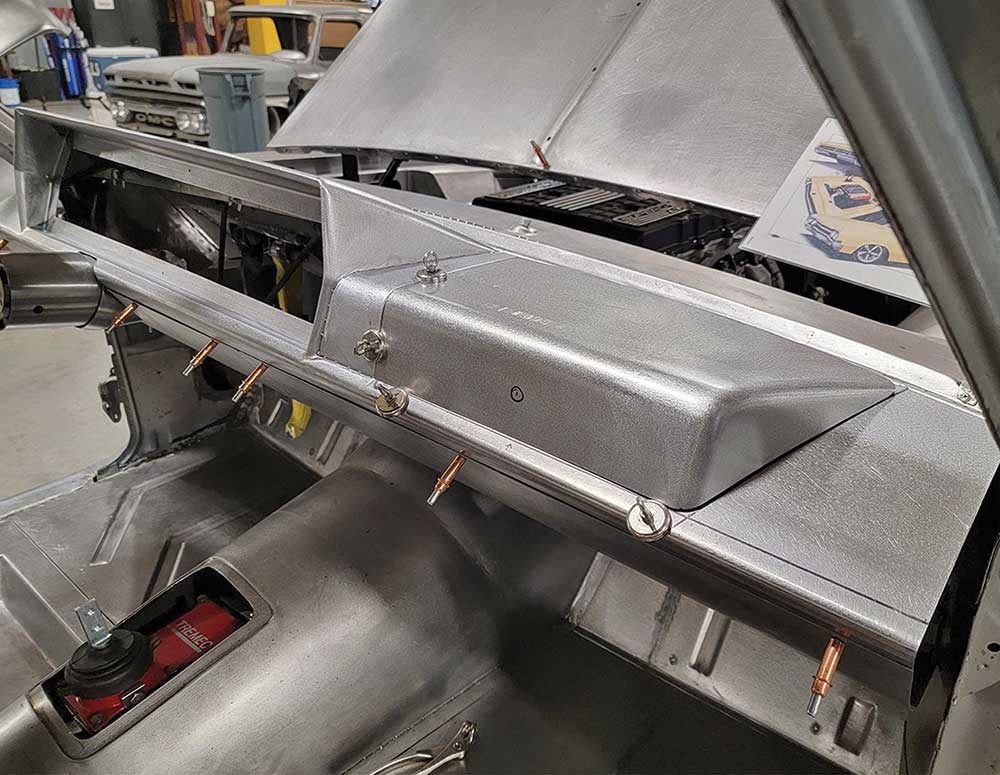
The dashboard itself has a completely unique design, featuring a custom-built instrument cluster that places the two large gauges symmetrically on either side of the steering column. A one-of-a-kind glove compartment door was also made for the passenger side of the dash, lifting upward for access.

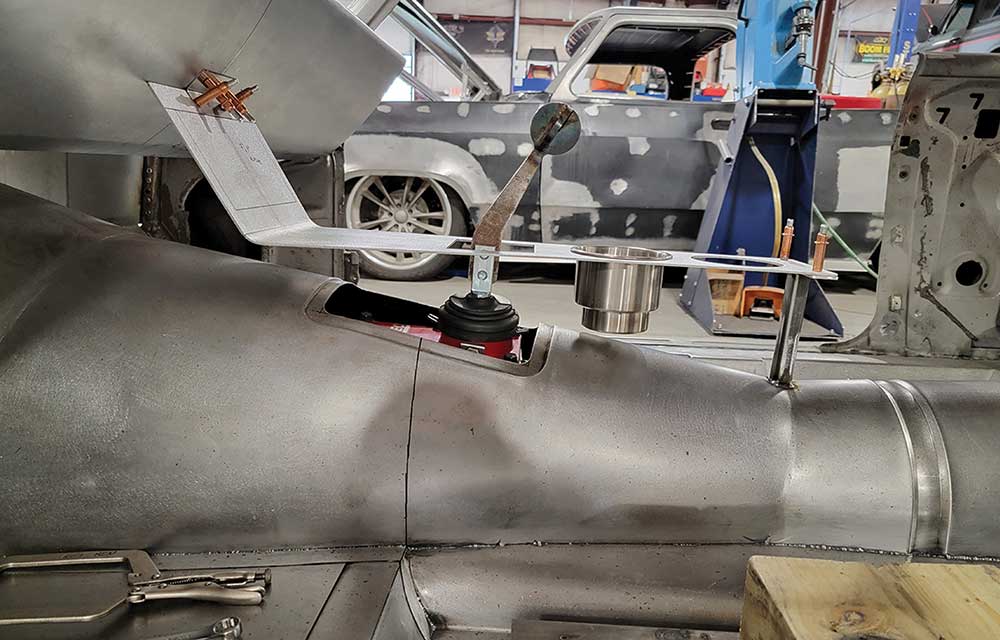
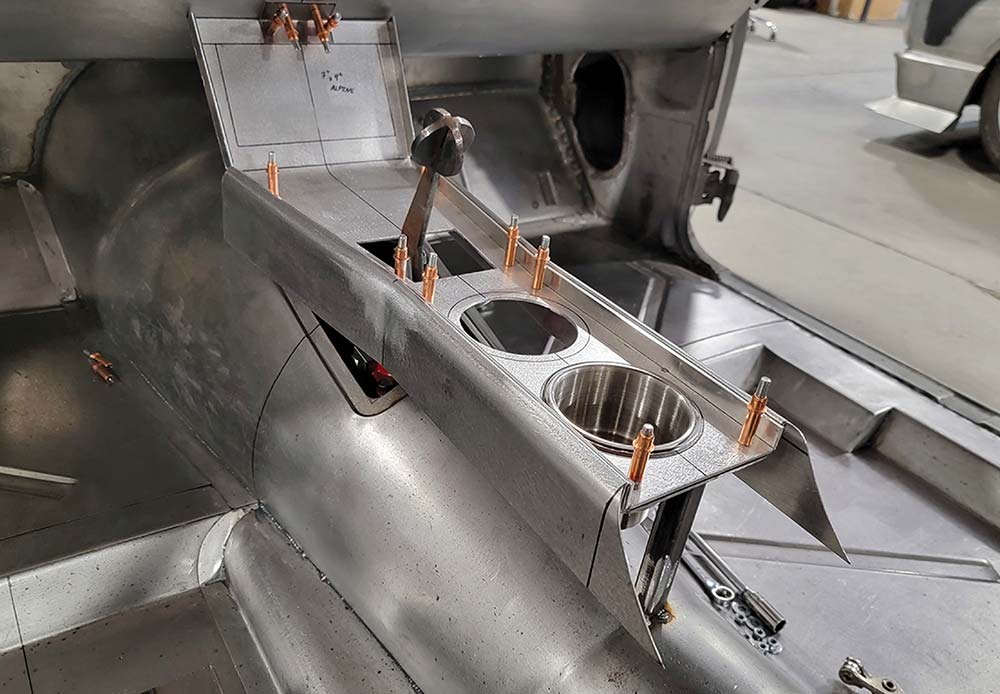
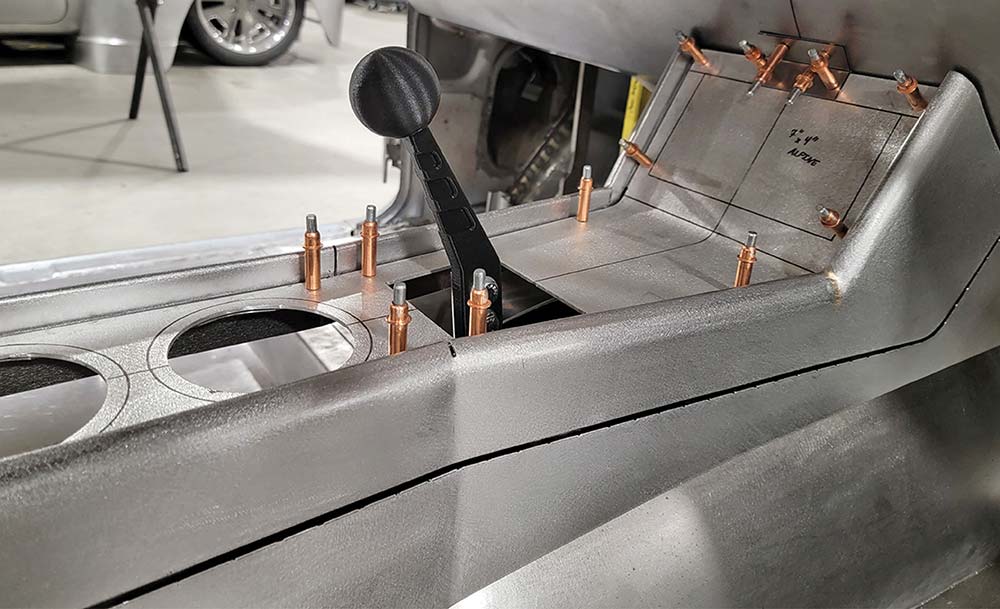
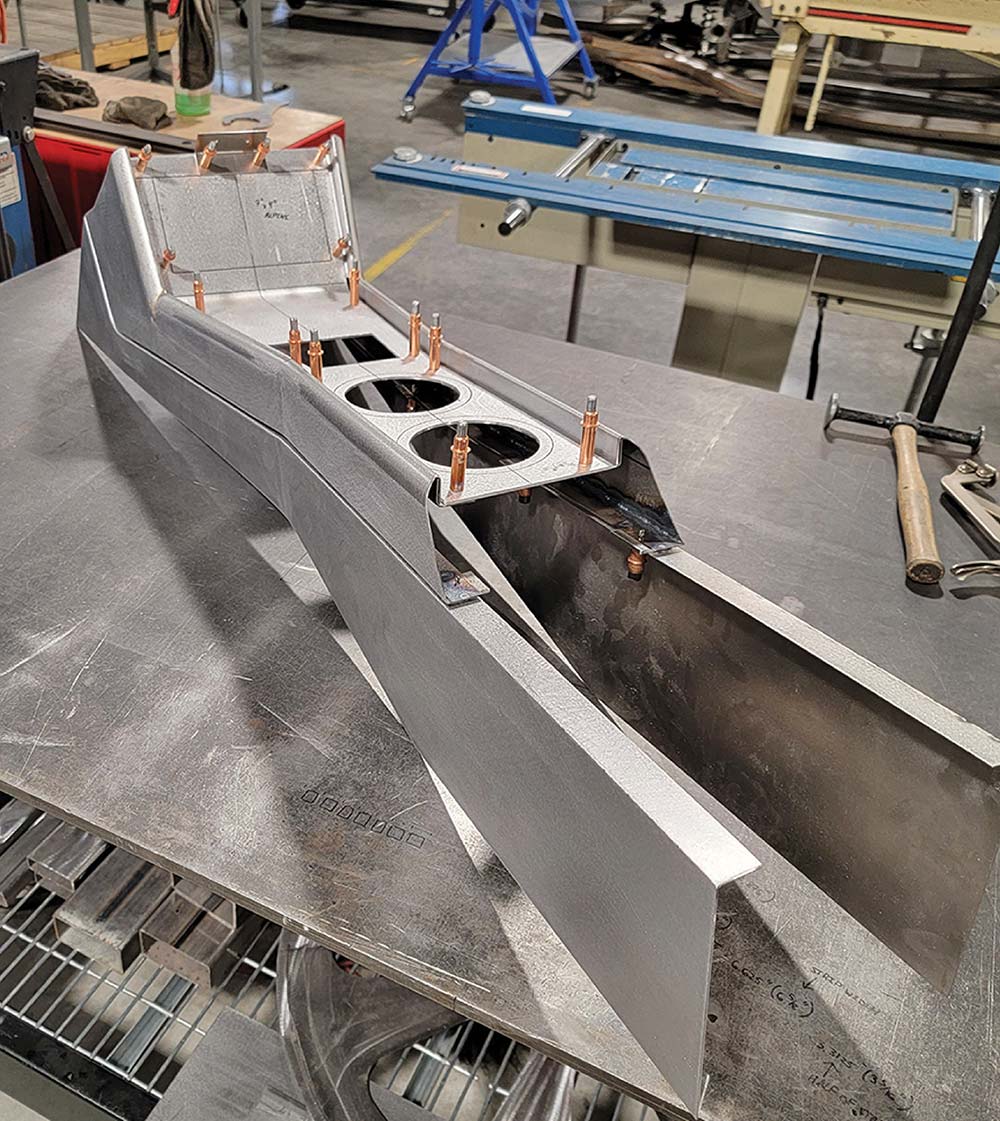
The center console is equally distinctive, made up of multiple sections that fit together precisely. An aluminum bezel was crafted to surround the shifter and cup holders, while the rest of the console was shaped to match the bezel. The top outer edges of the console feature a gentle radius similar to the rounded peak on the dashboard.

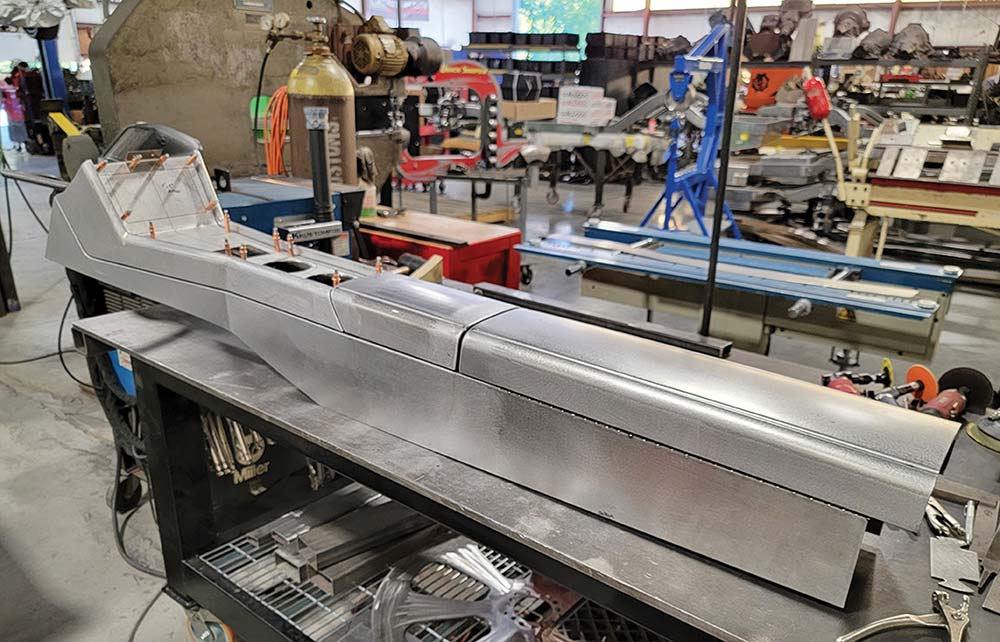
The console runs all the way to the rear seating area and features a hinged door that grants access to a convenient storage compartment just behind the cup holders. During the design process, careful consideration was given to ensuring enough clearance for the thickness of the upholstery materials that will eventually cover the console.

The accompanying photos showcase the level of detail involved in fabricating these components. In future articles, we’ll examine even more of the exceptional craftsmanship displayed throughout this build.
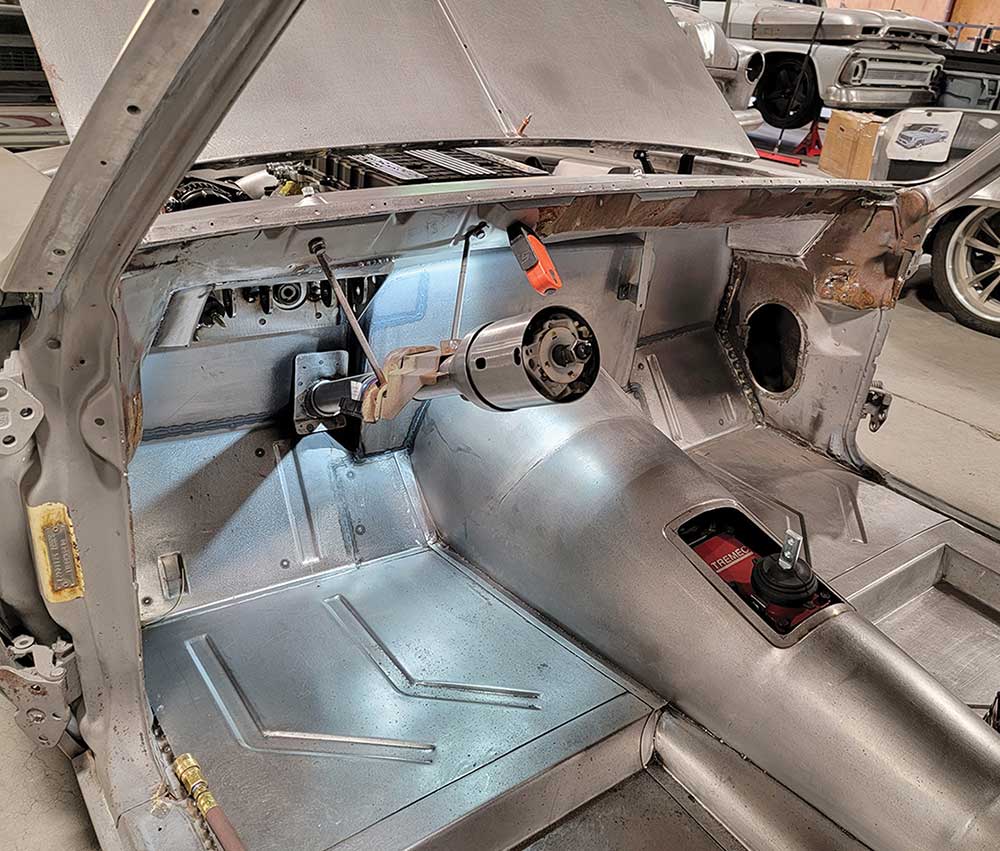
Interior view showing bare metal floor and Ididit steering column.
2. The entire floor and transmission tunnel are fabricated from new metal. The original dashboard has been removed to allow construction of a new dash and Dakota Digital instrument cluster.
Fabricated header panel for the new dashboard mounting.
3. A new header panel is fabricated to provide a solid mounting point for the front edge of the dashboard. Note the positioning of the Ididit steering column.
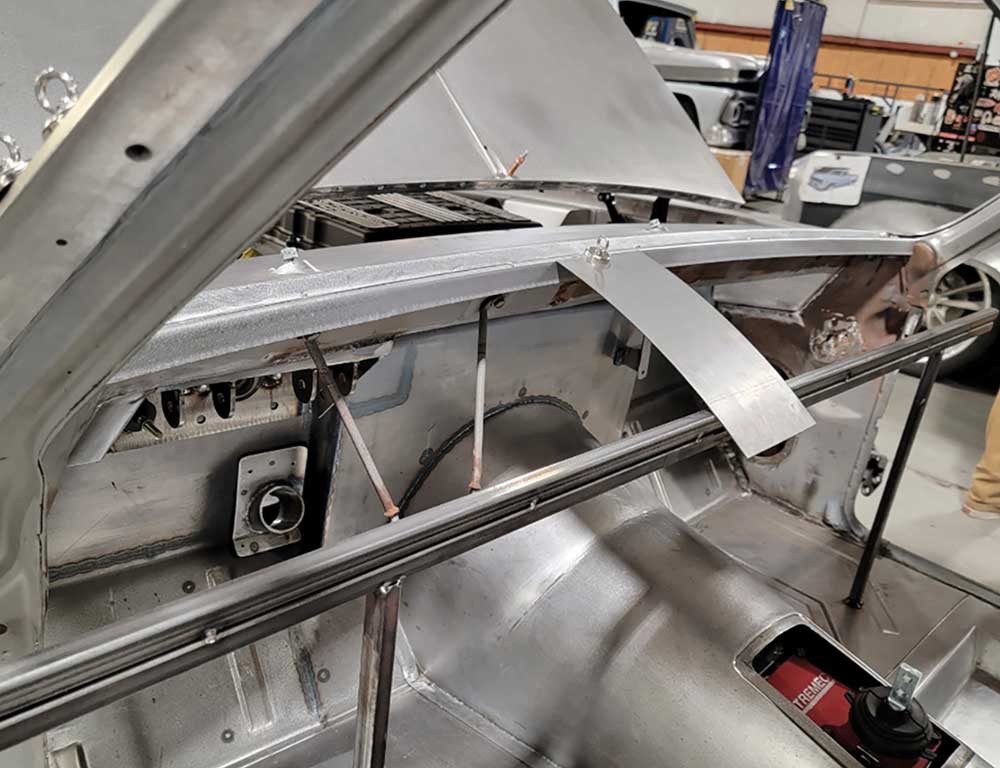
Curvature template defining curvature over dashboard brace.
4. A temporary square-tubing brace is installed to establish the peak at the rear of the dashboard. A template is then made to define the curvature of the top panel.
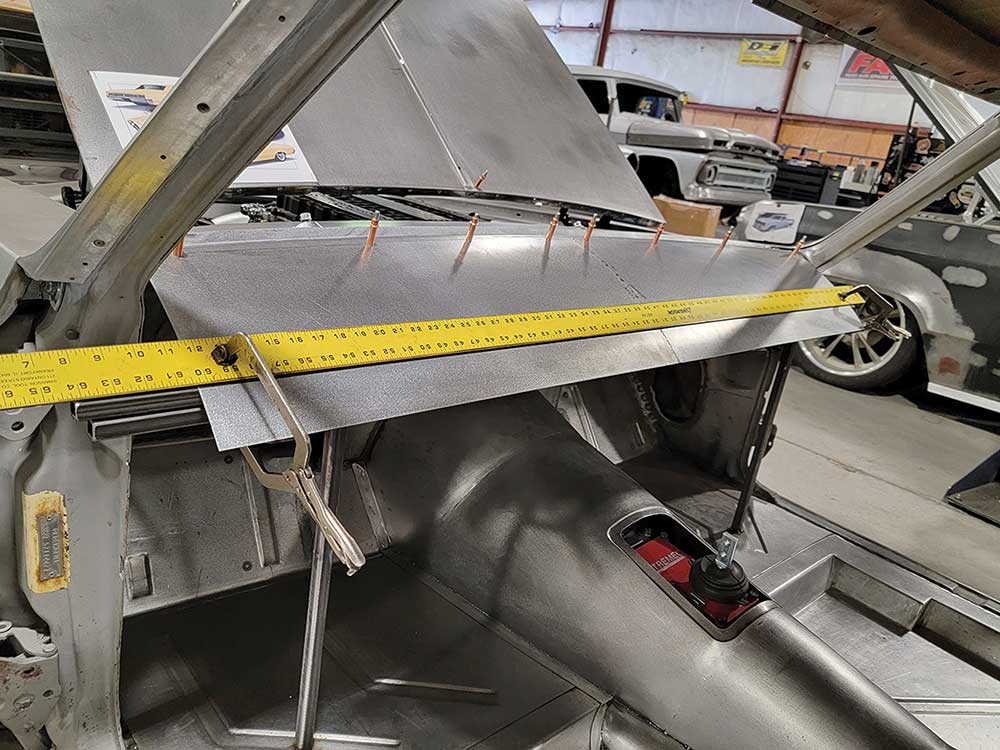
Marking a bend line on sheet metal with a straightedge.
5. An oversized sheet of new metal is shaped to fit the opening. A straightedge is used to accurately mark the rear bend line.
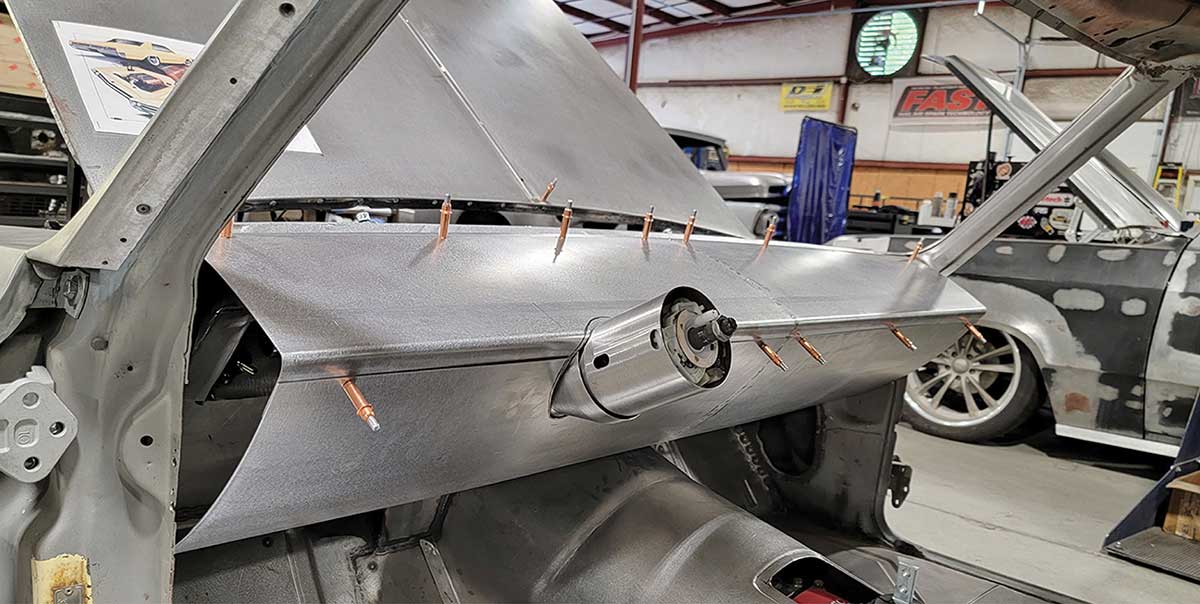
Dashboard panels joined and trimmed around the steering column.
6. A bend is created along the rear edge of the top panel, and a second panel is attached to form the lower part of the dash. Both panels are carefully trimmed to clear the steering column.
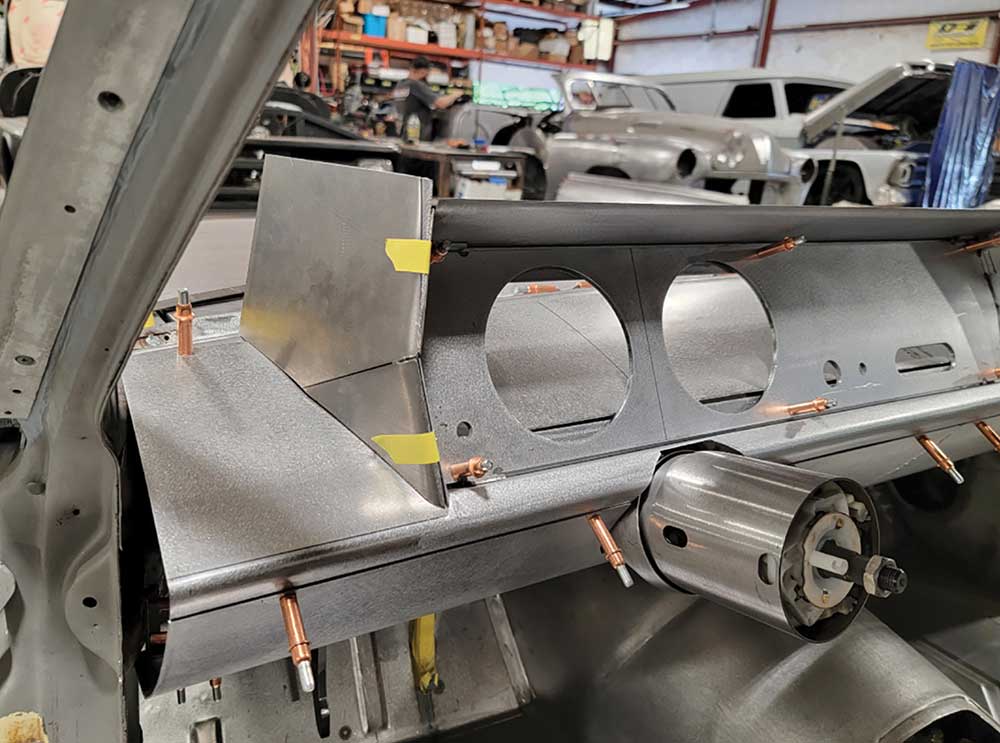
Trial-fitting the fabricated instrument cluster onto the dash.
7. The fabricated instrument cluster is trial-fitted on top of the dashboard. The large gauges are centered on the steering column to ensure proper alignment with the driver.
Added metal on left side of instrument cluster.
8. Metal is added on the left side of the instrument cluster to match the dashboard.
Instrument cluster housing welded with left side closeout panel.
9. The instrument cluster housing is welded to the dash. Then a closeout panel is installed on the left side, extending to the door pillar.
Separate panel installed on right side for glovebox.
10. A separate panel is built and installed on the right side of the dash. The new glovebox door will be created from this panel.
Dashboard removed for final welding on workbench.
11. The dashboard has been removed from the car and placed on the workbench so the long seam connecting the upper and lower panels can be fully welded.
Rectangular opening cut in dash top for glovebox storage.
12. An opening is cut in the top of the dash panel to create a glovebox storage space.
Magnets holding panels for fitting the upward-hinging glovebox door.
13. The glovebox door is designed to hinge upward. Magnets are used to temporarily hold the panels in place during fitting.
Positioning base bezel for console shifter and cup holders.
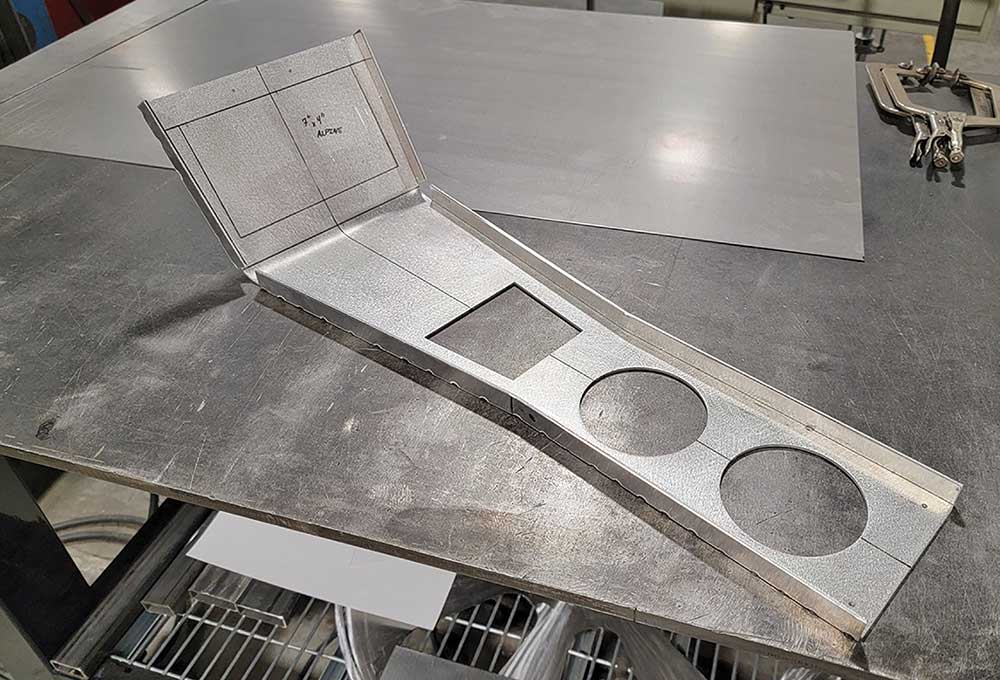
14. Construction of the center console starts by forming and positioning the base of the bezel that surrounds the shifter and cup holders.
Bezel with flanges formed and stitch-welded.
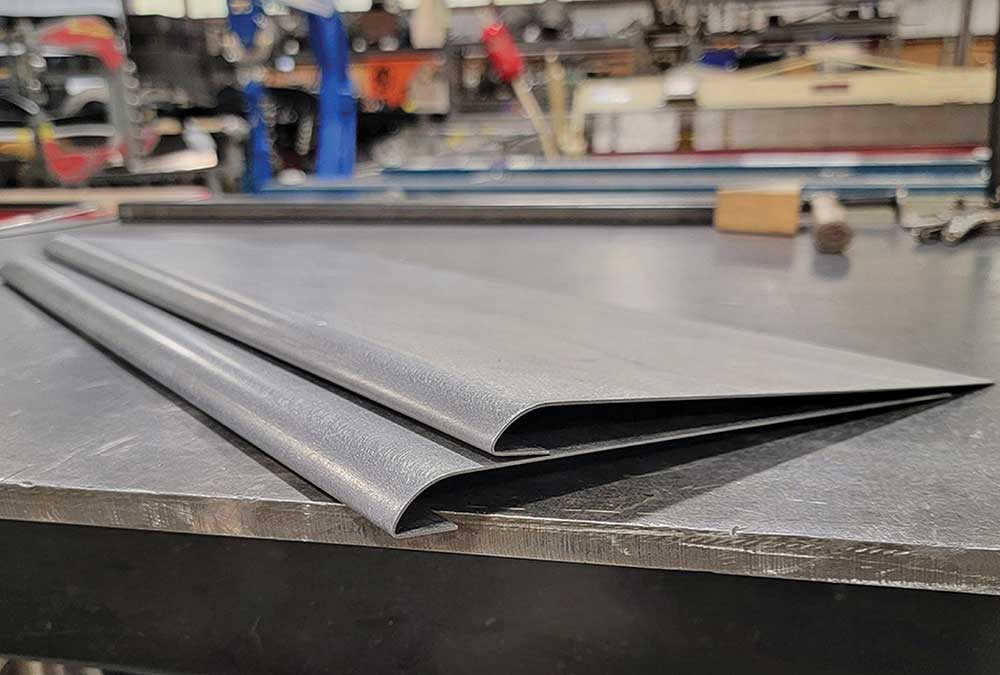
15. Flanges are formed and stitch-welded to the edges of the bezel to finish it and provide strength.
Detail of console side panels' distinctive top profile.
16. The console side panels feature a distinctive profile along the top edge. The bezel will fit snugly against these panels.
Angle sections welded for a flat bezel mounting surface.
17. Angle sections are welded to the side panels, creating a flat, sturdy surface for mounting the bezel.
Console side panels cut to specification.
18. The bottom and rear edges of the side panels are cut to specified measurements.
Console dog-leg section connecting to the dashboard.
19. Additional metal is added to the dog-leg section of the console, allowing it to connect smoothly with the dashboard.
Trial-fitting console spacer pieces with magnets.
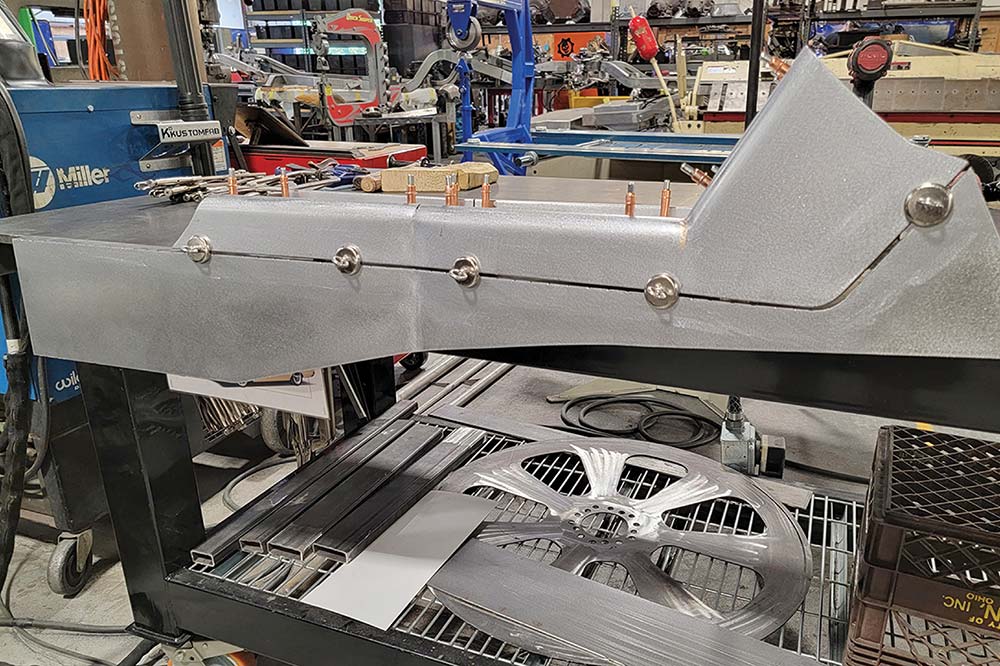
20. Spacer pieces are made to connect the top part of the console to the transmission tunnel. These parts are trial-fitted on the bench and temporarily held in place with magnets.
Verifying overall console shape and alignment in car.
21. The console is reinstalled in the car to verify the overall shape, alignment, and clearances.
Detail showing uniform gap between console sections.
22. This view highlights how closely the components fit together and shows the uniform gap between the upper and lower sections of the console.
Trimming top center section of console to final size.
23. The rear edge of the top center section of the console is precisely trimmed to its final size.
Back cap welded to upper console section.
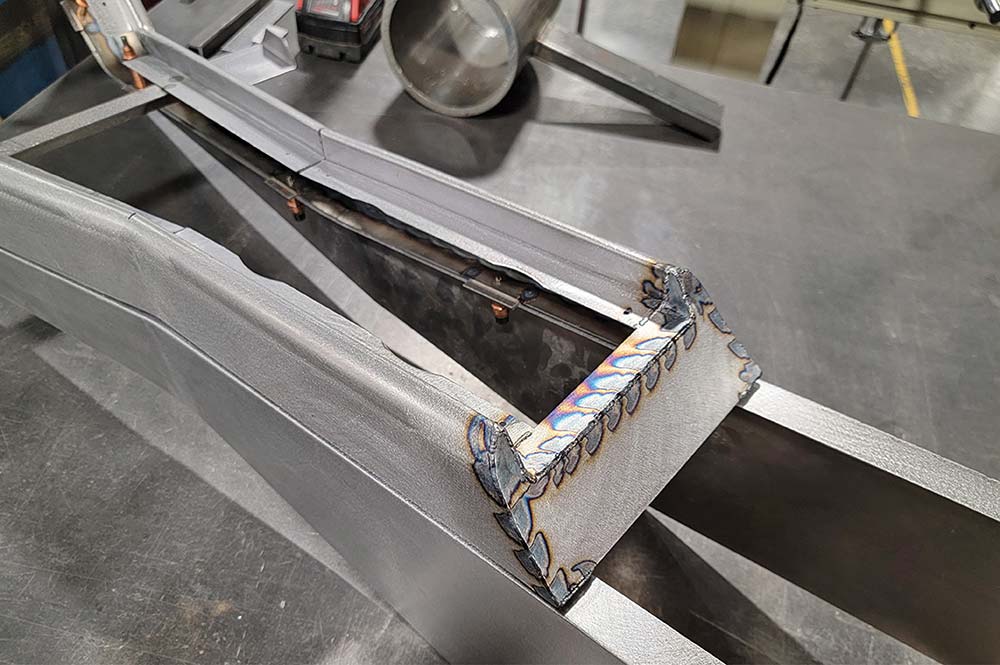
24. A cap is welded to the back of the upper console, completing the open end.
Second cap extending console towards rear seat.
25. A second cap is formed to extend the console rearward toward the back seat.
Magnets holding chipboard while shaping lower rear console section.
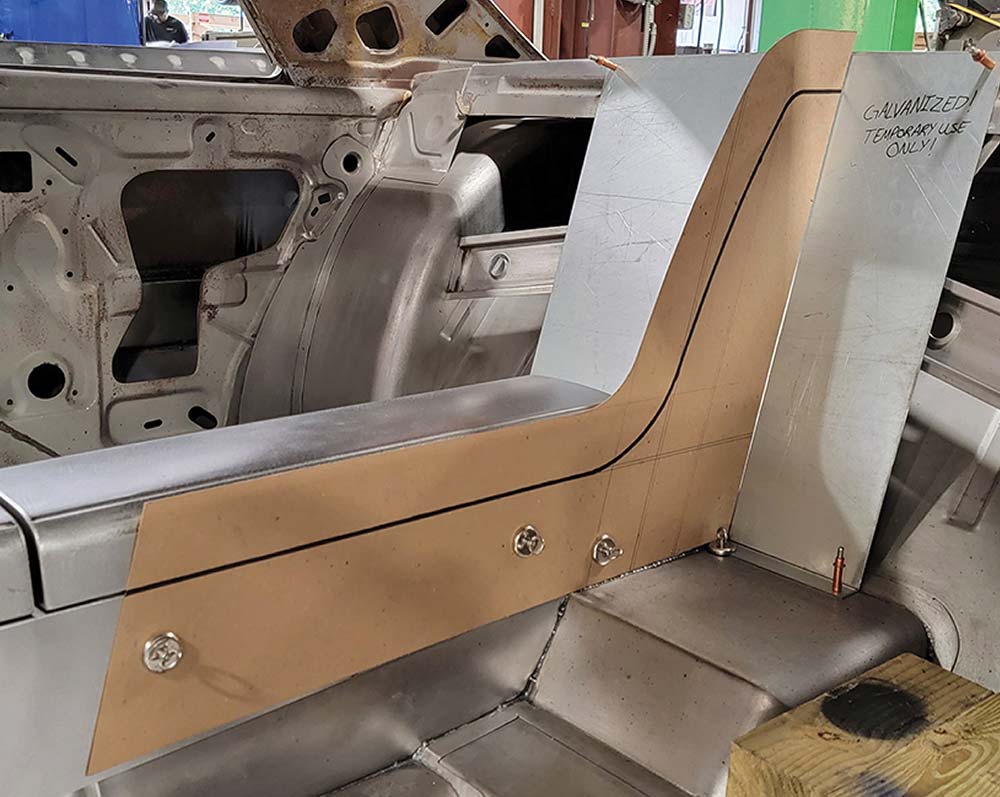
26. Magnets are used to hold chipboard in place while shaping the lower section of the rear console.
Completed bare metal custom console and dashboard interior.
27. The finished console showcases the accuracy of the fabrication work. Almost all of the metal parts shown here are custom made.
In The Garage Media
Scott’s Hotrods logo

(865) 951-2081
scottshotrods.com
Dakota Digital logo

(800) 852-3228
dakotadigital.com
IDIDIT logo

(517) 424-0577
ididit.com
Modern Rodding
VOLUME 7 • ISSUE 71 • 2026