Modern Rodding Tech
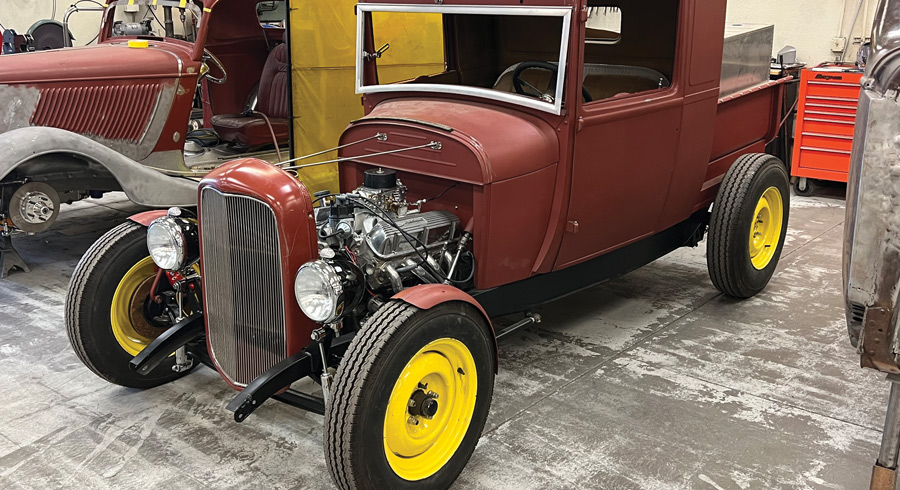
1. Well, you need headlights on a farm truck. So, we now have headlights on our highboy Model A closed-cab Ford pickup thanks to parts from Speedway Motors (SM) and Lokar Performance Products.

By Brian Brennan  Photography by THE AUTHOR
f you plan on driving your hot rod on the street there is a real good chance that you will need (and require) lighting comprised of headlights and taillights. Our ’28 Ford extended closed-cab pickup had its taillights installed (Nov. ’21 issue), so now it’s onto headlights.
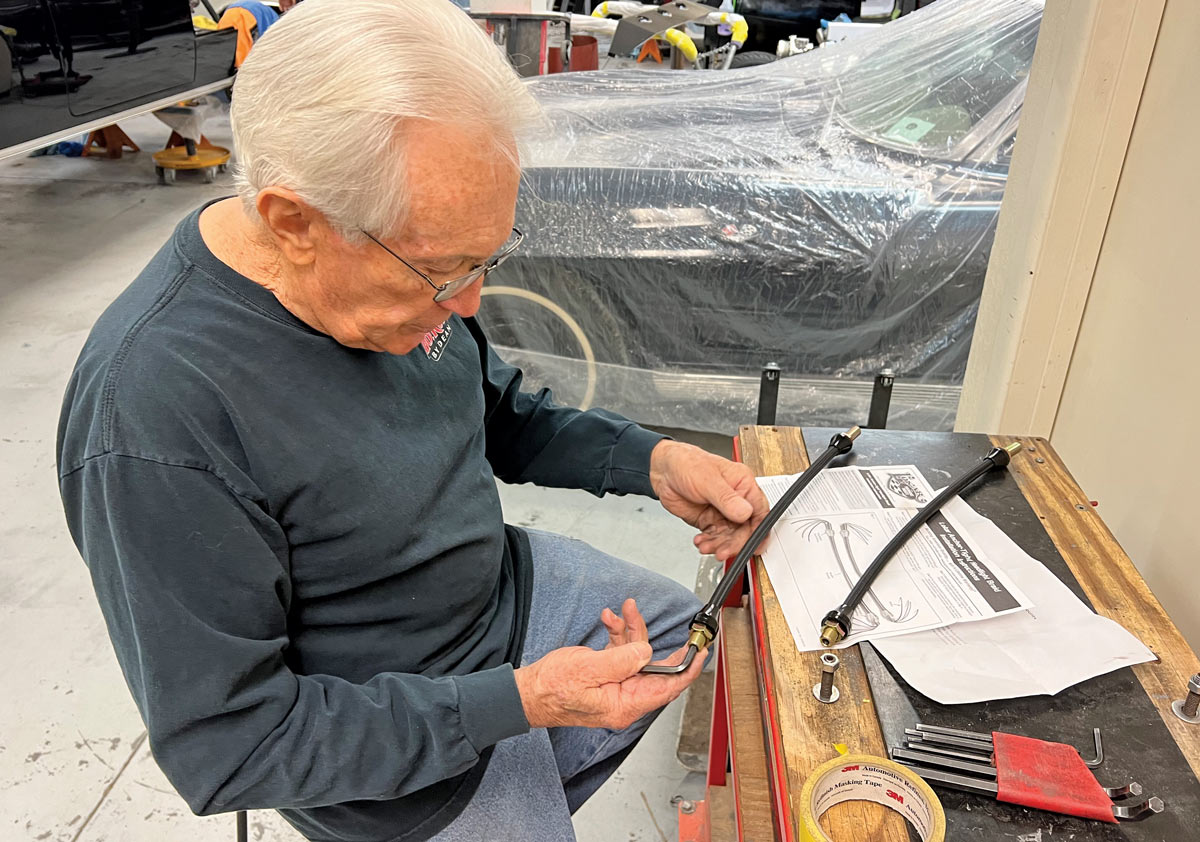
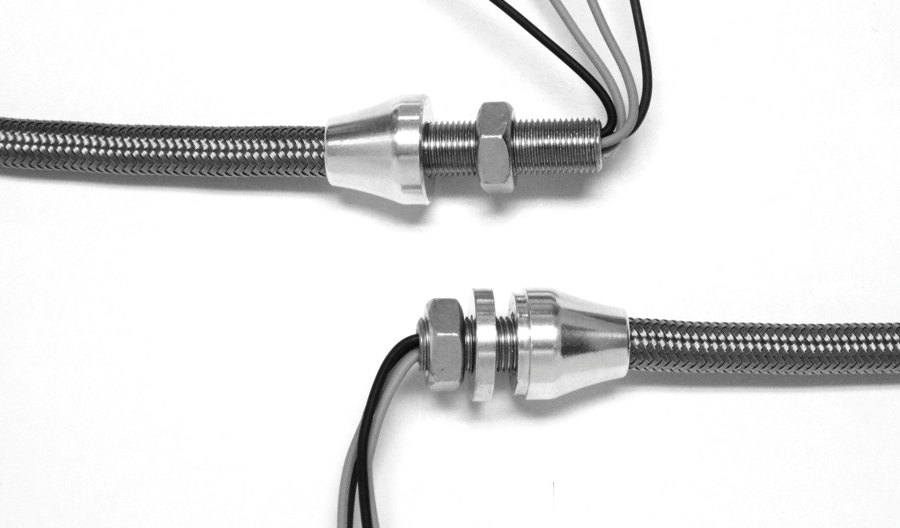
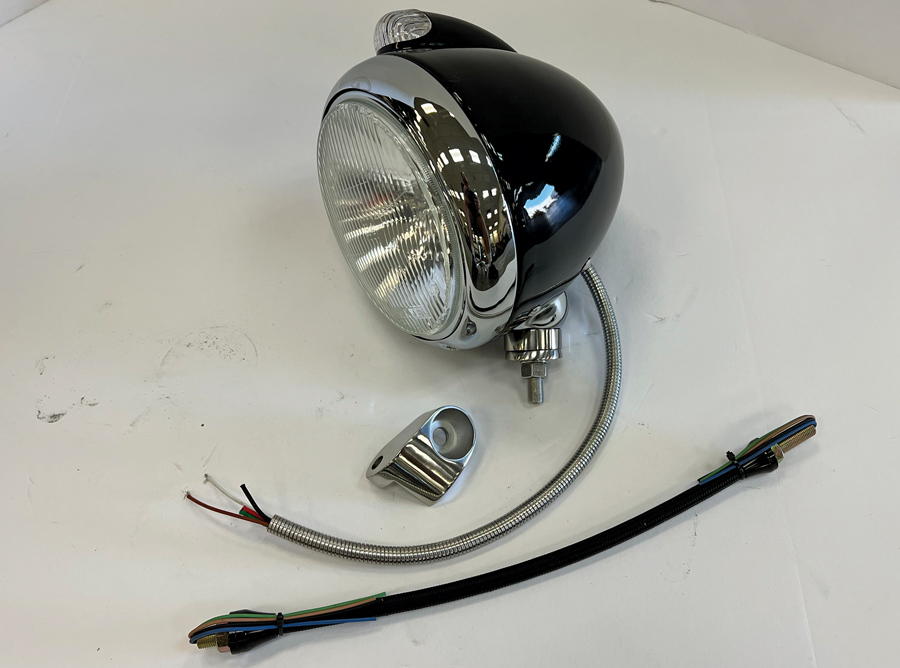
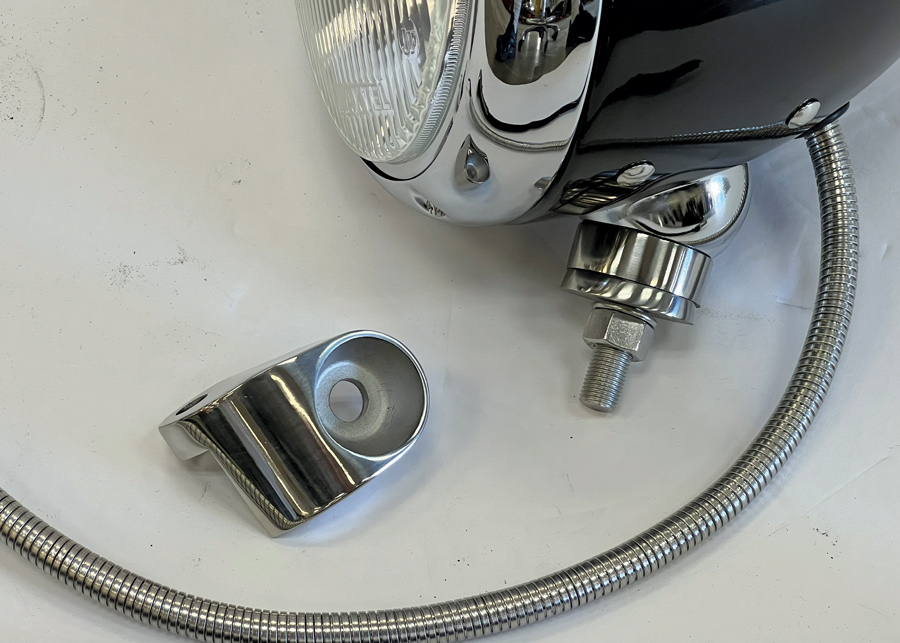
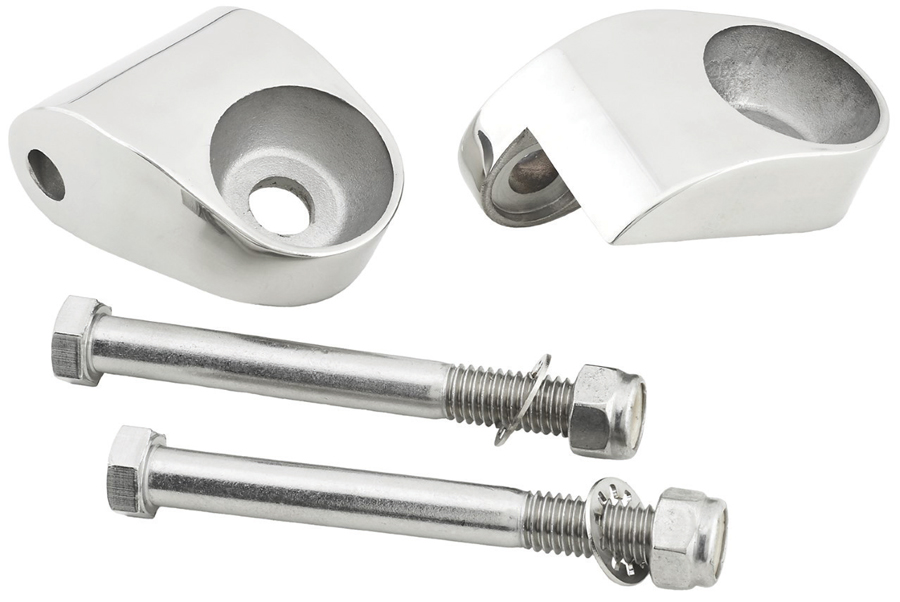
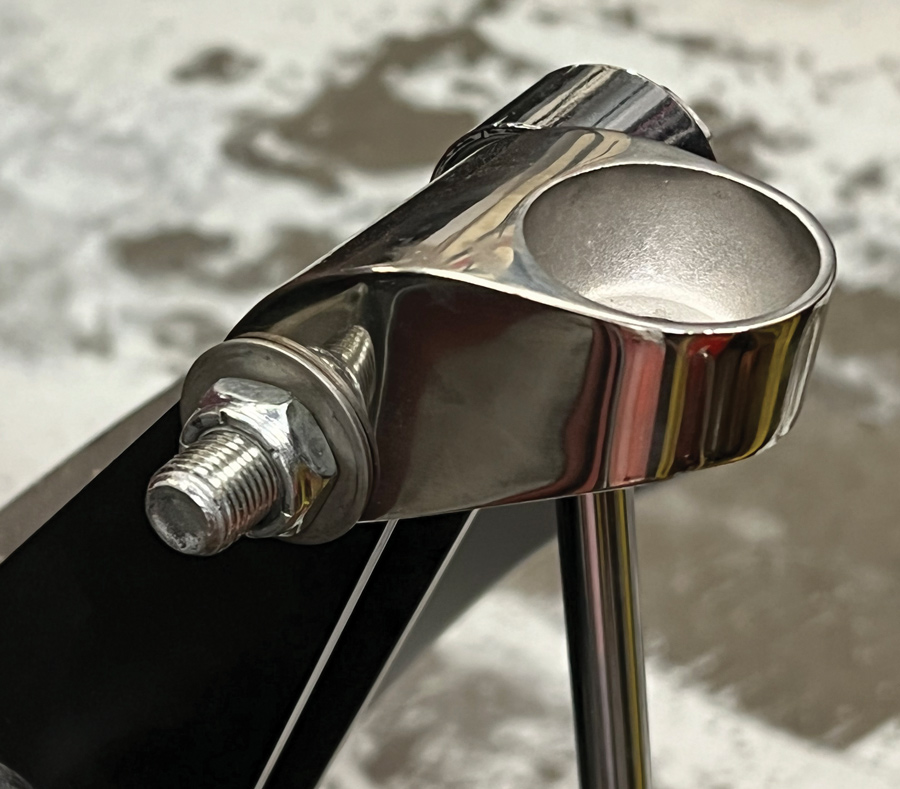
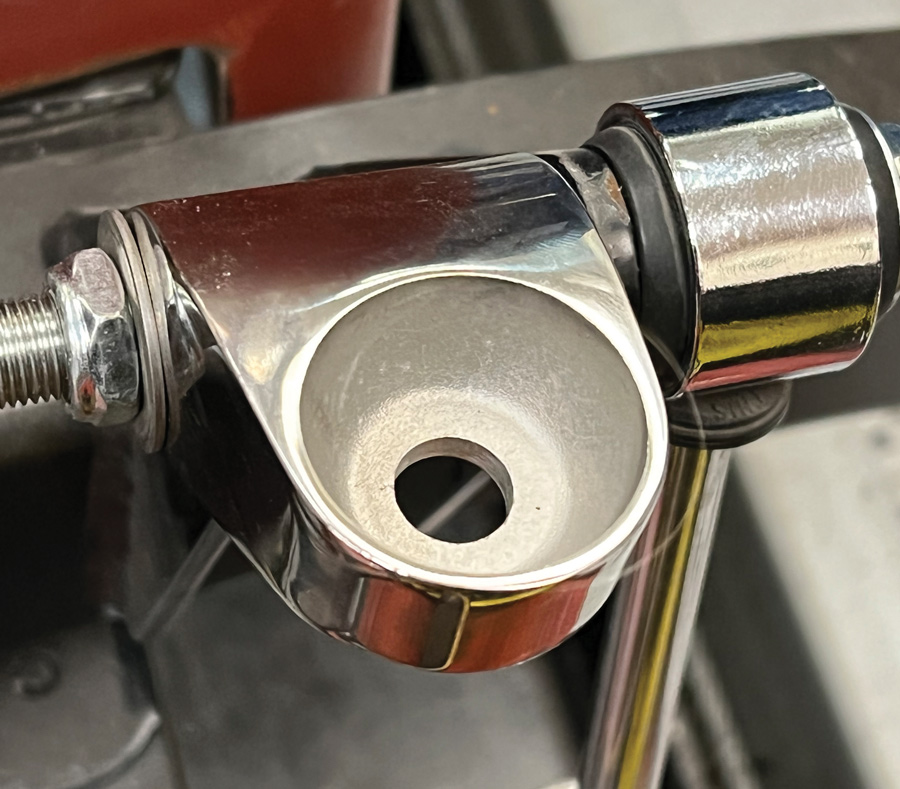
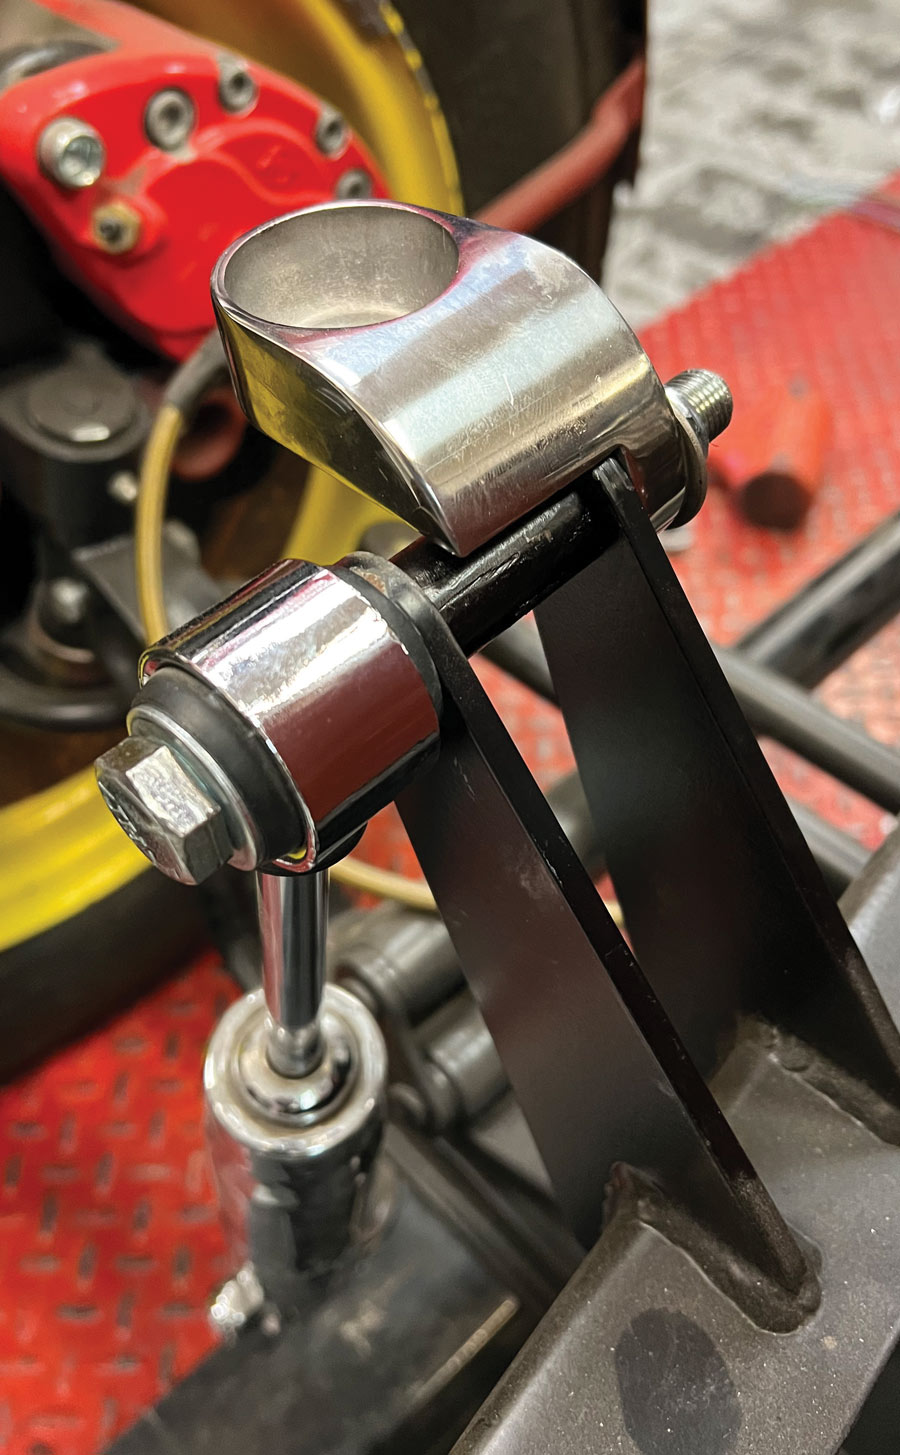
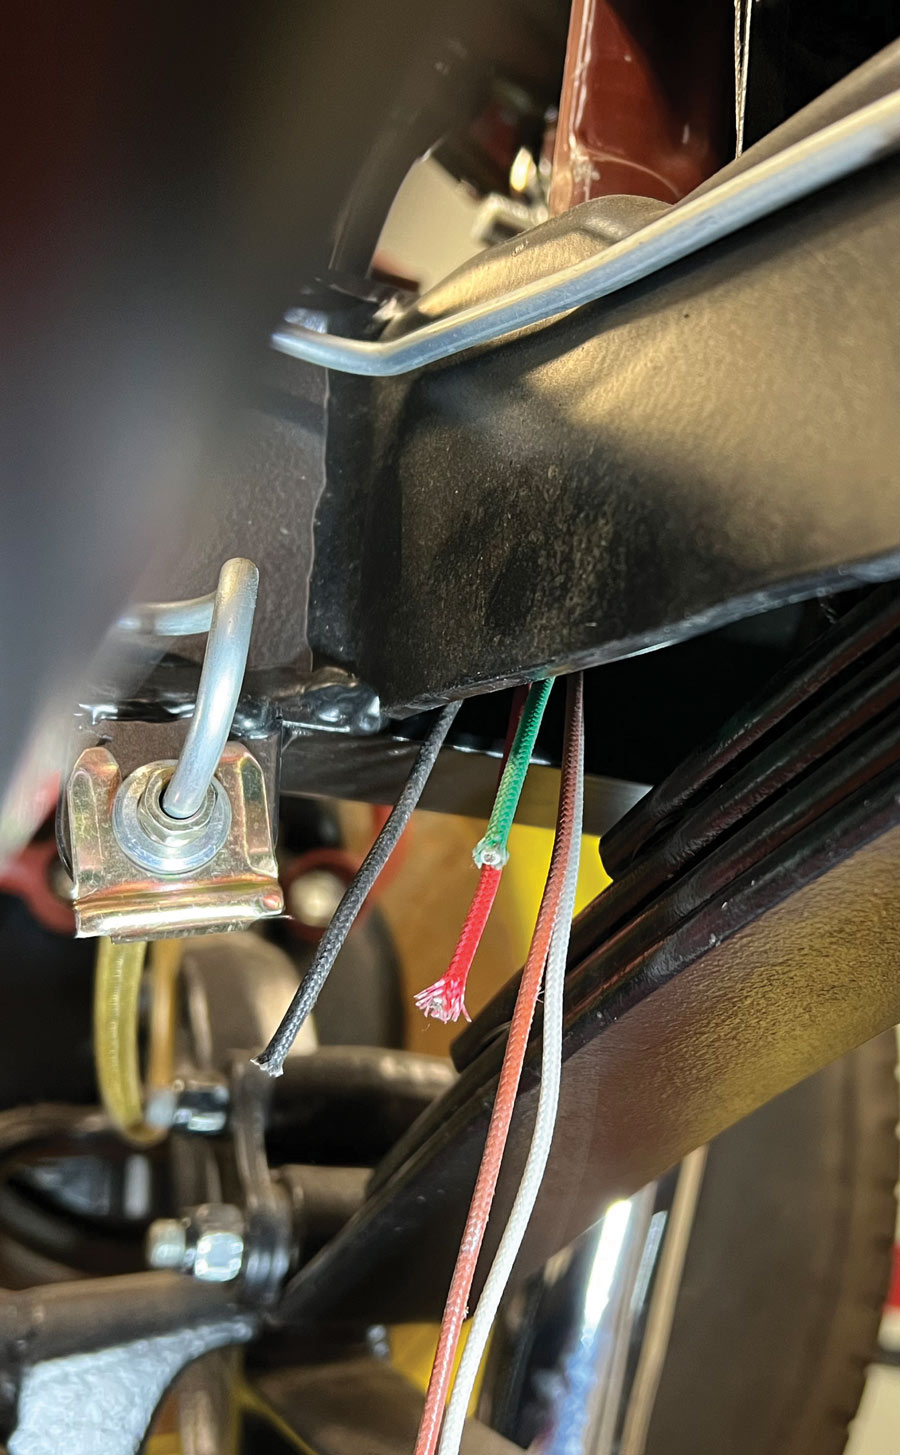
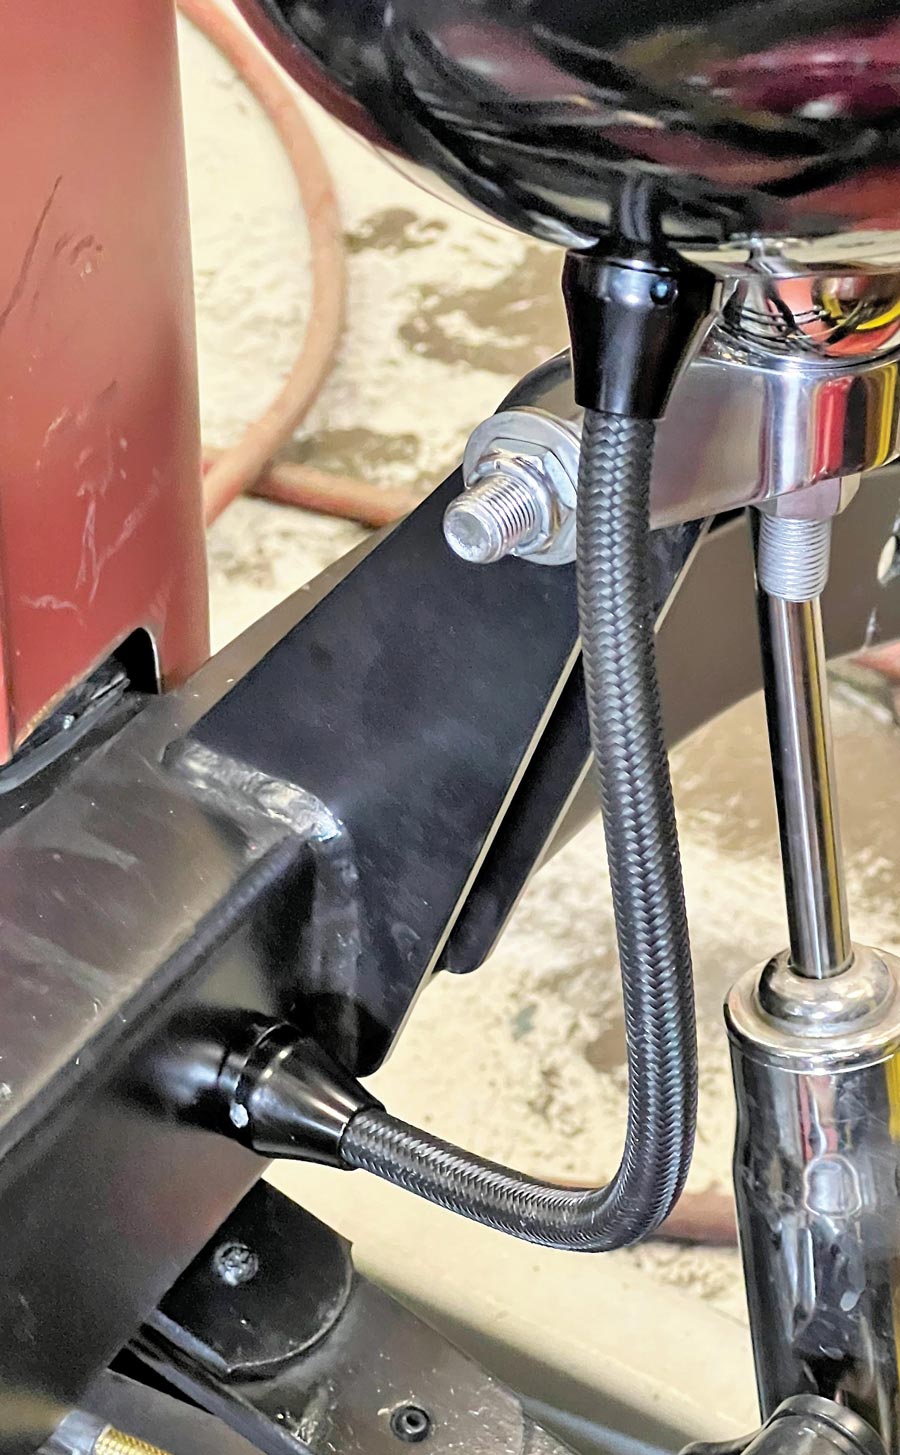
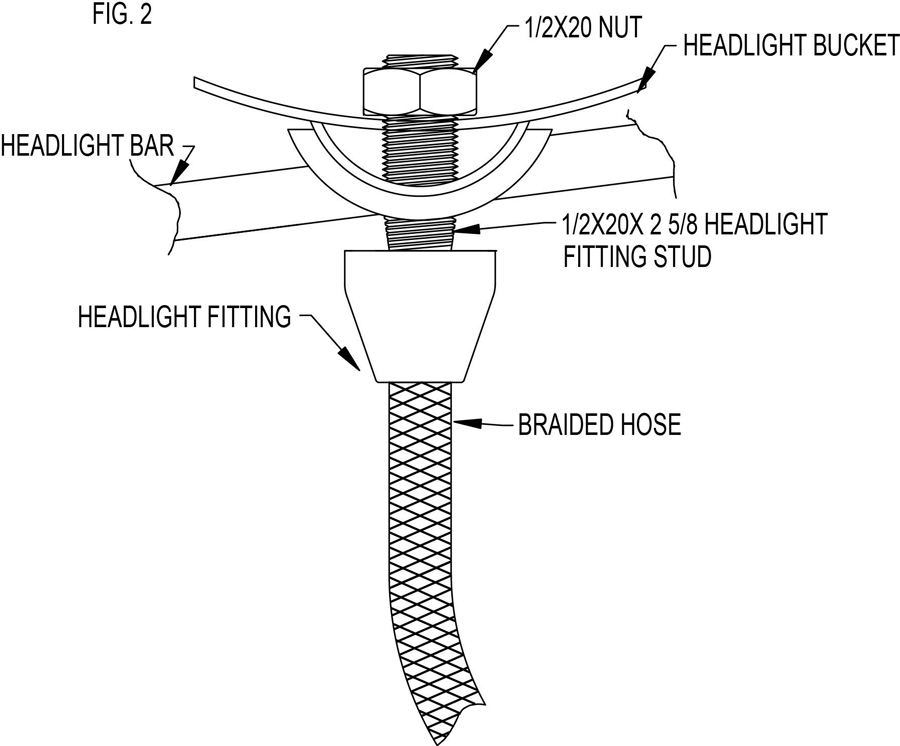
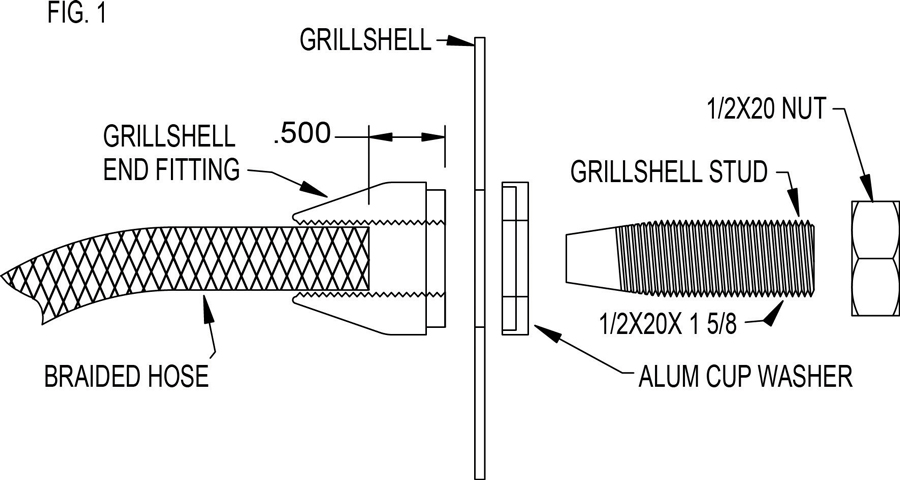
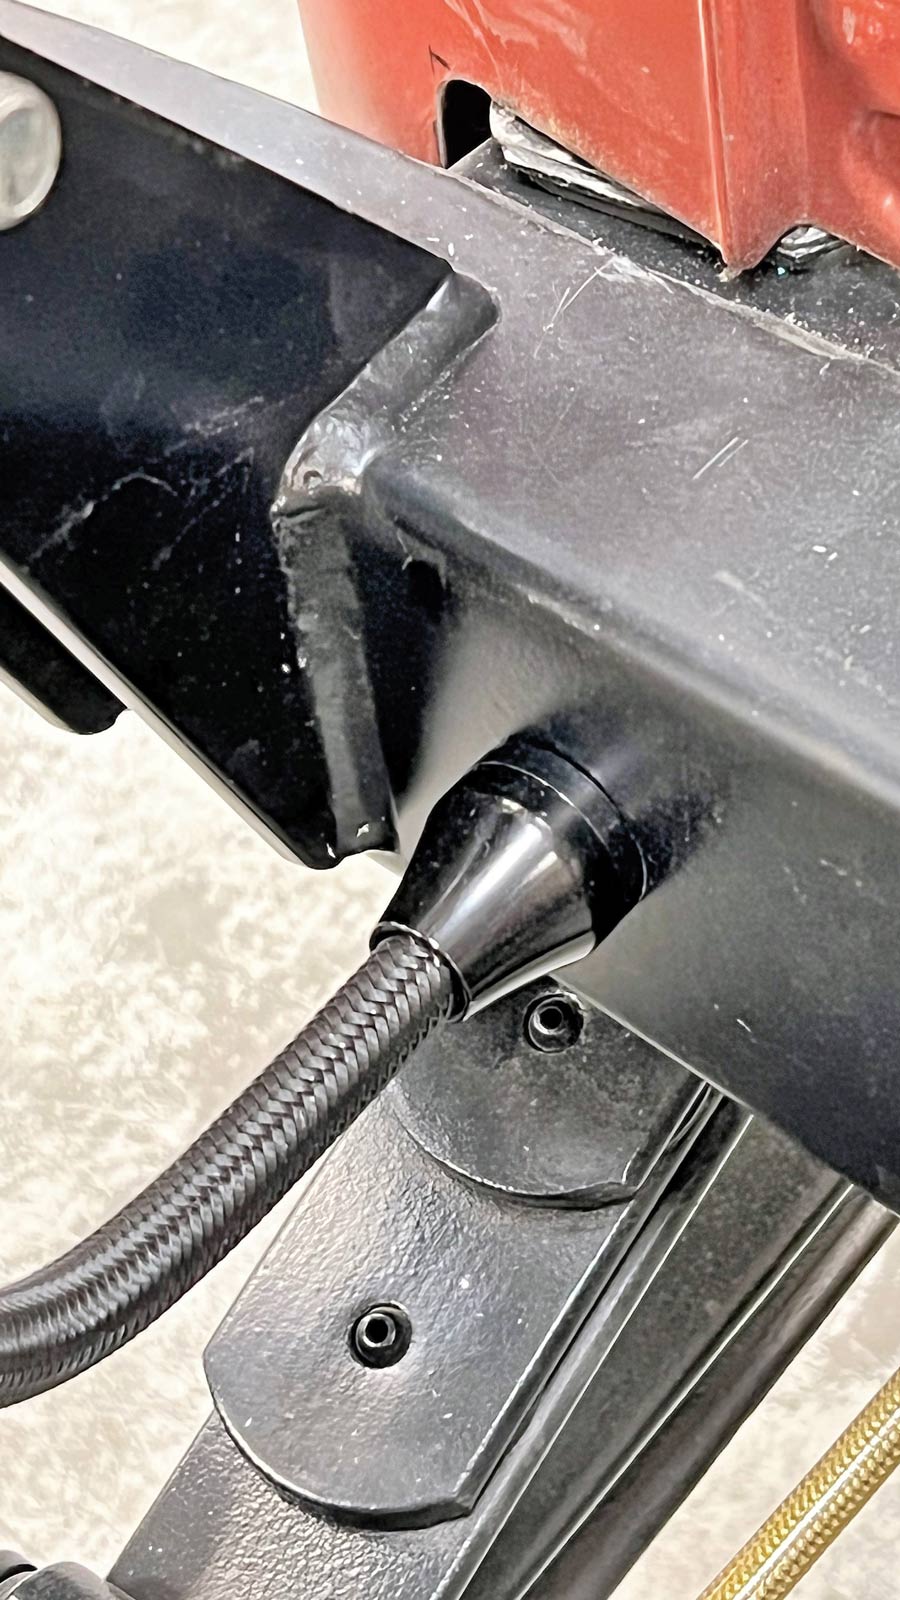
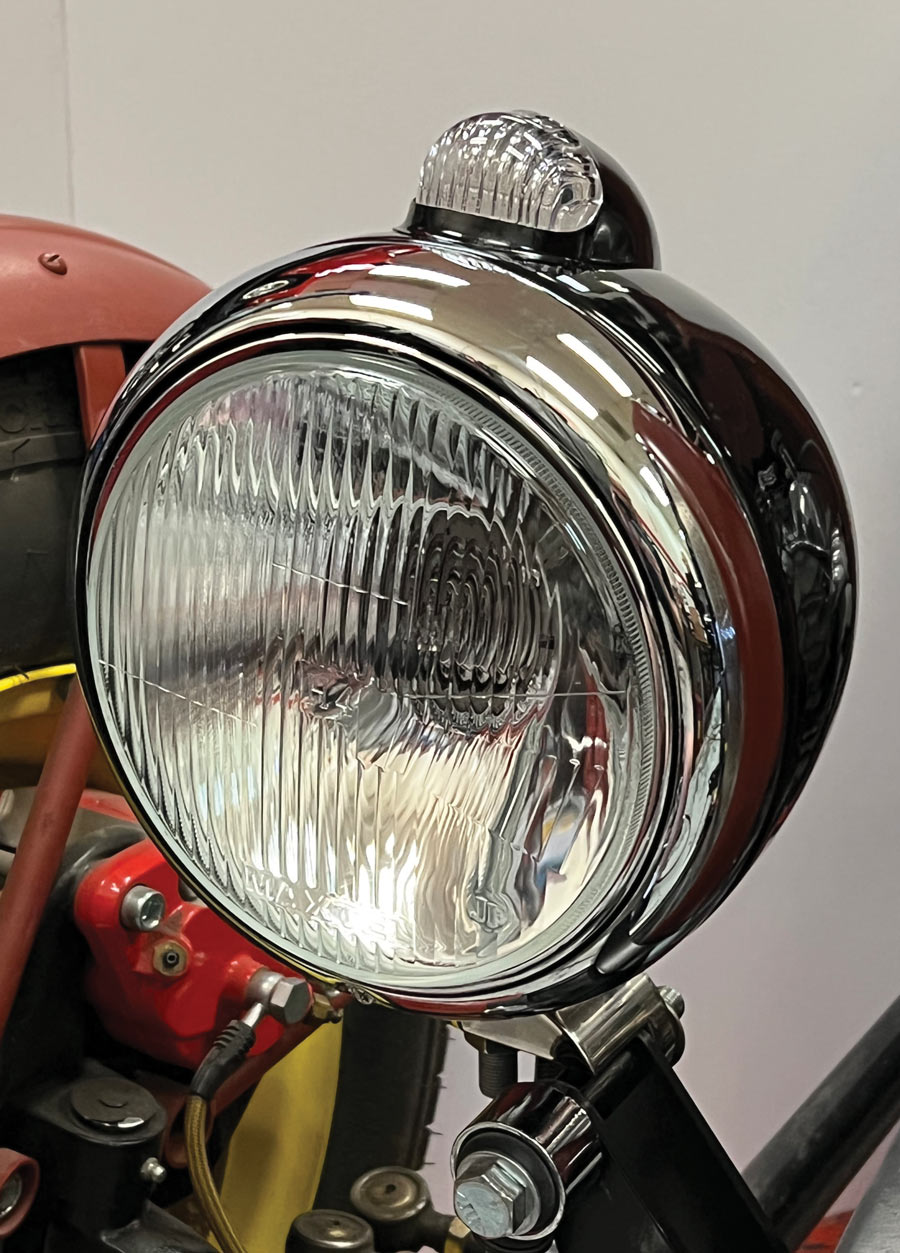
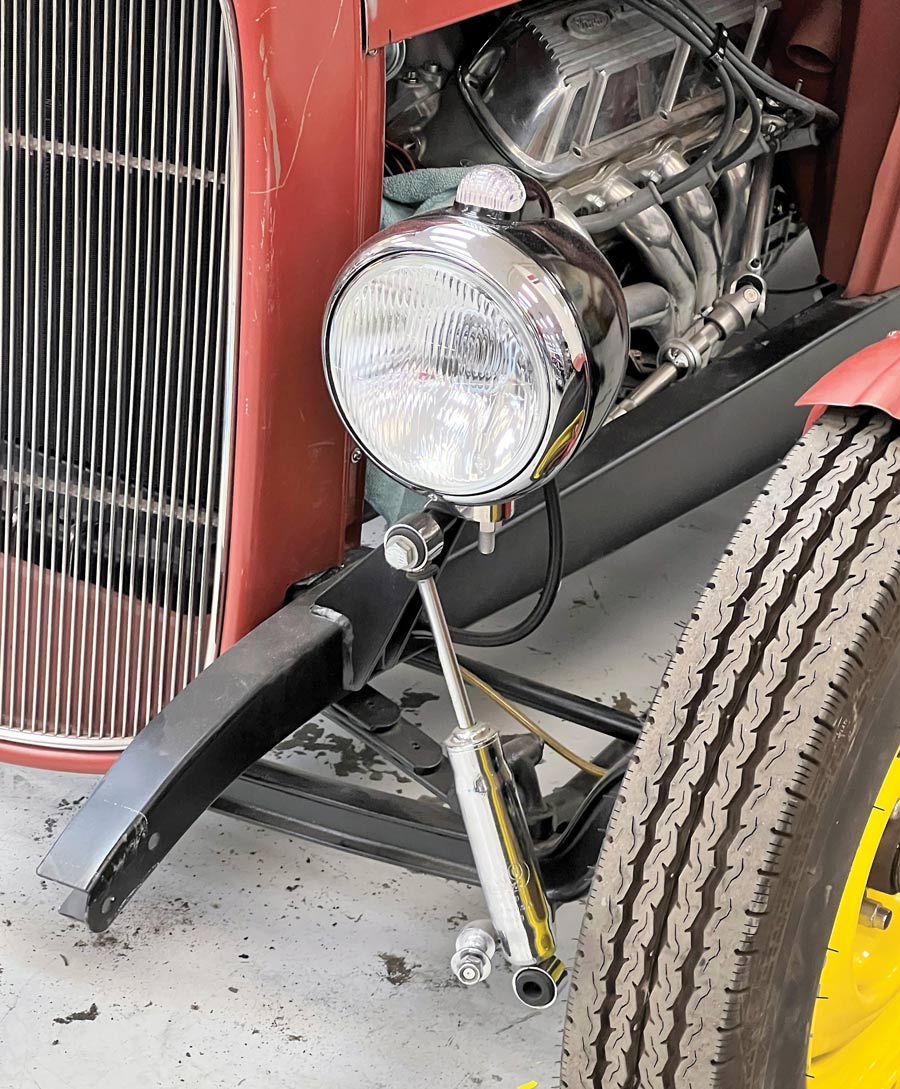
To keep the early hot rod appearance of our pickup we opted for the Speedway Motors (SM) Guide 682-C 12V H4 Headlights with Turn Signals (PN 91101020). Since our truck’s sheetmetal will retain its primer appearance along with its black powdercoated frame, the addition of the black headlights and taillights finishes off the look. To continue the lowkey early look, we added the Lokar Performance Products Anchor-Tight Headlight Braid in black (PN XHL-1900).
Prior to 1939 it was pretty much the “Wild West” with regards to headlight construction and design. They were made up of a headlamp bucket with a reflector, a bulb that could be changed, and then a lens.
It was in 1939 that General Electric invented the sealed beam headlamp. It was made up of a parabolic aluminized reflector, a stout glass lens, and a tungsten filament all hermetically sealed. They were immediately popular because of the significant increase in provided light. It was here that manufacturers realized the benefits and began to use it. It was also here that the Federal Government got into the picture.
From 1940-56 the Federal Government standardized headlamp use, requiring that all U.S. cars use two, 7-inch round sealed beam headlights, with one lamp per side. These were “dual filament,” meaning the single light served as both the high and low beam. (That’s where the three-prong connector we are all so familiar with came into use on the back of all headlights.)
It was in 1957 that the law was changed to allow the use of four sealed beam headlamps, where each lamp measured 5-3/4 inches in diameter. From 1958-75 manufacturers liked the idea as it enhanced their ability to come up with more stylish designs. While a manufacturer could continue to use two headlamps, one per side, the new four-light, with two per side, configuration could be positioned horizontally, vertically, or diagonally. This added greatly to what the OEMs could do design-wise.
It was 1975-84 that the advent of the rectangular headlamps came upon the scene. In this case there was a two-lamp-per-side system, meaning one was for low beam and the other for high beam. The two-lamp system used the 7.87-inch (200mm) lamp while the four-lamp system used the 6.5-inch (165mm) lamp. (During this time the U.S. experimented with converting to the metric system of measurement. Remember those days!)
Then in 1984 until the present the Federal Government allowed the use of composite headlamp assemblies that utilized the use of replaceable bulbs—although the “old-style” sealed beam light was still used.
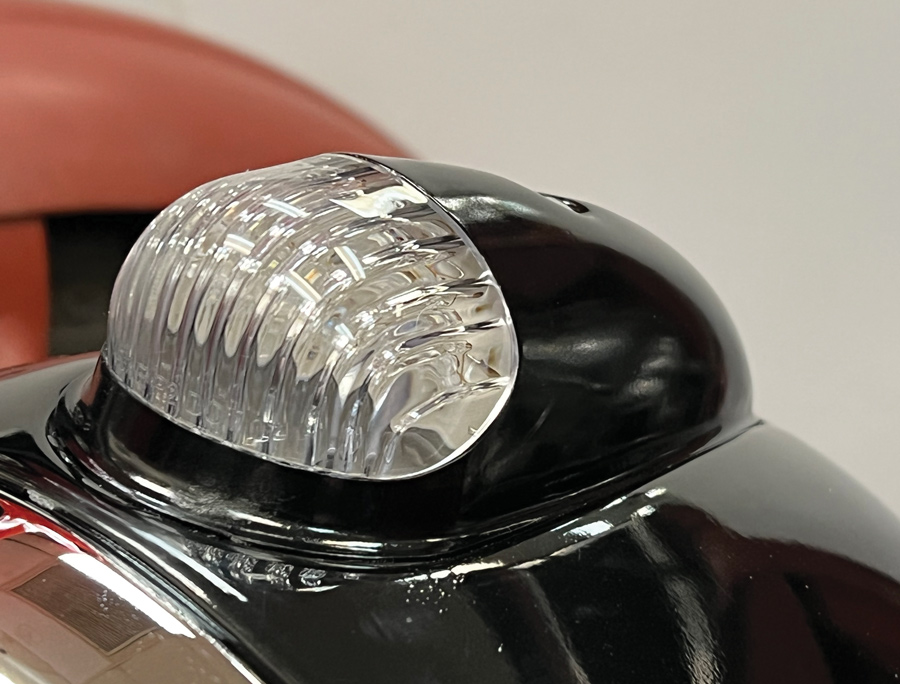
There were four Guide lights that are similar in appearance, with several having the parking light on top. Hot rodders of today like to turn these parking lots into turn signals. There was the 903-J, which had the shorter body and no parking light. Then came the 904-A, which had the parking light on top that was round but didn’t have a sheetmetal cover around it. Then there is the 682-J, which is the one with the long “pointy” bucket, making it very distinguishable, with no parking light. Lastly, and most popular among hot rodders, is the 682-C, as it had a parking light on top and, interestingly, had three distinctly different parking light sheetmetal covers and lenses. You will see that this light most closely resembles the ’36 Chevy headlight, which at the time was not a sealed beam as it wasn’t invented yet.
The SM black Guide 682-C headlight with turn signal (PN 91101020) is equipped with an H4 halogen bulb, is 12V operation, and has a 7-inch diameter. In this case we opted for the headlights with turn signals that are a nice touch. The parking light is now used as a turn signal and is a five LED panel configuration that lights up amber. The overall diameter of the front of the headlamp is 8-1/2 inches while the front-to-back overall dimension of the bucket is 8-1/2 inches, too. The overall height is 10-3/4 inches and that’s measured from the top of the marker light to the mounting base.
Well, you are going to need light to enjoy those long, nighttime drives or maybe it’s a very early morning cruise to grab some coffee and doughnuts. Whatever it is, let there be light.


VOLUME 3 • ISSUE 23 • 2022