Modern Rodding Tech
1. Holley wasted little time developing parts for the Ford 7.3L Godzilla. We leveraged Holley’s extensive experience and installed a Holley intake, timing cover, and oil pan (PN 20-340) on our project engine.
Front view of a Ford Godzilla V8 engine featuring a black accessory drive system, serpentine belt, and alternator, mounted on a vehicle chassis with orange wheels in a shop.
Project Godzilla
Adding “Go” to Our 7.3L Ford V-8
By Evan J. Smith

Photography By Ryan Foss & Brian Brennan

Videography By Ryan Foss Productions

R

emember the fuel-injected 5.0L Fox-body Mustang days from 1986-93? Of course you do; so you’ll recall that while the car struck a nerve with enthusiasts, what made it extra special was the attention paid by aftermarket performance manufacturers. Unlike generic items available for most engines, such as carburetors, headers, cams, and exhaust systems, companies produced cold-air kits, intake manifolds, camshafts, exhaust systems, and even forced-induction and nitrous kits specifically for the 5.0L engines and the LX and GT models.

Well folks, history is repeating itself as we see both new and old manufacturers jumping on the 7.3L Godzilla bandwagon. Today, it’s all about the engine (since the Godzilla doesn’t come in a passenger model), but that hasn’t stopped the development of high-performance parts.

While Ford’s latest Super Duty truck engine is available in the F-250-and-up trucks and not in cars, the powerhouse has proven to be an excellent option for high-performance swaps. We’ve seen Godzillas on the street, on drift tracks, off-road, and dragstrips, where racers have hit 6-second quarter-miles at nearly 200 mph!

Our team at Modern Rodding covered the attributes of the Ford V-8 in an earlier article; we also made mention of our 1965 Fastback Mustang (Project Godzilla) that’s getting a Ford Racing crate ’Zilla. In fact, Ford Racing offers several versions of the 7.3L Godzilla; we chose the most basic version to modify.

The platform provides a 430hp baseline, but stock as a rock wasn’t going to be enough. We boosted the power with Holley parts that fit directly in place, look great, and will help the engine fit nicely in the 1965 Mustang—even with a stock hood.

It should be noted that for clearance purposes, most Godzilla swaps will need an aftermarket oil pan and intake manifold. The factory oil pan is quite deep, and the truck’s intake angles the throttle body upward, which causes a hood clearance issue when installing an inlet system (similar to most passenger cars).

Holley Performance Products offers excellent solutions that make swap fitment easier while enhancing looks and power. We chose the Holley intake, oil pan, timing cover, and front engine accessory drive (FEAD) kit (PN 20-340). We also replaced the stock exhaust manifolds with an exhaust system featuring stainless pipes, and the additional horsepower will be delivered through a driveline kit from Silver Sport Transmissions (SST). SST offers swap kits for many applications, and they are impressive. Our kit included a TREMEC TKX five-speed manual, McLeod clutch, hydraulic throwout bearing, Quick Time SFI-approved bellhousing, and all the hardware needed for a clean installation (more on that in an upcoming story).

The Ford Racing engine (PN M-6007-73B) comes in a “crate,” so we uncrated it and placed it on an engine stand. We removed the exhaust manifolds, the stock oil pan, and the timing cover. The removal was straightforward, using only basic hand tools. The stock intake is included but not attached, so we set it aside since it won’t be needed.

The first “new” part to be installed was the Holley timing cover. The parts can be purchased individually or as a kit, and the cover is available in either a natural finish or black. Holley wisely designed it so the factory cam position sensor could be retained, so we installed it on the back side of the cover.

Some aftermarket cams require a cam lockout kit; if you use one, the sensor may be unnecessary since your variable cam timing won’t work. We then installed the water pump along with the Holley oil pump that fits with the cover and pan kit. (Note that the kit includes very specific hardware and tools, so careful attention is needed during installation. In other words, read the instructions!)

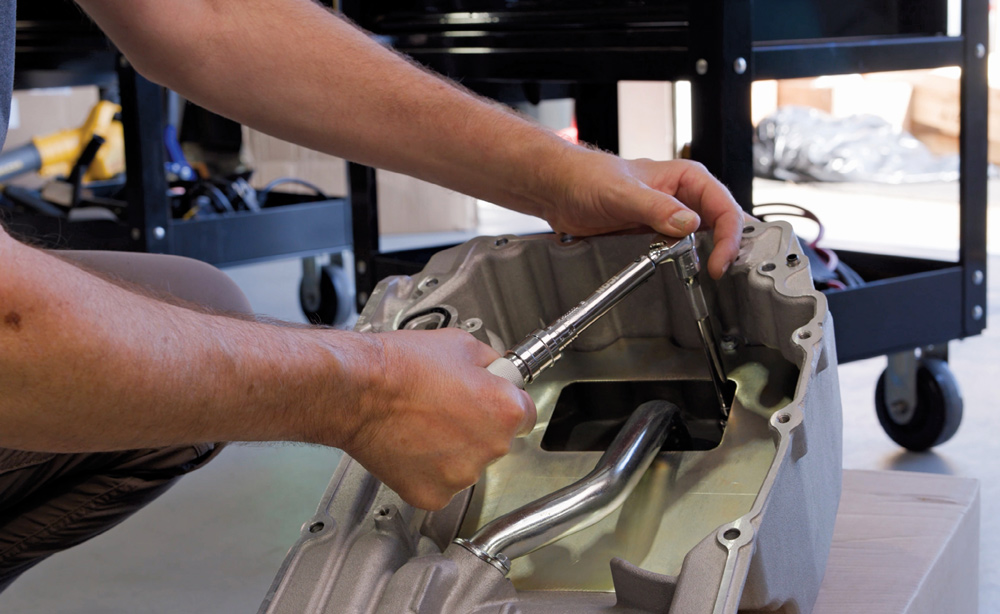
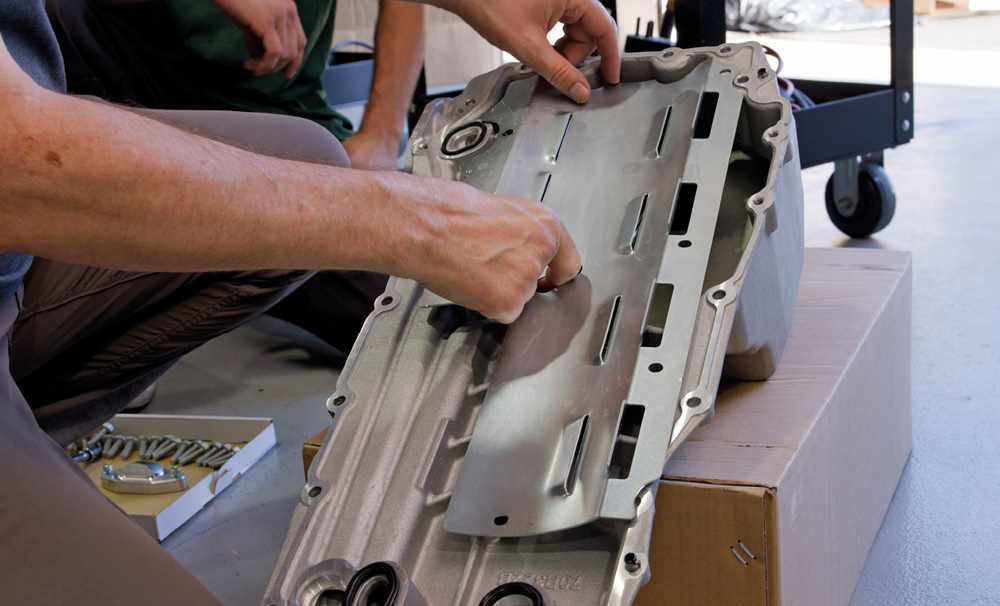
Next up was the Holley oil pan. The new unit is cast aluminum, has a rear sump, and lowers the overall height of the Godzilla engine. It includes baffling to control oil sloshing and a windage tray for maximum performance. The overall height from the rail to the bottom of the pan measures 6-1/4 inches compared to 8-1/8 inches stock.

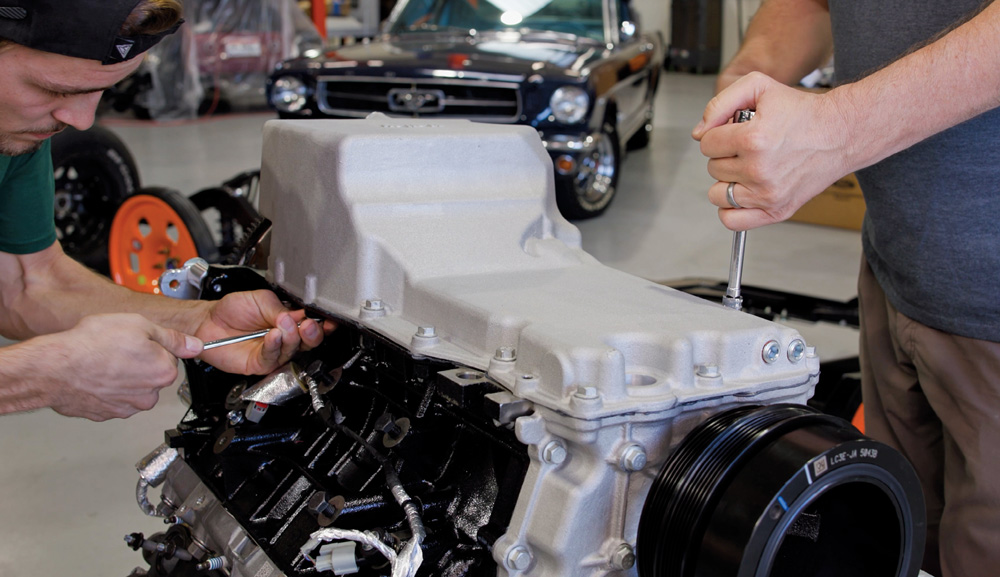
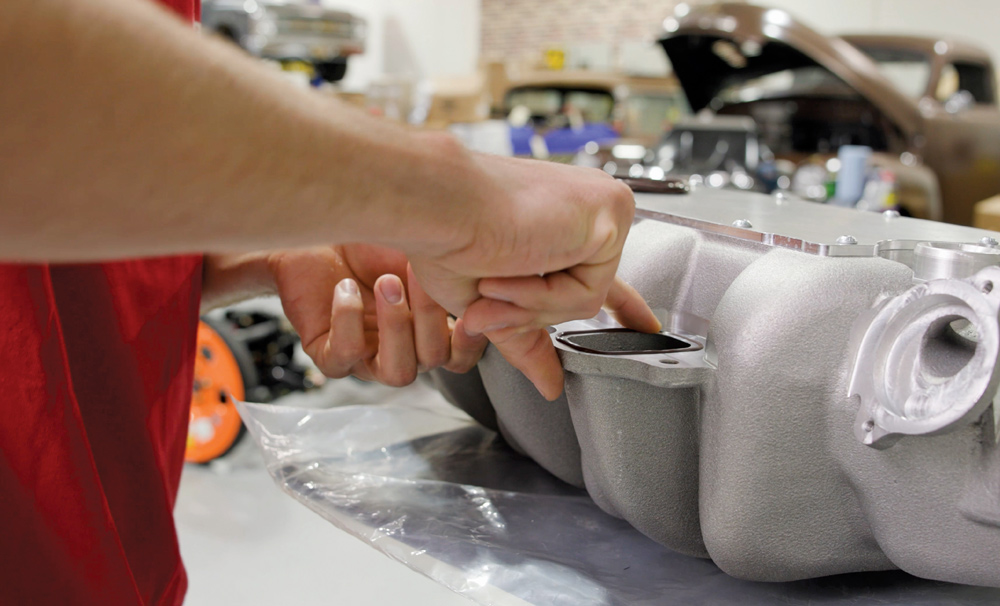
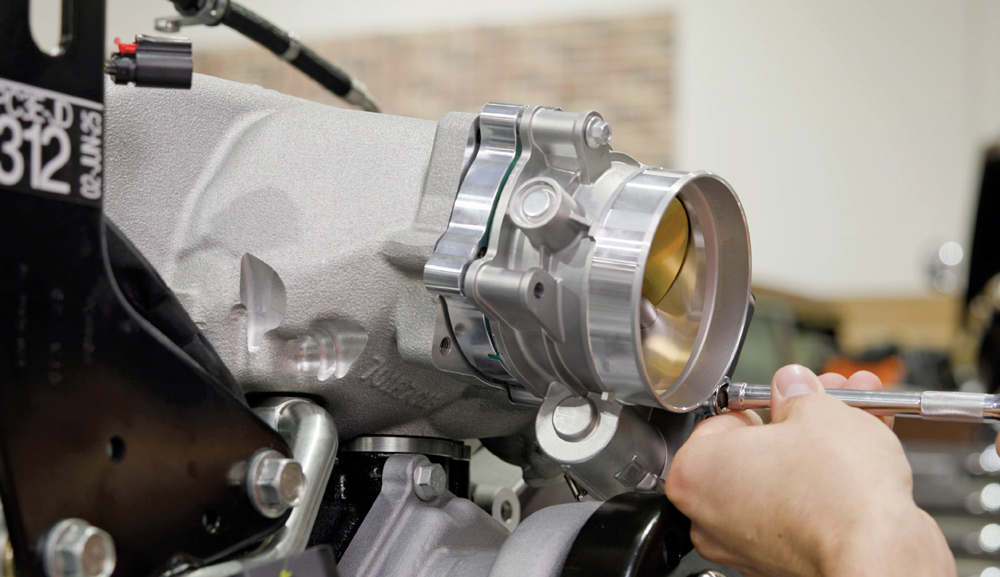
Keeping with the Holley theme, we went with its aluminum intake manifold. As previously noted, the stock truck intake inlet is angled upward, so with a throttle body and intake elbow/filter attached, the system increases the engine height. The Holley intake, like most other aftermarket units, has the throttle body flange facing directly forward, thus keeping the intake system at or below the overall height of the engine. Plus, it’s shorter than stock, so in addition to increasing airflow to improve power, the Holley intake will allow us to retain the stock hood on our classic Mustang.

Talking about the intake, Ford did a great job with the design, since the ports on the heads lie flat and use O-ring gaskets (on each port of the intake). There are no provisions for fuel injectors or cooling in the intake. This makes intake swaps easy. The Holley kit also includes a throttle body adapter that allows use of the Ford drive-by-wire throttle body.

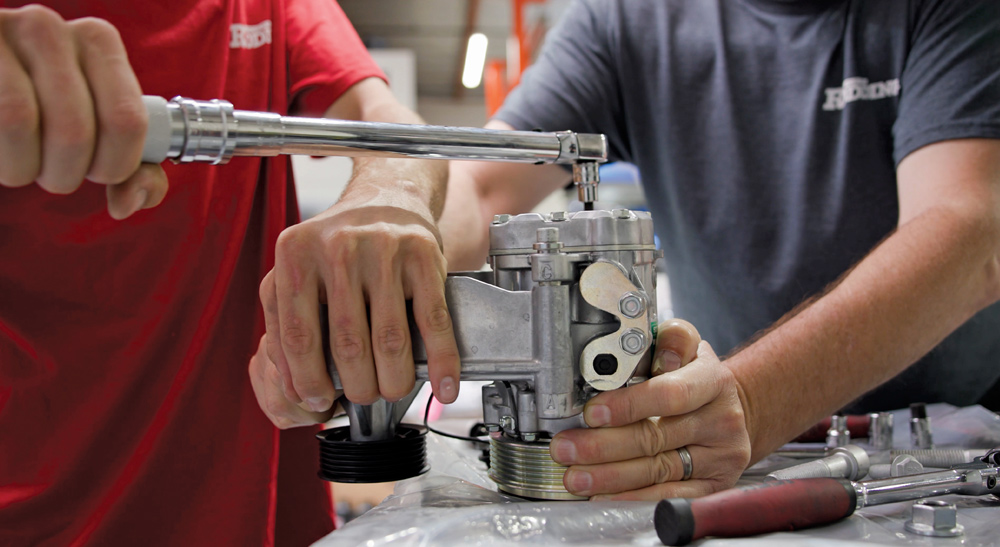
With that ready to go, we moved to the front of the engine and finished mounting the Holley front engine brackets and accessories. This kit includes an A/C compressor, power steering pump, alternator, water pump, pulleys, hardware, and a serpentine belt. Besides looking good, the kit fits much tighter than the stock FEAD, which offers better fitment during a swap.

Finally, we test-fit the Quick Time bellhousing and TREMEC five-speed, along with the engine and transmission mounts, and lowered the assembly into the Roadster Shop chassis. The fit was excellent and motivated us to take the next steps. These include setting up the clutch and permanently installing the transmission. We’ll also begin stripping the Mustang so the body can be lowered into the chassis and powertrain. Keep checking back as we get closer to our 1965 fastback.

A high-angle view of a Godzilla V8 crate engine on a shipping pallet, showing the black composite intake manifold, fuel rails, ignition coils, and silver throttle body.
2. We started with the Ford Racing (M-6007-73B) crate engine and handled the bolt-on modifications in our own shop with hand tools.
Side-by-side technical CAD diagrams comparing the dimensions of an OE Godzilla engine versus one equipped with a Holley intake, oil pan, and accessory drive solution.
Front-facing technical CAD diagrams comparing the height and width of a stock Godzilla engine (32-1/8 inches tall) to the Holley-modified version (28-3/16 inches tall).
3-4. These illustrations show the height and width differences between a stock Godzilla and one with the Holley parts installed.
Close-up of a mechanic removing a silver aluminum oil pan from the bottom of a black engine block, revealing the internal oil pump pickup and timing chain assembly.
5. Swapping the parts is straightforward. Oil was drained from the 7.3 engine and the pan was removed.
Two mechanics installing a silver Holley front timing cover onto a black Godzilla V8 engine block, which is mounted on a red engine stand in a professional garage.
6. Next came the crank pulley/balancer stock timing cover.
Top-down view of a mechanic's hands installing a small circular sensor and wiring harness into a recessed port on the interior of a cast aluminum engine component.
7. The variable cam timing sensor was transferred to the Holley front cover.
A mechanic aligns and installs a silver oil pump assembly onto the front of the crankshaft on a black engine block, showing the exposed timing chain and gears.
8. Next, we installed the new Holley oil pump drive and the pump onto the crank snout. Keep in mind, there are many more steps than can be shown in a magazine article, so we have a full video that explains the entire process.
Close-up of a mechanic using a torque wrench to tighten a bolt on a silver Holley-branded front timing cover already mounted to the black Ford engine block.
9. Here, the Holley front cover is bolted into place. Holley offers the cover in natural satin or black finish.
A detailed view of a mechanic's hand threading a bolt into the center of a crankshaft hub through the front of a silver Holley aluminum timing cover.
10. The Holley kit comes with all the necessary hardware, along with special tools like this front seal installer.
A mechanic uses a digital torque wrench to tighten a crankshaft bolt on a Godzilla V8 engine, while another technician assists with the upper wiring and fuel components.
11. With the cover bolted up, we reinstalled the crank pulley.
Close-up of a mechanic's hands using a socket wrench to install an internal oil baffle inside a cast aluminum oil pan, ensuring proper oil control for the engine.
12-13. The kit requires you to do a little work. We installed the oil pump pick-up tube and slipped the windage tray into it.
A technician manually positions a long, slotted metal windage tray into a silver aluminum oil pan, preparing the component for installation onto the engine block.
12-13. The kit requires you to do a little work. We installed the oil pump pick-up tube and slipped the windage tray into it.
A mechanic uses a white cloth and cleaning solution to wipe down the mounting surface of a black engine block, showing the exposed crankshaft counterweights.
A technician applies a continuous bead of grey RTV silicone sealant to the mounting flange of an aluminum oil pan using an orange and silver manual caulking gun.
Two mechanics work together to bolt a high-clearance aluminum oil pan onto the bottom of a black engine block using a socket wrench in a well-lit automotive shop.
14-16. As always, we checked our work and cleaned the pan rails before installing the Holley oil pan.
A studio shot of a silver Holley intake manifold for a Godzilla V8 engine, featuring an вось-runner design and a machined front opening for the throttle body.
17. Holley’s low-profile intake manifold for Ford’s 7.3L Godzilla engine makes installation easy in vintage vehicles, kit cars, and other tight spaces while keeping the factory hood. The intake ensures even cylinder distribution and good street manners. It also reduces clearance by 2 to 3-1/2 inches, corrects the OE throttle body angle, and increases the opening to 92 mm.
A close-up view of a mechanic's hand inspecting the port gaskets on a silver cast intake manifold, with a classic car visible in the blurred workshop background.
18. The intake kit includes new O-rings to seal the ports to the heads.
Two technicians carefully lower a silver Holley intake manifold onto the engine block, aligning it with the fuel rails and black composite valve covers.
A mechanic uses a chrome socket wrench to secure the mounting bolts of a silver aluminum intake manifold, focusing on the area near the front throttle body flange.
19-20. The intake simply slides into place and can be torqued down.
A black factory composite Godzilla intake manifold sits on a cardboard box, partially covered by protective plastic, showing the stock electronic throttle body.
21. By comparison, the stock intake is composite and has the undesirable angled throttle body inlet.
A close-up shows a mechanic using a torque wrench to install a green O-ring gasket and adapter plate onto the front opening of a silver cast aluminum intake manifold.
A technician uses a hand tool to bolt a silver high-performance throttle body onto the adapter plate of the aluminum intake manifold on a Godzilla V8 engine.
22-23. The Holley intake kit included the O-ringed spacer that allows for big throttle bodies.
A mechanic installs a cast aluminum accessory drive bracket onto the front of the engine block using a socket extension, with the intake manifold visible above.
A close-up view of a technician using a red-handled torque wrench to secure a black idler pulley to the front accessory drive system of the Godzilla engine.
24-25. Turning back to the cover, we installed the brackets for the front engine accessory drive (FEAD).
Two mechanics work together to assemble a silver air conditioning compressor on a workbench, using a torque wrench to ensure all fasteners are to specification.
26. Holley offers this kit with a few variations depending on what accessories you plan on running. Our kit has air conditioning, so we’re preparing the compressor for installation.
A technician installs a silver alternator onto the passenger side accessory bracket of the engine, using a socket wrench to tighten the mounting hardware.
27. Next up was the alternator …
A mechanic's hands begin routing a black multi-rib serpentine belt around the various pulleys, including the A/C compressor and water pump, on the engine front.
A technician uses a long breaker bar to move the spring-loaded belt tensioner, allowing the serpentine belt to be fully seated around the main crank pulley.
28-29. … then the serpentine belt.
A wide shot shows the completed Ford Godzilla V8 engine with all Holley upgrades installed, mounted on a rolling chassis with bright orange wheels in a shop.
30. We were so excited with the results that we couldn’t resist dropping the Godzilla in our Roadster Shop chassis.
Modern Rodding
VOLUME 7 • ISSUE 67 • 2026