Modern Rodding TECH

InTheGarageMedia.com

Ranch Wagon Rust Repair title
test-fit of a replacement rocker panel
1. Tate Radford does a test-fit of a replacement rocker panel on grandparents Colin and Sue Radford’s ’57 Ford Ranch Wagon.
Ranch Wagon Rust Repair title
A New Life for a Vintage Ford
By Ron Ceridono Photography by Tate Radford
L

et’s take a step back to a time when the ’57 Ford Del Rio station wagon shown here rolled off the end of the assembly line. Because it was 1 of 46,105 examples of a Deluxe two-door Ranch Wagon with Fairlane trim that was built that year, it had a base price of around $2,500. To put things in perspective, the average family income that year was $5,000 and the average price for a home was $12,220.

We can only imagine how happy the beautiful, new, shiny station wagon made its original owners. But eventually, the Ford’s useful life was over; the stylish yet practical family hauler lost its luster, eventually becoming what most people considered to be just another old used car. And like most old cars of its age, the ’57 had suffered the ravages of time and needed a fair amount of TLC, but Colin and Sue Radford saw it as a diamond in the rough. A station wagon would be perfect for hauling their grandkids around, going to swap meets, and making the family’s yearly trips to the Bonneville Salt Flats—and just like that a new project was born.

Collaborating with Colin on the wagon from the beginning has been their grandson, Tate. So far, the duo has updated the chassis with suspension components from Art Morrison Enterprises, brakes from Wilwood, and slipped in a Ford Performance Coyote V-8 and Gearstar 4R70W transmission in the space a Y-block and Ford-O-Matic once occupied.

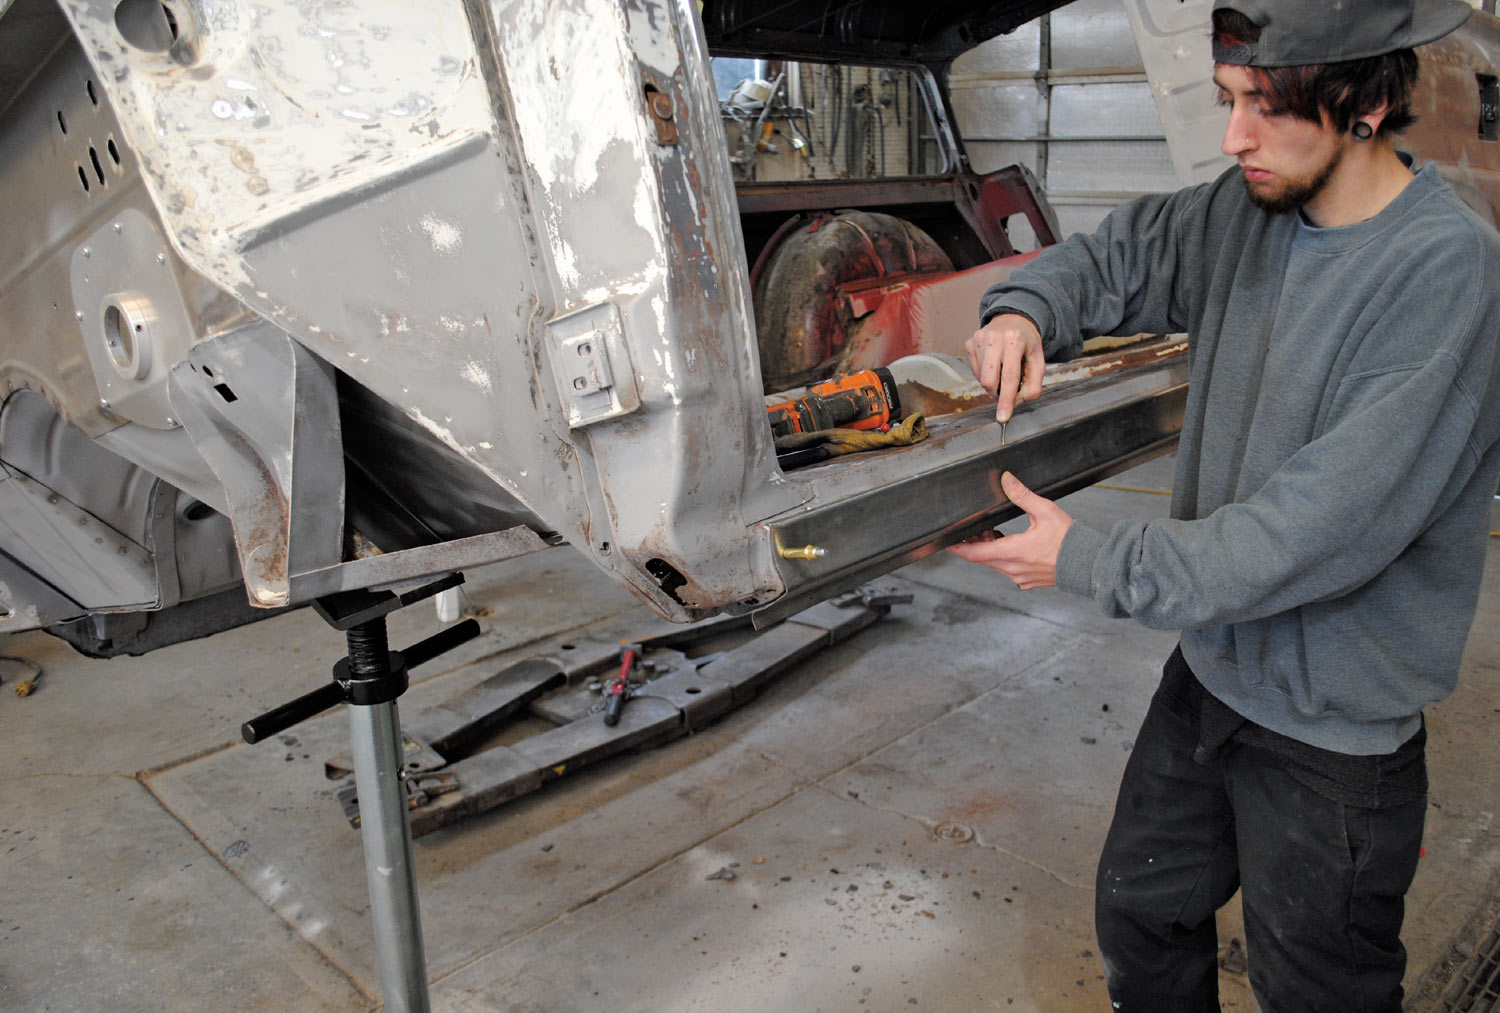
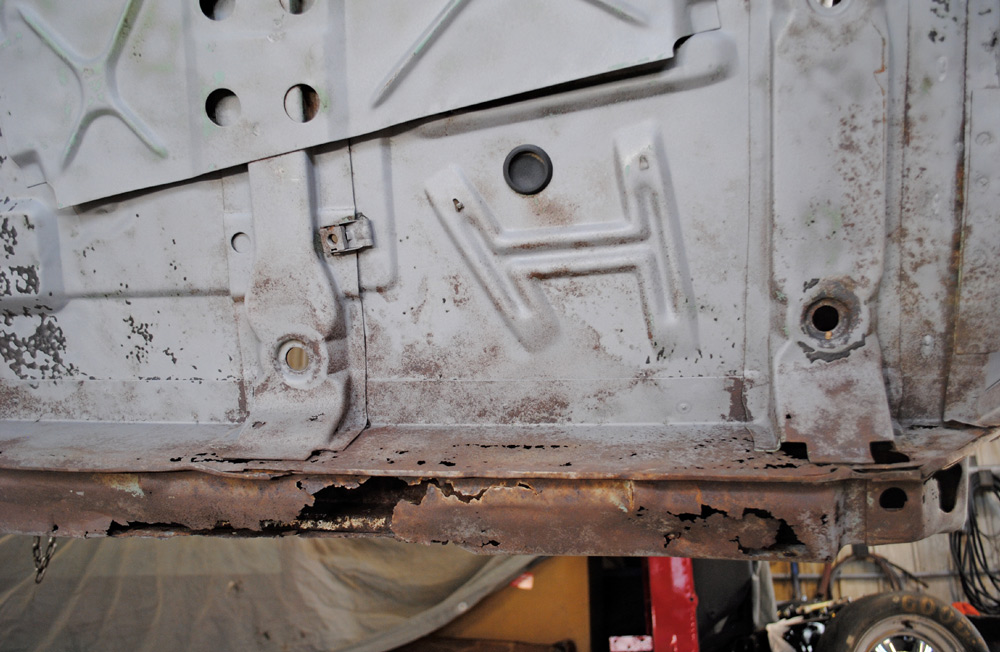
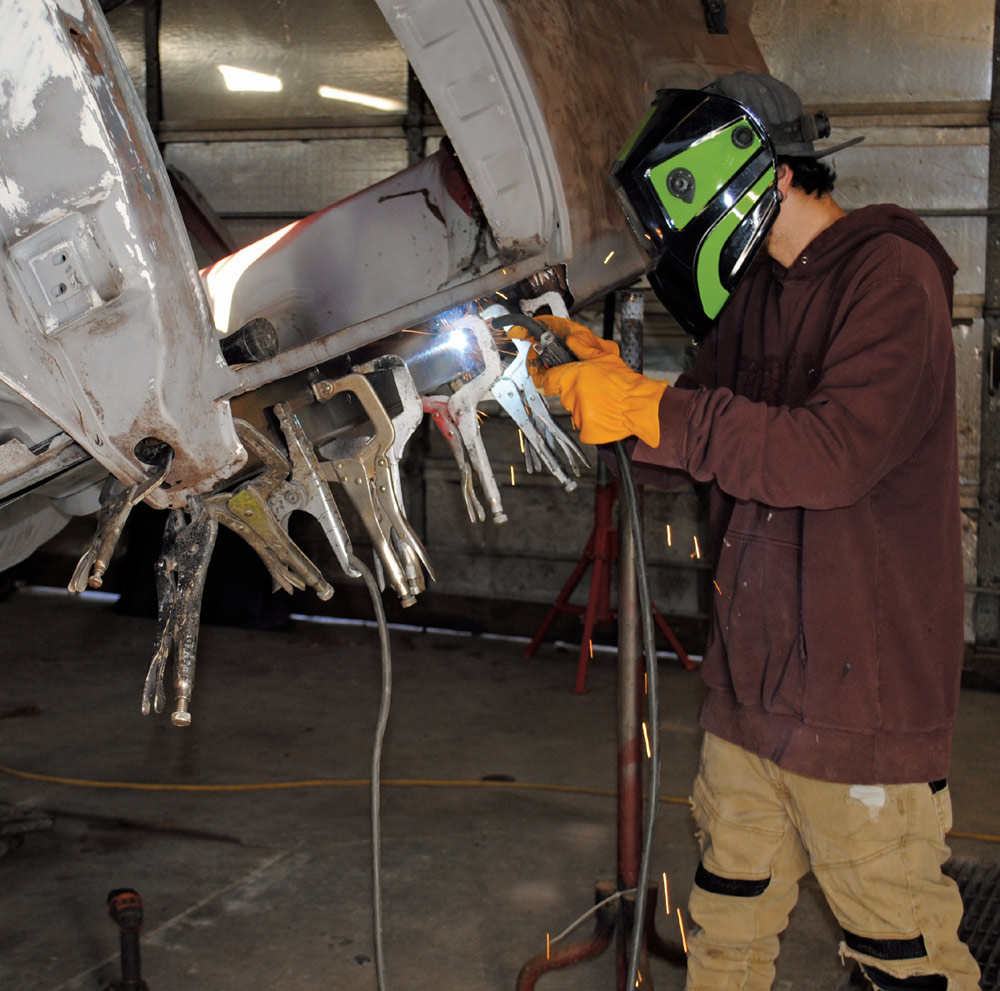
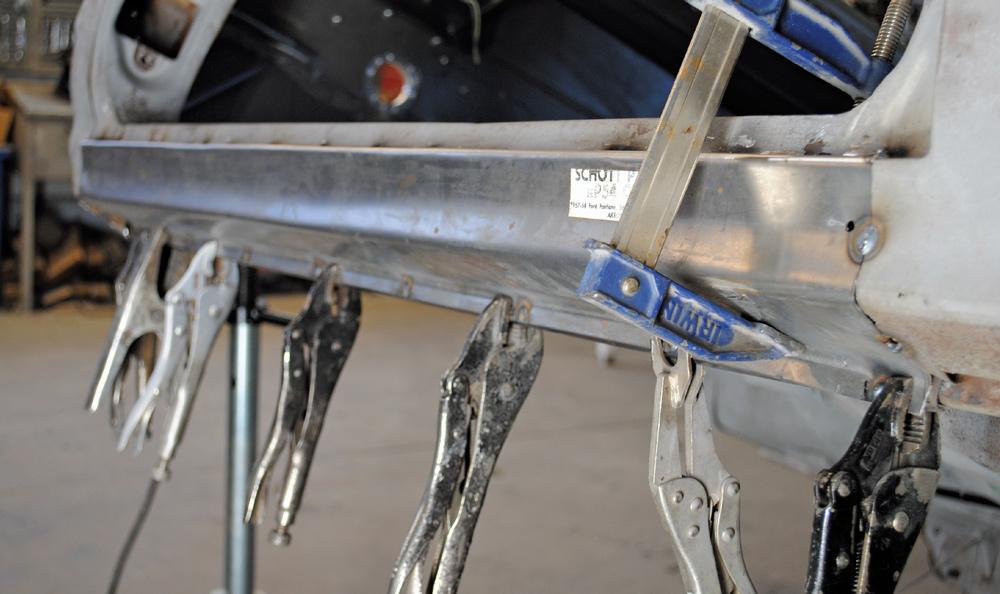
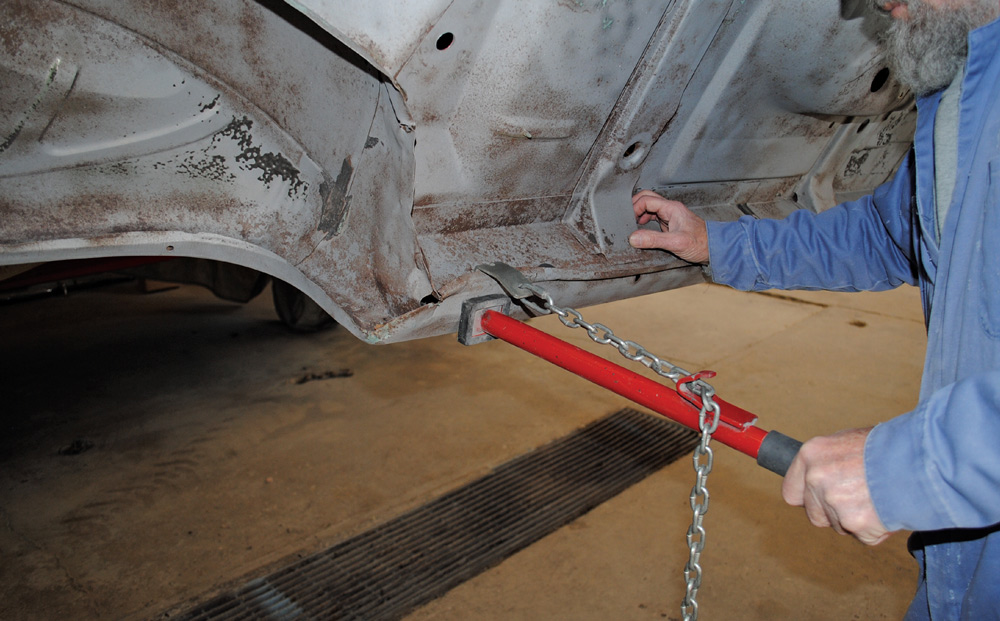
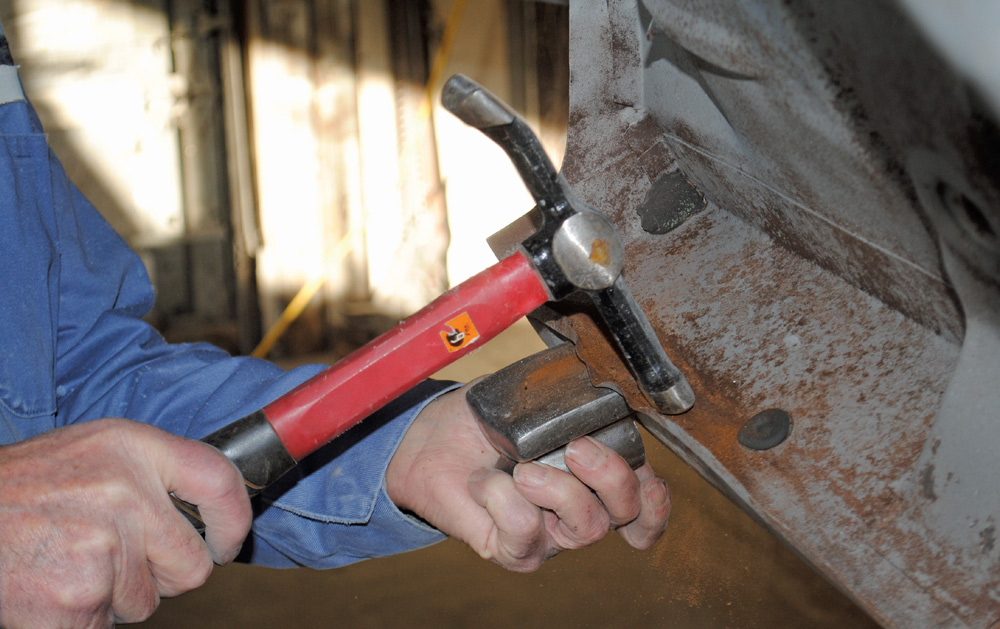
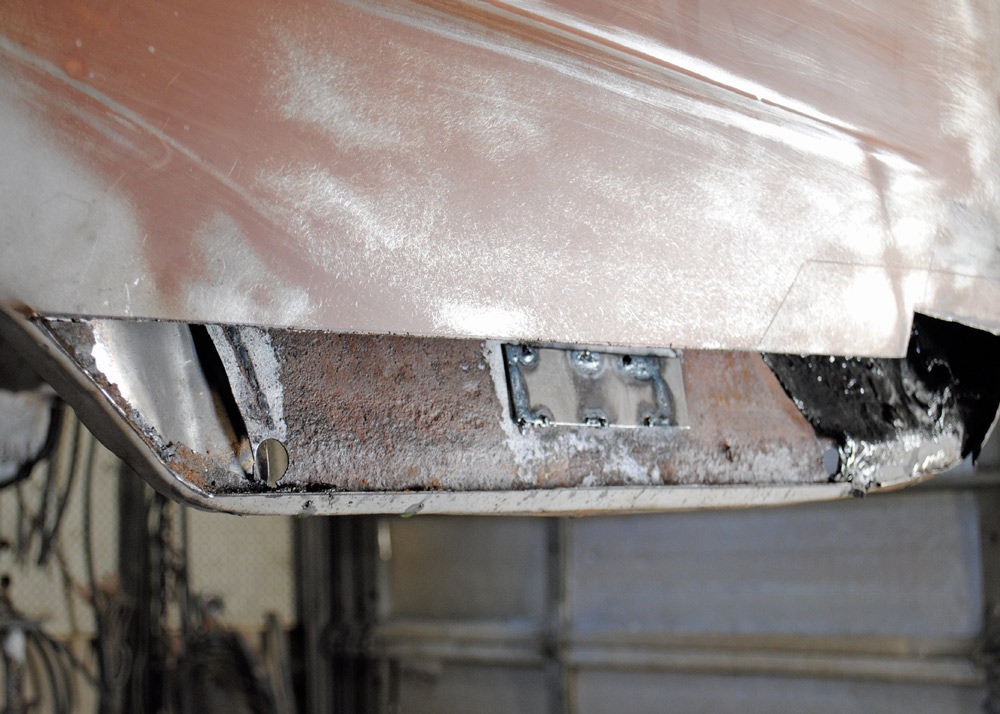
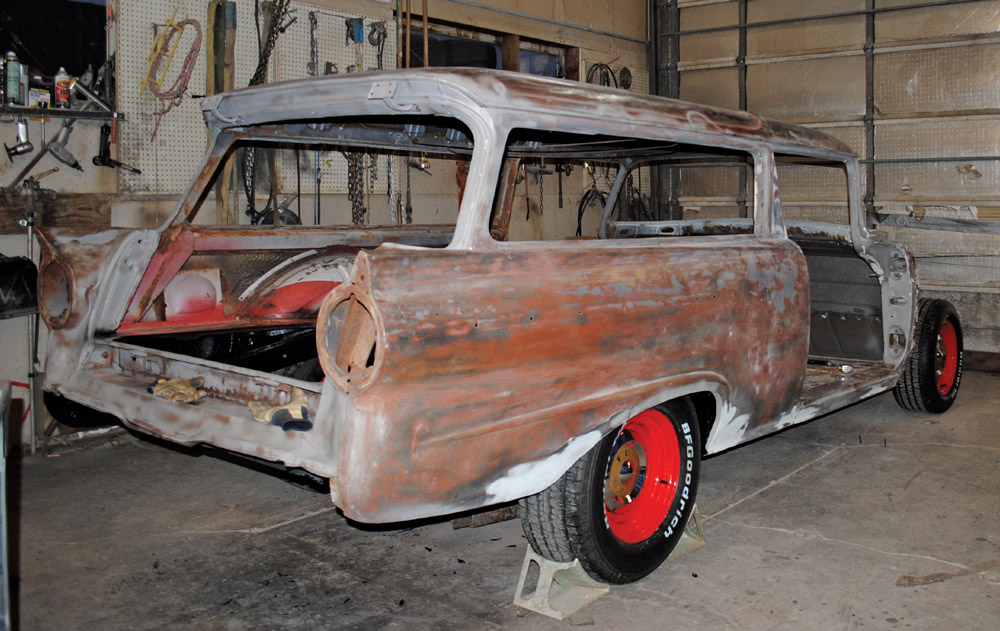
With the chassis work completed, the body was lifted off the frame and mounted on a rotisserie to provide access to all the areas that required repair and Colin and Tate went to work. The worst damage was rust in the rocker panel below the driver door. Not only was the outer skin rusted, but the inner structure was destroyed and would have to be replaced as well. Fortunately, the floor supports were in good condition and will remain in place.

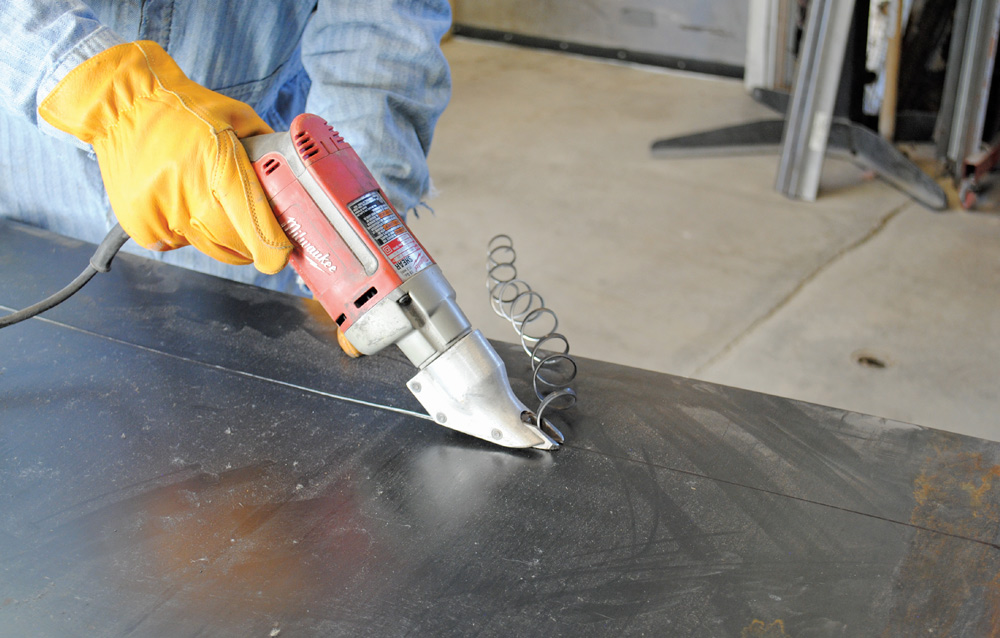
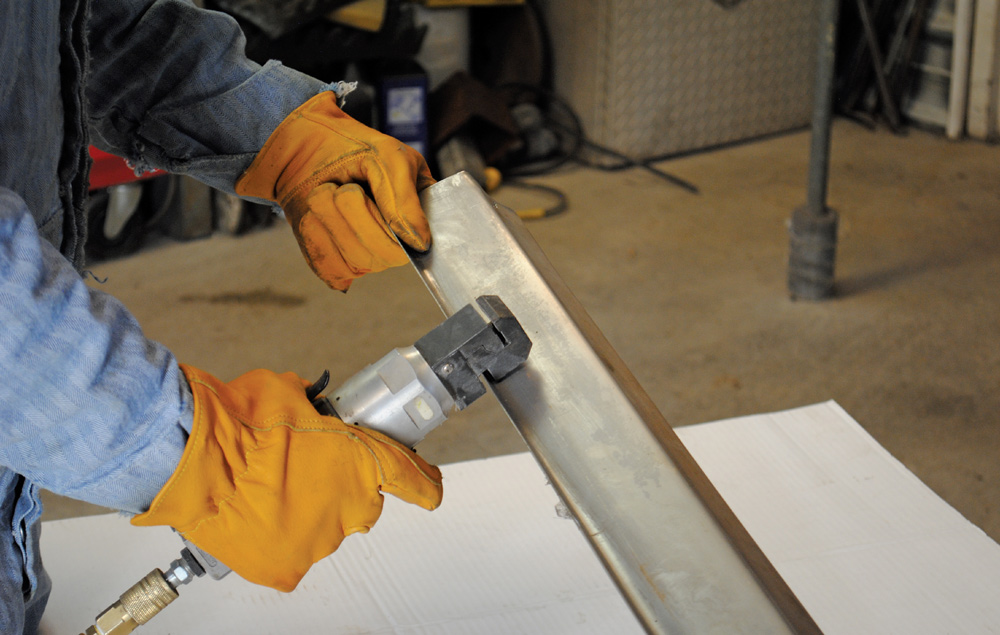
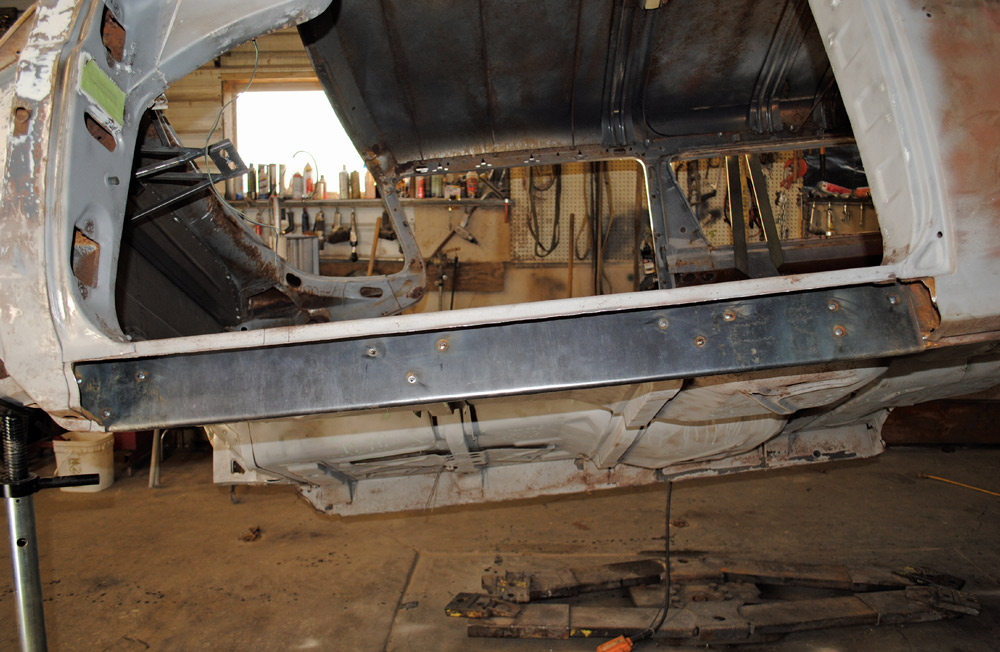
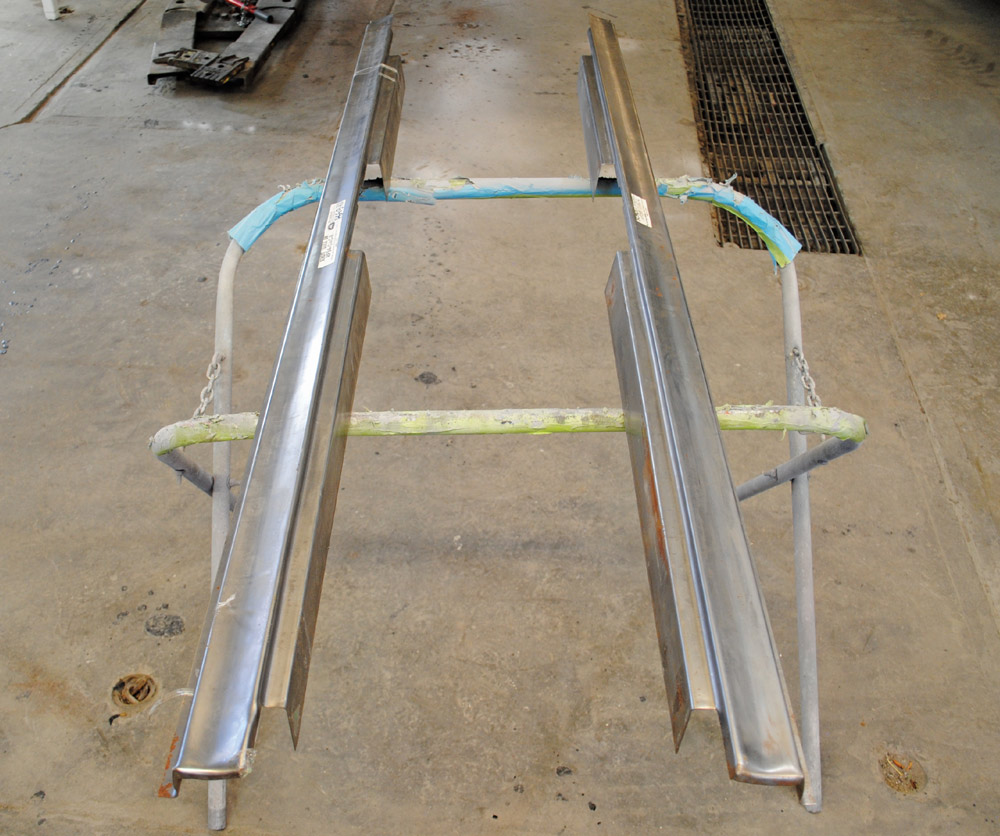
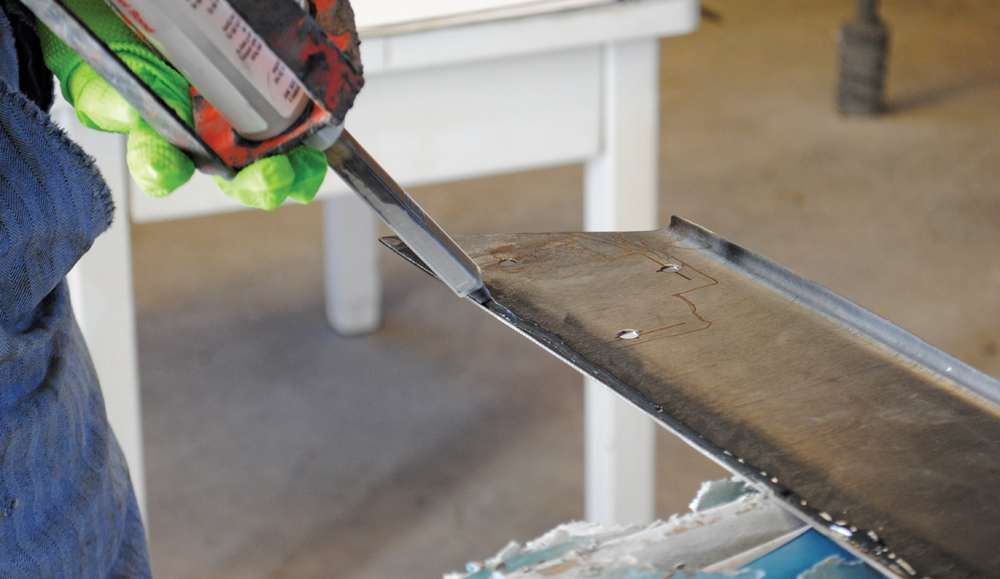
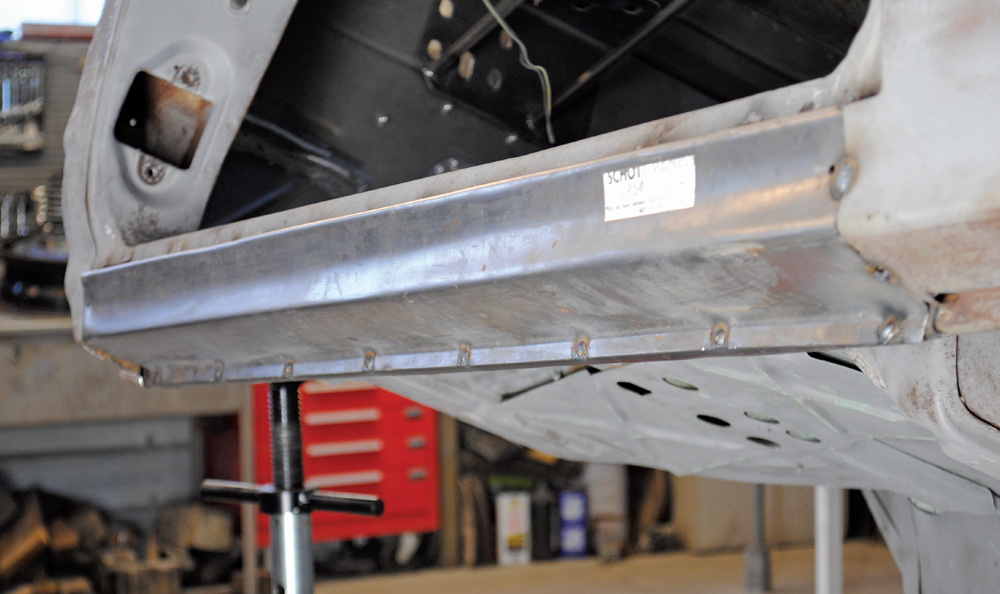
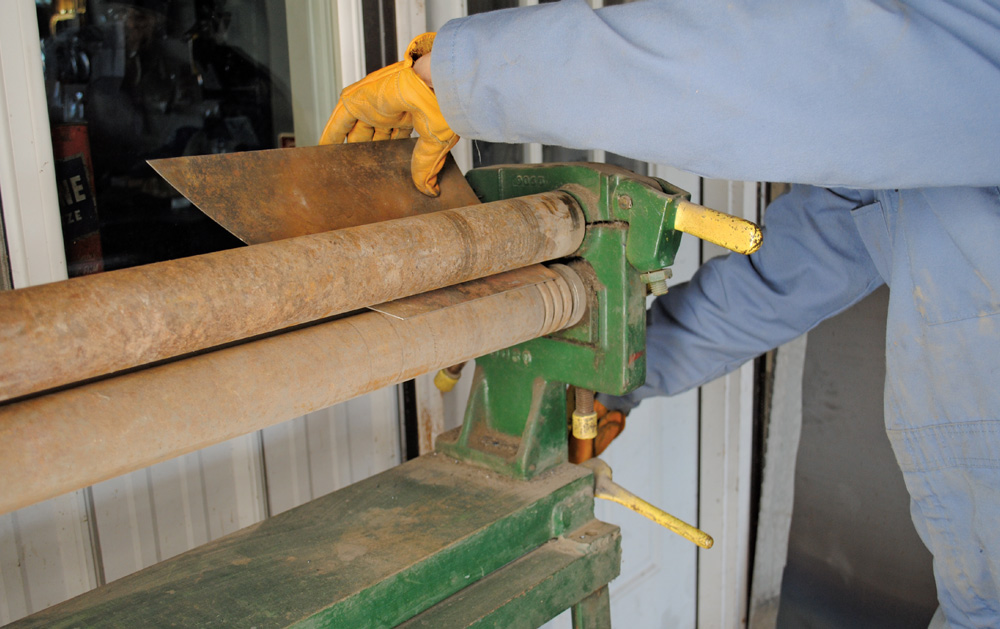
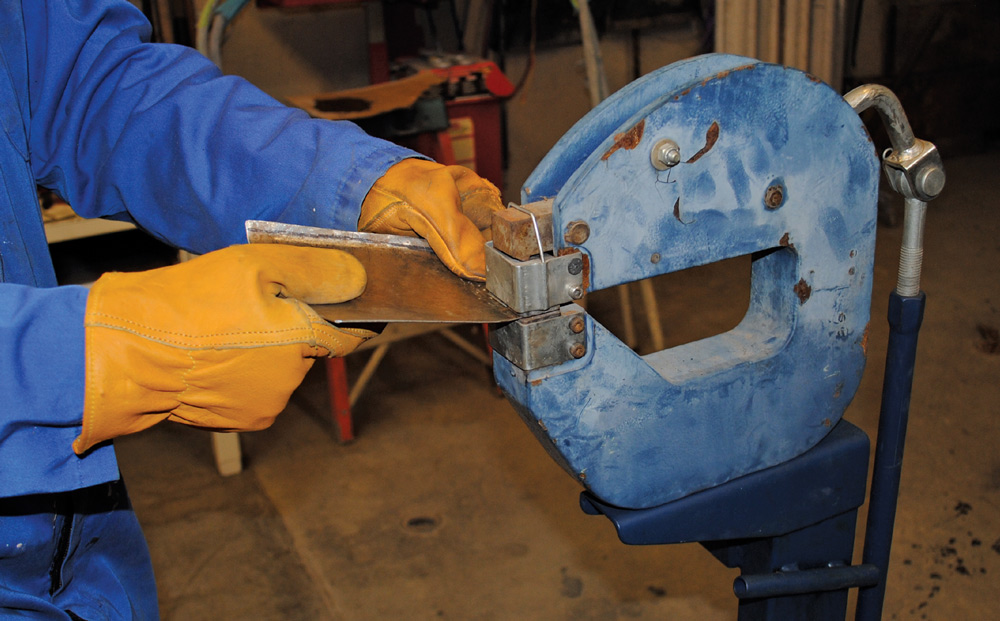
To repair the rusted rocker panel, a new inner portion was fabricated from sheetmetal and formed to fit in a brake. The replacement piece would be welded to the floor braces and the sill below the door opening. With the inner structure repaired, a replacement outer panel was trimmed to fit and welded in place. To ensure no moisture could infiltrate the repaired rocker panel and cause more rust, all the joints received a bead of panel adhesive as they were installed.

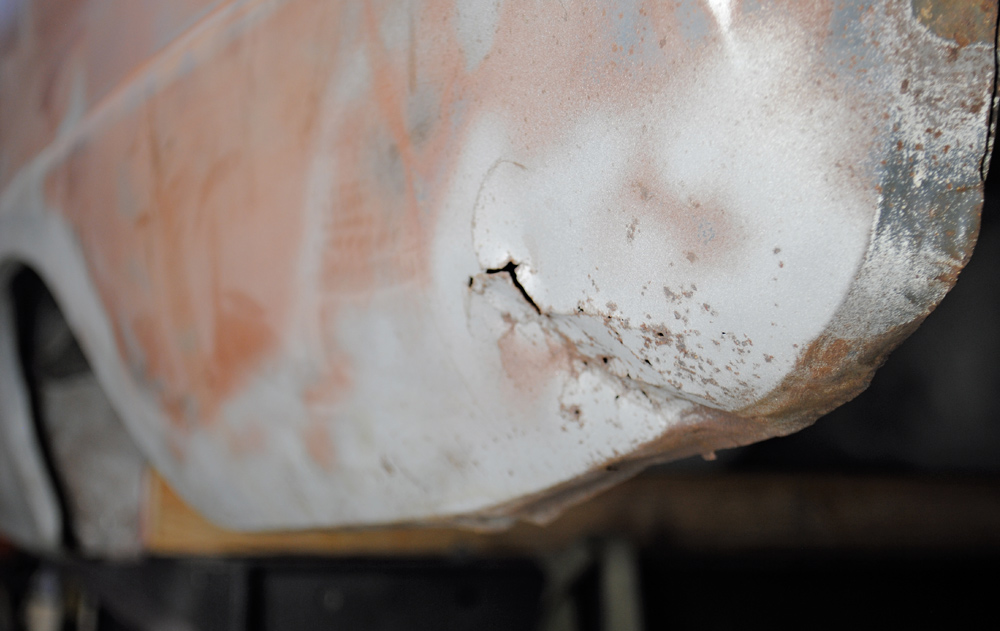
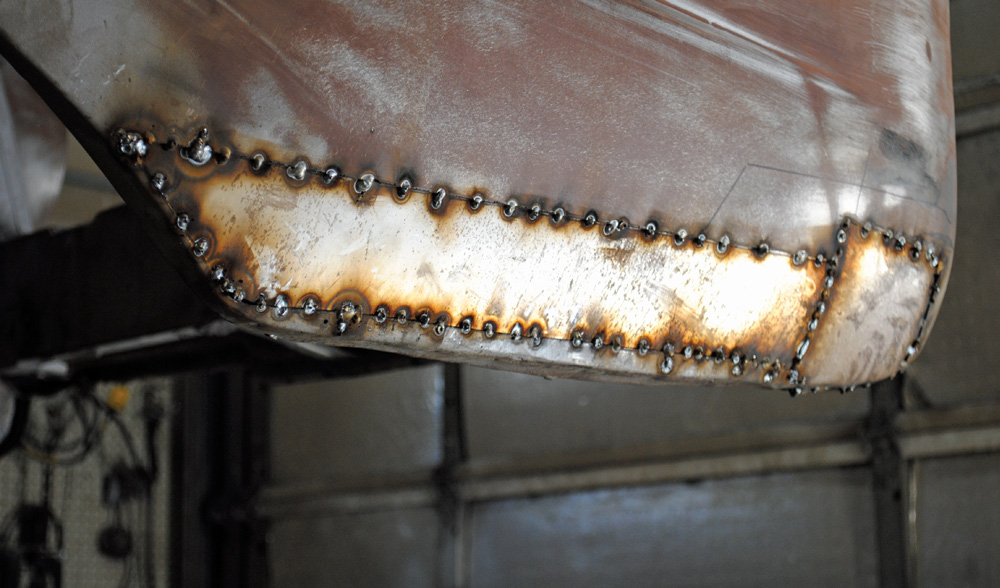
While the driver side rocker panel required replacement, the passenger side was in relatively good shape and needed only minor repair. With all the damage to the rocker panels resolved, the next chore was to repair the bottom of the left quarter-panel behind the wheel opening. Again, all the rotted metal was cut away, which left a larger hole to patch than it first appeared, but a two-piece patch panel cured that problem.

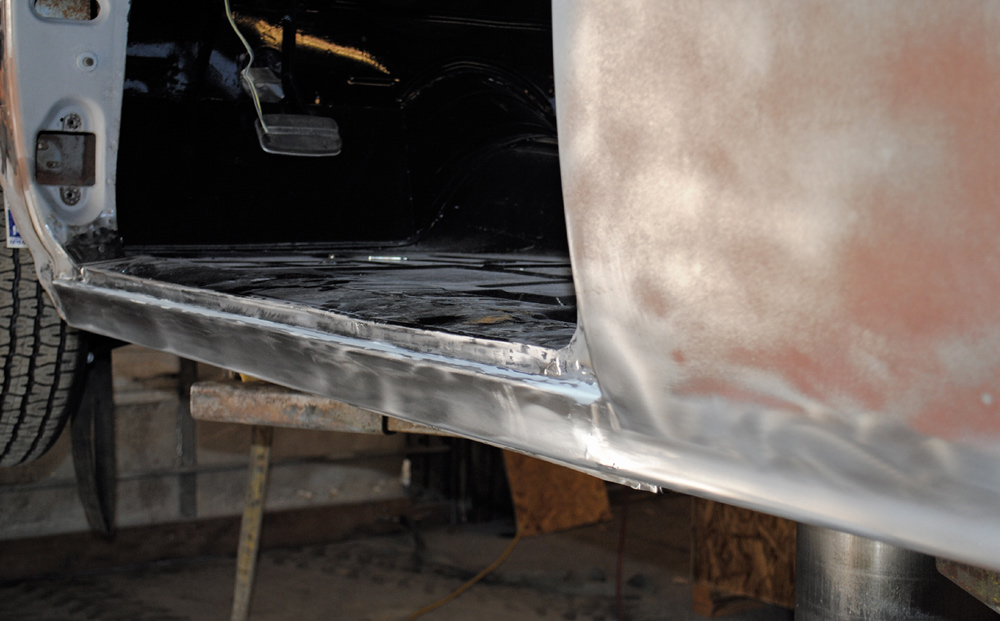
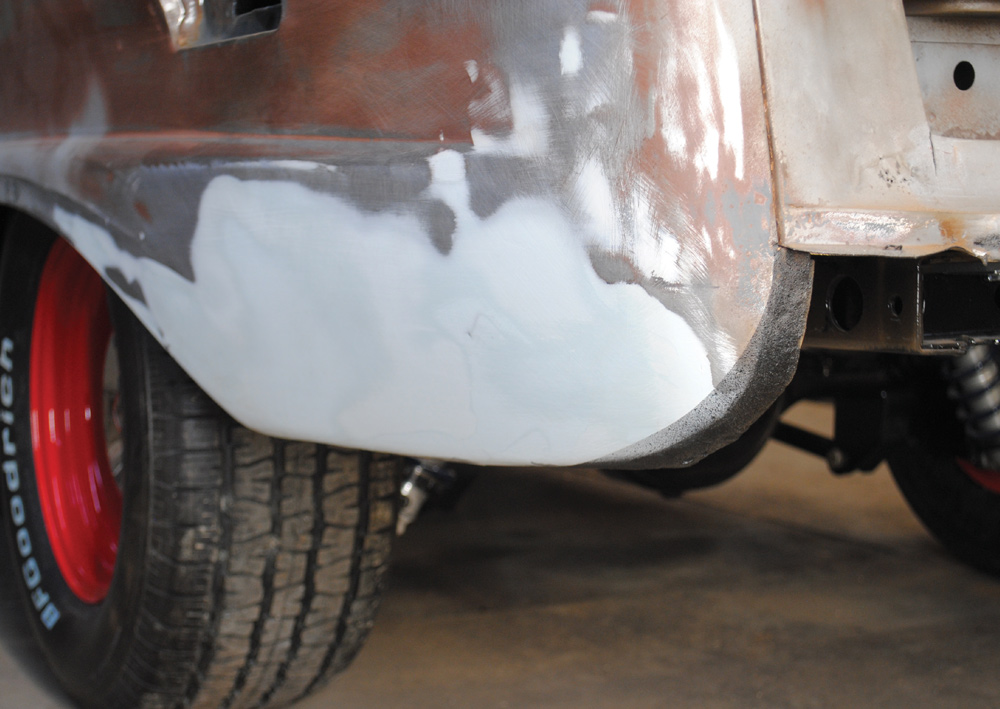
This wagon is destined to be driven, so every effort has been made to make the Ford fit for what lies ahead. To that end, the bottom of the body was prepped and covered in epoxy primer followed by an application of Raptor pickup bedliner and then a topcoat of single-stage black urethane gloss paint was applied.

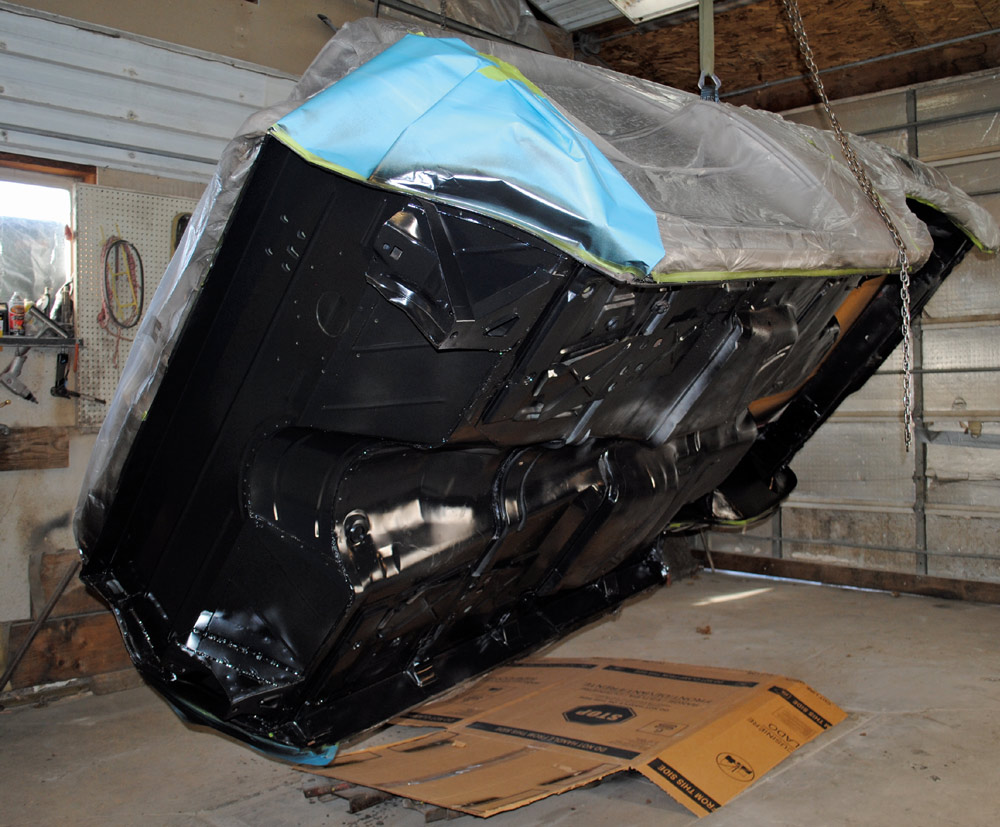
With the rusted areas repaired the body was reunited with the frame that was previously covered in gloss black urethane. Next Team Radford will turn its attention to finish bodywork and paint, which means the Del Rio Ranch Wagon is well on its way to its new life—and with all the improvements that new life will be even better than the first.

body on a rotisserie
2. With the body on a rotisserie, the extent of the damage to the drivers side rocker panel could be seen.
inner portion of the rusty rocker panel was cut away, leaving solid sheetmetal
3. The inner portion of the rusty rocker panel was cut away, leaving solid sheetmetal. Since the floor supports that tied into the inner rocker panels were in good shape they were left in place.
inner rocker panel being fabricated
4. A new inner rocker panel was fabricated from a strip of material cut from 18-gauge sheetmetal.
pneumatic punch being used to make holes for rosette welds
5. The replacement panel was formed in a sheetmetal brake. A pneumatic punch was used to make holes for rosette welds.
new inner panel clamped into place
6. Clamped in place, the new inner panel has a horizontal section at the top enclosing the doorsill; the vertical section will be the back of the rocker panel and a lip at the bottom of the panel wraps under the body.
welder wearing a mask while using a torch
7. Before welding the inner rocker in place the areas that would be enclosed were sandblasted and treated with rust preventative.
inner panel directly under the driver door
8. Here the inner panel is in place. Fortunately, it was only necessary to replace the section directly under the driver door.
fabricated inner rocker panel in place
9. This is the fabricated inner rocker panel in place. It will be welded to the floor supports and the upper and lower flanges on the body.
pair of full-length stamped replacements
10. Due to the complicated concave shape of the outer rocker panels, a pair of full-length stamped replacements were purchased.
man trimming the replacement to repair only the section that was rusted
11. Rather than replace the entire rocker panel, Colin trimmed the replacement to repair only the section that was rusted.
bead of panel adhesive being applied to the attachment flanges
12. A bead of panel adhesive was applied to the attachment flanges on the inner and outer rocker panels before installation. This not only makes a strong structural bond but it acts as seam sealer as well.
replacement outer rocker clamped in place
13. Here the replacement outer rocker has been trimmed to fit and clamped in place.
bottom the outer replacement panel was secured to the fabricated inner portion with rosette welds
14. Along the bottom the outer replacement panel was secured to the fabricated inner portion with rosette welds, as well as the adhesive.
TIG welding the upper edge of the outer rocker to the flange on the floor
15. Colin TIG welded the upper edge of the outer rocker to the flange on the floor. The seam was then ground smooth for a finished, factory look.
finished repair matches the shape at the bottom of the front fender
16. Although it’s hard to tell in bare metal, the finished repair matches the shape at the bottom of the front fender and blends into the quarter-panel in the rear just like the original.
damage to rocker panel caused by bottoming out on solid surfaces
17. Another typical rocker panel problem is the damage caused by bottoming out on solid surfaces like rocks and curbs.
repairing a crumpled rocker panel
18. Sometimes using a combination of brute force and leverage is the only way to repair a crumpled rocker panel.
using a hammer and dolly to do the finish work
19. With the smashed rocker roughed into shape, Colin used a hammer and dolly to do the finish work, returning it to the proper shape.
using a stud gun welder to attach studs to the damaged area
20. Fortunately the passenger side rocker panel was solid, but it too had been caved in. Tate used a stud gun welder to attach studs to the damaged area. A slide hammer was used to pull out the dents then the studs were ground off.
typical rust found in lower body panels
21. This is typical of the rust found in lower body panels where dirt that can hold moisture collects.
large patch of rust on a car
22. It’s not unusual to start cutting away rust and finding that a larger section than first thought must be removed.
repairing the lower quarter-panel
23. To repair the lower quarter-panel the patch panel was made from two pieces of 18-gauge sheetmetal. The longer front portion was made on a roller.
rear portion of the patch panel being shaped in a Speedway Motors shrinker/stretcher
24. Due to the convex shape, the rear portion of the patch panel was shaped in a Speedway Motors shrinker/stretcher.
fabricated patches pushed and tapped to line up with the surrounding metal using a body hammer
25. As the fabricated patches were tack welded into place, they were pushed and tapped to line up with the surrounding metal using a body hammer.
repaired quarter-panel
26. After some grinding and a skim coat of body filler the repaired quarter-panel looks as good as new.
bottom of the body primed, coated with bedliner, and painted gloss black
27. With all the rust damage repaired the bottom of the body was primed, coated with bedliner, and painted gloss black.
body and frame were reunited with new rubber mounts and hardware
28. The body and frame were reunited with new rubber mounts and hardware. At this point, the chassis is finished and the rust repair has been completed. Now it’s time to focus on making the body laser straight.
SOURCES
Modern Rodding
VOLUME 5 • ISSUE 43 • 2024