Modern Rodding Tech
InTheGarageMedia.com
1962 Chevy convertible chassis with custom boxed frame and coilover-ready suspension setup
The Great Cover-Up
1. Old Anvil Speed Shop designed and built this sturdy, ultralow-profile air-ride chassis in-house. The body will be securely welded to the framerails, forming a unibody structure.
The Great Cover-Up
Fabricating New Floor and Wheelwells for a 1962 Chevrolet Impala
By Ron Covell Photography by Taylor Kempkes
O

ld Anvil Speed Shop is renowned for its exceptional builds. For this project, they began with a pristine 1962 Chevrolet Impala convertible. They designed and constructed a stout full-perimeter chassis, incorporating air suspension and a 1,200hp Nelson Racing Engines powerplant. We will have several articles about this build; this one focuses on the construction of the floor and the wheelwells for the massive 24-inch rear wheels.

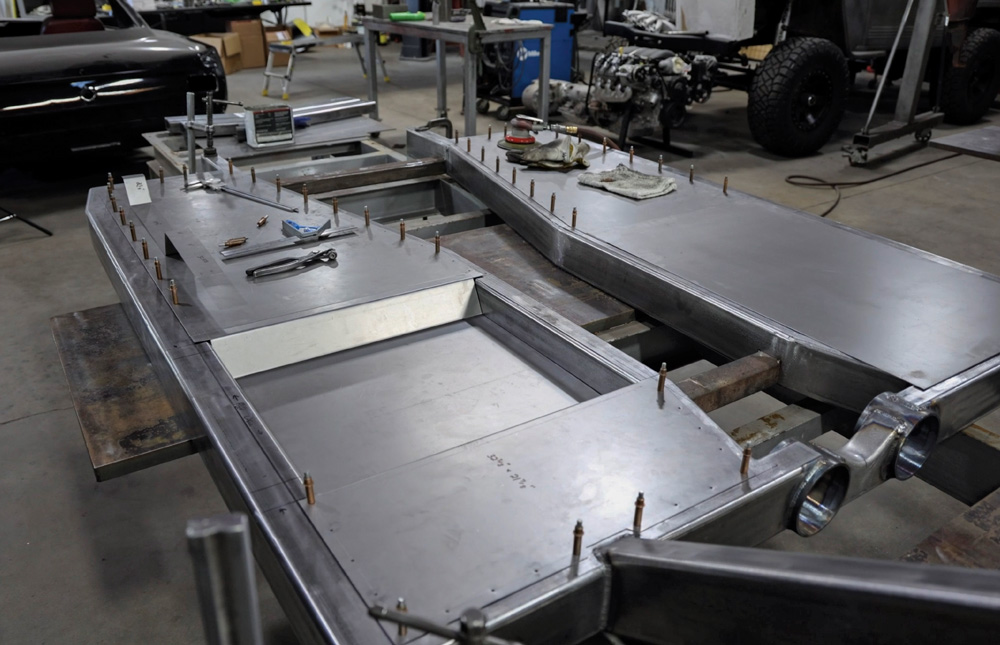
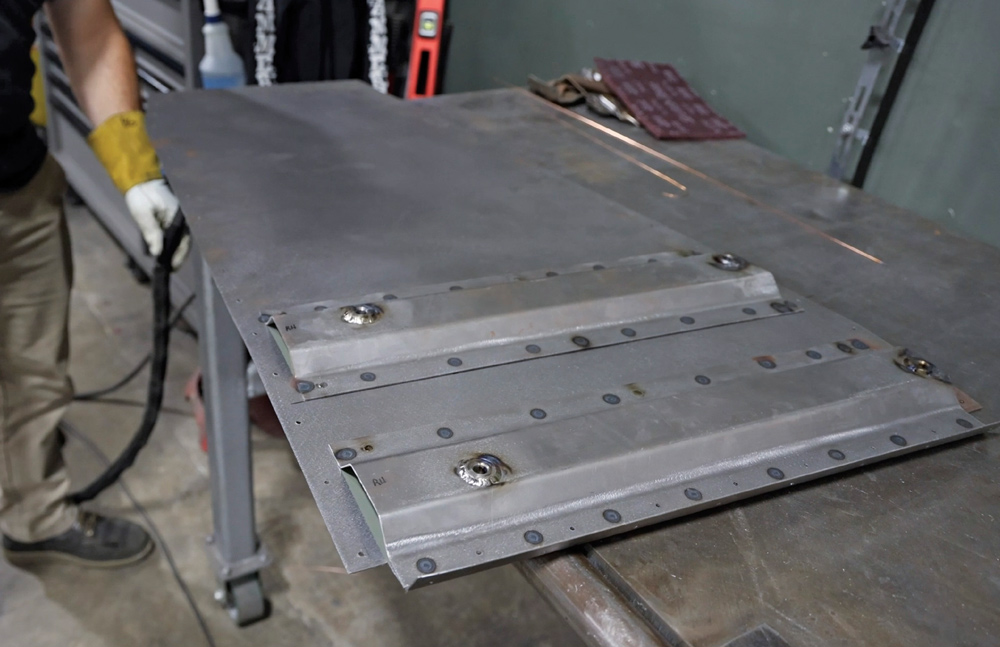
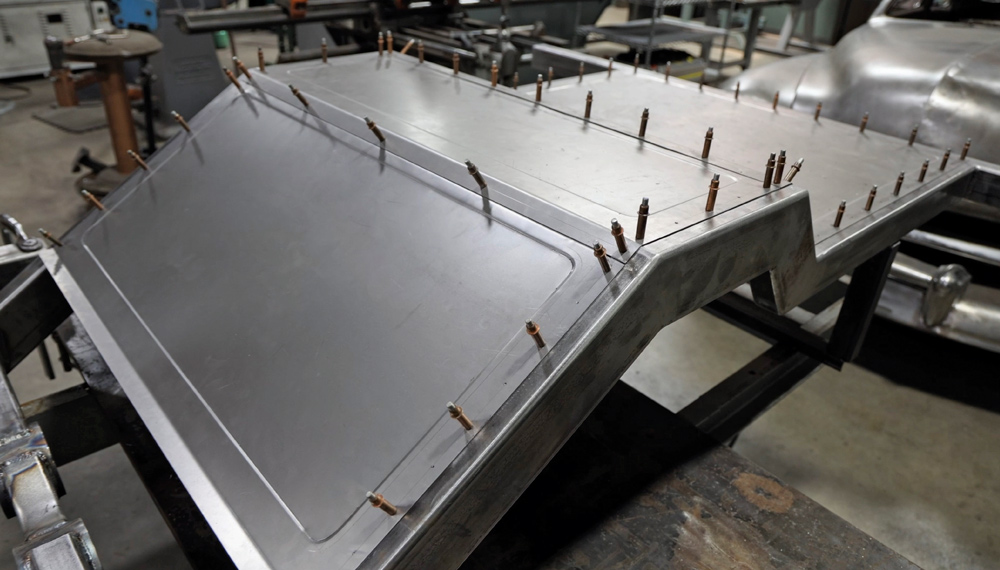
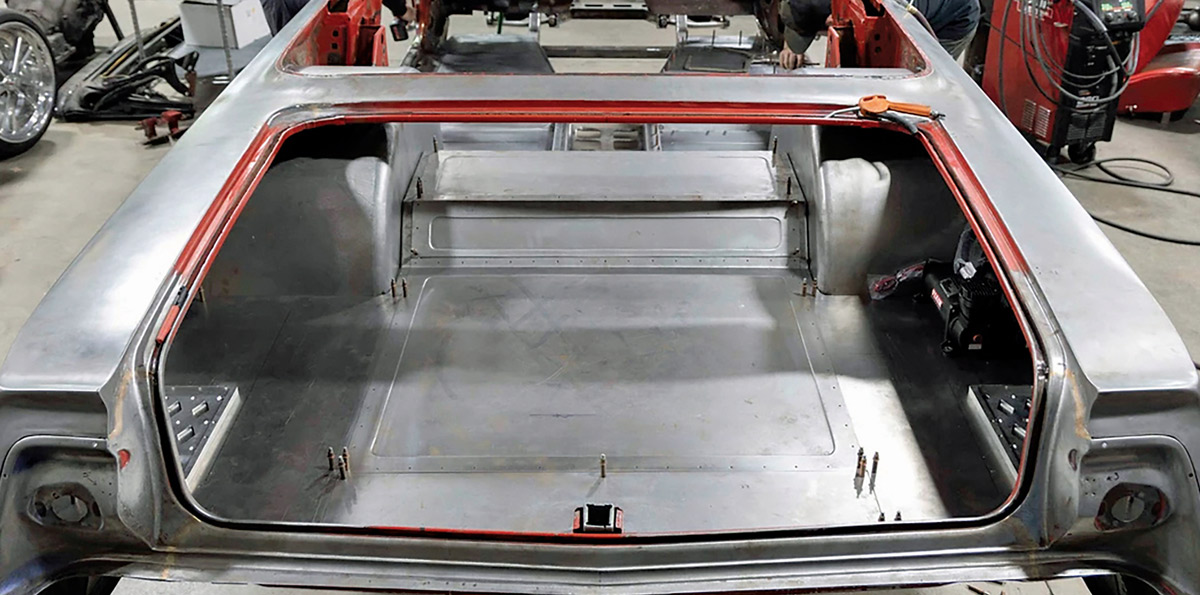
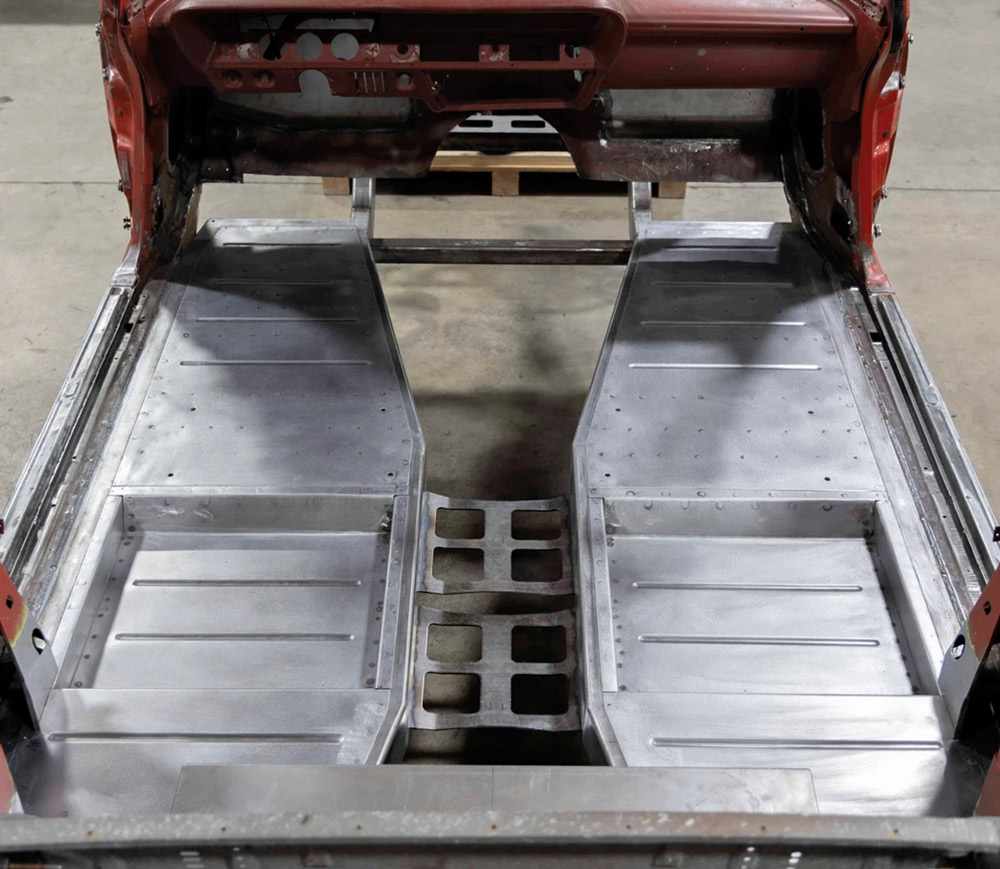
Old Anvil designed and built a very robust chassis in-house for this project, which will have the body welded to it, creating a unibody structure. They wisely decided to start constructing the floor before the body was joined to the chassis, allowing unrestricted access for fitting the largest panels. The forward section of the floor is flat, featuring footwells for the rear seat passengers. The floor follows the framerails behind the rear seat, where they rise over the rear suspension. Behind the rise, the trunk floor is completely flat.

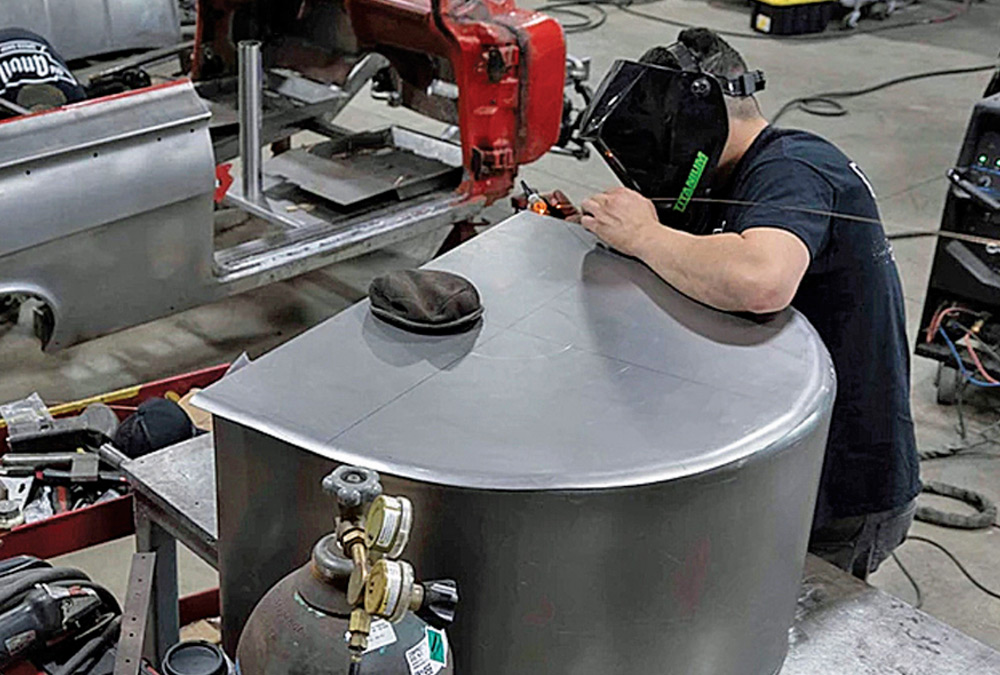
Once the central portion of the floor was completed, the body was carefully positioned and welded solidly to the framerails. Then, the construction of the wheelwells could begin. The owner wanted the ability to drop the body nearly to the ground when the car is parked, and with 24-inch wheels in the back that required XXL wheelwells.

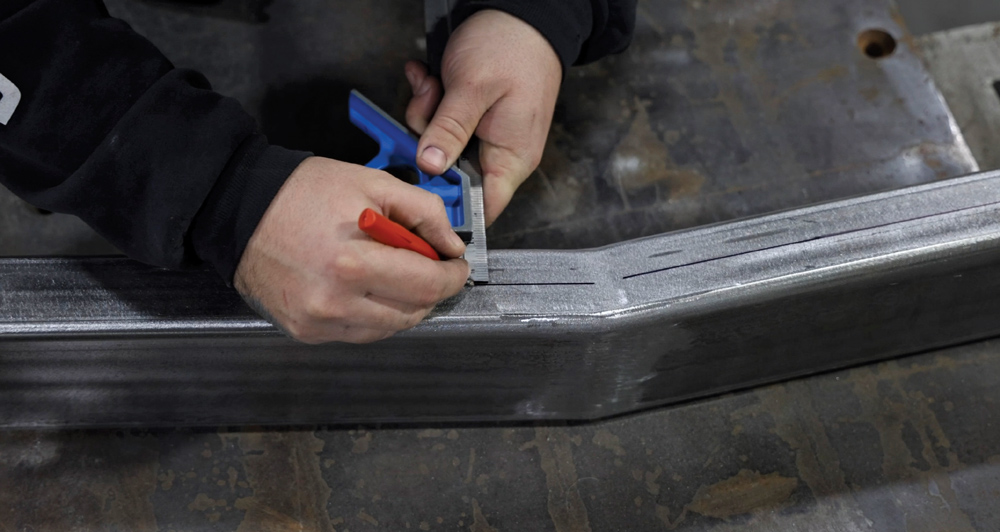
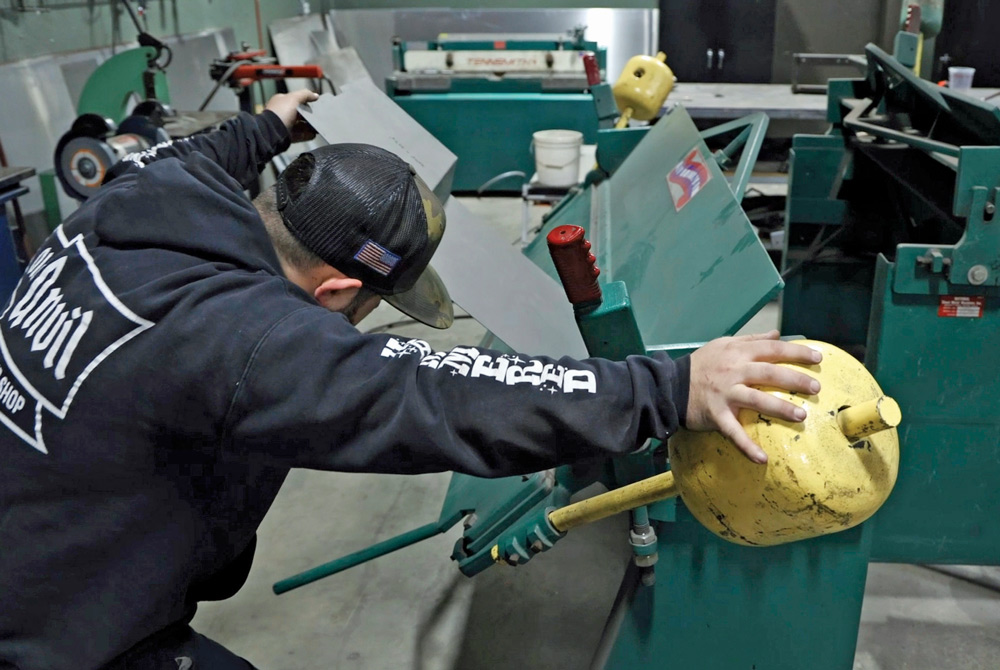
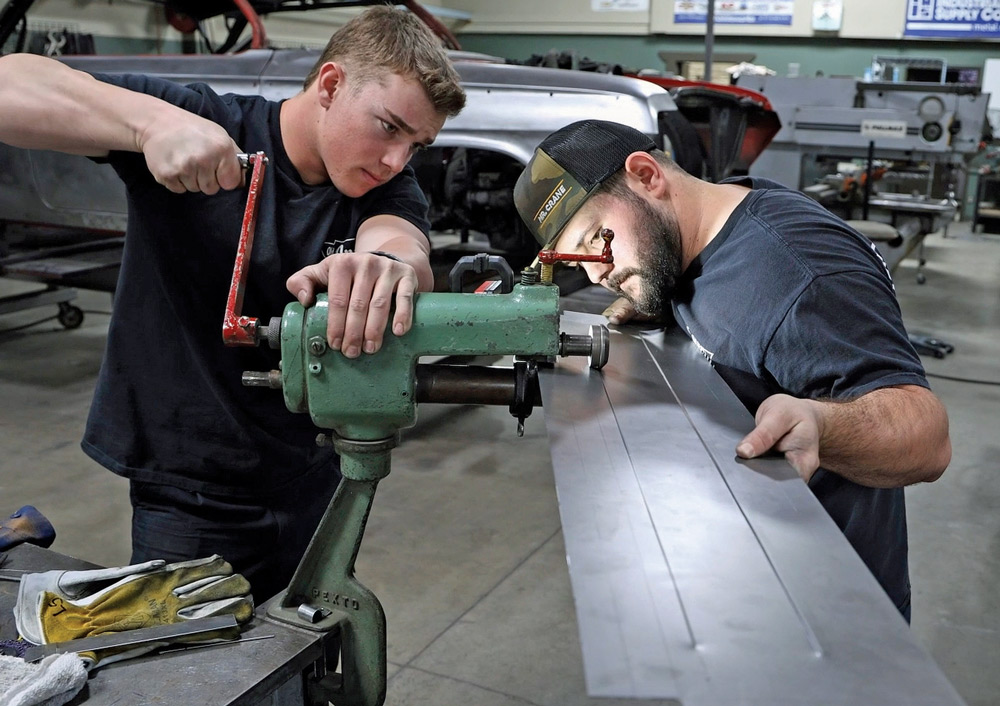
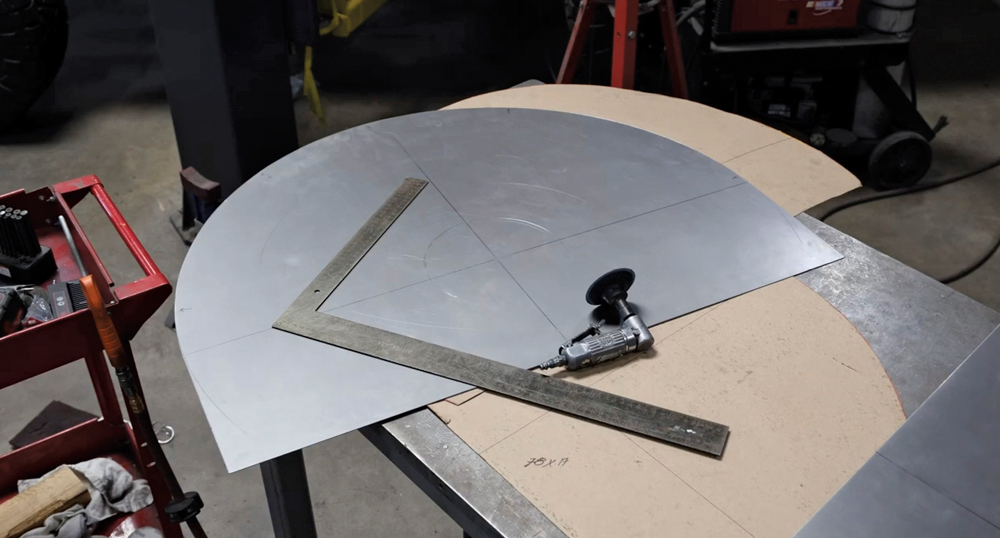
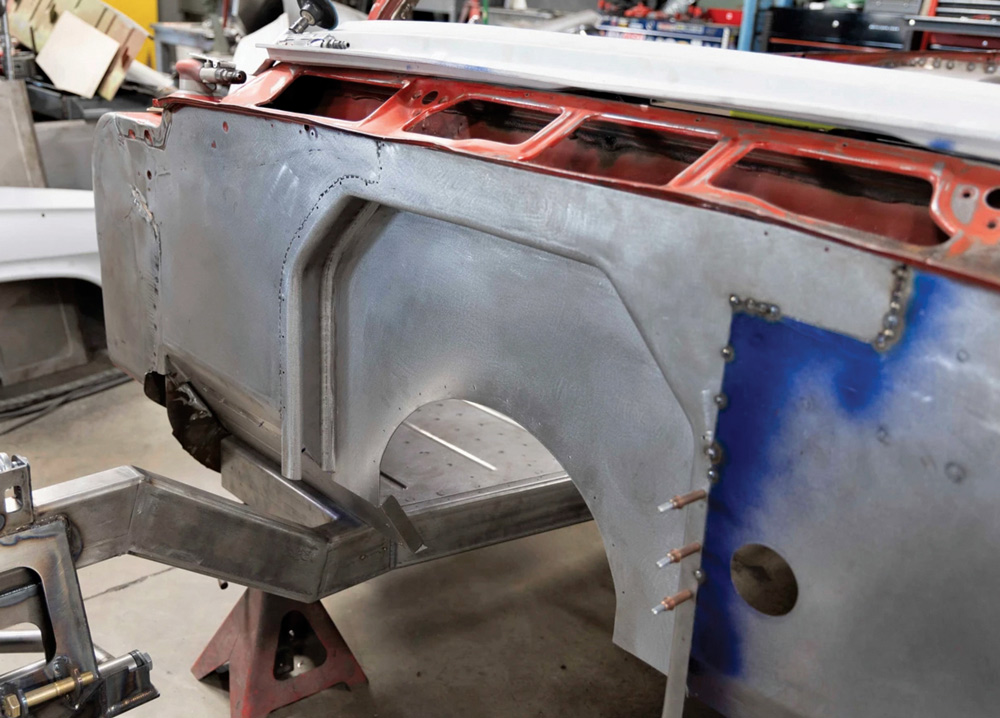
The wheelwells were fabricated from two pieces of 18-gauge steel. The vertical section was shaped like a “D,” and the cap was cut as a rectangle, then rolled into a “C” shape. Round-Over dies were used on a Bead Roller to create a 45-degree curl on the mating edges before joining them together, which results in a very professional-looking rounded corner. The wheelwells were completely welded and smoothed before trimming them to fit between the body and frame, and then welded into place with filler pieces added where necessary.

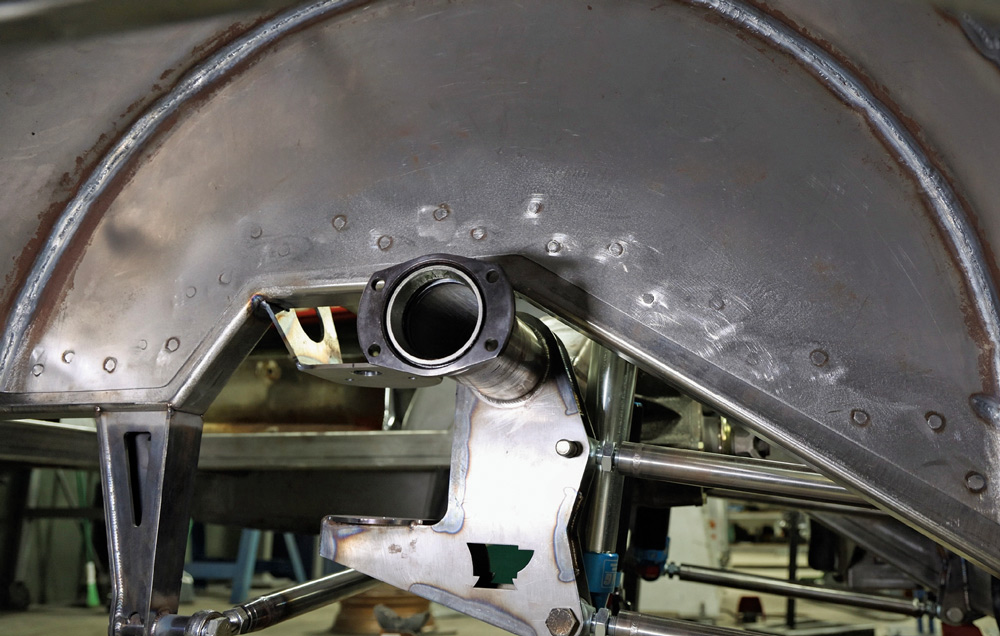
The engine in this car was moved back a few inches, necessitating a recess in the firewall, and an elegant cover was designed for the bellhousing, transmission, and driveshaft. This intricate construction was composed of multiple pieces, which were then joined together as a single unit.

Look forward to more articles on the car—it’s going to be very special, and you will appreciate many of the features after looking through these photos.

1962 Chevy convertible chassis frame rail marked for crossmember fabrication
2. The floor panels are installed before the body is mounted, which ensures the best access. A centerline is marked on the top of the framerails, which will serve as the target for fitting the edges of the floor against.
1962 Chevy convertible floor pan layout marked on steel sheet for precision cut
3. Sheets of 18-gauge steel are fitted carefully to the lines marked on the chassis.
1962 Chevy convertible floor section being cut on vertical bandsaw
4. The floor of the rear seating area will be lowered to provide the passengers with additional foot room. The layout is designed on a flat panel, and the metal blank is currently trimmed on a bandsaw.
1962 Chevy convertible sheetmetal floor bent on Tennsmith box and pan brake
5. A bending brake shapes the recessed portion of the rear floor panels.
1962 Chevy convertible transmission tunnel panels mocked up on frame rails
6. The panels are test-fitted to the chassis and trimmed as needed for a perfect fit.
1962 Chevy convertible floor panels drilled and Cleco-pinned for TIG welding
7. Once the panels are fitted, holes are drilled for the Clecos, which temporarily hold the panels in place during fabrication.
1962 Chevy convertible custom-fabbed sheetmetal floor fully mocked up on chassis
8. The fitting proceeds in the central section of the chassis. Observe how snugly all the panels fit together.
1962 Chevy convertible bead-rolled sheetmetal floor pan with riveted stiffeners
9. Channels are spot-welded under the floor in areas requiring additional strength, such as the seat mounts.
1962 Chevy convertible floor panel being bead-rolled on Pullmax machine
10. A Pullmax machine is used to form beads in the floor panels, adding extra strength and preventing drumming.
1962 Chevy convertible floor with bead-rolled stiffeners and Cleco fasteners
11. Special forming dies are utilized on the Pullmax, resulting in a clean, crisp end on each bead.
1962 Chevy convertible floor section bead-rolled with Pexto rotary machine
12. A bead roller is used to emboss steps into the panels on the rear portion of the floor. Teamwork is essential here; one person turns the crank on the machine while another guides the panel, ensuring it maintains tight contact against the guide. The straight runs are completed first, followed by the rounded corners.
1962 Chevy convertible rear floor pan panel Cleco-clamped and contoured
13. The rear portions of the floor are secured in place with numerous Clecos. These steps enhance both the strength and style of the floor panels.
1962 Chevy convertible circular panel layout marked for rear tub fabrication
14. The wheelwells for the massive 24-inch wheels and tires are constructed from two pieces of 18-gauge steel. Here, the vertical portion has been laid out and cut to size.
1962 Chevy convertible wheel tub sheet rolled on Pexto slip roll
15. Round-over dies are used on a bead roller to create a 45-degree curl on the edges of both panels.
1962 Chevy convertible custom rear tub welded during fabrication process
16. With both edges curled, the panels can be butt-welded together. This method effectively creates beautifully rounded corners on parts like this.
1962 Chevy convertible rear mini tub mocked up inside wheel well
17. After tack-welding the panels together, the wheelwell is test-fitted between the body and chassis. Many of the inner body panels had to be trimmed away to make room for these massive components.
1962 Chevy convertible mini tubs and driveshaft tunnel welded into place
18. Once the fit is verified, the wheelwell is finish-welded and smoothed while out of the car. Then, the assembly is positioned in the body, and filler panels are fitted to connect the wheelwell to the body.
1962 Chevy convertible mini tub with upper four-link bracket welded in
19. The vertical surface of the wheelwell is plug-welded to the framerail.
1962 Chevy convertible full trunk floor and tubs mocked up in rear body
20. Peering through the decklid opening, you can see how beautifully all the panels fit together. It requires significant planning to ensure that large panels like these fit together with precision.
1962 Chevy convertible custom-fabricated floor pans fully installed with bead-rolled reinforcements
21. The floor has a very tidy appearance in the central portion of the chassis, too.
1962 Chevy convertible smoothed firewall and trans tunnel notch tacked in
22. A recess is required in the firewall to move the engine back a few inches.
1962 Chevy convertible transmission and driveshaft tunnel fully fabricated and TIG welded
23. The transmission tunnel and driveshaft cover consist of multiple pieces that are welded together into a single unit. Be on the lookout for more articles about this amazing car.
SOURCE
Modern Rodding
VOLUME 6 • ISSUE 60 • 2025