Modern Rodding Tech
InTheGarageMedia.com
man sitting on garage ground wearing gloves while holding a brake disc and hub
1. Kyle Tucker, who knows a little something about Detroit Speed & Engineering suspension systems, is tackling the G-body installation on Rick Love’s Monte Carlo.
G-Body Moves
Coilovers, Control Arms, Bigger Brakes & More Transform the Road-Going Capabilities of a Classic Monte Carlo SS
By Barry Kluczyk Photography by Rick Love
T

he classic GM G-bodies (1978 to 1988), Cutlass, Regal, Grand Prix, and, of course, the Monte Carlo were the last of the company’s intermediate body-on-frame cars. They had suspension and braking technology little changed from the muscle car days.

It all worked quite well in the later 1970s through the 1980s, but to be honest, that was the era when not even the highest output of the brands’ respective “performance” models even cracked 200 hp. For example, the high-profile, undeniably sharp-looking, and NASCAR-influenced Monte Carlo SS looked like it could shred rubber from Daytona to Talladega. Still, its 305-inch small-block managed only a meager 180 hp.

That meant it was pretty hard to squeak even a smidge of rubber in a Cracker Barrel parking lot. Not surprisingly, enthusiasts have spent the better part of the past 40 years upping G-machines’ output, pumping more performance into the cars to complement their timeless good looks.

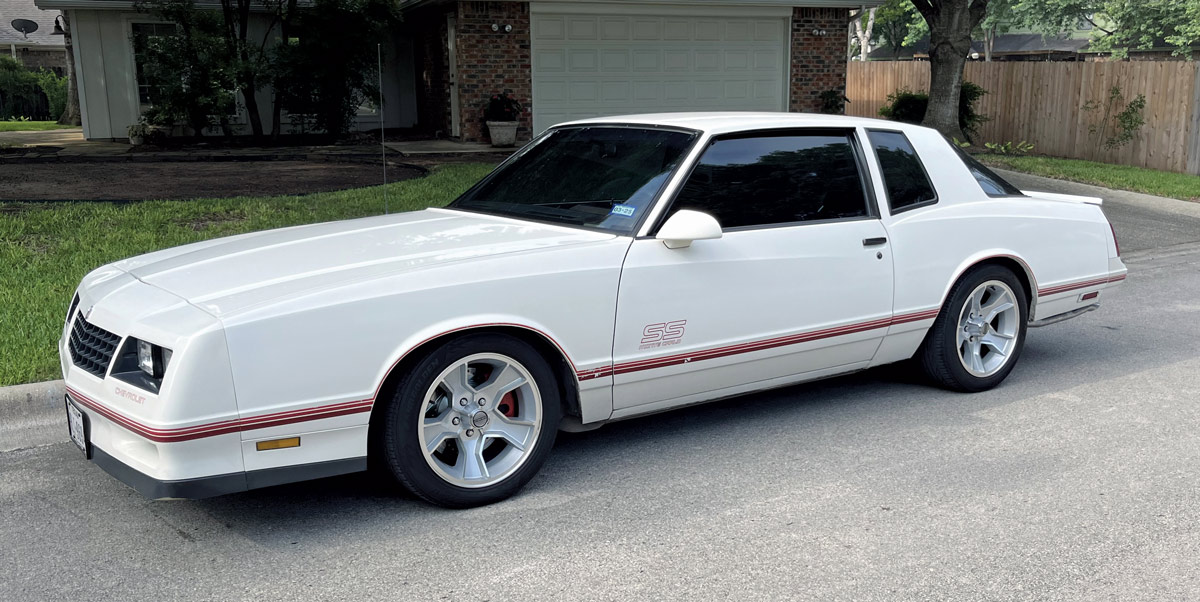
Performance, of course, takes many forms. While a boost in horsepower is typically the first line of action, matching that with higher levels of handling and braking capability are the logical follow-up measures. That’s the case here with our project 1987 Monte Carlo SS Aero Coupe—the distinctive model that featured a sloping rear window to make the car even slipperier around NASCAR super speedways.

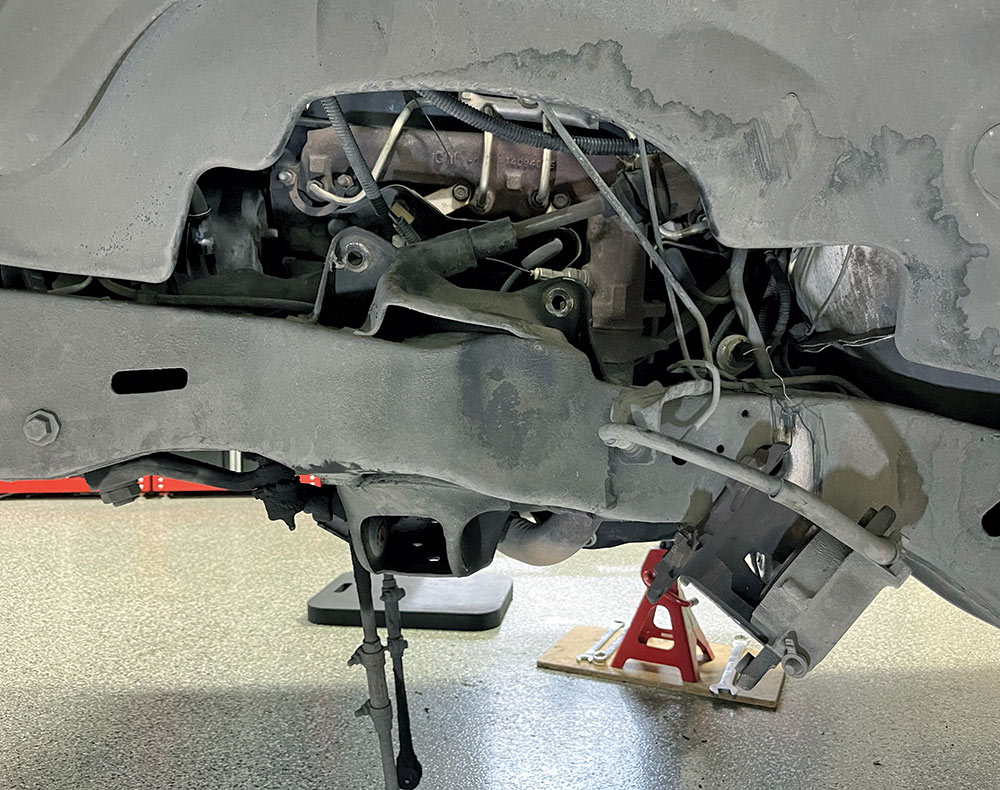
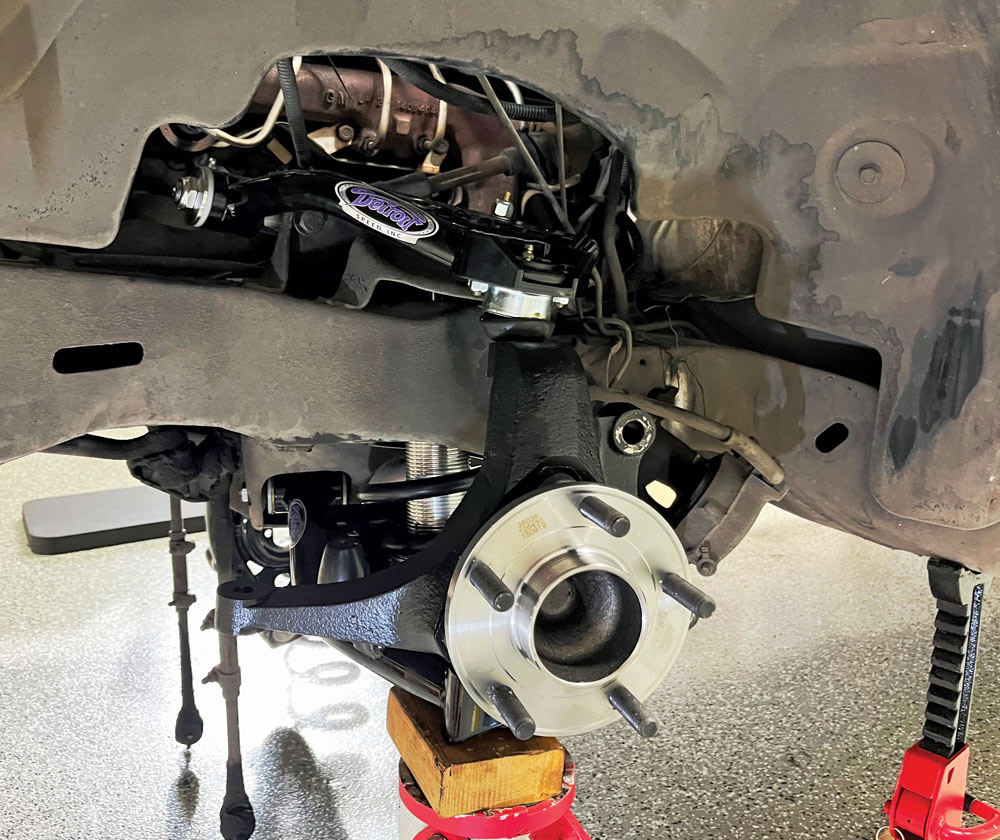
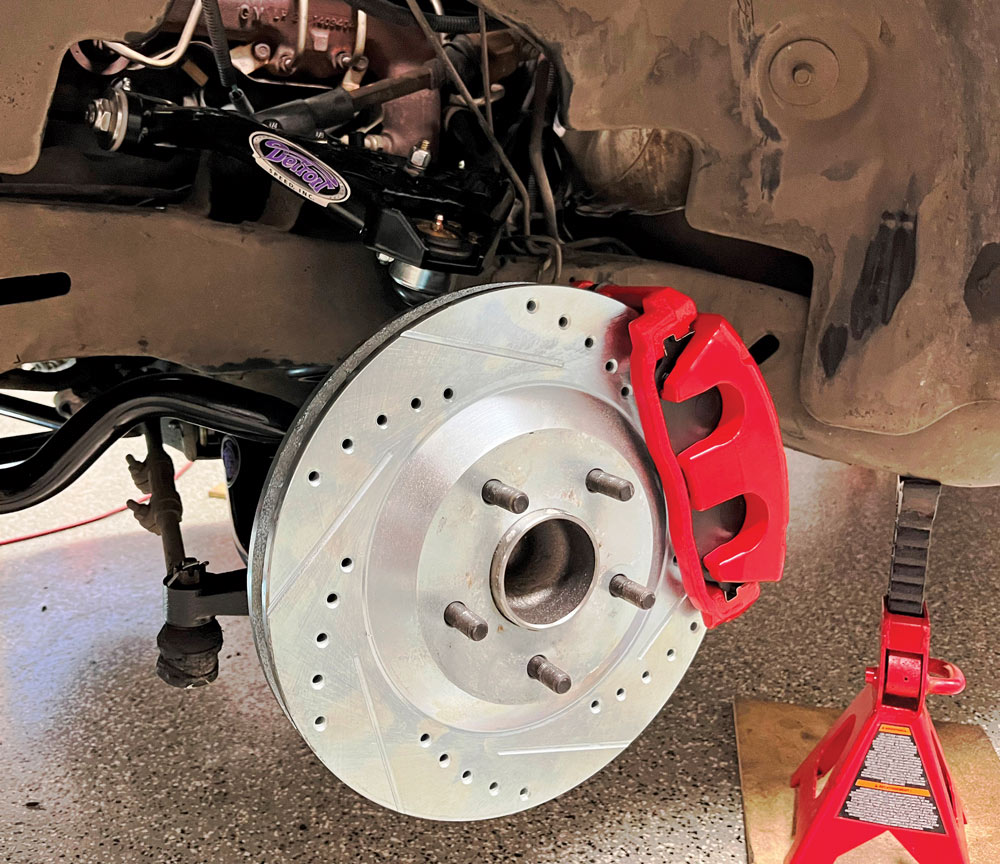
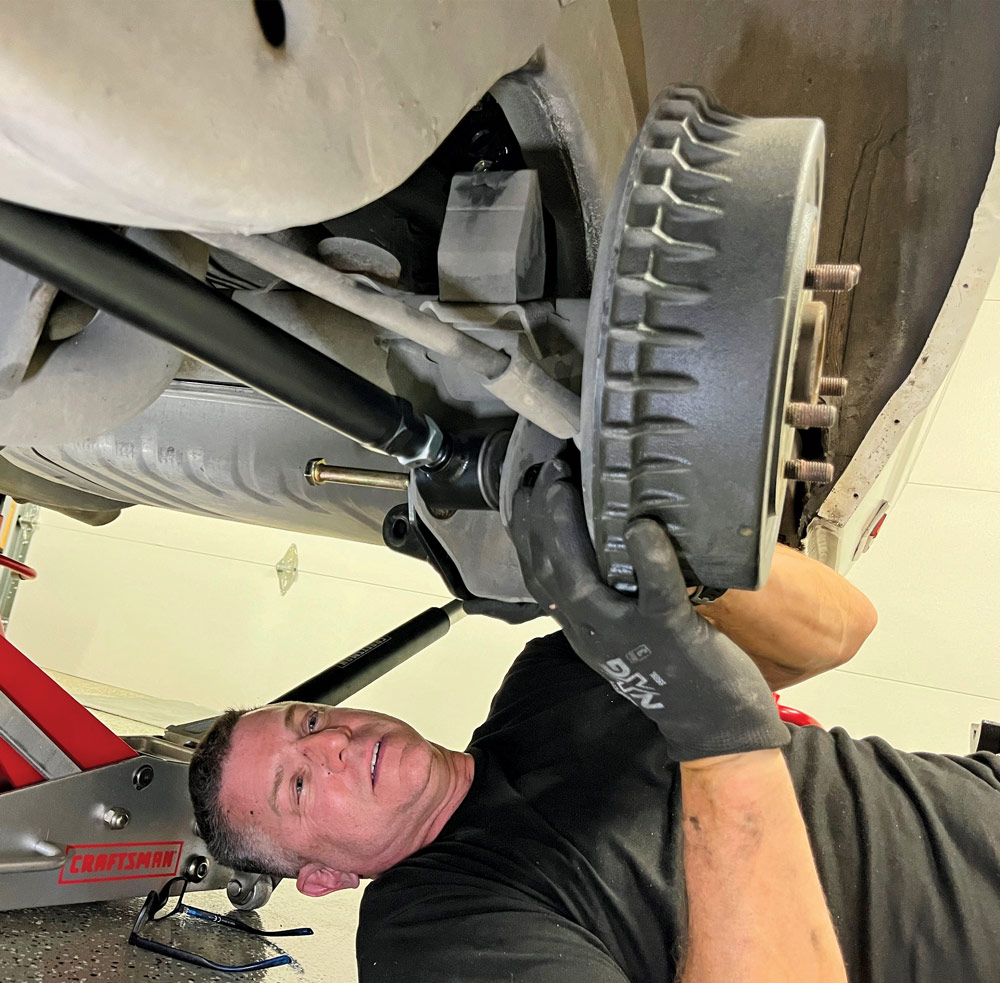
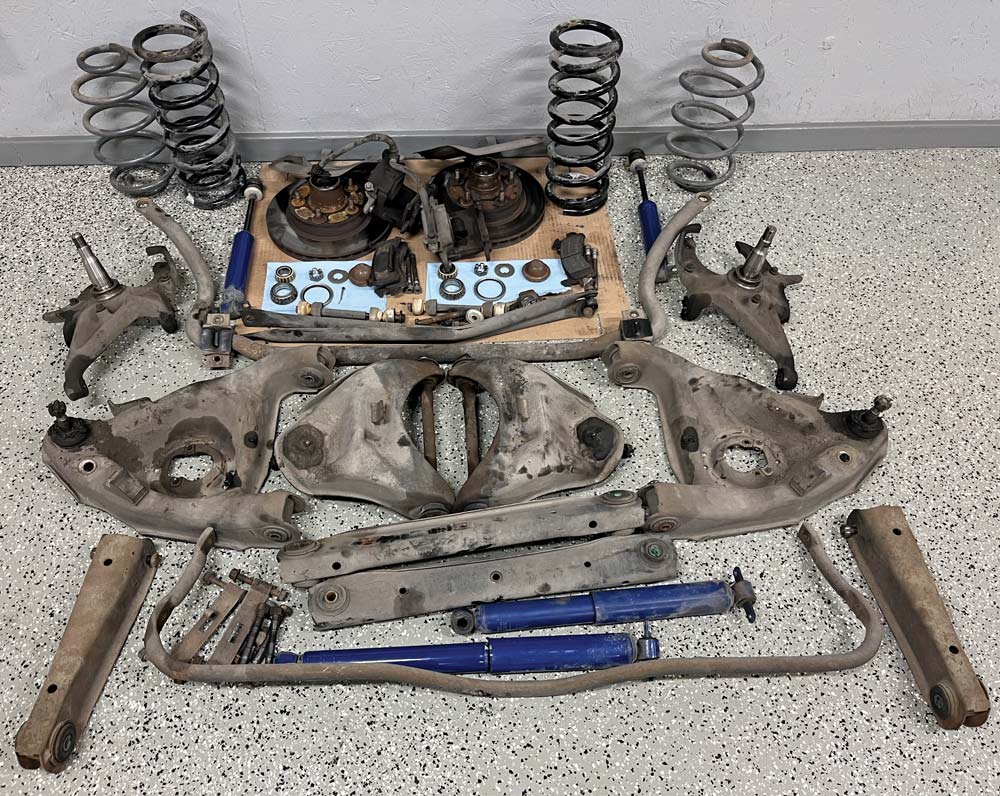
The suspension and brakes were targeted for upgrades as part of a plan to elevate the car’s overall performance in all areas. The vision included front and rear coilover conversions, supporting suspension enhancements, and larger front disc brakes on CPP C5-style spindles.

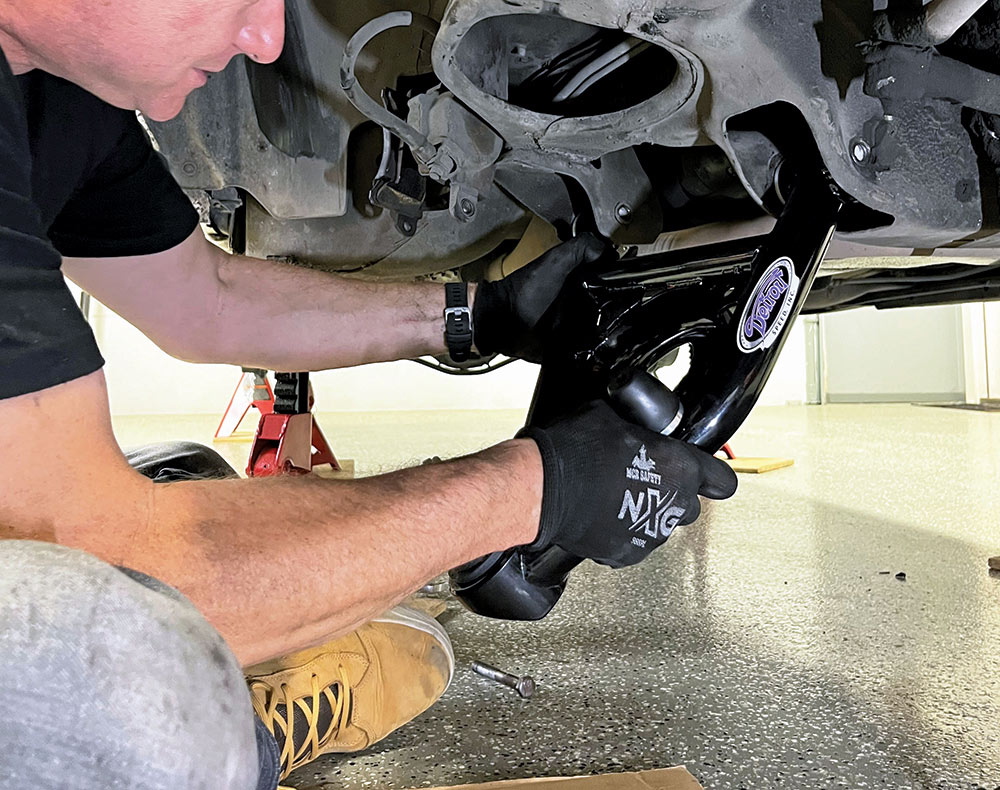
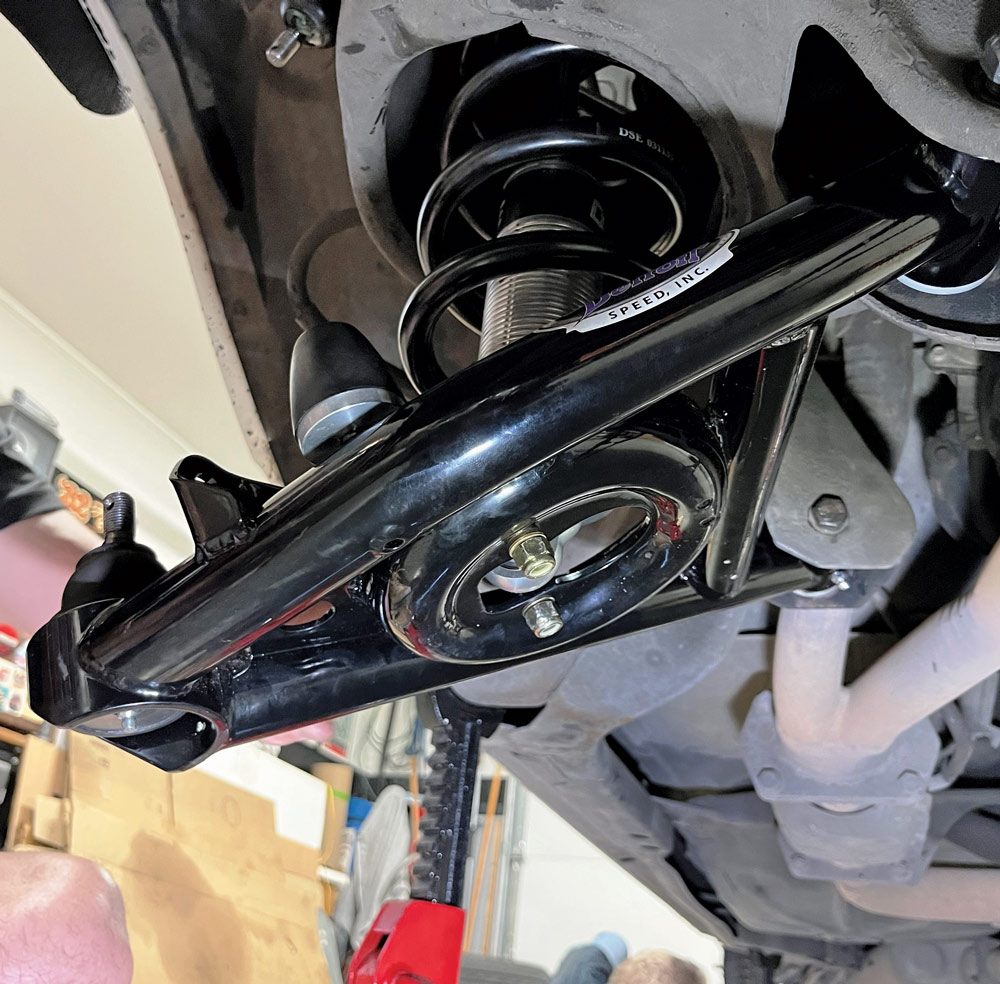
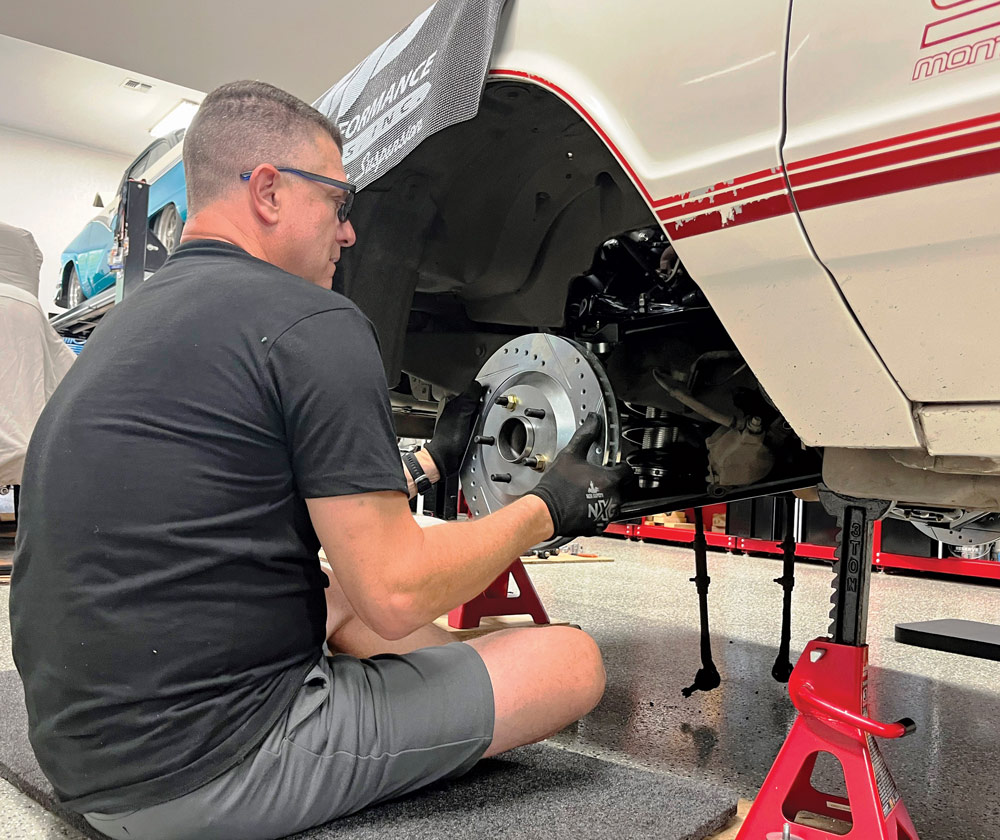
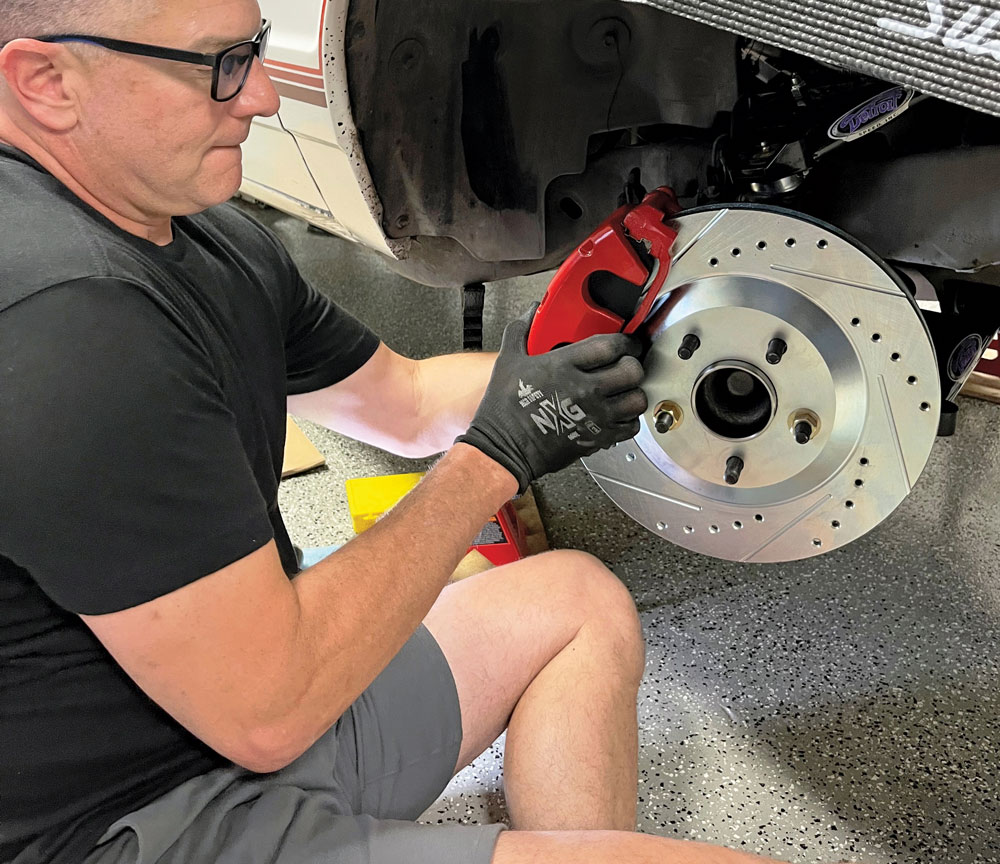
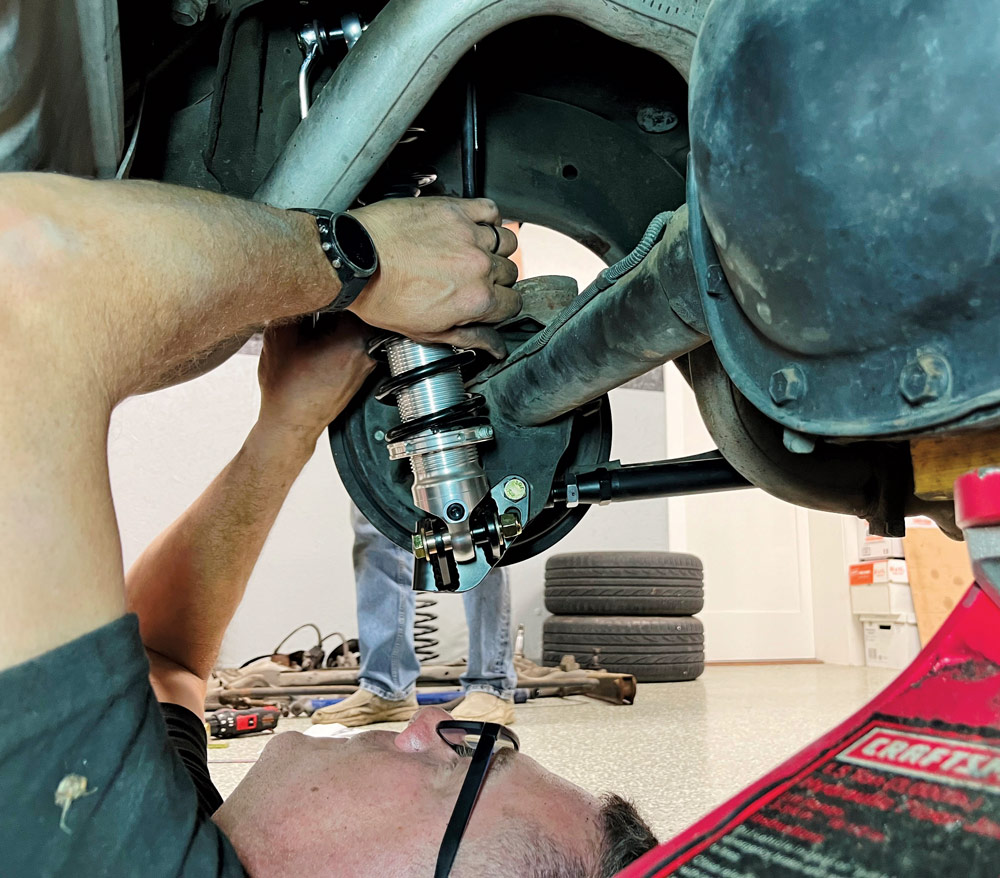
At the risk of overstating the obvious, there are almost innumerable advantages that come with coilover suspensions and bigger brakes, including greater feelings of control and stability and even aesthetic considerations in stance and ride-height adjustability. For our project, the suspension parts came from Holley’s Detroit Speed division, while the brakes came courtesy of Classic Performance Products (CPP). All the components were straightforward bolt-ons, so everything outlined in the accompanying photos and captions could be accomplished at home by someone with even moderate wrench-turning experience.

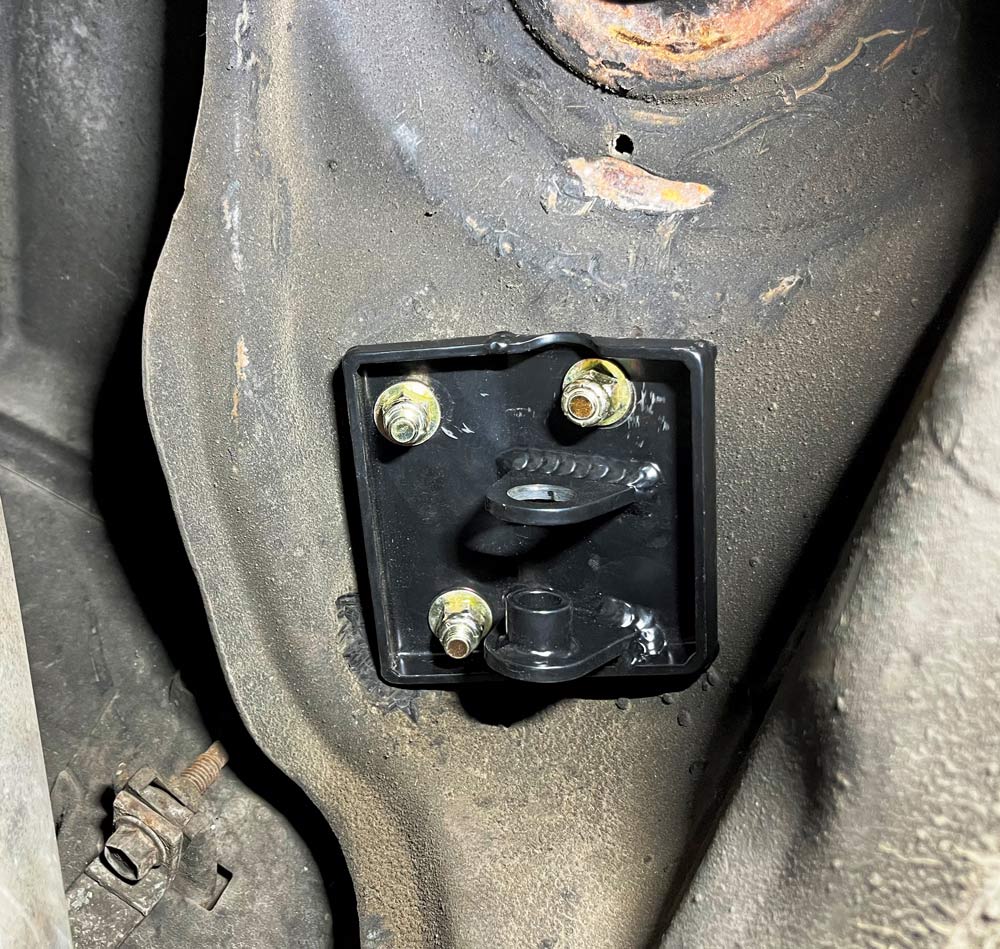
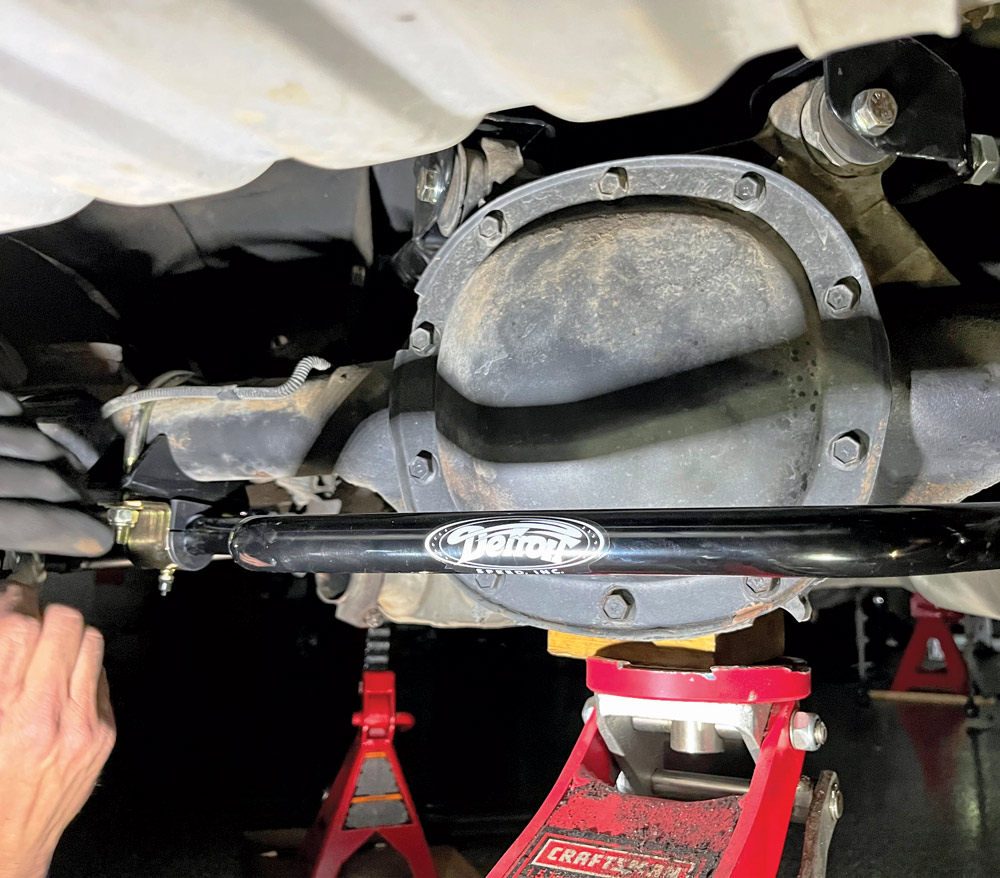
In addition to the coilovers for the rear suspension, the trailing arms were replaced with Detroit Speed’s Swivel Link rear suspension. The adjustable links eliminate bind in the suspension for full articulation and allow very easy pinion-angle adjustments to enhance traction and even reduce driveline vibrations.

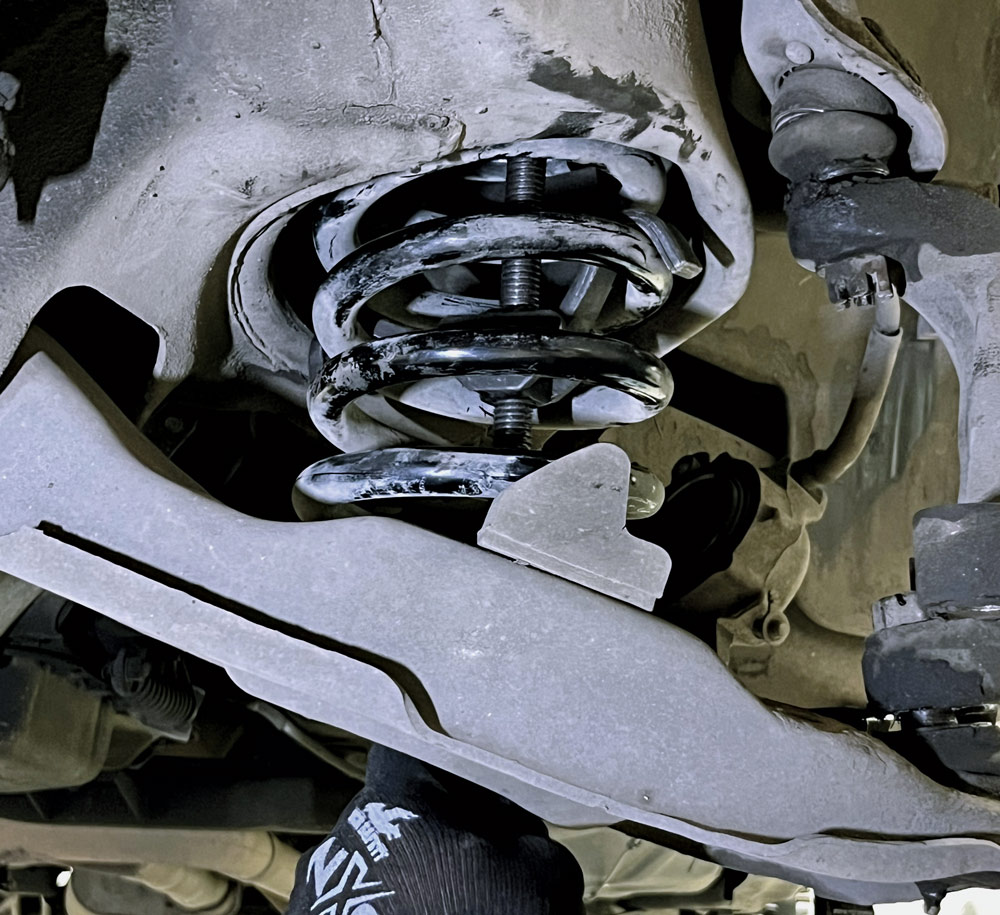
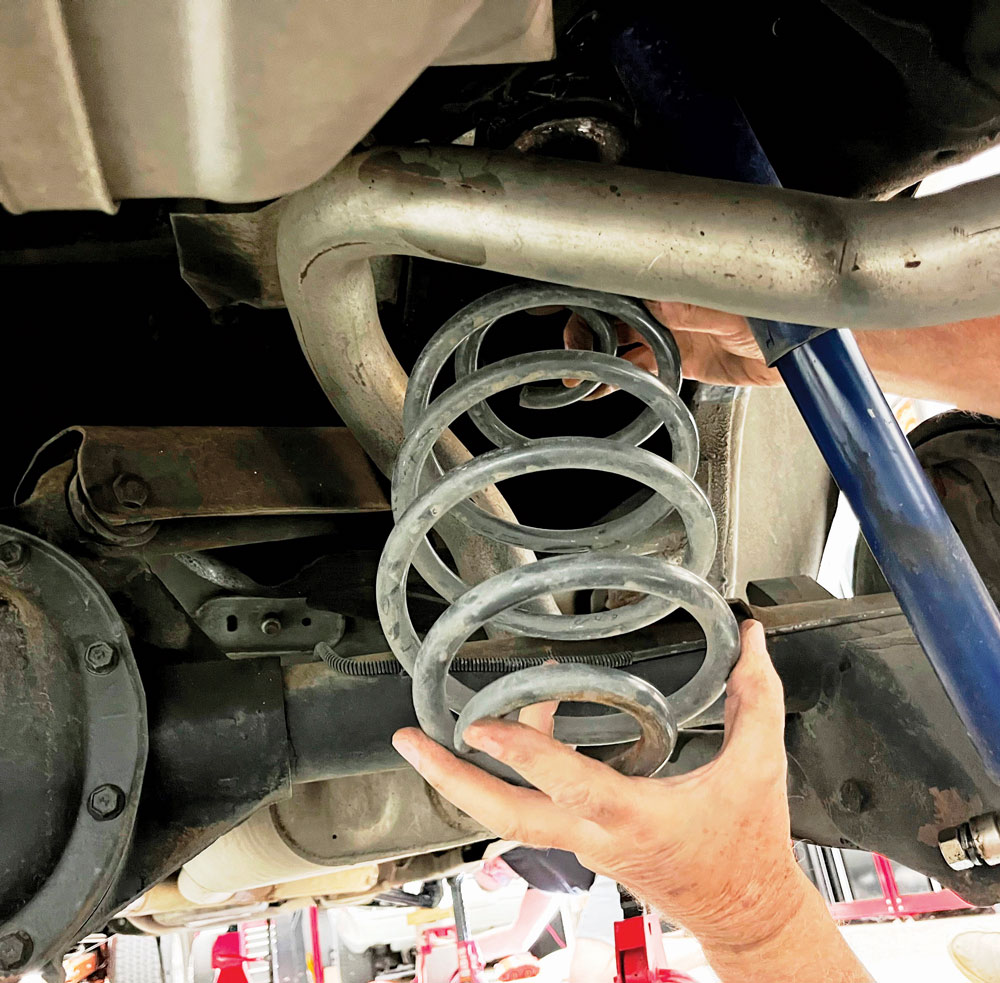
None of the various elements are too difficult to install, but a spring compressor is necessary for safety when removing the original front coil springs. They can often be rented for free at most auto parts stores.

The only significant caveat for this as a DIY project is the need for a front-end alignment after the new suspension components are installed. For most, that means a trip to the alignment shop; unless it is very close, it may have to be trailered. Again, it’s a safety thing.

This overall package highlights the basics of the various installation sub-projects, so it’s not meant to be an instruction guide. However, it provides a thorough overview of the tasks involved and shows their relatively easy bolt-on nature.

With more power under the hood and capability in the corners, this G-body lives up to its racing-inspired style.

front suspension parts are from Detroit Speed
2. The front suspension parts are from Detroit Speed and include the front upper and lower control arms, coilovers, a camber shim kit, and a thick stabilizer bar. We’re also adding a pair of front chassis braces that enhance strength and overall responsiveness.
CPP-based disc brake kit
3. Also going up front is a CPP-based disc brake kit that features C5-style spindles. The kit (PN 7987SWBK-DWWR) includes the spindles, rotors, stainless hoses, and loaded twin-piston calipers.
closeup of spindle after disassembling the front brakes and suspension
4. After propping up the car on jackstands and removing the wheels, the project starts with disassembling the front brakes and suspension. The brakes have been removed, leaving only the spindle to provide easier access to the stock control arms, springs, and shocks.
man laying on ground to work on the sway bar
5. The sway bar endlinks are disconnected, and the lower ball joints are separated from the spindles. The sway bar has also been removed and replaced.
closeup of spring compressor being used to remove coil springs
6. The lower control arms must be dropped to remove the front coil springs, but because they are under tremendous tension, a spring compressor must be used to secure them before removal. It can be rented at most auto parts stores.
control arm being lowered
7. With the spring secured with the compressor, the control arm is carefully lowered. It’s important to be wary of the coil spring, even when compressed. As seen here, the spindle has also been removed.
shocks unbolted from frame
8. After that, the springs drop out of the frame and the shocks are easily unbolted.
hand holding tool to remove the stock lower and upper control arms
9. Next, it’s simple to unbolt and remove the stock lower and upper control arms.
closeup of disassembled frontend
10. Here, the disassembled frontend is ready for upgrades. Before the new parts are installed, it is a good idea to inspect other components and bushings and implement any necessary service or repairs.
person sitting on ground wearing gloves while adding new control arms
11. The front suspension buildup starts with the Detroit Speed lower control arms (PN 031208), which conveniently came with the lower ball joints installed. Due to factory variations, the lower-rear mounts on the frame sometimes need modification to accommodate the new control arms, but that wasn’t the case here. They slipped in without an issue.
coilover assembly being installed
12. The coilover assembly (PN 030316) comes next, with the shock sliding up the middle of the spring and the spring itself indexed on frame protrusions that essentially lock the spring in place. For this Detroit Speed system, the hole in the frame for the upper shock mount must be drilled out and enlarged to 3/4 inch.
hands adding bolts to new upper control arms in place
13. Similar to the lower control arms, the new upper arms (PN 030107) simply bolt in place of the originals. They’re also equipped with new ball joints, and along with the control arms, the new drop spindles from the CPP brake kit are installed on the upper and lower ball joints.
front suspension installation
14. The front suspension installation is really that simple. It’s essentially done at this stage, although the tie rods need to be reinstalled and the camber must be adjusted during the alignment. Most alignment shops will have shims for this, but we purchased Detroit Speed’s own caster shim kit (PN 031721).
man sitting on floor while installing CPP brake kit
15. Work on the front end continues with the installation of the CPP brake kit. The new drop spindles incorporated the mounting hubs, so the new rotors slip onto them like any other brake job.
man sitting on ground installing twin-piston calipers onto hub
16. The twin-piston calipers are installed on the brackets incorporated into the hubs. After that, the new brake lines are installed and the system is bled. This is just basic brake-job stuff.
closeup of hands using box-ended wrench to install new endlinks to lower control arms
17. The frontend project wraps up with the installation of Detroit Speed’s tubular sway bar (PN 031410), starting with the installation of the new endlinks on the lower control arms.
hand using tool to install sway bar
18. The sway bar attaches to the frame via new frame mounts included with the kit. Some fidgeting with the bar’s position is inevitable, so make sure it attaches to the endlinks on both lower control arms. The recommendation is to initially snug the bar with enough slack to enable those fitment adjustments. There’s not much more to it than that.
finished frontend
19. Here’s the finished frontend, with the coilovers, control arms, brakes, sway bar installed, tie rods reconnected, and more. It was a very straightforward project and, apart from a few holes to drill, a completely bolt-on procedure.
hand removing stock coils
20. Regarding the rear suspension, the stock coil springs can be easily removed by lowering the rear axle on a floorjack until they essentially fall out.
man laying on ground to install Detroit Speed’s Swivel Link rear suspension kit
21. We’re installing Detroit Speed’s Swivel Link rear suspension kit (PN 042107) to eliminate bind and enable full suspension articulation. It starts with swapping the original lower trailing arms with the new lower trailing links. Because all the links hold the rear axle in place, Detroit Speed recommends removing and replacing the links one at a time.
man laying on ground while working on upper links
22. The shorter, upper trailing links go next. It’s the same basic procedure as the lower links.
endlinks' mount
23. There are upper and lower mounting brackets for the coilovers that bolt onto the frame. One of the upper mounts is shown here.
person bolting coilovers into place
24. With the mounting brackets installed, the coilovers bolt into place. The shocks themselves should be clocked so their adjustment knobs face inboard. Again, this is pretty easy stuff that can be done at home on the garage floor.
Detroit Speed rear sway bar
25. Moving onto the Detroit Speed rear sway bar (PN 042206), its installation requires drilling four holes for the endlinks’ mounting brackets. The axle-tube brackets should be positioned as close to the bar’s 90-degree bends around the rearend.
man installing endlinks with sway bar
26. Finally, the endlinks are installed with the sway bar. They are positioned 3-1/2 inches from the upper stud’s centerline to the lower stud’s centerline. The sway bar endlinks have forward and rear mounting points. The front holes create a lower effective rate for the sway bar than the rear holes. Detroit Speed recommends using the front holes.
old parts
27. After all the ratchets stopped turning and the jackstand was finally removed, these are the take-off parts from all the procedures. It was a lot of work and time-consuming but satisfyingly straightforward—a true bolt-on project done at home.
side view of white gm g-body
28. With CPP C5-style spindles and the new suspension elements, the Aero Coupe has a sportier stance. It’s underpinned by truly track-capable suspension components that will handle the planned horsepower upgrades for this G-body. The next step, however, is an immediate trip to the alignment shop.
SOURCES
Modern Rodding
VOLUME 5 • ISSUE 48 • 2024