Modern Rodding TECH

InTheGarageMedia.com

1. Sparks from within, a sure sign team MetalWorks is on the job. This time the job is fabricating and installing a smooth firewall in David Goodwin’s ’55 Chevrolet.
Recess Time
How to Make Your ’55 Chevy Firewall Accept an LS3
By Gerry Burger Photography by Chadly Johnson
D

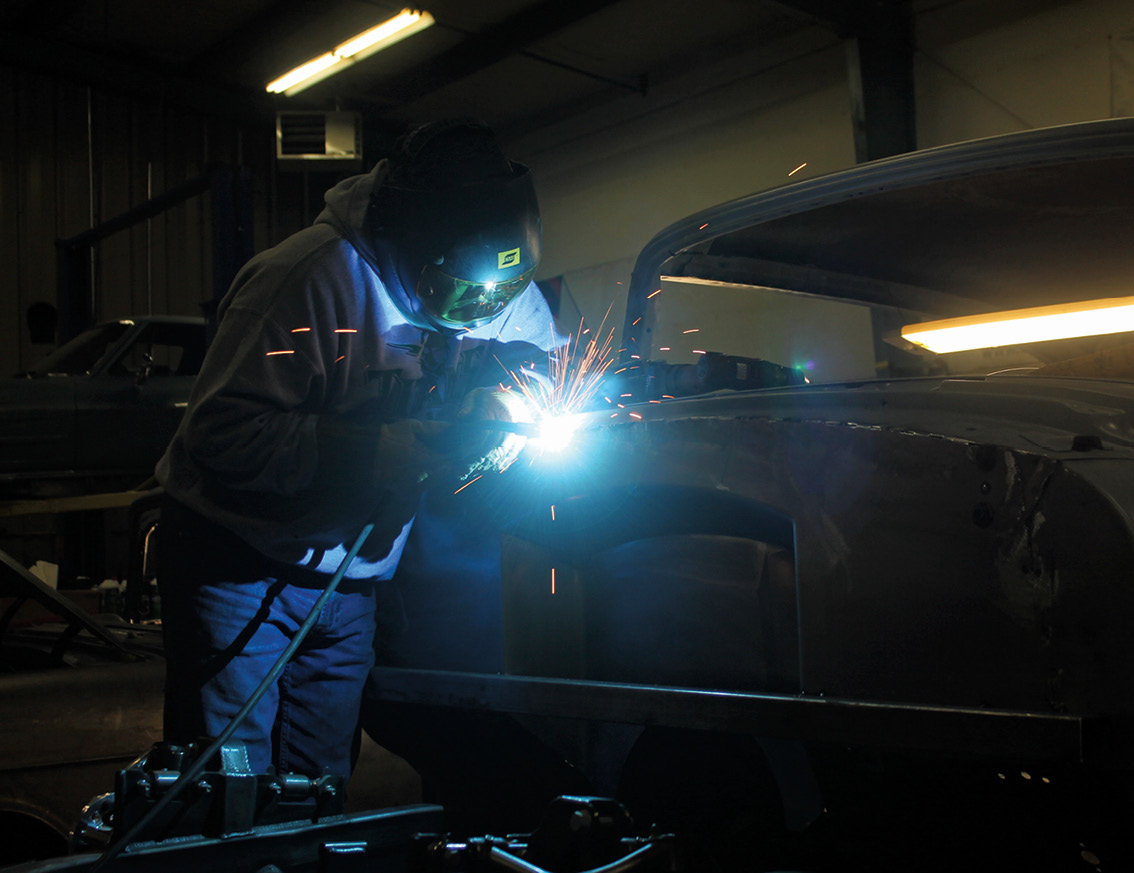
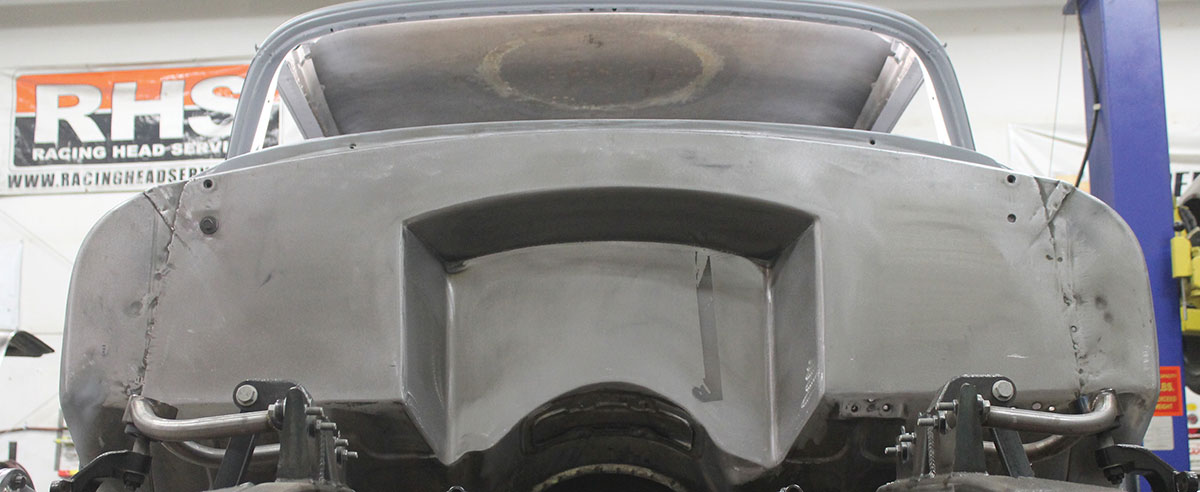
avid Goodwin and the team at MetalWorks Speed Shop in Eugene, Oregon, are putting together one very tasteful, Pro Touring–style ’55 Chevy hardtop. Like most top-shelf hot rods, this one does a fine job of hiding all the cool fabrication, making it look like the car could have been built this way in 1955.

He has had a string of cool cars since the ’60s, so he has learned there is no better money spent than on the original car. Paying a bit more up front for a good example saves you money in the end and leads to a better finished product. Armed with that wisdom, he found a good example of a ’55 Chevrolet Bel Air hardtop. While the car was not a 100-point restoration, it was a good, solid start.

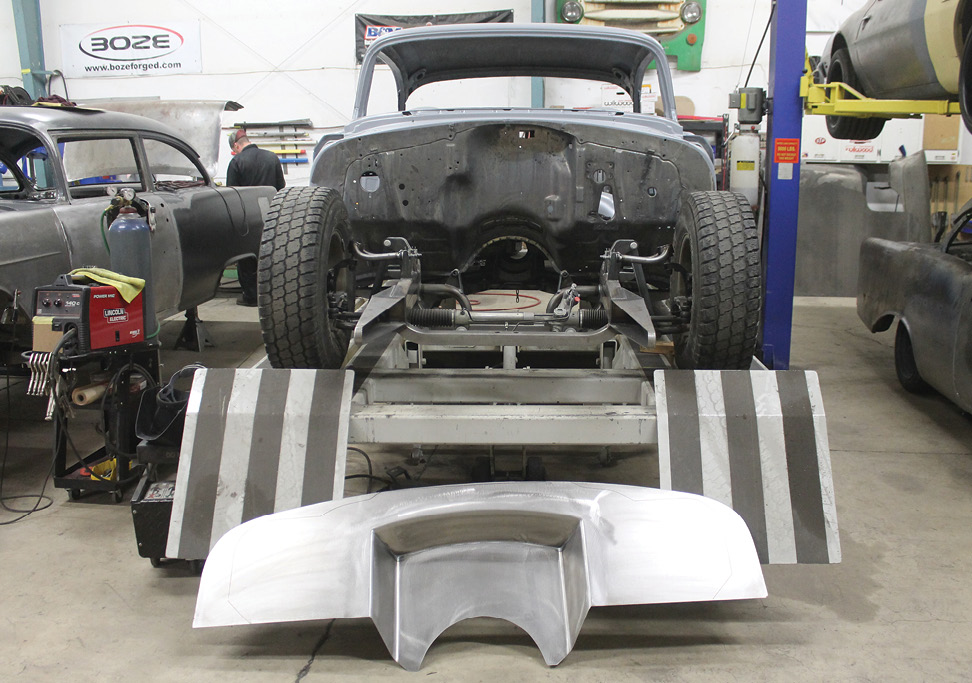
First, team MetalWorks rolled the original chassis out from under the car and the Art Morrison Enterprises GT Sport chassis was rolled into place. Four-wheel independent suspension, Wilwood Pro-II disc brakes, and Flaming River rack-and-pinion steering are just some of the highlights under the car. It is obvious from these specs that Goodwin enjoys spirited performance. One of his past cars was a ’67 427 Corvette. Once you’ve had a 427 you never get over it. Goodwin thought another 427 would be perfect for his latest project, but this time it would be 427 inches wrapped in a tighter and lighter package, namely a modern small-block LS3.

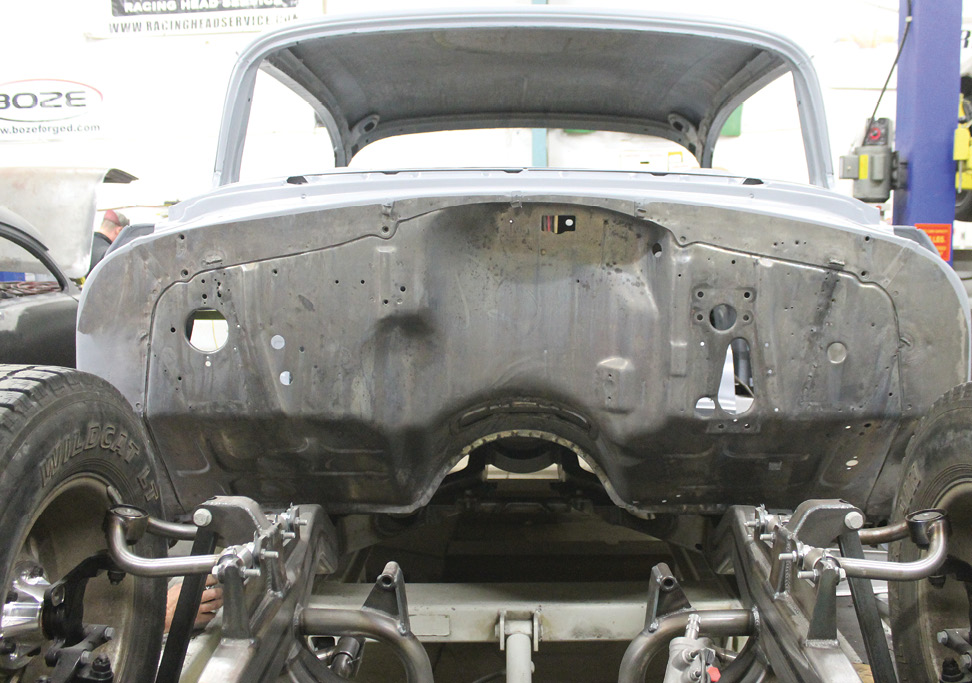
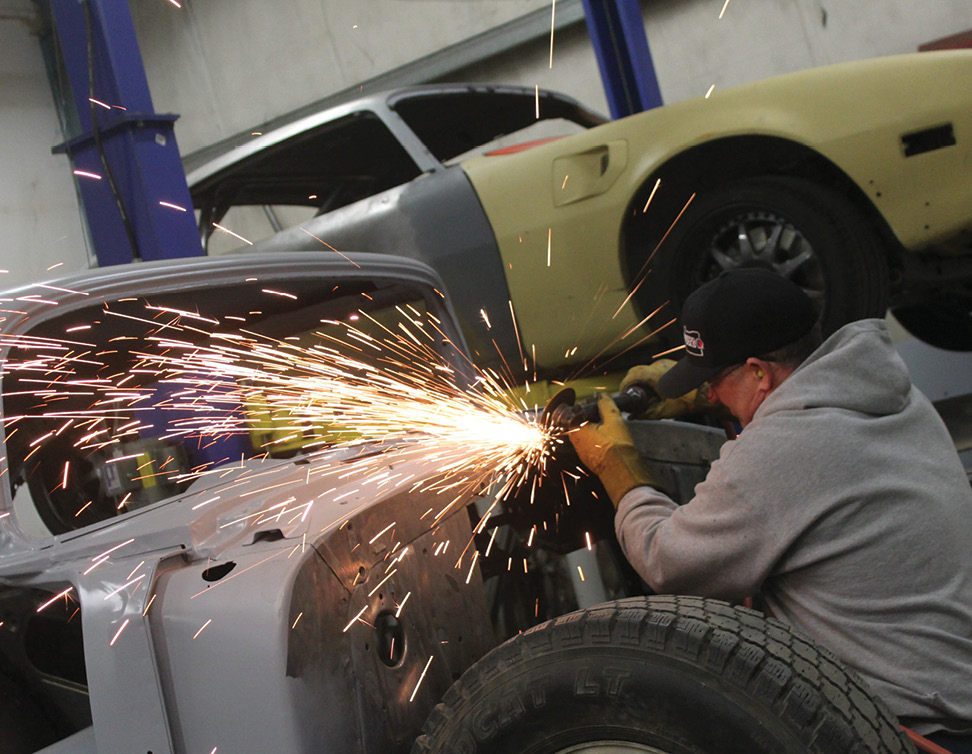
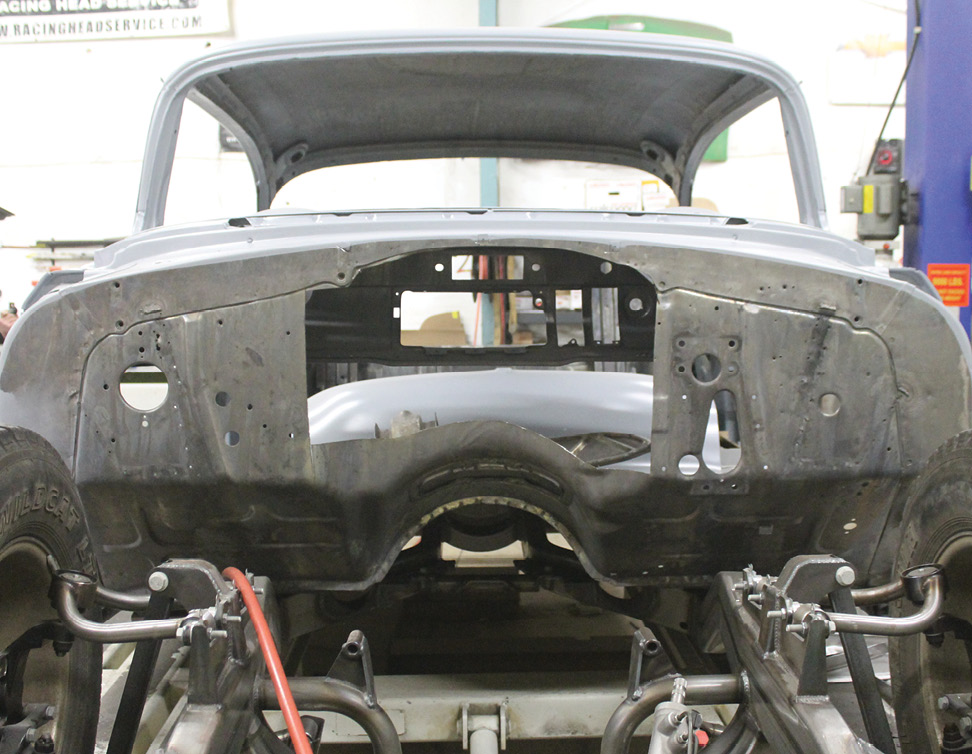
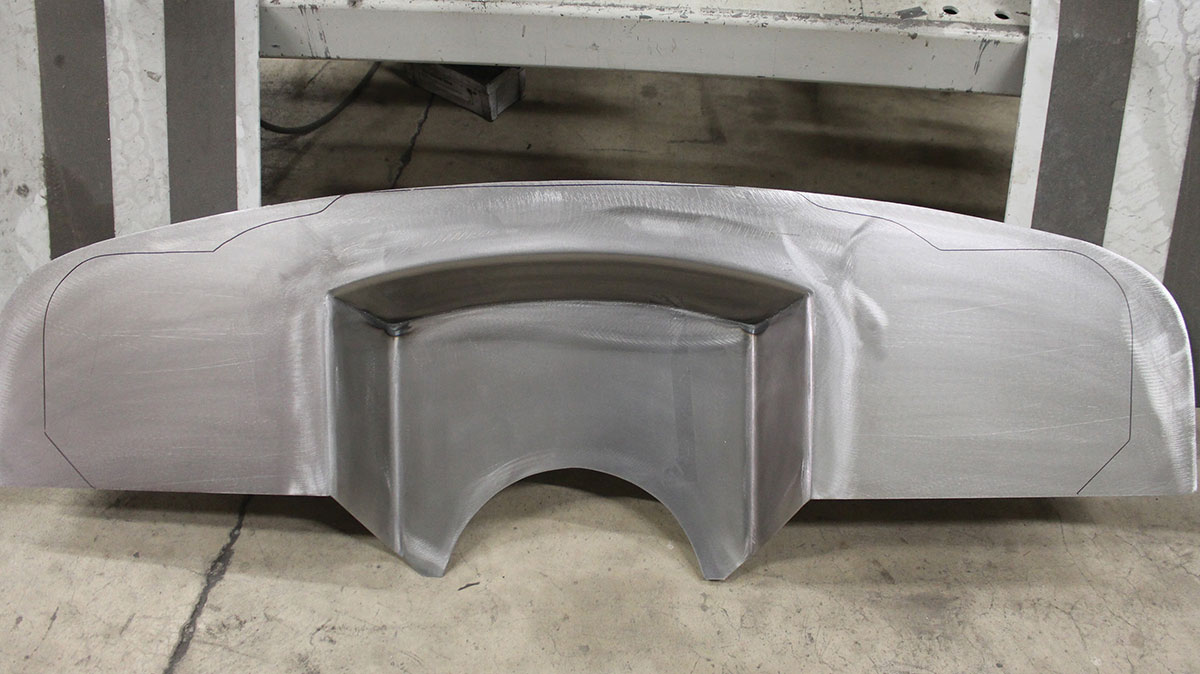
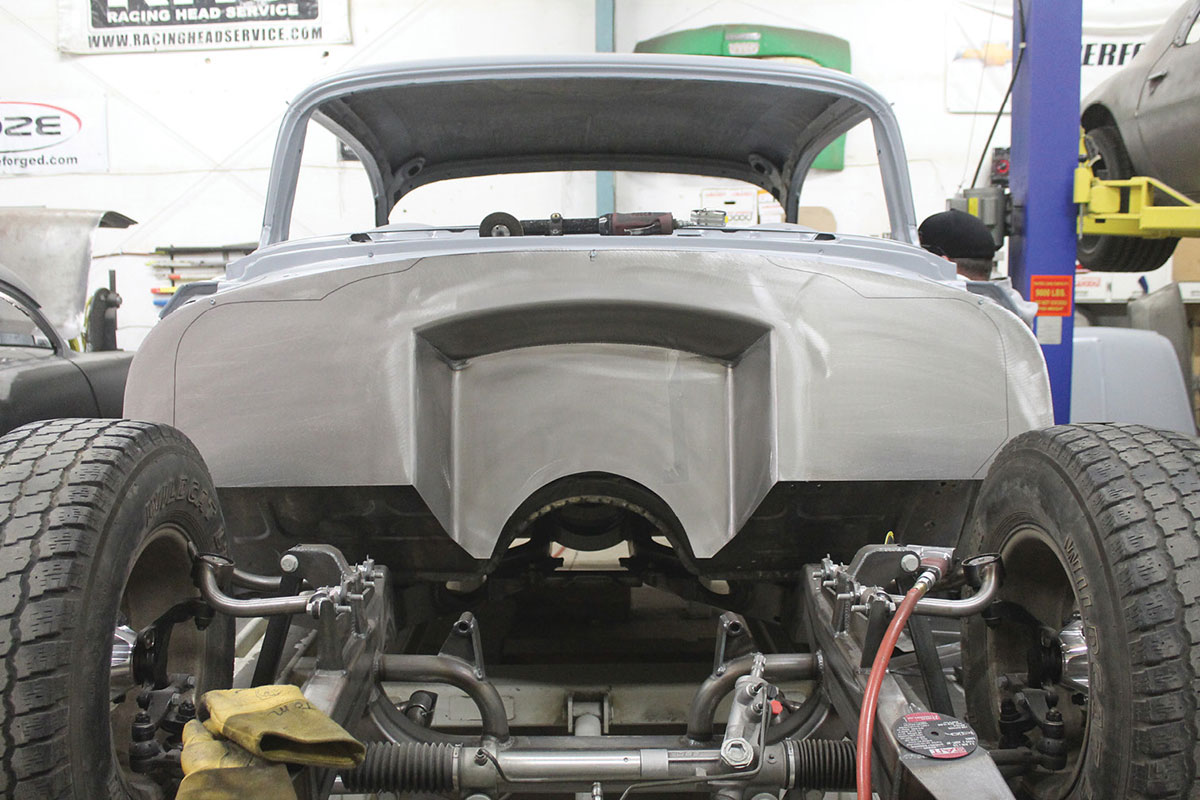
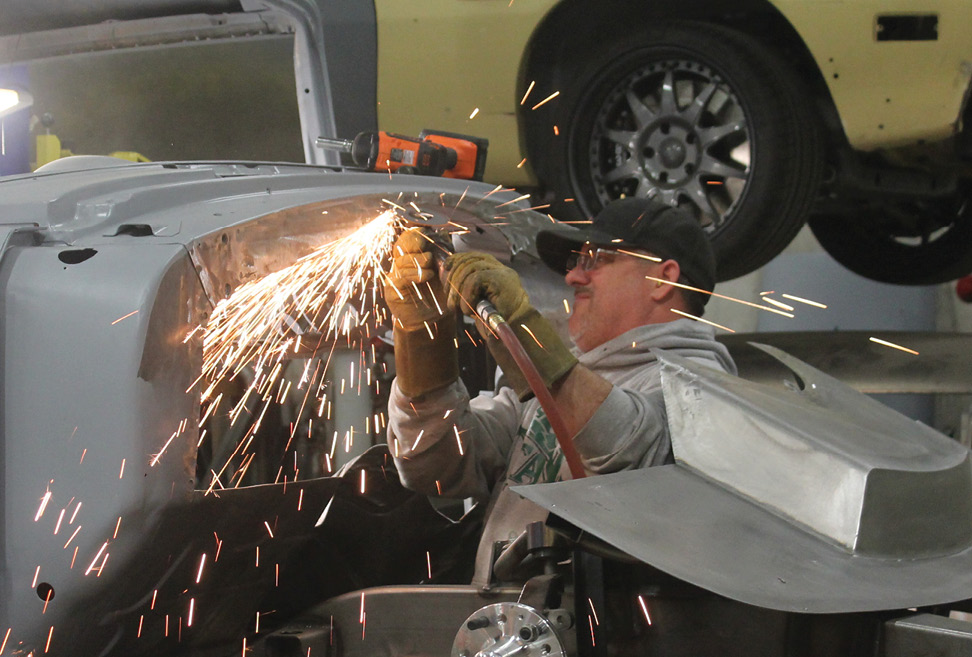
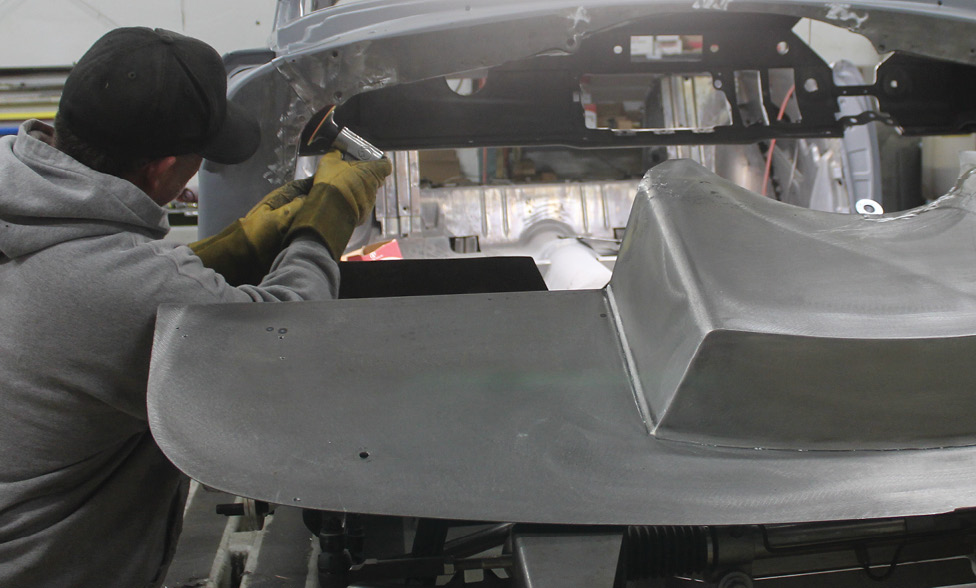
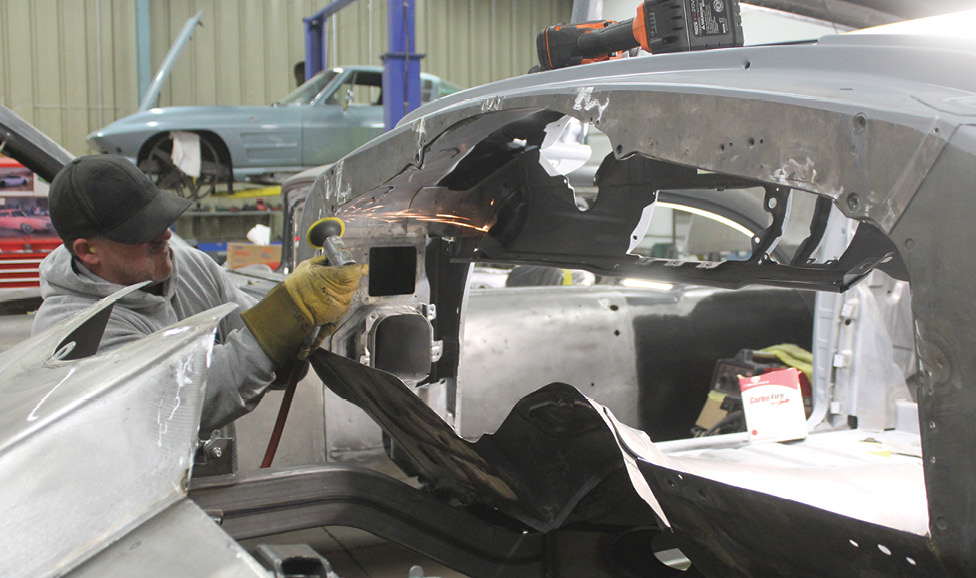
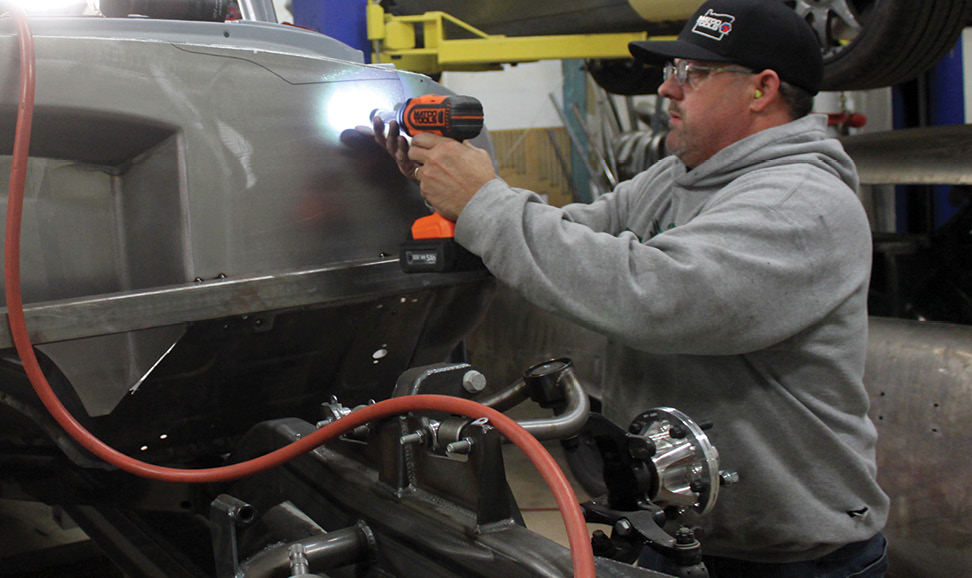
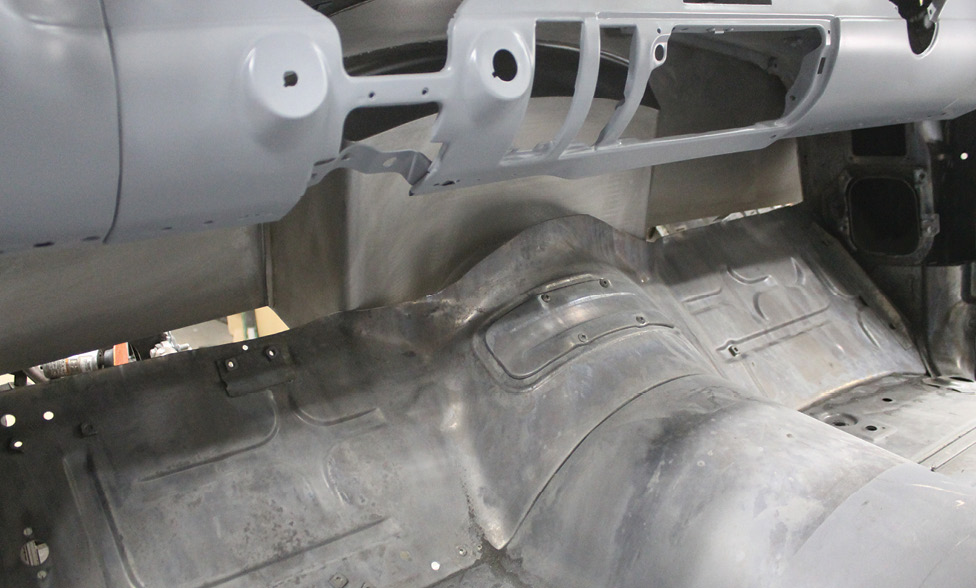
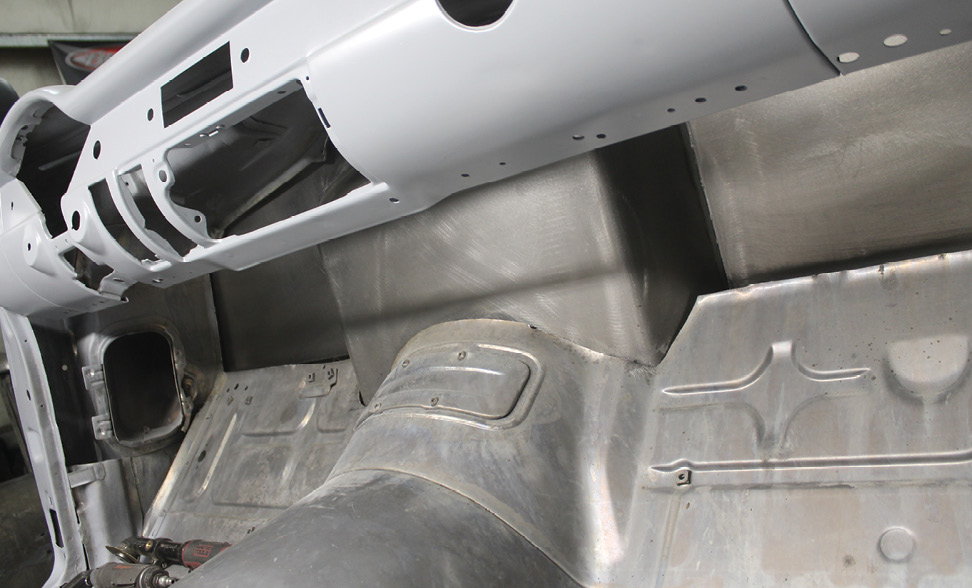
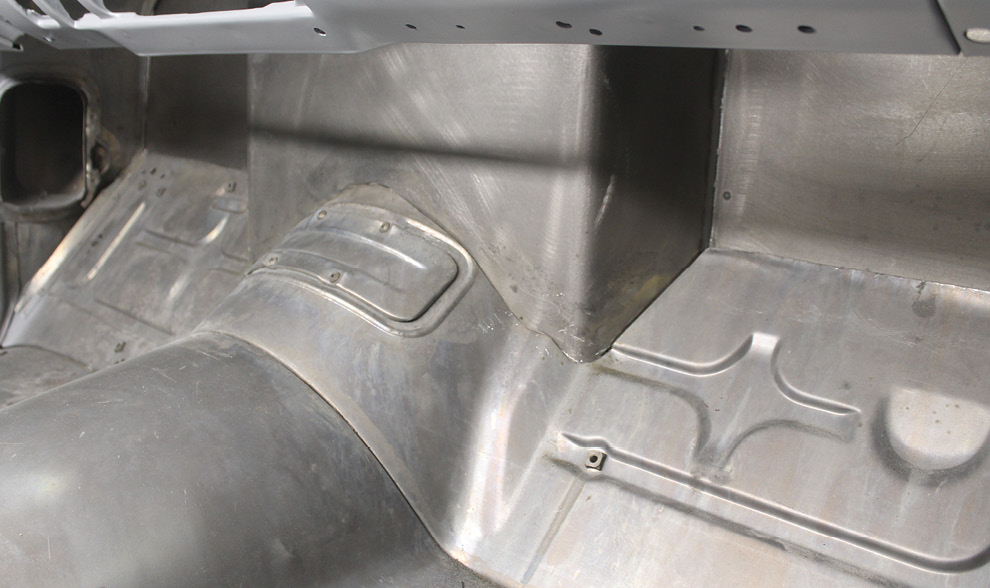
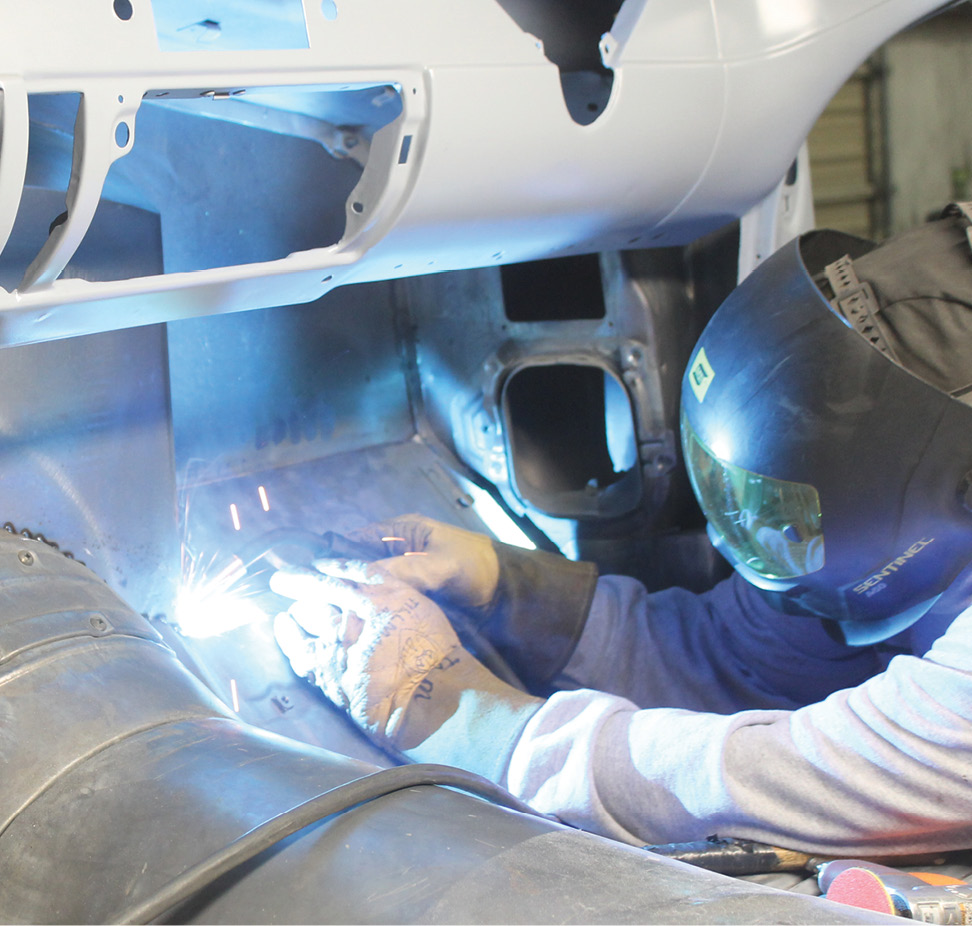
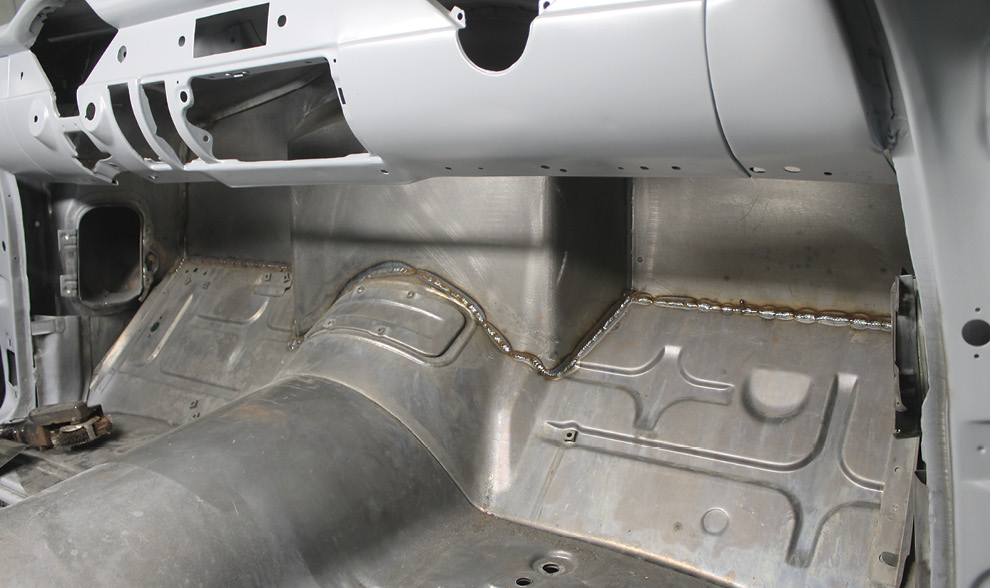
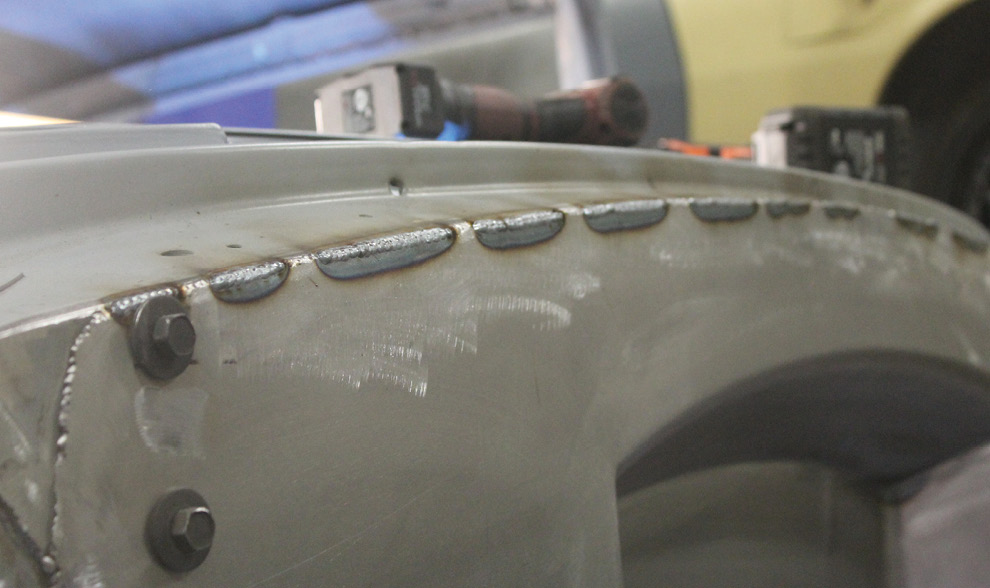
To facilitate the new engine the team at MetalWorks decided a new firewall was in order. The original firewall was in solid condition, but MetalWorks Speed Shop believes a slick motor, such as an LS3 built out to 427 ci, should be sitting in front of a slick firewall.

To that end, team MetalWorks set about fabricating and installing one very smooth, recessed firewall, that, when finally painted, will provide the perfect reflection of performance.

Of course the first order of business is removing the original firewall. For our snowbelt readers, this is what an original ’55 Chevrolet firewall looks like without rust.
2. Of course the first order of business is removing the original firewall. For our snowbelt readers, this is what an original ’55 Chevrolet firewall looks like without rust.
This is an interesting comparison of the new smooth firewall sitting in front of a stock ’55 Chevrolet. Now we must join them together.
3. This is an interesting comparison of the new smooth firewall sitting in front of a stock ’55 Chevrolet. Now we must join them together.
More sparks fly as the cut-off disc does its work. Cut carefully, as it is always easier to remove a bit more metal than it is to add a bit more metal.
4. More sparks fly as the cut-off disc does its work. Cut carefully, as it is always easier to remove a bit more metal than it is to add a bit more metal.
This initial opening is used to get a view from both inside and outside while cutting the original firewall out. Now is a good time to remember and mark the hood hinge mounting holes as they must not be disturbed.
5. This initial opening is used to get a view from both inside and outside while cutting the original firewall out. Now is a good time to remember and mark the hood hinge mounting holes as they must not be disturbed.
A close look at the new firewall reveals great metalwork from MetalWorks. The design and fabrication is clean and simple, but just like in the Karate Kid … “Ah yes, simple, but not easy.”
6. A close look at the new firewall reveals great metalwork from MetalWorks. The design and fabrication is clean and simple, but just like in the Karate Kid … “Ah yes, simple, but not easy.”
The new firewall was held in place with sheetmetal screws so the floor, transmission tunnel, and firewall could be accessed and marked for cutting. Once again, work slowly to locate any unwanted contact areas.
7. The new firewall was held in place with sheetmetal screws so the floor, transmission tunnel, and firewall could be accessed and marked for cutting. Once again, work slowly to locate any unwanted contact areas.
Trimming out the original firewall continues with special care not to cut into the structural cowl brace. This brace supports the entire front of the car, including the hood hinges, body mounts, and windshield posts.
8. Trimming out the original firewall continues with special care not to cut into the structural cowl brace. This brace supports the entire front of the car, including the hood hinges, body mounts, and windshield posts.
After trimming the firewall, spend a few minutes with a grinding disc dressing the burrs of the cut edges. Your fingers will thank you. Note the excellent metalwork inside the new firewall.
9. After trimming the firewall, spend a few minutes with a grinding disc dressing the burrs of the cut edges. Your fingers will thank you. Note the excellent metalwork inside the new firewall.
This is the initial cut of the floorboards and transmission tunnel; final trimming and bending will be completed when the new firewall is mounted in place.
10. This is the initial cut of the floorboards and transmission tunnel; final trimming and bending will be completed when the new firewall is mounted in place.
From this angle you can see the structural cowl brace running from the floorboard up and over the cowl. The grinder carefully trims the firewall to the bottom of the cowl brace.
11. From this angle you can see the structural cowl brace running from the floorboard up and over the cowl. The grinder carefully trims the firewall to the bottom of the cowl brace.
After the outside is trimmed to fit, attention is turned to fitting the floor and transmission tunnel to the new firewall. A piece of temporary box tubing is tack-welded in place to ensure the firewall remains flat and square.
12. After the outside is trimmed to fit, attention is turned to fitting the floor and transmission tunnel to the new firewall. A piece of temporary box tubing is tack-welded in place to ensure the firewall remains flat and square.
The original floor was cut and folded back to install the new firewall. Now the original floor and transmission tunnel must be folded back to meet the new firewall.
13. The original floor was cut and folded back to install the new firewall. Now the original floor and transmission tunnel must be folded back to meet the new firewall.
The floor metal is slowly folded back into shape to meet the new firewall.
14. The floor metal is slowly folded back into shape to meet the new firewall.
The floor and firewall meet after carefully forming both panels to perfectly mate with each other. Extra time spent here ensures perfect welding gaps.
15. The floor and firewall meet after carefully forming both panels to perfectly mate with each other. Extra time spent here ensures perfect welding gaps.
The original rust-free floor panels are now mated to the new firewall by carefully tack welding the panels together. Close tack welds ensure good alignment.
16. The original rust-free floor panels are now mated to the new firewall by carefully tack welding the panels together. Close tack welds ensure good alignment.
Beautiful welds join the original floors to the new firewall. Alternating the welding in short beads from side to side prevent warped panels.
17. Beautiful welds join the original floors to the new firewall. Alternating the welding in short beads from side to side prevent warped panels.
Joining the new firewall to the engine bay cowl involves a series of short welds varied from side to side until the bead is complete.
18. Joining the new firewall to the engine bay cowl involves a series of short welds varied from side to side until the bead is complete.
As you can see, alternating short welds from side to side prevents unwanted warpage. Those two bolts will mount the hood hinges through the inner cowl brace.
19. As you can see, alternating short welds from side to side prevents unwanted warpage. Those two bolts will mount the hood hinges through the inner cowl brace.
Here is the finished job, a nice, smooth firewall providing ample engine room while eliminating the factory holes in the original firewall. It’s just a great recess.
20. Here is the finished job, a nice, smooth firewall providing ample engine room while eliminating the factory holes in the original firewall. It’s just a great recess.
SOURCES
Art Morrison Enterprises
(866) 808-4759
artmorrison.com
Metalworks Speed Shop
(541) 341-3372
metalworksclassics.com
Modern Rodding

VOLUME 4 • ISSUE 36 • 2023