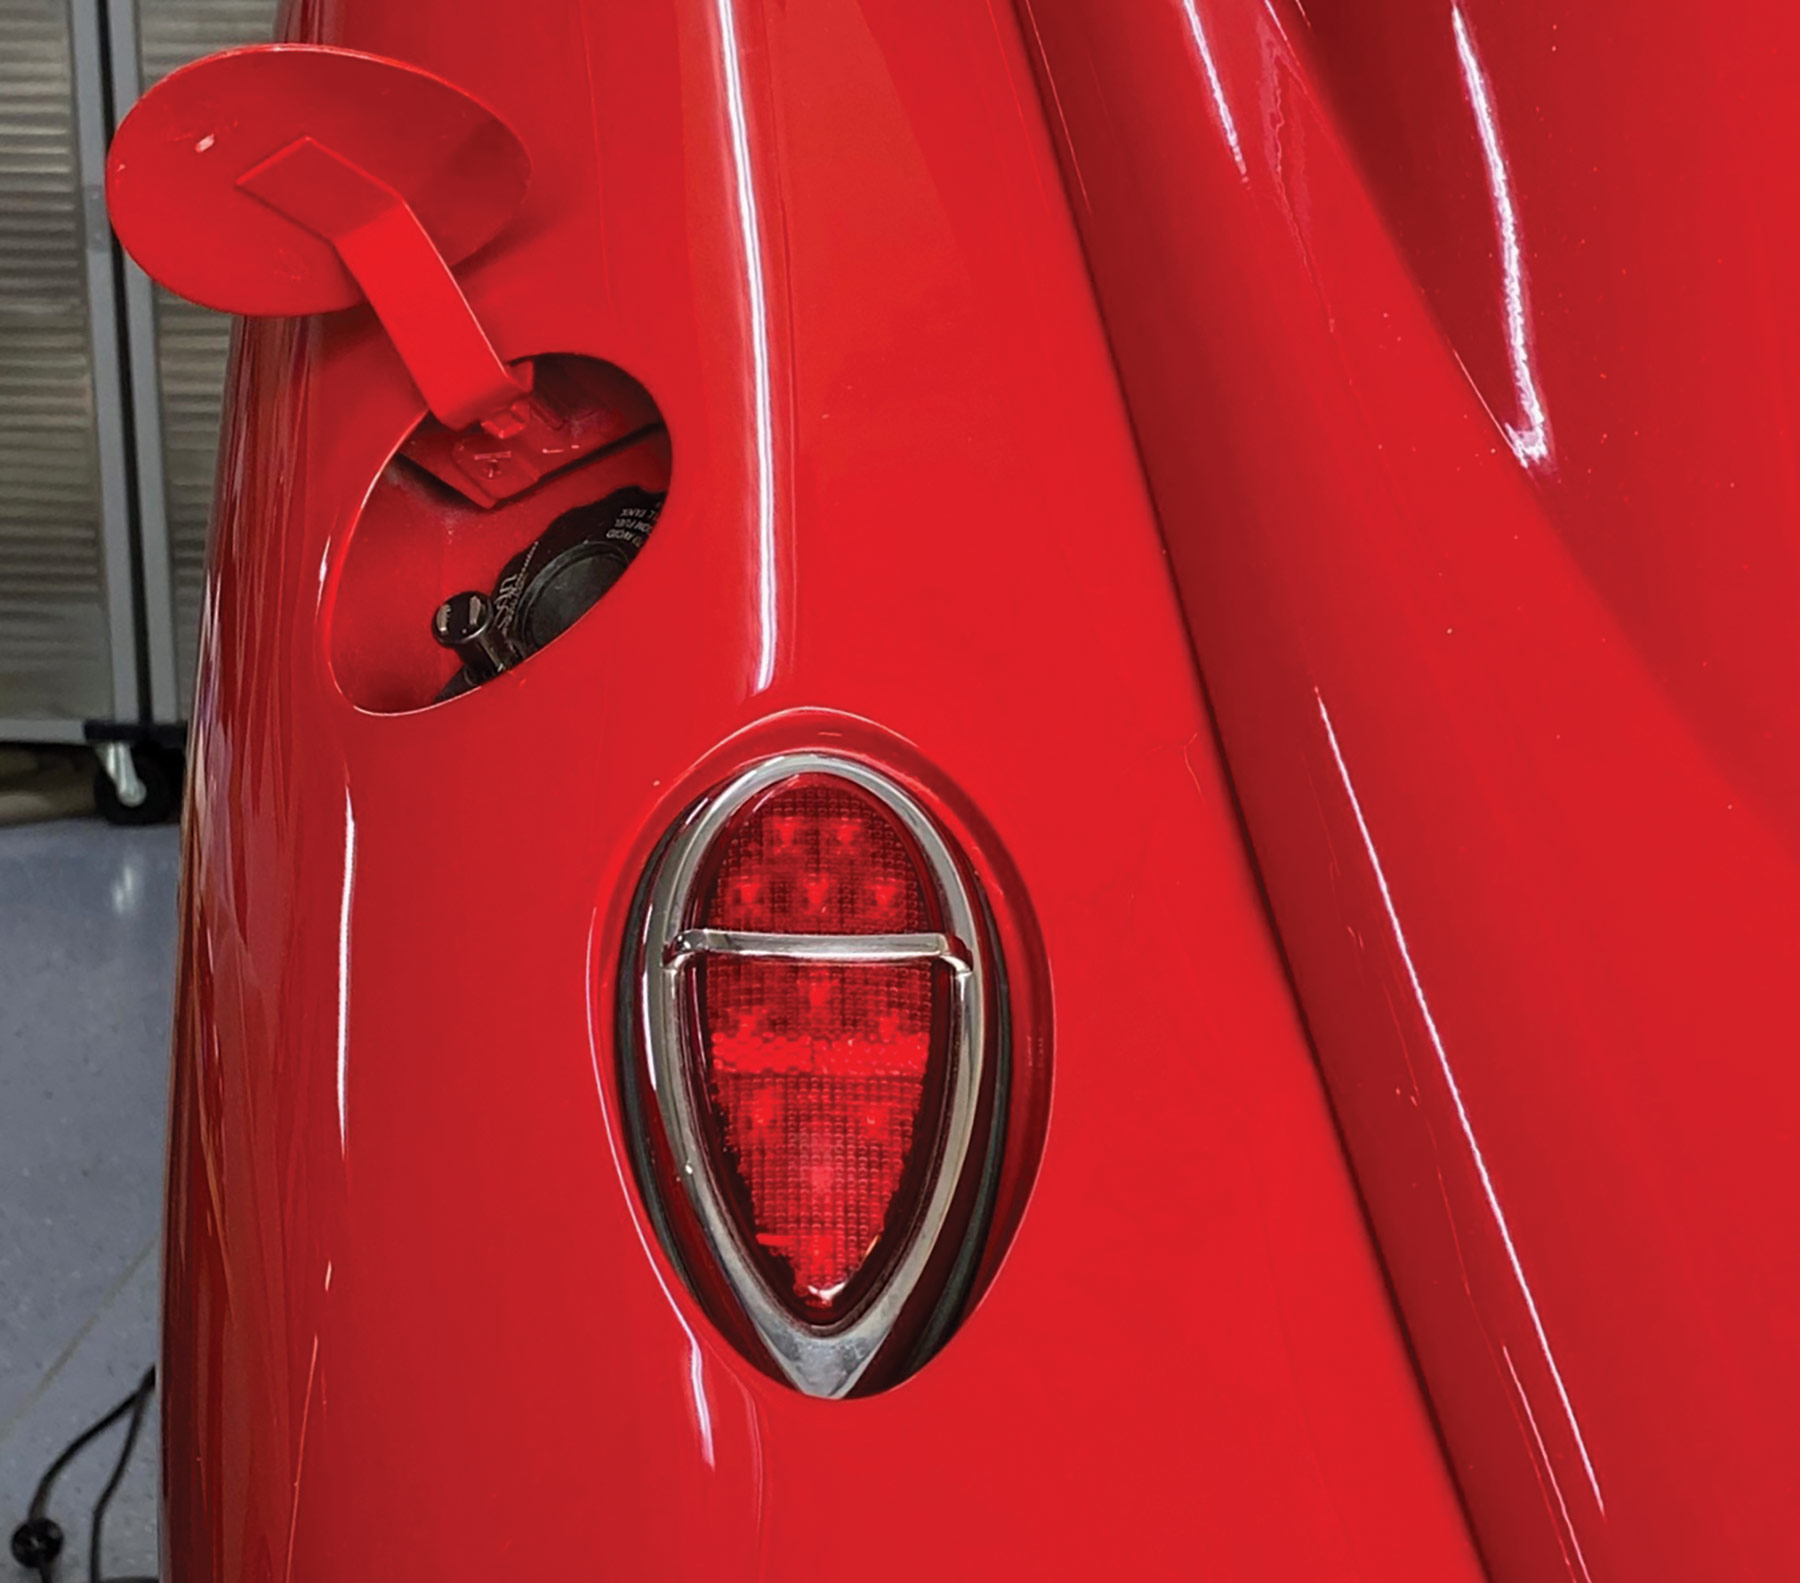
1. A nicely frenched light that is vertical enough to be seen flows with the fender and is straight as an hour.
 Photography by Glenn Sinon
Now none of this was lost on longtime hot rodder Dwight Winter. There is simply no denying the good looks of the ’39 Ford, or even better ’39 Lincoln taillights. Their classic style comes from utter simplicity wrapped in the perfect shape. With that thought in mind, Dwight opted for a set of ’39 Lincoln taillights from Speedway Motors, and much like Ford did in 1939 he mounted them to the rear fenders of his fine ’35 Ford Tudor. All that sounds simple enough but finding the perfect mounting surface on a ’35 Ford rear fender is no small chore. The new lights were mounted, wired, and the new LEDs illuminated the lenses far better than anything available in 1939.
But there was a problem. It seems viewing the taillights was a bit tricky. From straight behind they appeared straight but take a step to the side and suddenly they appear a bit cross-eyed; move another direction and they look pigeon-toed. All part of the curse of a curvaceous fender. Now Dwight had recently brought a damaged grille to his longtime pal Glenn Sinon over at Copper Hill Rod & Custom for some R&R (repair and repaint). Seeing how perfectly the paint matched inspired him to finally do something about those pesky taillights.
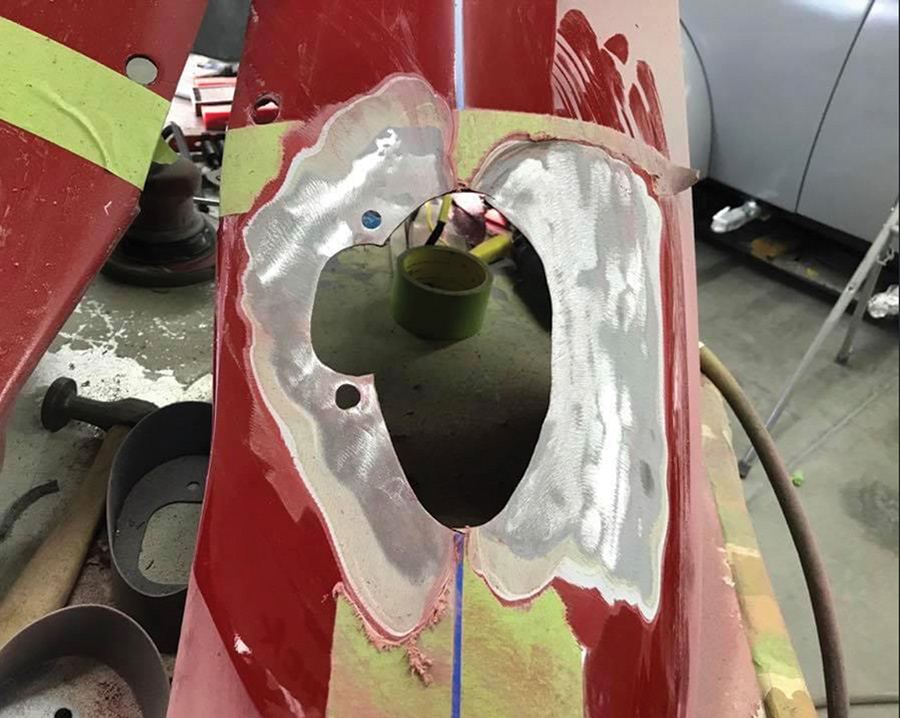
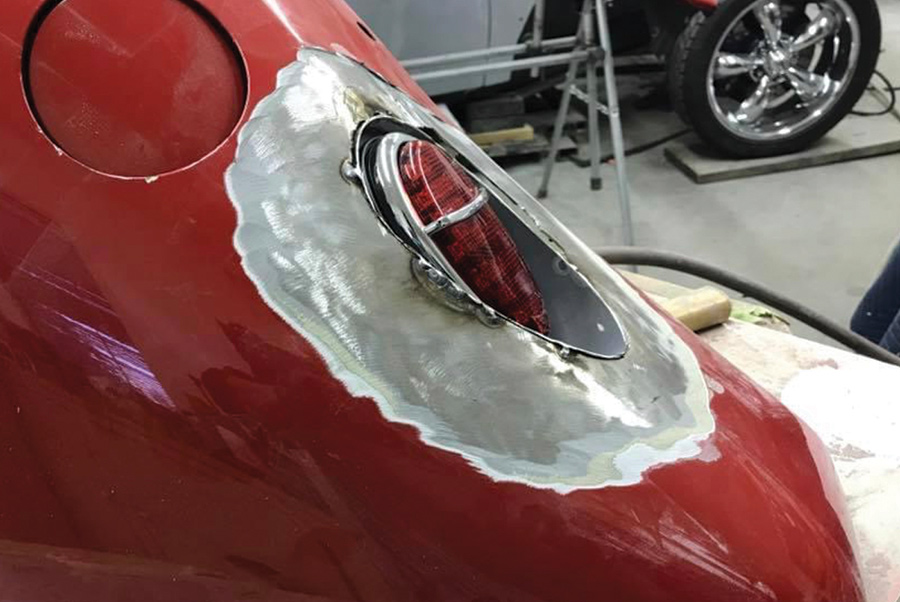
After a brief discussion it was decided the best solution would be to french those very same taillights into the ’35 fenders. This would do several things. First it would stand the taillight up more toward vertical, which makes them much more visible from behind. Write one off for safety. Next it would make it easier to center the lights in the fender. Finally, what could be more traditional than a pair of frenched taillights? With all the go boxes checked, Sinon made a quick call to Speedway Motors for one of their frenching kits for the ’39 Lincoln lights (also available for the ’39 Ford and ’50 Pontiac lights, among others).
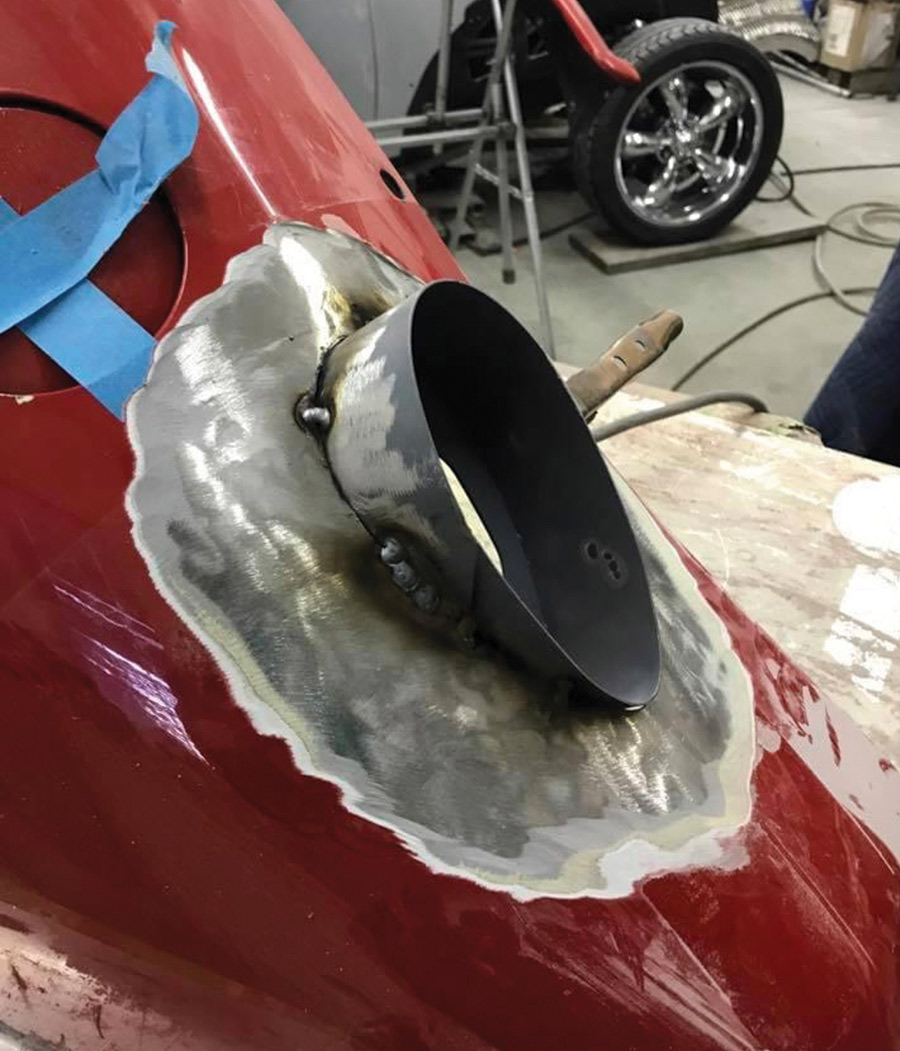
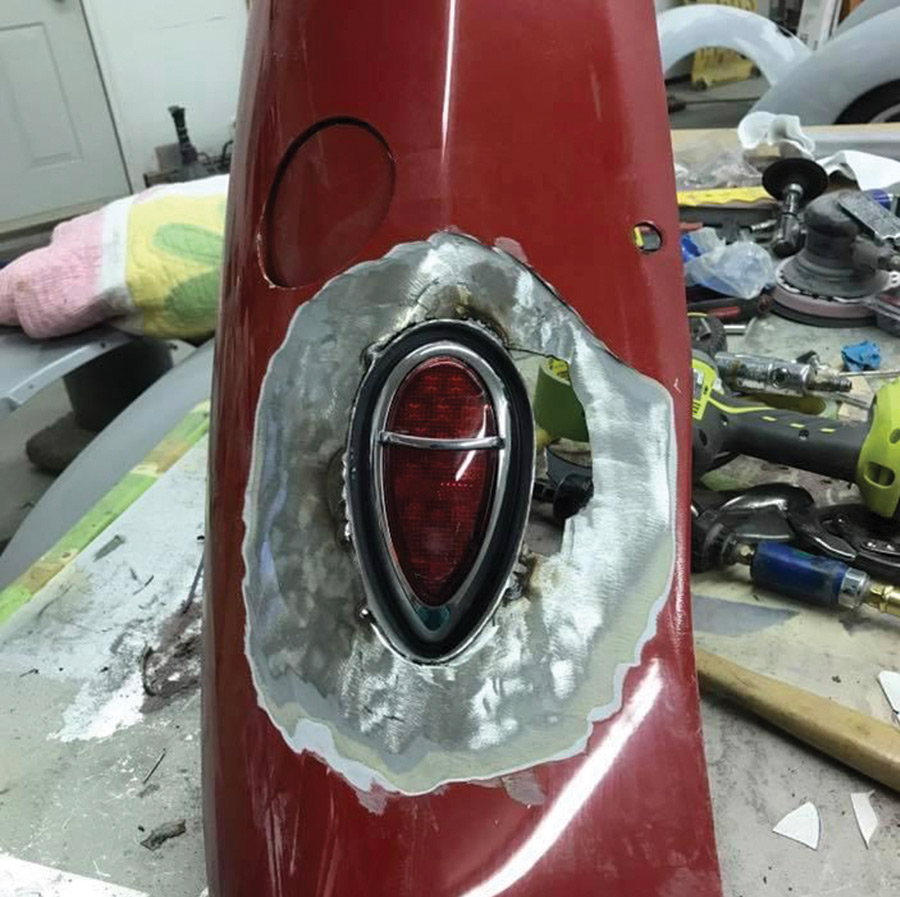
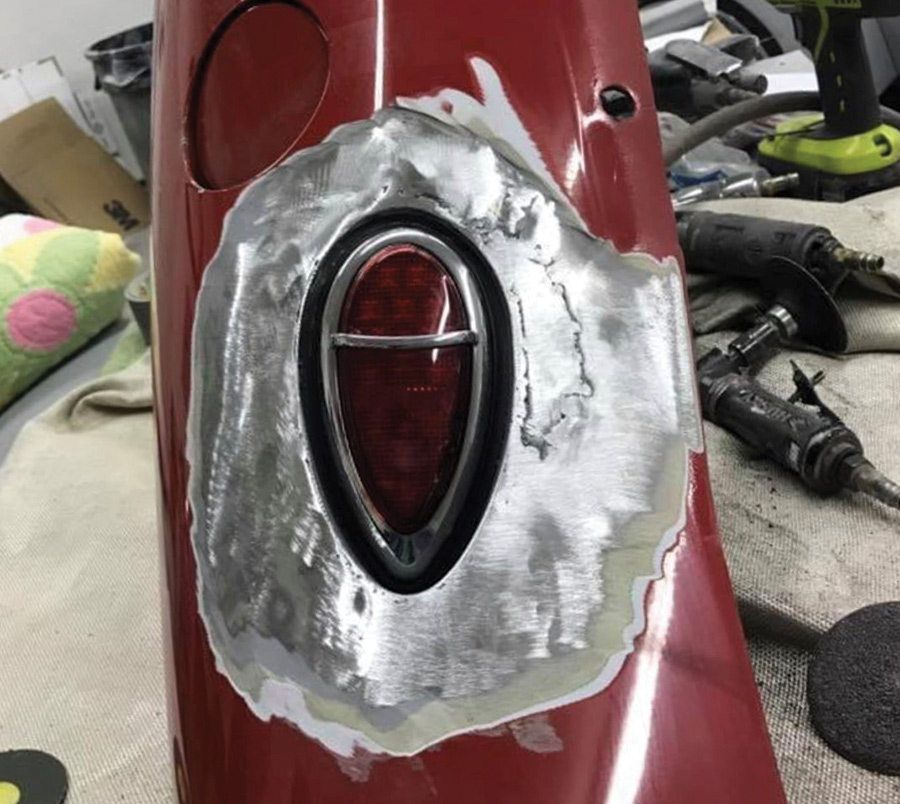
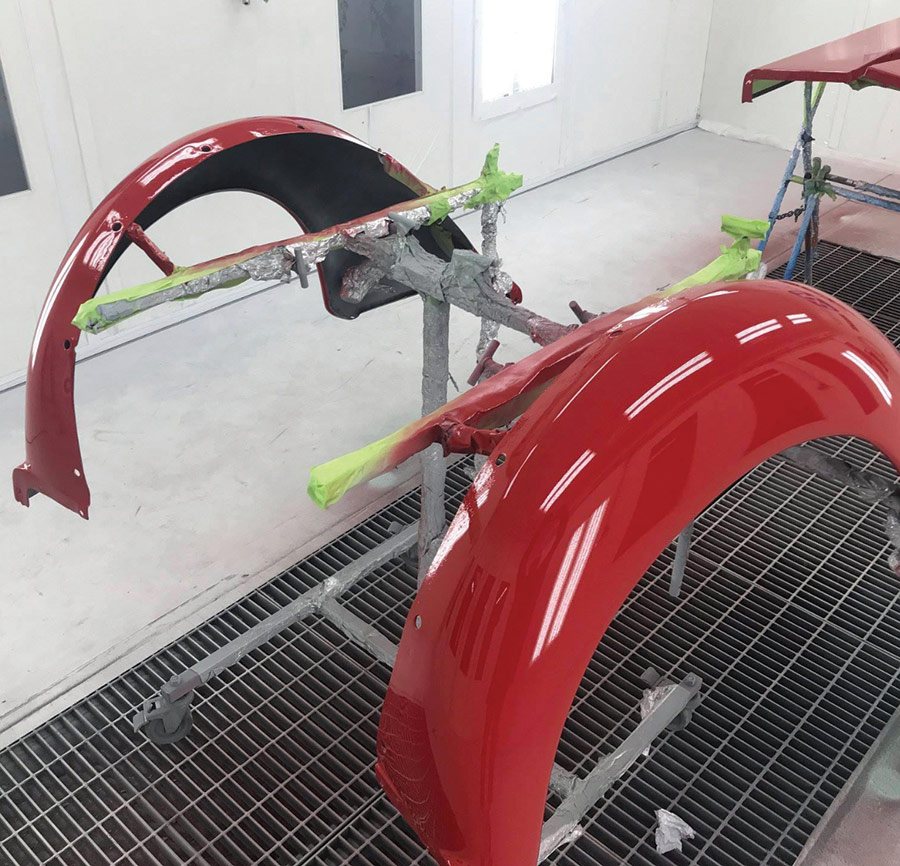
In short order the frenching kit arrived and from there it was basic body modifications with a healthy dose of experienced “eyeball.” The stock Ford taillights on ’35 and ’36 Ford taillights are tricky. Once the original taillight is removed you will notice the center ridge of the fender is not in perfect alignment where it once passed through the stock taillight. This is hidden with the stock taillight, but when trying to align any type of hot rod light on the fender it takes a careful eye to make that center ridge appear centered on the light. After arriving at the perfect location, the frenching “bucket” was used to trace the out light and the opening was carefully cut. Then the light bucket was slipped into the fender to adjust the angle toward vertical. Because the bucket is plenty deep you can push the bottom in while leaving the top nearly flush with the fender and sink it as deep as you’d like. This will get you a pleasing angle that is not true vertical but upright enough to look good and cast the proper light. From there it was welding, grinding, standard bodywork, and paint.
Mounting the fenders back on the Tudor can be summed up in just two words: Mission accomplished.


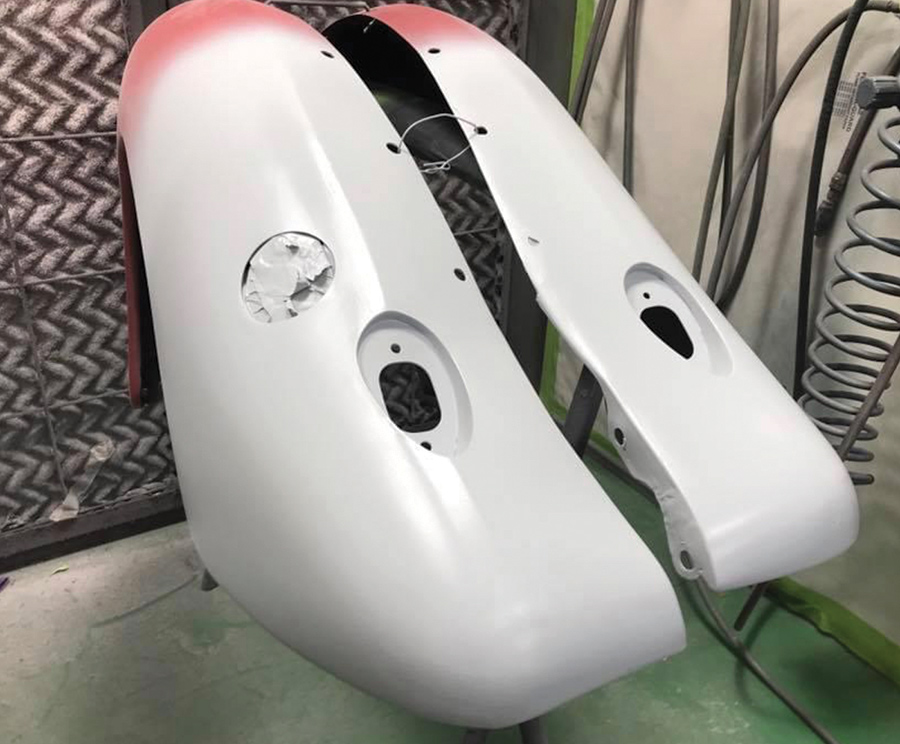
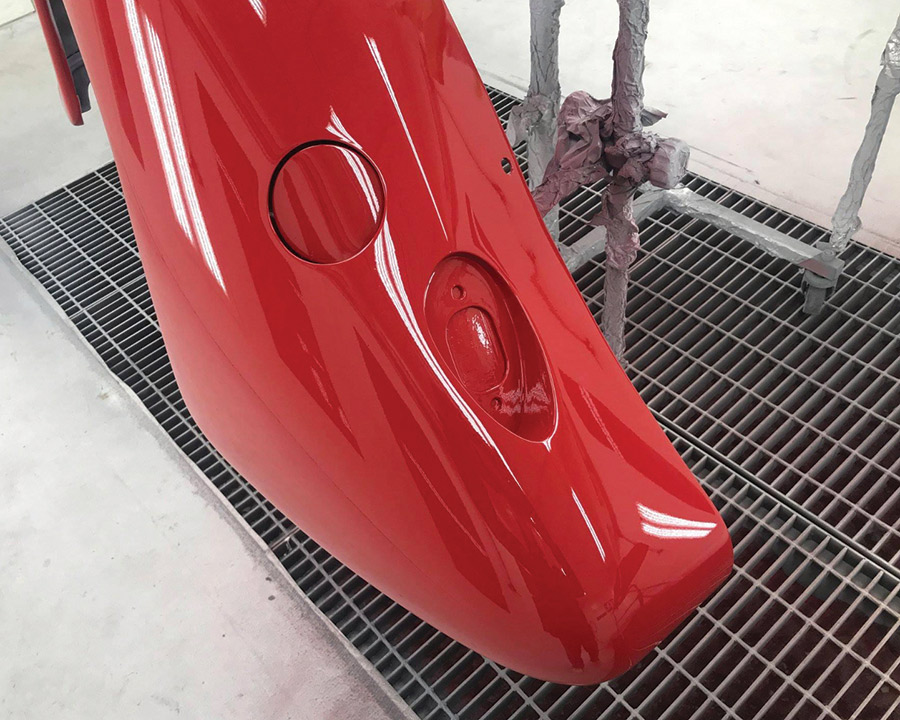
12. The final finish looks great even prior to color-sanding and buffing. While this work was done in a professional spray booth, with some care you can get great results in your home shop.
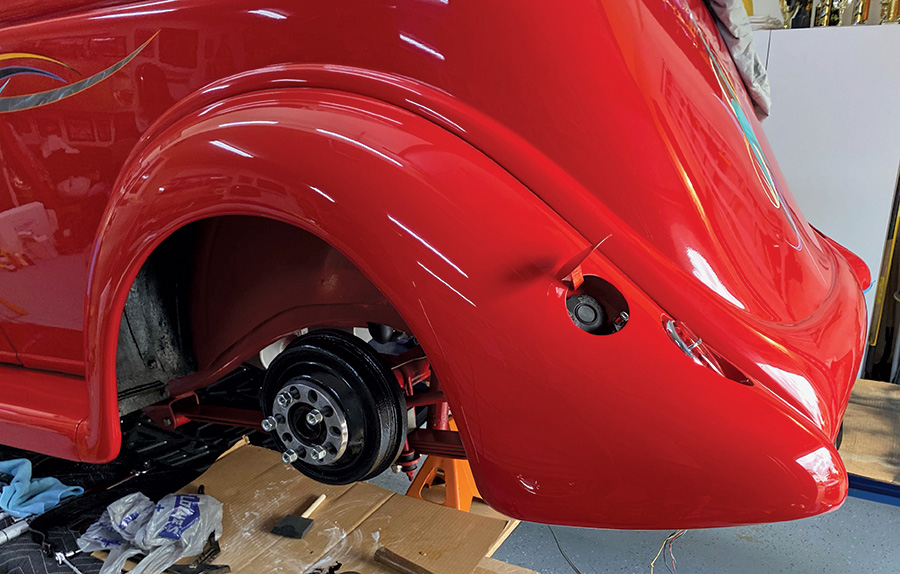
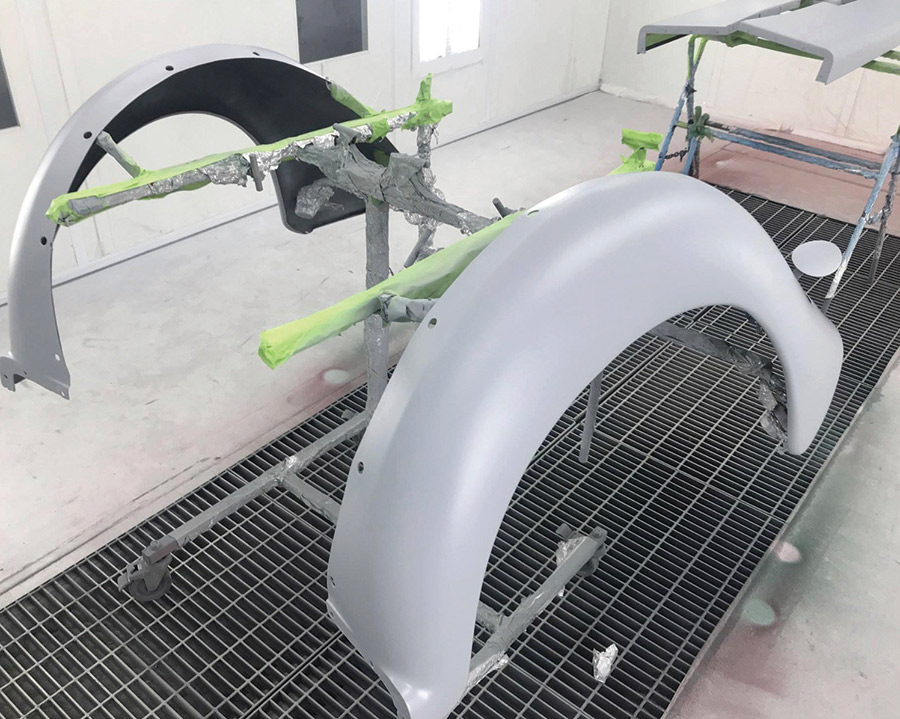
13. After painting and finishing, the owner, Dwight Winter, bolted the fenders back in place and connected the fuel fill hose and the wiring to each taillight to complete the project. The color match is spot-on.
VOLUME 3 • ISSUE 24 • 2022