Modern Rodding Tech
InTheGarageMedia.com
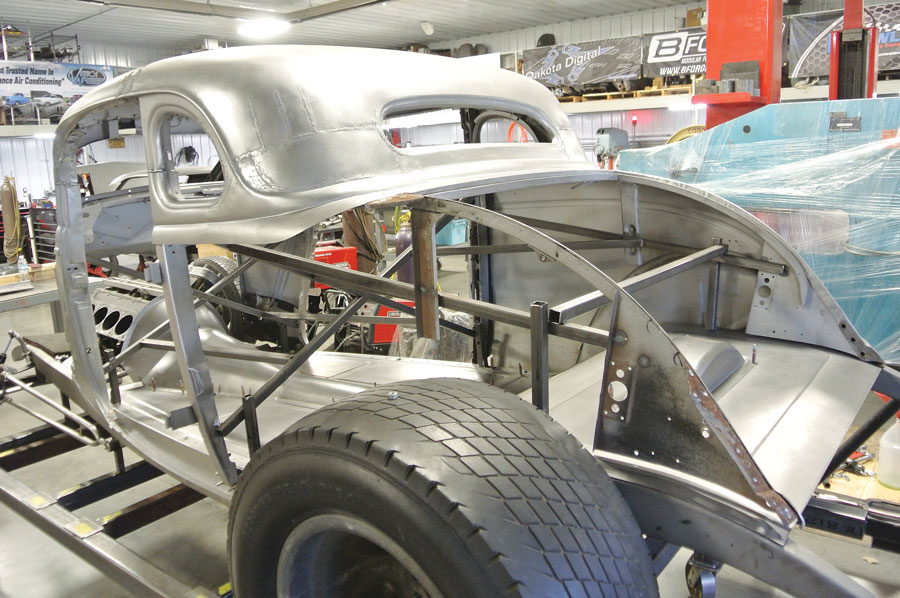
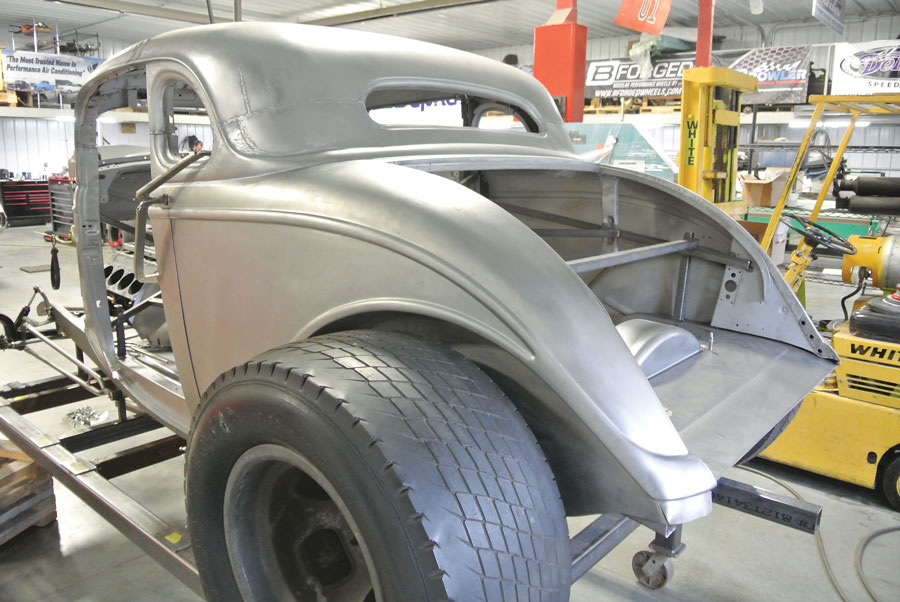
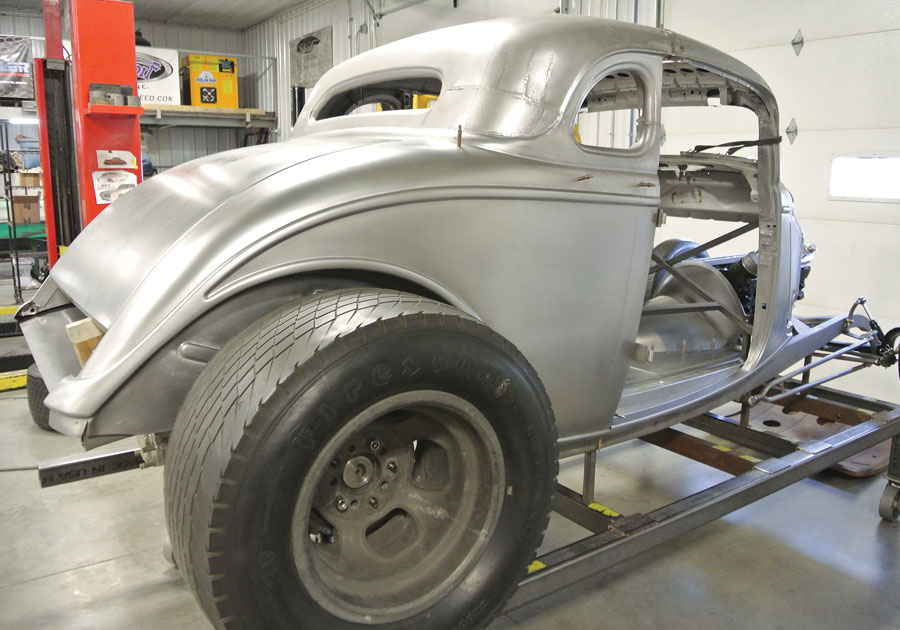
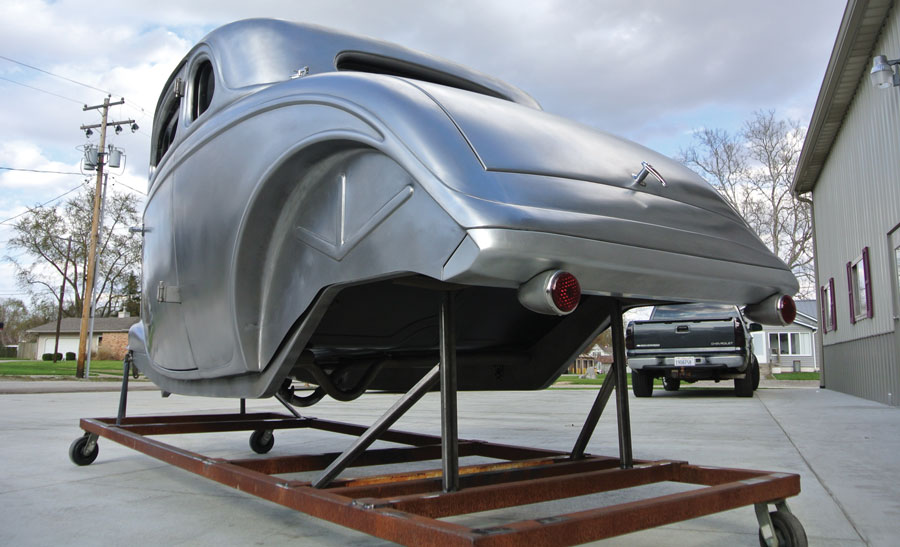
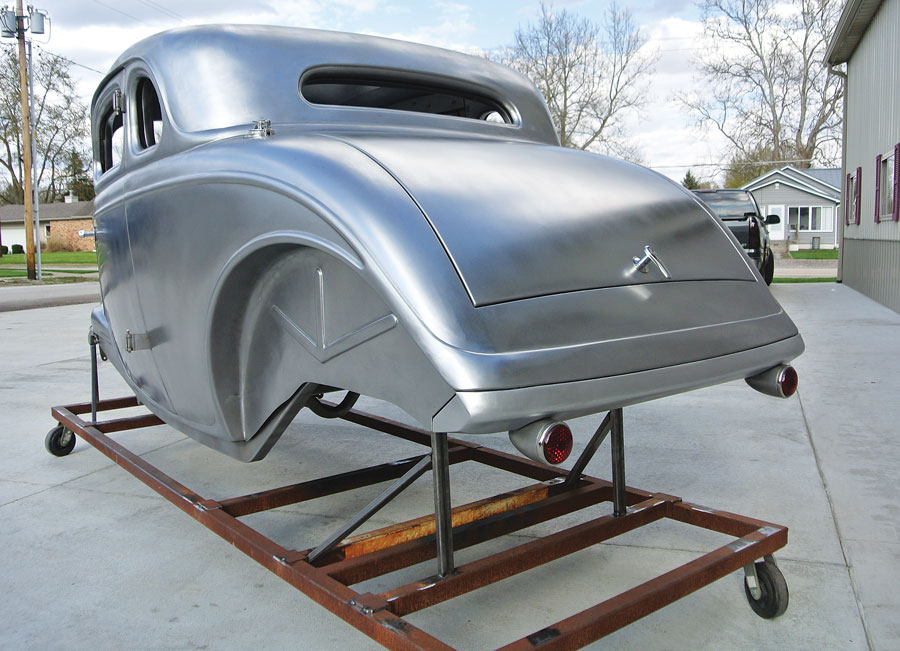
1. The rear profile of the Bill Sather coupe is a study in fine metalwork and timeless hot rod modifications, from the chopped top to the rolled rear pan this coupe body is spot-on.
Adapting Repro-Roadster Quarters to a 1934 Ford Coupe
1. The rear profile of the Bill Sather coupe is a study in fine metalwork and timeless hot rod modifications, from the chopped top to the rolled rear pan this coupe body is spot-on.
COUPE QUARTERS
Adapting Repro-Roadster Quarters to a 1934 Ford Coupe
By Gerry Burger Photography by THE AUTHOR
N

ow, we all know Texas is horse country. Yessiree Bob, Texans love their horses almost as much as they love horsepower. Bill Sather is a horsepower-lovin’ Texan through and through, and while Texas is known for quarter horses, Sather was having his latest steed quartered—as in adding a pair of new quarter-panels. Yes, his 1934 Ford coupe was in need of some rust and wreck repair in the quarter-panel region so he left it to the team at BBT Fabrications to fit his coupe with a pair of reproduction quarter-panels from Steve’s Auto Restorations (SAR). BBT’s Troy Gudgel would also be fitting the new SAR rear panel between the quarters and below the decklid. Finally, they would be building a very cool rolled pan.

So far this sounds like pretty standard fare, but of course there is always a hitch … and we’re not talking about a place to park your horse (Burger, I’m not sure Texans “park” their horses. —B.B.). The hitch is this, SAR doesn’t make reproduction steel quarter-panels for the three- or five-window coupe. They do make a very nice reproduction of the 1934 Ford roadster quarter-panel and as it says on their website, these quarter-panels can be trimmed to fit to coupe bodies. Actually, adapting the roadster quarters to the coupe body involves trimming and some forming in areas for a perfect fit, but it’s a high-quality part and a great start. At this point we also need to confess this tech piece is slightly out of sequence of the actual build. We have already shown how BBT “repaired and re-chopped the top” on this coupe (Modern Rodding Mar. ’21 issue, inthegaragemedia.com/chop-chop/). These quarter-panels were installed prior to the top repair.

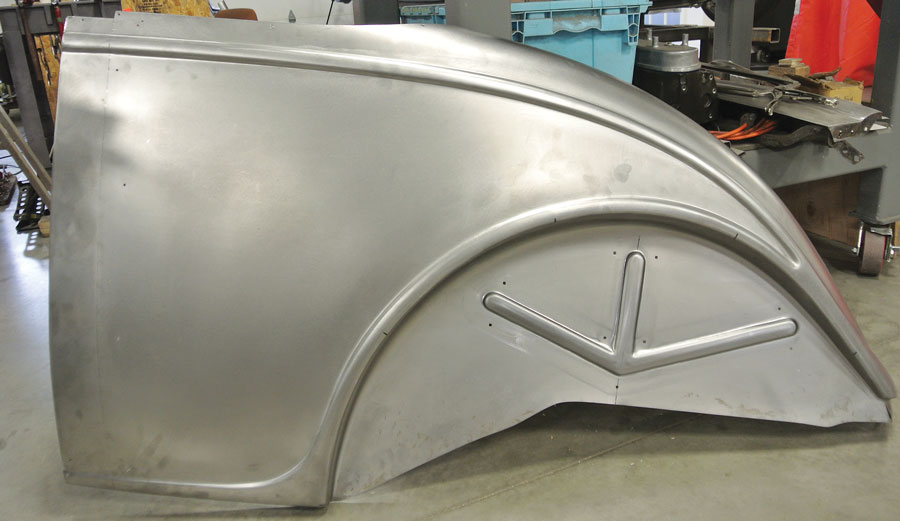
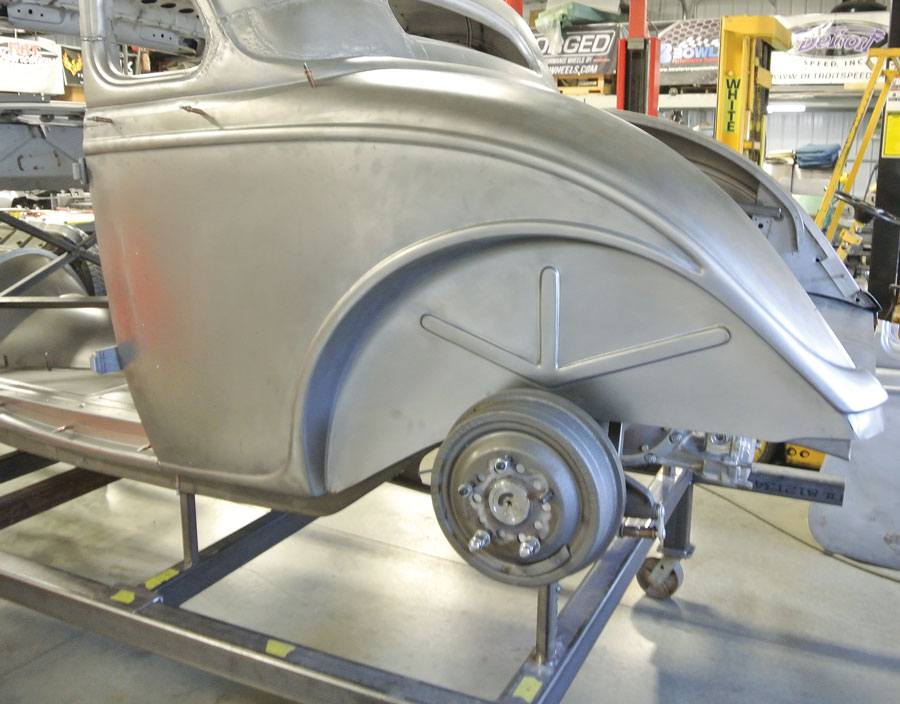
Now for a little Ford fun fact, it seems ol’ Henry didn’t bother stamping the “crow’s foot” in the roadster quarter-panel. The closed cars had these stiffening beads stamped into the inner fenderwell, but the roadster left the factory with smooth inner fenderwells. We like to think Henry left them that way for a smooth look on future highboy roadsters, but regardless of the reasoning (no doubt cost was a consideration), to make a roadster quarter-panel believable on a five-window coupe it needs the crow’s feet rolled or stamped into the inner fenderwell. BBT managed that by making a die set from plywood and using their Pullmax to form the beads within the dies.

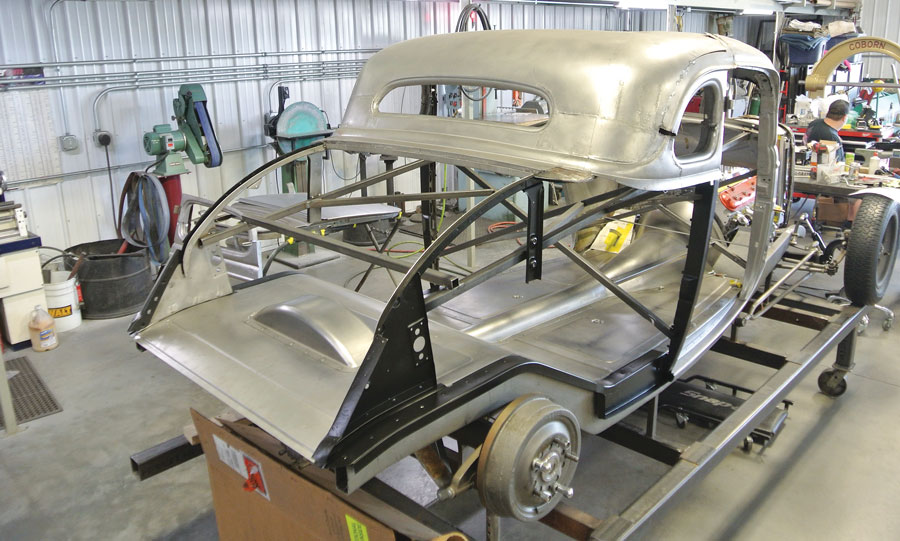
After extensively crossbracing the body with 1-inch box tubing, the actual fitting of the new SAR quarters to the coupe body began. The first step is removing most of the original quarter-panels but leaving several inches of sheetmetal behind the B-pillar and also several inches of original tin below the window body bead. The SAR repro-roadster quarter-panels would initially be fitted over this original sheetmetal and the two pieces are then each carefully trimmed for a perfect fit.

The quarter-panels were fit to a reproduction panel below the decklid, also from SAR. This area would take a bit of slicing and dicing to get a perfect blend as the adapted quarters round the corner and mate with the center panel. Obviously, it was all well within the abilities of team BBT and in the end the coupe was well quartered. But wait there’s more …

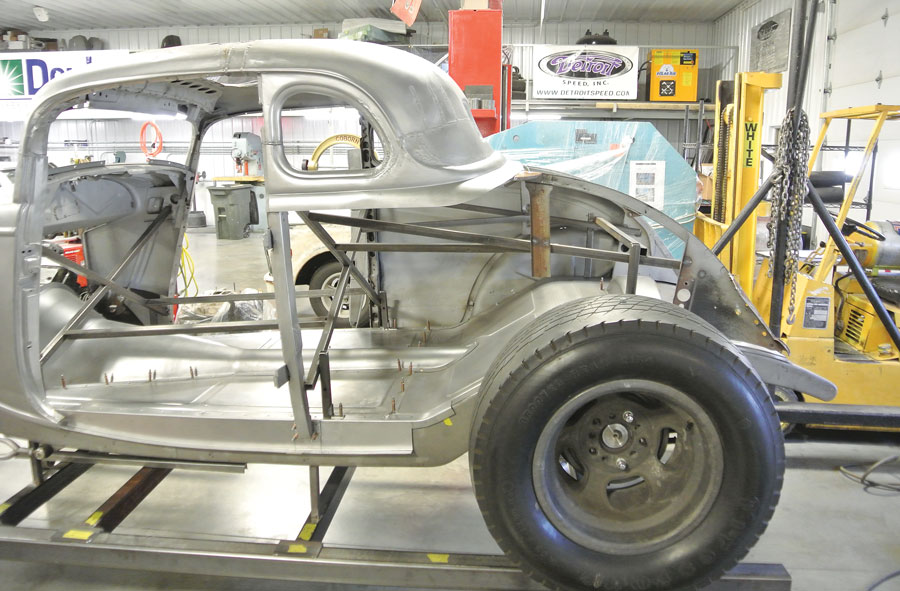
No real hot rodder would just bring a chopped highboy coupe back to stock configuration. With that thought in mind, team BBT grabbed the nearest sheet of 18-gauge steel and proceeded to form a very cool rear rolled pan. We like the fact that it is a bolt-on rear panel, as adding a seamless rolled pan can sometimes make the lower body look a bit long. The body seam breaks up what would otherwise be an expanse of sheetmetal. The rear pan is actually more angular than rolled, another nice detail. The final touch is mounting a set of 1937 Ford taillights to the bottom of the pan. With the decklid latched, gapped, and fitted, the entire car is now beautifully metal finished. The final step will be finished bodywork and mile-deep black paint.
The Sather coupe had some lower quarter-panel rust that had been improperly repaired in years past
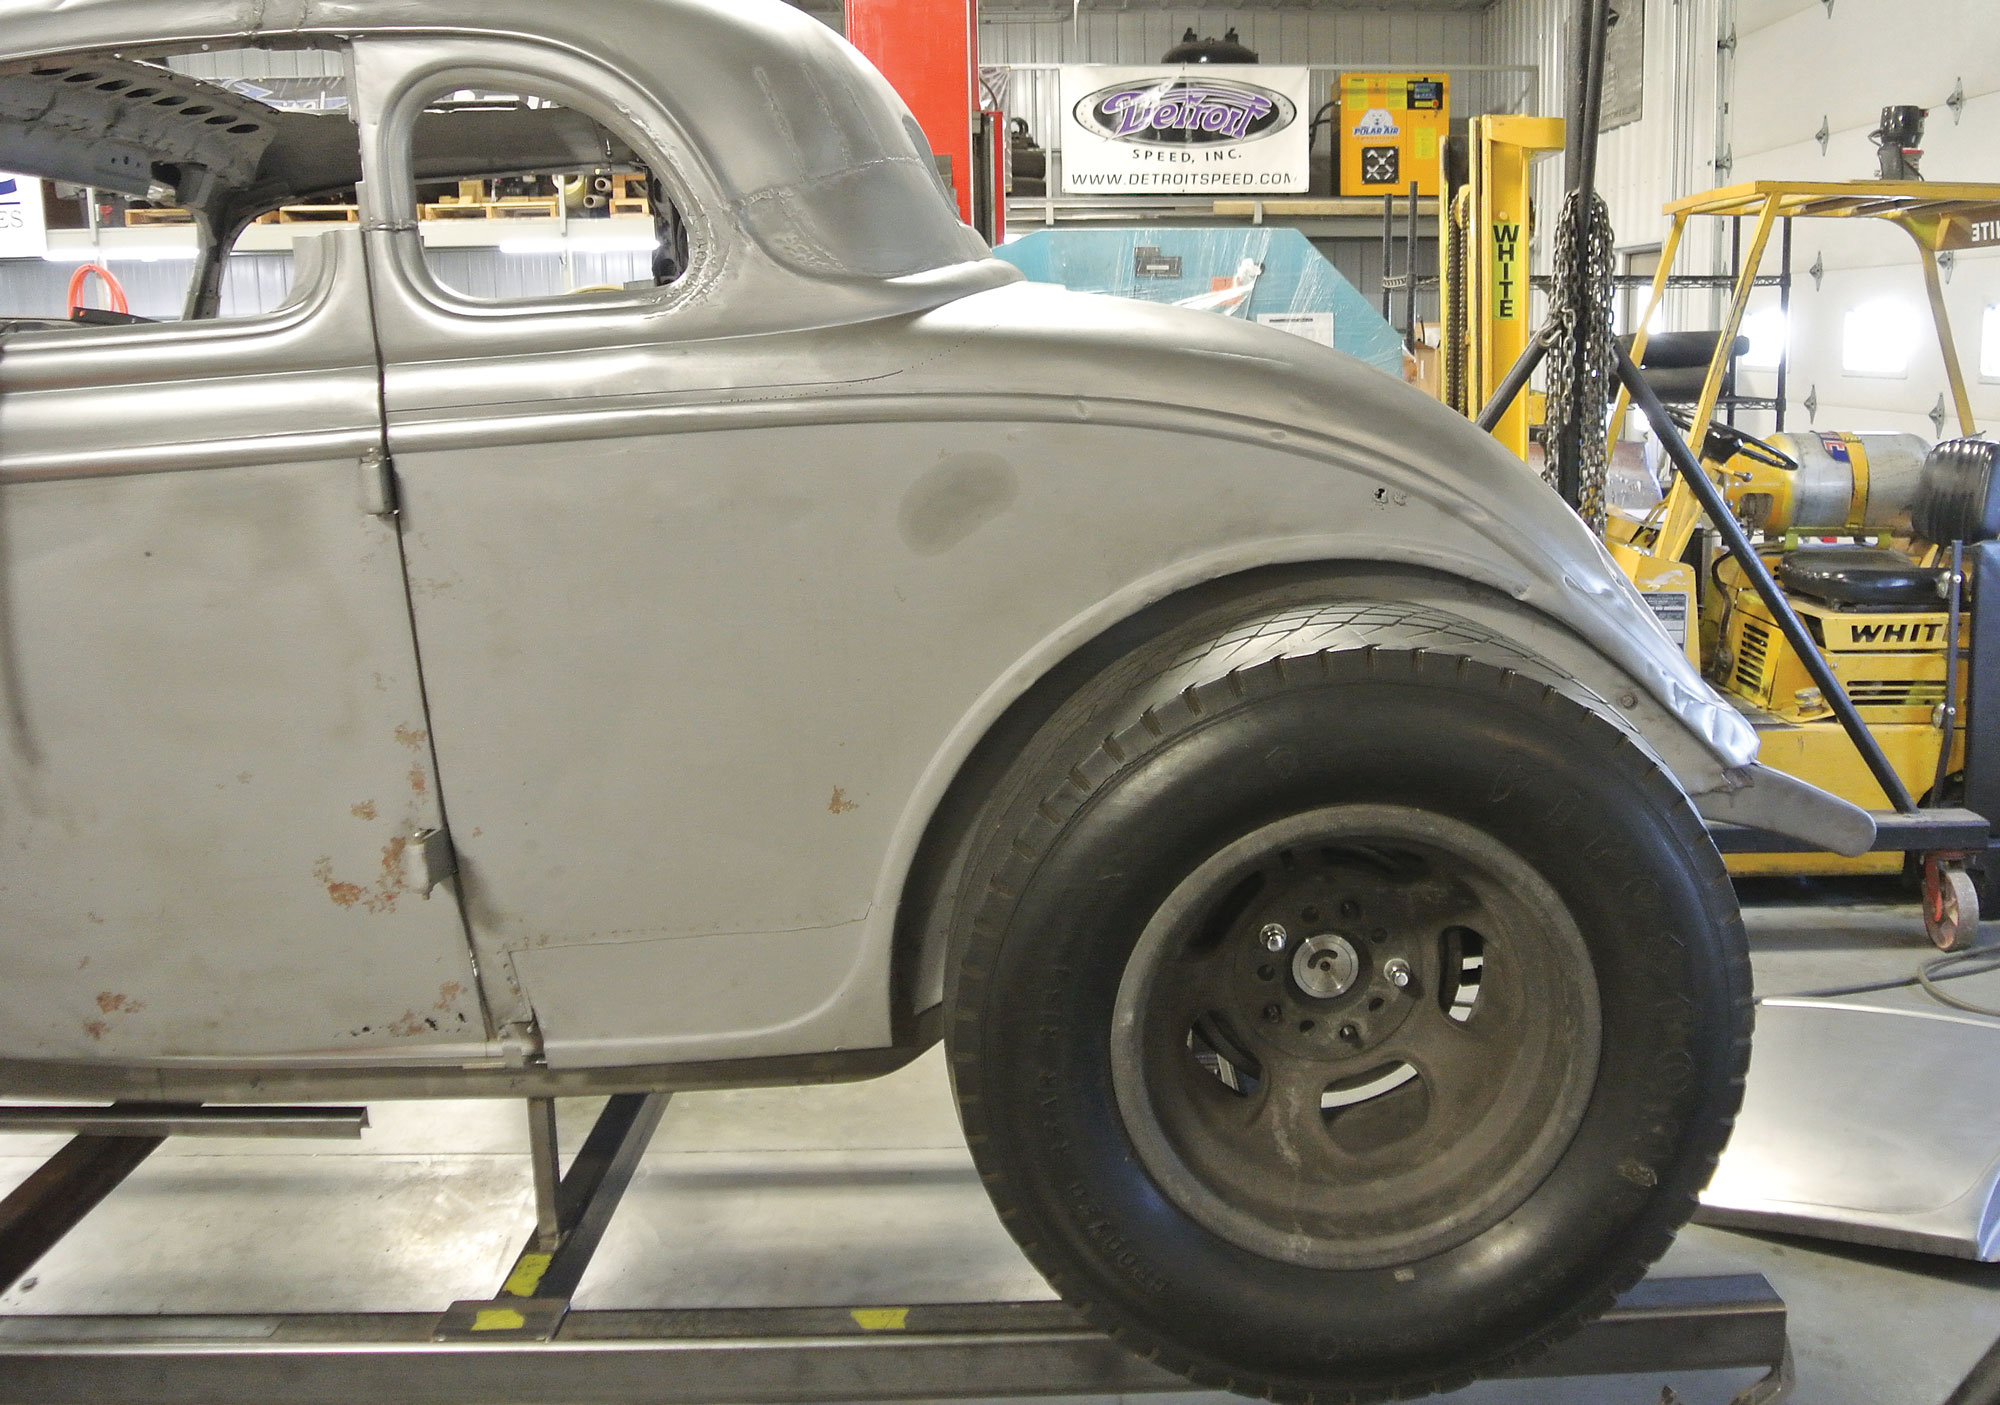
2. The Sather coupe had some lower quarter-panel rust that had been improperly repaired in years past and the rear corner had suffered light contact during a minor wreck, also part of this hot rod’s history.
After blasting the body to bare metal this patch panel was exposed
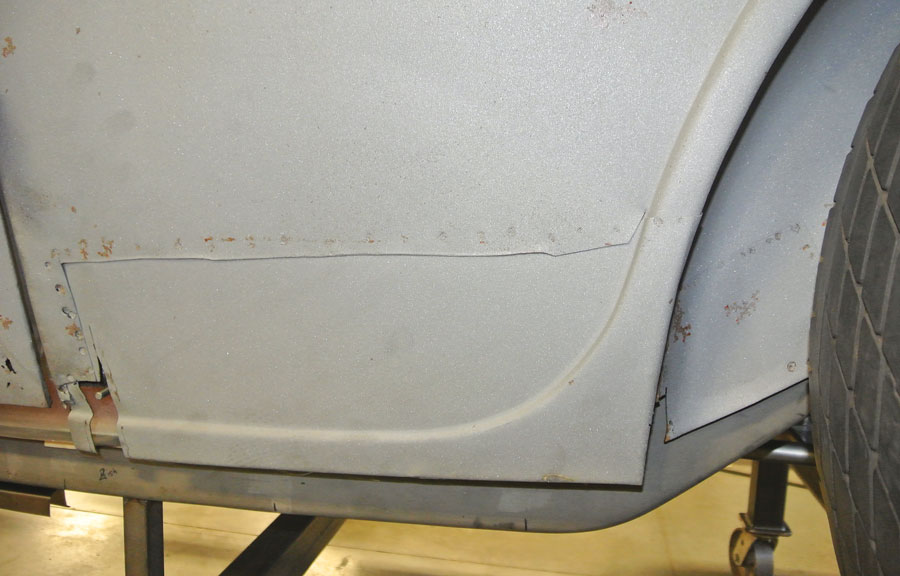
3. After blasting the body to bare metal this patch panel was exposed. It appears to be a quality patch panel but unfortunately a prior hot rodder had overlapped the panels and secured them with a series of spot welds. Because of this repair and other damage to the rear of the quarter-panel Troy Gudgel decided all-new quarter-panels were in order.
The original quarter-panels were carefully removed while maintaining the inner quarter-panel structure
4. The original quarter-panels were carefully removed while maintaining the inner quarter-panel structure. This assured the rain gutters and inner braces would maintain the proper opening for the decklid.
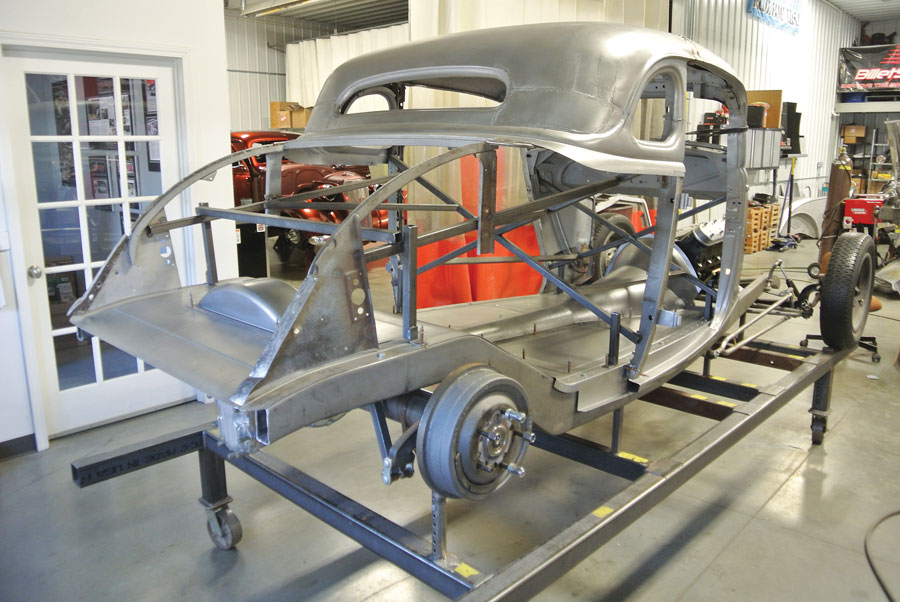
As you can see the coupe was extensively crossbraced before any cutting began
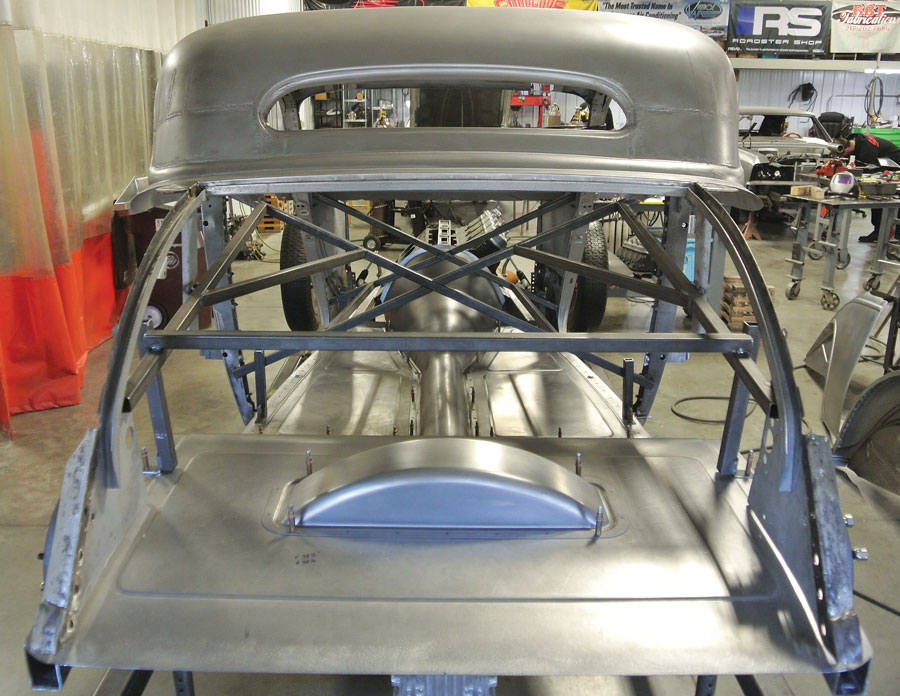
5. As you can see the coupe was extensively crossbraced before any cutting began. There are several inches of the original quarter-panel remaining below the body bead and also on the B-pillar/doorjamb.
From the rear we can see the rain gutters remain intact along with the original lower corner quarter-panel bracing panels
6. From the rear we can see the rain gutters remain intact along with the original lower corner quarter-panel bracing panels.
A preliminary fit of the SAR reproduction quarter-panels shows a basically good fit, although some modification would be required to fit these roadster quarters to the coupe body
7. A preliminary fit of the SAR reproduction quarter-panels shows a basically good fit, although some modification would be required to fit these roadster quarters to the coupe body. Note the panel overlap at the B-pillar.
From the rear we see the new SAR quarter-panel fitted in place but still overlapping the original sheetmetal
8. From the rear we see the new SAR quarter-panel fitted in place but still overlapping the original sheetmetal. The cutline of the new panel will be marked on the existing original sheetmetal and carefully trimmed for a perfect fit.
Here we can see team BBT has trimmed the two panels and welded the leading edge of the original quarter-panel to the reproduction quarter-panel
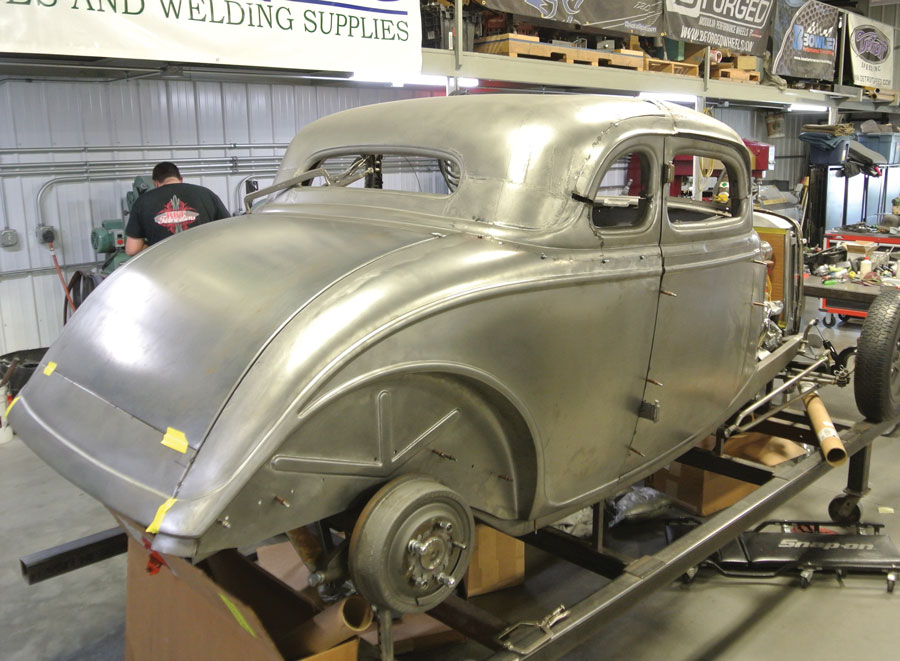
9. Here we can see team BBT has trimmed the two panels and welded the leading edge of the original quarter-panel to the reproduction quarter-panel. Note the perfect match of the body bead on both panels. Cleco fasteners hold the panels together.
At this point the quarter-panels show a very nice fit, with most of the remaining blending being at the top of the panel just below the roofline
10. At this point the quarter-panels show a very nice fit, with most of the remaining blending being at the top of the panel just below the roofline. You will note the inner fenderwells are smooth; this is correct for a roadster but closed cars had “crow’s feet” stamped into the inner fenderwell.
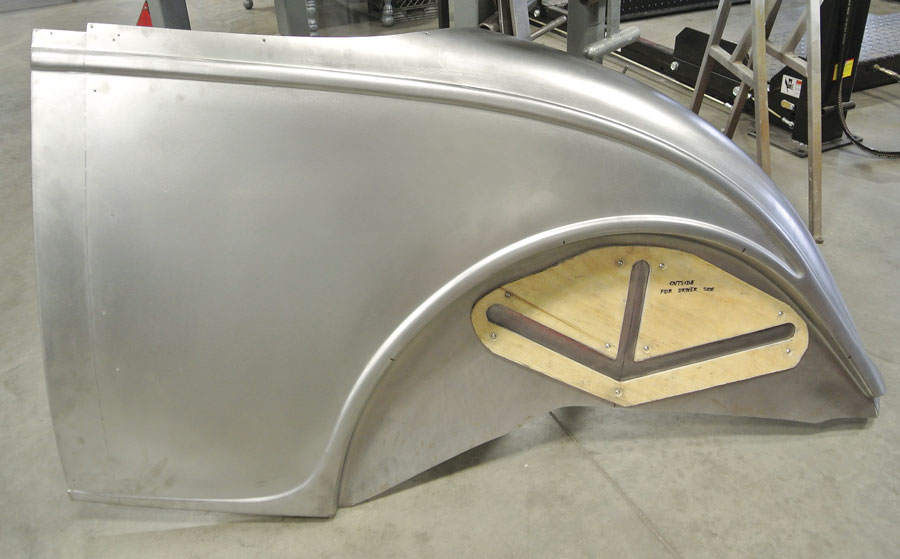
Dies were fabricated from plywood to hammer the proper beads into the new wheelwells. An inner die is found inside the panel.
11. Dies were fabricated from plywood to hammer the proper beads into the new wheelwells. An inner die is found inside the panel. Also note, due to the angle of the beads, a passenger side and driver side die set were built.
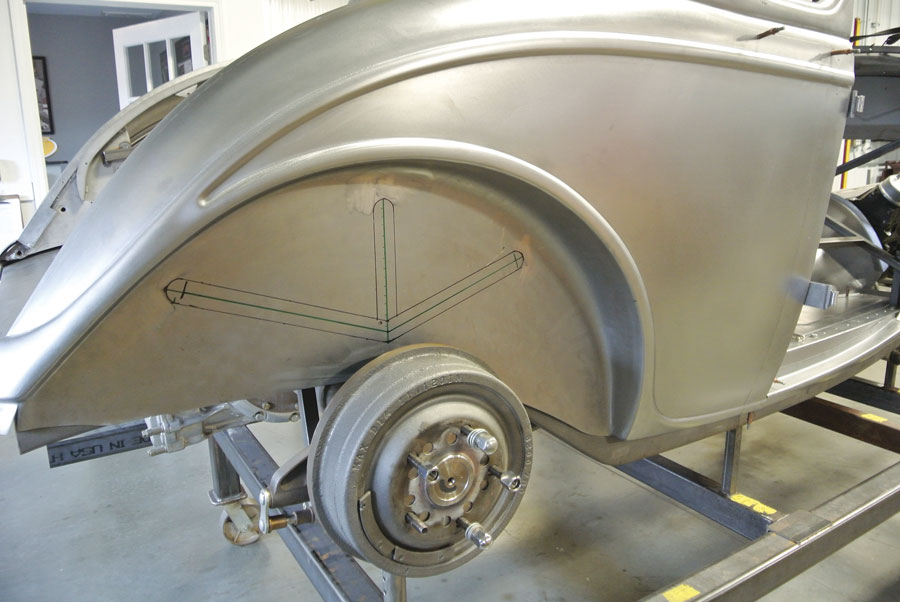
After a session with the BBT Pullmax machine the proper crow’s feet are in place, making this appear to be a genuine factory coupe panel
12. After a session with the BBT Pullmax machine the proper crow’s feet are in place, making this appear to be a genuine factory coupe panel. The beads are not exact replicas of the original beads, rather they are formed to duplicate the firewall and floor beads fabricated on the car.
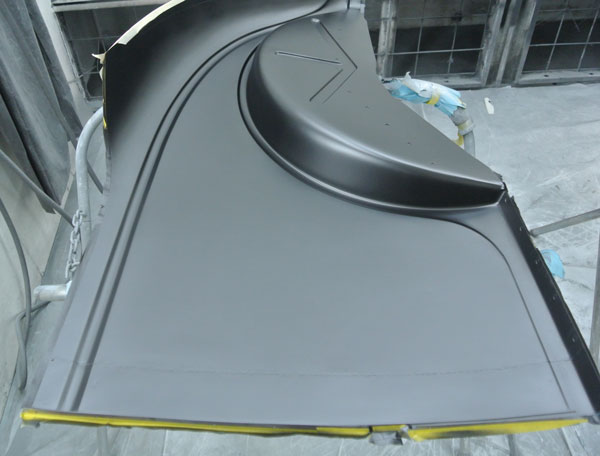
If you look carefully, you can see the weld seam on the leading edge of the panel and of course the perfectly stamped crow’s feet
13. If you look carefully, you can see the weld seam on the leading edge of the panel and of course the perfectly stamped crow’s feet. The inside of the panel has been painted to protect the metal prior to final installation.
The inner structure of the quarter-panels are all final welded to the BBT-fabricated floor and the original 1934 Ford inner quarter-panel/rain gutter structure
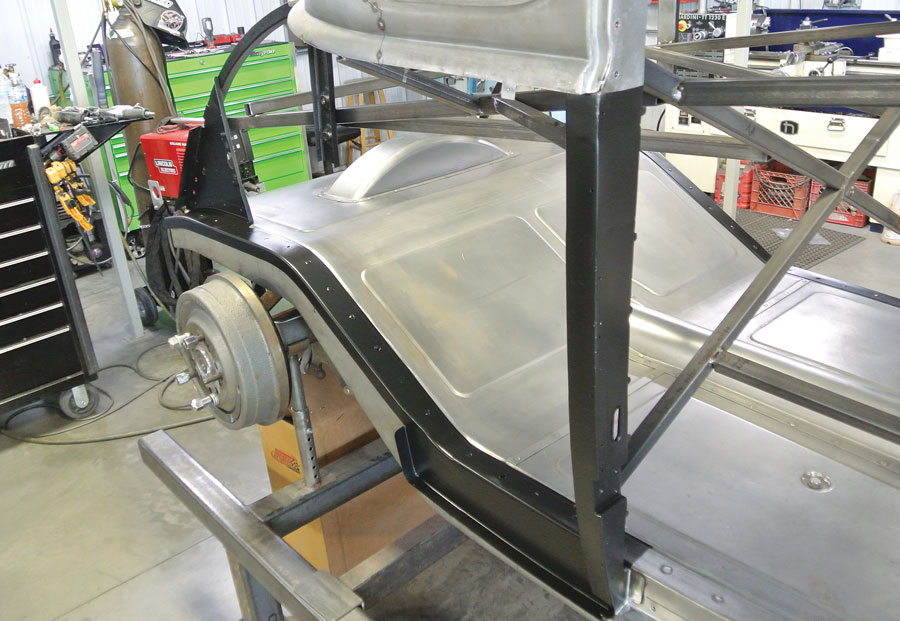
14. The inner structure of the quarter-panels are all final welded to the BBT-fabricated floor and the original 1934 Ford inner quarter-panel/rain gutter structure.
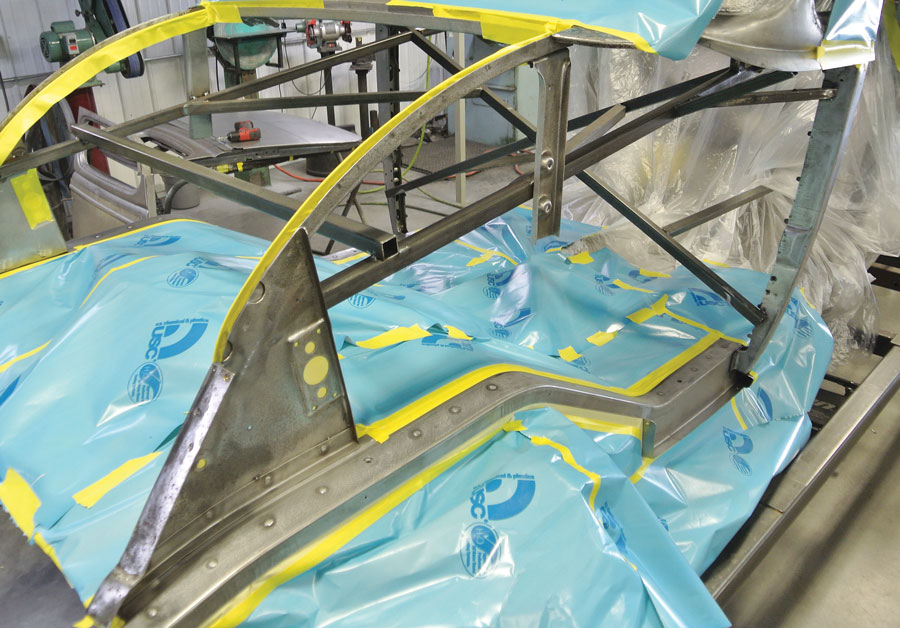
All this structural metal must be protected prior to welding the quarter-panels in place
15. All this structural metal must be protected prior to welding the quarter-panels in place. To that end the floorpan and outer sheetmetal is taped off to prepare the area for paint.
Rust-resistant paint POR-15 was sprayed on the inner structure before the masking tape and paper was removed
16. Rust-resistant paint POR-15 was sprayed on the inner structure before the masking tape and paper was removed. This type of inner protection is imperative for a long-lasting body.
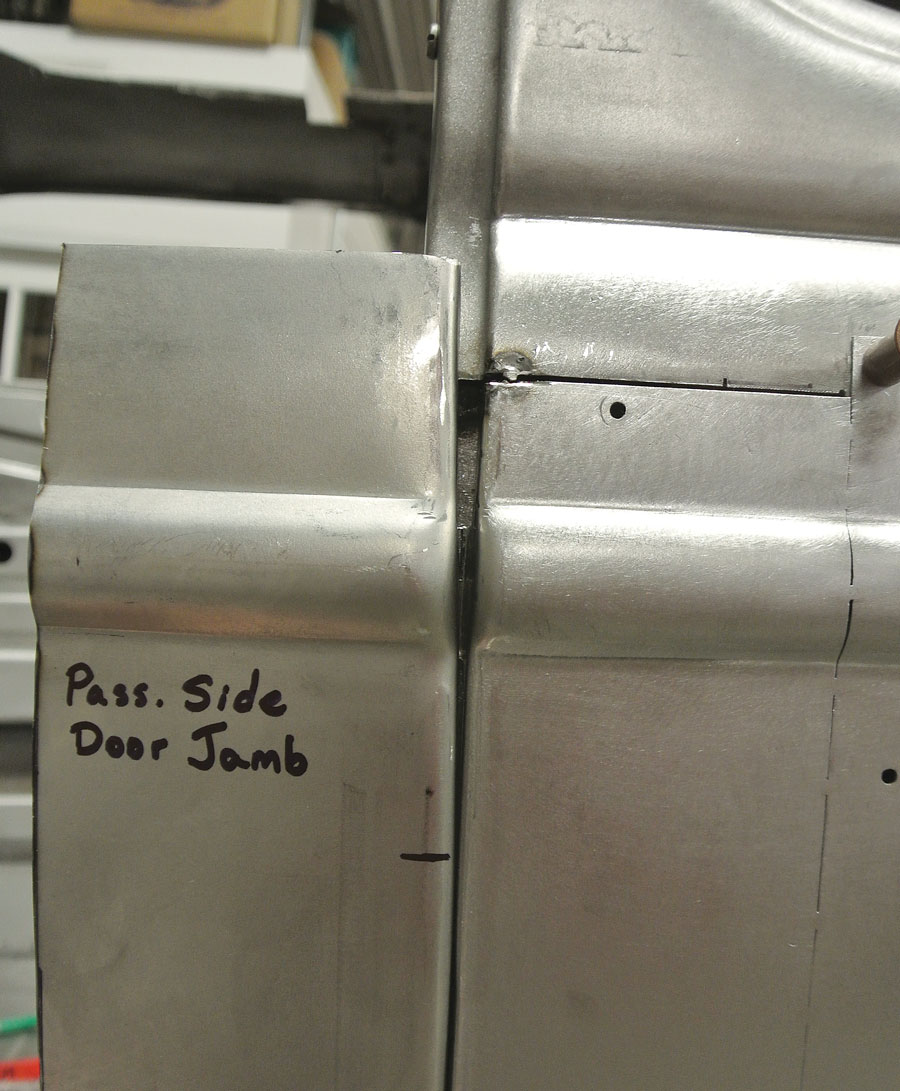
The inner doorjambs received the same rust-proofing treatment. Note the perfect fit between the quarter-panel structure to the floorpan.
17. The inner doorjambs received the same rust-proofing treatment. Note the perfect fit between the quarter-panel structure to the floorpan.
Here we see the new quarter-panel being fitted for the final time. There is still some cutting and fitting to do under the quarter window, but the overall fit is complete.
18. Here we see the new quarter-panel being fitted for the final time. There is still some cutting and fitting to do under the quarter window, but the overall fit is complete.
The passenger side is also completely fitted from the doorjamb to the rear corner
19. The passenger side is also completely fitted from the doorjamb to the rear corner. The fresh SAR sheetmetal has very clean, crisp body line stampings.
The next trick is to blend the roadster quarter to the coupe panel below the decklid
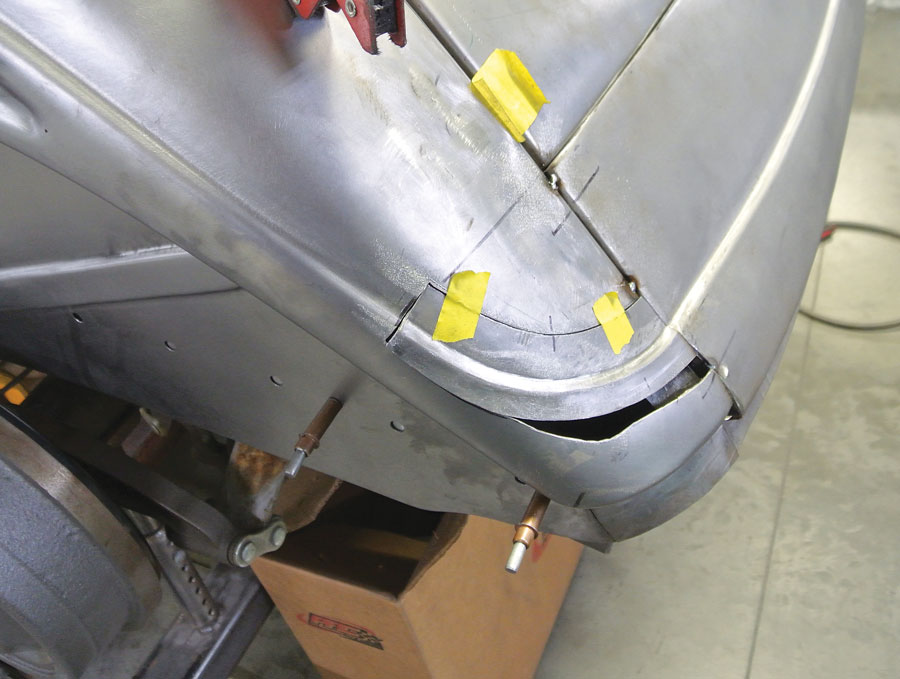
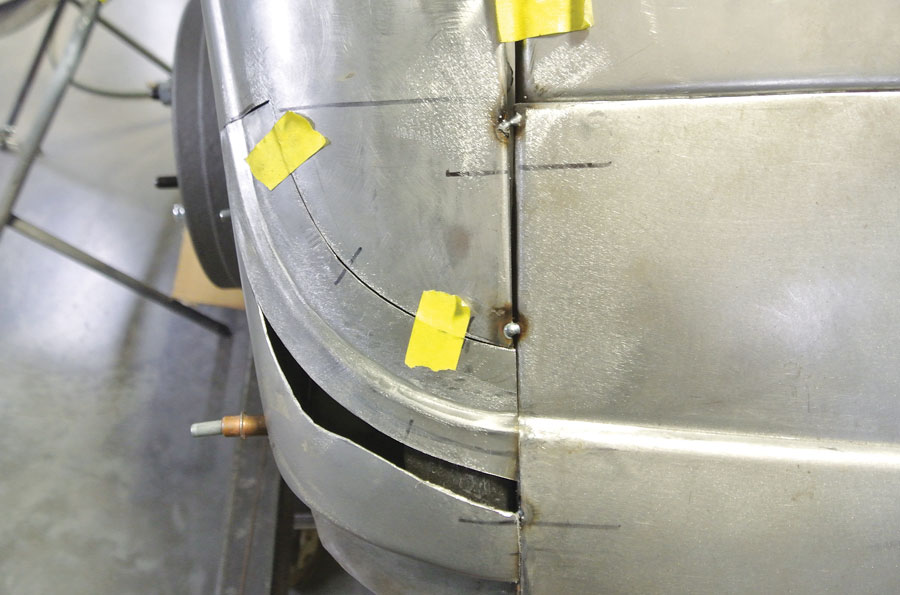
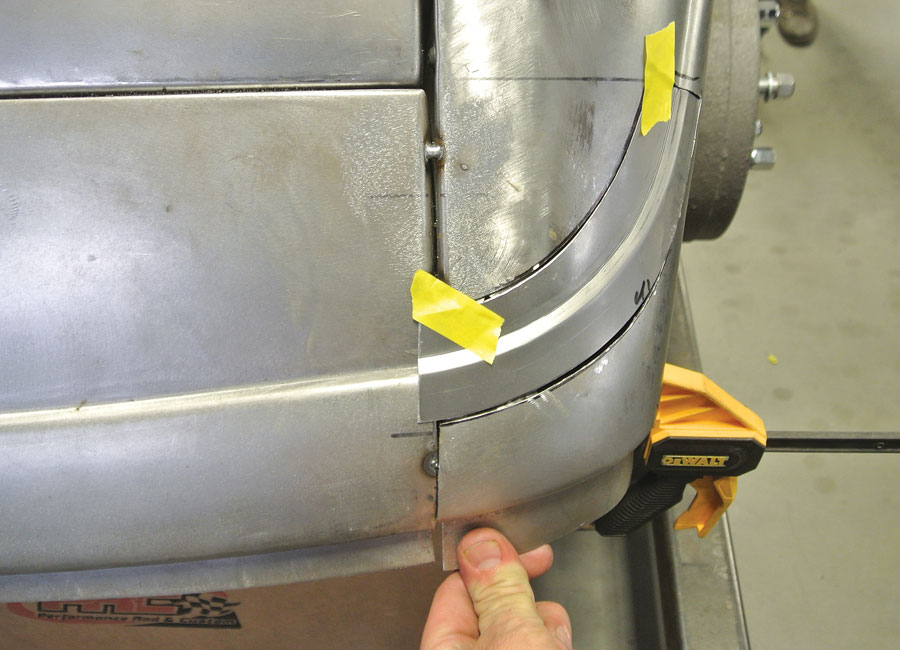
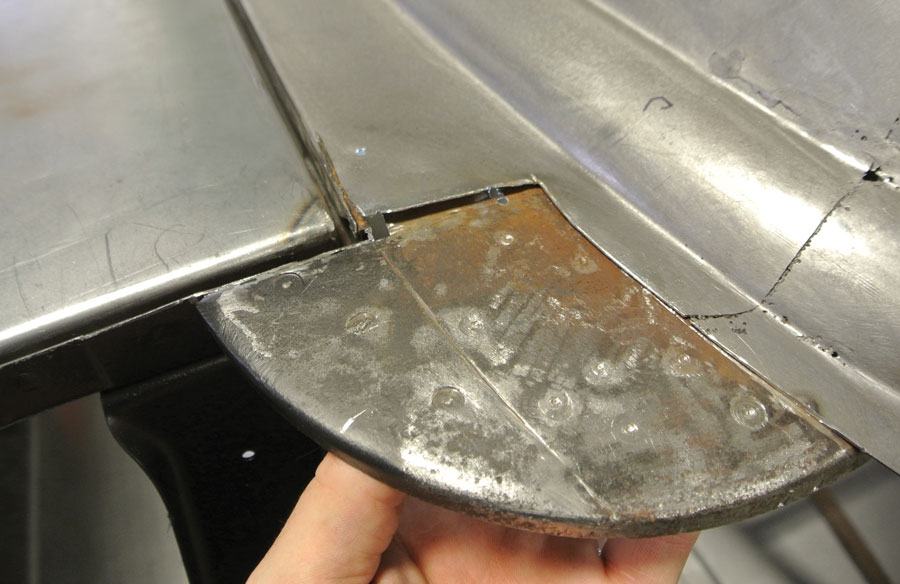
20. The next trick is to blend the roadster quarter to the coupe panel below the decklid. Gudgel formed the transition piece to make the perfect radius from the quarter-panel to the center panel.
Here we can see the transition piece taped into place. Next the lower corner will be sliced and fitted
21. Here we can see the transition piece taped into place. Next the lower corner will be sliced and fitted.
This tapered piece of sheetmetal fills the void nicely and after welding and metal finishing you will never know this corner was not stamped as one piece
22. This tapered piece of sheetmetal fills the void nicely and after welding and metal finishing you will never know this corner was not stamped as one piece.
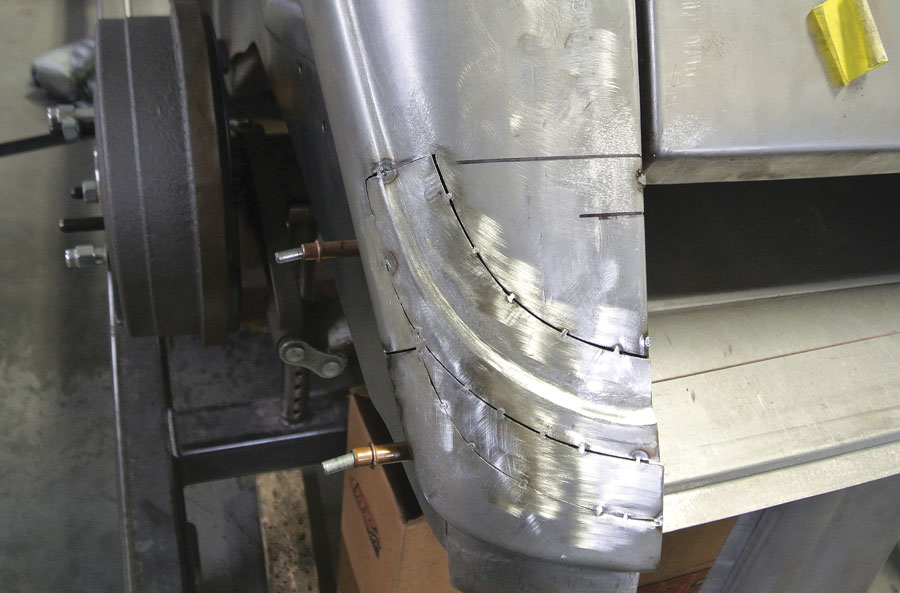
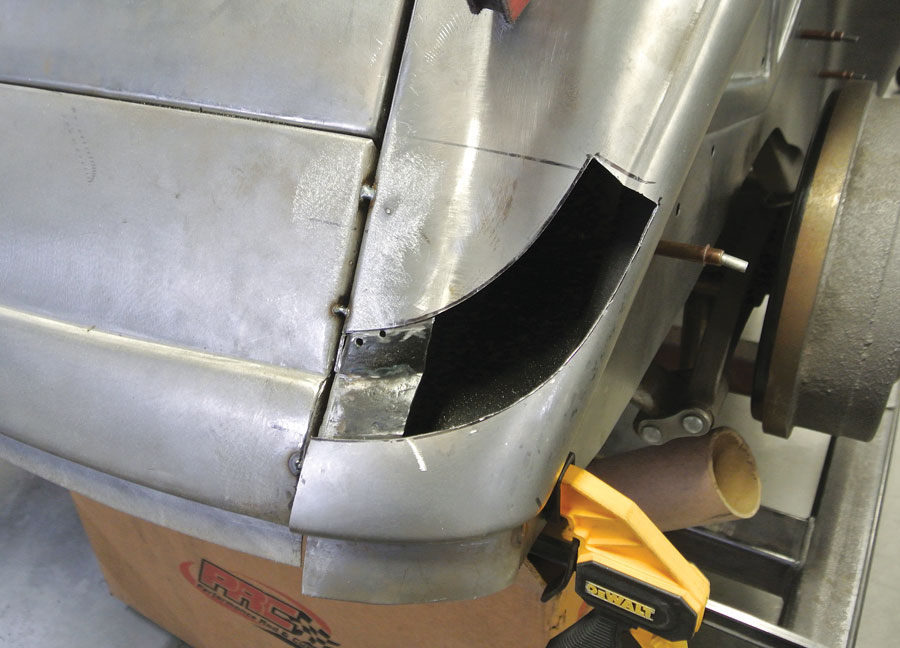
Moving to the passenger side, the new quarter-panel appears to have a slightly different angle where it meets the center panel
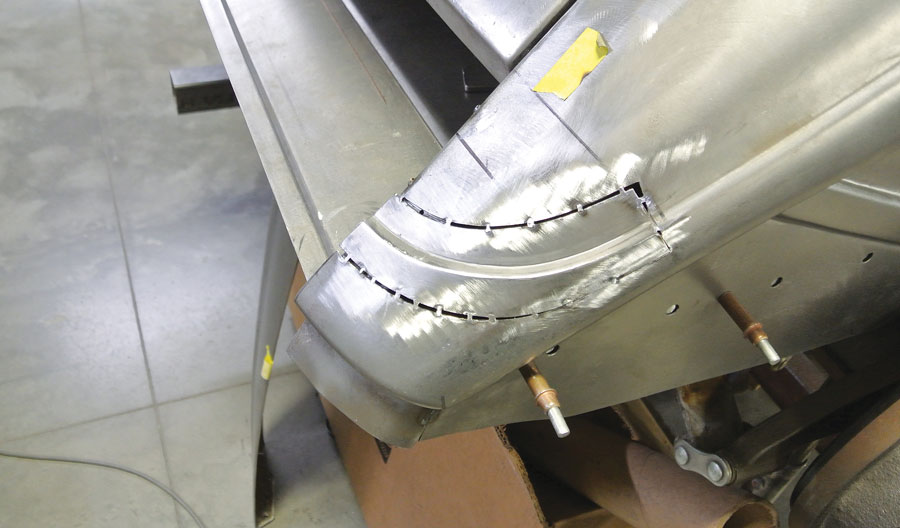
23. Moving to the passenger side, the new quarter-panel appears to have a slightly different angle where it meets the center panel. Gudgel opted to form this corner in one piece.
With the new radius piece fabricated and taped into place, the lower portion of the new quarter-panel was cut and folded to perfectly meet the new SAR center panel
24. With the new radius piece fabricated and taped into place, the lower portion of the new quarter-panel was cut and folded to perfectly meet the new SAR center panel.
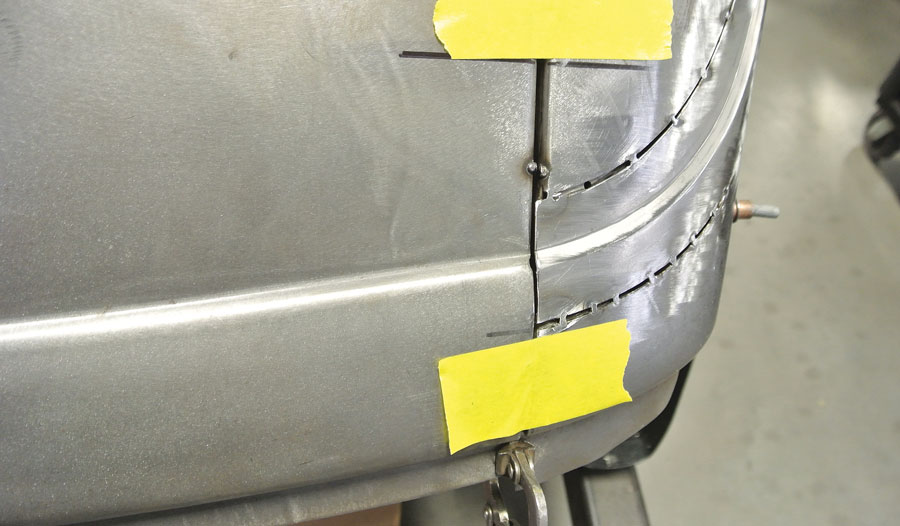
The rear corner of the passenger side is now shaped and tack-welded in place. Once again, final welding and metal finishing will make this look like a single stamping.
25. The rear corner of the passenger side is now shaped and tack-welded in place. Once again, final welding and metal finishing will make this look like a single stamping.
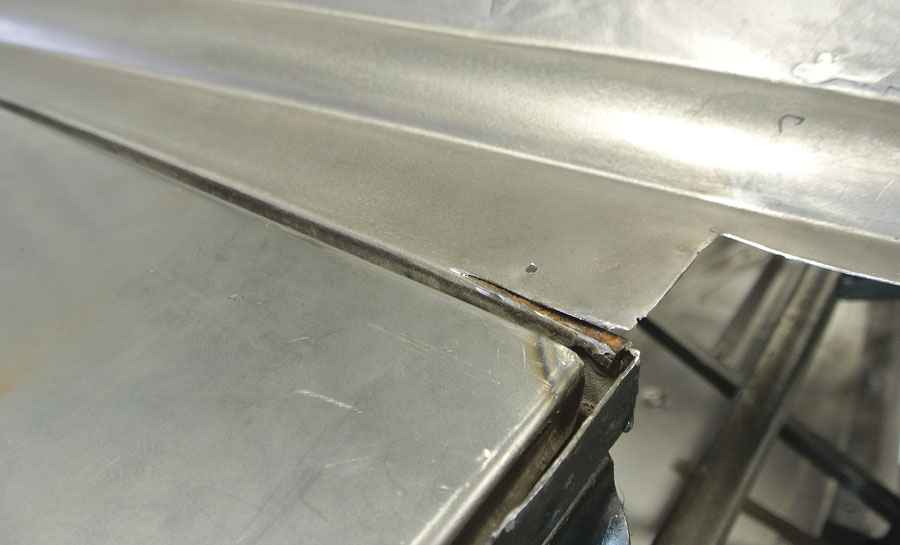
Fitting the gaps between the new center panel and the new quarter-panel is a painstaking process that makes a big difference in the final fit of the panels
26. Fitting the gaps between the new center panel and the new quarter-panel is a painstaking process that makes a big difference in the final fit of the panels. A good fit here makes welding easy.
Moving up to the top of the quarter-panel, the original rain gutter remains in place and the sheetmetal of the original body header panel has been cut to facilitate the new quarter-panel
27. Moving up to the top of the quarter-panel, the original rain gutter remains in place and the sheetmetal of the original body header panel has been cut to facilitate the new quarter-panel.
Before the new quarter-panel can be fitted to the existing body sheetmetal the original corner brace must be welded in place
28. Before the new quarter-panel can be fitted to the existing body sheetmetal the original corner brace must be welded in place.
Here we see the final fit of the passenger side quarter-panel. The rear center panel fits the lower rear corner of the quarter-panel perfectly and the fit of the new SAR quarter-panel to the original coupe metal below the windows is also perfect.
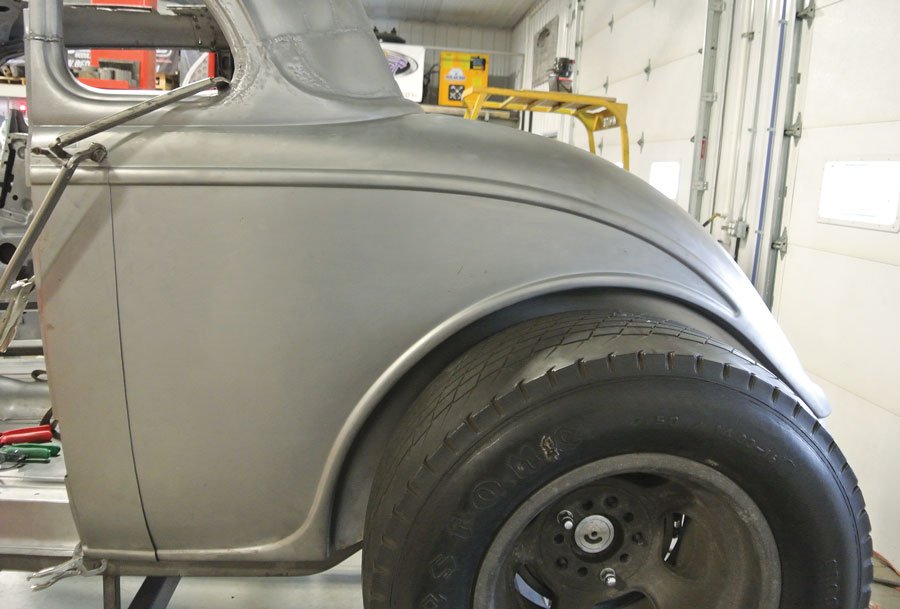
29. Here we see the final fit of the passenger side quarter-panel. The rear center panel fits the lower rear corner of the quarter-panel perfectly and the fit of the new SAR quarter-panel to the original coupe metal below the windows is also perfect. It is ready for final welding.
Here we see the finished quarter-panel after welding and metal finishing. Also note the gas fill opening has been formed in the upper driver side quarter-panel.
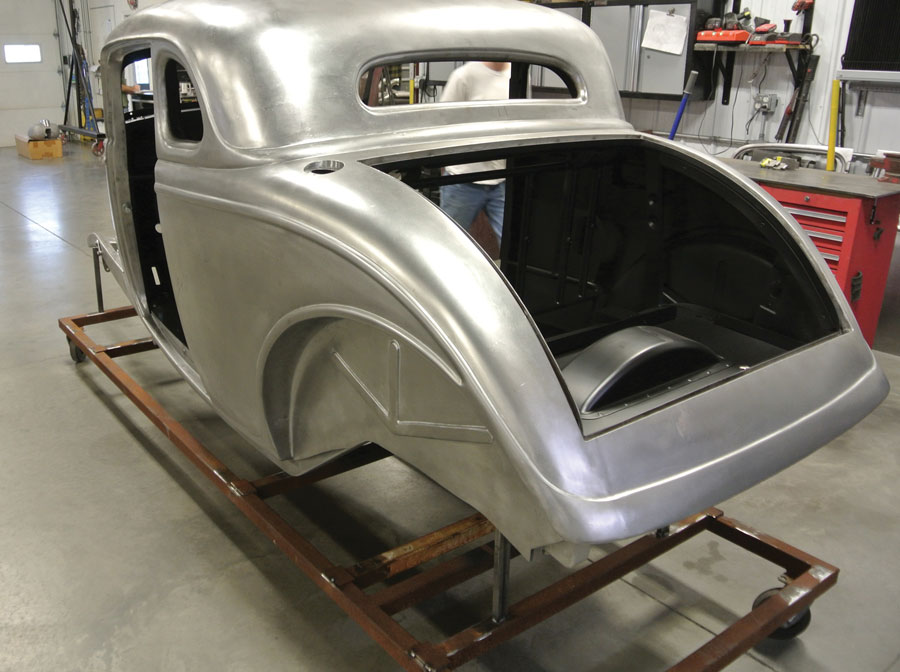
30. Here we see the finished quarter-panel after welding and metal finishing. Also note the gas fill opening has been formed in the upper driver side quarter-panel. All we can say is, “It sure looks like factory sheetmetal.”
The final piece to the puzzle was this nicely formed rolled rear pan. We like the somewhat angular lines on the pan rather than a true rolled pan.
31. The final piece to the puzzle was this nicely formed rolled rear pan. We like the somewhat angular lines on the pan rather than a true rolled pan. The hot rod staple, 1937 Ford taillights, look right at home on this new rolled pan.
 SOURCES
BBT Fabrications
(217) 586-5699
bbtfabrications.com

Steve’s Auto Restorations
(503) 665-2222
stevesautorestorations.com

Modern Rodding
VOLUME 2 • ISSUE 12 • 2021