
Modern Rodding Tech
InTheGarageMedia.com
1964 Pontiac GTO interior disassembly with stock tilt column removal and exposed under-dash wiring
1. Literally beginning at the beginning—installing a Flaming River tilt column in this 1964 GTO was a relatively simple task at this stage. Can’t damage anything other than the column!
Tilt, Turn, and Burn typography
A New Flaming River Steering Column Steers Our GTO Project in the Right Direction
By Ryan Manson Photography by THE AUTHOR
U

pgrading a classic muscle car isn’t unfamiliar territory to those who follow what we do here at Modern Rodding. In fact, it’s probably one of the most popular topics of conversation around the watercooler when discussing the various projects in and around the In The Garage Media Tech Center. Recently, we’ve been assisting our buddy Mike Hannah with his 1964 Pontiac GTO project. Hannah had already handled the basics: brakes, steering, suspension, carbs, and ignition, so the old goat was dialed in pretty well. However, it was in need of a new wiring harness, lights, brightwork, gauges, interior, and paint. Long story short, the mechanical side of the car was solid, but comfort and appearance were two areas where the GTO was woefully lacking.

To get Hannah’s Poncho up and running reliably, we first tackled the wiring requirements. While we were doing that job, however, we noticed that the original steering column had some internal issues related to the turn signal circuits and felt flat and worn out. Sloppy steering does not inspire confidence when it comes to driving a classic car, so we decided to not only replace the old steering column but to also enhance the level of comfort.

In the distant past, upgrading to a tilt steering column meant a trip to the junkyard with your fingers crossed, hoping to find one that was not only the correct length but also not completely worn out. The results were usually marginal at best, requiring a handful of modifications and a bit of imagination to make everything work. However, in more recent years (over 30!), Flaming River has successfully guided car enthusiasts in a more reliable direction, offering a variety of columns and steering components for nearly every classic car imaginable.

The decision to replace the original steering column was an option that left us with no alternative; however, upgrading it to a new tilt column was something we hadn’t previously considered, although we welcomed the idea. The decision to order a brand-new tilt column from Flaming River, powdercoated black to boot, left us with no other option; it simply made sense. Additionally, with the inclusion of the necessary components available from Flaming River to make the column a straight bolt-in job, it couldn’t be easier.
1964 Pontiac GTO steering shaft routing past headers and upper control arm with tight engine bay clearance
1964 Pontiac GTO steering linkage and column through firewall showing coupler and suspension proximity
2-3. The first step in replacing the old steering column with the new one is to loosen the pinch bolt that secures the rag joint to the steering shaft.
1964 Pontiac GTO column base firewall hole enlarged and worn for tilt column clearance
4. Next, remove four fasteners to separate the floor mount from the firewall.
1964 Pontiac GTO under-dash column bracket with wiring loom and fasteners during removal process
5. Two additional fasteners secure the upper column support to the bottom of the dash rail, offering support to the upper part of the steering column.
1964 Pontiac GTO removed factory tilt column showing full shaft and weathered steering wheel
6. Once the upper column support is removed and the turn signal wiring harness connector is disconnected, the column assembly can be taken out of the vehicle.
1964 Pontiac GTO OEM steering coupler rag joint removed and set on floor for replacement
7. Here’s the original steering column, shaft, and rag joint assembly.
1964 Pontiac GTO aftermarket black tilt column with prewired harness ready for installation
8. A closer look at the rag joint that connects the steering shaft to the input shaft of the steering box reveals the two pinch bolts that secure everything together.
1964 Pontiac GTO factory vs aftermarket tilt column comparison with intermediate shaft on bench
9. A brand-new, 30-inch tilt steering column from Flaming River (PN FR20005BK) will replace the worn-out steering column in Mike’s GTO. Constructed from 304-grade stainless steel with brand-new internal components, we chose the floor shift version in black powdercoat.
1964 Pontiac GTO steering column upgrade project showing full retrofit parts layout and fabrication planning
10. Instead of connecting the column to the box with an extended steering shaft, our installation requires a length of polished stainless 3/4-inch DD shaft and a pair of universal joints to link the new column to the steering box. Flaming River offers these components as a kit (PN FRUJKT6SS), eliminating the guesswork. The kit includes a 22-inch-long, 3/4-inch DD stainless shaft and a pair of stainless steel U-joints (1-inch DD x 3/4-inch DD for the column end and a 13/16-36 spline x 3/4-inch DD U-joint to connect to the stock steering box).
1964 Pontiac GTO billet firewall plate with bearing next to rusted factory steering column plate
11. The stock floor mount in the GTO has seen better days, so it was decided to replace it with a new, upgraded item from Flaming River (PN FR20101CH). The new swiveling floor mount allows for easy positioning of the column, regardless of the installation angle.
1964 Pontiac GTO new billet column plate vs original steel plate showing upgrade in finish and precision
1964 Pontiac GTO billet firewall plate installed clean fitment replacing damaged factory mount
12-13. A bit of trimming was required to ensure the clutch linkage has plenty of space.
1964 Pontiac GTO black powder-coated tilt column with stainless Borgeson-style U-joint attached
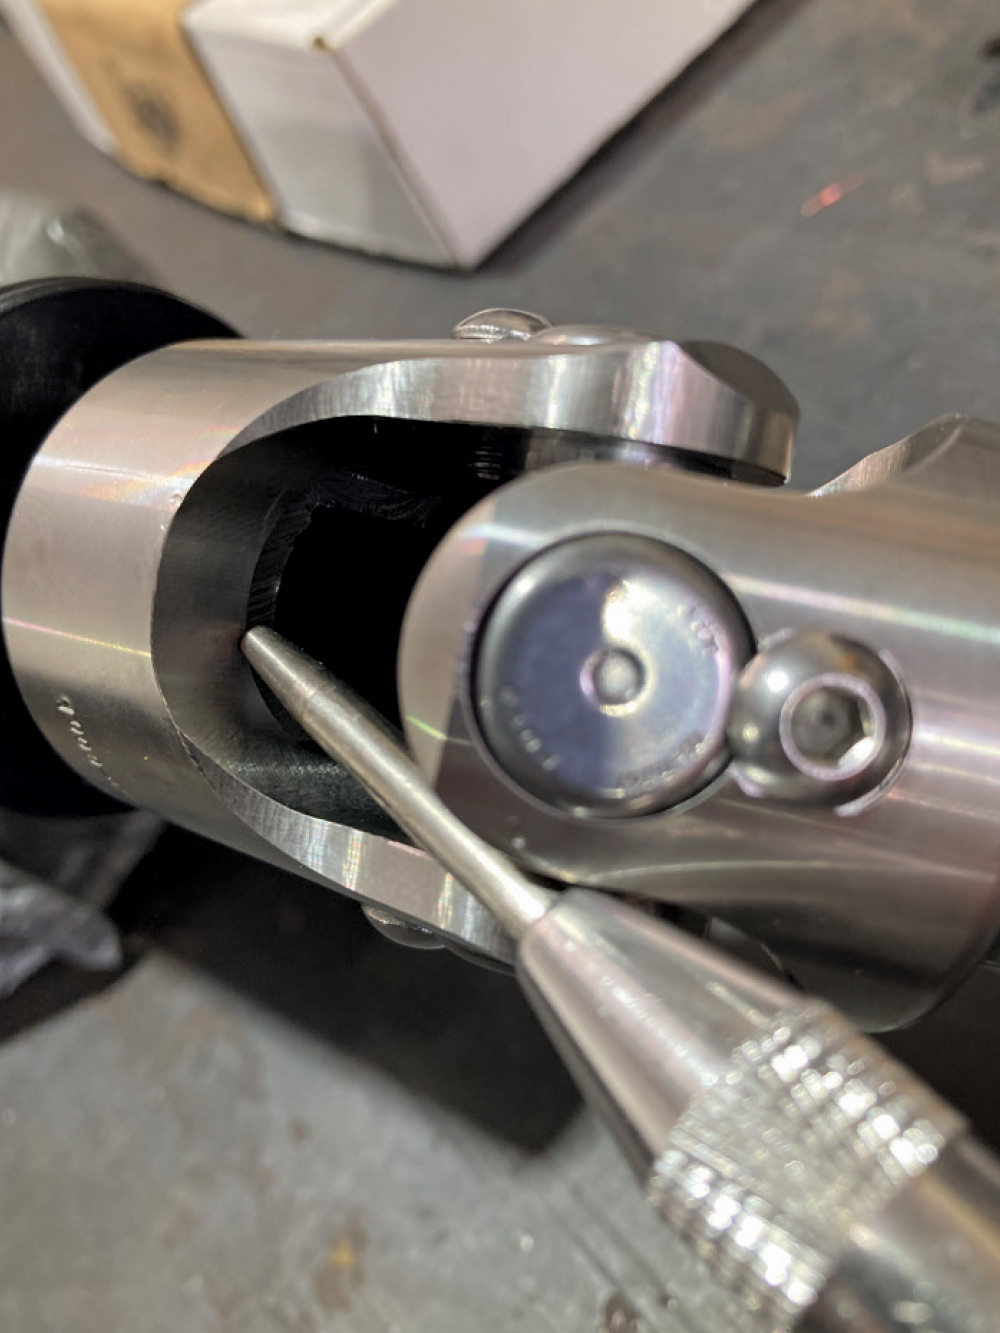
14. Before installing the steering column, we temporarily attached the U-joint and tightened the setscrews. This marks the output shaft of the steering column, allowing a pair of dimples to be created using a 1/4-inch drill bit. This process ensures that the setscrews of the U-joint achieve better engagement with the shaft.
1964 Pontiac GTO U-joint shaft alignment using scribe to mark notch for set screw drilling
1964 Pontiac GTO polished U-joint close-up showing full spline engagement and safety fasteners
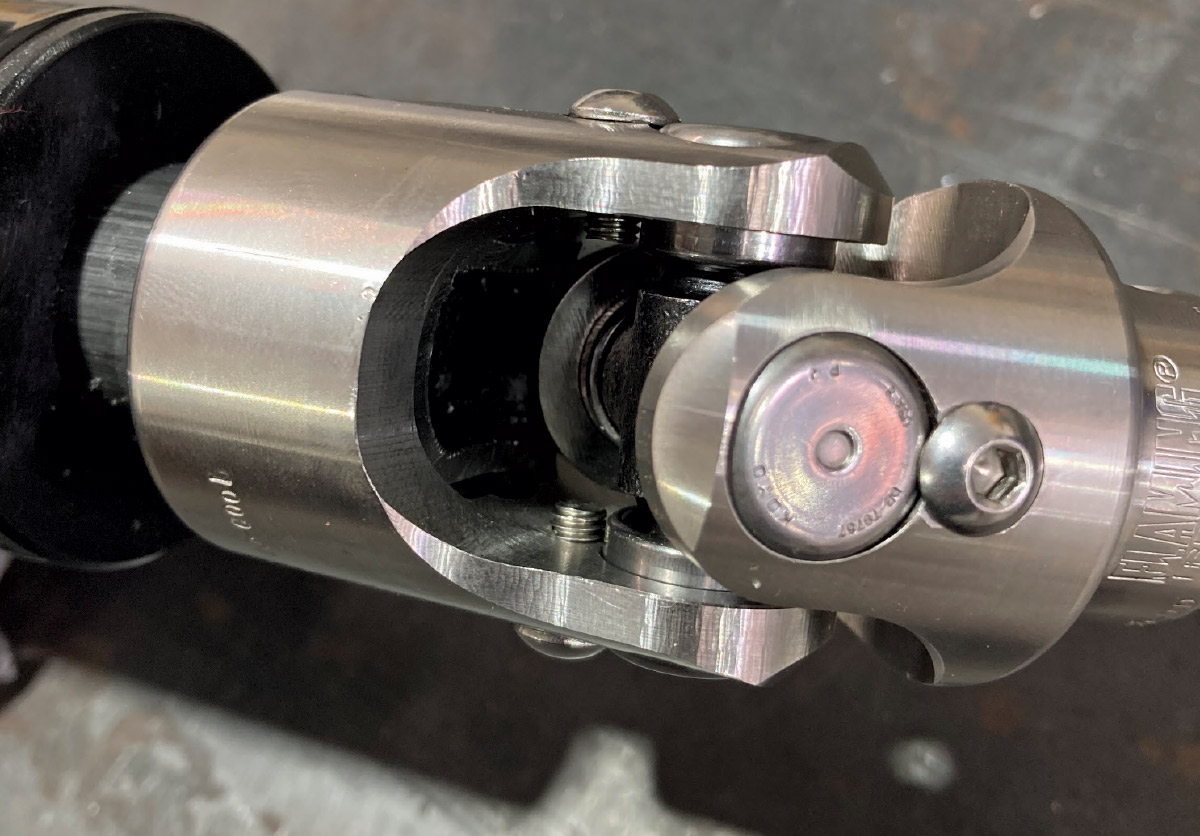
15-16. Proper installation of a U-joint ensures that the end of the steering shaft is flush with the inner edge of the connected half of the U-joint. This permits complete articulation of the U-joint without binding or contacting the steering shaft.
1964 Pontiac GTO tilt column tightened under dash using 716” ICON socket and factory bracket
17. With the column prepped, it’s time to position it. Slide the floor mount up about an inch from the bottom of the column and loosely install it, along with the dash mount. Once the final position of the column is set, the dash mount fasteners are tightened, and the steering column wiring harness is connected to the vehicle.
1964 Pontiac GTO new steering column sealed through billet firewall plate with proper fitment
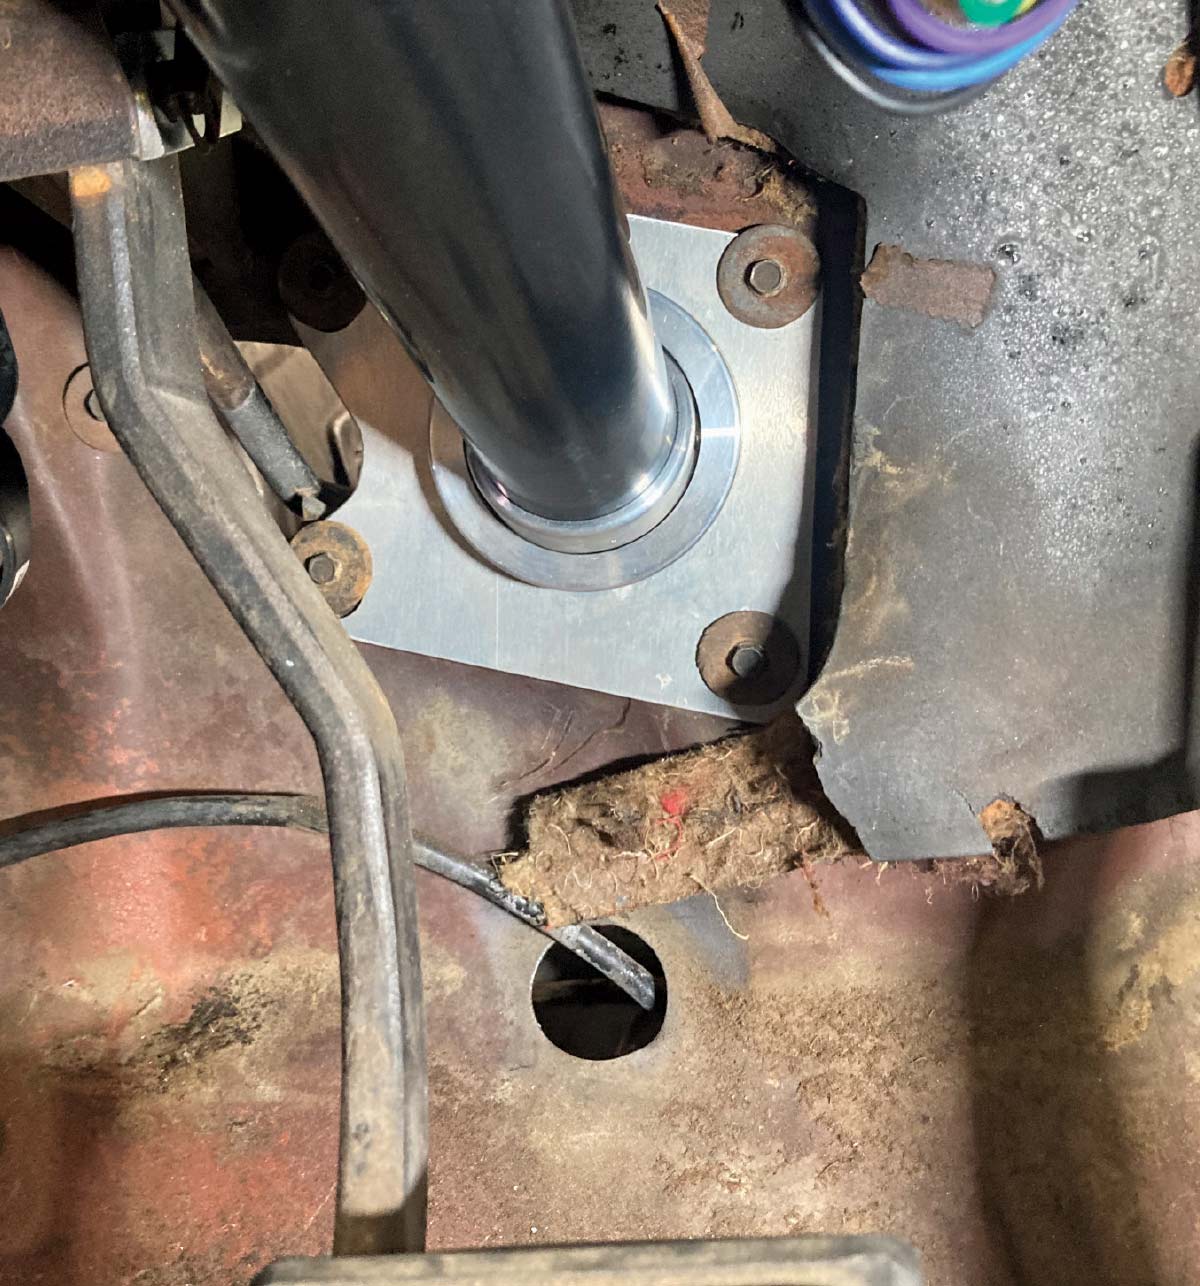
18. … and the floor mount secured to both the firewall and the column.
1964 Pontiac GTO engine bay shot with installed billet column plate and stainless U-joint at firewall
19. On the other side of the firewall, the 1-inch DD x 3/4-inch DD U-joint is temporarily installed.
1964 Pontiac GTO splined steering box input shaft test-fitted with stainless U-joint for final alignment
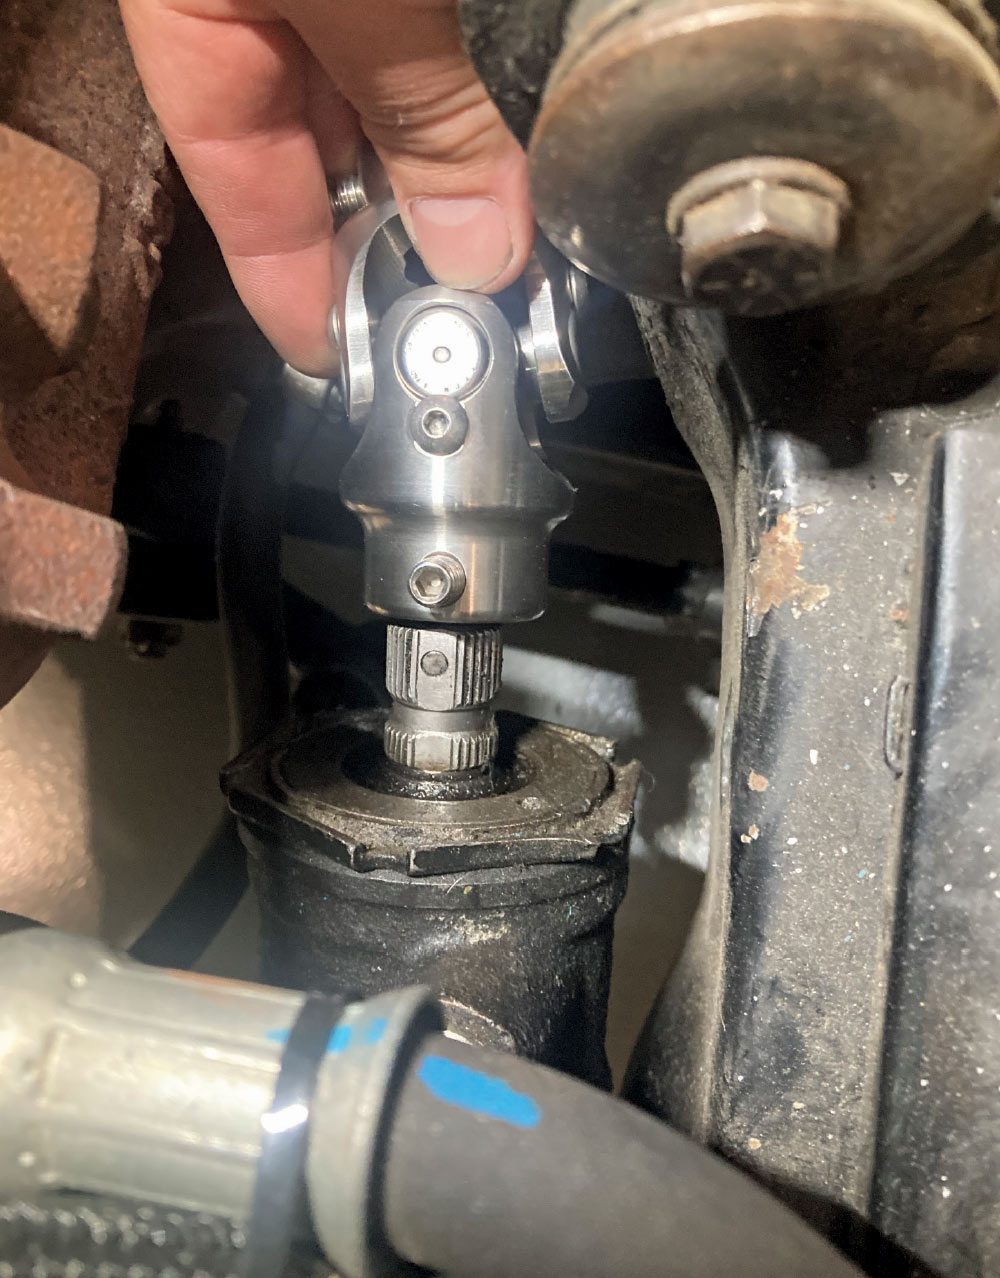
20. The 13/16×36 x 3/4 DD joint on the steering box input shaft features a flat on the input shaft, which aligns with the location of the setscrew. This stands in contrast to the dimpling method utilized on the DD shaft.
1964 Pontiac GTO measuring firewall to box for steering shaft fitment with tape against brake booster
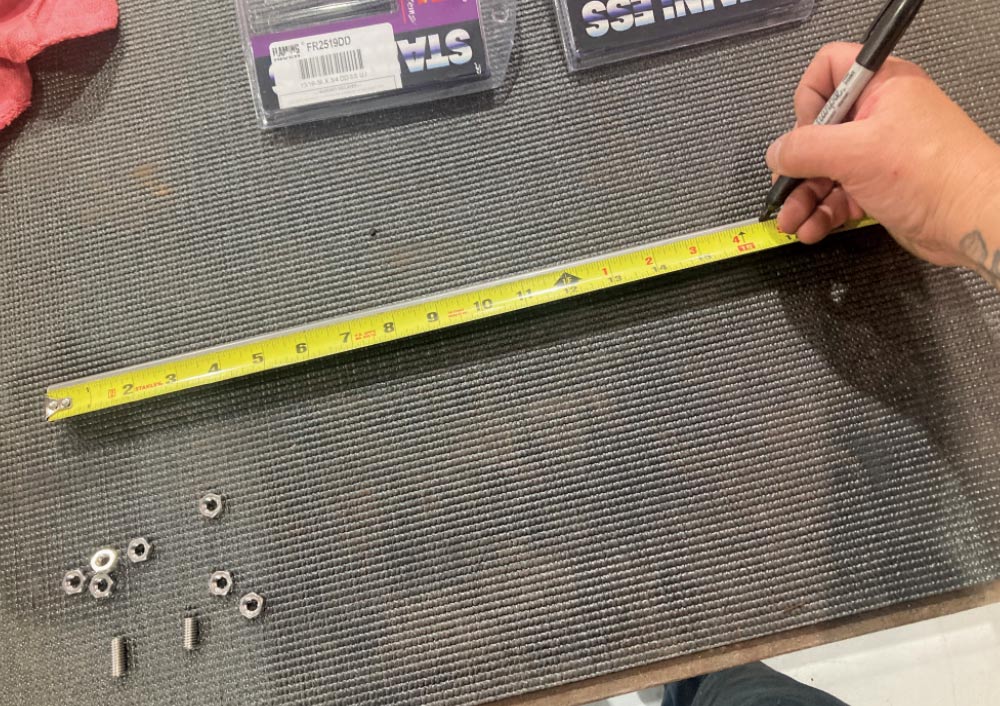
21. With the two opposing U-joints in place, we can now measure the length needed to cut the 3/4-inch DD shaft. Remember that we don’t want the shaft to protrude into the knuckle area of the U-joint.
1964 Pontiac GTO measuring double-D shaft cut length at 15.25 inches for custom intermediate section
22. The shaft is then marked for length before it is cut on a chop saw and deburred.
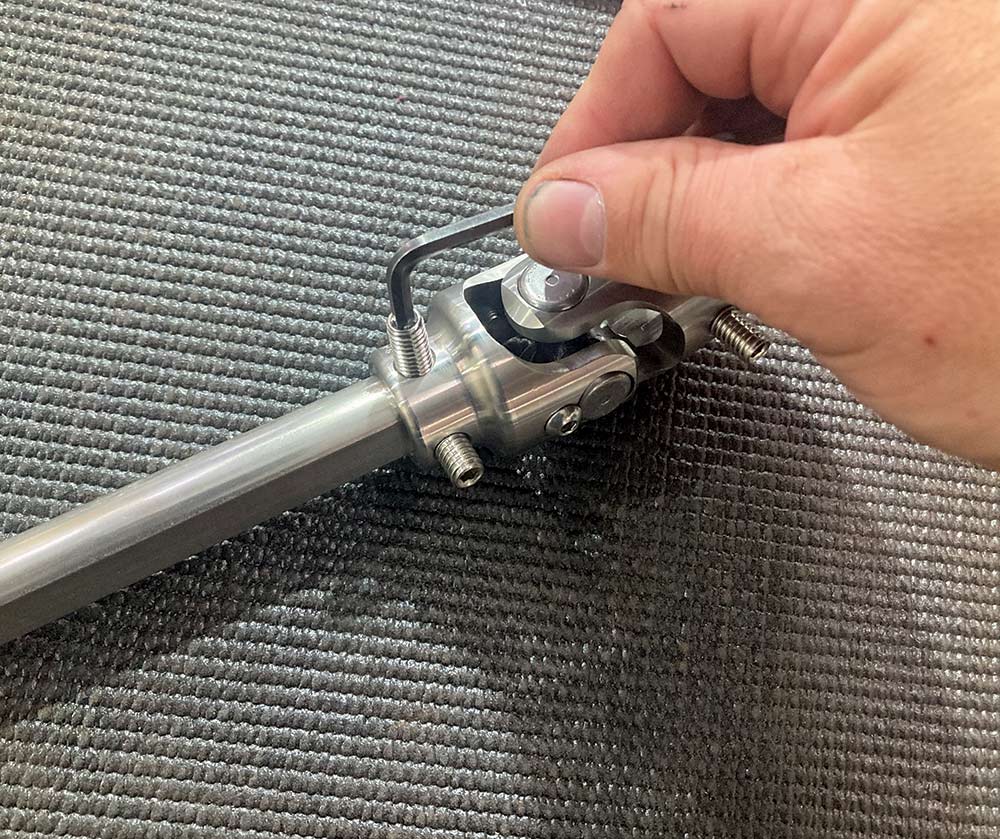
1964 Pontiac GTO assembling U-joint to DD shaft using set screws and hex key
23. Both U-joints are temporarily installed, one at each end, allowing the shaft to be dimpled for setscrews.
1964 Pontiac GTO center punching DD shaft for accurate drill location at U-joint set screw
24. Dimpling the shaft after the setscrews have marked their position is done by center punching each location.
1964 Pontiac GTO drilling shaft for dimple to lock U-joint set screw securely
25. Before the actual dimple can be made, a 1/4-inch drill bit is used.
1964 Pontiac GTO U-joint fully seated on shaft with set screw recess drilled and aligned
26. Here, you can see how the setscrew will align with the dimple in the shaft once it is installed.
1964 Pontiac GTO applying Loctite to Borgeson-style U-joint set screw for anti-vibration security
27. Each setscrew gets a dab of thread locker before final installation.
1964 Pontiac GTO fully assembled intermediate shaft with double U-joints and hardware laid out
28. Here is the intermediate shaft assembly, complete with both U-joints.
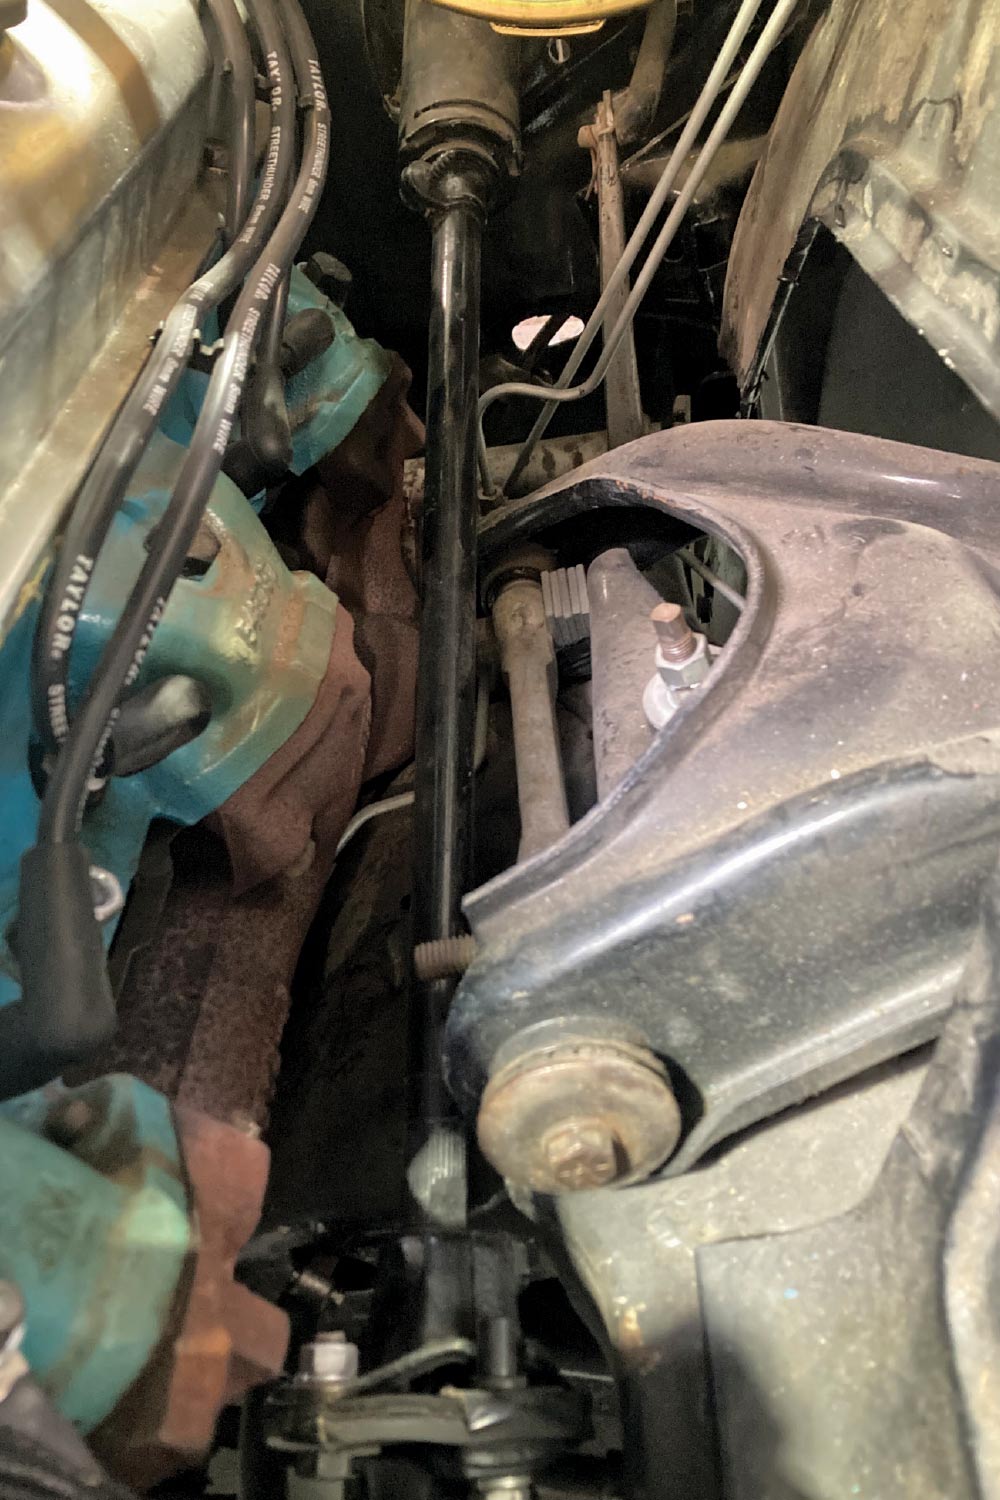
1964 Pontiac GTO installed intermediate shaft showing straight routing and header clearance
29. Installing the intermediate shaft assembly is relatively simple, but it may require a second set of hands depending on whether the steering column needs to be moved up to accommodate it or not.
1964 Pontiac GTO column-to-box linkage complete with tight U-joint angles and full spline engagement
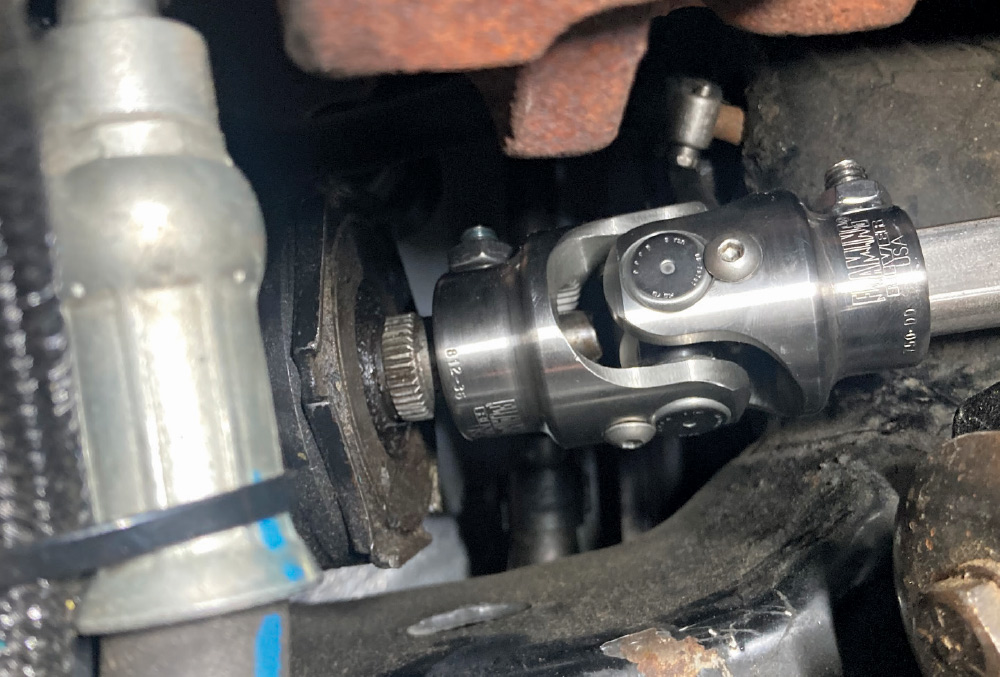
1964 Pontiac GTO Borgeson U-joint installed at steering box with tight header and frame clearance
30-31. A closer look at both U-joints reveals plenty of clearance between the shaft and each joint, allowing the U-joint to move through its entire range of motion.
1964 Pontiac GTO tilt column prepped for steering wheel install with exposed shaft and wiring
32. With our steering connections complete, it’s time to return inside the GTO to prepare the column for the steering wheel installation. Note that the hazard button, turn signal, and tilt levers have been installed, along with the canceling cam, which will be positioned between 10 and 11 o’clock.
1964 Pontiac GTO new black leather 3-spoke steering wheel with billet adapter hub on bench
33. Topping off our new steering components is a fitting 14-inch Mopar Tuff Wheel from Flaming River (PN FR20161S). We will mate the wheel to our tilt column using a Flaming River steering wheel adapter (PN FR20161AD).
1964 Pontiac GTO new steering wheel installed on tilt column with visible wiring harness integration
34. The resulting steering column and wheel complement the GTO’s muscle car vibe while adding modern comfort and convenience that only a tilt steering column can provide.
SOURCE
Modern Rodding
VOLUME 6 • ISSUE 61 • 2025