Modern Rodding Tech
InTheGarageMedia.com
This rendering by Sean Smith Designs shows the direction of the build. The body modifications are mild rather than wild
1. This rendering by Sean Smith Designs shows the direction of the build. The body modifications are mild rather than wild. Still, there is a significant emphasis on making this car a serious driver, getting the stance just right, and adding detail a mile deep for the body repairs and modifications.
BBT Fabrications Builds a 1959 Chevy Impala
Part 1: The Interior Sheetmetal
By Ron Covell Photography by BBT Fabrications
T

roy Gudgel and his company BBT Fabrications have been making quite a name for themselves with their outstanding work. They run a full-service shop in Mahomet, Illinois, doing top-level bodywork, metal fabrication, CNC machining, paint, upholstery, wiring, and final assembly. They have received awards in some top shows nationwide and show no signs of slowing down.

They are just wrapping up an outstanding 1959 Chevrolet Impala for Eugene Bothello. They started with a 65-year-old survivor in fair shape but they wound up replacing over half the sheetmetal on the body shell and creating hundreds of custom-fabricated components in their quest for perfection.

It will take several installments to do justice to this massive project, and they have set a very high bar for every component of the car, whether it will be visible when the car is completed or not. This time, we’ll focus on the extensive work done on the interior.

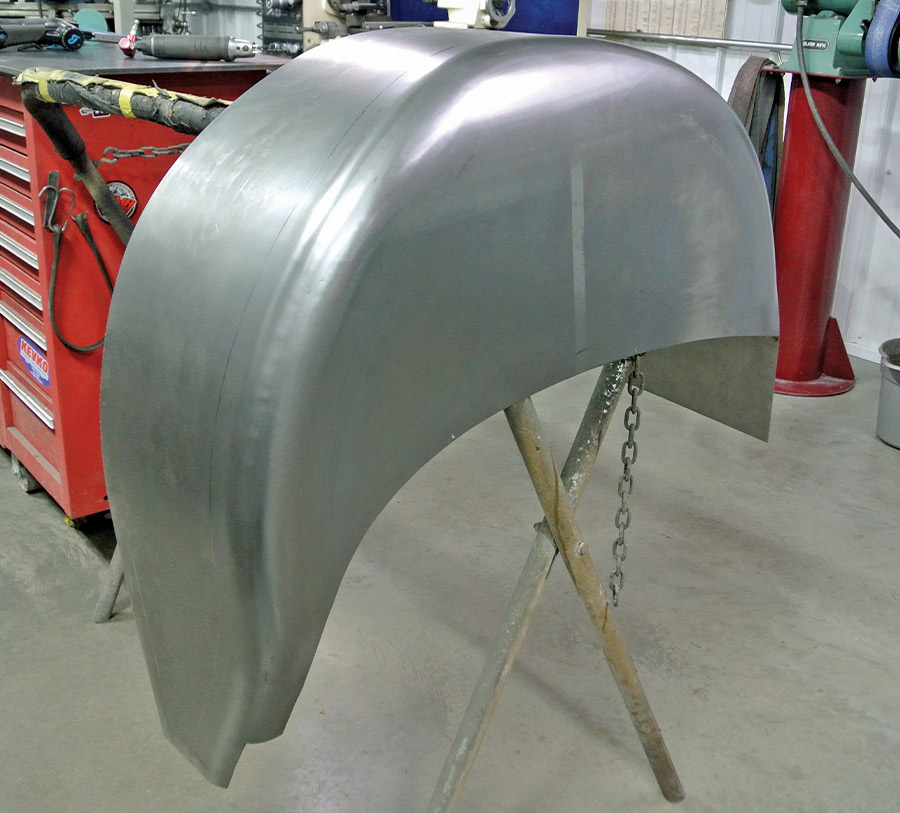
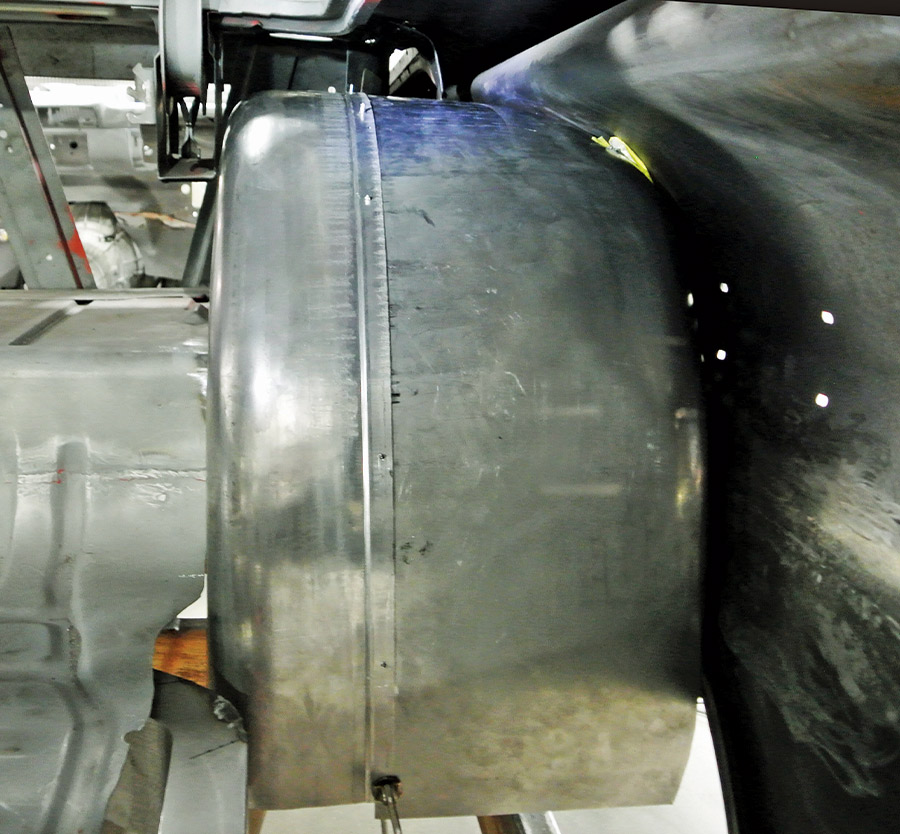
The car features 20- and 21-inch Forgeline wheels on the front and back, respectively, and lots of work was required to accommodate the massive tires. The rear wheelwells were discarded then the floor was trimmed to get sufficient clearance for the wide tires. New wheelwells were built from 18-gauge steel sheets and then carefully fitted into place.

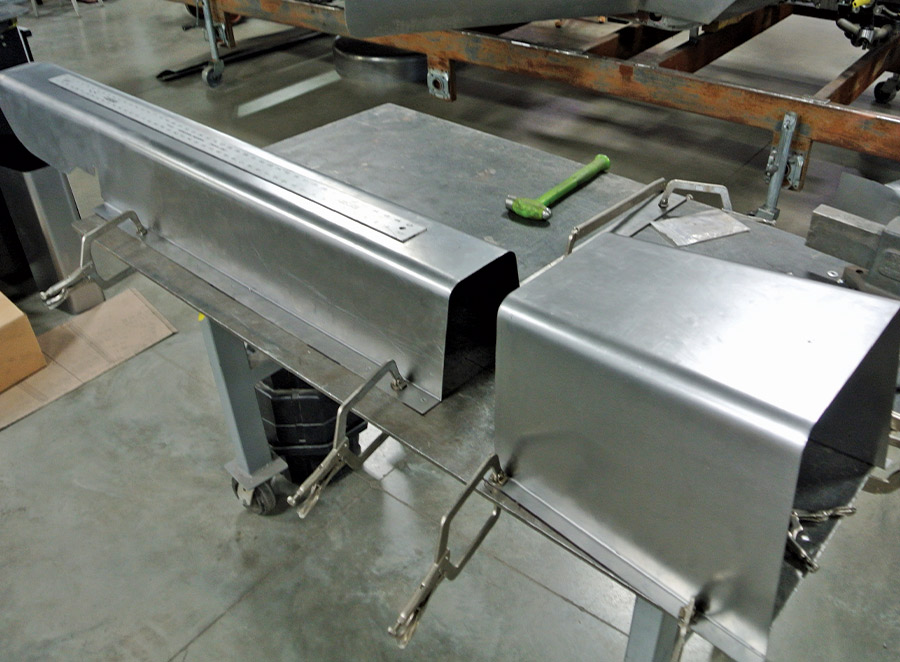
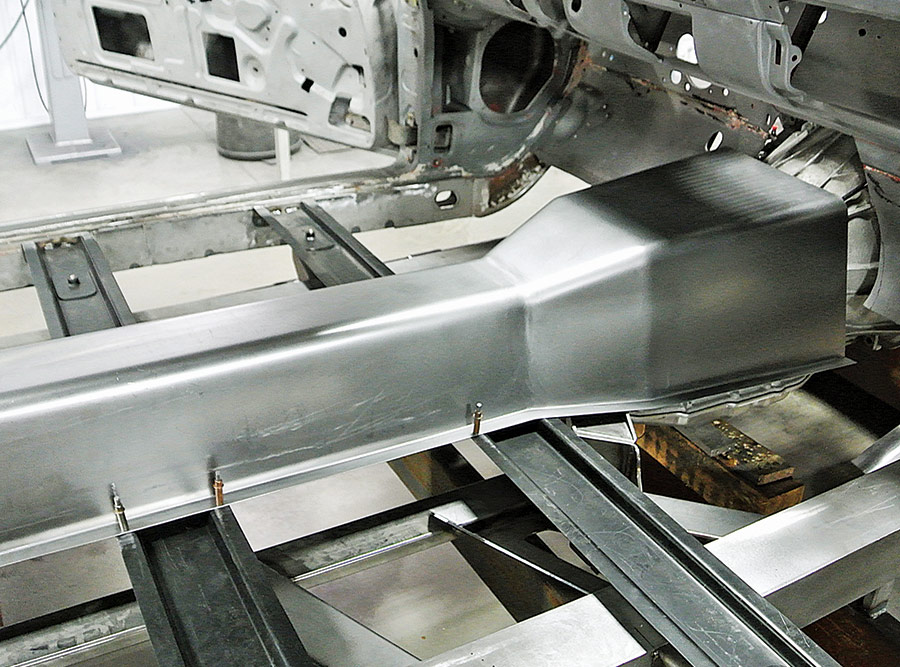
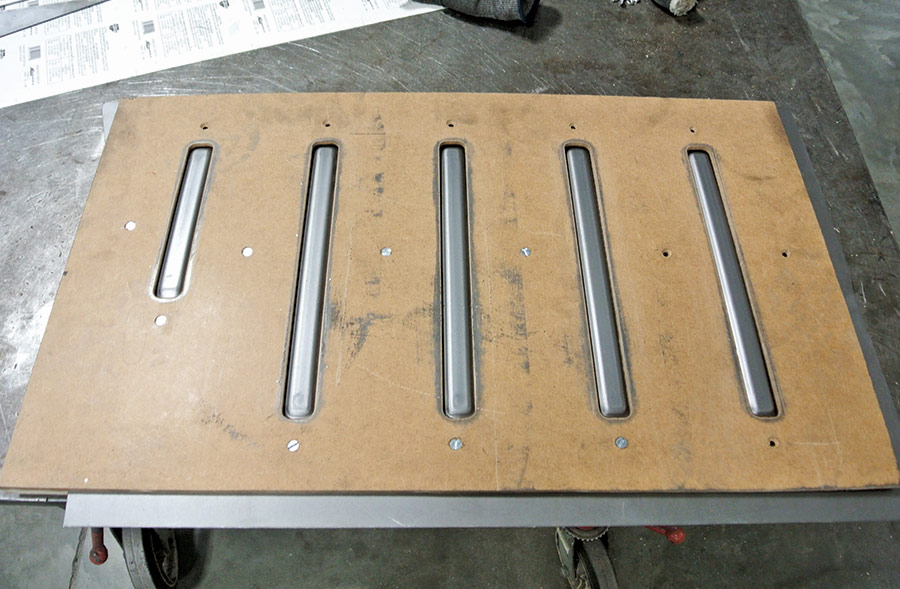
The entire floor was replaced with new metal and much care went into placing large, strong ribs in these panels. Special beading dies were used in a Pullmax machine in conjunction with plywood forms explicitly made for the purpose. The floors were too large to be made in one piece, so each side was divided into two pieces and then welded together after the beads were formed. These floors were plug-welded to the sub-structure, then ground smooth. The longer sections of the transmission and driveshaft covers were made from one piece of metal, and then a tapered connector was made from four pieces to join them. After welding and metal finishing it looks like one seamless piece of metal.

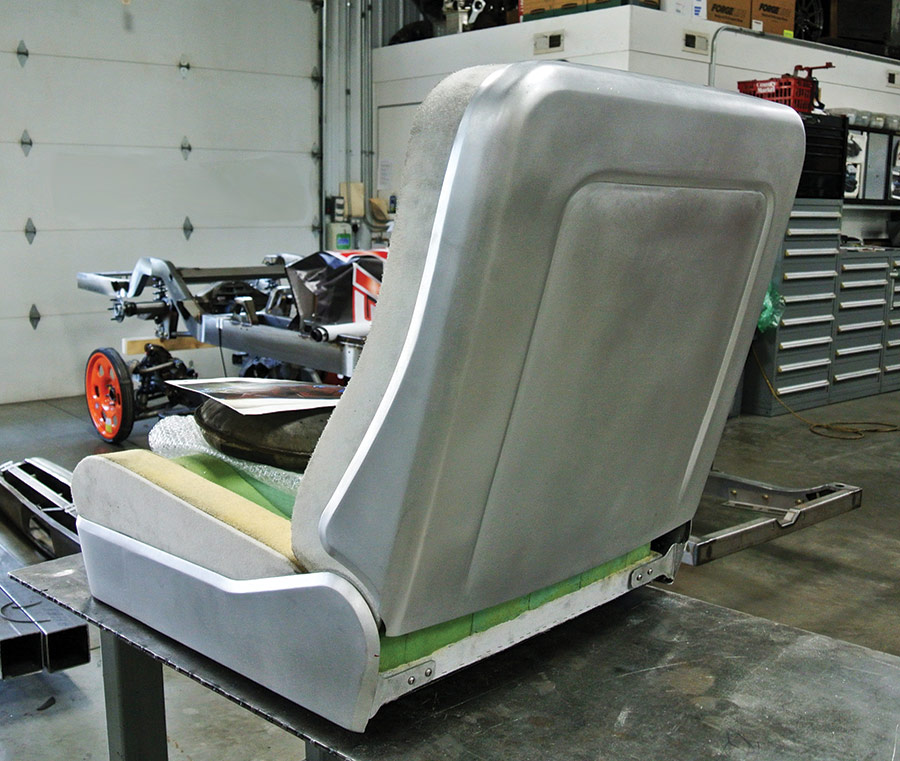
Phil Cato, BBT’s in-house specialist, completely custom-made the seats for this car. The substructure is made from tubing with custom-fitted springs topped with two different densities of foam rubber.

Stylish sheetmetal trim was made to cover the seat back and sides.

The dashboard is an actual work of art, with all the surface contours refined to perfection. The bezels and trim were designed using CAD and CNC machined from aluminum billet.

Next time, we’ll deeply dive into the extensive work on the car’s rear, including fabricating the recessed, custom-made bumpers and rebuilding the sheetmetal for the huge batwing tailfins on the 1959 Chevy.

21-inch Forgeline wheels are used in the rear with Pirelli tires
2. In the quest for performance, 21-inch Forgeline wheels are used in the rear with Pirelli tires. The floor and inner wheelwells required extensive modifications to fit the huge tires.
The chassis is a Roadster Shop REVO with pickups for the original body mounts
3. The chassis is a Roadster Shop REVO with pickups for the original body mounts. Some careful fitting was required to widen the wheelwells sufficiently while retaining the integrity of the mounts.
New metal was shaped for the outer portion of the new wheelwells, ensuring adequate clearance for the tires
4. New metal was shaped for the outer portion of the new wheelwells, ensuring adequate clearance for the tires.
With the outer wheelwell roughed in, fabrication on the cap could commence
5. With the outer wheelwell roughed in, fabrication on the cap could commence.
The cap is joined to the outer portion, and the joint is smoothed to perfection
6. The cap is joined to the outer portion, and the joint is smoothed to perfection.
The assembly is test-fitted to the body, ensuring proper clearance at all points
7. The assembly is test-fitted to the body, ensuring proper clearance at all points.
The inner portion of the wheelwell was constructed similarly
8. The inner portion of the wheelwell was constructed similarly.
The inner and outer sections are test-fitted in place
9. The inner and outer sections are test-fitted in place.
Before joining the two sections, the bottom edges of the wheelwell were formed to add additional strength and style
10. Before joining the two sections, the bottom edges of the wheelwell were formed to add additional strength and style.
The joint is joggled to provide maximum tire clearance inside the wheelwell
11. The joint is joggled to provide maximum tire clearance inside the wheelwell.
The transmission cover and driveshaft housing were made in sections. The nicely radiused bends give them a very smooth appearance
12. The transmission cover and driveshaft housing were made in sections. The nicely radiused bends give them a very smooth appearance. The parts are aligned on a bench to help lay out the transition piece.
The transition was made from four separate sections, ensuring a perfect fit on both ends
13. The transition was made from four separate sections, ensuring a perfect fit on both ends.
Here all the segments are welded together and metal finished
14. Here all the segments are welded together and metal finished.
All the floors were replaced with new metal. A plywood pattern is used here to guide one of the floor pieces through the Pullmax machine, precisely locating the beads
15. All the floors were replaced with new metal. A plywood pattern is used here to guide one of the floor pieces through the Pullmax machine, precisely locating the beads.
This is how the part appears after the forming is completed before removing the plywood guide
16. This is how the part appears after the forming is completed before removing the plywood guide.
Each side of the floor was made in two segments, which were then welded together
17. Each side of the floor was made in two segments, which were then welded together.
Here’s the floor welded into place and the metal finished. No shortcuts are taken here; the quality of fabrication is top-notch
18. Here’s the floor welded into place and the metal finished. No shortcuts are taken here; the quality of fabrication is top-notch.
The seats were completely custom fabricated. Two densities of foam, custom-fitted springs, and handcrafted metal trim were used
19. The seats were completely custom fabricated. Two densities of foam, custom-fitted springs, and handcrafted metal trim were used.
The folding backs of the front seats were highly detailed, too
20. The folding backs of the front seats were highly detailed, too.
The dashboard received extensive, unique work. Large sections were filled with metal to create smooth, flowing shapes
21. The dashboard received extensive, unique work. Large sections were filled with metal to create smooth, flowing shapes.
After metal finishing the seams are completely invisible
22. After metal finishing the seams are completely invisible.
A new panel for the air conditioning ducting was added below the dash
23. A new panel for the air conditioning ducting was added below the dash.
The dash's top surface is a series of beautifully contoured surfaces, all finished to perfection
24. The dash’s top surface is a series of beautifully contoured surfaces, all finished to perfection.
Here, you can see the dash as it nears completion. The bezels for the instruments and air conditioning vents are custom made for this car
25. Here, you can see the dash as it nears completion. The bezels for the instruments and air conditioning vents are custom made for this car.
SOURCES
Modern Rodding
VOLUME 5 • ISSUE 49 • 2024