Modern Rodding TECH

InTheGarageMedia.com

1. Out with the old sheetmetal and in with the new Golden Star Classic Auto Parts tailpan.
TRI-FIVE TAILPAN REPLACEMENT
Getting Rid of Decades of Deteriorating Metal
By Eric Geisert Photography by THE AUTHOR
A

s you get into any metal repair or replacement work on your project you must always balance time versus money. Sometimes you may have more of one than the other (with rarely an abundance of both) but doing rust repair work on a vehicle can eat up a lot of time and money. Luckily for Tri-Five owners, Texas-based Golden Star Classic Auto Parts can save you a bit of both.

Golden Star is a family owned/operated business that sells a huge amount of replacement parts and pieces for everything from old Ford Broncos, Mustangs, Chevelles, GTOs, A- and G-body GMs, to ’60s VW Buses and Mercedes-Benzes, but they also carry a full line of ’55-57 Chevy replacement panels to make repair work more manageable.

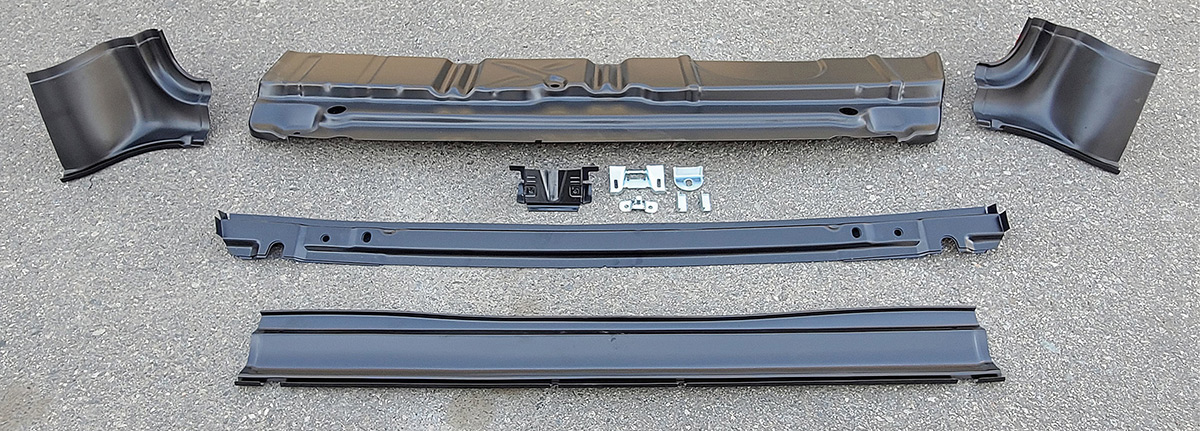
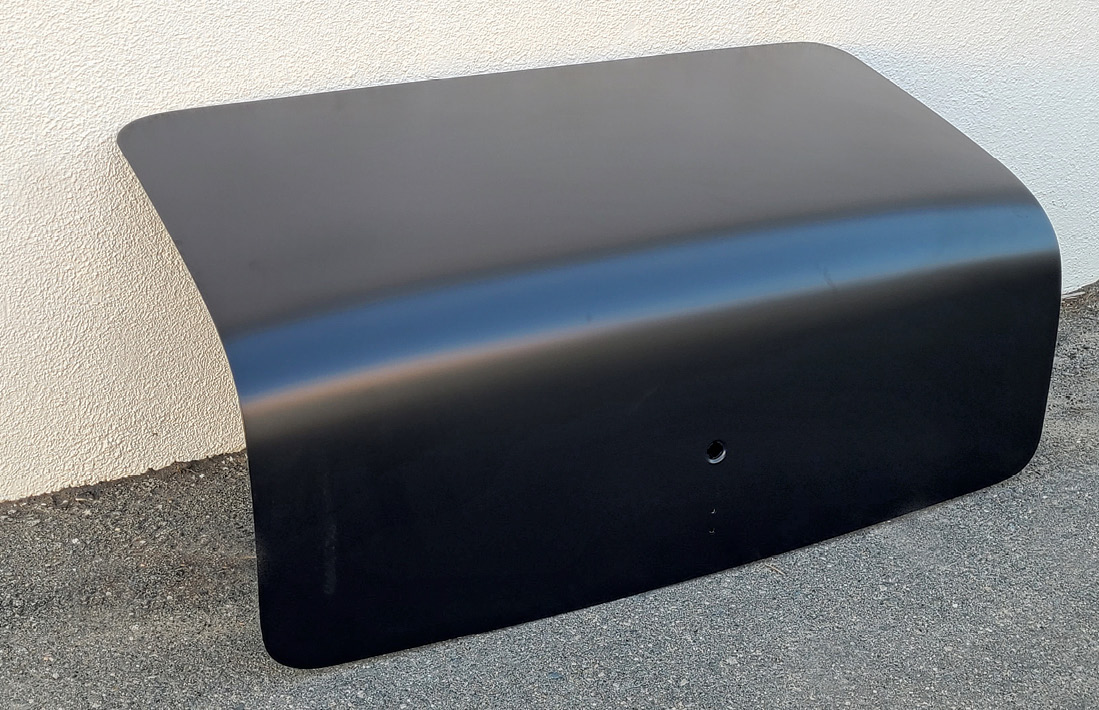
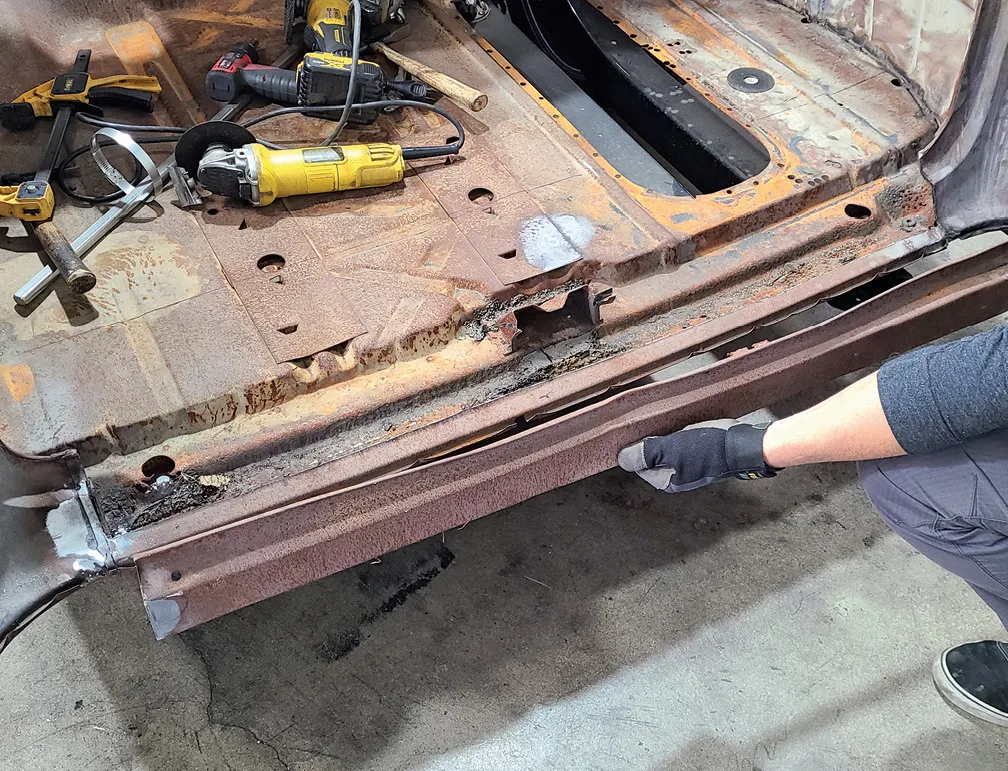
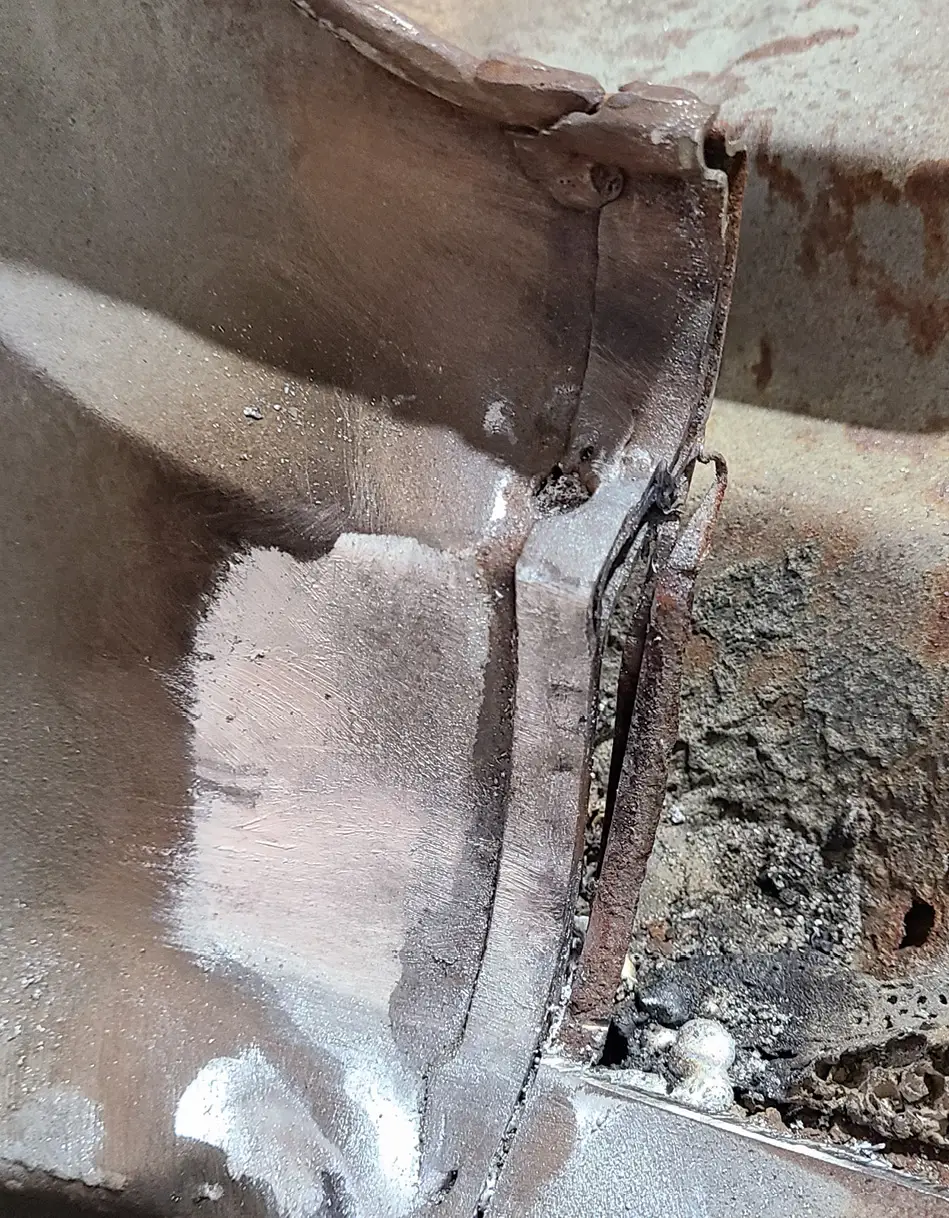
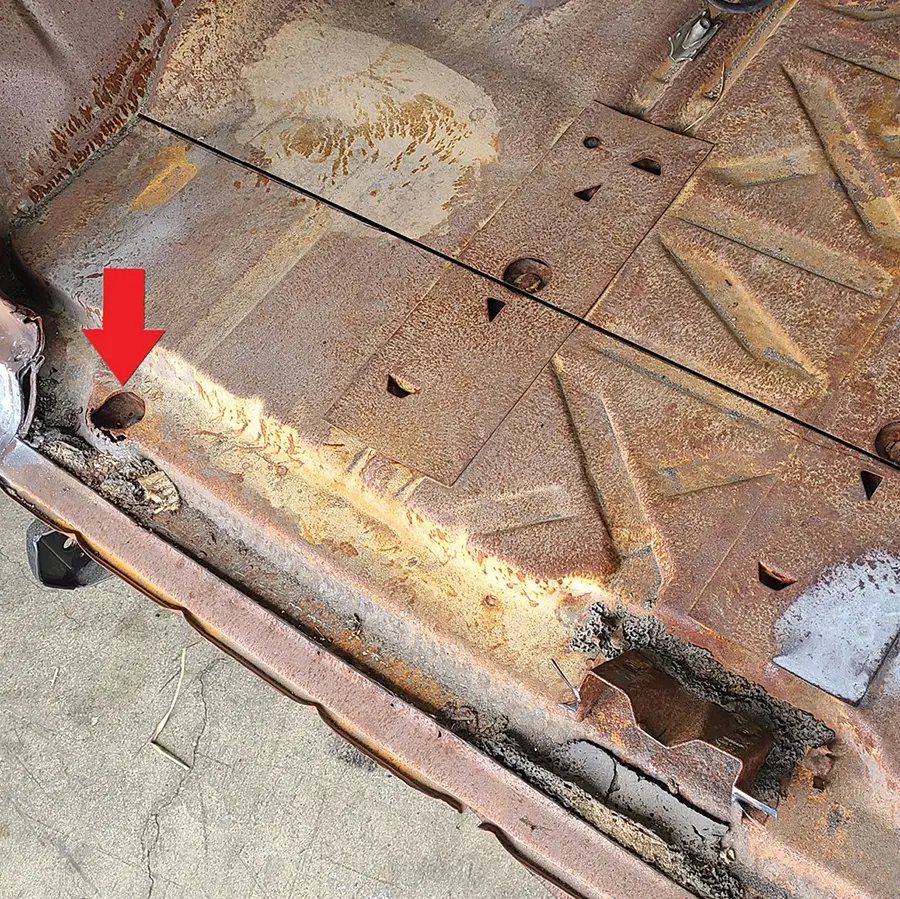
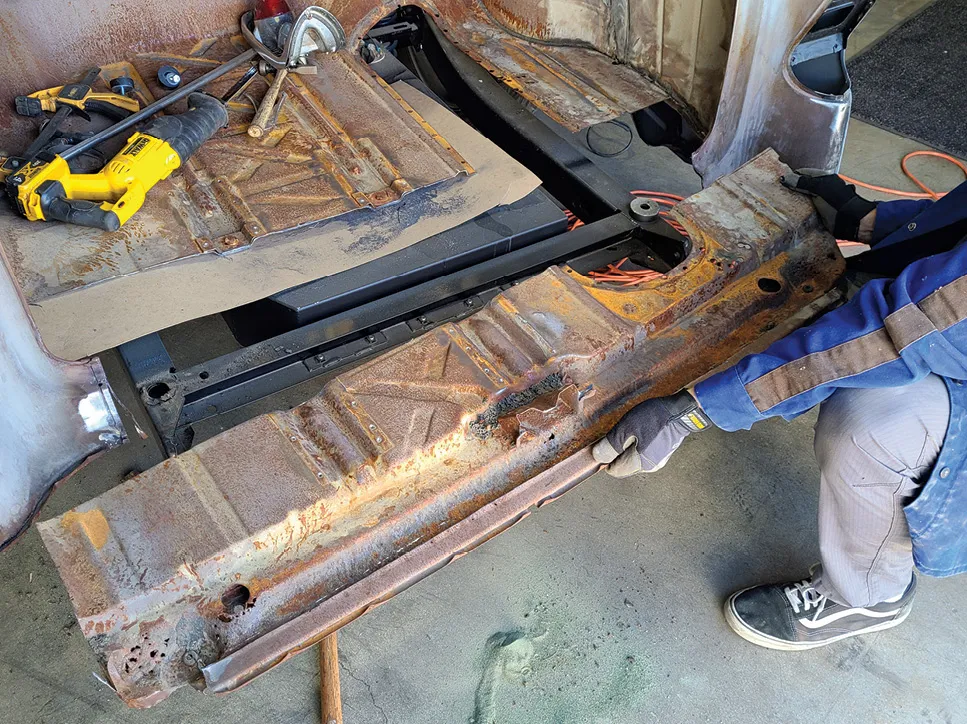
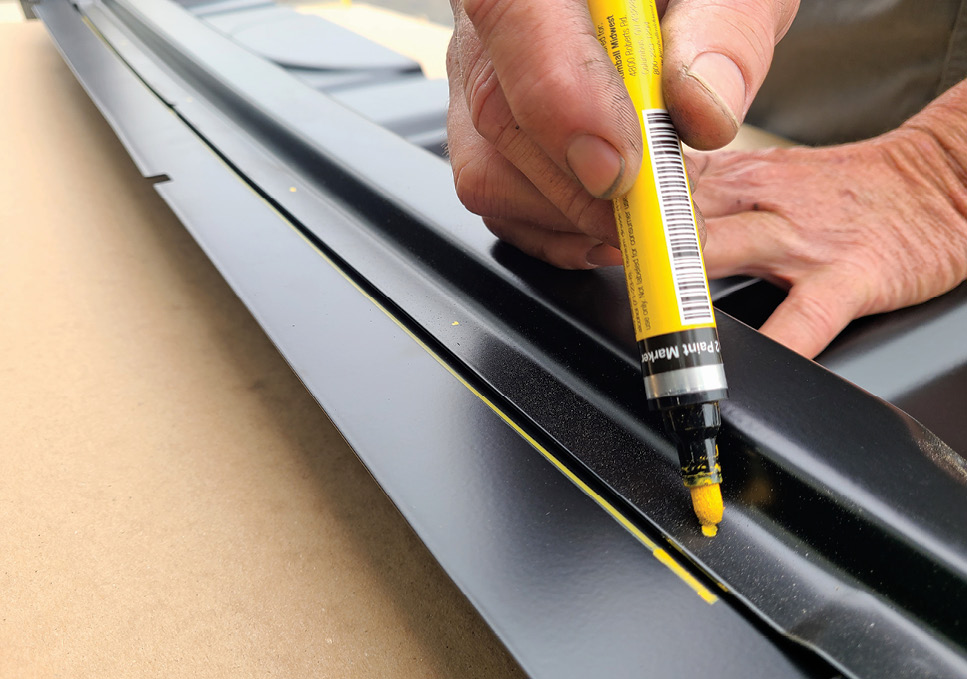
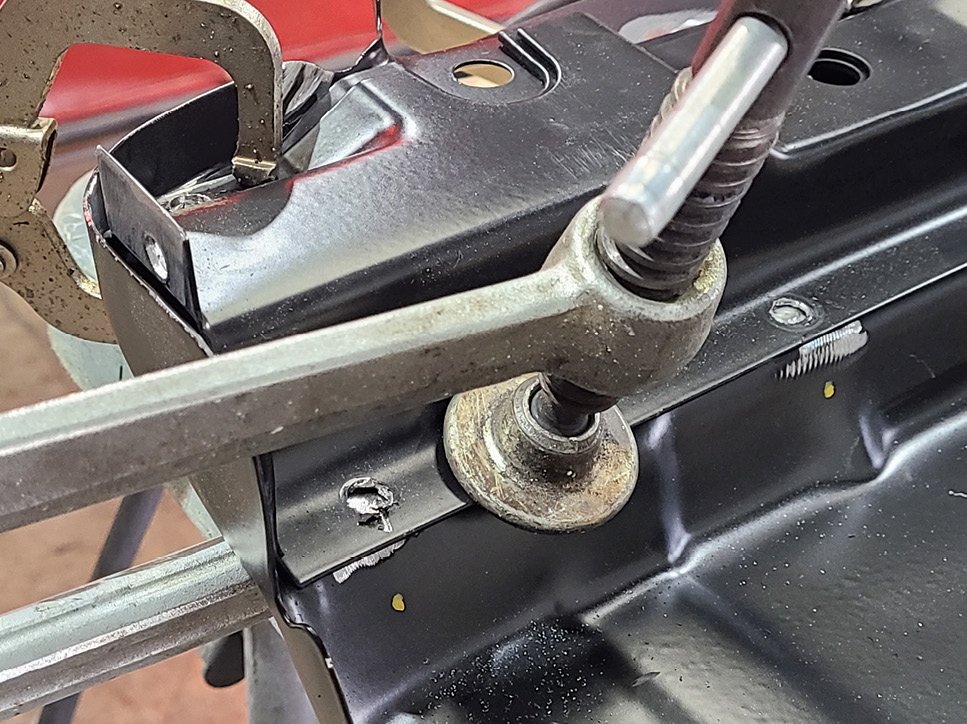
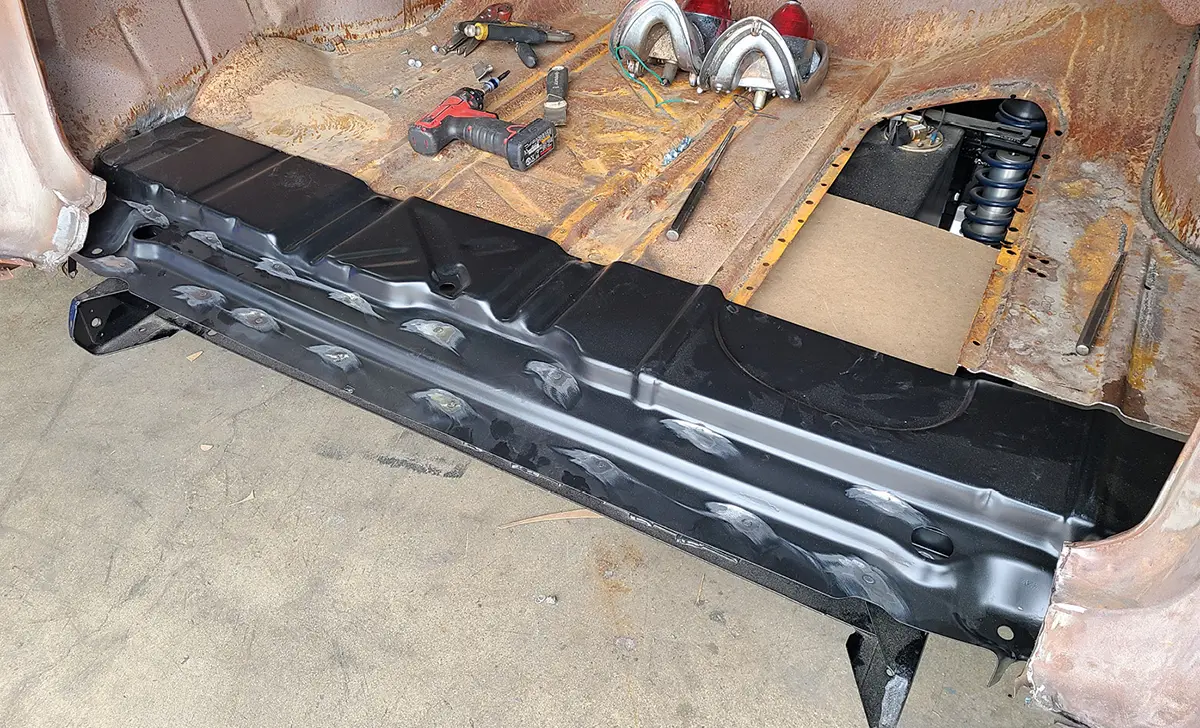
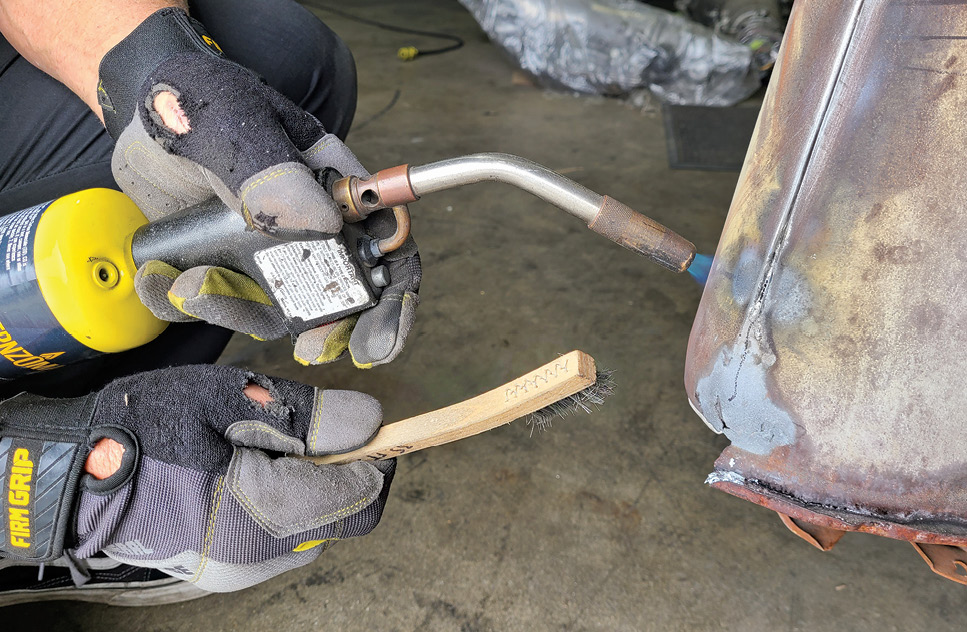
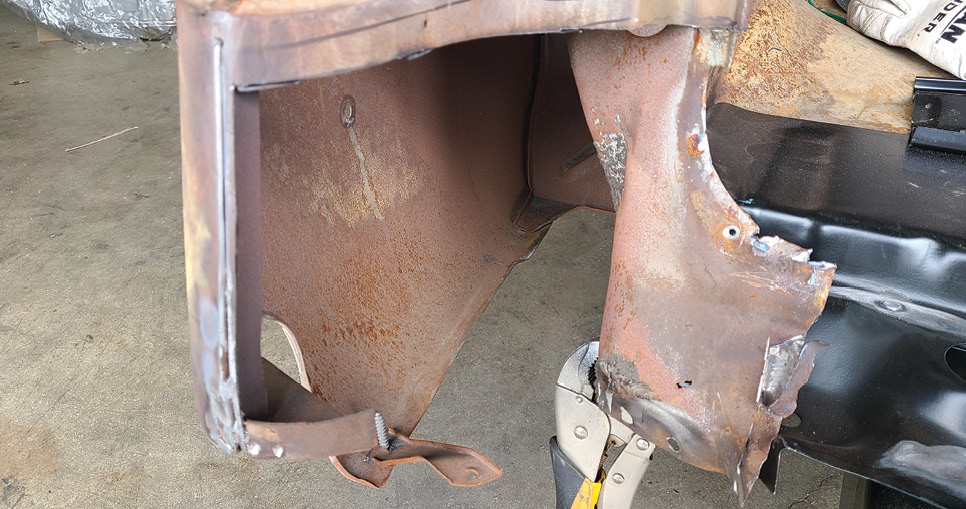
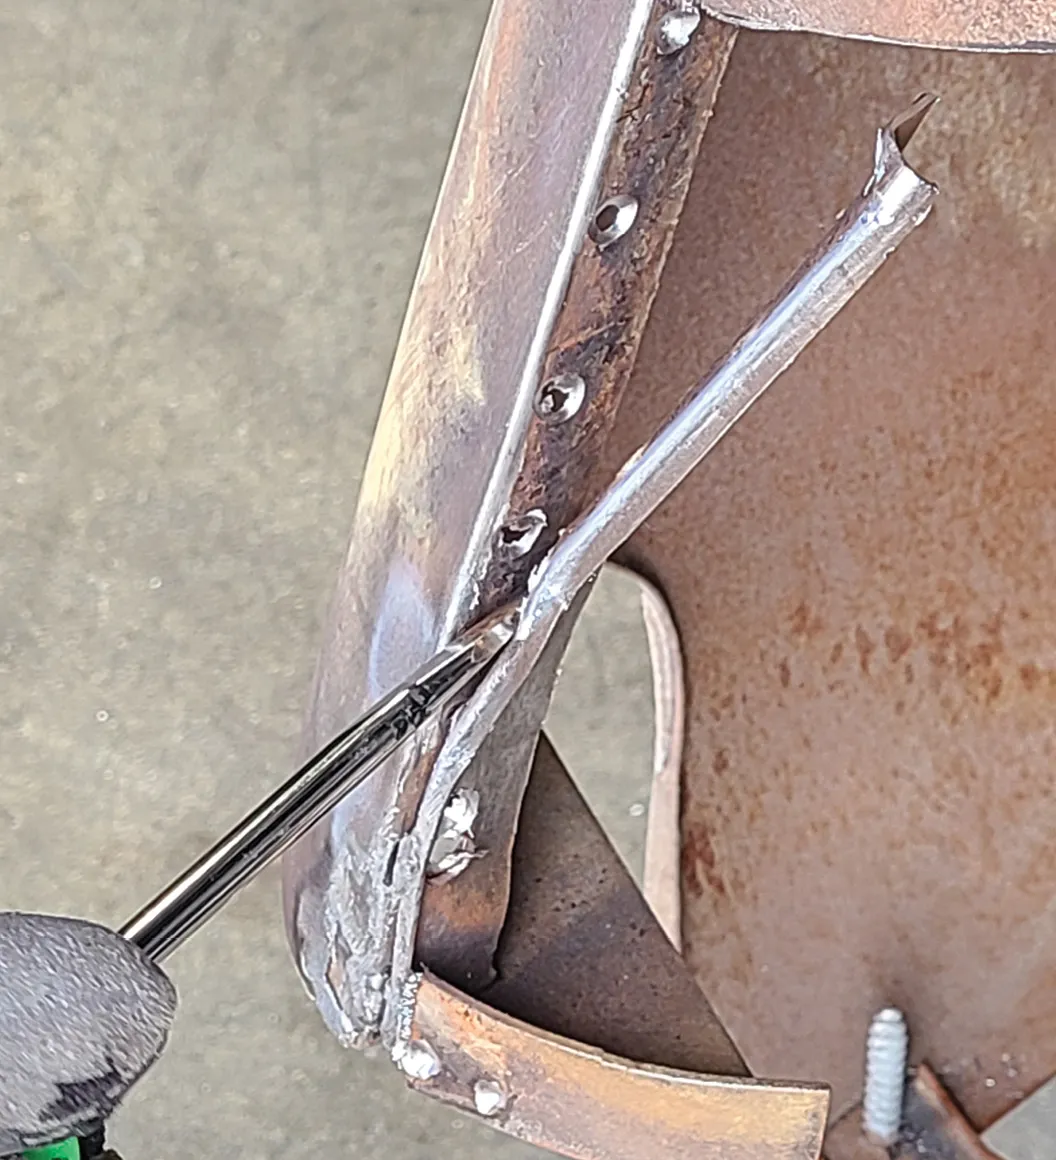
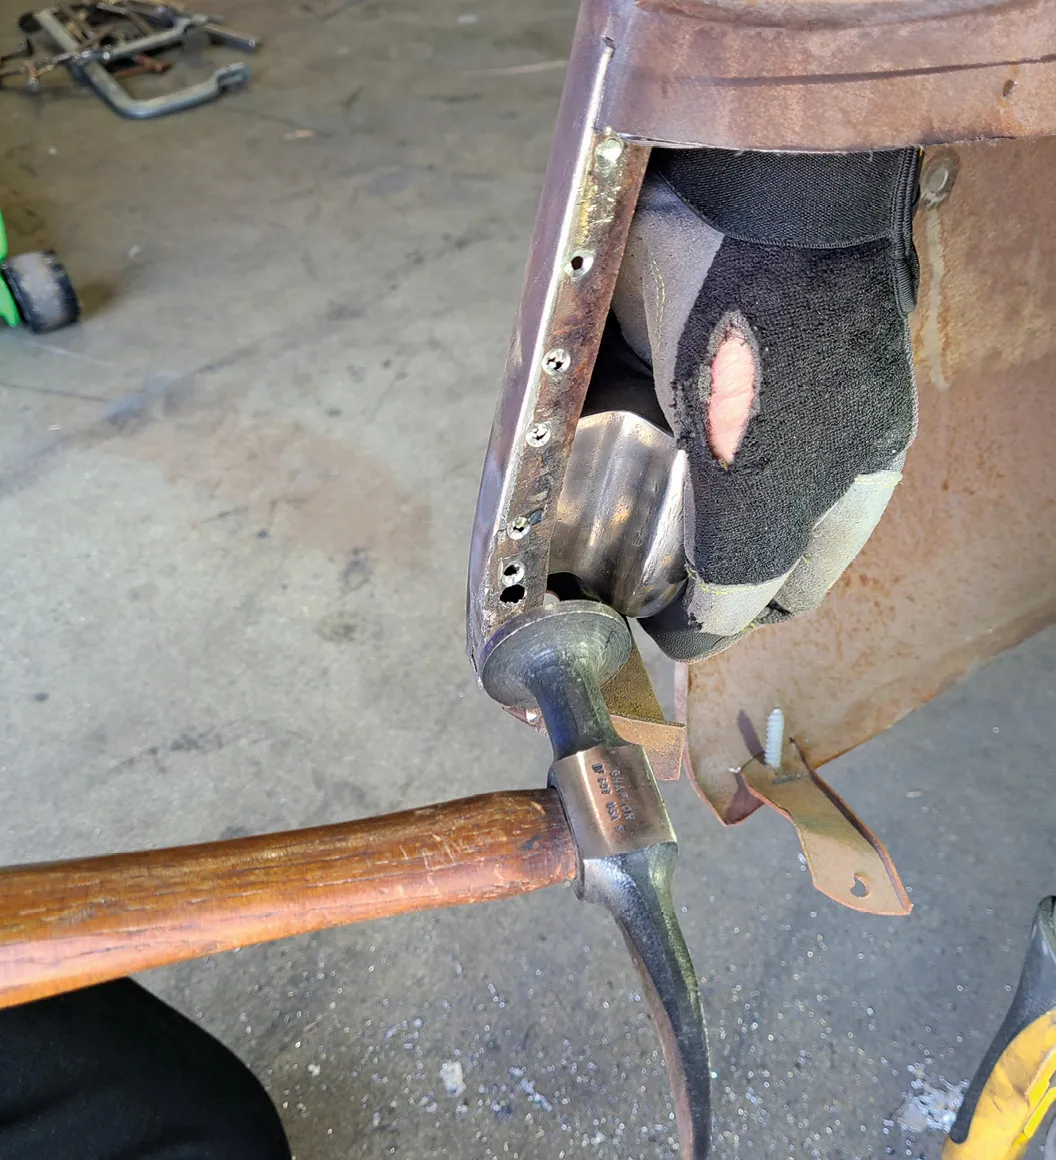
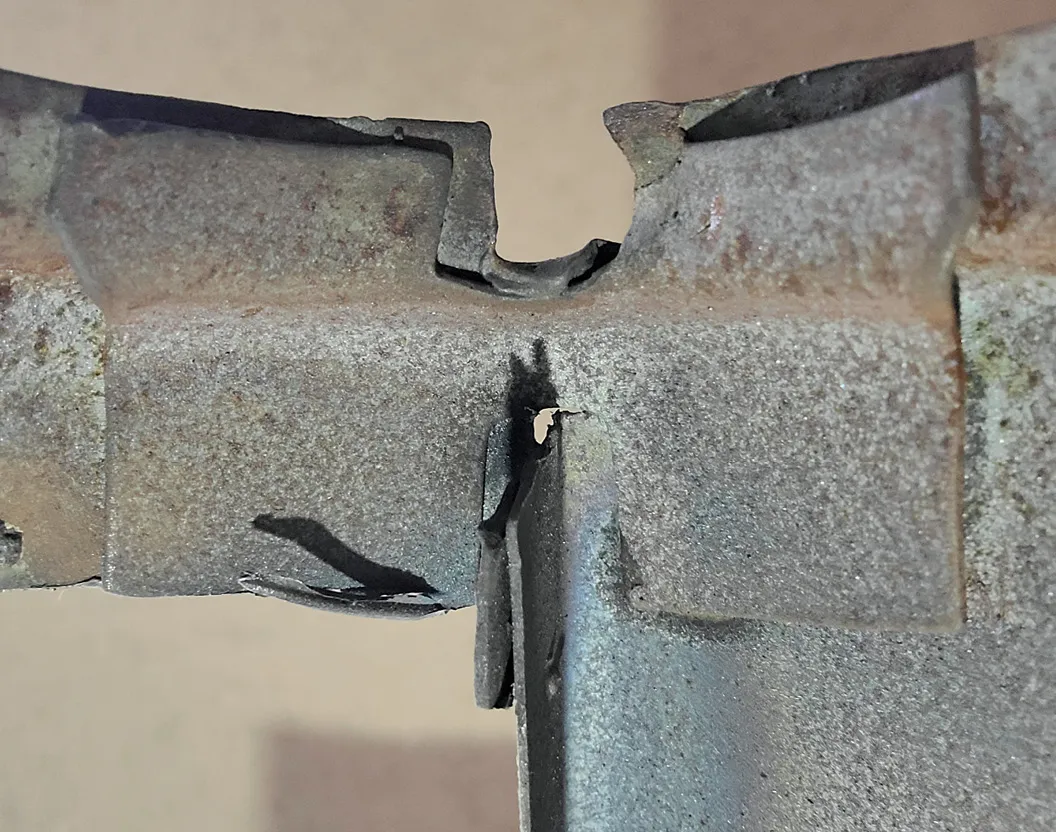
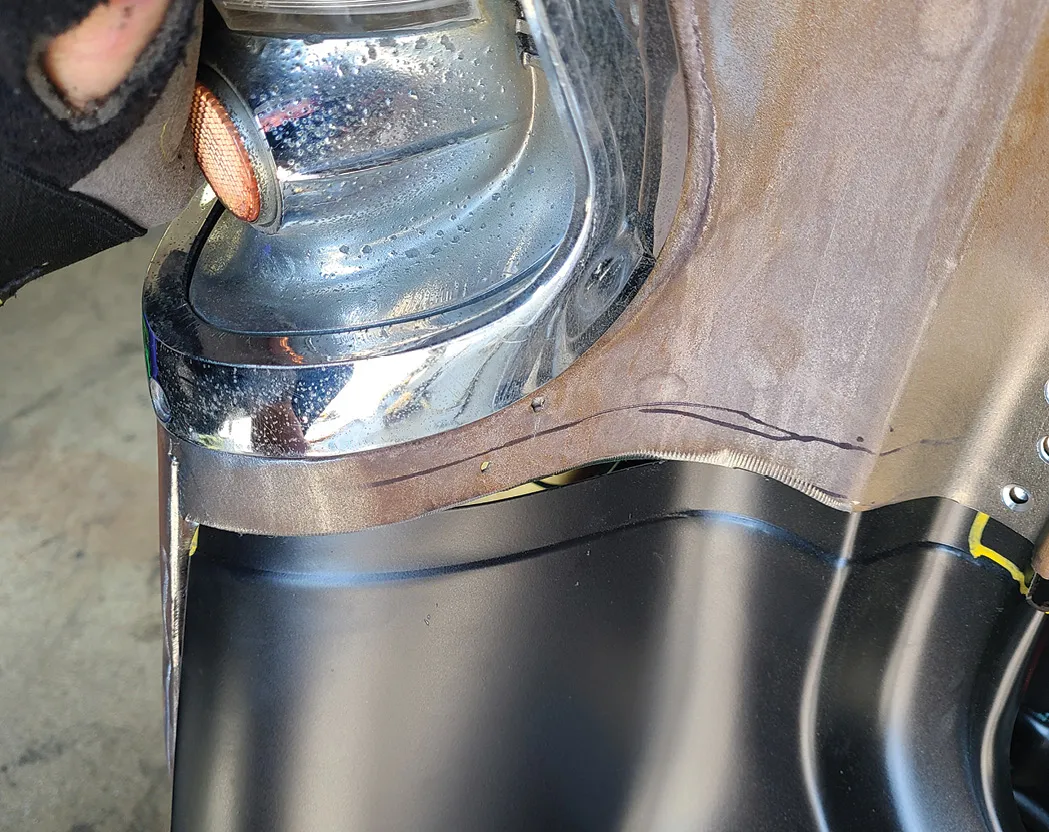
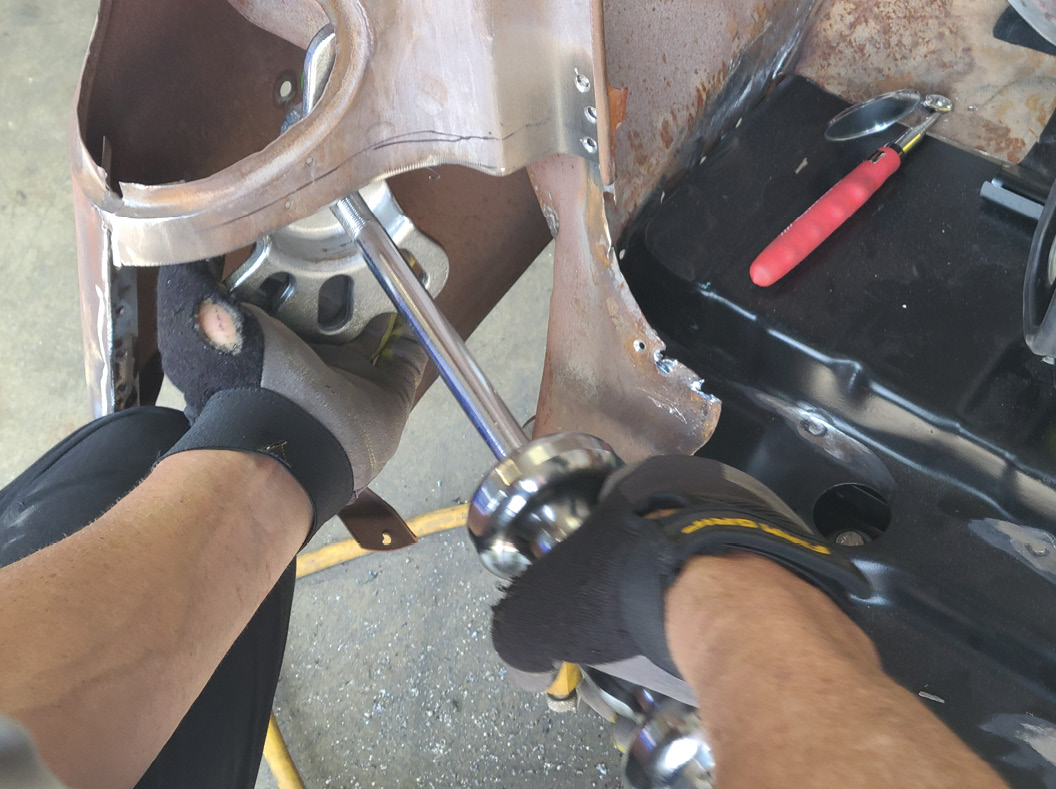
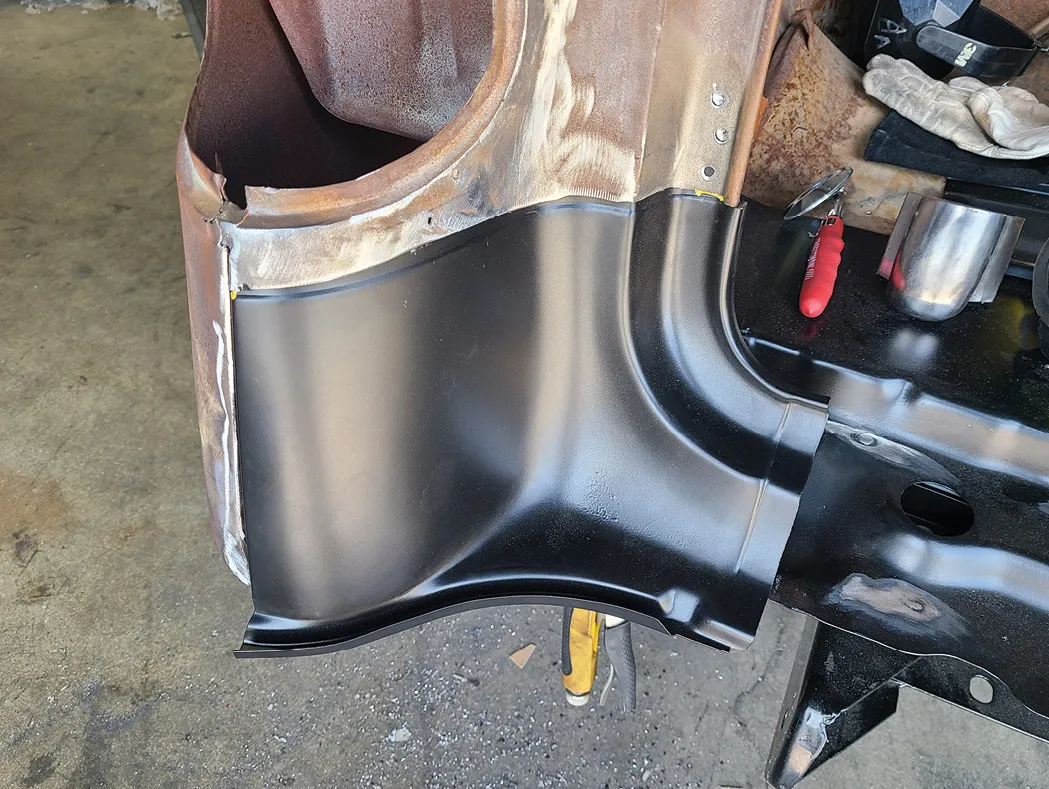
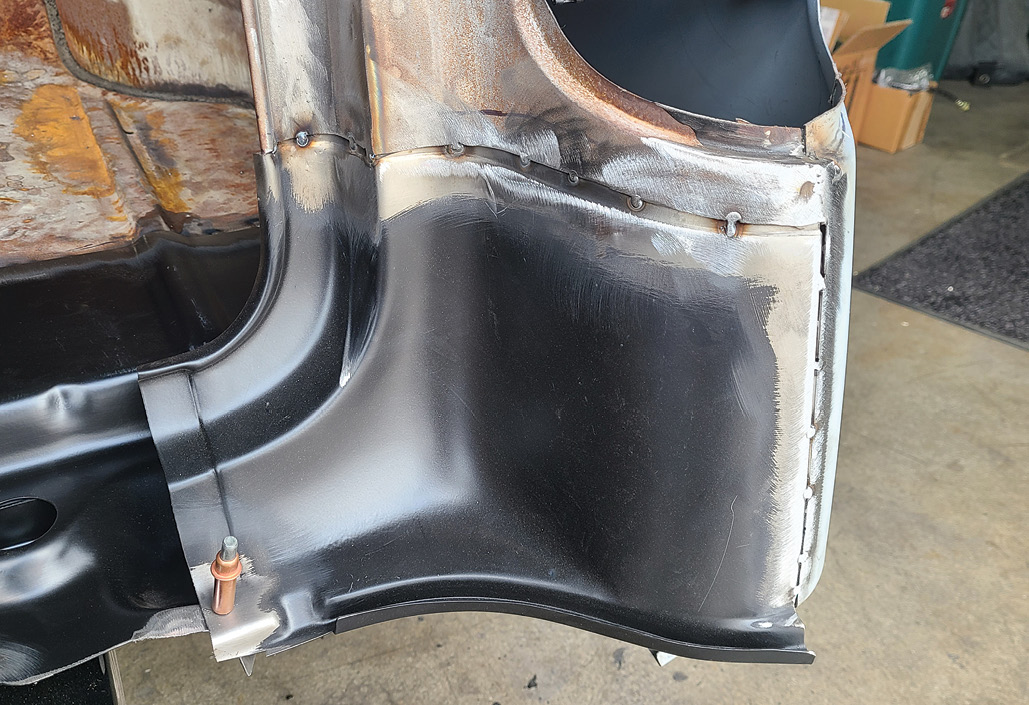
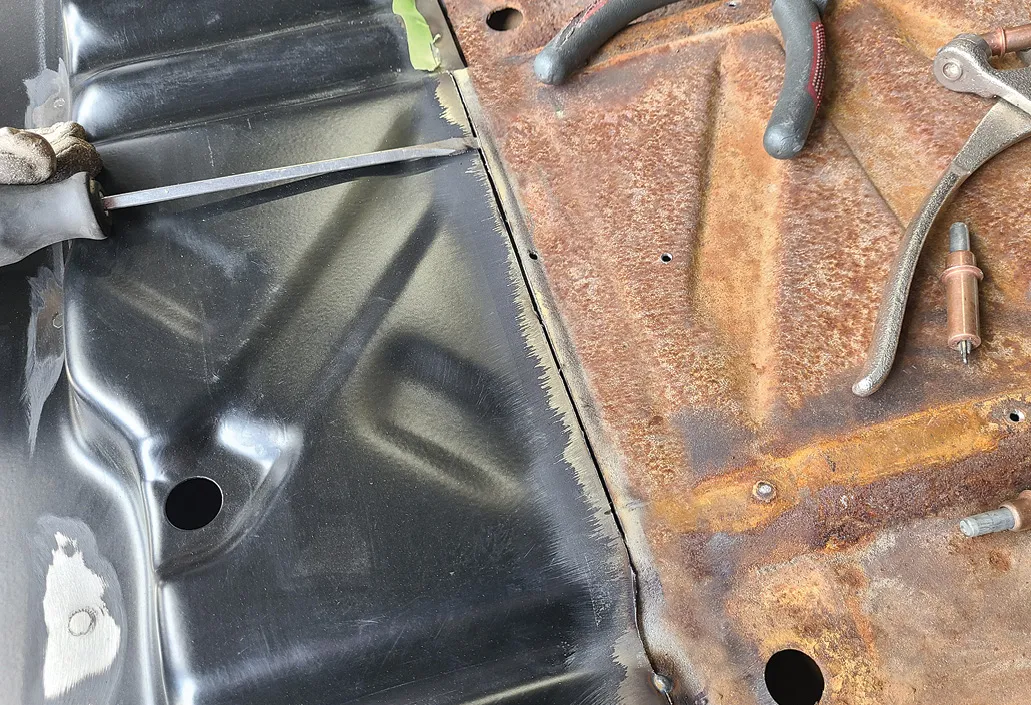
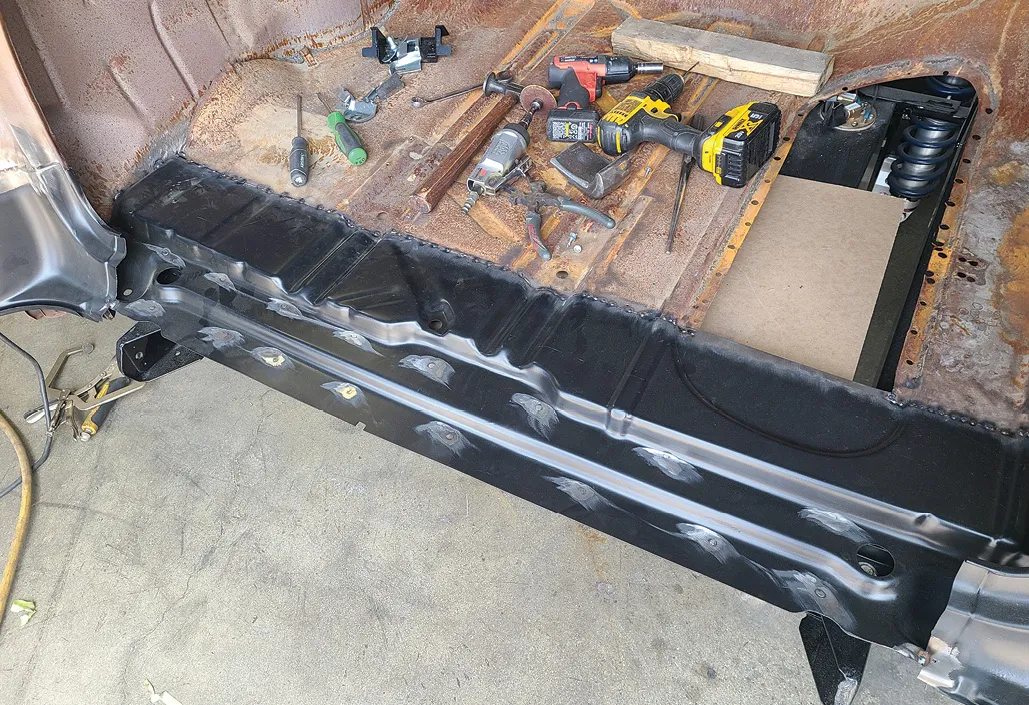
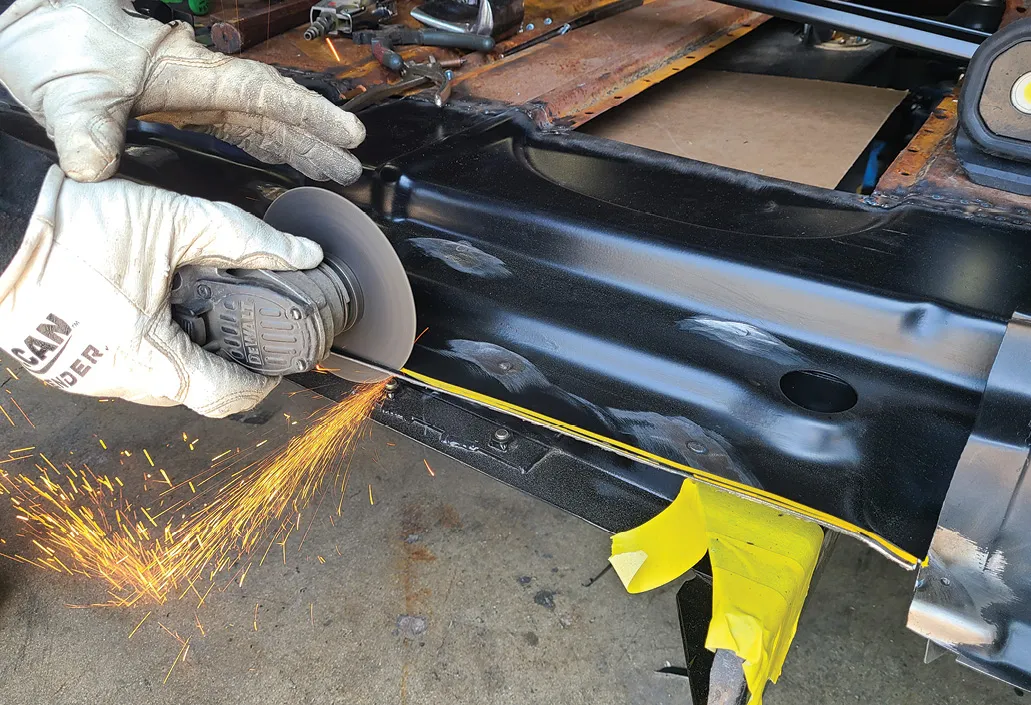
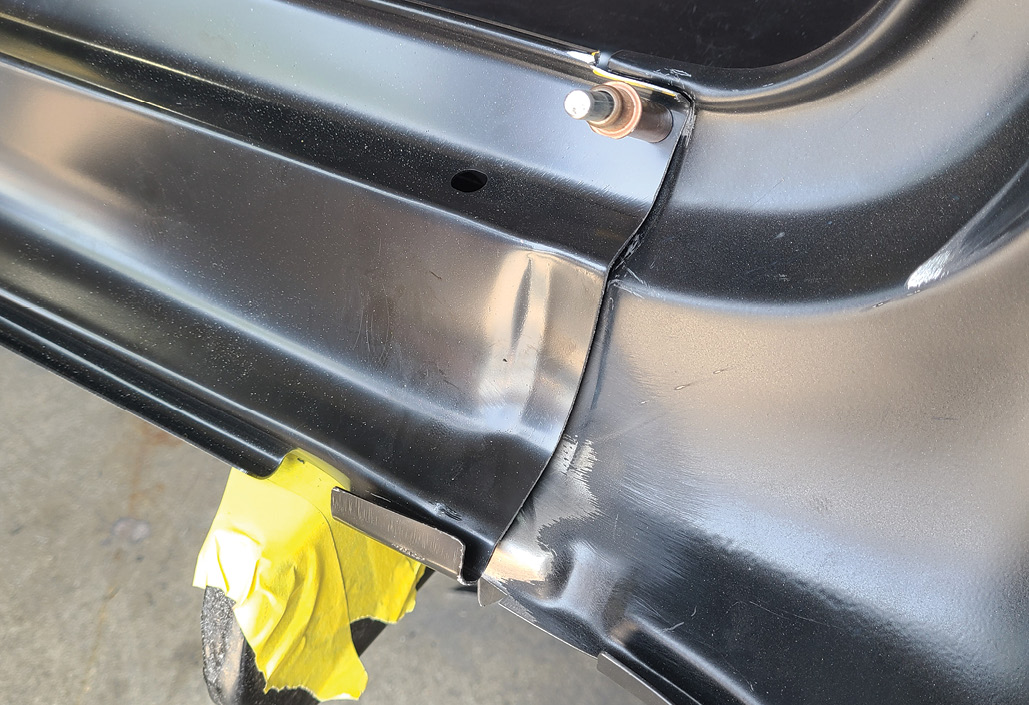
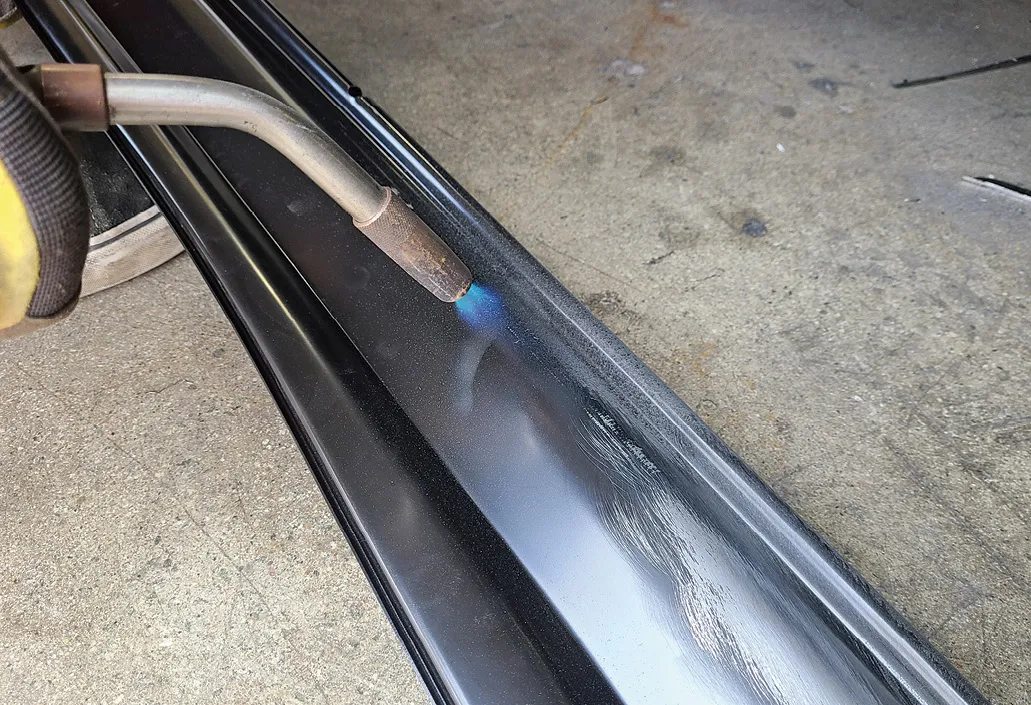
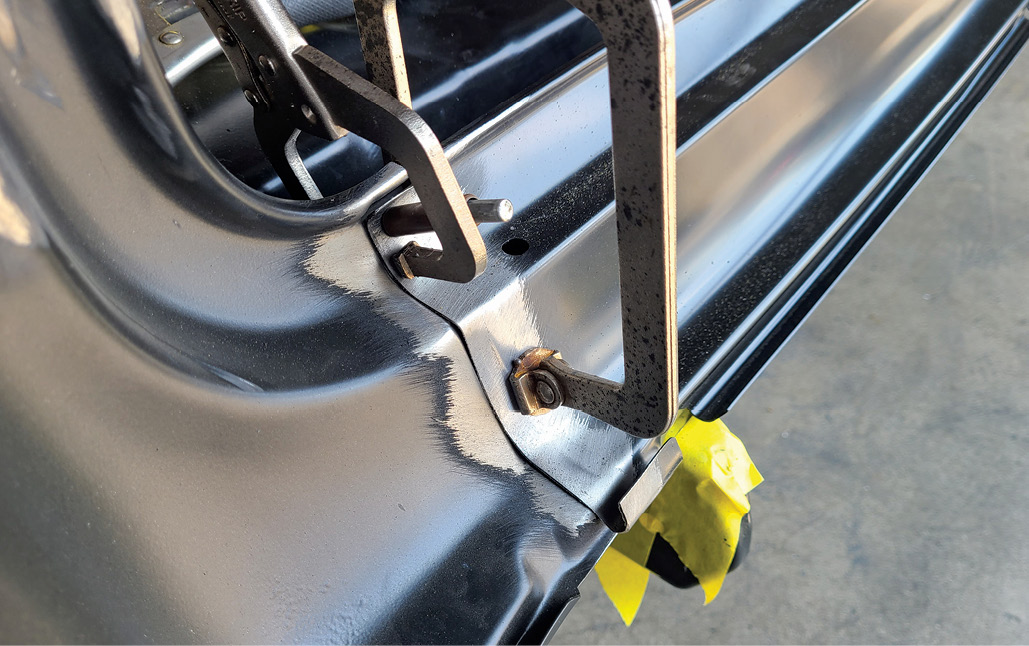
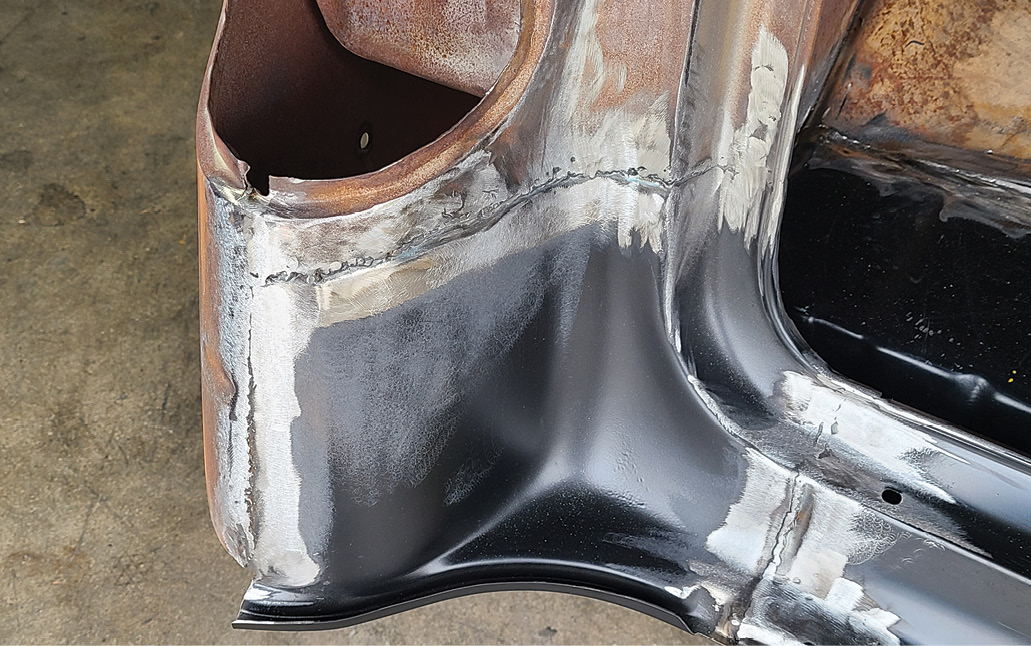
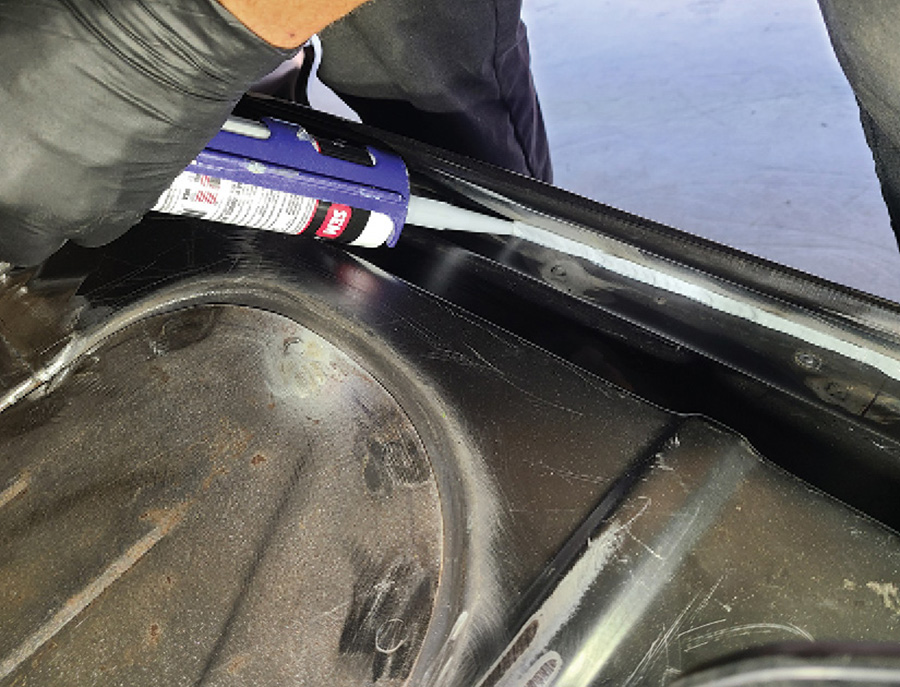
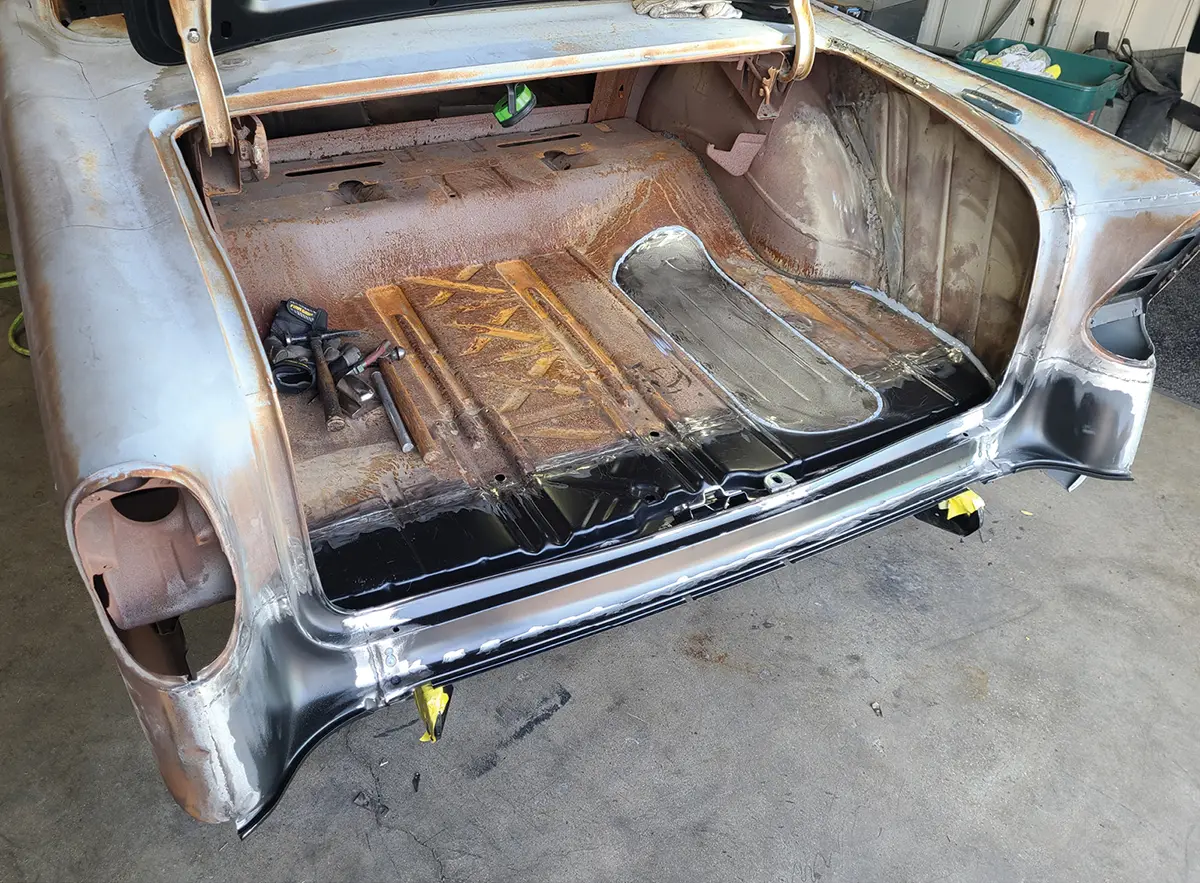
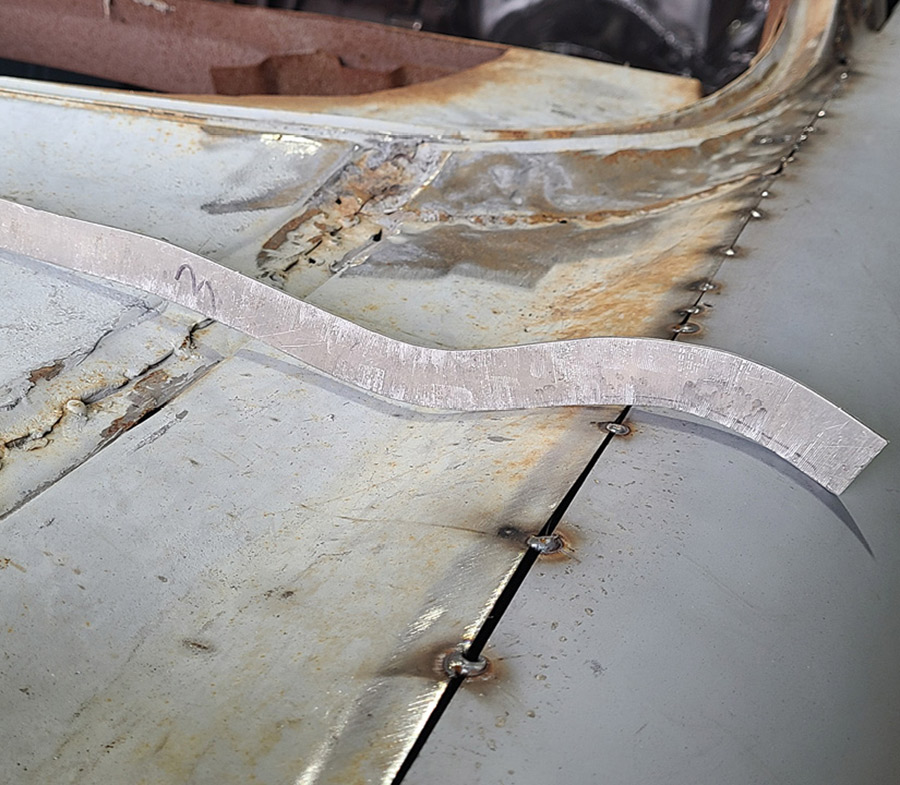
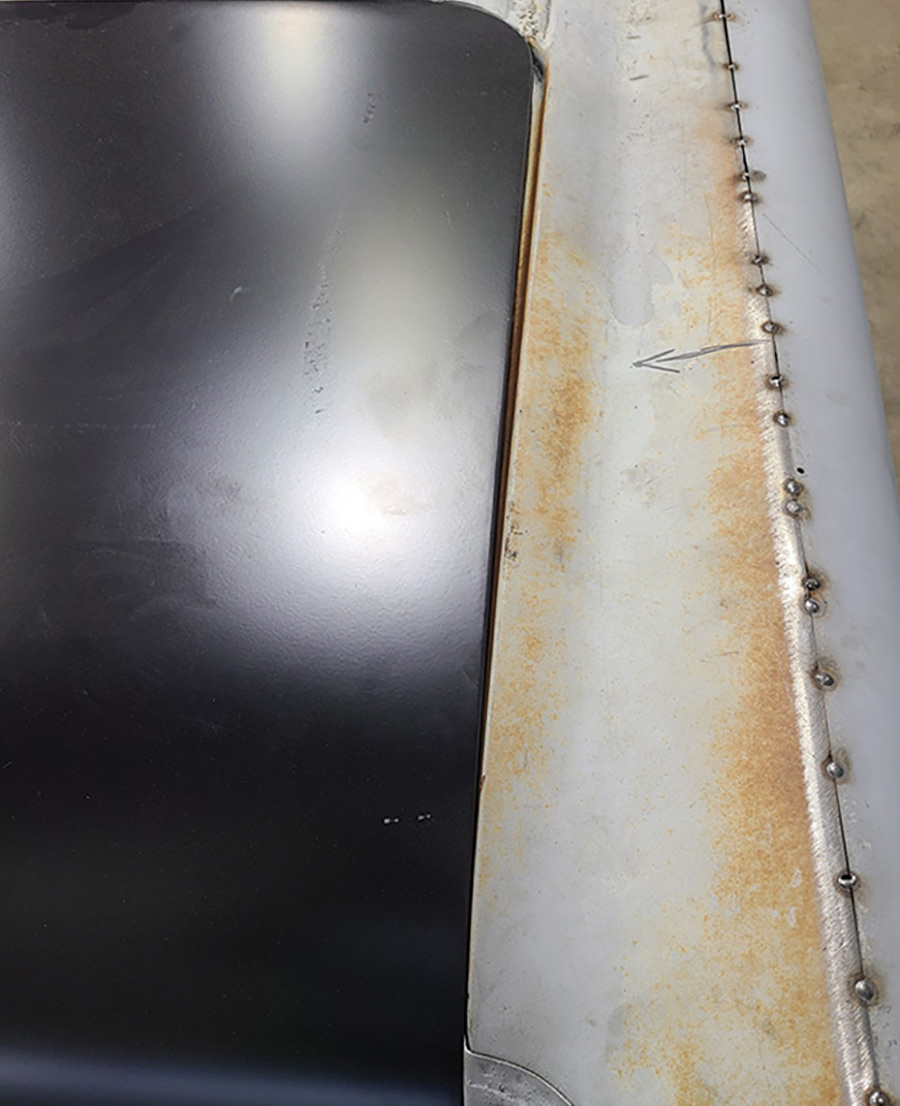
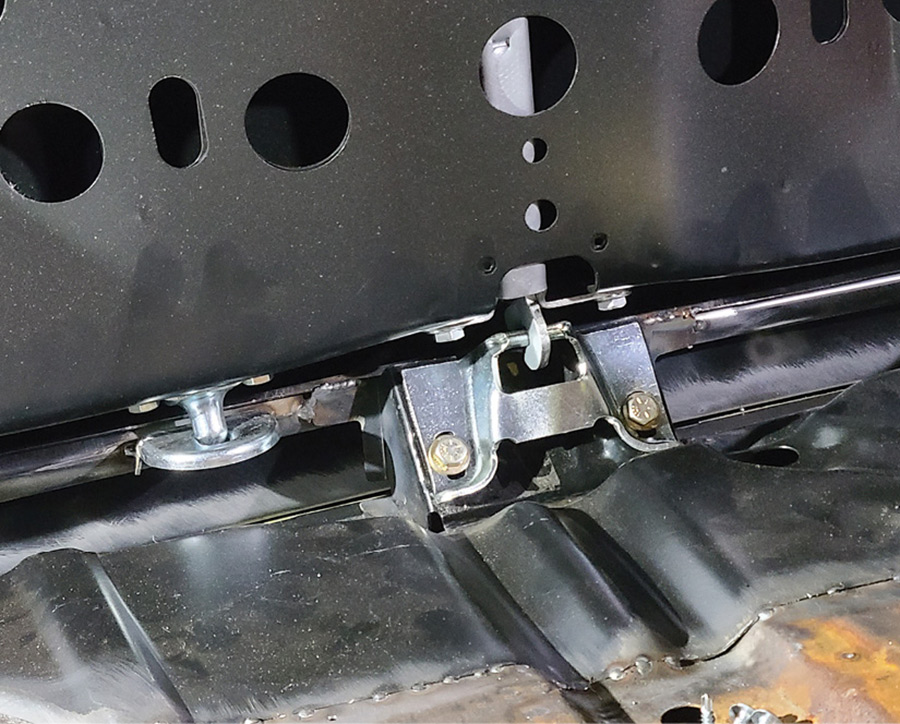
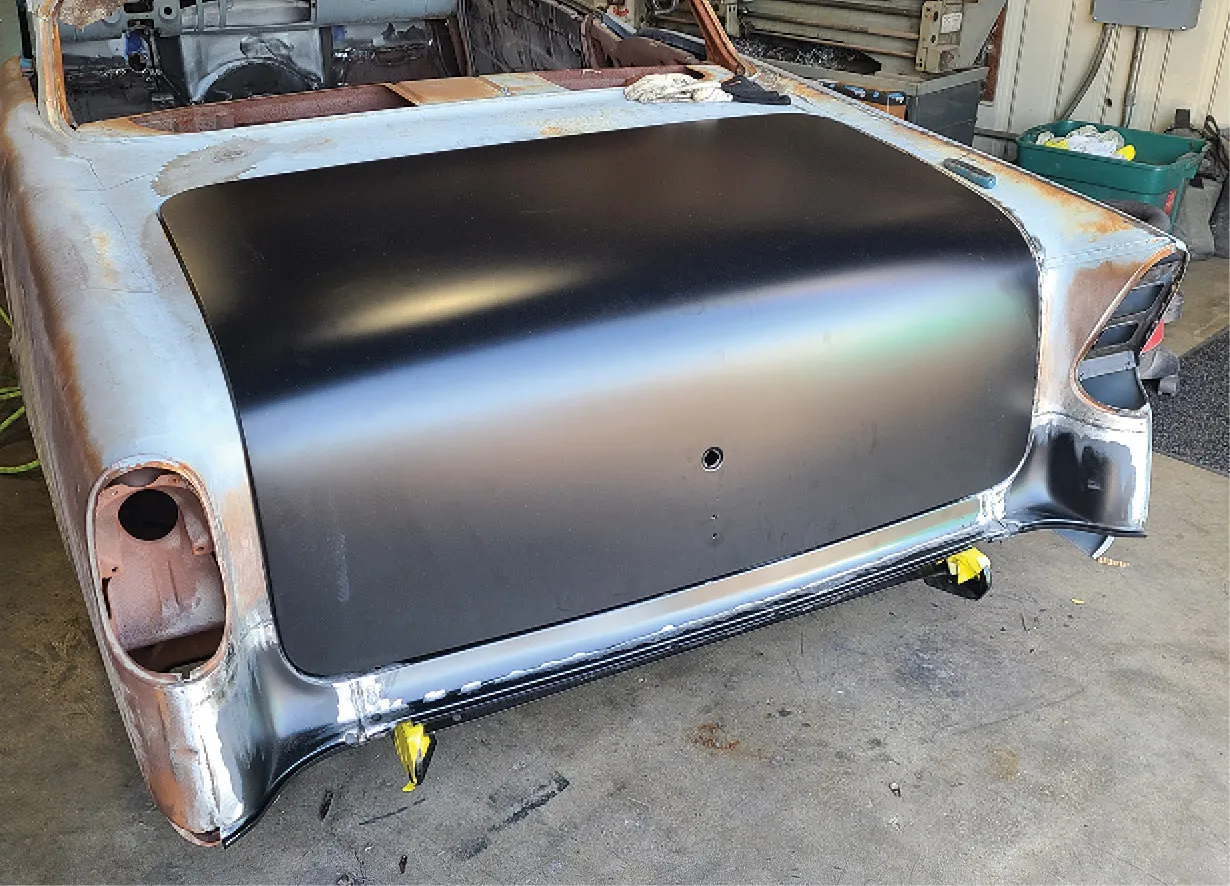
At Orange County Hot Rods (Corona, California) owner Aaron Hamusek had a customer’s ’56 Bel Air hardtop in his shop that needed some major repair work done, including quarter-panel and floor replacement but, as he turned his attention to the back end of the car, he found a large amount of heavily rusted and Swiss-cheesed metal that was beyond repair, so he decided to do a full replacement of the car’s tailpan section—basically everything below and between the taillights, including the trunklid, which is a common place for Tri-Fives to rust. After an order to Golden Star for the seven pieces needed, Hamusek started the removal process documented here.

Golden Star parts used in this remove-and-replace project are the left and right rear quarter-panel (PN QP13-56P) sections, the 10-inch ’55-57 trunk floor patch (PN TF13-553), the trunk floor brace (PN TP13-551), the ’55-57 tailpanel (PN TP13-55), the ’55-57 trunklid alignment kit (PN TL13-55A), and the trunklid latch lower mounting bracket (PN TL13-55LS).
2. Golden Star parts used in this remove-and-replace project are the left and right rear quarter-panel (PN QP13-56P) sections, the 10-inch ’55-57 trunk floor patch (PN TF13-553), the trunk floor brace (PN TP13-551), the ’55-57 tailpanel (PN TP13-55), the ’55-57 trunklid alignment kit (PN TL13-55A), and the trunklid latch lower mounting bracket (PN TL13-55LS).
The Golden Star ’55-56 trunklid (PN TL13-55) comes without emblem holes and is what helped indicate the positioning of most of the other parts during the reconstruction.
3. The Golden Star ’55-56 trunklid (PN TL13-55) comes without emblem holes and is what helped indicate the positioning of most of the other parts during the reconstruction.
Cut just inboard of the seam with the quarter-panel section below the taillights, the tailpanel was the first piece removed, which revealed more rust damage beneath.
4. Cut just inboard of the seam with the quarter-panel section below the taillights, the tailpanel was the first piece removed, which revealed more rust damage beneath.
Besides lead to fill seams, the factory also loved their spot welds, and they’re used in abundance with the parts used in this fix. Aaron Hamusek will drill all of them out and pop the parts apart with either a screwdriver or chisel.
5. Besides lead to fill seams, the factory also loved their spot welds, and they’re used in abundance with the parts used in this fix. Aaron Hamusek will drill all of them out and pop the parts apart with either a screwdriver or chisel.
The new 10-inch-wide tailpan will lay out (see line) just to the rear of the two gas tank mounting bolts under the two spot-welded flat braces here. There are also two outboard body mount bolts (see arrow), one on each side, that will need to be removed.
6. The new 10-inch-wide tailpan will lay out (see line) just to the rear of the two gas tank mounting bolts under the two spot-welded flat braces here. There are also two outboard body mount bolts (see arrow), one on each side, that will need to be removed.
The new tailpan section was laid inside the trunk to help define the cutline and, with a piece of cardboard shoved up between the aftermarket gas tank and the floor, Hamusek makes a rough cut and removes the old tailpan.
7. The new tailpan section was laid inside the trunk to help define the cutline and, with a piece of cardboard shoved up between the aftermarket gas tank and the floor, Hamusek makes a rough cut and removes the old tailpan.
Using a special drill bit made for removing spot welds (called a “spot weld cutter”), Hamusek removes the ones behind each outboard tailpan seam.
8. Using a special drill bit made for removing spot welds (called a “spot weld cutter”), Hamusek removes the ones behind each outboard tailpan seam.
Having done a rough cut on the tailpan left a small section of the tailpan spot-welded to the inner quarter-panel piece, which then had its spot-welds drilled and the pieces pried apart.
9. Having done a rough cut on the tailpan left a small section of the tailpan spot-welded to the inner quarter-panel piece, which then had its spot-welds drilled and the pieces pried apart.
Working on the back side of the 10-inch floorpan piece, the trunk floor brace is laid out, marked for position for a new set of spot welds.
10. Working on the back side of the 10-inch floorpan piece, the trunk floor brace is laid out, marked for position for a new set of spot welds.
A handful of clamps keeps the parts in alignment so Hamusek can spot weld them together in the same location as the factory.
11. A handful of clamps keeps the parts in alignment so Hamusek can spot weld them together in the same location as the factory.
The new rear tailpan section (with brace added) is set in place to check fitment.
12. The new rear tailpan section (with brace added) is set in place to check fitment.
Using a BernzOmatic MAP/PRO propane torch Hamusek starts to melt the factory lead out of the quarter-panel seam, removing it with a wire brush.
13. Using a BernzOmatic MAP/PRO propane torch Hamusek starts to melt the factory lead out of the quarter-panel seam, removing it with a wire brush.
A rough cut is made to remove the section of quarter-panel that’s below the taillight but has left the spot-welded piece that will need to be drilled out.
14. A rough cut is made to remove the section of quarter-panel that’s below the taillight but has left the spot-welded piece that will need to be drilled out.
Once drilled out the spot welds can be popped apart with a screwdriver or, in some cases, a pneumatic chisel.
15. Once drilled out the spot welds can be popped apart with a screwdriver or, in some cases, a pneumatic chisel.
Hamusek found out this portion of the quarter-panel had been previously hit, so some bodywork with a hammer and dolly needed to be done.
16. Hamusek found out this portion of the quarter-panel had been previously hit, so some bodywork with a hammer and dolly needed to be done.
The factory adds little braces and brackets to keep panels from coming apart or shifting and there is a tiny one (less than 2x3 inches) on the back side of the lower taillight area, just under the lower taillight housing screw. Make sure you don’t cut through it!
17. The factory adds little braces and brackets to keep panels from coming apart or shifting and there is a tiny one (less than 2×3 inches) on the back side of the lower taillight area, just under the lower taillight housing screw. Make sure you don’t cut through it!
Checking the fit of the original taillight assembly Hamusek finds more bodywork is needed so the assembly can fit in its hole better.
18. Checking the fit of the original taillight assembly Hamusek finds more bodywork is needed so the assembly can fit in its hole better.
A slide hammer, followed by more hammer and dolly work, solves the problem.
19. A slide hammer, followed by more hammer and dolly work, solves the problem.
Now the new left-side quarter-panel piece can be checked for fit. There are a lot of contours in this piece, and they all must line up, so some massaging might need to take place.
20. Now the new left-side quarter-panel piece can be checked for fit. There are a lot of contours in this piece, and they all must line up, so some massaging might need to take place.
Once satisfied with the fit, the righthand quarter-panel piece is tacked and Cleco’d in place.
21. Once satisfied with the fit, the righthand quarter-panel piece is tacked and Cleco’d in place.
Having laid the new tailpan section over the old one, a thin (0.035-inch) cut can be made that will produce a perfect seam to be welded.
22. Having laid the new tailpan section over the old one, a thin (0.035-inch) cut can be made that will produce a perfect seam to be welded.
During all this test-fitting of pieces Hamusek also has installed the trunklid, which he often brings down to check that all the gaps are tight and the parts are fitting as they’re supposed to.
23. During all this test-fitting of pieces Hamusek also has installed the trunklid, which he often brings down to check that all the gaps are tight and the parts are fitting as they’re supposed to.
On this build, a little bit of the tailpan section needed to be trimmed for better fitment of the tailpanel.
24. On this build, a little bit of the tailpan section needed to be trimmed for better fitment of the tailpanel.
A rough fit of the tailpanel shows the fitment is close, but some massaging with a hammer and dolly will help bring all the lines together.
25. A rough fit of the tailpanel shows the fitment is close, but some massaging with a hammer and dolly will help bring all the lines together.
One of Hamusek’s tricks to remove the primer (as well as the old seam-sealer) on the new pieces is to heat it up a little with a torch, which makes wire brushing to get to clean metal a breeze.
26. One of Hamusek’s tricks to remove the primer (as well as the old seam-sealer) on the new pieces is to heat it up a little with a torch, which makes wire brushing to get to clean metal a breeze.
The tailpanel is clamped and Cleco’d in place and ready to be tacked and welded.
27. The tailpanel is clamped and Cleco’d in place and ready to be tacked and welded.
Some of the areas that had been filled with lead by the factory will again be covered with a minimal amount of lead.
28. Some of the areas that had been filled with lead by the factory will again be covered with a minimal amount of lead.
Once the final welding has taken place, SEM 29372 seam sealer is used around the edges the way the factory did.
29. Once the final welding has taken place, SEM 29372 seam sealer is used around the edges the way the factory did.
Hamusek fab’d up a cover for the old spare tire hole, rolling some beads in for strength.
30. Hamusek fab’d up a cover for the old spare tire hole, rolling some beads in for strength.
This simple aluminum template was fab’d on the shop’s shrinker/stretcher to copy the contour of the trunk panel to quarter-panel, then laid on the same area on the opposite quarter (note the gaps between the body and template) to see how bad the previous metalwork was.
31. This simple aluminum template was fab’d on the shop’s shrinker/stretcher to copy the contour of the trunk panel to quarter-panel, then laid on the same area on the opposite quarter (note the gaps between the body and template) to see how bad the previous metalwork was.
Hamusek takes the view that the Golden Star part is the right shape, and the previous poor bodywork produces an uneven trunk gap.
32. Hamusek takes the view that the Golden Star part is the right shape, and the previous poor bodywork produces an uneven trunk gap.
A slice is made just a fraction outside the channel to create a new lip edge and then tacked and welded.
33. A slice is made just a fraction outside the channel to create a new lip edge and then tacked and welded.
The trunk latch and alignment kit can now be installed.
34. The trunk latch and alignment kit can now be installed.
Just seven Golden Star parts were used to take this rusty rear section and transform it into a respectable hot rod.
35. Just seven Golden Star parts were used to take this rusty rear section and transform it into a respectable hot rod.
SOURCES
Golden Star Classic Auto Parts
(972) 315-3758
goldenstarauto.com
Orange County Hot Rods
(714) 514-3887
orangecountyhotrods.com
Modern Rodding

VOLUME 4 • ISSUE 37 • 2023