Modern Rodding TECH

InTheGarageMedia.com

illustration concept artwork for red interior
1. Beginning with Tavis Highlander’s artwork, the interior for the ’57 Ford Ranch Wagon has a starting point.
Ironworks’ ’57 Ranch Wagon
Part II: Making a Custom Interior
By Ron Covell
Photography by Rodger Lee
ARTWORK by Tavis Highlander
W

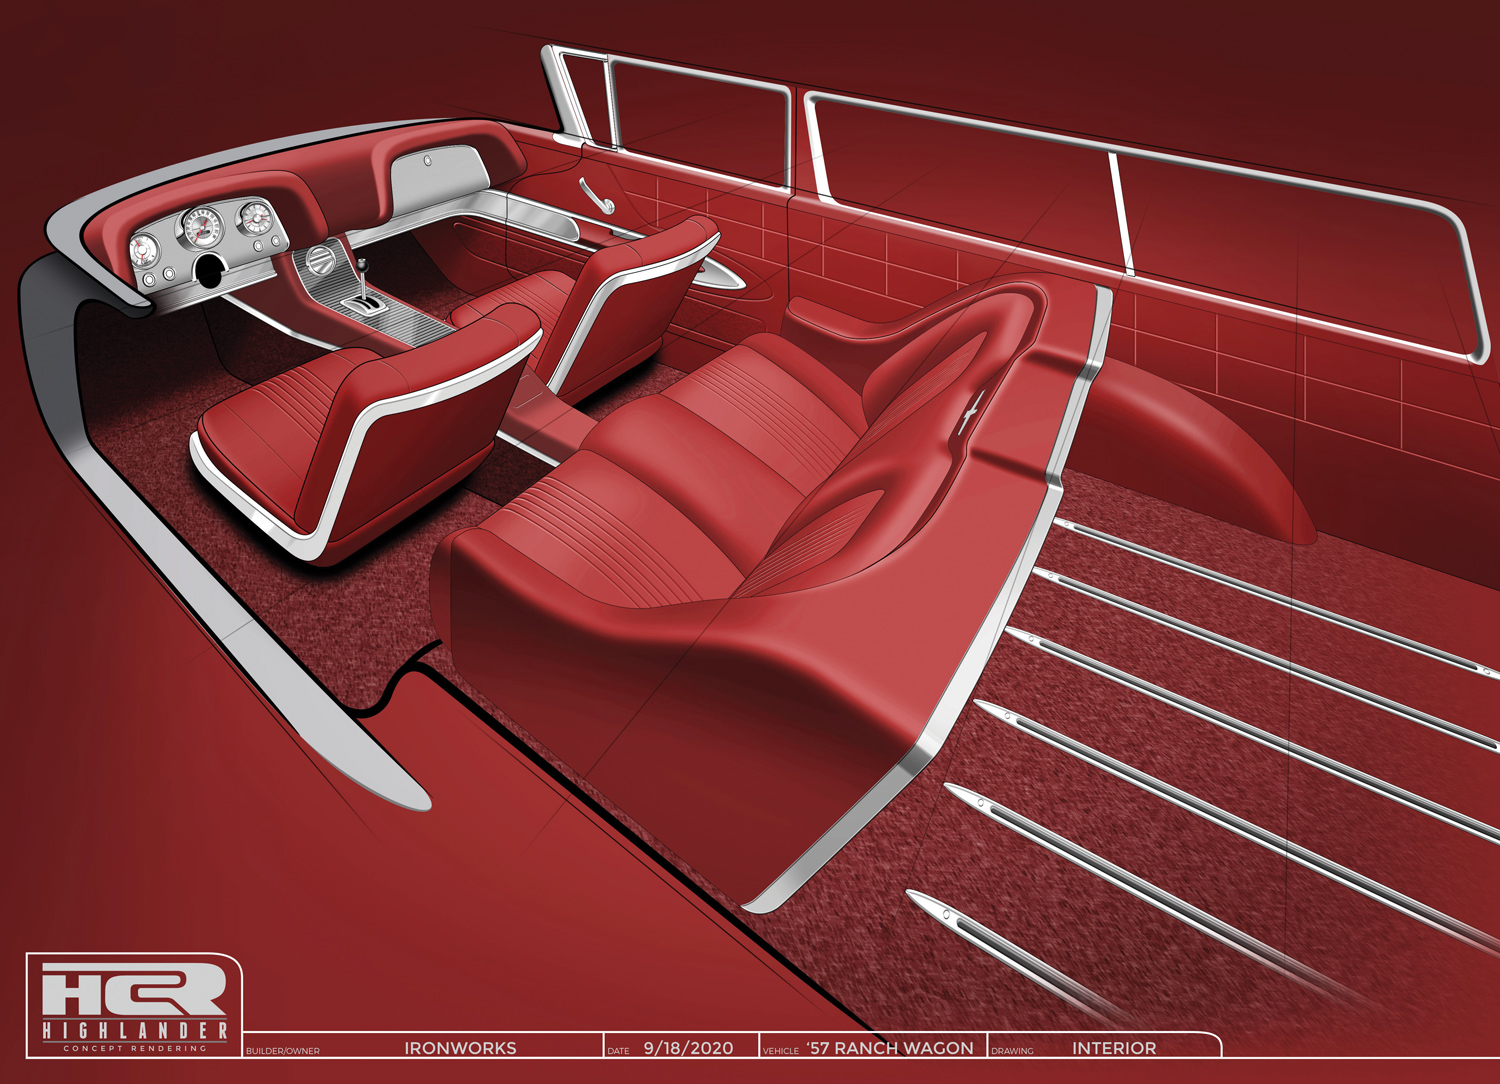
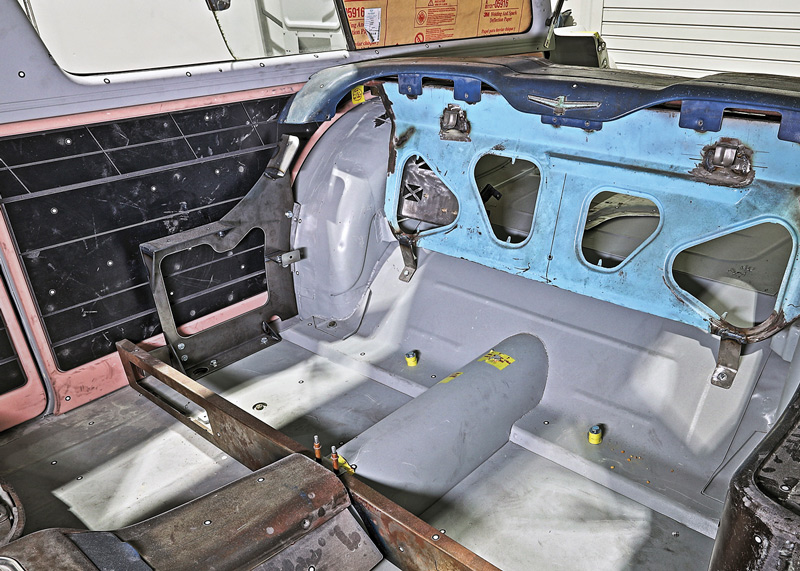
ork continues at Ironworks Rod and Kustom on Danny Schaffer’s ’57 Ford Ranch Wagon. The interior of this car has been completely redesigned, from the custom headliner to the numerous CNC-machined components on the dash, doors, and console. Each component is unique but crafted to have an OEM character. Using a ’60 Thunderbird as inspiration, most of the interior was fabricated from scratch, with Tavis Highlander, from Highlander Concept Rendering, making dozens of sketches for details, large and small, before the fabrication commenced. This design utilizes bucket seats both front and back.

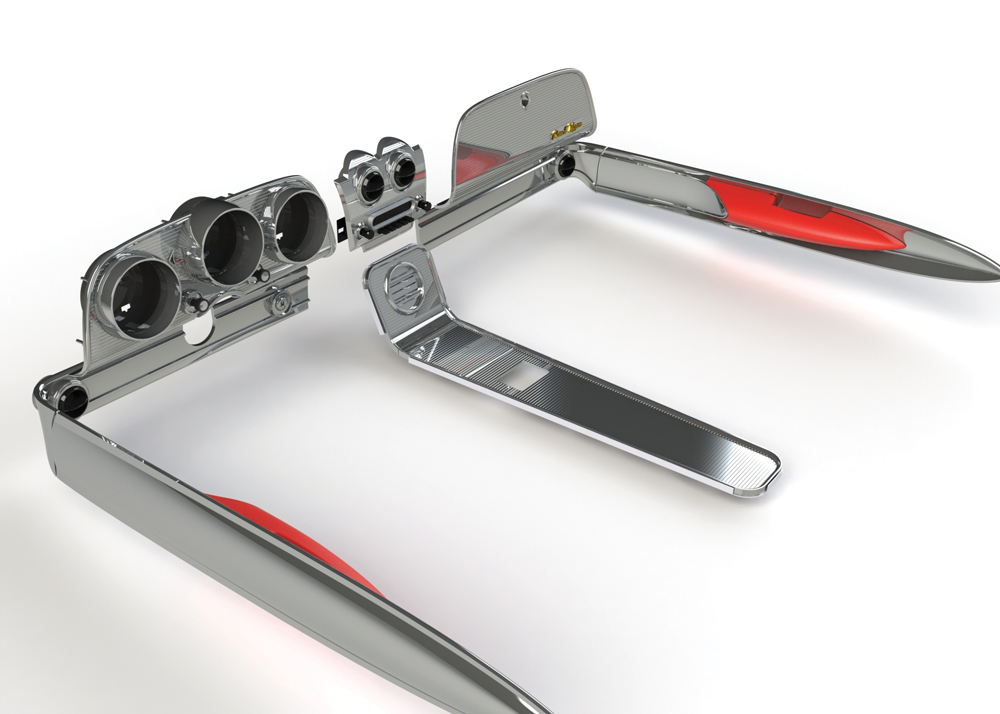
A steel Thunderbird dashboard was modified to fit the cowl area of the Ranch Wagon, and all the details were custom designed, including the gauge cluster, the glovebox door, and the bezel for the radio faceplate and center air conditioner ducts. As with many details on this project, the locations of interest were scanned, then the components were designed in CAD and often 3-D printed in plastic for evaluation before CNC machining the final parts from billet aluminum.

The center console was a major project, with an elegantly machined bezel that incorporates the air conditioner controls, the shift lever, the door window controls, and two conveniently positioned cup holders. All of this was fitted above a custom-fabricated transmission and driveshaft cover.

A special panel was made to fit under the dashboard, which incorporates two more air conditioner vents, and these machined components extend into the door panels, featuring an elegant, bullet-shaped armrest.

Custom door and side panels were designed then cut with a CNC router from high-density urethane foam board. This rigid board will be the backing for thin upholstery foam and the final leather top surface.

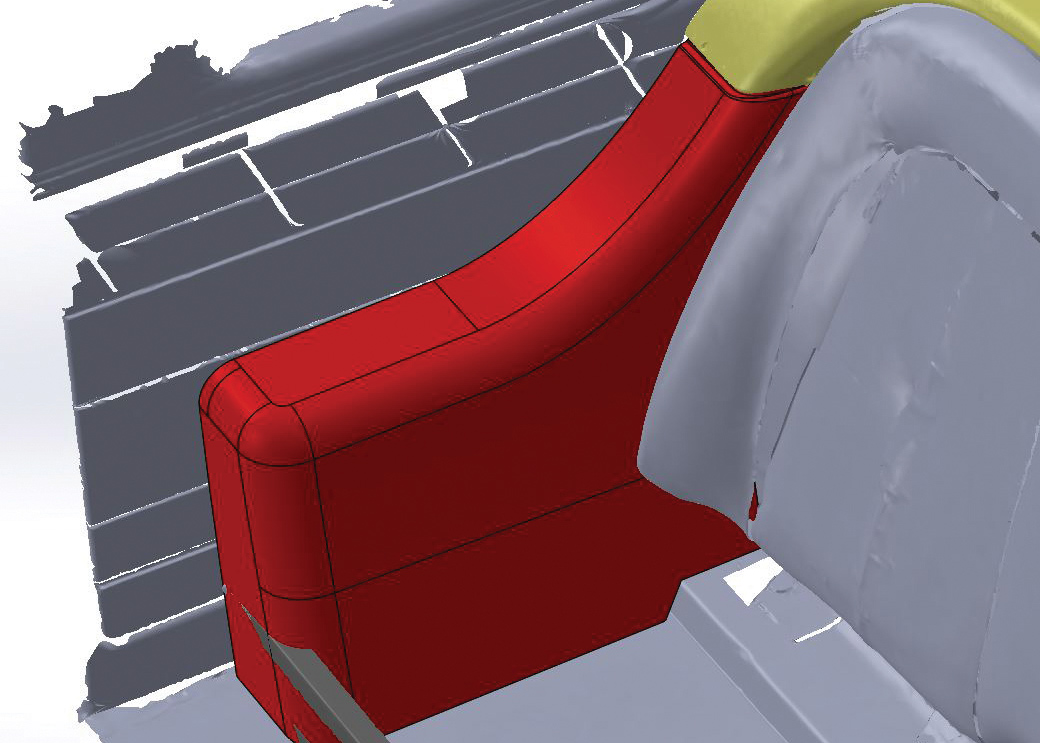
The rear seating area required a lot of special fittings as well, and custom armrests were designed to integrate with the bucket seats. These parts were 3-D printed from plastic to check the fit before being made in fiberglass. They will be covered with foam and leather. A custom-machined aluminum bezel was made to cap each armrest, following the style of the bezel on the console.

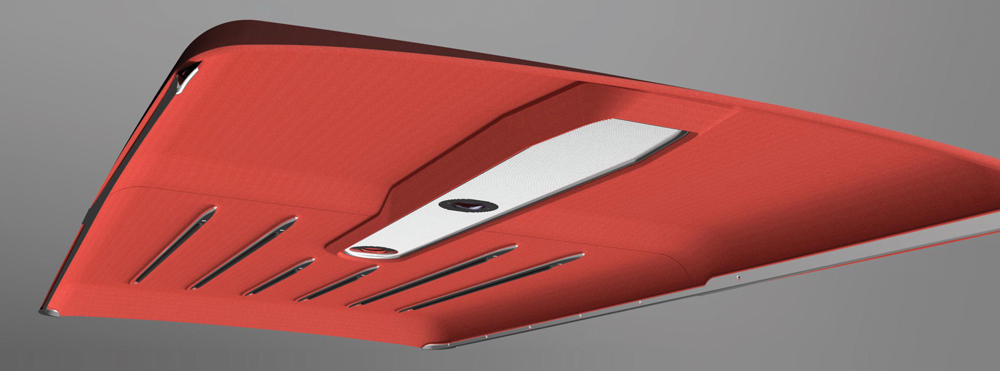
The headliner was a major undertaking. While most cars used stretched fabric for the headliner, the plan for this car was to make something rigid, with only one joint separating the front seating area from the rear. The interior of the roof was scanned, and a simple but elegant headliner shape was designed, along with the trim pieces and the hardware that will hold it securely in place.

Once the design was completed in CAD, a CNC router was used to carve blocks of foam to the precise shape needed, and fiberglass molds were made. Fiberglass parts were made from these molds, which are the basis for the new headliner. Careful attention was paid to concealing all the fasteners. Some fasteners are hidden by the six custom-machined trim pieces in the rear section, and there is a machined aluminum bezel, made in a style like the console, that covers the fasteners in the front.

As you can see, the interior of this project was done with a degree of design and precision that ensures it will stand out from the crowd. In the next article, you will see how a similar level of refinement is brought to the engine compartment.

A dash panel from a ’60 Thunderbird was fitted into the ’57 Ford cowl.
2. A dash panel from a ’60 Thunderbird was fitted into the ’57 Ford cowl.
The dash was removed from the car to complete the welding and to provide better access for metal finishing.
3. The dash was removed from the car to complete the welding and to provide better access for metal finishing.
With the metal smoothed to perfection, the highly modified dash looks like it was factory made.
4. With the metal smoothed to perfection, the highly modified dash looks like it was factory made.
All the floor panels were replaced with new metal, and a snugly fitted cover was made for the Ford 4R70W transmission and driveshaft.
5. All the floor panels were replaced with new metal, and a snugly fitted cover was made for the Ford 4R70W transmission and driveshaft.
All the inserts for the dash were CAD designed and CNC machined from aluminum billet. This is the instrument cluster.
6. All the inserts for the dash were CAD designed and CNC machined from aluminum billet. This is the instrument cluster.
The console features a custom insert, too. Several versions of this were considered before the finished part was machined.
7. The console features a custom insert, too. Several versions of this were considered before the finished part was machined.
The custom-made parts continue into the radio bezel, the air conditioner vents, the door panels, and an underdash panel.
8. The custom-made parts continue into the radio bezel, the air conditioner vents, the door panels, and an underdash panel.
With the bezel for the console machined, it is carefully fitted into the console.
9. With the bezel for the console machined, it is carefully fitted into the console.
With the dash and console installed, you can get a sense of how elegant this one-of-a-kind interior will be.
10. With the dash and console installed, you can get a sense of how elegant this one-of-a-kind interior will be.
Several variations of the door and side panels were studied, the “C” version is the one that was selected.
11. Several variations of the door and side panels were studied, the “C” version is the one that was selected.
The door and side panels were CNC routed from high density urethane foam, which will be covered with leather.
12. The door and side panels were CNC routed from high density urethane foam, which will be covered with leather.
The custom-machined door panel inserts are checked for fit on the door panels.
13. The custom-machined door panel inserts are checked for fit on the door panels.
  The rear seating area required extensive reworking, too.
14. The rear seating area required extensive reworking, too.
After scanning the interior space, CAD was used to design the armrests on either side of the rear seats.
15. After scanning the interior space, CAD was used to design the armrests on either side of the rear seats.
The armrests were checked for shape, style, and fitment by 3-D printing fullsized test pieces.
16. The armrests were checked for shape, style, and fitment by 3-D printing fullsized test pieces.
A completely new headliner was designed, along with the mounting hardware to hold it in place. The headliner will be made from fiberglass, then covered with leather.
17. A completely new headliner was designed, along with the mounting hardware to hold it in place. The headliner will be made from fiberglass, then covered with leather.
Here is how the headliner will look with all the accessories in place.
18. Here is how the headliner will look with all the accessories in place.
To make the headliner, a CNC router was used to carve a block of urethane foam to the proper contour, then a female mold was made from it.
19. To make the headliner, a CNC router was used to carve a block of urethane foam to the proper contour, then a female mold was made from it.
When the mold for the headliner was finished, fiberglass was used to make the rigid structure of the headliner. You can see the steel brackets here that will hold the headliner in place.
20. When the mold for the headliner was finished, fiberglass was used to make the rigid structure of the headliner. You can see the steel brackets here that will hold the headliner in place.
Here all the components are being test-fitted. This is going to be one very special ’57 Ford Ranch Wagon.
21. Here all the components are being test-fitted. This is going to be one very special ’57 Ford Ranch Wagon.
SOURCE
Ironworks Speed and Kustom
(661) 399-8999
ironworksspeedandkustom.com
Modern Rodding

VOLUME 4 • ISSUE 37 • 2023