Modern Rodding Tech
InTheGarageMedia.com
1. The Installation Center (TIC) test-fits all panels on the car to ensure everything is in alignment before moving onto welding.
The Installation Center (TIC) test-fits all panels on the car to ensure everything is in alignment before moving onto welding.
1. The Installation Center (TIC) test-fits all panels on the car to ensure everything is in alignment before moving onto welding.
More Sheetmetal Work on Vintage Cars
Replacing a Rusted-Out Wheelhouse and Trunk Floor Extension on ’66-’69 Ford Fairlanes and Torinos
By Brian Brennan Photography by The Author
W

e’re back! Our ’69 Ford Torino Fastback Q-code continues to have its “skin” refurbished. This time we take a look at the wheelhouse and trunk floor extension. It should be noted that while we are working on a ’69 Ford Torino Fastback the parts and the work required will be the same for ’66-’69 Ford Fairlanes and Torinos and other years and models … but more on that later.

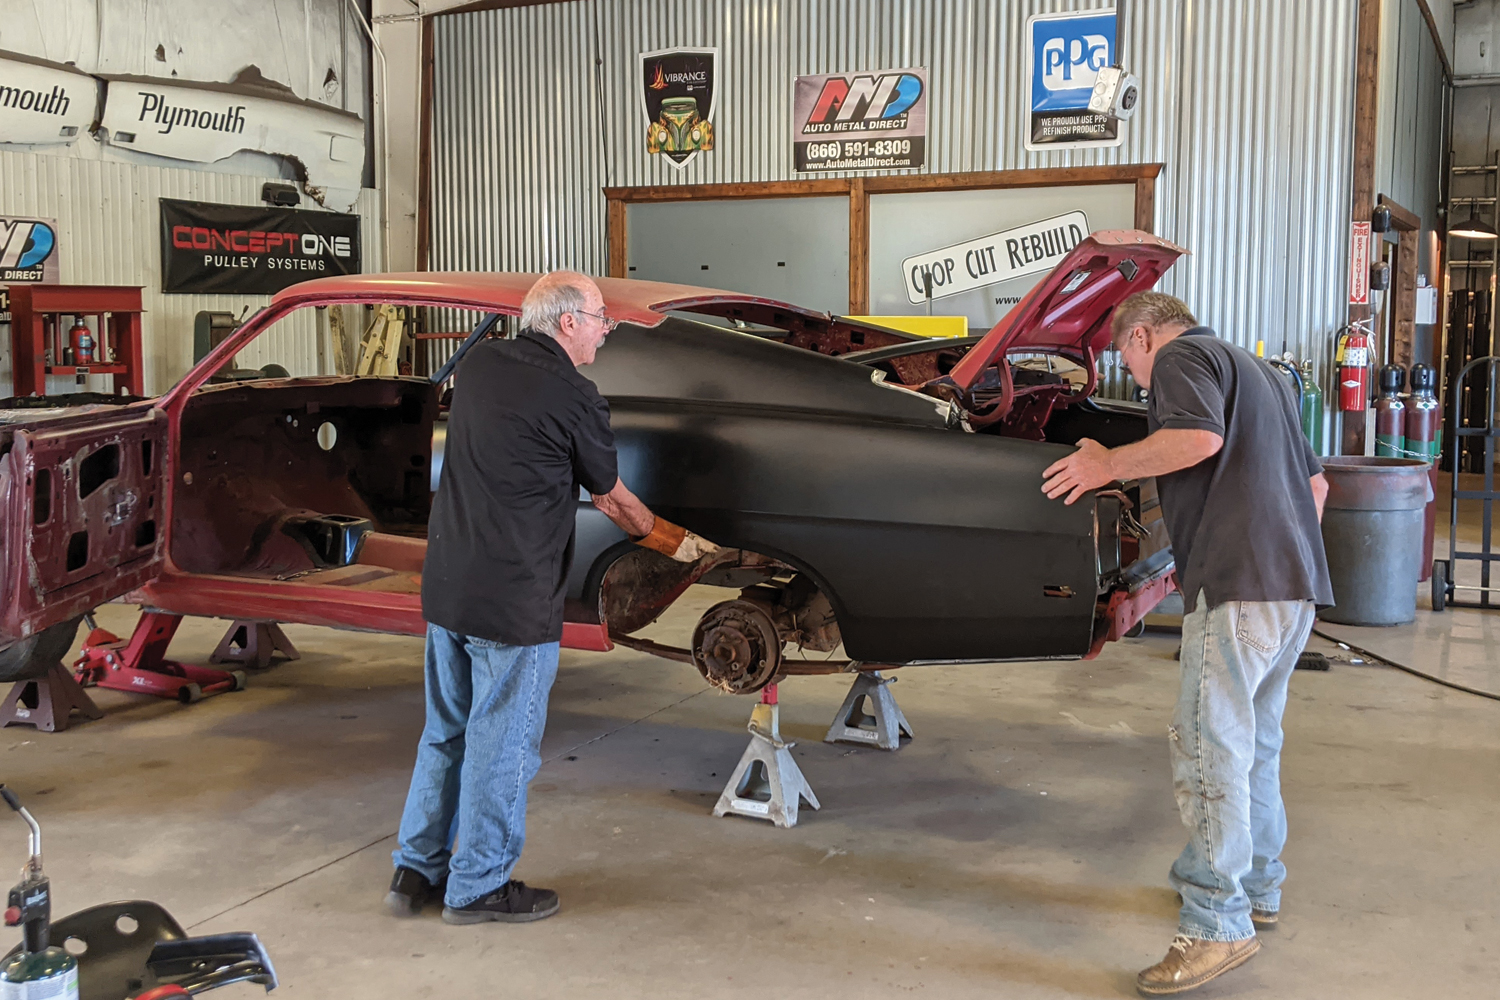
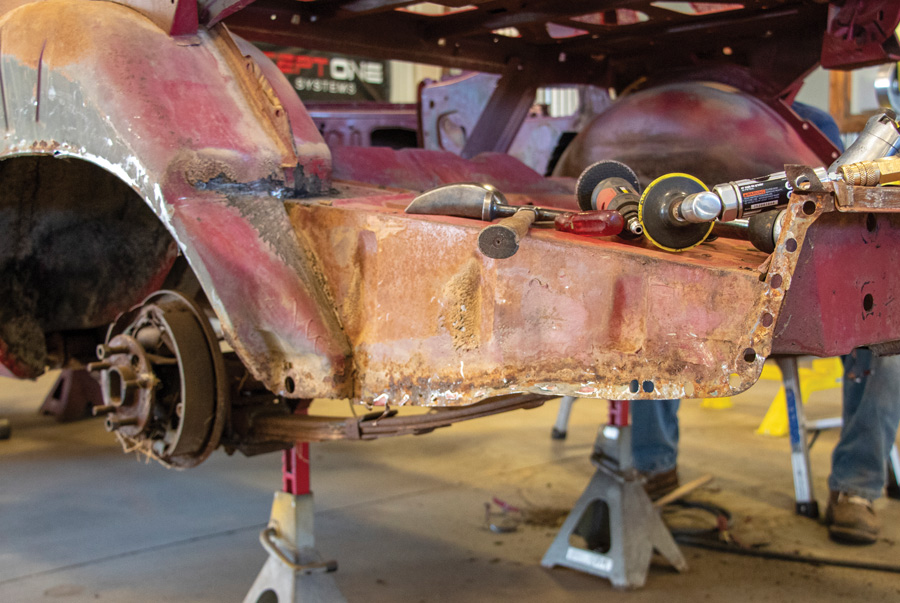
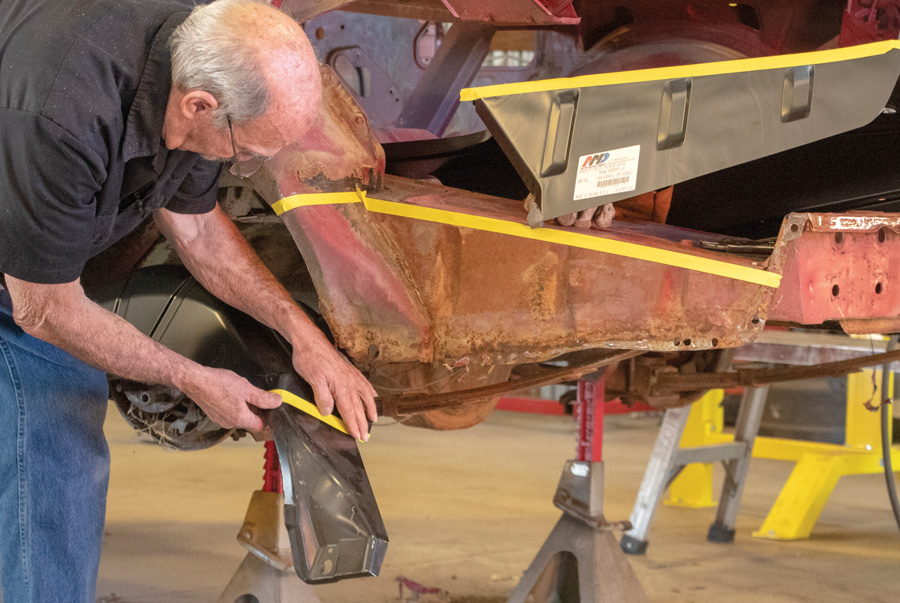
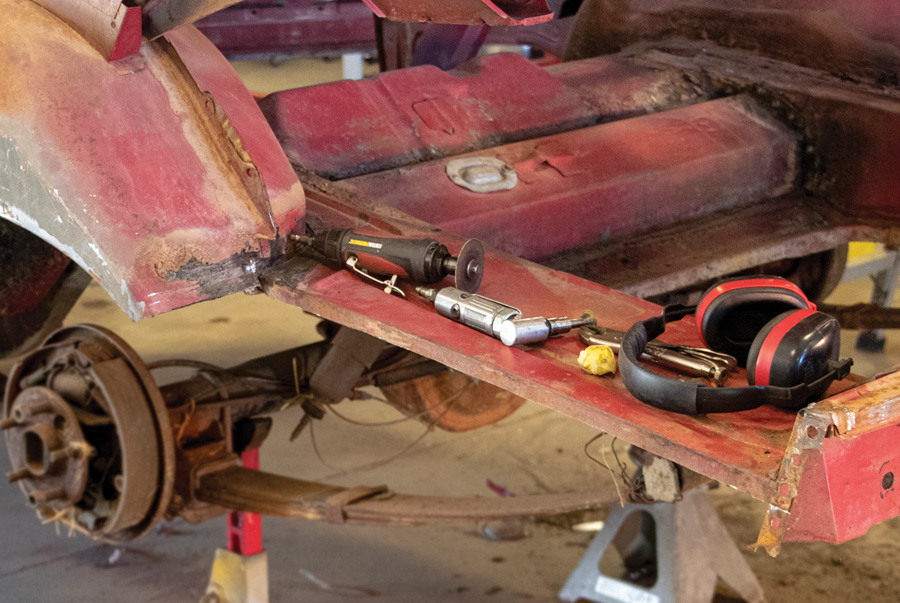
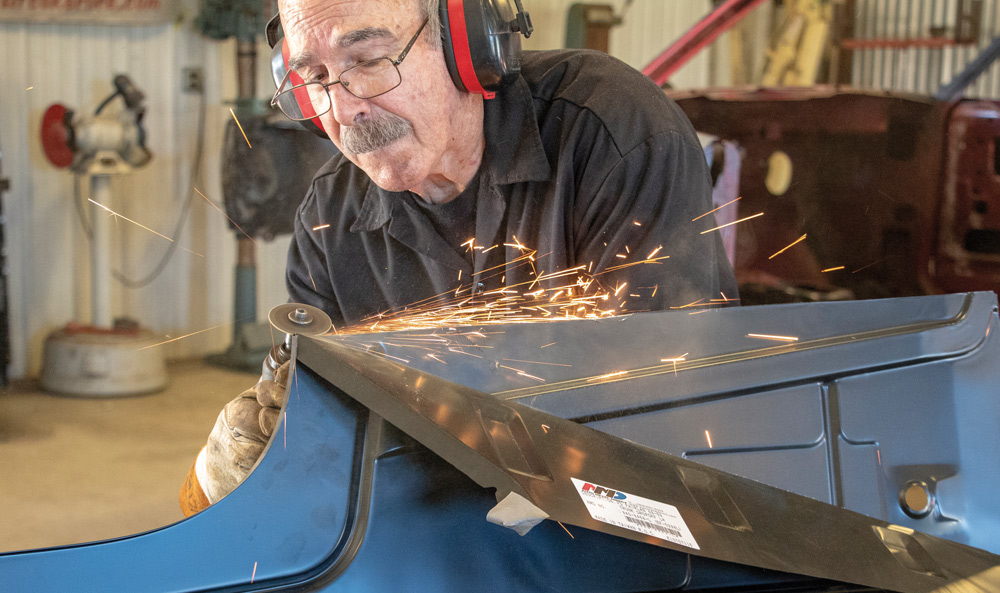
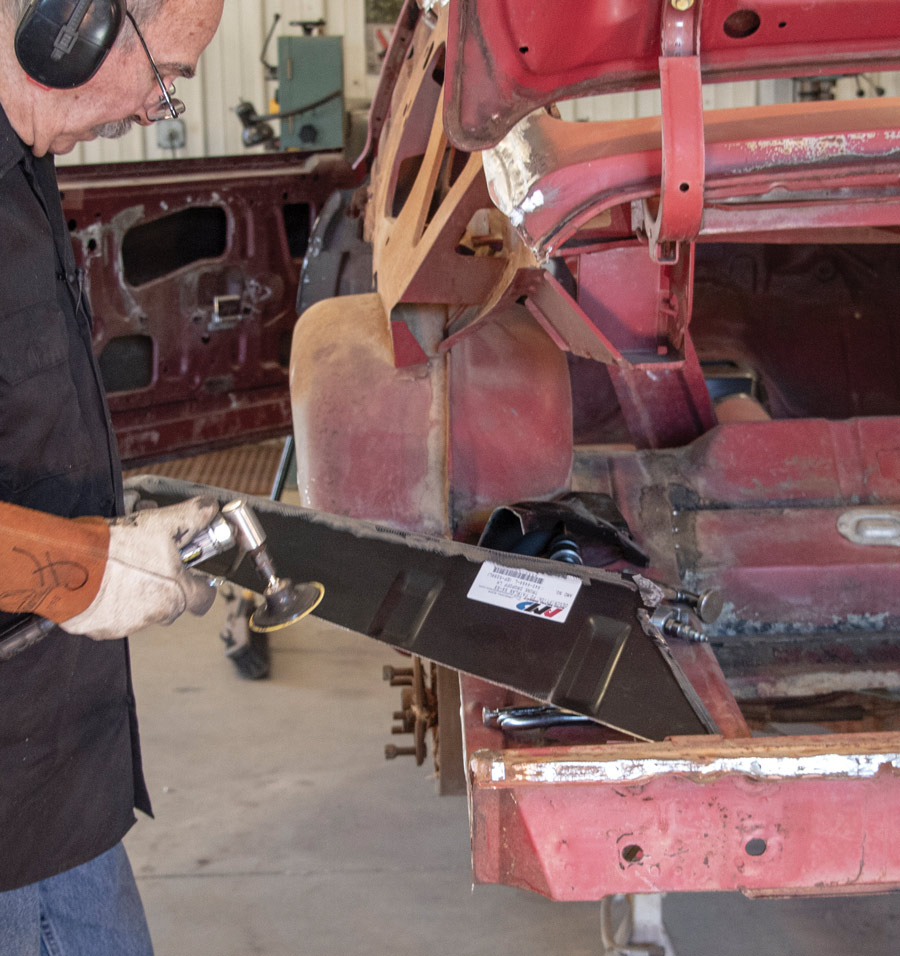
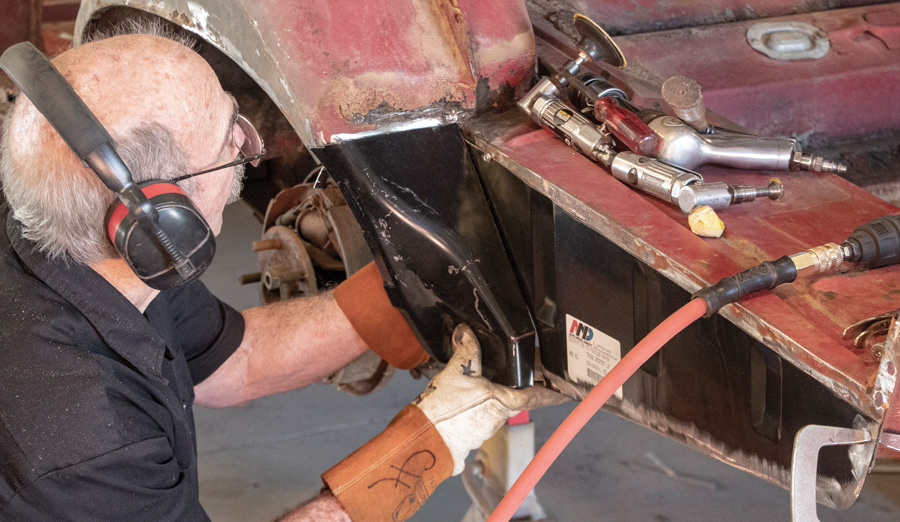
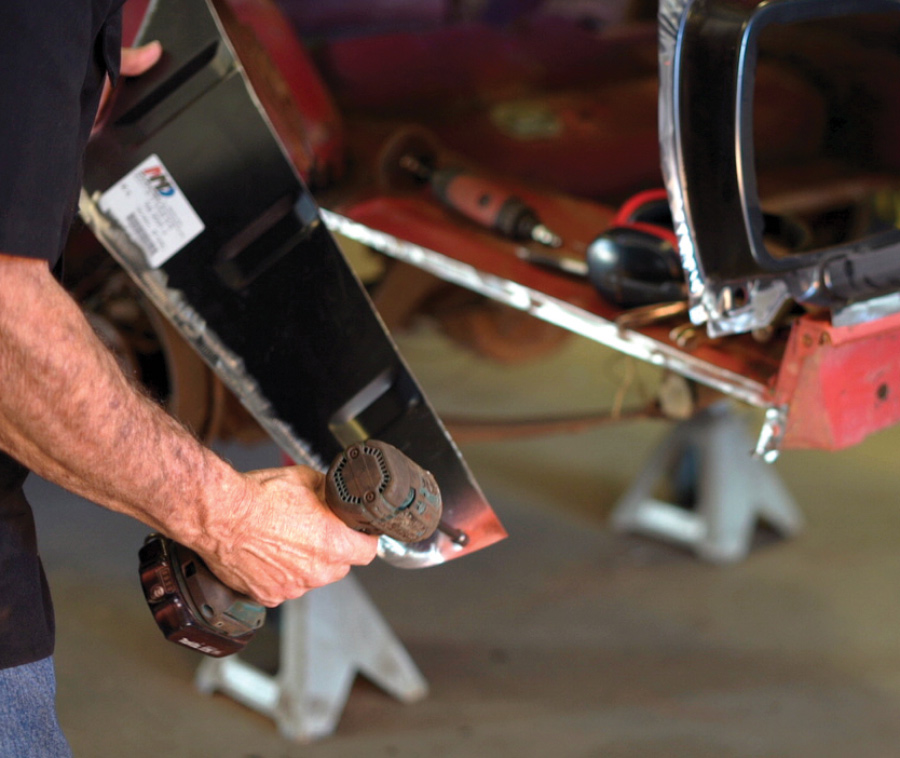
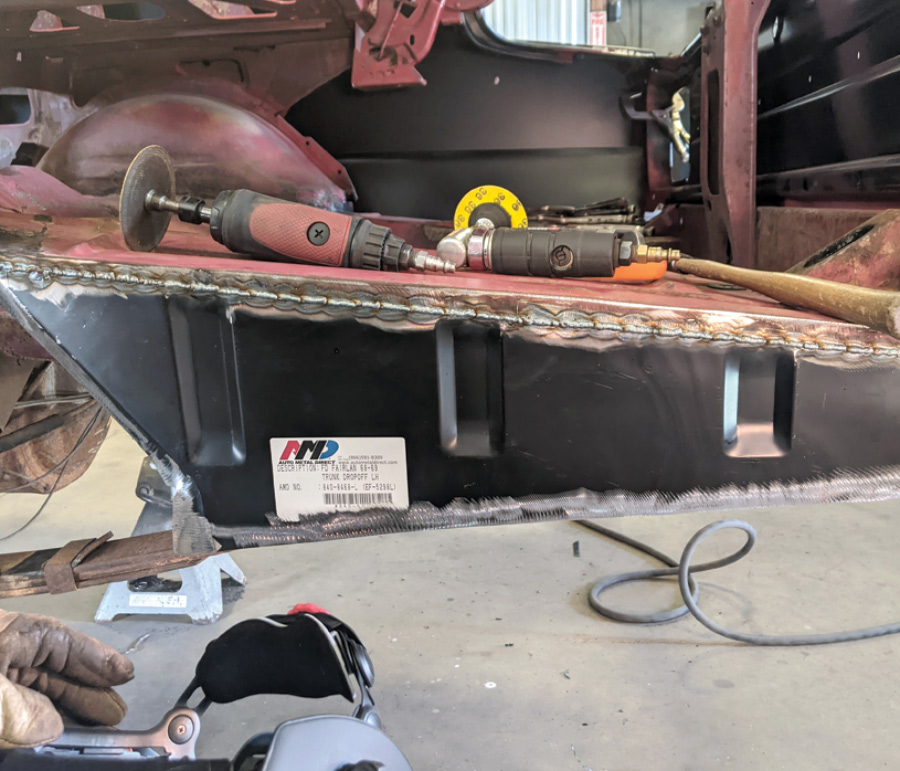
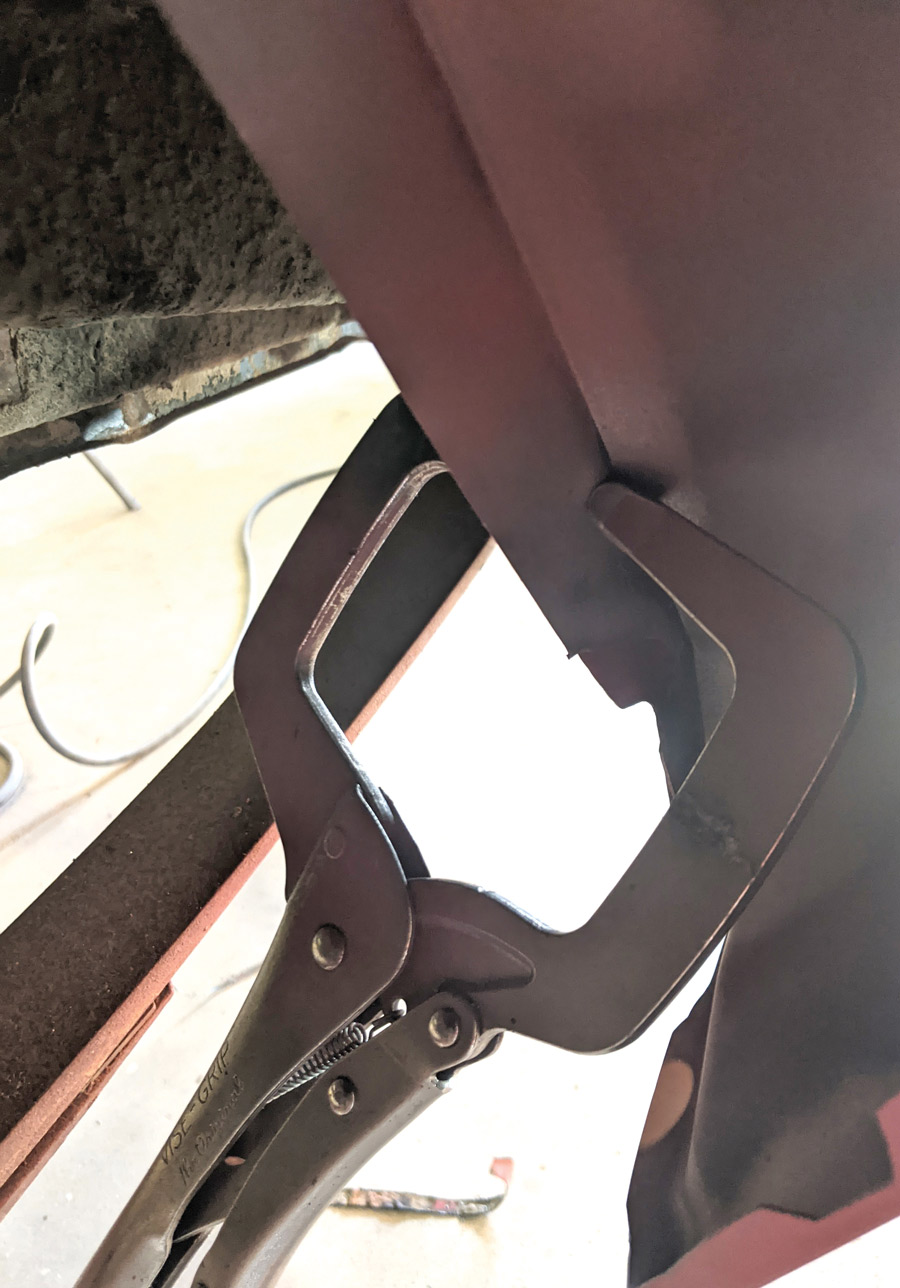
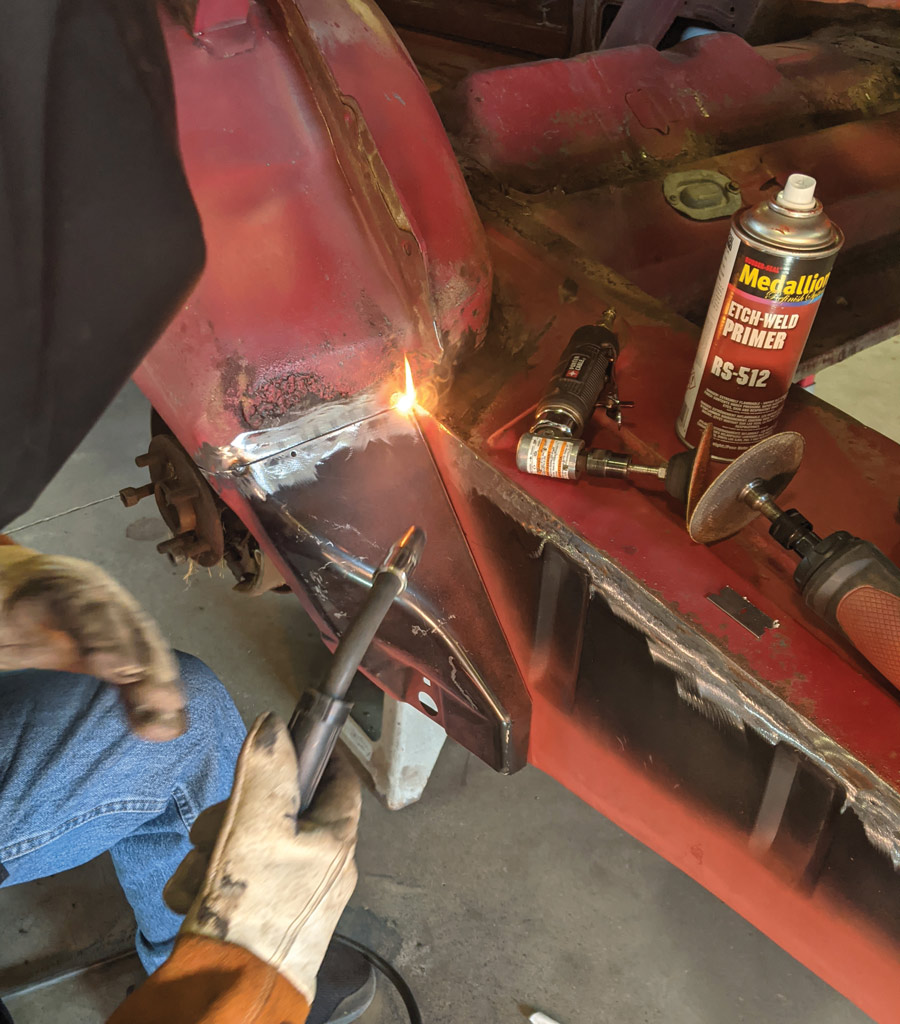
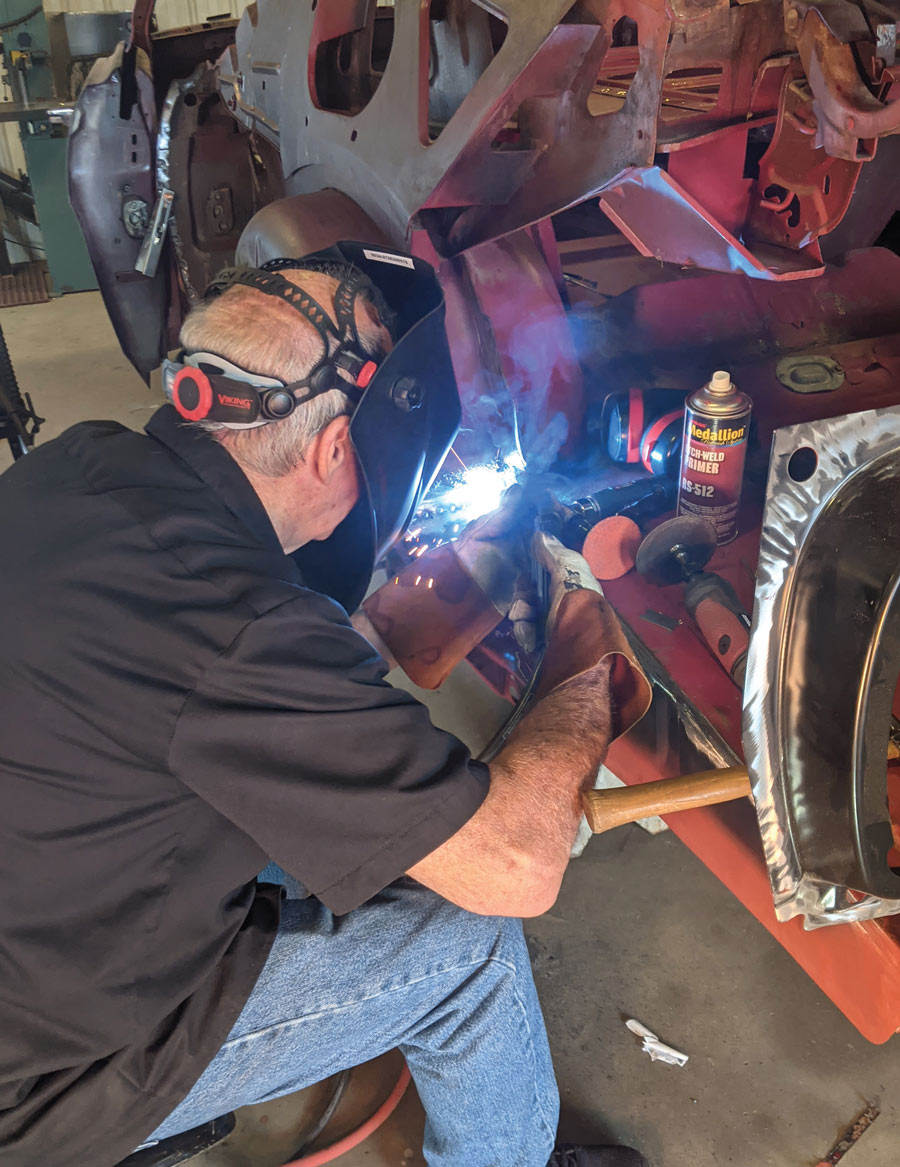
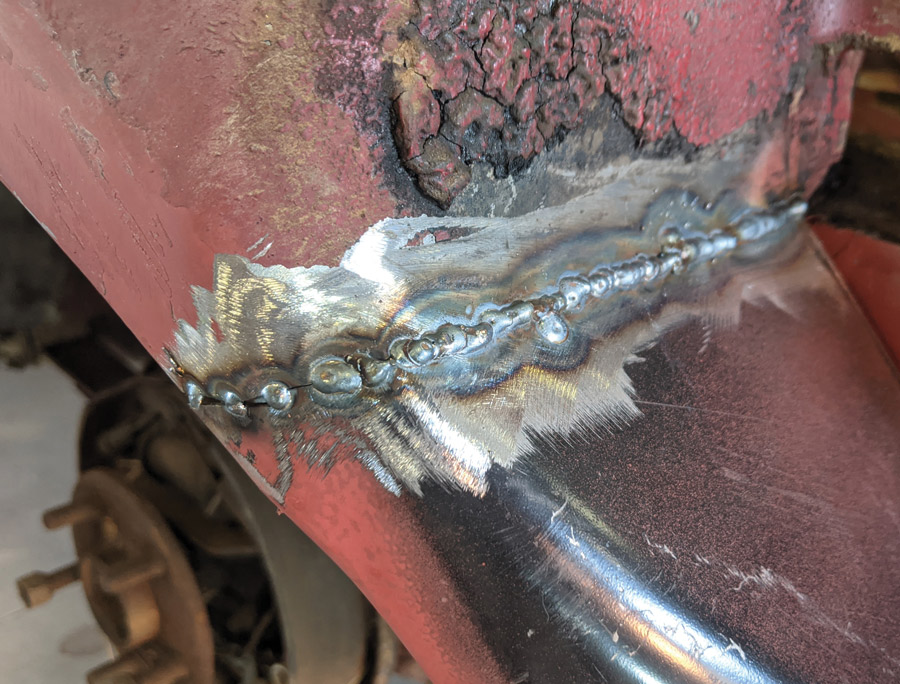
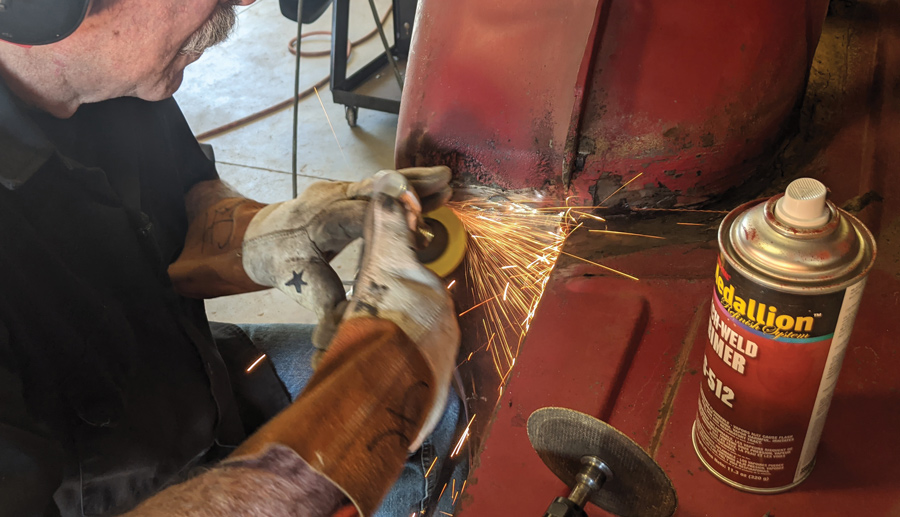
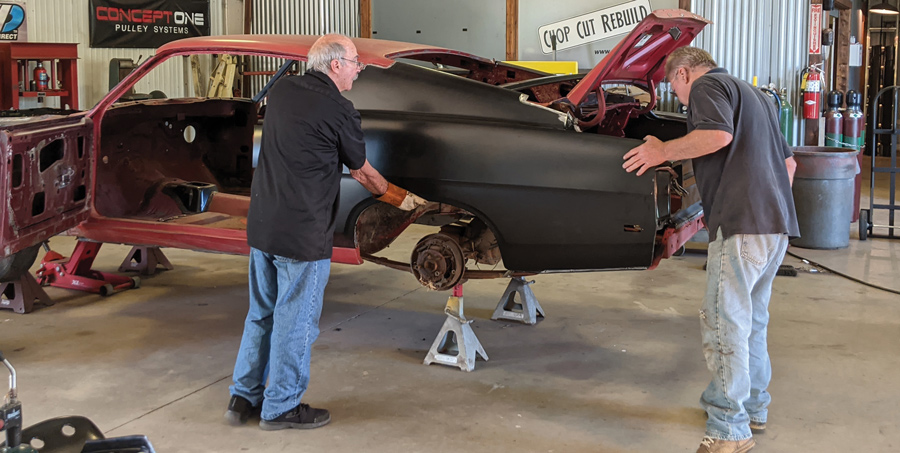
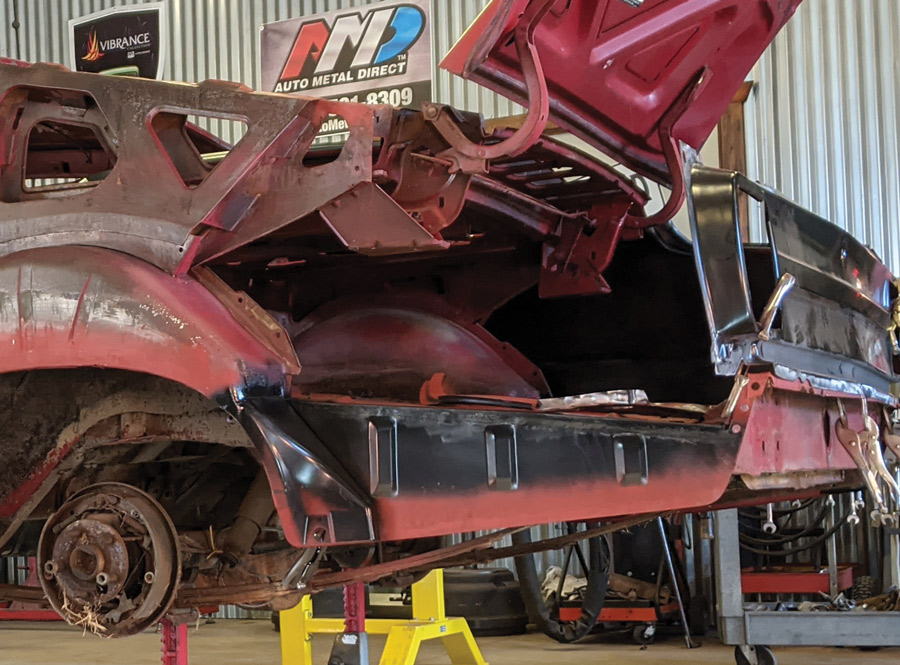
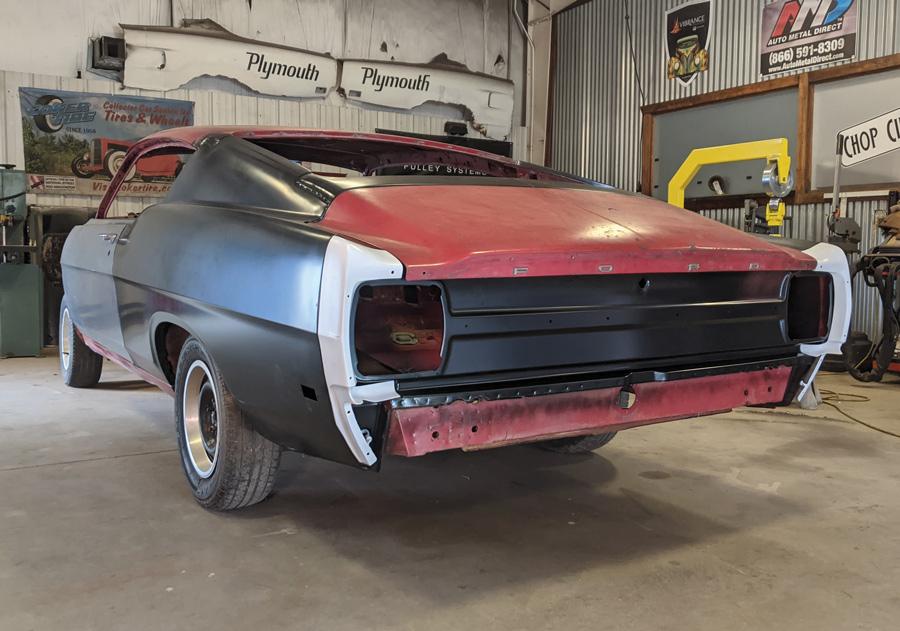
We find ourselves once again back at The Installation Center (TIC) in Cleveland, Georgia, watching Craig Hopkins continue the resurrection of our Torino while using Auto Metal Direct (AMD) sheetmetal. In the past two articles we have looked at replacing entire rear quarter-panels and the core support. Both of those projects required a good bit of effort and expertise. This time we are looking at patch panels; it’s been our experience this is something virtually any rodder who has dabbled in sheetmetal work has done some patch panel work.

Let us first familiarize ourselves with the parts at hand.
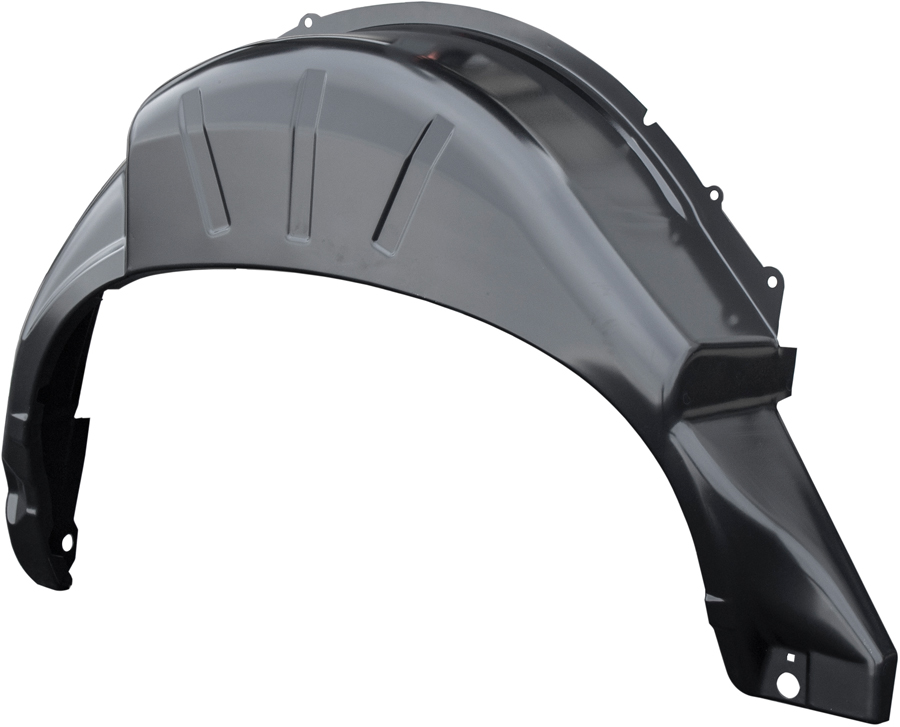
Outer Wheelhouse Patch Panel
The Outer Wheelhouse patch panel is available in two different part numbers to accommodate the left- and righthand sides. We are working specifically with the lefthand (PN 770-8468-L, driver side) outer wheelhouse patch panel for ’68-’69 Fairlanes and Torinos (these parts won’t work on similar-year wagons). There is also a patch panel for the righthand (passenger side) outer wheelhouse
(PN 770-8468-R).

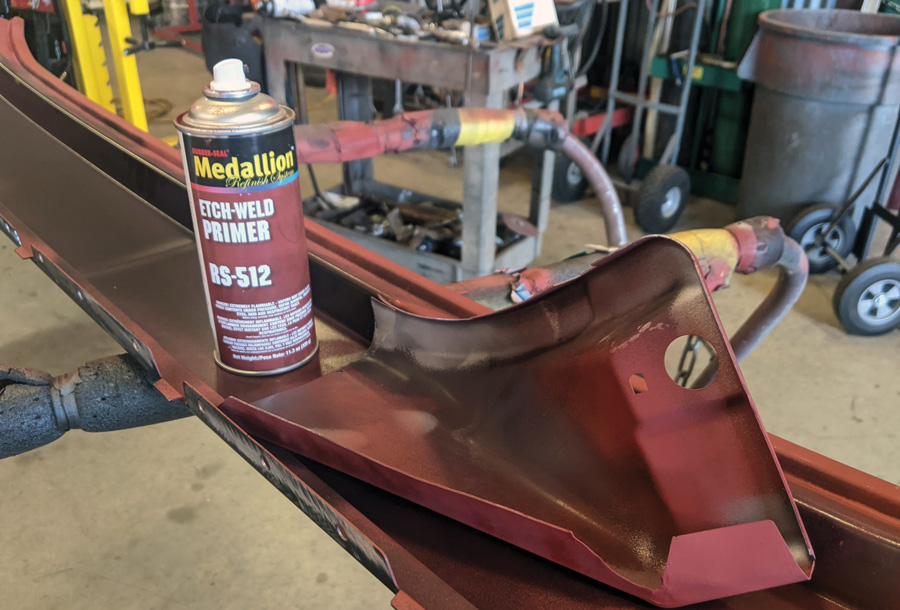
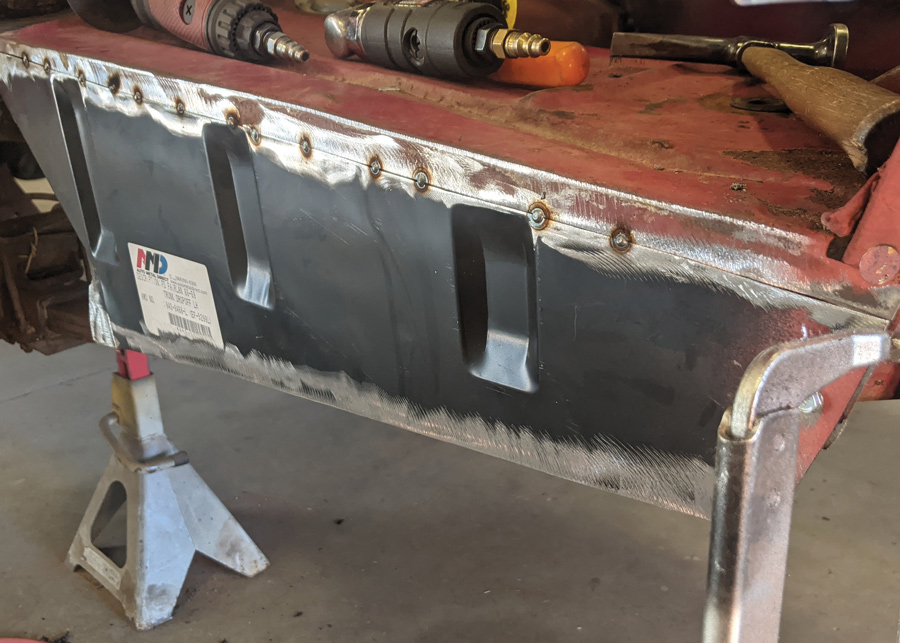
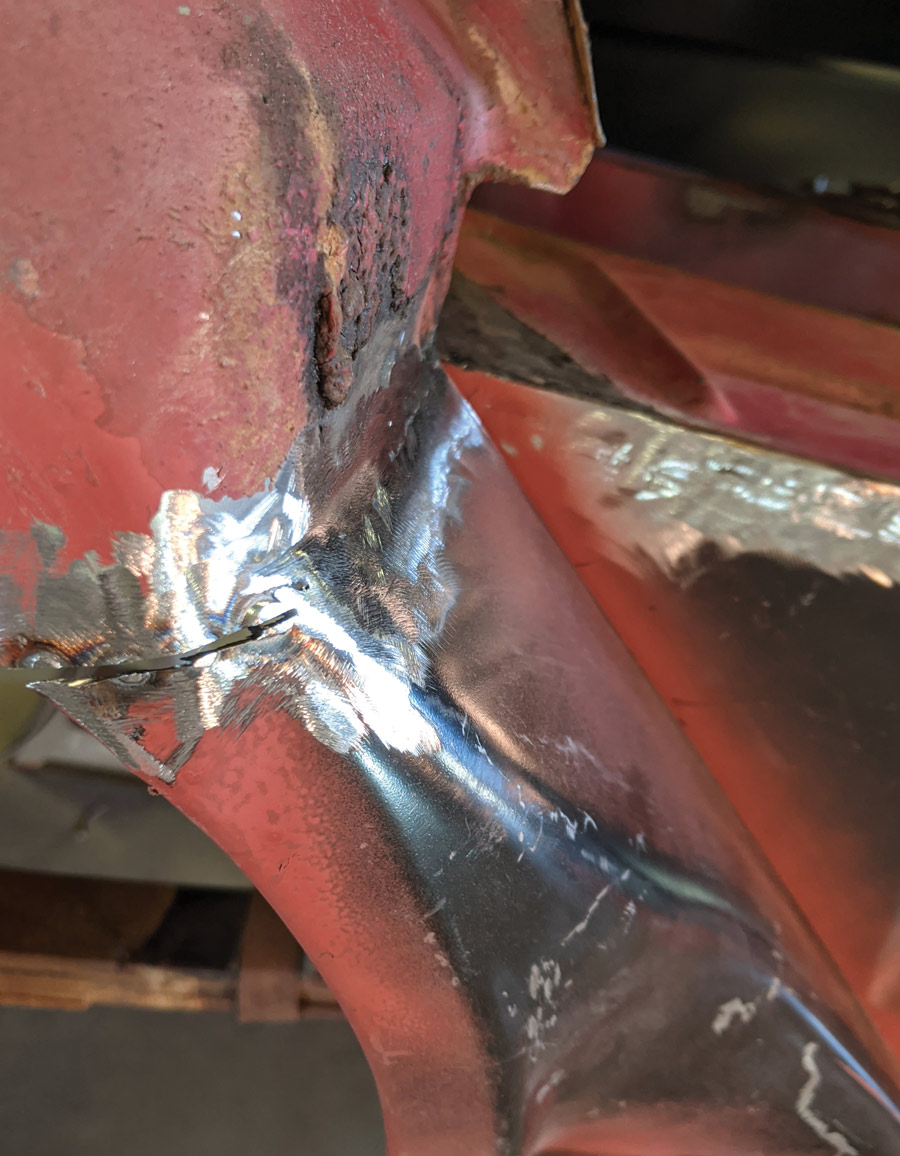
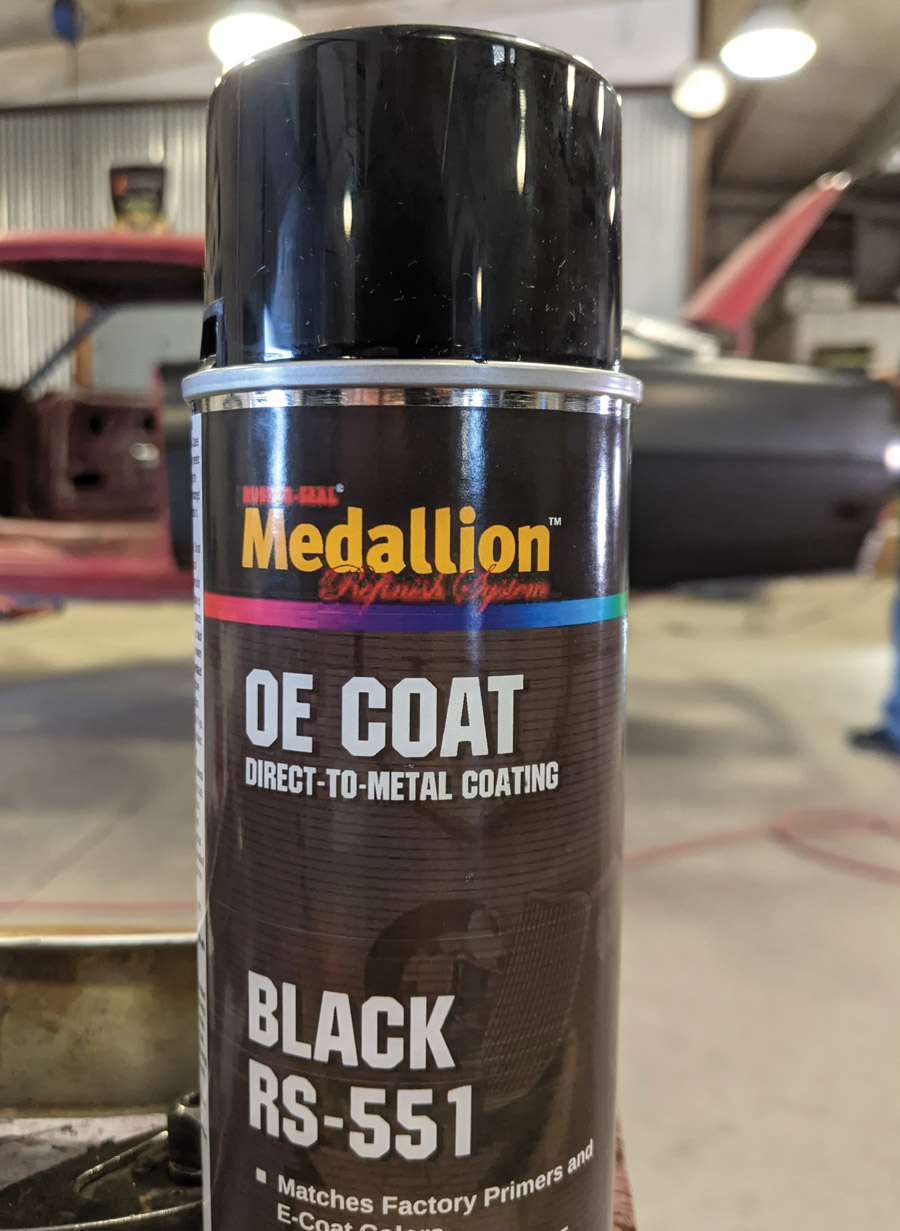
These pieces are stamped for AMD out of a high-quality heavy-gauge steel on AMD-exclusive tooling. It should be noted that AMD went to great lengths to make sure that their replicated parts feature correct-as-original shape, size, bends, tabs, and holes. This AMD component replaces Ford PN C8OZ-5427895-B. The wheelhouse will come to you with an EPD coating to protect against rust and corrosion. We have spoken about EPD, as it stands for electrophoretic deposition. E-coating, as it is commonly referred to, is an immersion wet paint process that uses electrical current to attract material (paint) to the metal surface. It’s great for protecting metal during the build process right up and until the body- and paintwork begins.

Trunk Floor Side
The second patch panel that we will be working on within this story is the Trunk Floor Side (PN 840-8468-L, extension). It will work on ’68 and ’69 Torinos, Mercury Cyclones, and Montegos and ’69 Fairlanes and Mercury Comets (except wagon or Ranchero). There’s also a Trunk Floor Side for the righthand (passenger) side, PN 840-8468-R. 

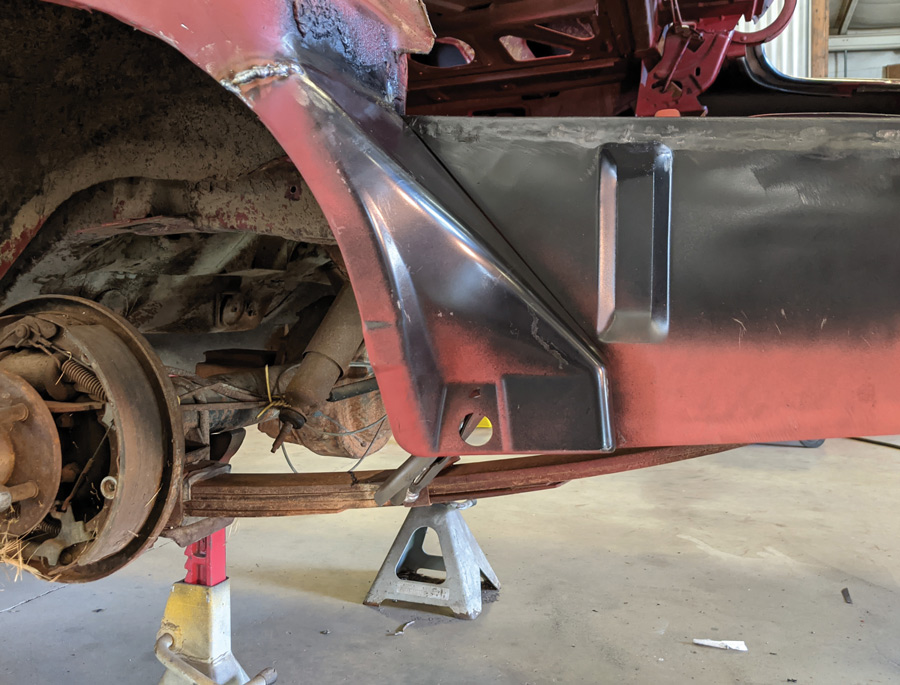
This component is stamped from the same high-quality heavy-gauge steel and each of these pieces features the same correct shape, size, bends, ribs, holes, and tabs like the factory. It arrives EPD coated to help protect against rust and corrosion. This AMD component also replaces Ford PN D0OZ-65112A23-A and comes with the same EPD coating.

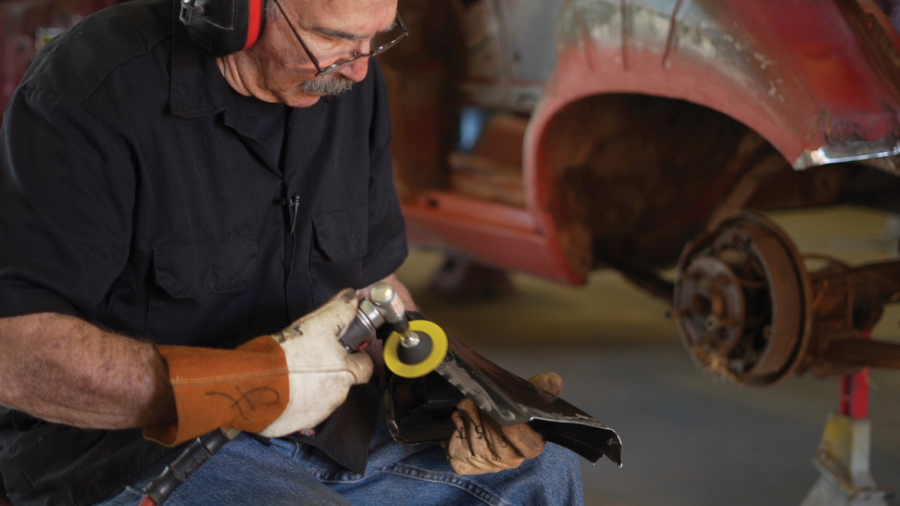
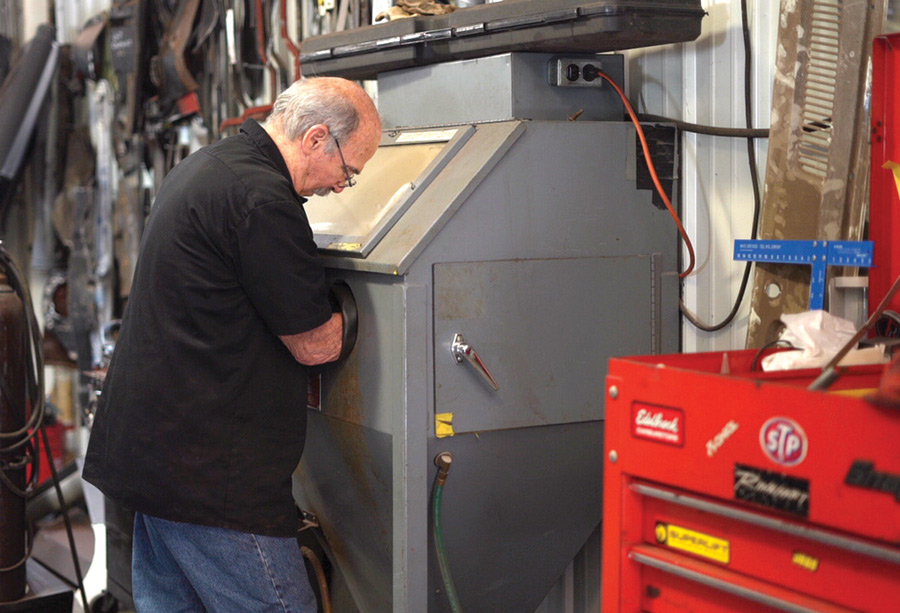
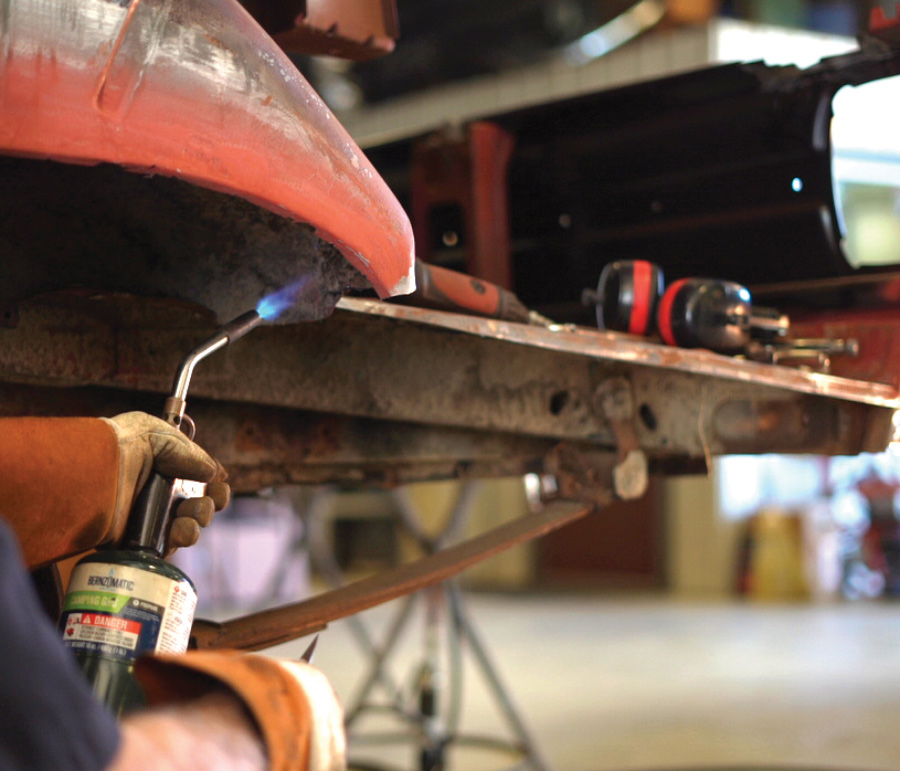
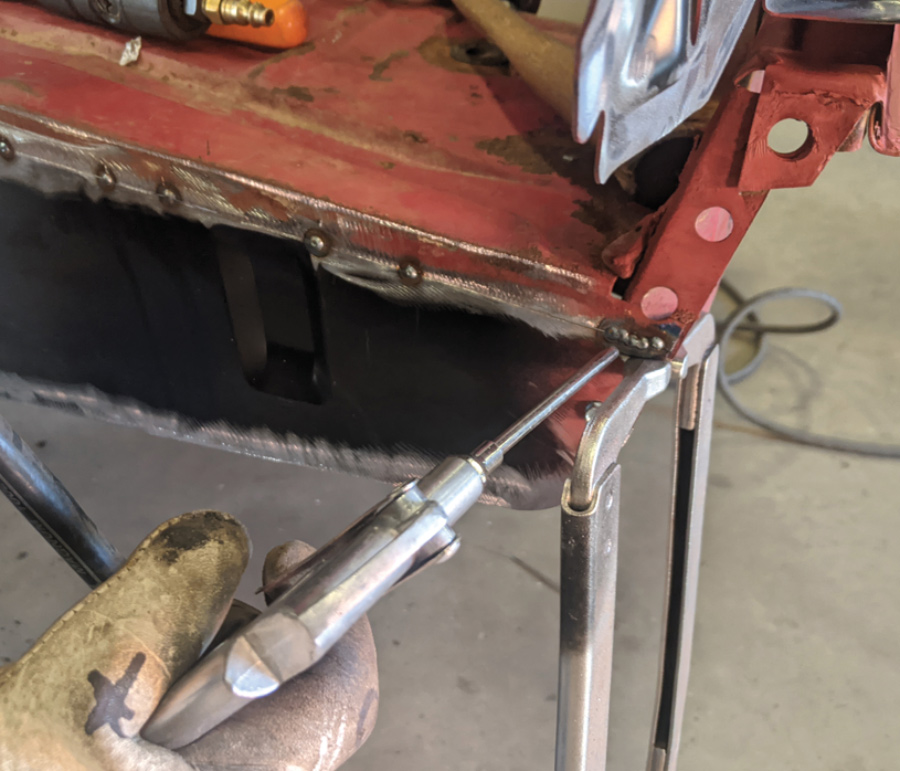
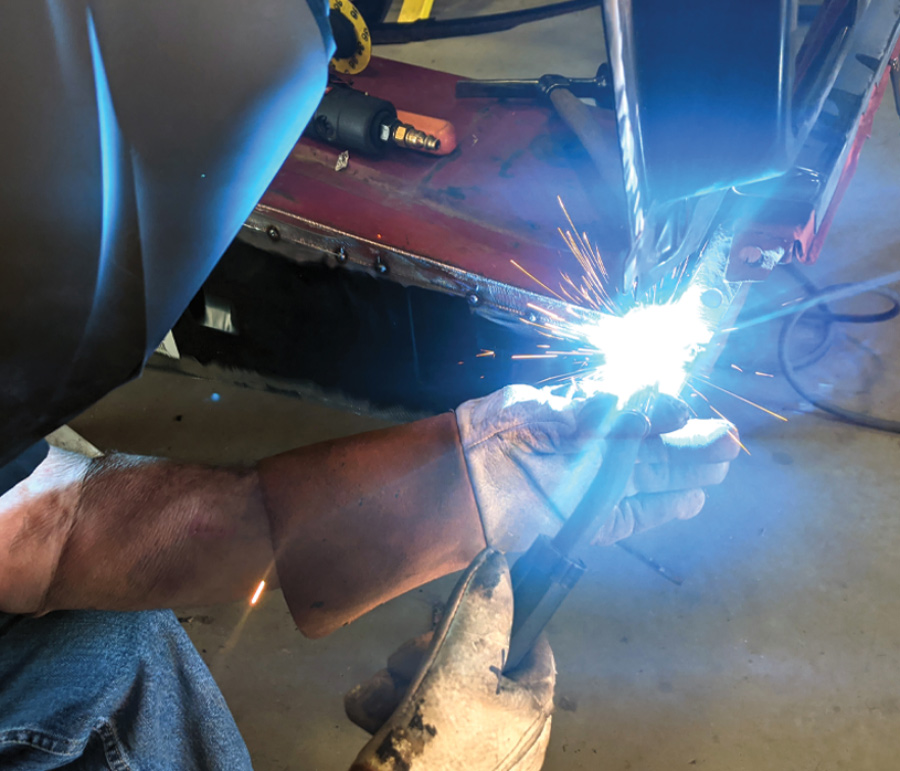
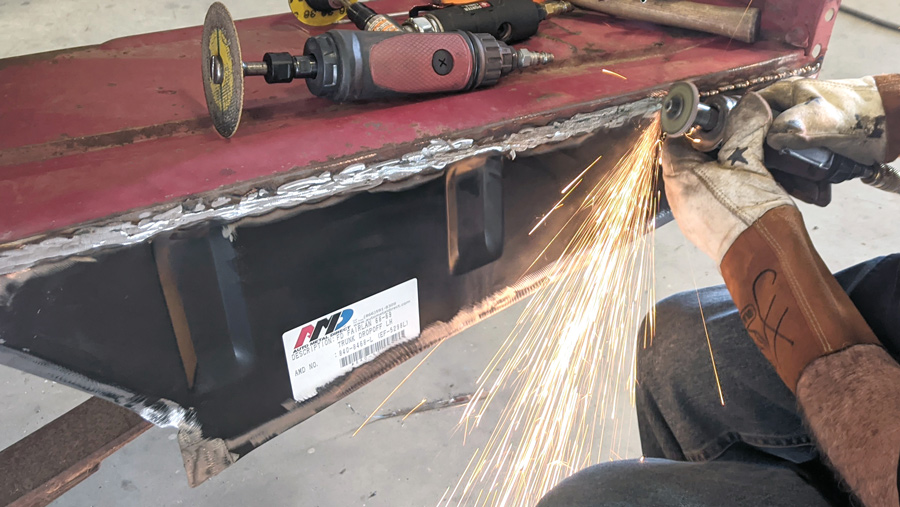
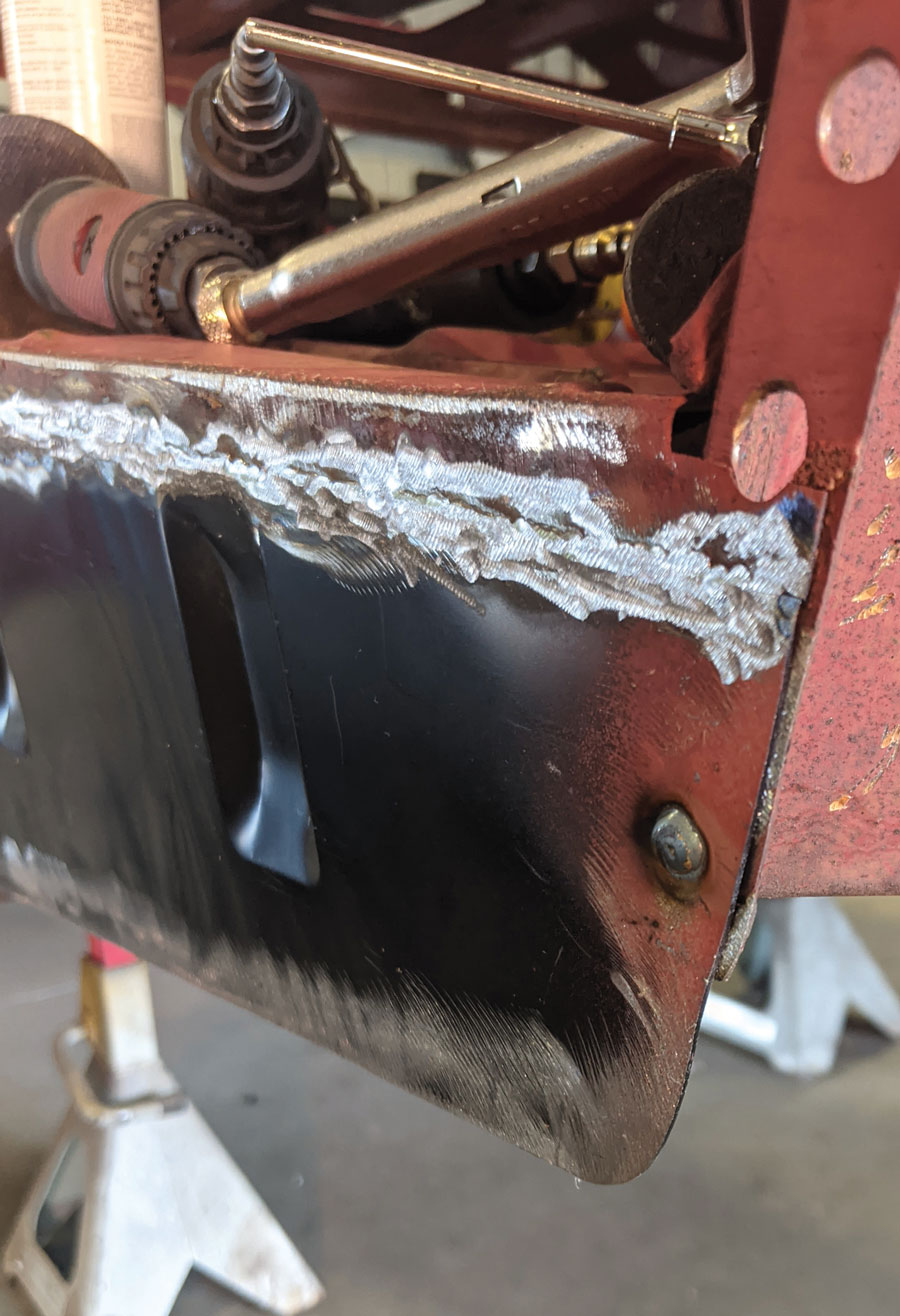
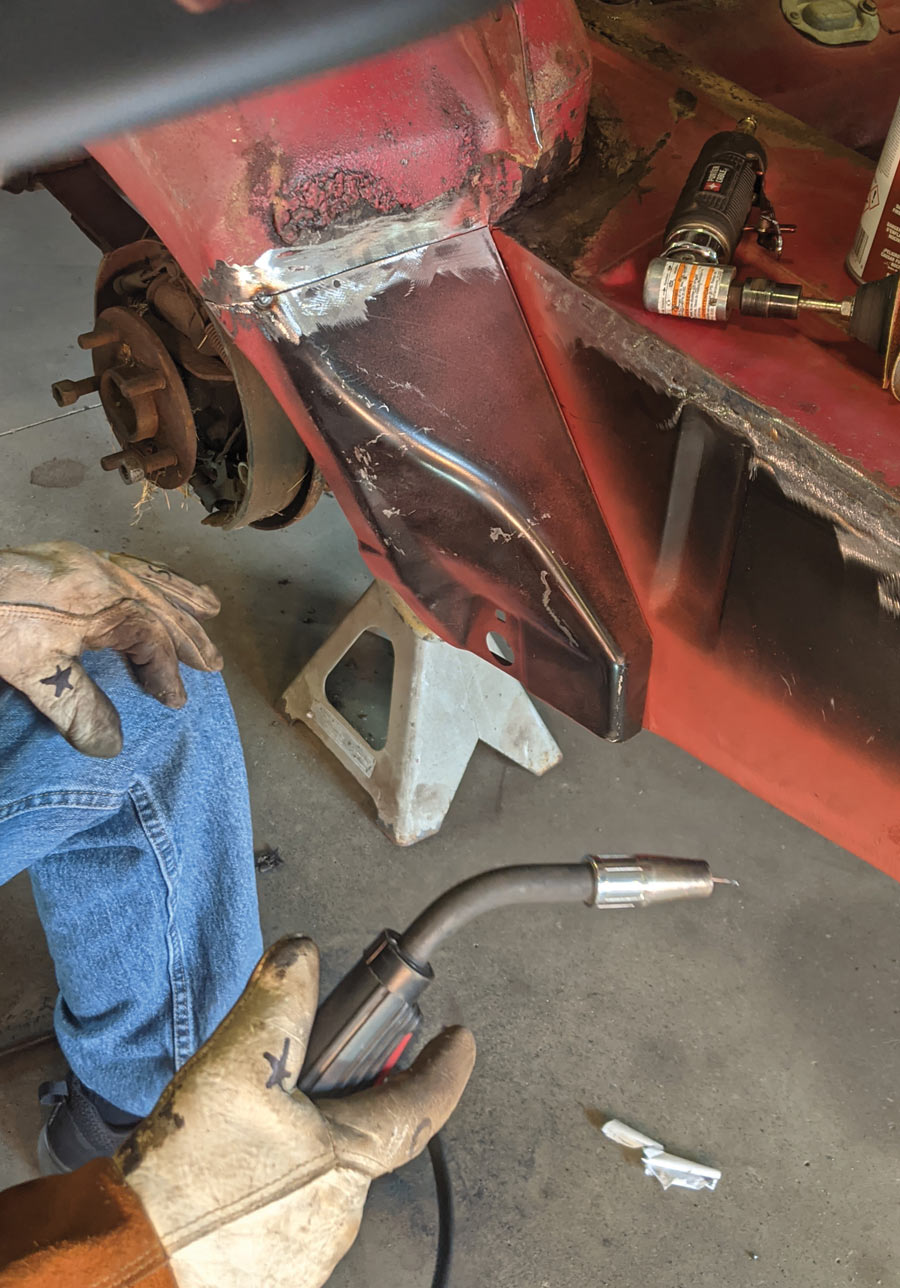
Follow along with the photos as it will pretty much be a step-by-step process on how to remove the tired and rusted-out sheetmetal and replace it with the fresh sheetmetal from AMD.

An inspection is performed to see what we need to repair
2. This Arizona rust-free car isn’t without its faults. Upon removal of the quarter-panel shows this car isn’t exactly rust-free. An inspection is performed to see what we need to repair.
Craig starts by taping a cutline on the car and also taping off a line to cut both the outer wheelhouse and the trunk floor extension
3. Once Craig at the Installation Center has figured out what metal needs to be replaced, he will gather the correct sheetmetal pieces from Auto Metal Direct (AMD). The labor it would take to replace both the outer wheelhouse and the trunk floor extension isn’t warranted as most of the metal is in good condition. Craig starts by taping a cutline on the car and also taping off a line to cut both the outer wheelhouse and the trunk floor extension.
TIC starts by cutting out the old damaged metal.
Equipment sitting on car frame
4-5. Butt welding is the proper method for this repair. TIC starts by cutting out the old damaged metal. Using a cut-off wheel, both rusted areas are removed. An air chisel is used to separate the wheelhouse from the trunk floor extension.
Follow the same procedure on the new panels to create your patches.
6. Follow the same procedure on the new panels to create your patches.
Reproduction outer rear wheelhouse (PNs 770-8468-L and 770-8468-R) for the ’68 and ’69 Ford Fairlane and Torino, except the station wagon.
7. Reproduction outer rear wheelhouse (PNs 770-8468-L and 770-8468-R) for the ’68 and ’69 Ford Fairlane and Torino, except the station wagon.
Reproduction trunk floor side, extension (PNs 840-8468-L and 840-8468-R) for the ’68 and ’69 Ford Fairlane and Torino.
8. Reproduction trunk floor side, extension (PNs 840-8468-L and 840-8468-R) for the ’68 and ’69 Ford Fairlane and Torino.
Clean the surfaces that will be welded, both on your patch panels and on your car.  A sanding disc works great for this.
9. Clean the surfaces that will be welded, both on your patch panels and on your car. A sanding disc works great for this.
Test-fitting your panel
A grinder will allow you to fine-tune it from there
10-11. Test-fitting your panel is key to great results. TIC uses mockup panels with self-tapping screws and clamps. They will scribe the backside of the patch panels and cut the excess off to ensure a flush fit. A grinder will allow you to fine-tune it from there.
prep the wheelhouse patch on both sides
Here a media blast cabinet was used but a wire wheel will do the job  as well
12-13. TIC will be spot-welding the quarter-panel on the car, so prep the wheelhouse patch on both sides for a proper weld. Here a media blast cabinet was used but a wire wheel will do the job as well.
Weld Through Primer is applied to the mating surfaces. Not to the area that is welded. A light coat will do the job.
14. Weld Through Primer is applied to the mating surfaces. Not to the area that is welded. A light coat will do the job. 
There’s a lot of undercoating that needs to be removed at the repair site. A hand torch and scraper work best.
15. There’s a lot of undercoating that needs to be removed at the repair site. A hand torch and scraper work best.
TIC installed the AMD patch panels using sheetmetal screw holes from the test-fit.
16. TIC installed the AMD patch panels using sheetmetal screw holes from the test-fit. This helps as a guide to get your patch back in alignment. Control is the name of the game.
Using 0.023 wire for ease of control on thinner metal, TIC tacks the trunk floor extension in place.
17. Using 0.023 wire for ease of control on thinner metal, TIC tacks the trunk floor extension in place. They also start with the inner edge and manipulate the patch in and out for that flush fit. Often a thin screwdriver helps. Continue tacking the patch flush across the panel.
Butt welding is done once the patch is tacked where you want it.
18. Butt welding is done once the patch is tacked where you want it. Weld in one direction only in small sections, maybe three or four beads. Followed by air to keep it cool and prevent warping.
Small welds, cool it down. All in one direction.
19. Small welds, cool it down. All in one direction.
The welded patch should look like this once you’re finished welding across.
20. The welded patch should look like this once you’re finished welding across.
Start cleaning up the welds with a grinding disc. Finish sanding using a sanding disc to bring the two parts into one.
21. Start cleaning up the welds with a grinding disc. Finish sanding using a sanding disc to bring the two parts into one.
Don’t forget to plug weld any area that your spot welder will not reach later on.
22. Don’t forget to plug weld any area that your spot welder will not reach later on.
Craig will be welding the wheelhouse patch the same way. He leaves the patch loose from the trunk floor extension so he can make any final adjustments before going for the final weld up.
A clamp will hold it in place until that time comes.
23-24. Craig will be welding the wheelhouse patch the same way. He leaves the patch loose from the trunk floor extension so he can make any final adjustments before going for the final weld up. A clamp will hold it in place until that time comes.
Tack the patch and check alignment.
25. Tack the patch and check alignment. Using your flathead screwdriver, flush the patch and continue tacking as before. A hammer and dolly will be helpful to get the perfect alignment.
weld the panel just like the trunk floor extension
One direct, small weld and then cool the weld.
26-27. Continue to weld the panel just like the trunk floor extension. One direct, small weld and then cool the weld.
Clean the welded area to a flush fit just like factory.
28. Clean the welded area to a flush fit just like factory.
Craig test-fits the patch to make sure he’s happy with the alignment before proceeding.
29. Craig (left) test-fits the patch to make sure he’s happy with the alignment before proceeding.
It’s a good thing TIC didn’t weld the trunk floor extension to the wheelhouse patch.
30. It’s a good thing TIC didn’t weld the trunk floor extension to the wheelhouse patch. A relief cut is needed to make a final adjustment for a perfect fit.
After testing a final time, TIC is happy with the alignment on the quarter-panel and we weld up the relief cut. Follow the same steps in cleaning up this area.
31. After testing a final time, TIC is happy with the alignment on the quarter-panel and we weld up the relief cut. Follow the same steps in cleaning up this area.
A final spray of OE Coat or E-Coat in a can will seal the area and prevent any future rust and corrosion.
32. A final spray of OE Coat or E-Coat in a can will seal the area and prevent any future rust and corrosion.
The rust is repaired and the car is ready for its other repairs.
33. The rust is repaired and the car is ready for its other repairs.
Now we send it off to paint and body ready to go.
34. Now we send it off to paint and body ready to go.
 SOURCES
Auto Metal Direct
(877) 575-3586
autometaldirect.com
The Installation Center
(706) 348-6653
amdinstallation.com
Modern Rodding
VOLUME 2 • ISSUE 13 • 2021