Modern Rodding Tech
InTheGarageMedia.com
Trie-Five Chevy Backside
Out With the Old and in With the New
Replacing and Repairing All Things Tailgate on a Tri-Five Chevy
Duralast, Harbor Freight, and Frontier Shop Supplies logos
By Brian Brennan Photography by The Author Videography by Ryan Foss Productions
W

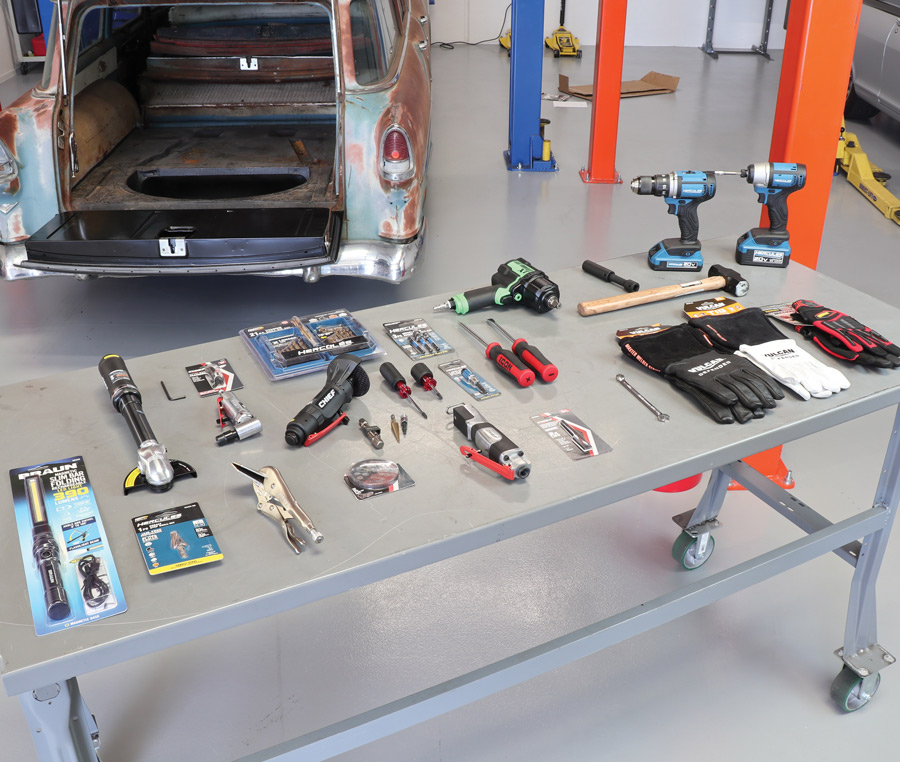
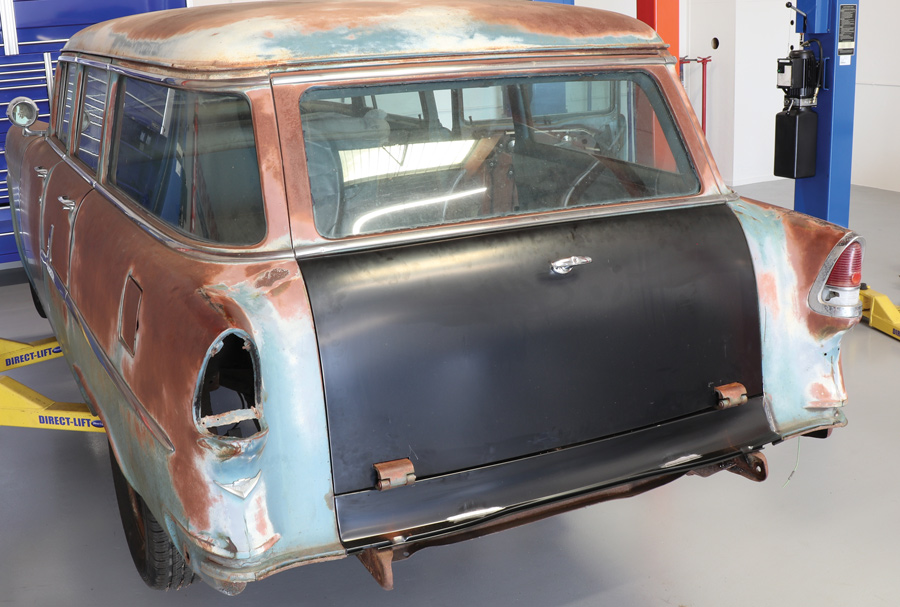
hen the tailgate on your station wagon is old enough to collect social security it’s a good bet it’s time to repair and replace where needed. Around the Modern Rodding offices our “shop truck” is a ’55 Chevy wagon—that one, you might say, has seen better days. (Shop truck is a loose definition as it has no powertrain, hence doesn’t run, and some of the sheetmetal is more accurately represented by saying “sheetair.”) Apparently, rust is the sheetmetal of choice that we have to work with so there will be lots of patch and replacement panels in its future. Thank goodness for Golden Star Classic Auto Parts and Danchuk as each possess the parts we need. Our tech center is filled with all of the necessary tools courtesy of Harbor Freight to perform this sleight of hand, expertly handled by Jason “IJ” Scudellari, our tech center manager.

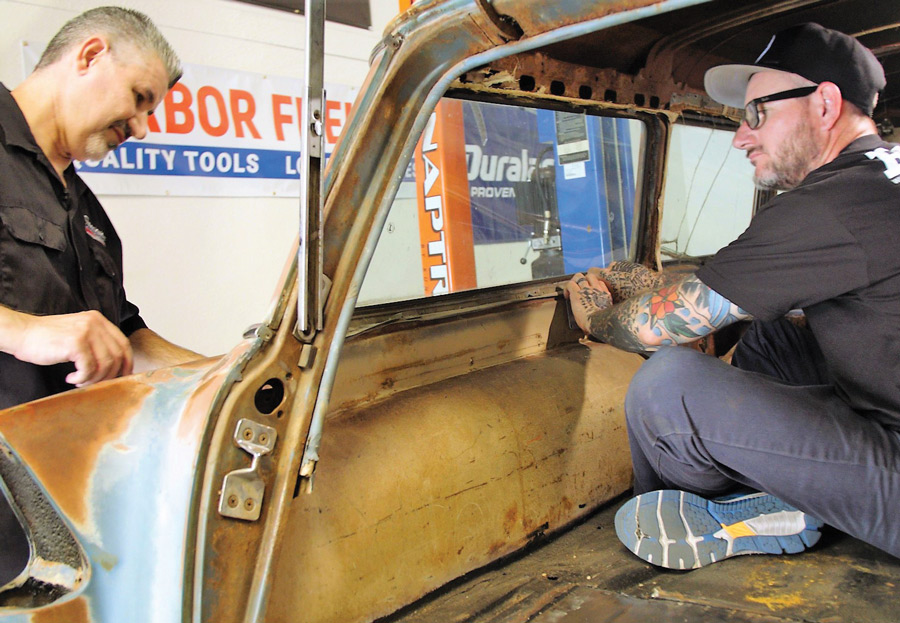
When it comes time to round up sheetmetal for a Tri-Five (and a myriad of other vintage tin) and the accompanying accessories there’s no better place to start than Golden Star Classic Auto Parts and Danchuk for a Tri-Five project. You may remember that we have already replaced a rear section of flooring as well as the tail pan in this ’55 Chevy wagon. That turned out very well so it is onto the next phase. Of course we could have started anywhere on this wagon but we opted to start in the rear and work our way forward and upward.

Truthfully, sheetmetal work, such as a ’55-’57 Chevy tailgate, has little to do with sheetmetal work and more to do with obtaining fresh metal and making sure it fits, the gaps are good, and the tailgate functions correctly. Check off all of the above.

The Golden Star tailgate carrying PN TG13-55 will work on all Tri-Five Chevy wagons. Unfortunately, or fortunately (it’s a matter of perspective), the Nomad Chevy wagon requires a different tailgate. The upside here is the necessary hardware to make either work is basically all the same and that’s where Danchuk comes into the picture. We rounded up all of the necessary hardware from them (since our gennie goodies had seen much better days). It included the usual assortment of tailgate strikers and latches, retractor cables, tailgate balls and covers, handle to latch rods and lockable handle, tailgate access cover, and fastener assortment of hardware. There was one item (actually individual) we borrowed from Danchuk and they made us return him. Frank Correia is an expert on Tri-Fives but does have a particularly deep well of information on wagons. Whether a standard or a Nomad, Correia had us covered and it was like having a speaking assembly manual (that could actually pick up tools and parts), making this project that much more doable.

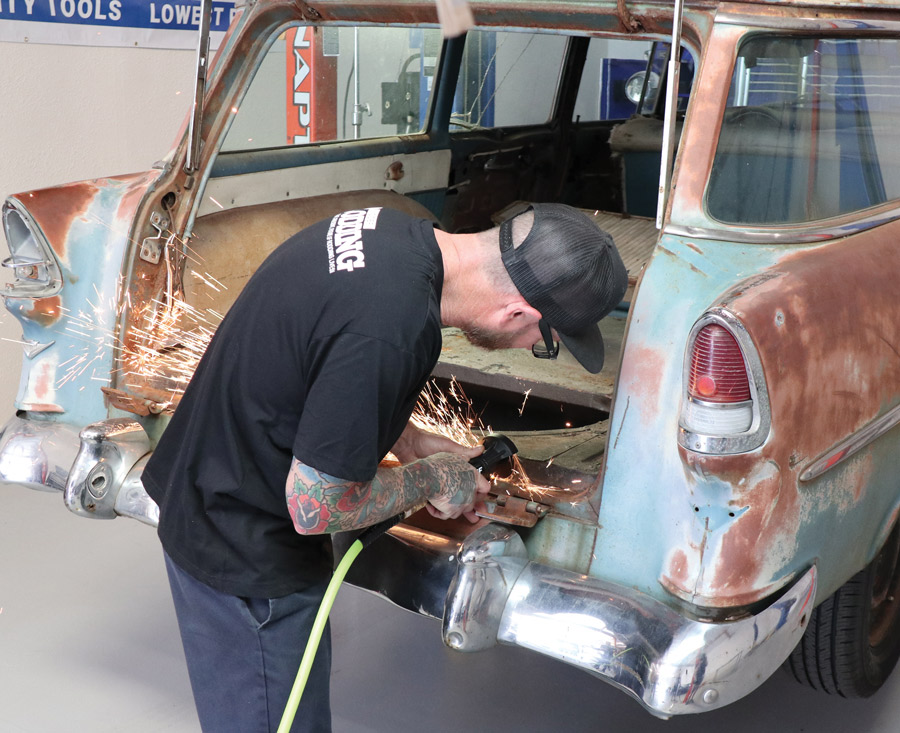
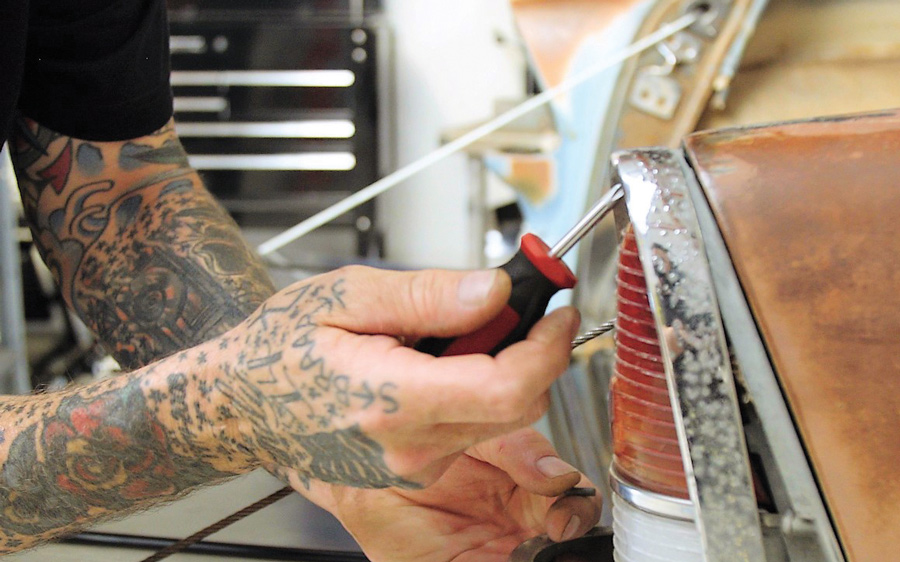
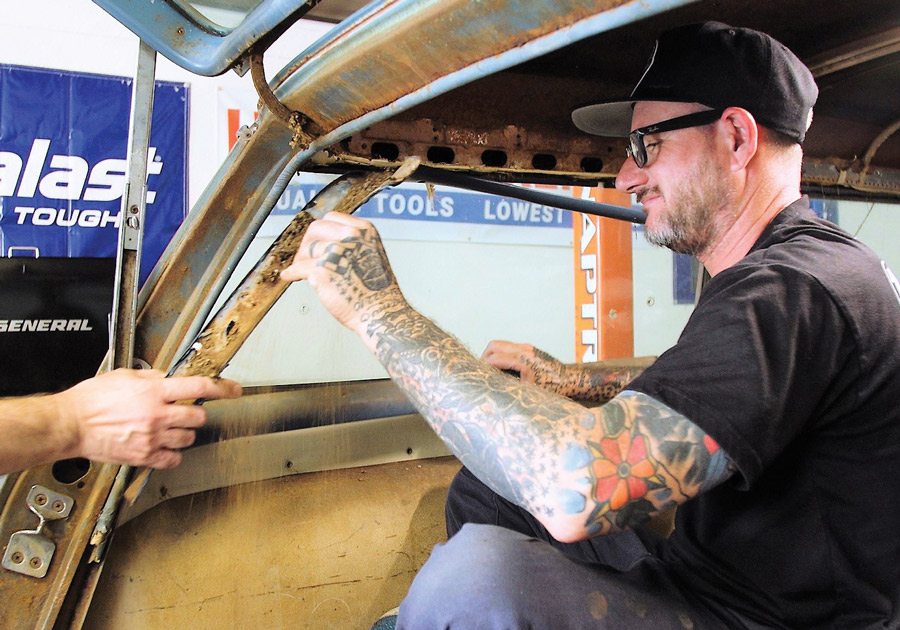
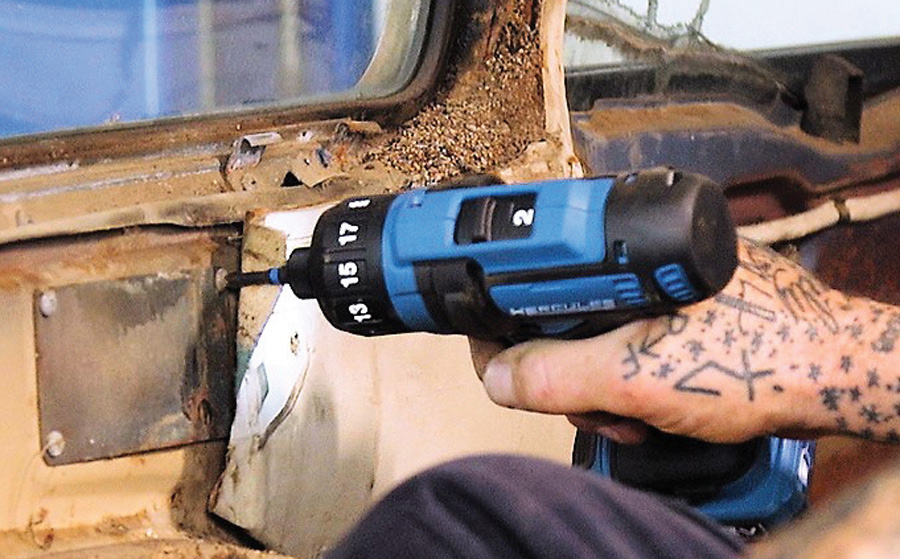
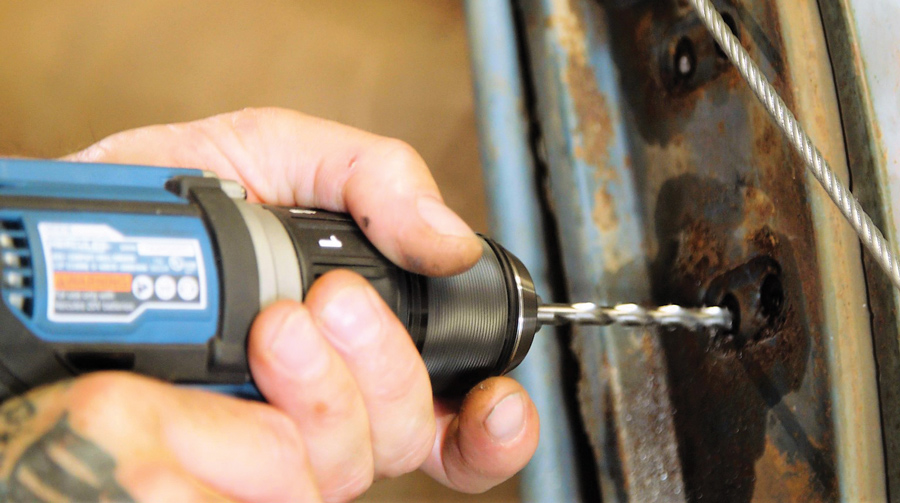
If you haven’t replaced a tailgate on a Tri-Five Chevy wagon it would be a good investment to latch onto an assembly manual (available through Danchuk). While this project is straight forward, the retractable cable (holds tailgate while in the down, open position) isn’t difficult, but it’s sneaky. We broke out our Harbor Freight toolbox and grabbed an assortment of tools that we would need to remove the tailgate, and from both sides of the interior trim pieces, the inspection covers, and taillight assemblies.

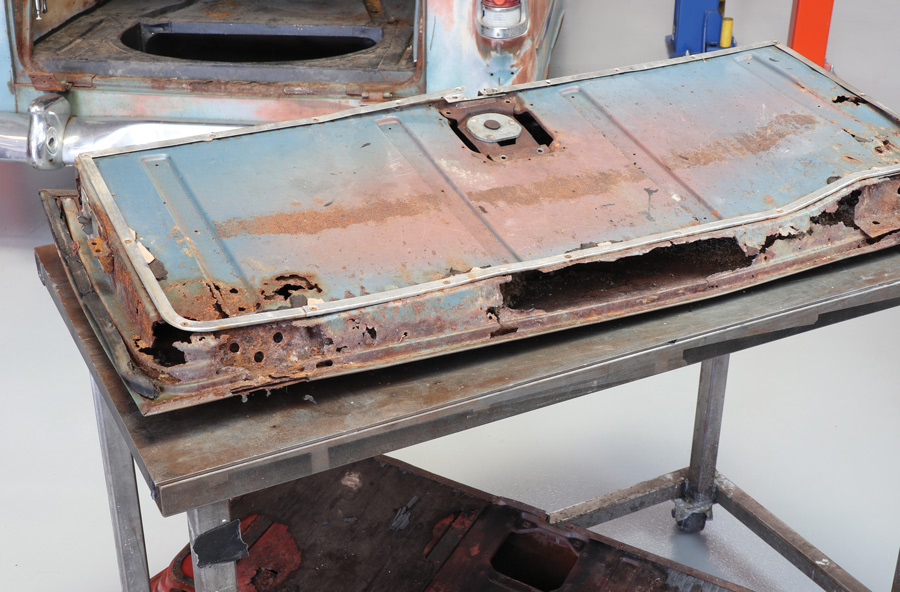
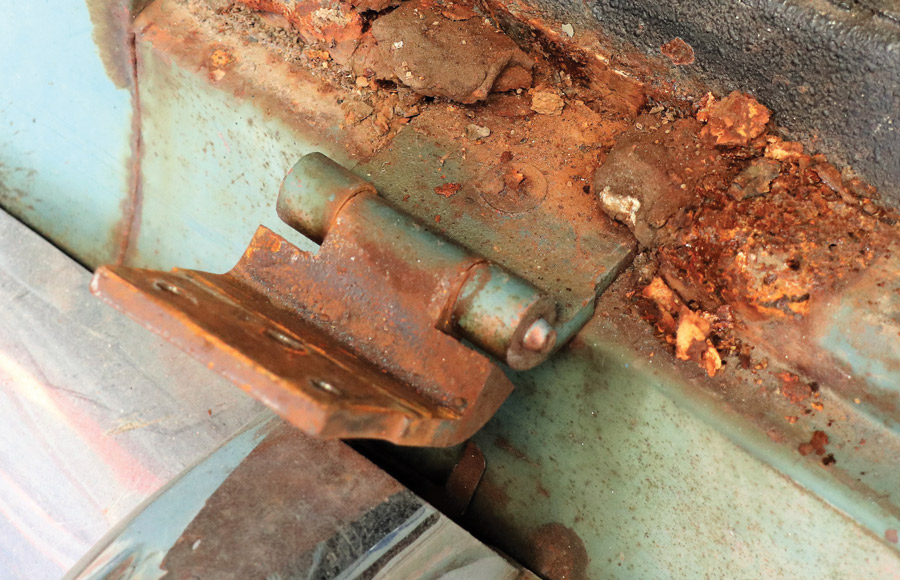
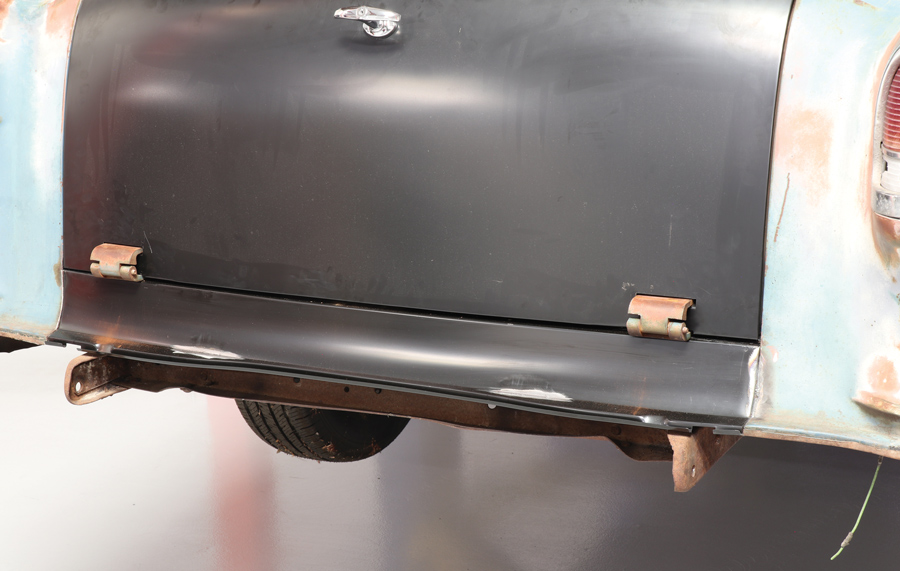
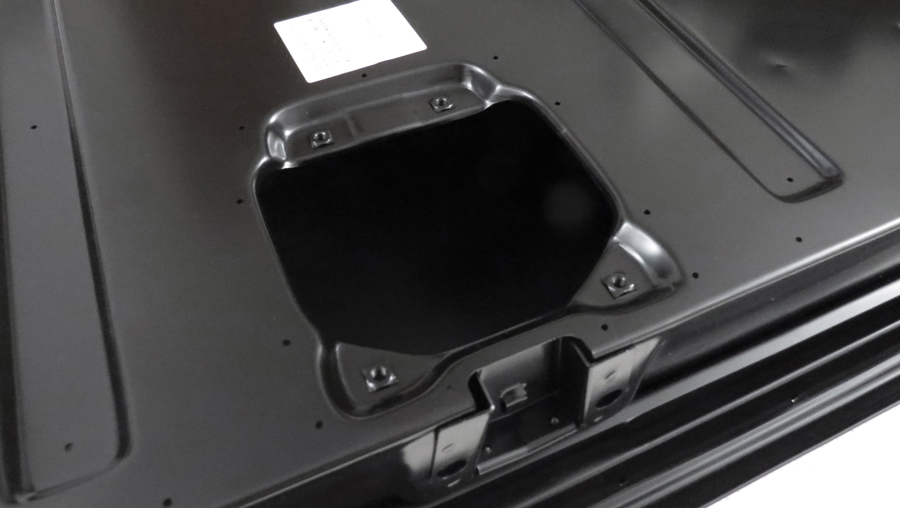
Once the old tailgate was removed, we realized just how bad ours was and that replacing it was truly the only way to go as 60-plus years of rust can really take its toll on sheetmetal. With the ’gate and both taillight assemblies removed we could see into the rear quarter-panel area. Once the interior trim and inspection plates were removed it was time to exchange the old for the new retractor cables. You can see how the cable works by looking into the rear quarter-panel area through the taillight assembly opening and from the ground up at the rear axle.

The installation of the new tailgate is pretty straightforward. It’s the old remove-and-replace approach. The trick here will be negotiating around old, rusty hinges, which we had. In our case, getting off the old hinges required grinders, chisels, and chasing the threads so that they are “fresh” and the new hardware easily passes through them. We were fortunate in that once we performed the removal of the pair of hinges and now attached our new Golden Star tailgate everything aligned very well. Care was taken in removing and cleaning up the old hinges, which made a big difference, and the fresh hardware from Danchuk also improved overall alignment as all strikers and latches were “tight.”

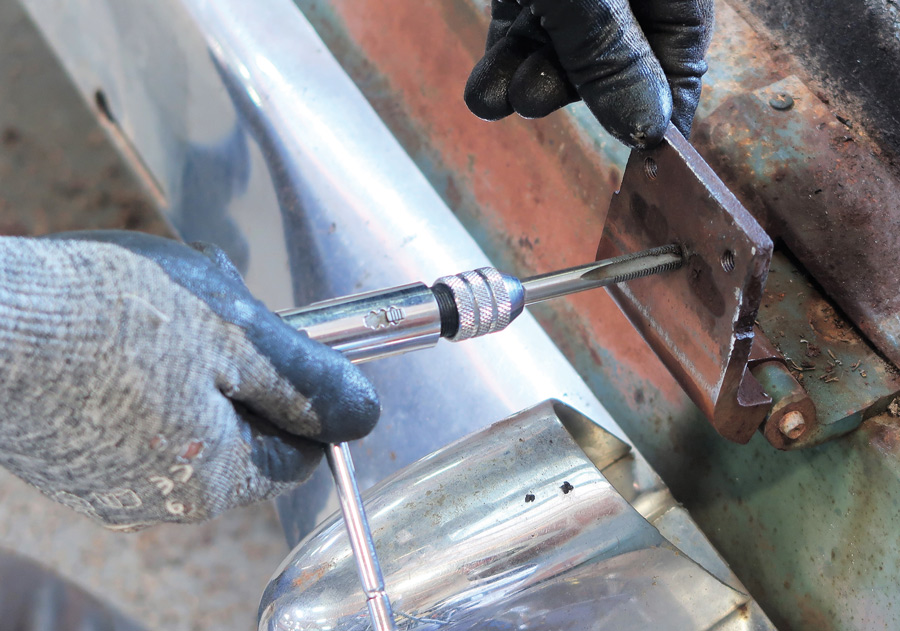
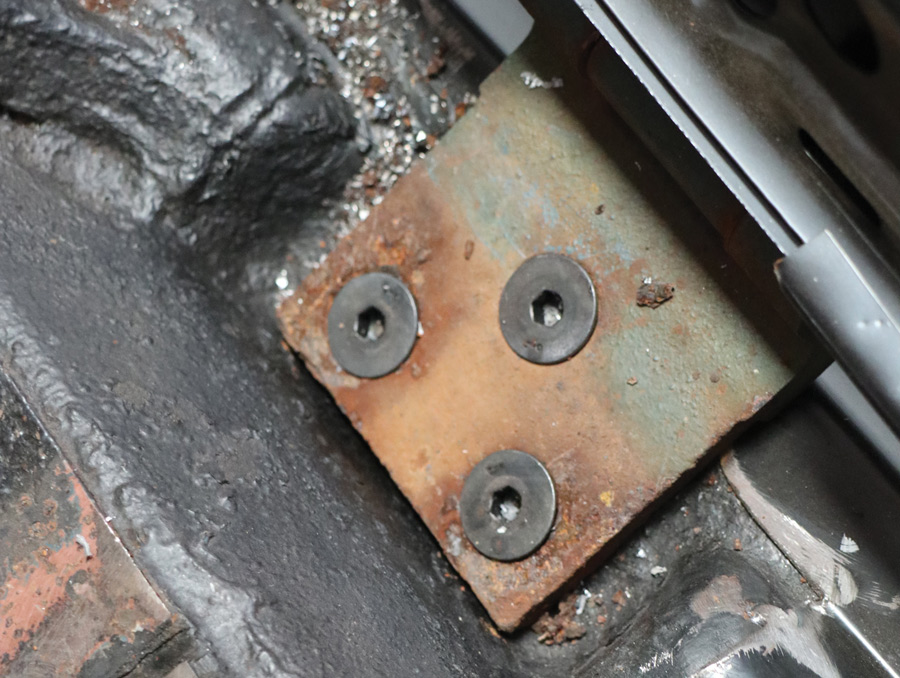
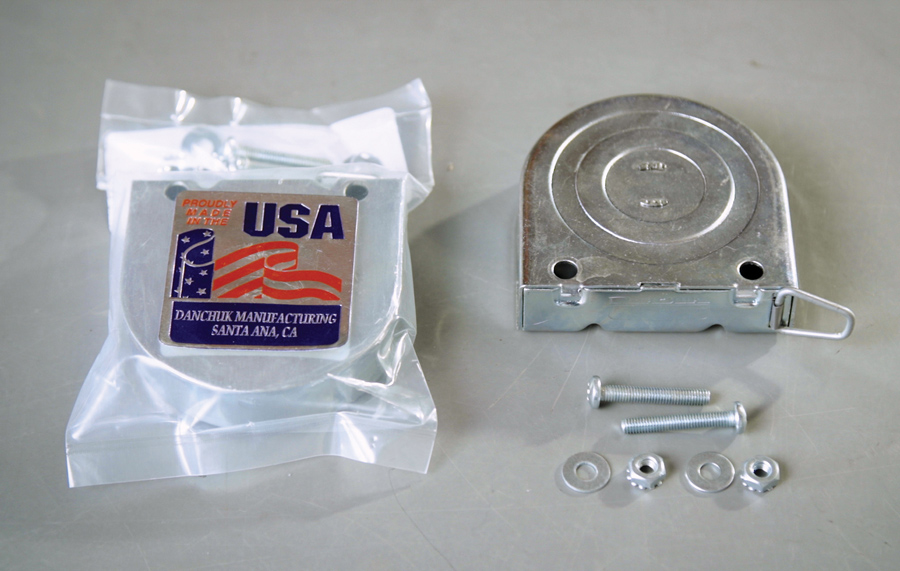
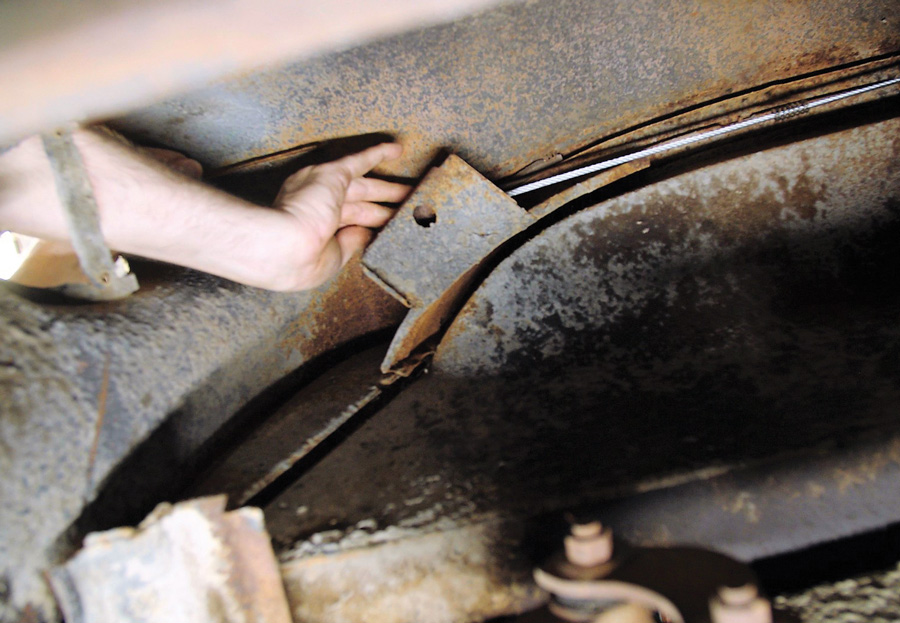
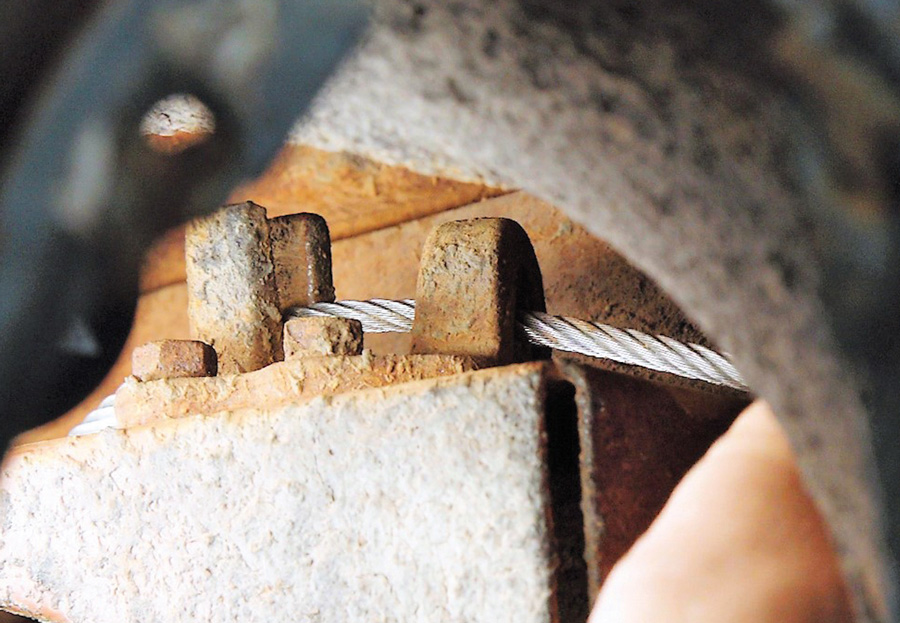
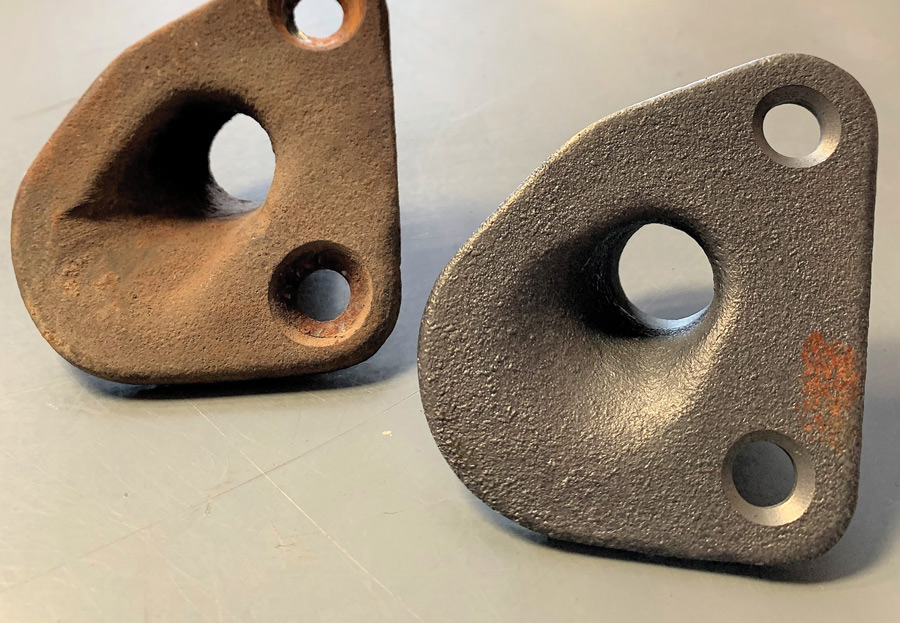
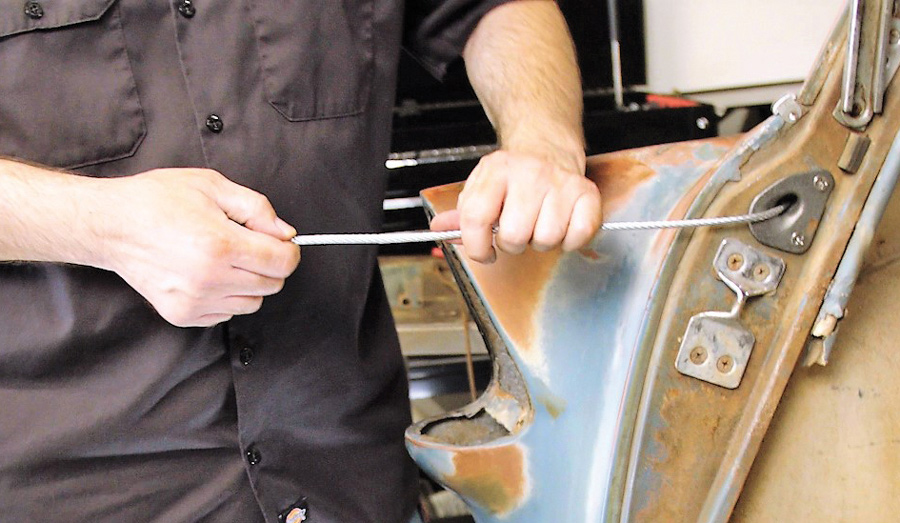
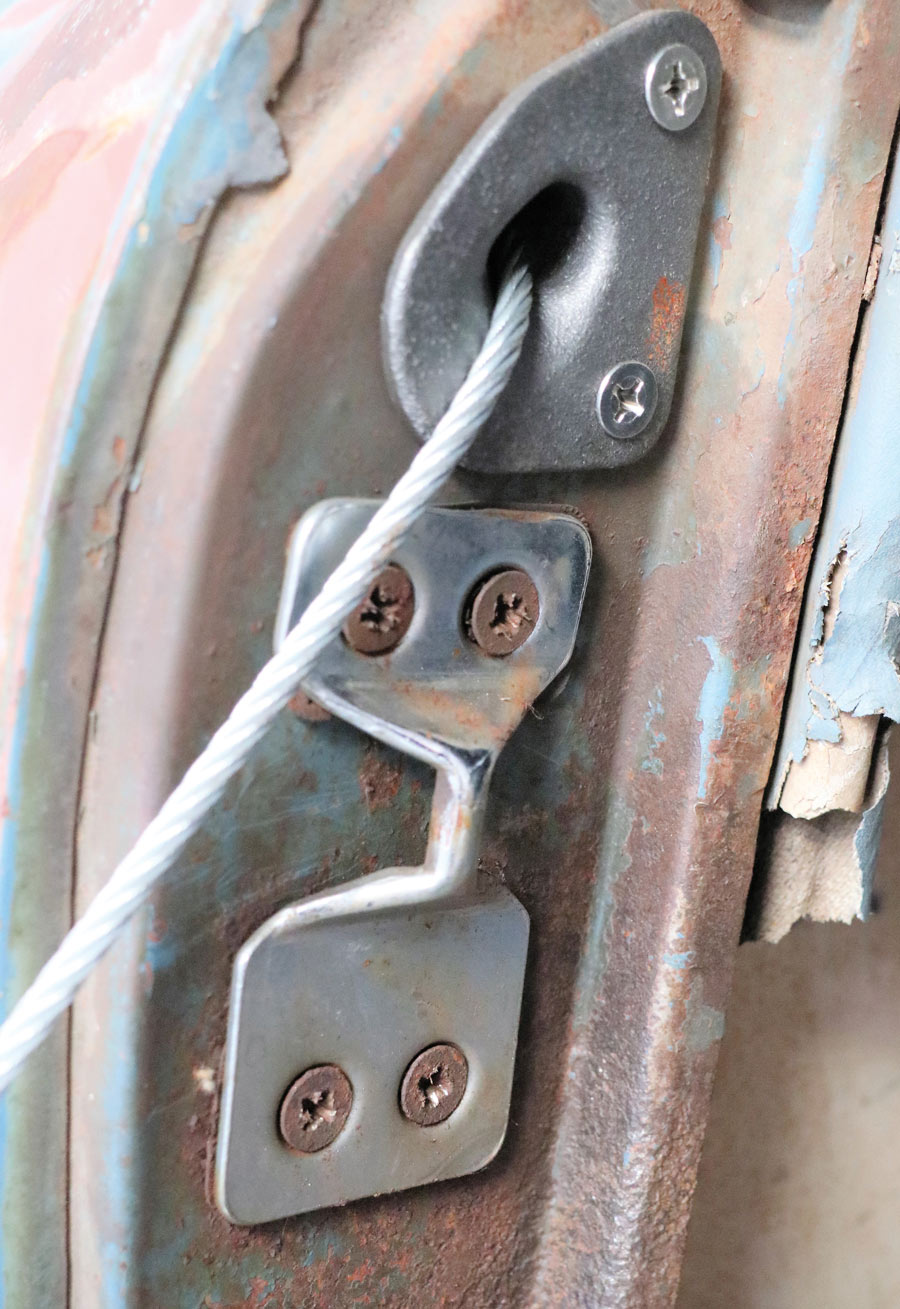
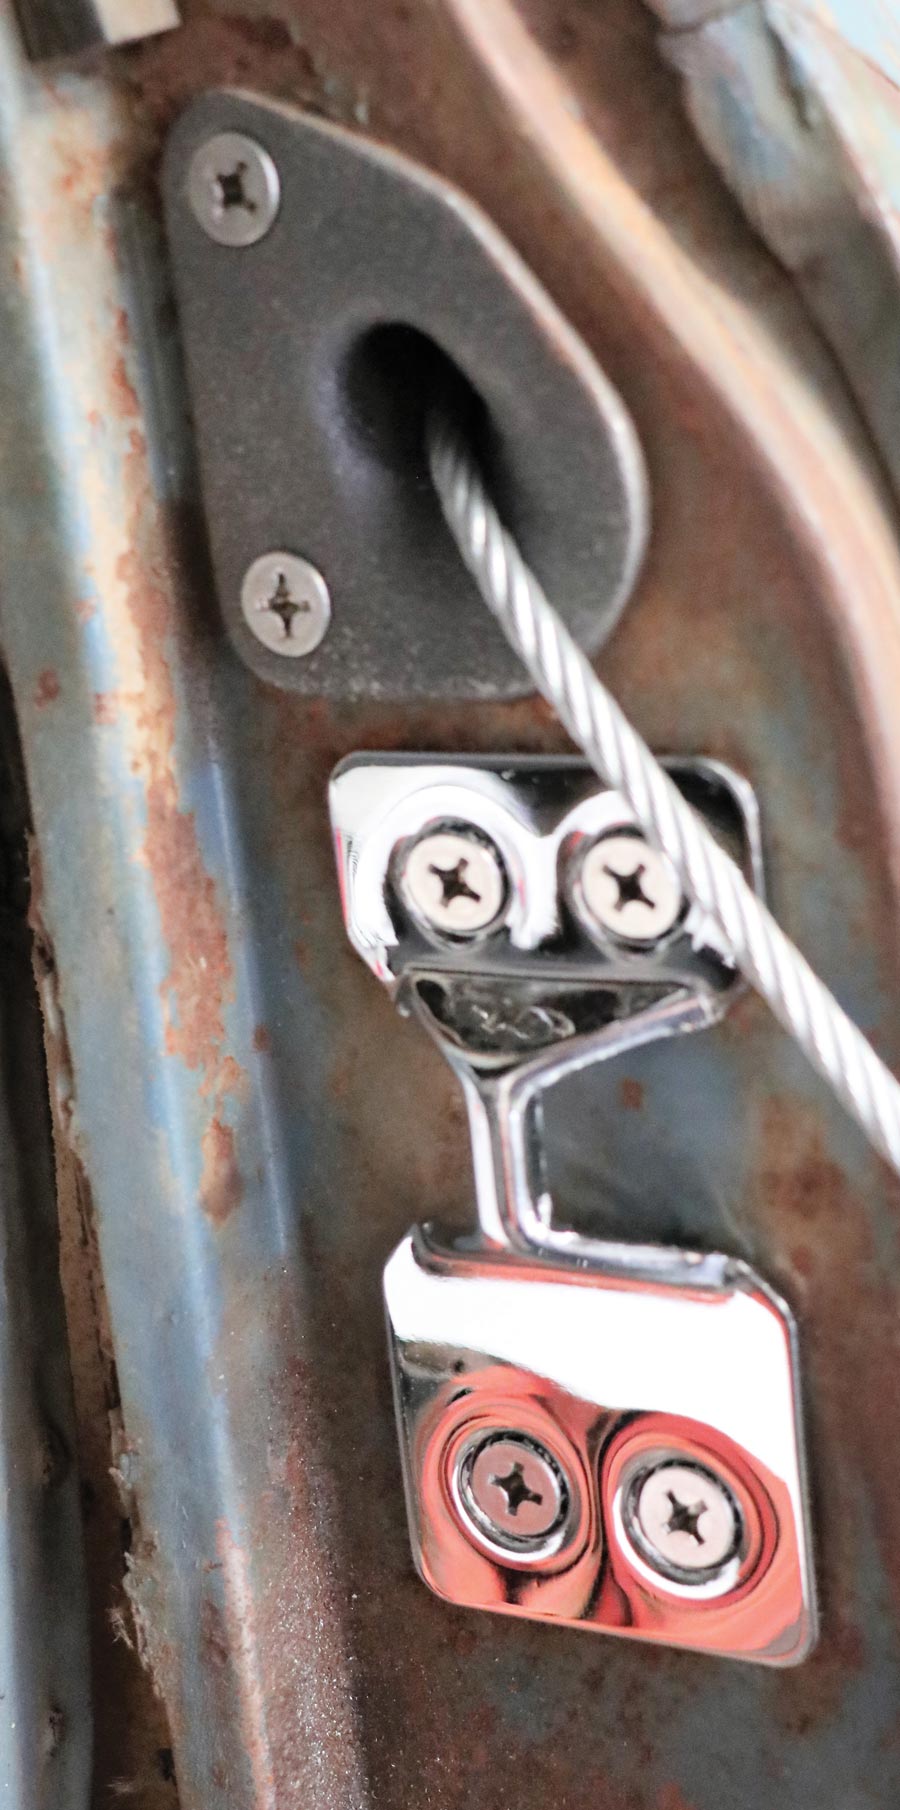
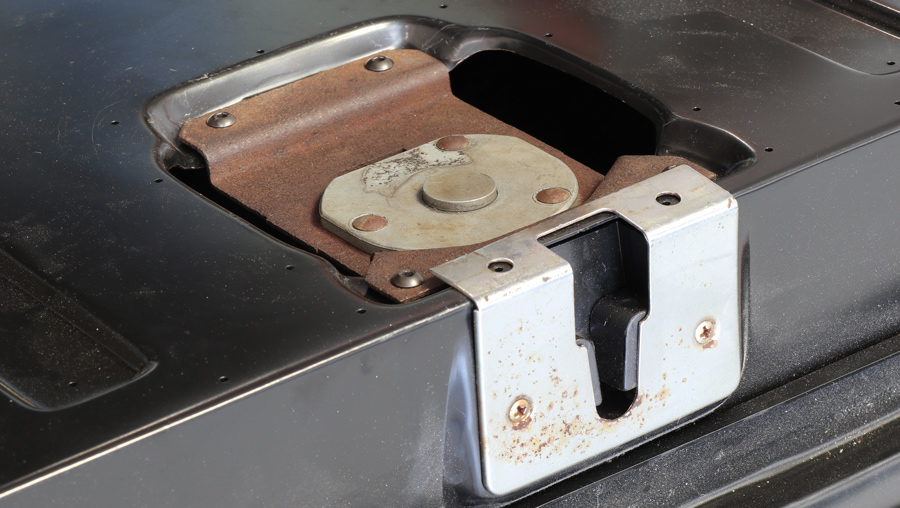
The retractor assembly, which includes cable and clevis pin (PN 1058 cable, and PN 1058A cable clevis pin) is bolted into position through an inspection opening in the passenger compartment (one per side) just over the wheelwell area. With the taillight assembly removed on each side and from the ground looking up you can see where the cable runs from its forward anchor position. The cable runs through and is centered and aligned by a pair of OEM factory brackets that you can see from the ground-up view. Since these brackets do not move, they should be fine and reusable. With the retractor cable assembly anchored you can then pull the cable forward, fully extending it to make sure it moves freely. It will then be anchored via a pair (one per side) of tailgate balls and covers that attach directly to the tailgate. The length of the cable is predetermined so there’s no need on your behalf to shorten or lengthen this cable. It should be noted that the cable does pass from the quarter-panel area through a tailgate cable guide (cast piece) and brings the cable back into the area where the tailgate is located. This part is often reusable but, in our case, we could see the wear marks and since all other hardware was new, we opted to change the pair. It will take two of the Danchuk (PN 17408) tailgate cable guides, one per side; they are a simple remove-and-replace item.

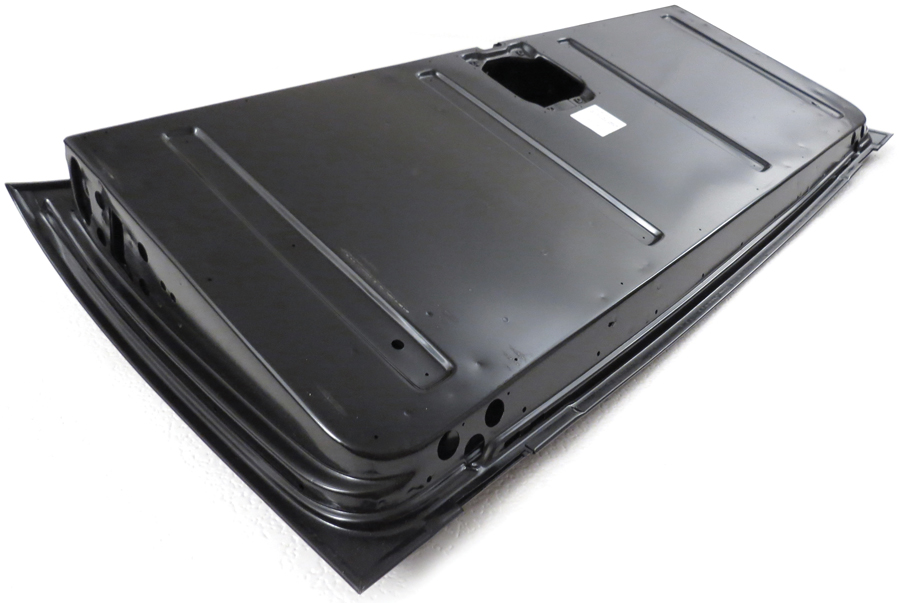
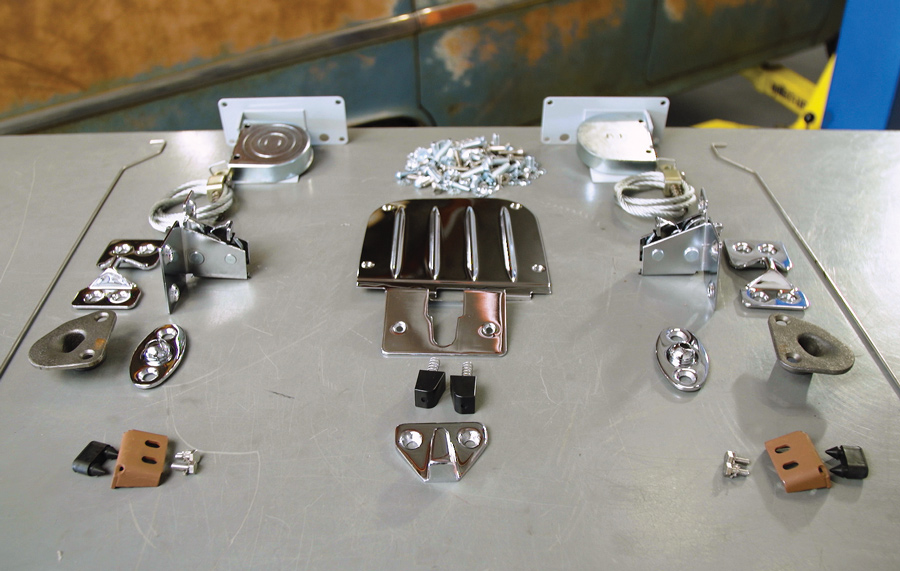
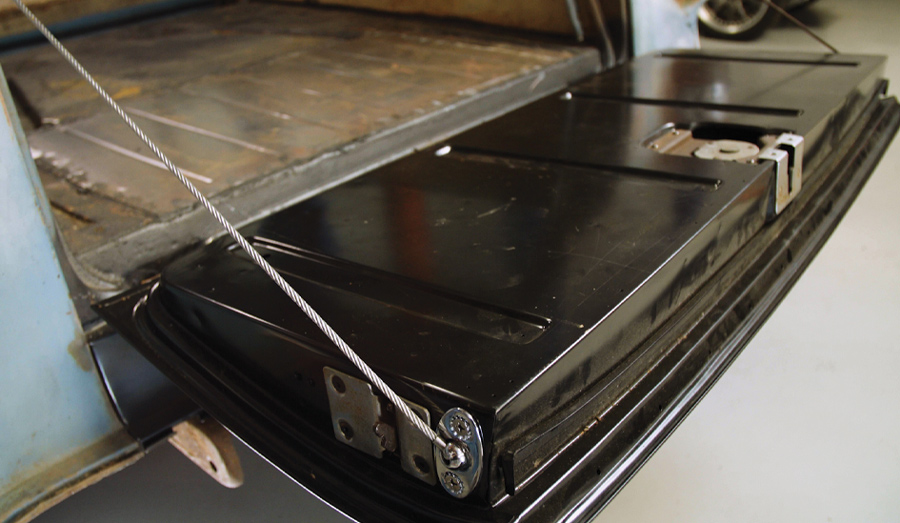
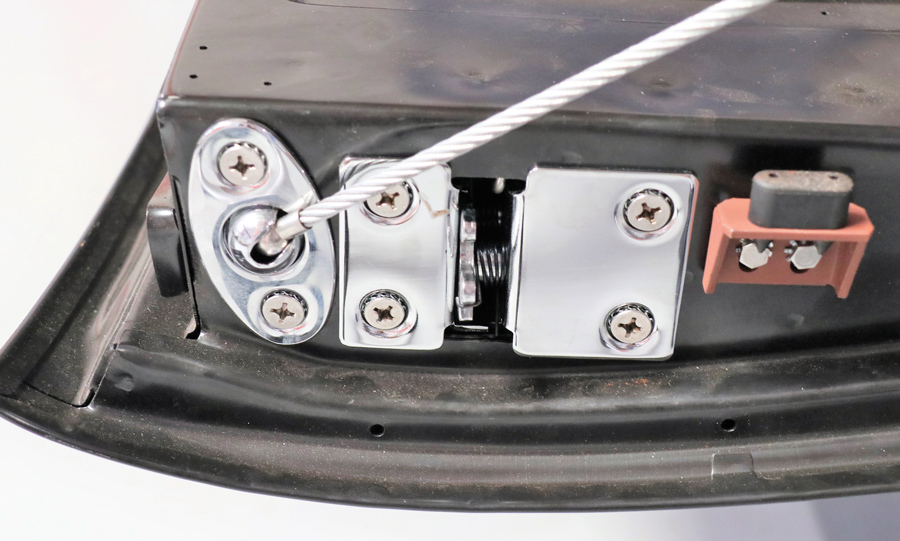
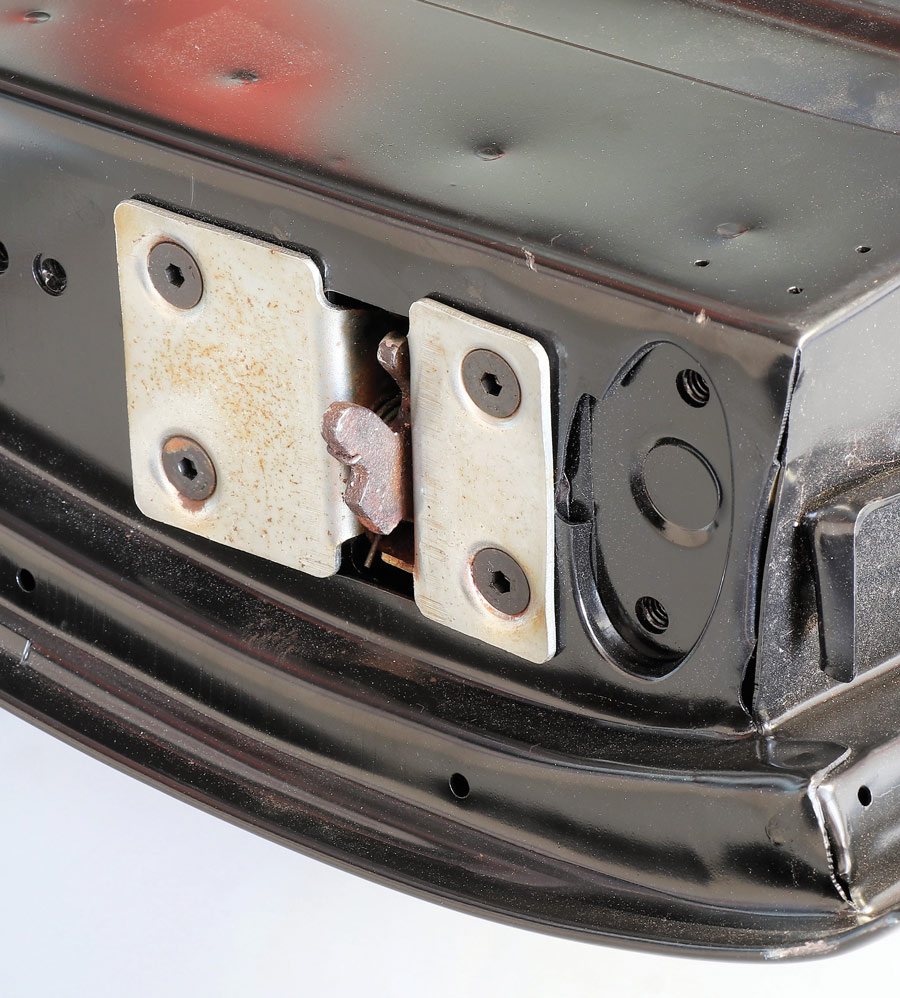
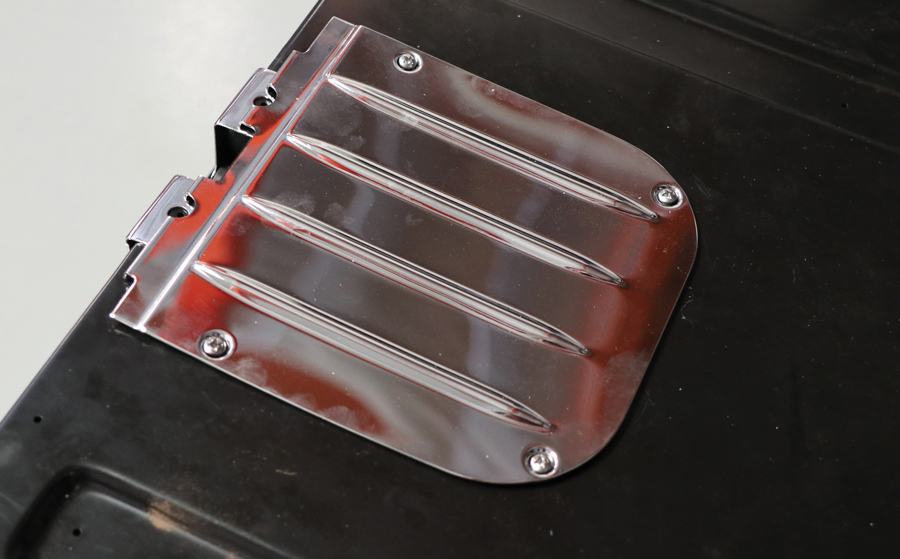
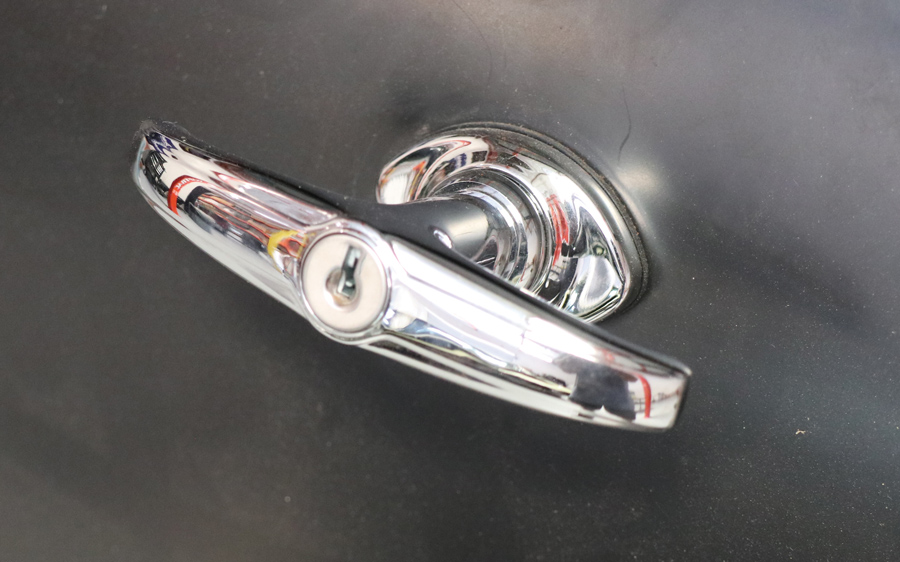
Next up there are a pair of Danchuk strikers (PN 18780) that come with fresh hardware as well as a pair of Danchuk latches (PN 18498) that you will affix to the new tailgate. Other items such as the lockable handle (PN 16538) with latch rods (PN 15539) and Danchuk striker cover (PN 16832) for the tailgate handle latch and the tailgate access cover (PN 17066) pretty much finish out the changeover.

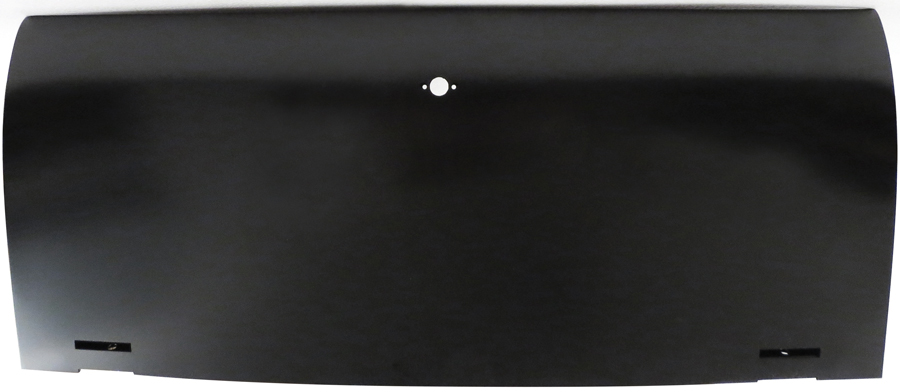
Follow along with the photos and watch how we remove and replace the original tailgate with the Golden Star freshly minted one outfitted with all of the necessary hardware from Danchuk.

Jason Scudellari, working at the In The Garage Media Tech Center, begins the process of swapping out the rusty tailgate on our ’55 Chevy wagon for a fresh one from Golden Star Classic Auto Parts along with the required accessory items and hardware from Danchuk (the Tri-Five people).
1. Jason Scudellari, working at the In The Garage Media Tech Center, begins the process of swapping out the rusty tailgate on our ’55 Chevy wagon for a fresh one from Golden Star Classic Auto Parts along with the required accessory items and hardware from Danchuk (the Tri-Five people).
Once off it becomes even more apparent why it was time to retire the old and bring in the new–tailgate.
2. Once off it becomes even more apparent why it was time to retire the old and bring in the new–tailgate.
The new Golden Star tailgate front view
The new Golden Star tailgate isometric view
3-4. The new Golden Star tailgate (PN TG13-55) will work on any of the Chevy wagons in the Tri-Five era with the exception of the Nomad; that’s a tailgate unto itself. Features all of the factory holes, stampings, bends, and shapes.
ITGM Tech Center is outfitted with  Harbor Freight tools
5. The ITGM Tech Center is outfitted with Harbor Freight tools (hand and power), of which we will be using a number during the tailgate removal and installation.
The factory tailgate is held into position by a pair of hinges.
6. The factory tailgate is held into position by a pair of hinges. You can bet after 60-plus years once the old hardware is removed from these hinges the threads should be “chased” (cleaned and aligned). We used our Harbor Freight chaser to clean up the existing set of possibly damaged (aged) threads.
You can see here that decades of abuse has left the hinge in a precarious position. It will need to be thoroughly cleaned and checked out before reusing.
7. You can see here that decades of abuse has left the hinge in a precarious position. It will need to be thoroughly cleaned and checked out before reusing.
The factory hinges, while decades old, still have plenty of life left in them once cleaned up and fresh hardware is used to hold them in position.
8. The factory hinges, while decades old, still have plenty of life left in them once cleaned up and fresh hardware is used to hold them in position.
The tailgate fits well and this can be attributed to the excellent manufacturing tolerances from Golden Star.
9. The tailgate fits well and this can be attributed to the excellent manufacturing tolerances from Golden Star. Also being able to reuse the original hinges helps. Note a new tail pan is visible. This was positioned a while ago when we installed the Golden Star spare tire delete flooring.
Danchuk supplied a handful of fresh accessories and hardware
10. Danchuk supplied a handful of fresh accessories and hardware to complete the tailgate renew, like tailgate retractors and cables, liftgate guides and supports, strikers and latches, latch rods, and so on.
The Danchuk cable retractor (PN 1058, shown) and retractor to cable clevis pin (PN 1058A, not shown) are two items you will want to upgrade at this stage
11. The Danchuk cable retractor (PN 1058, shown) and retractor to cable clevis pin (PN 1058A, not shown) are two items you will want to upgrade at this stage.
In order to get to the retractor cable you will want to remove both taillight assemblies to gain access to the hidden area where the cables (driver and passenger side) live. Grab your Harbor Freight Phillips screwdriver and remove trim.
12. In order to get to the retractor cable you will want to remove both taillight assemblies to gain access to the hidden area where the cables (driver and passenger side) live. Grab your Harbor Freight Phillips screwdriver and remove trim.
 IJ (nickname of Installation Jason) is removing the remnants of interior trim to get to the retractor cable.
13. IJ (nickname of Installation Jason) is removing the remnants of interior trim to get to the retractor cable.
Once the interior side panel trim is removed an inspection cover will be revealed (over the forward part of the rear wheelwell).
14. Once the interior side panel trim is removed an inspection cover will be revealed (over the forward part of the rear wheelwell).
 Grab your handy power screwdriver so you can remove this cover plate. In goes the Danchuk retractor cable assembly and on goes the cargo area inspection cover (PN 17413).
15. Grab your handy power screwdriver so you can remove this cover plate. In goes the Danchuk retractor cable assembly and on goes the cargo area inspection cover (PN 17413).
Frank Correia (left) of Danchuk and IJ (right) are readying themselves to feed the retractor cable in the open cavity of the rear quarter-panel. The cable travels from the retractor to its mounting point on the tailgate.
16. Frank Correia (left) of Danchuk and IJ (right) are readying themselves to feed the retractor cable in the open cavity of the rear quarter-panel. The cable travels from the retractor to its mounting point on the tailgate.
 This view is from the ground level looking up within the rear wheelwell area.
17. This view is from the ground level looking up within the rear wheelwell area. You can see where the retractor cable is run. Right of the photo is going toward the front end while the left of the photo is going toward the tailgate.
This alignment point is within the hidden area of the rear quarter-panel
18. This alignment point is within the hidden area of the rear quarter-panel. The “capture and alignment” of the cable is the job of these factory items. While they are old, they are still in perfectly fine working order. No moving parts (other than the cable). Again, only visible from ground level looking up in the rear quarter-panel section.
Tailgate cable guides
19. The Danchuk (PN 17408) tailgate cable guide (right) and original (left). Look closely and you can see the wear tracks from years of use. Odds are you can get by with these but since we had the entire tailgate assembly apart, we thought it a good idea to remove and replace.
Correia extends the retractor cable through the new cable guide before attaching to the tailgate itself.
20. Correia extends the retractor cable through the new cable guide before attaching to the tailgate itself.
With the new Danchuk retractor cable and guide in position the next step will be to replace the tailgate striker and hardware.
21. With the new Danchuk retractor cable and guide in position the next step will be to replace the tailgate striker and hardware.
Retractor cable is attached to the tailgate to confirm operation.
22. Retractor cable is attached to the tailgate to confirm operation.
New hardware from Danchuk, such as the attached retractor cable and anchor hardware, latch, and lower tailgate bumper bracket and hardware (PN 18320) are all positioned on the Golden Star tailgate.
23. New hardware from Danchuk, such as the attached retractor cable and anchor hardware, latch, and lower tailgate bumper bracket and hardware (PN 18320) are all positioned on the Golden Star tailgate.
Removing the old striker may take some persuasion from several tools such as a drill motor to get old hardware out. But once removed, threads chased, it’s now time to install the new Danchuk striker.
24. Removing the old striker may take some persuasion from several tools such as a drill motor to get old hardware out. But once removed, threads chased, it’s now time to install the new Danchuk striker.
The Danchuk striker (PN 18780) comes with fresh hardware and is another item that you will want to replace old with new.
25. The Danchuk striker (PN 18780) comes with fresh hardware and is another item that you will want to replace old with new.
The Danchuk latch (PN 18498) comes with new spring and latch as well as hardware. Here’s another item that wears with time and it’s always a good idea to freshen this component when redoing a tailgate.
26. The Danchuk latch (PN 18498) comes with new spring and latch as well as hardware. Here’s another item that wears with time and it’s always a good idea to freshen this component when redoing a tailgate.
The Golden Star tailgate comes with the appropriate holes already there for such items as the latch, latch rods, release mechanism, and exterior handle.
27. The Danchuk striker (PN 18780) comes with fresh hardware and is another item that you will want to replace old with new.
Not seen but the Danchuk handle to latch rods (PN 15539) run within attaching to the center-mounted handle and then outward to the latch mechanisms. Also supplied is the Danchuk striker cover (PN 16832) for the tailgate handle latch.
28. Not seen but the Danchuk handle to latch rods (PN 15539) run within attaching to the center-mounted handle and then outward to the latch mechanisms. Also supplied is the Danchuk striker cover (PN 16832) for the tailgate handle latch.
The tailgate access cover (PN 17066) comes neatly chromed from Danchuk and drops into place offering a nice bit of detail.
29. The tailgate access cover (PN 17066) comes neatly chromed from Danchuk and drops into place offering a nice bit of detail.
The tailgate wagon handle with key lock (PN 16538) is another detail item from Danchuk that adds to a neatly completed project.
30. The tailgate wagon handle with key lock (PN 16538) is another detail item from Danchuk that adds to a neatly completed project.
The dilemma: How do we deal with a patina ’55 Chevy wagon and a perfectly brand-new Golden Star tailgate fully appointed with Danchuk accessory items? Stay tuned. Looks good and the gaps are tight. Maybe there’s some well-deserved credit for IJ and Correia in this project–nah, can’t be!
31. The dilemma: How do we deal with a patina ’55 Chevy wagon and a perfectly brand-new Golden Star tailgate fully appointed with Danchuk accessory items? Stay tuned. Looks good and the gaps are tight. Maybe there’s some well-deserved credit for IJ and Correia in this project–nah, can’t be!
Danchuk
(800) 648-9554
danchuk.com
Golden Star Classic Auto Parts
(972) 315-3758
goldenstarauto.com
Harbor Freight
harborfreight.com
Modern Rodding
VOLUME 2 • ISSUE 13 • 2021