Modern Rodding Tech
InTheGarageMedia.com
Replacing a 1969 Camaro’s
Rear Quarter-Panel
Auto Metal Direct’s New Rear Sheetmetal
1. Here is the replacement quarter-panel from Auto Metal Direct. It perfectly matches the dimensions and contours of the original. The tape lines allow accurate measurements as the panel is adjusted to fit.
Replacing a 1969 Camaro’s Rear Quarter-Panel
Auto Metal Direct’s New Rear Sheetmetal
By Ron Covell Photography by Brian Brennan
I

n the last installment, we saw how Hot Rods By Dean (HRBD) installed new floors and wider wheelwells inside this 1969 Camaro. This time, we’ll follow Paul Gilbert of HRBD as he installs the reproduction quarter-panels made by Auto Metal Direct (AMD).

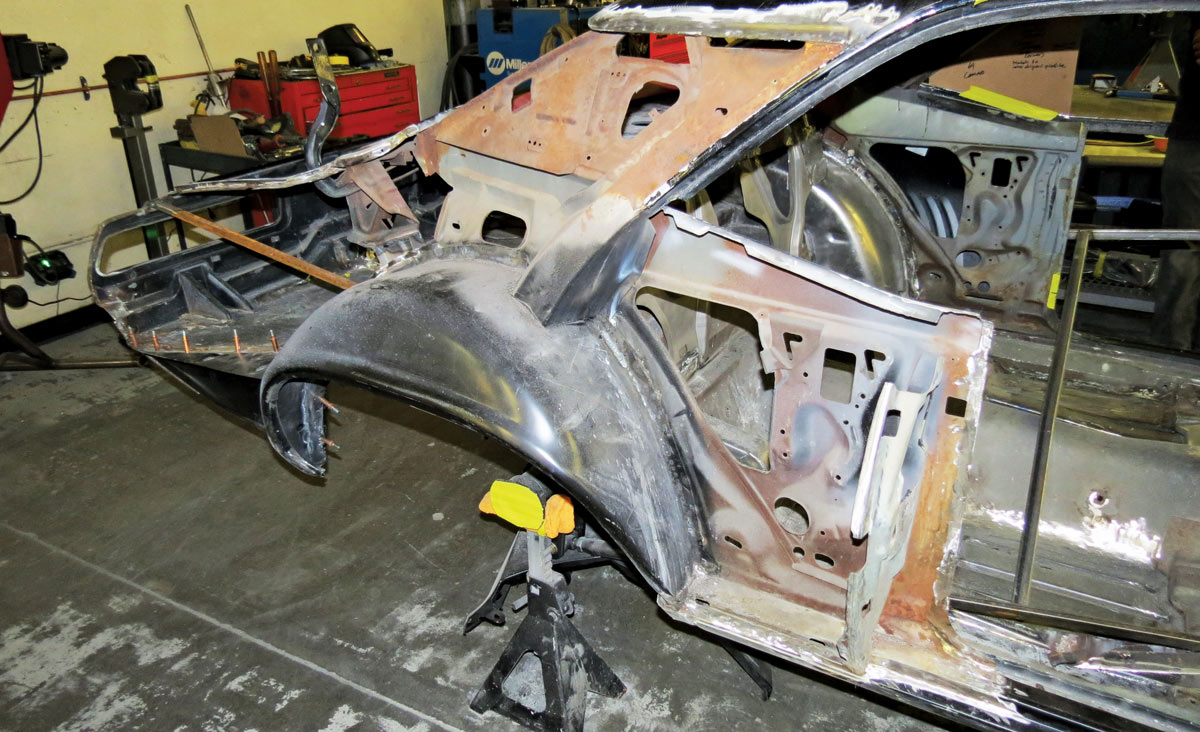
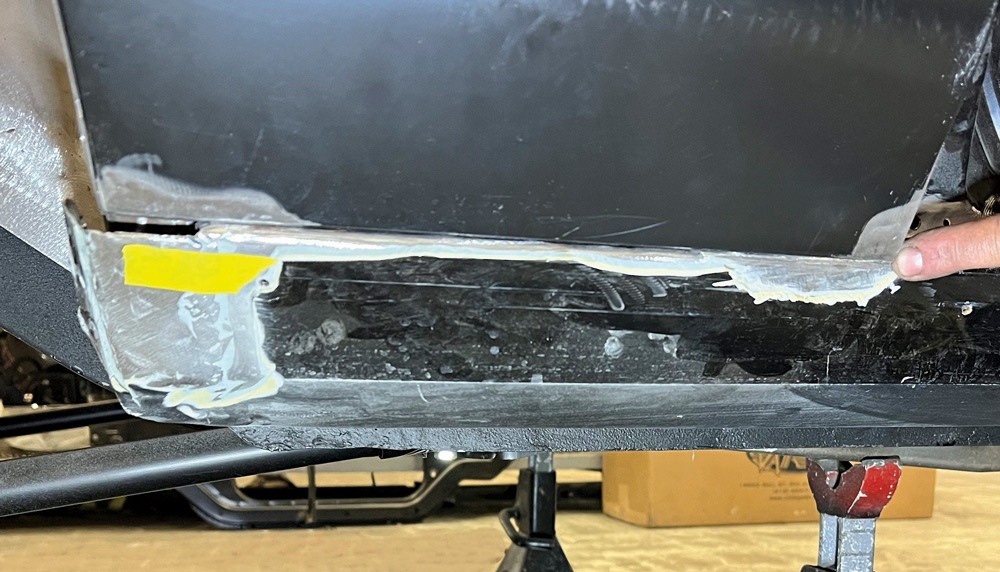
After removing the original quarters, each attachment point for the new panels must be meticulously cleaned and reshaped to provide a perfect fit. The cleanliness and tightness of each joint determines the quality of the welds. A band of clean metal at least 1/2-inch wide for TIG welding is required next to all joints.

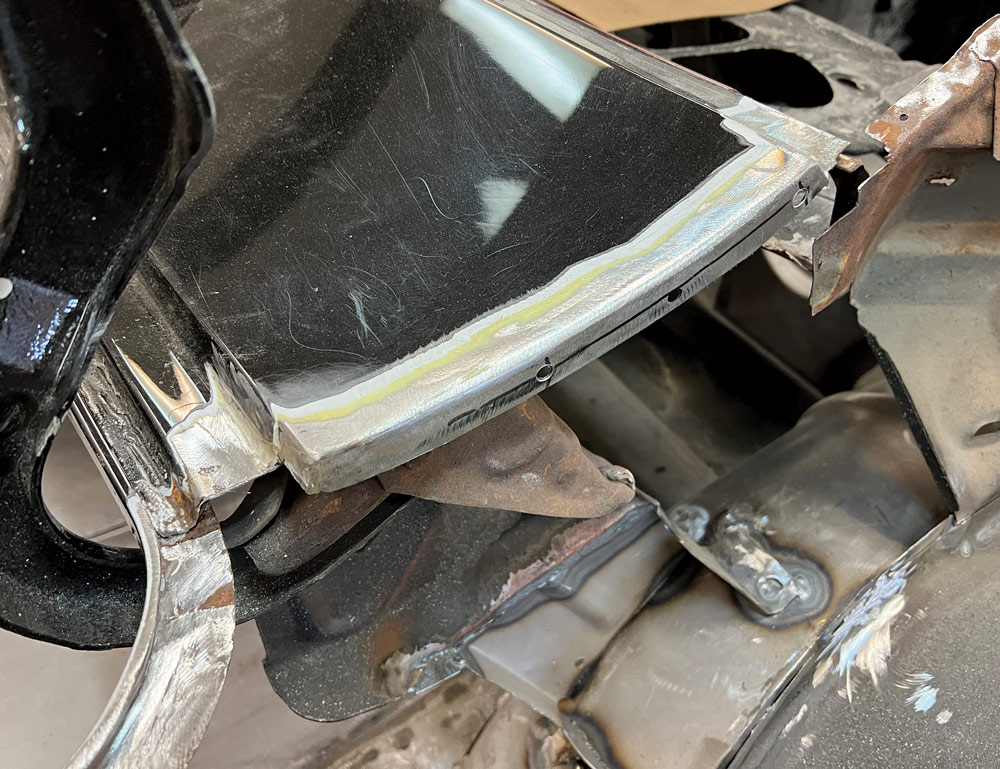
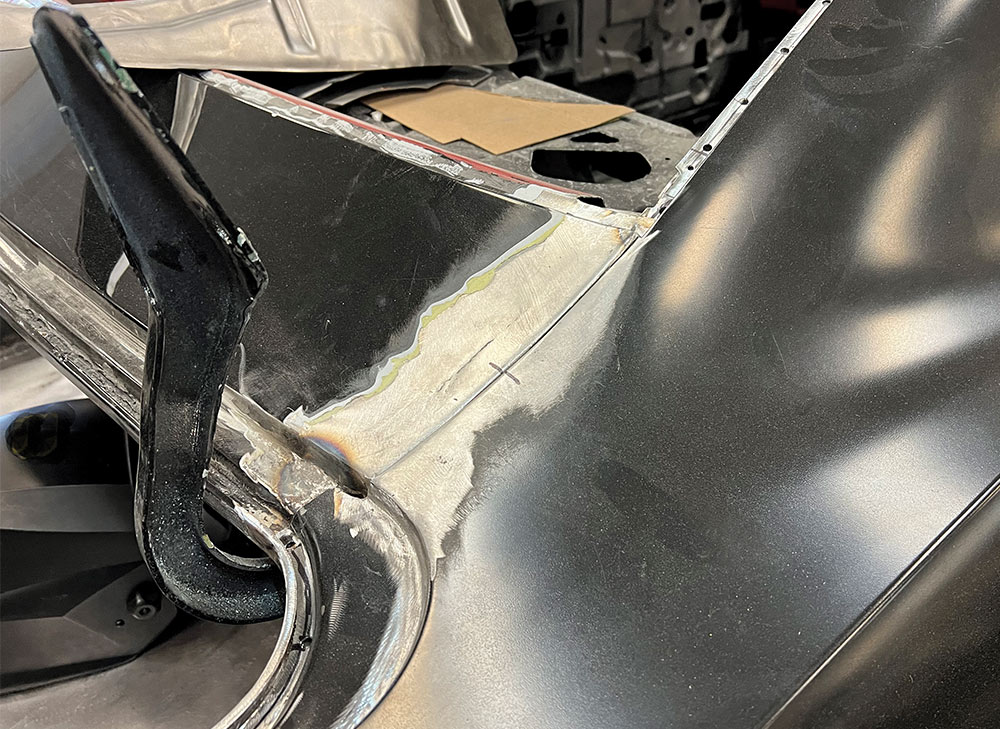
The original sail panel fit into a recess in the roof. This joint was carefully disassembled to preserve the step. This allows the new sail panel to fit flush on the outside, ensuring the panels fit properly when the welds are made.

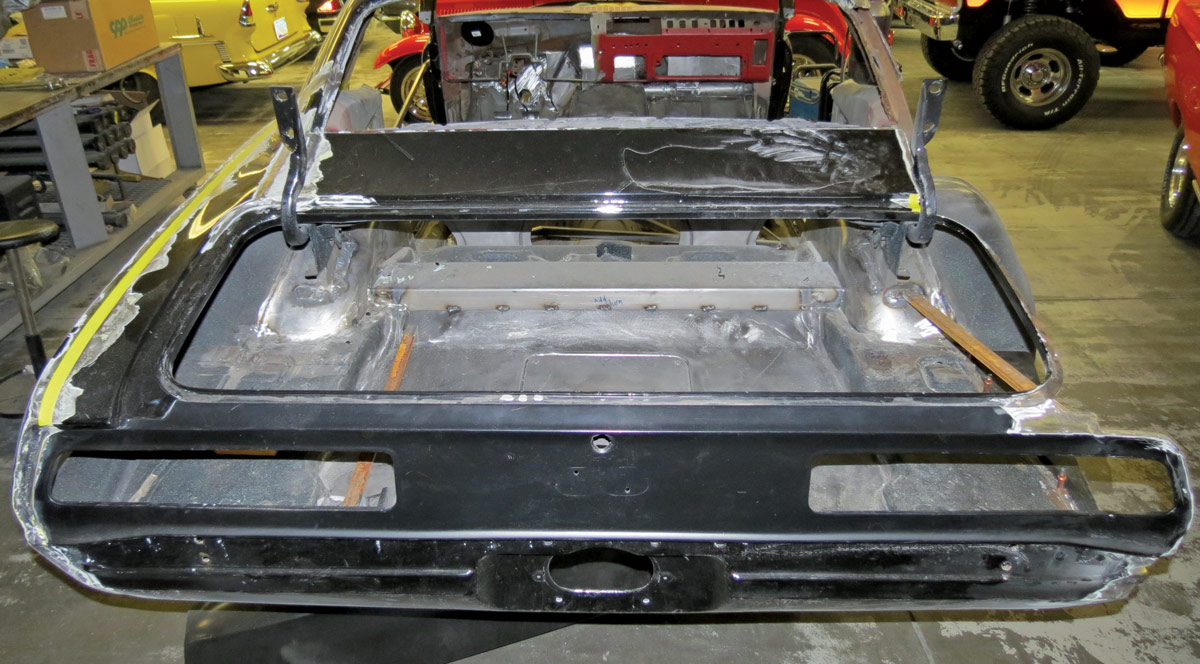
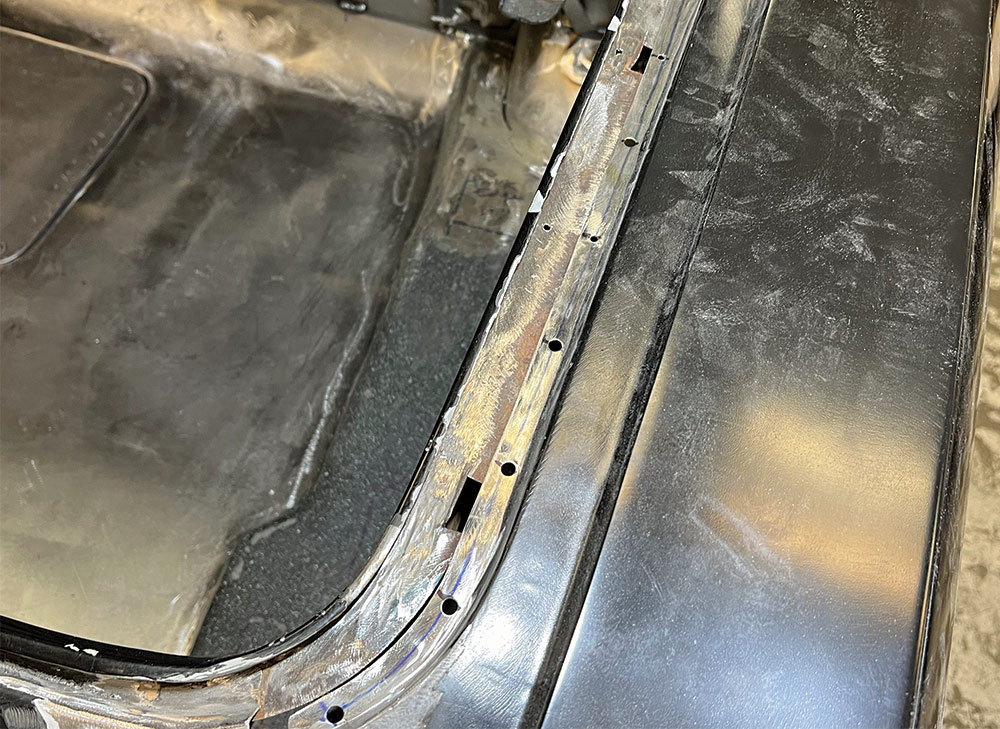
The tulip panel (behind the rear window) joins the new quarter-panels with a flanged joint about 3/4-inch wide. These joints were spot-welded together from the factory. Removing these welds with a 5/16-inch spot weld cutter makes holes in the tulip panel flanges for the plug welds that will bond them to the new quarters.

There is a long joint along the driprail on each side of the decklid, and holes are made in the new quarters for the plug welds to hold these joints together.

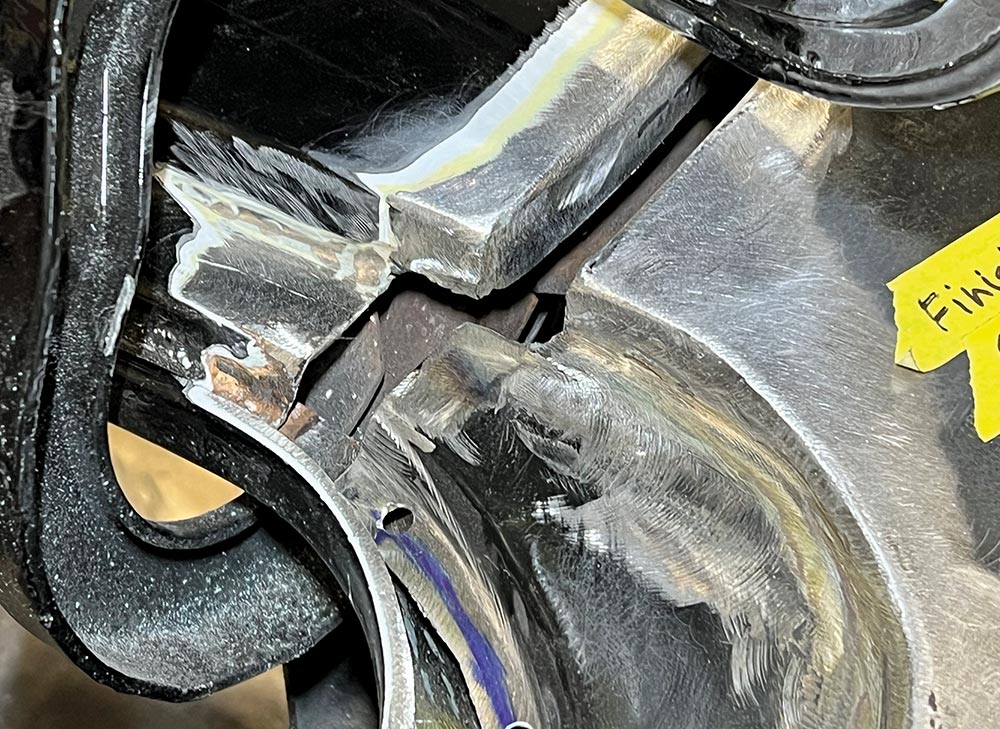
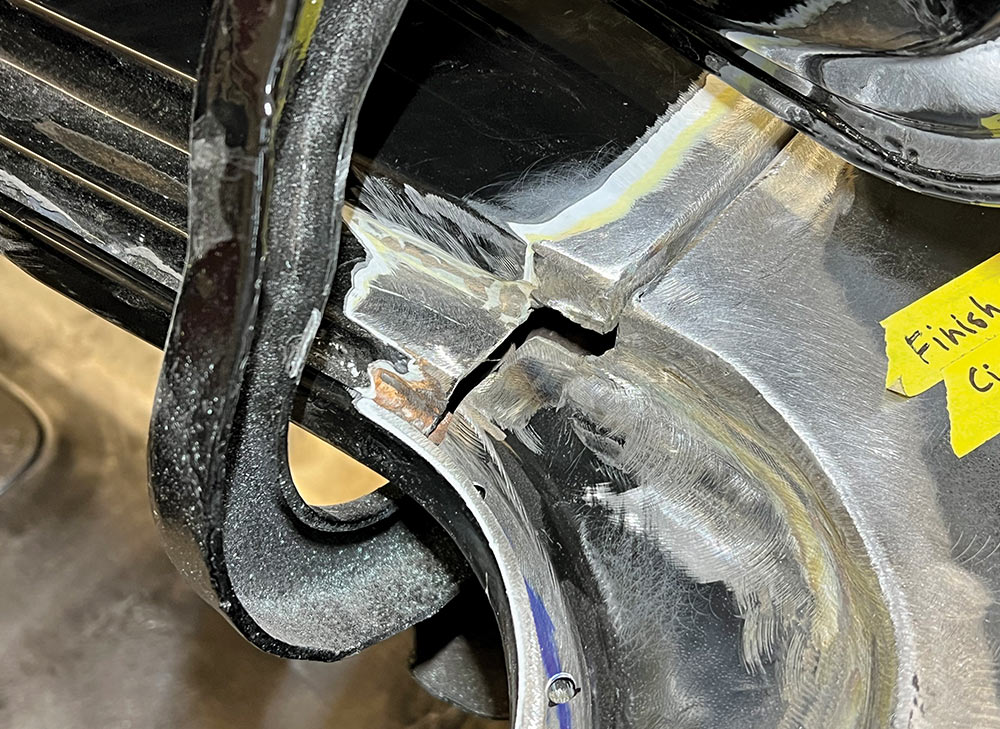
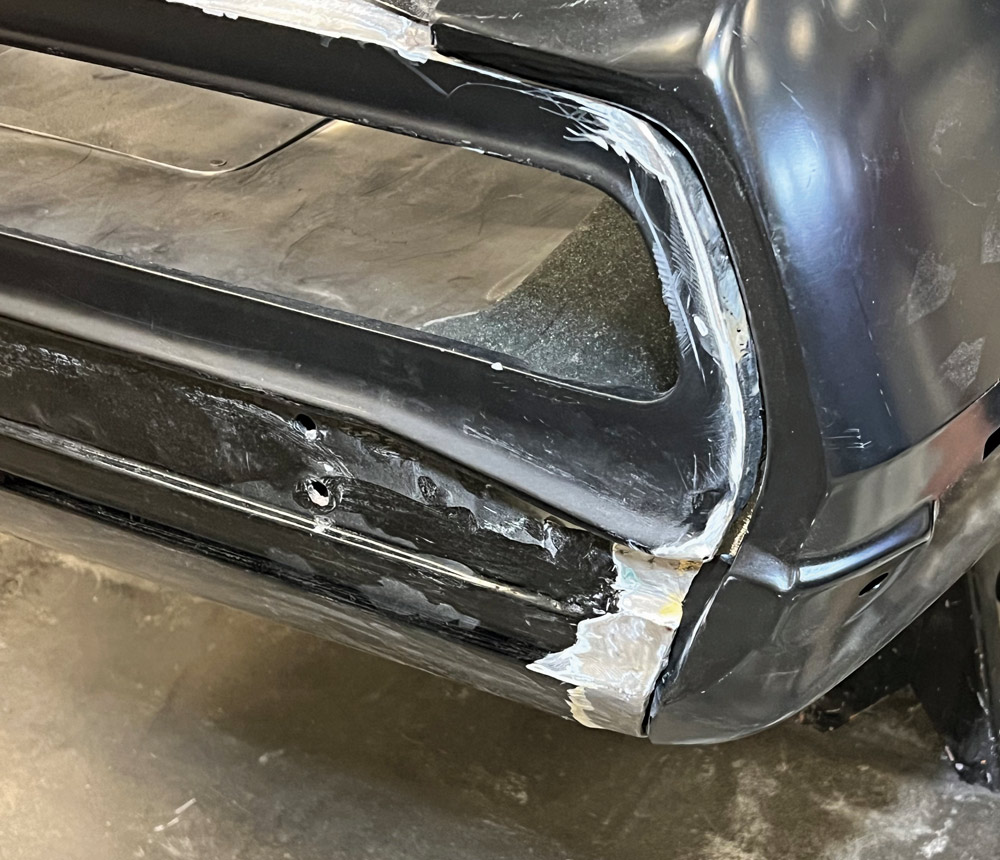
One of the trickiest areas to fit is the convoluted junction on the rear corners where the quarter-panel fits against the rear panel in the taillight area. A good fit must be attained here before the joints are finish-welded together.

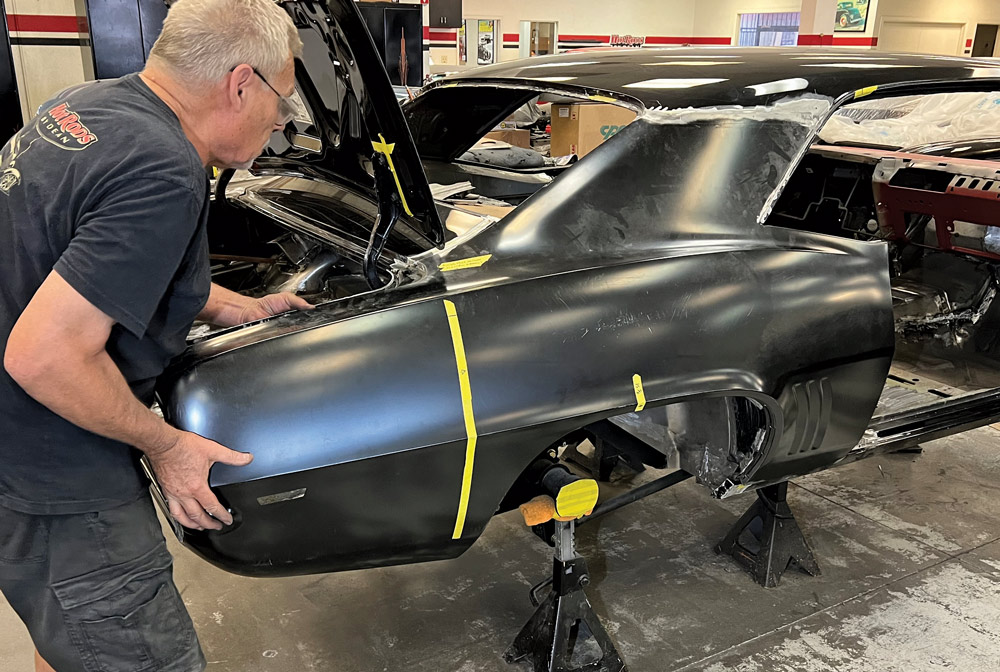
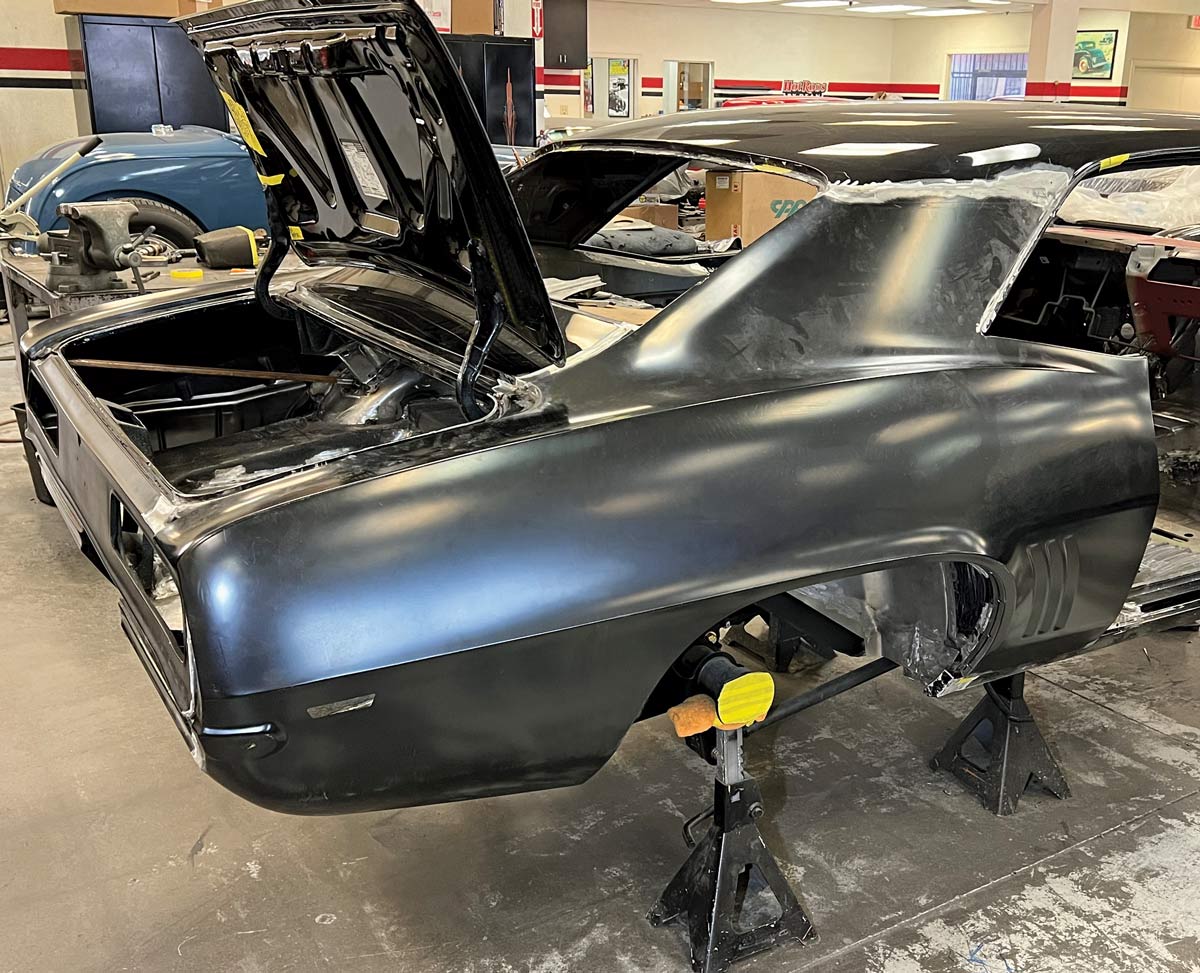
The fit of the doors must be verified before the final attachment of the quarter-panels. Gilbert got everything fitted closely, then held the quarters into place with Clecos and a few spot welds, which allowed him to make micro-adjustments to get the door and decklid gaps just right before finish welding all the joints.

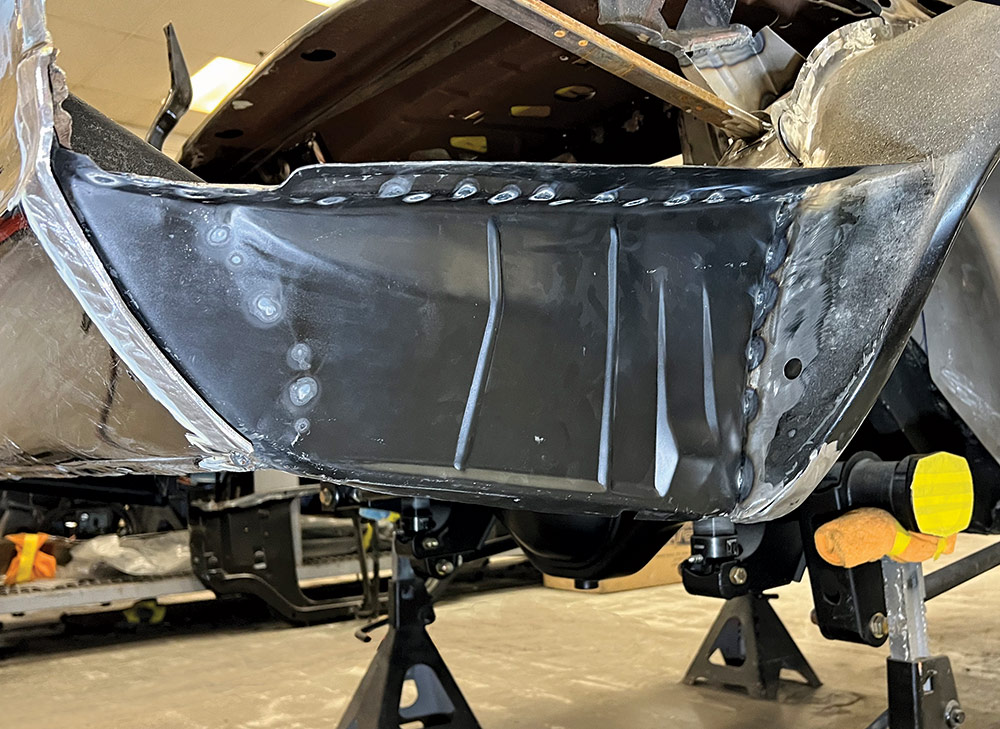
Once all the fitting, adjusting, and welding were finished, the car’s rear corners looked like new. This would have been more difficult to achieve by trying to patch the original quarter-panels, which had rust damage, thin metal from previous repairs, and irregular gaps along the doors and decklid. We are fortunate to have good-quality patch panels available for many popular cars, like this Camaro, and shops like Dean’s that can professionally do the work.

Partially restored 1969 Camaro body with rust removed and new parts being prepped for installation
2. Before the new panel can be installed, all the mating surfaces must be cleaned, straightened, and accurately positioned.
Close-up of the 1969 Camaro's rear wheel well showing rust repairs and new sheet metal welding
3. In the last installment, we saw the removal of the old quarters and how the new, wider wheelwells were fitted to the car.
Roof edge of a 1969 Camaro with rust removed, preparing for a new windshield frame installation
4. The junction between the quarter-panel and the roof has been carefully cleaned. Note that the factory roof panel has a recess, so the sail panel fits flush on the outside.
Rear quarter panel of a 1969 Camaro with fresh metal work showing alignment and body adjustments
5. The tulip panel is cleaned and prepped. The holes in the flange were made while drilling out the factory spot welds; plug welds will be made through these holes to join the new quarter-panel.
Rear section of a 1969 Camaro, stripped to metal with structural support bars in place for alignment
6. A tubing brace holds the rear panel in the proper location, and all the edges have been cleaned in preparation for attaching the new quarter.
Open trunk area of a 1969 Camaro showing metal repairs and preparation for the trunk lid installation
7. The panels are checked from the rear to confirm that everything is positioned correctly.
Close-up of a rear inner fender on a 1969 Camaro showing freshly welded replacement metal panels
8. The decklid is installed to check the hinge alignment, ensuring it is still in its original position.
Mechanic fitting the rear quarter panel on a 1969 Camaro, aligning it for proper fitment
9. The replacement quarter-panel is test-fitted against the body with all the edge preparation completed.
Rear end of a 1969 Camaro, the new quarter panel in place, showing progress in the restoration process
10. The lower floor and inner panels are cleaned and checked for proper alignment.
The trunk area of a 1969 Camaro with newly installed metal and prepared seams for fitting panels
11. Before the quarter-panel is permanently positioned, two small tabs are bent up on the driprail to act as stops.
Close-up of the rear deck of a 1969 Camaro, showing refinished metalwork and welding seams
12. The new quarter-panel is being added to the locating tabs. Note that holes have been made in the edges of the latest panel for the plug welds that will hold the joint together.
Rear corner of a 1969 Camaro with precise alignment clamps, preparing the panel for welding
13. The fit of the new quarter-panel is adjusted where it joins the rear panel. A Cleco is used to hold the panels together temporarily.
Detailed view of a newly welded rear corner joint on a 1969 Camaro, marked for final adjustments
14. The junction between the new quarter and the tulip panel is being brought into alignment.
Rear corner welds of a 1969 Camaro trunk showing detailed grinding and finishing marks
15. Clamps are used to pull the joint into its final position.
Rear quarter section of a 1969 Camaro, with welded and finished seams showing new panel work
16. Everything has been pulled up snugly, and the panels can be welded together.
Roof edge of a 1969 Camaro with fresh welding and smoothing along the rear window frame area
17. The joint between the sail panel and the roof is fitted and ready for welding.
Rear tail light area of a 1969 Camaro with welds smoothed out and seams prepped for finishing
18. The rear corner of the quarter-panel is particularly challenging because of all the contours. A little more adjusting is required to perfect the fit of these panels before welding.
Inner rear quarter panel of a 1969 Camaro, with fresh panel and alignment pins in place for final fitting
19. The doorjambs are another tricky area. Here, the quarter is tack welded into place so the fit against the door can be verified before the final welding is done.
Interior view of the rear door jamb on a 1969 Camaro, showing precision welding on a replacement panel
20. The joint on the inner edge of the jamb needs to be properly adjusted, too. Clecos are used to temporarily hold the jamb to the inner panel as the fit is checked.
Side view of a 1969 Camaro door jamb showing fresh panel work and holes prepared for hardware
21. The door is hinged shut to check the fit. As you can see, the door gaps are spot-on.
Underside corner of a 1969 Camaro with detailed panel alignment and seam sealer applied to the joints
22. The last joint to be welded is the junction between the quarter- and the rocker panel. These panels can be welded together after a little more adjustment at the rear edge.
Full rear quarter view of a 1969 Camaro with the trunk lid open, showing fitted new panels and bodywork
23. With the installation of the new quarter-panel completed, this corner of the car looks like new! Getting the original quarter-panels to look this good would have been an enormous job.
SOURCES
Modern Rodding
VOLUME 5 • ISSUE 50 • 2024