Modern Rodding Tech
InTheGarageMedia.com

Fuel Level Sensing for the 21st Century

Wiring terminals being connected on a circular fuel tank sender unit
1. Holley’s Easy Level Sender (PN SN37) represents the latest sending unit technology and can be used on all sorts of fluid-level tanks, not just gasoline.

Fuel Level Sensing for the 21st Century

Forget That Float, Lasers are the Way
By Ryan Manson Photography by Brian Brennan
N

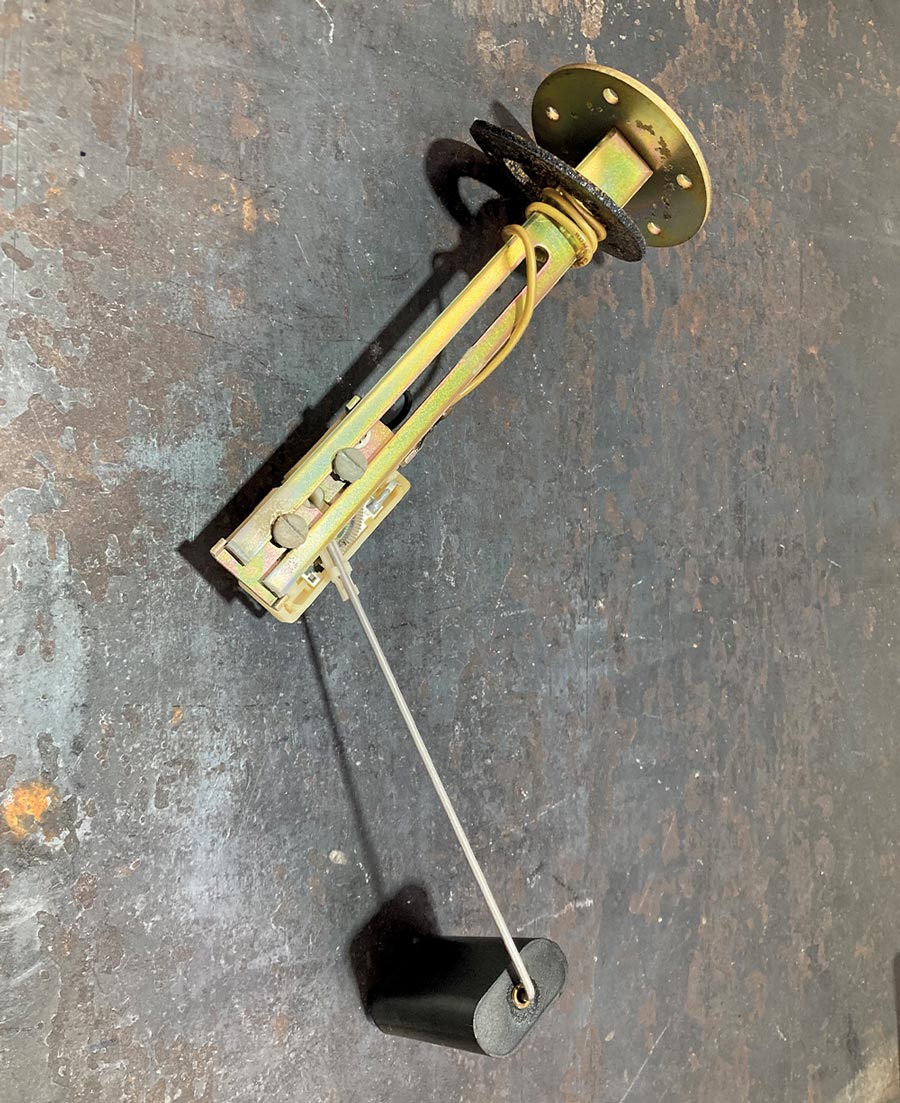
ew technology comes and goes in the hot-rodding world, but our attention gets piqued when something shows up and wins the “Best Engineered New Product” at the 2023 SEMA Show. That’s just what happened when Holley released its Easy Level Sender. Featuring LiDAR technology—that’s “laser imaging, detection, and ranging” for us plebes—Holley’s groundbreaking fuel sender replaces that antiquated float-style sending unit with one that uses a laser. Yes, that type of laser. Buck Rogers, be damned, the technology from the future is here, and it’s measuring the amount of fuel left in your 1929 Ford highboy, of all things!

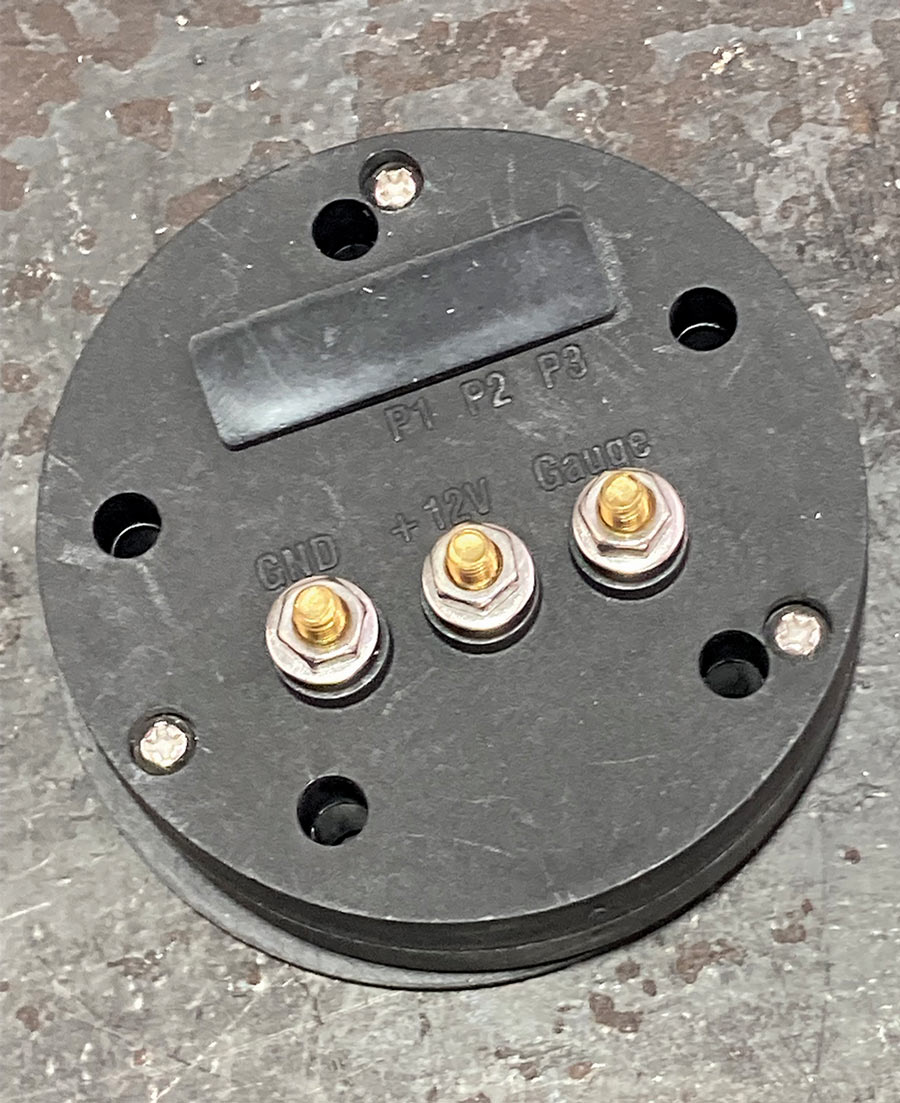
But aside from replacing that old float-style sending unit, Holley’s Easy Level Sender is fully programmable for any tank with a depth ranging from 4 to 39 inches and is compatible with nearly any gauge or fluid. Figuring out the ohm range of the sender and gauge and whether they jive is a thing of the past with Holley’s new sender. Fuel slosh and gauge bounce, something the older float-style sending units can suffer from in more aggressively driven hot rods, is also much more manageable with the new LiDAR sender. Its compact size also results in a useful solution where a float-style sending unit might foul on a tank’s inner baffle or wall.

If you’ve ever set up a traditional float-style sending unit, you know there’s a bit of guesswork once the depth is determined, the bracket trimmed, and the float adjusted in place. The reading on the gauge might be close, but it’s probably not very accurate. Using specific measurements and programming the Holley Easy Level Sender to said specs ensures that it is accurate and fully adjustable.

Black fuel sender with mounting hardware displayed separately
2. The kit includes the Easy Level Sender, gasket, and hardware.
Rectangular fuel tank with the fuel sender mounted on the left side
3. The LiDAR sending unit will fit in virtually any of the new tanks made today, replacing the position of the old float-style sender.
Fuel sender placed on a rusted surface, showing labeled connection points for wiring
4. Holley’s Easy Level Sender is a universal float-less fuel level sender that utilizes LiDAR technology to precisely measure the fuel amount in any given tank. The bolt circle diameter is standard SAE 2.122 inches, retrofitting the Holley Easy Level Sender is a breeze when replacing older float-style senders.
Close-up of the fuel sender’s circuit board and terminals during wiring
5. Beneath that rubber cover is a set of onboard buttons (P1-3) for initial setup and a status LED. A set of dip switches is also present, allowing for adjustment of the dampening rate, which adjusts how fast or slow the gauge reacts to the fuel level change.
Classic-style fuel level float designed for older fuel tanks
6. Traditional float-style sending units have moving parts that can wear out and fail. Floats can develop leaks and provide erratic readings during hard cornering, acceleration, or deceleration. Holley’s Easy Level Sender cures those woes while providing state-of-the-art technology to monitor the fuel state.
Optima battery powering the fuel sender during a test
7. The Easy Level Sender can be programmed to read a full and empty fuel state on a workbench with a 12V power supply. First, the depth of the existing fuel tank is measured, subtracting a 1/2 inch for a bit of “reserve” capacity. Pressing and holding the P1 button until the slow flashing green status LED turns off, then releasing the button enters calibration mode.
Green LED indicator on the fuel sender during a voltage test with a measuring tape
8. The sensor with the blinking green LED is placed at the noted tank depth distance from a solid object. After roughly 10 seconds, the P1 button is pressed and held until the LED turns off and is released. The LED flashes red three times to confirm that the setting has been saved. This programs the sensor’s “empty” position.
Blue LED illuminating from the fuel sender during calibration
9. The LED should be blinking blue now, and we’re ready to program the “full” position. With the sensor roughly 1/4-inch away from that solid surface for about 10 seconds, the P1 button is pressed and held again until the LED turns off, released, and three red flashes confirm the setting again.
Fuel sender being secured into place with screws and wiring connected
10. The sender programmed for our fuel tank can be installed in place of the old float.
Wired fuel sender with terminals connected on top of a black fuel tank
11. The wiring connections are the same as those of a typical fuel-sending unit, with the addition of a 12V switched source.
Green LED glowing on the fuel sender during the calibration process
12. Next, we must program the sender to match our fuel level gauge. Once again, the P1 button is pressed and held until the green status LED turns off, then the button is released to enter calibration mode.
Classic fuel gauge on a vehicle dashboard, indicating fuel level
13. We’ll program the empty position first for standard, short-sweep gauge calibration. With the status LED a solid blue, pressing either the P2 or the P3 buttons moves the needle on our fuel level gauge one way or the other. We want to hold the P2 button until the needle reaches our gauge’s “empty” setting. The P1 button is pressed and held until the LED turns off and the button is released. Once again, the LED will flash red three times to confirm the setting has been saved. This process is repeated for half- and full-tank positions.
Blue LED lighting up the fuel sender’s circuit board during testing
14. The gauge needle should move to the desired location as the P2 or P3 buttons are pressed and held.
Installed fuel sender with wires connected, showing placement near the fuel filler neck
15. With the gauge and sender programmed, you can enjoy years of trouble-free fuel level readings regardless of the tank or gauge.
SOURCE
Modern Rodding
VOLUME 5 • ISSUE 50 • 2024