Modern Rodding TECH

InTheGarageMedia.com

Sand and Deliver
1. Nick “Hubcap” Sinoris shows us how he goes about handling the long-block when prepping long panels such as doors, quarters, and the like.
Sand and Deliver
Paying for Paint Prep Feeling Like Highway Robbery? You can do it Yourself, PART 1.
By Chris Shelton Photography by Brian Brennan
T

hey may not make ’em like they used to. But they sure never finished ’em the way we can now. The quality of contemporary body- and paintwork is truly unprecedented. More than straighten a panel, we can straighten an entire body from tip to tail.

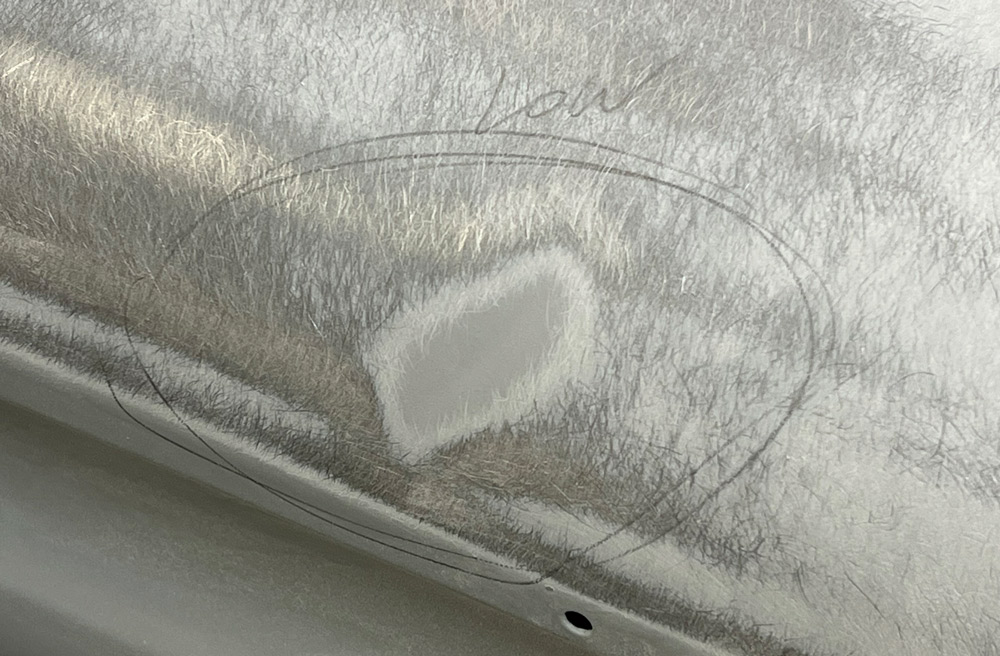
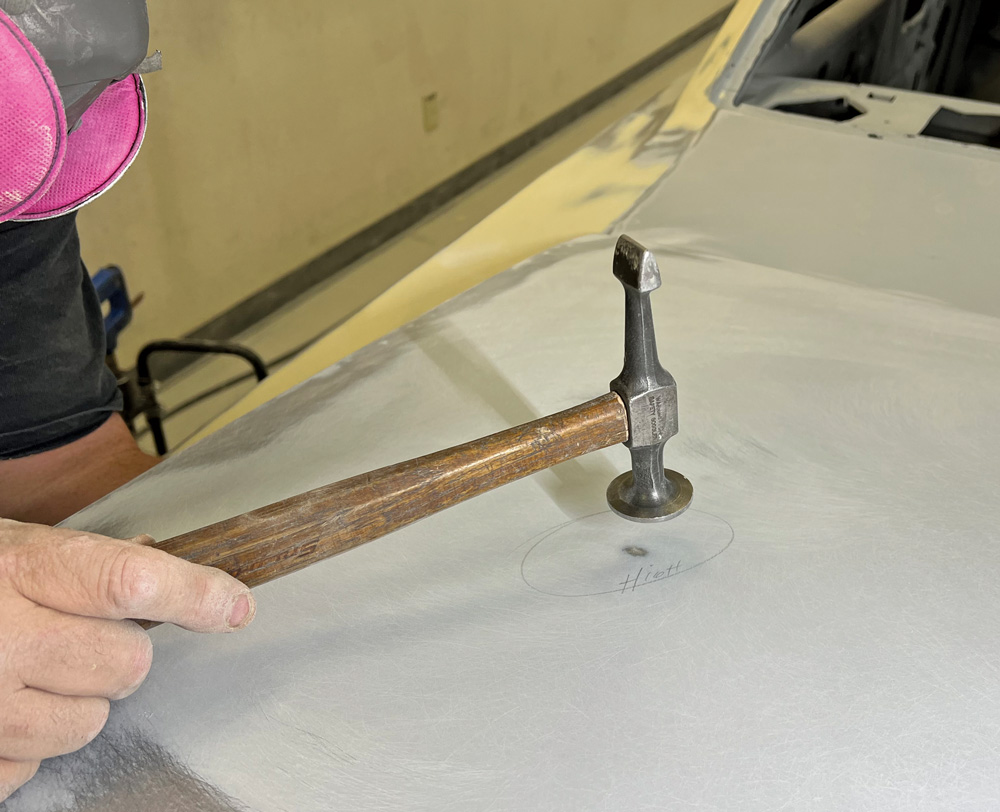
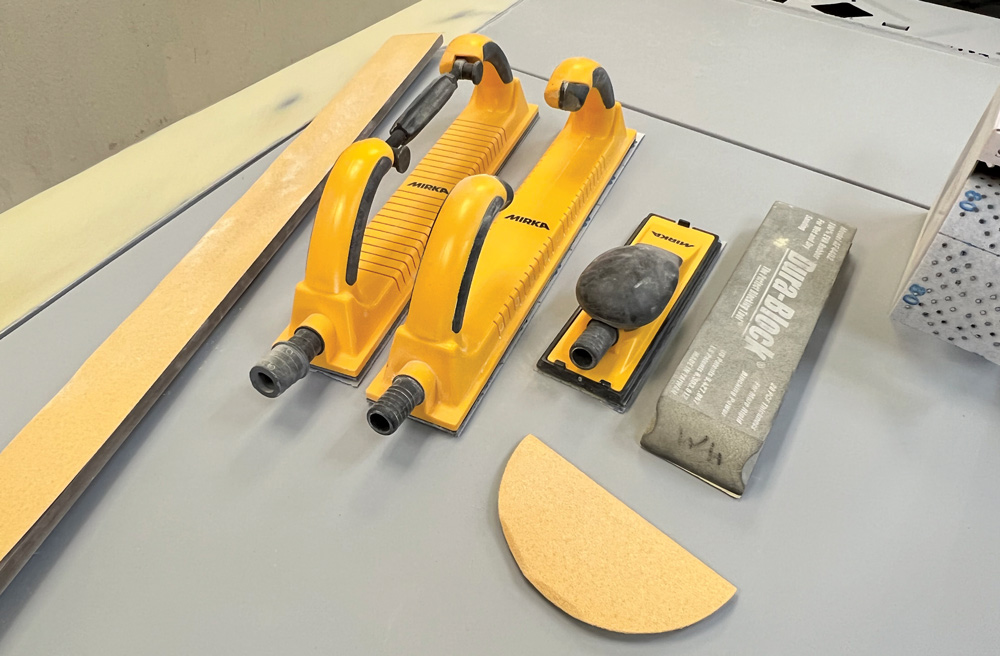
Of course, nobody said it was easy. Prepping a straightened body for paint is a labor-intensive process of raising low spots with fillers and milling the surface to a consistent level. And historically speaking, it was a rinse-and-repeat process of filling and sanding interspersed with long cure times.

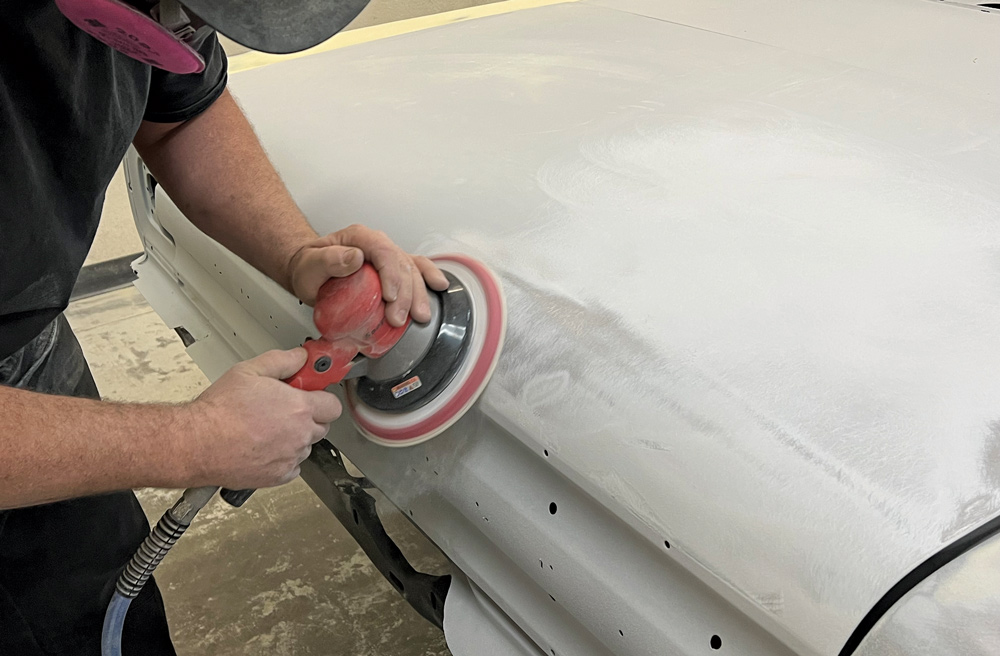
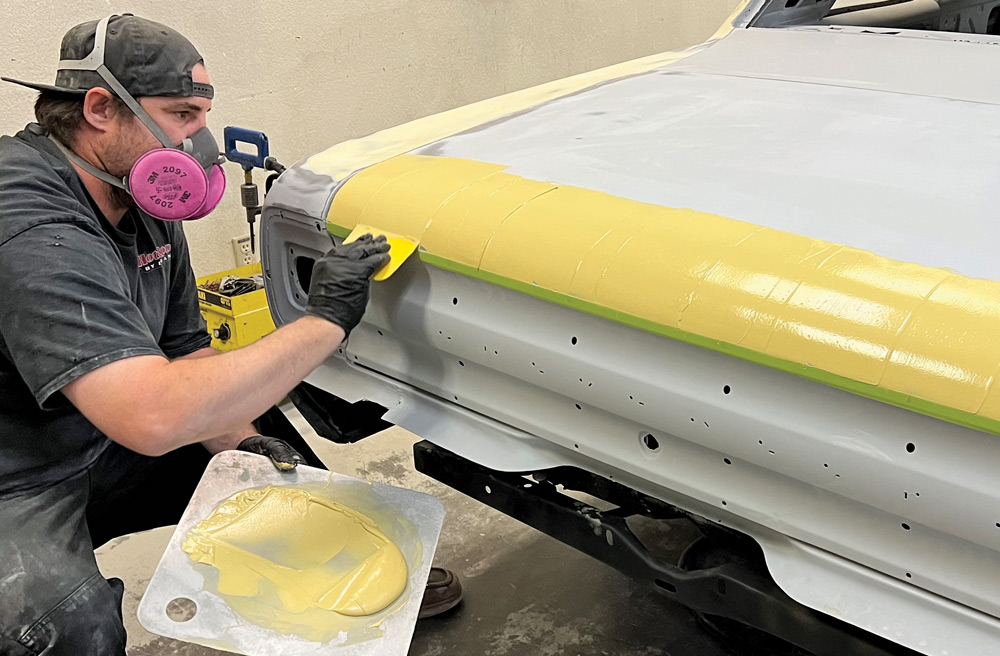
The act will always eat up time, money, and energy, but today’s techs figured out ways to minimize the investment. Rather than incrementally build up the surface of a panel bit by bit, they discovered that they could just skim vast sections of a panel with filler and knock it all down to the panel’s highest level in one fell swoop. When done properly, the filler ends up no thicker than it would by any other method. But the process reduces time and minimizes material that ends up on the floor as dust. And at today’s labor and material costs, that’s saying something.

Then real progress came when techs started treating the body in groups of panels rather than individually. Old body panels—even pristine ones—are far from perfect. The simpler panels often bulge, and that makes valleys where those panels meet. Creases and ridges on more complex panels don’t always line up precisely, either.

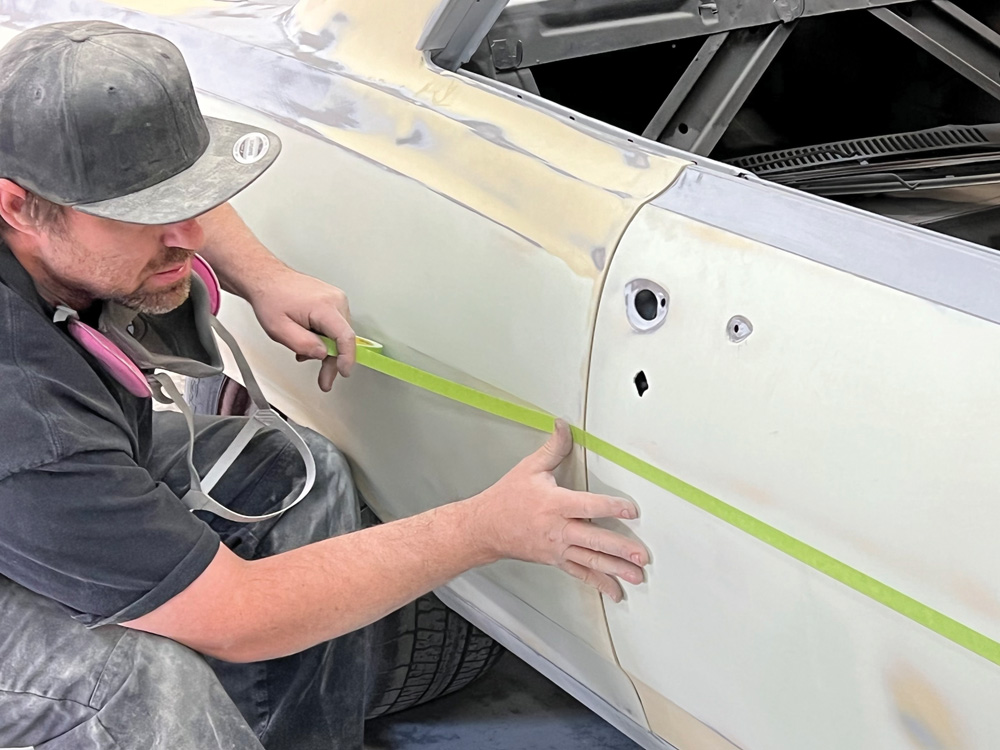
But by treating bodies in groups rather than individual panels, we can correct a multitude of corporeal indiscretions. More than align those wonky character features, we can sharpen them. We can raise the valleys between bulging panels. Using these contemporary techniques, we can even tune the width of gaps among those panels.

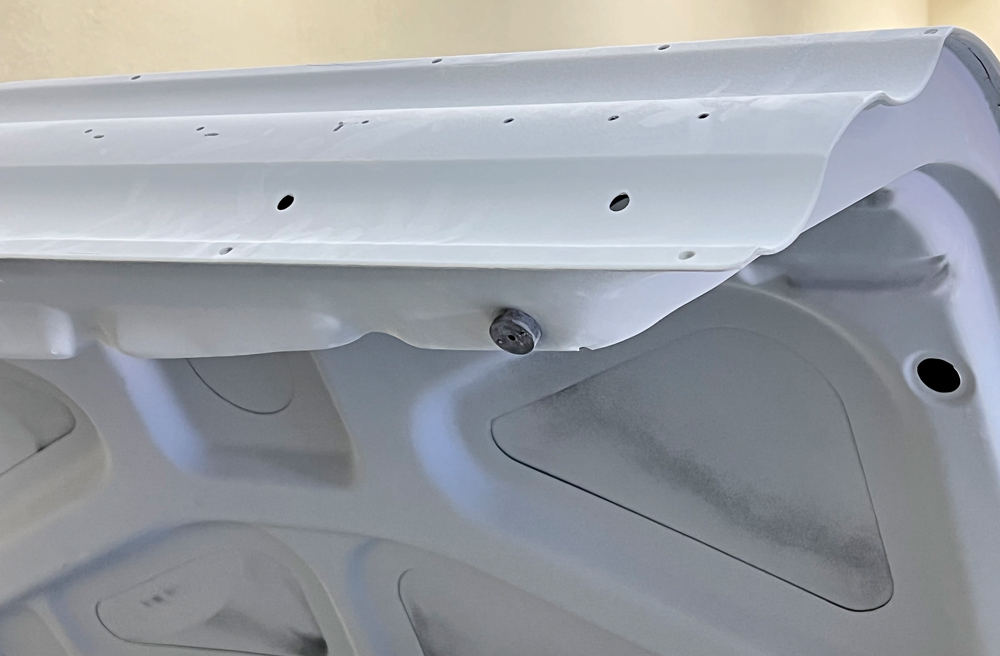
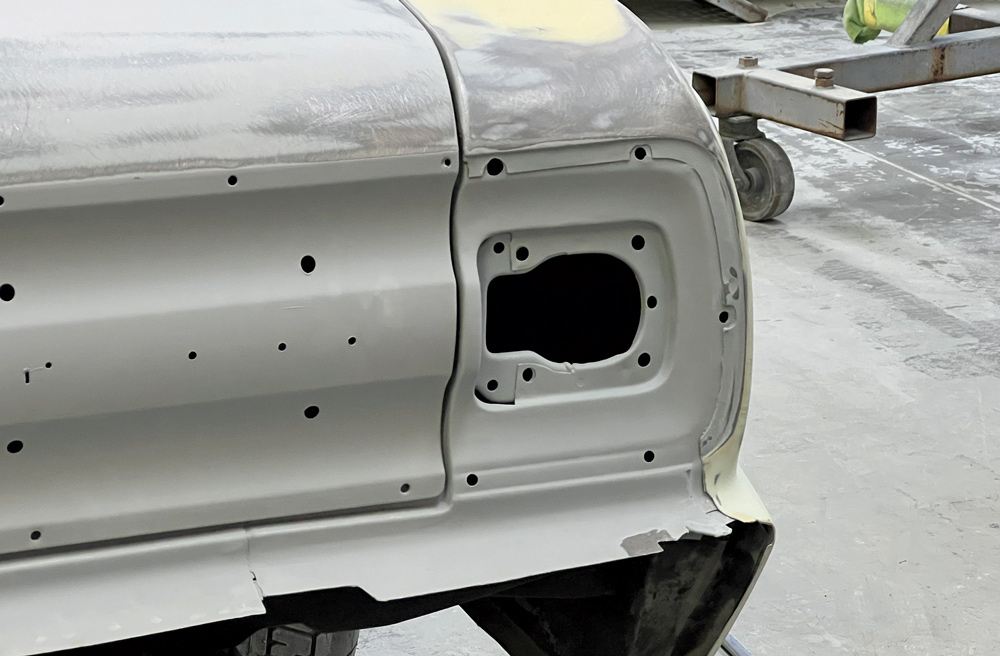
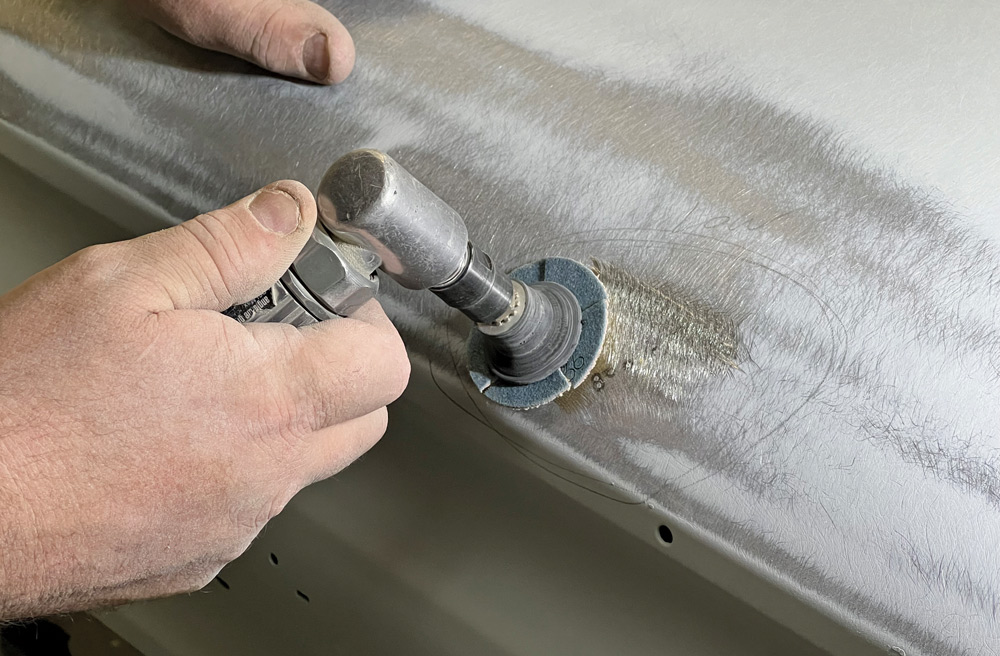
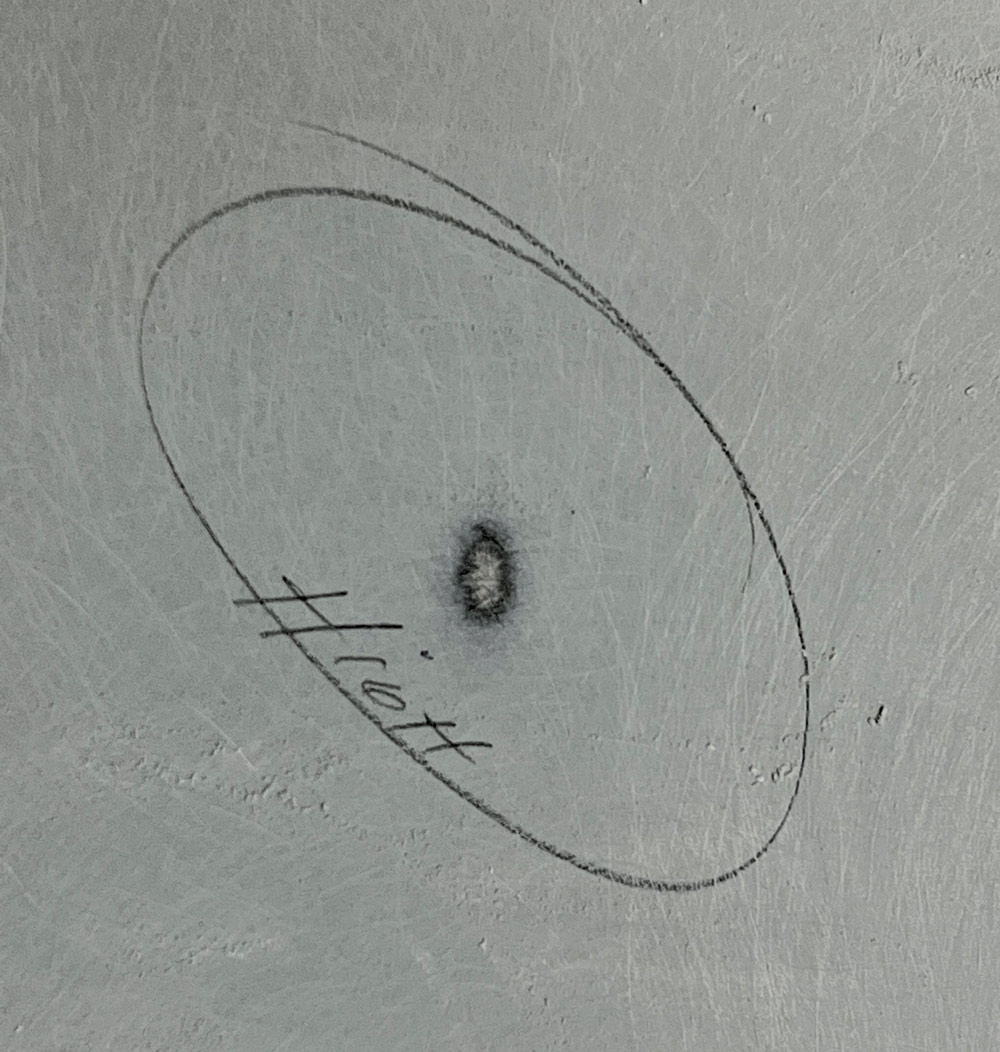
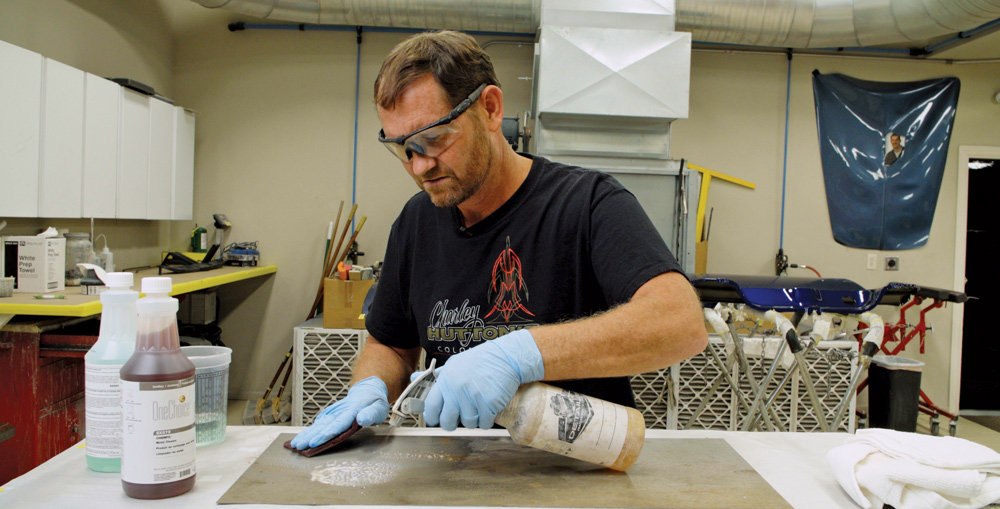
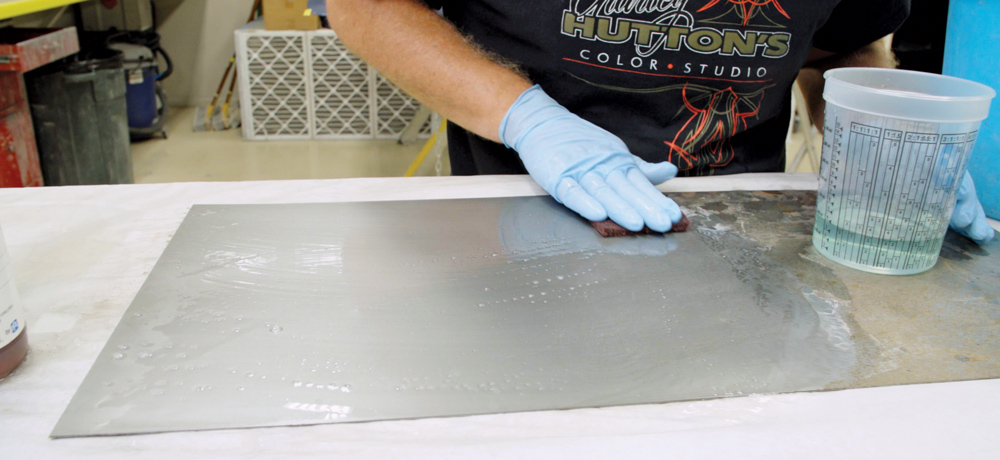
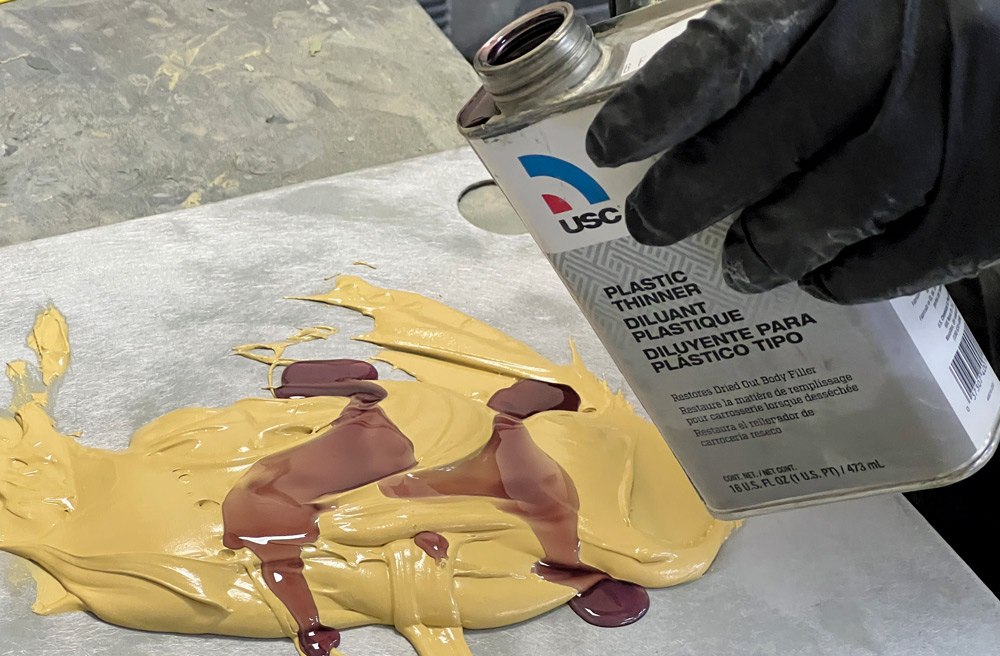
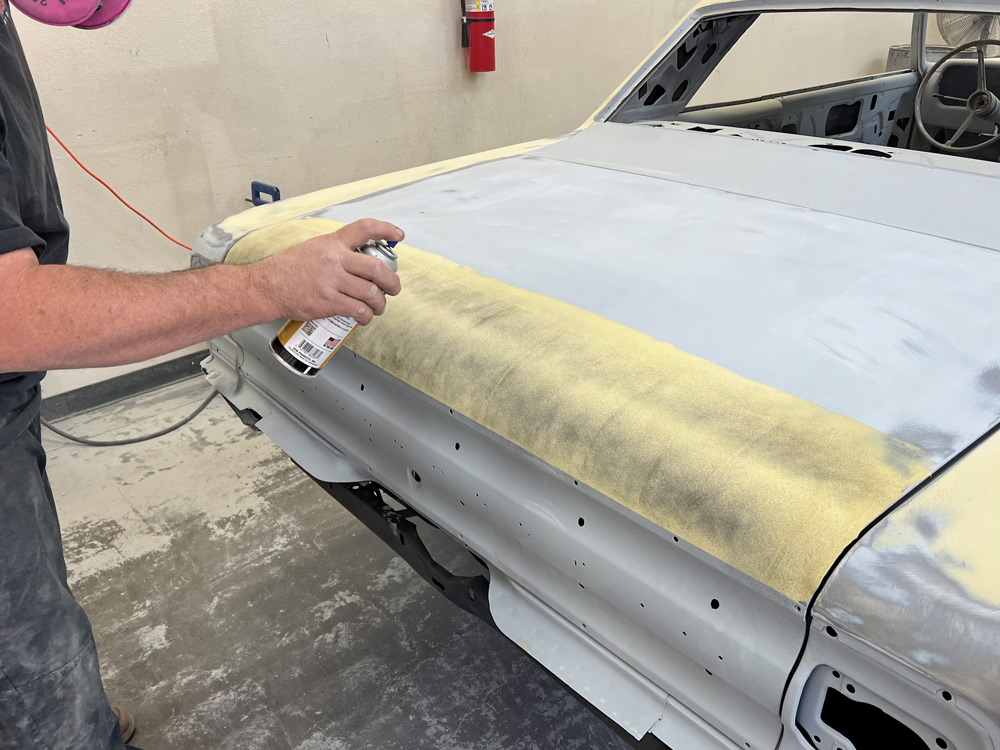
To get an idea what this process looks like, we followed Nick “Hubcap” Sinoris prep a ’65 Chevelle for paint at Hot Rods by Dean in Phoenix. It’s a big undertaking and to do it justice here means breaking it up into multiple entries. It should go without saying that they started with a body as straight as possible. Body fillers are wonderful, but they’re not remedies for sloppy bodywork. Also, as with any other material applied to a body, they require a perfectly clean substrate, be it metal, fiberglass, or primer. Just as it will under paint, the tiniest spec of just surface rust will fester under filler, and that can wreck a finish.

It’s not the easiest work in the world. But prepping a restored body for paint is within reach of the ambitious among us. If nothing else, the following should explain just why those prep bills add up the way they do!

Begin by fitting body panels with the corresponding bumpers, snubbers, and, if necessary, even seals. This ensures that the panels orient the way they will on the finished car.
2. Begin by fitting body panels with the corresponding bumpers, snubbers, and, if necessary, even seals. This ensures that the panels orient the way they will on the finished car.
 It may sound stupidly obvious but align every panel as if the vehicle was ready for assembly. The filling and blocking processes will make each panel match the others around it, so adjustments made after the fact will throw everything out of whack.
3. It may sound stupidly obvious but align every panel as if the vehicle was ready for assembly. The filling and blocking processes will make each panel match the others around it, so adjustments made after the fact will throw everything out of whack.
Run a well-calibrated hand over the body to find blemishes. Eighty-grit paper on an orbital not only gives filler a good foundation, but it can also reveal ridges, bumps, valleys, and craters.
4. Run a well-calibrated hand over the body to find blemishes. Eighty-grit paper on an orbital not only gives filler a good foundation, but it can also reveal ridges, bumps, valleys, and craters.
While barely perceptible, the dent that Sinoris found turned out to be about 1-1/2 inches tall and 1 inch wide. While probably less than 1/16-inch deep, it would’ve showed up through paint as a crater.
5. While barely perceptible, the dent that Sinoris found turned out to be about 1-1/2 inches tall and 1 inch wide. While probably less than 1/16-inch deep, it would’ve showed up through paint as a crater.
Raise low spots by the most appropriate means. The structure behind this one dictated a stud welder.
6. Raise low spots by the most appropriate means. The structure behind this one dictated a stud welder.
Multiple pulls while hammering around the perimeter of this low spot leveled it with the rest of the panel. Buzz off the weld spots.
7. Multiple pulls while hammering around the perimeter of this low spot leveled it with the rest of the panel. Buzz off the weld spots.
The orbital revealed this high spot. High spots are potentially worse than dents as they require raising the entire panel with filler to match the peak of the blemish.
8. The orbital revealed this high spot. High spots are potentially worse than dents as they require raising the entire panel with filler to match the peak of the blemish.
The open backside of this panel made it possible to work the high spot flat with a hammer and dolly. Remember to use the hammer-off-dolly bumping technique, as hammering directly over the crown of a dolly stretches metal. And stretched metal invites panels to spring back and forth like an oil can lid.
9. The open backside of this panel made it possible to work the high spot flat with a hammer and dolly. Remember to use the hammer-off-dolly bumping technique, as hammering directly over the crown of a dolly stretches metal. And stretched metal invites panels to spring back and forth like an oil can lid.
With the panels sufficiently aligned and flattened, eliminate any traces of rust, wax, and grease. Our pal<br />
Charley Hutton scoured this panel clean with PPG’s SX579—an acid-based metal cleaner—and a maroon 3M surface-conditioning pad.
10. With the panels sufficiently aligned and flattened, eliminate any traces of rust, wax, and grease. Our pal Charley Hutton scoured this panel clean with PPG’s SX579—an acid-based metal cleaner—and a maroon 3M surface-conditioning pad.
A few minutes of scrubbing transformed what many may consider a surface clean enough to spotless one. Remember that rust remains active in the presence of air, and that it’s impossible to completely seal a surface even under layers of seemingly impervious fillers, primers, and paint.
11. A few minutes of scrubbing transformed what many may consider a surface clean enough to spotless one. Remember that rust remains active in the presence of air, and that it’s impossible to completely seal a surface even under layers of seemingly impervious fillers, primers, and paint.
Reducing filler slightly makes it flow a lot easier and thinner. These reducers—or honey as some manufacturers call them—are basically polyester resin, the foundation of body fillers. Catalyze the thinned filler as usual.
12. Reducing filler slightly makes it flow a lot easier and thinner. These reducers—or honey as some manufacturers call them—are basically polyester resin, the foundation of body fillers. Catalyze the thinned filler as usual.
Sinoris then skimmed the entire tail of the trunk with the thinned filler. Remember that we’re not going for a thick surface—we’re talking 1/8-inch thick or so, and most of that will come off.
13. Sinoris then skimmed the entire tail of the trunk with the thinned filler. Remember that we’re not going for a thick surface—we’re talking 1/8-inch thick or so, and most of that will come off.
Sinoris used Mirka boards and Dura-Block sanding blocks. The nipples on the Mirka boards connect to a dust-evacuation system. Dust evacuation is optional of course, but it can reframe your priorities if your body shop doubles as a home garage.
14. Sinoris used Mirka boards and Dura-Block sanding blocks. The nipples on the Mirka boards connect to a dust-evacuation system. Dust evacuation is optional of course, but it can reframe your priorities if your body shop doubles as a home garage.
Knock down the filler with 80-grit paper while it’s in the so-called green phase. This is the point where the filler has mostly—but not fully—polymerized. Also note that he’s moving the board diagonal to its shape. Pushing a board lengthwise causes the paper to bite along the long edge, which results in grooves.
15. Knock down the filler with 80-grit paper while it’s in the so-called green phase. This is the point where the filler has mostly—but not fully—polymerized. Also note that he’s moving the board diagonal to its shape. Pushing a board lengthwise causes the paper to bite along the long edge, which results in grooves.
After Sinoris knocked the top off the filler, he dusted the surface with SEM guidecoat black. Remember that less is more in this application. Don’t blast the panel solid black.
16. After Sinoris knocked the top off the filler, he dusted the surface with SEM guidecoat black. Remember that less is more in this application. Don’t blast the panel solid black.
Sanding removes the guidecoat from the high spots, leaving a visual map of the surface’s shape. The sanding scratches also reveal how Sinoris runs the board diagonal to its shape.
17. Sanding removes the guidecoat from the high spots, leaving a visual map of the surface’s shape. The sanding scratches also reveal how Sinoris runs the board diagonal to its shape.
Give yourself a stop point for things like body lines. Sinoris taped directly under this one to show how far down he should sand this area. To address the lower areas, remove the tape and run another strip above the body line. This produces that sexy, sharp body line that old bodies never had from the factory.
18. Give yourself a stop point for things like body lines. Sinoris taped directly under this one to show how far down he should sand this area. To address the lower areas, remove the tape and run another strip above the body line. This produces that sexy, sharp body line that old bodies never had from the factory.
Sand with the longest board possible to achieve the most consistent surface. Note how Sinoris is sanding multiple panels simultaneously. That makes each panel match the others around it. This also underscores why every panel should fit before you start. Adjusting panels after this point only screws up the lines. Next month we’ll show another bag of tricks.
19. Sand with the longest board possible to achieve the most consistent surface. Note how Sinoris is sanding multiple panels simultaneously. That makes each panel match the others around it. This also underscores why every panel should fit before you start. Adjusting panels after this point only screws up the lines. Next month we’ll show another bag of tricks.
SOURCES
Charley Hutton’s Color Studio
huttonscolorstudio@gmail.com
Hot Rods by Dean
(623) 581-1932
hotrodsbydean.com
PPG Automotive Refinish
(800) 647-6050
us.ppgrefinish.com/ppg-refinish/home
Modern Rodding

VOLUME 4 • ISSUE 38 • 2023