Modern Rodding TECH

InTheGarageMedia.com

1. The stage was set for this project by Tavis Highlander, at Highlander Concept Rendering, who made an extensive set of renderings for the complete vehicle and many of the details.
Ironworks’ ’57 Ranch Wagon
Part III: Making the Wheels, Hood & Wrapping Up
By Ron Covell
Photography by Rodger Lee
ARTWORK BY TAVIS Highlander
I

n this installment, we’ll wrap up our coverage of the outstanding build on Danny Shaffer’s ’57 Ford Ranch Wagon that’s being constructed at Ironworks Speed & Kustom.

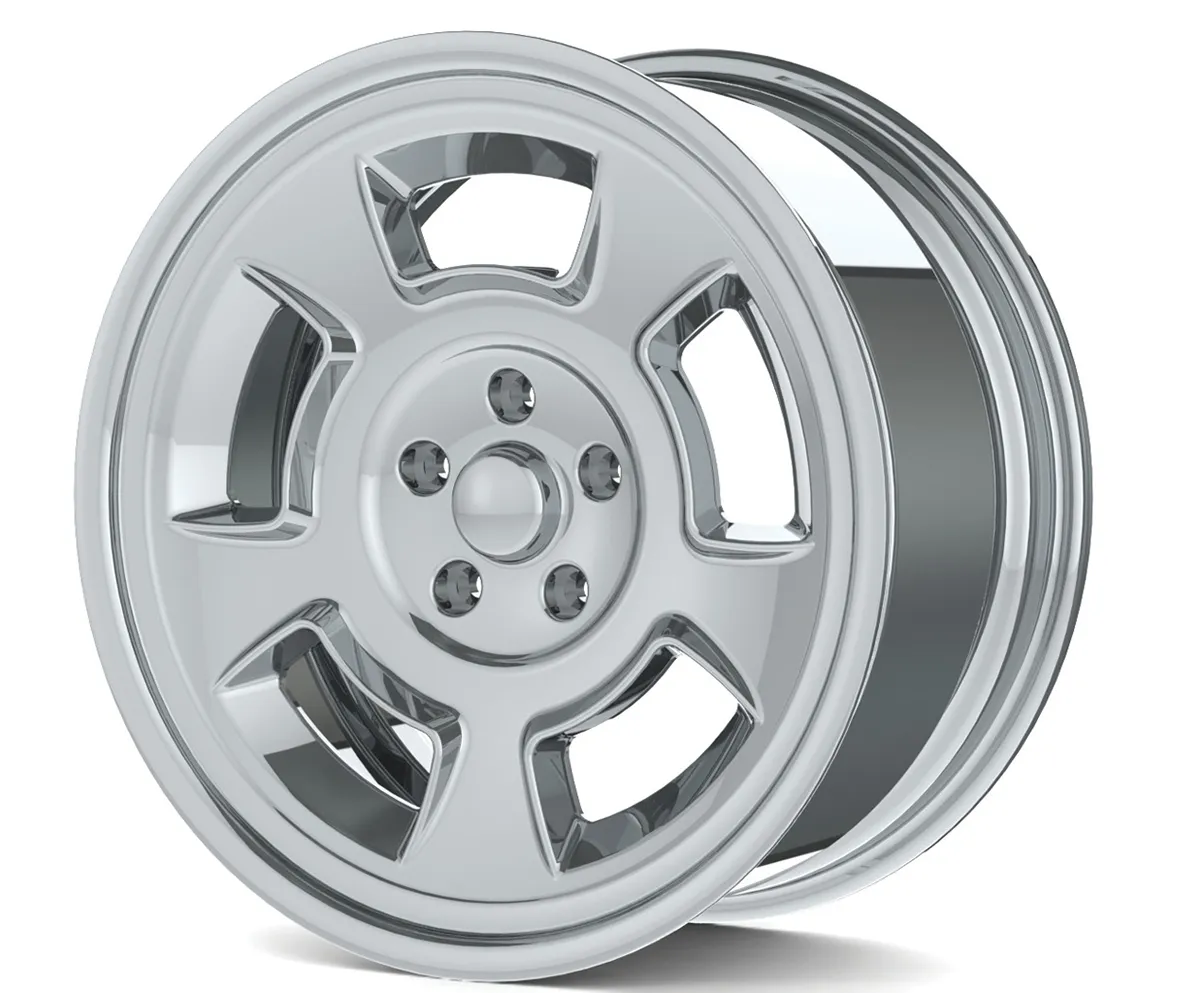
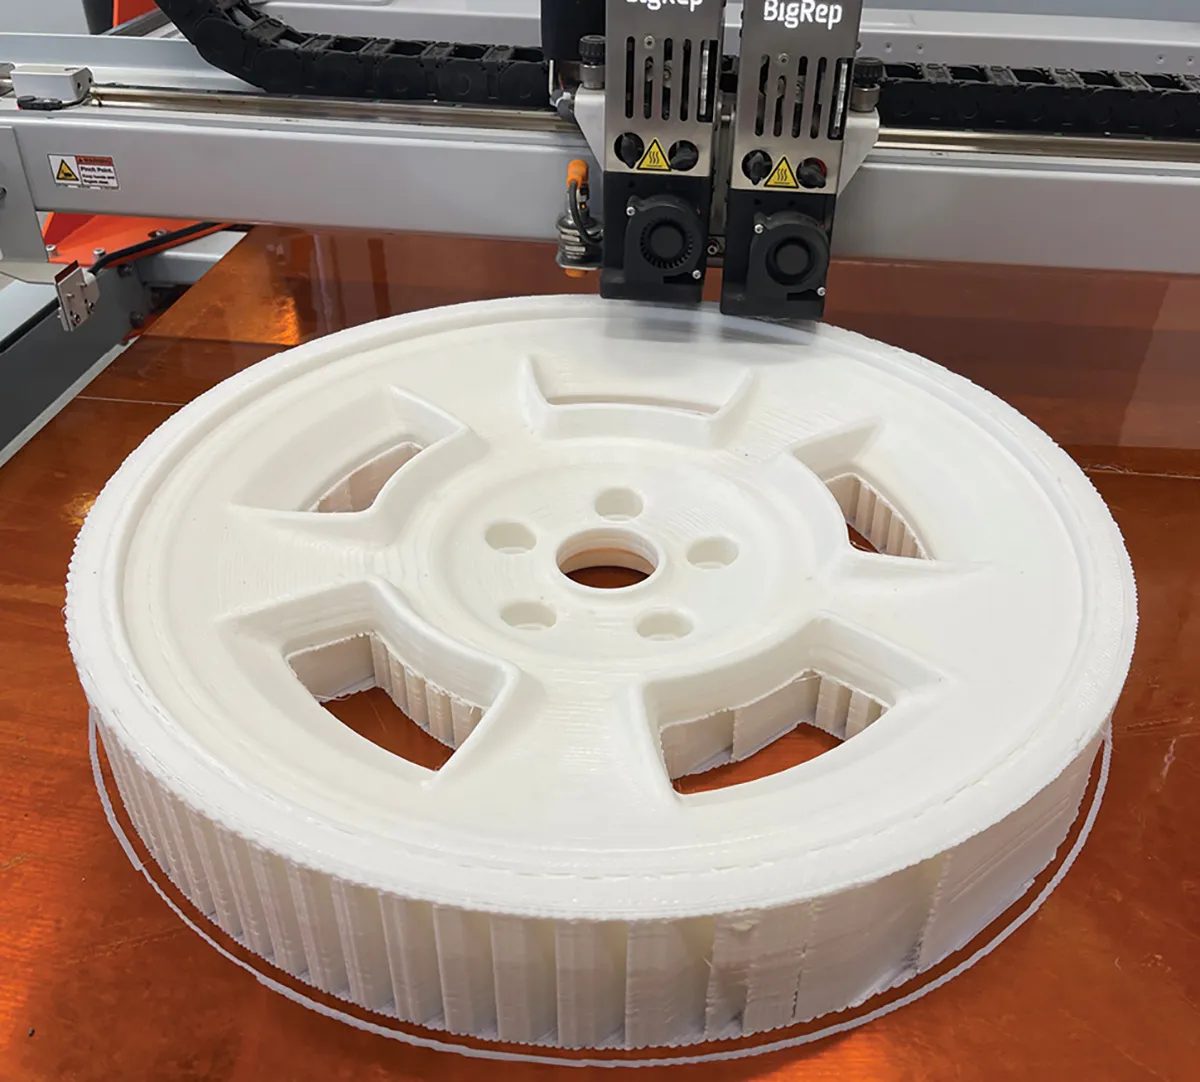
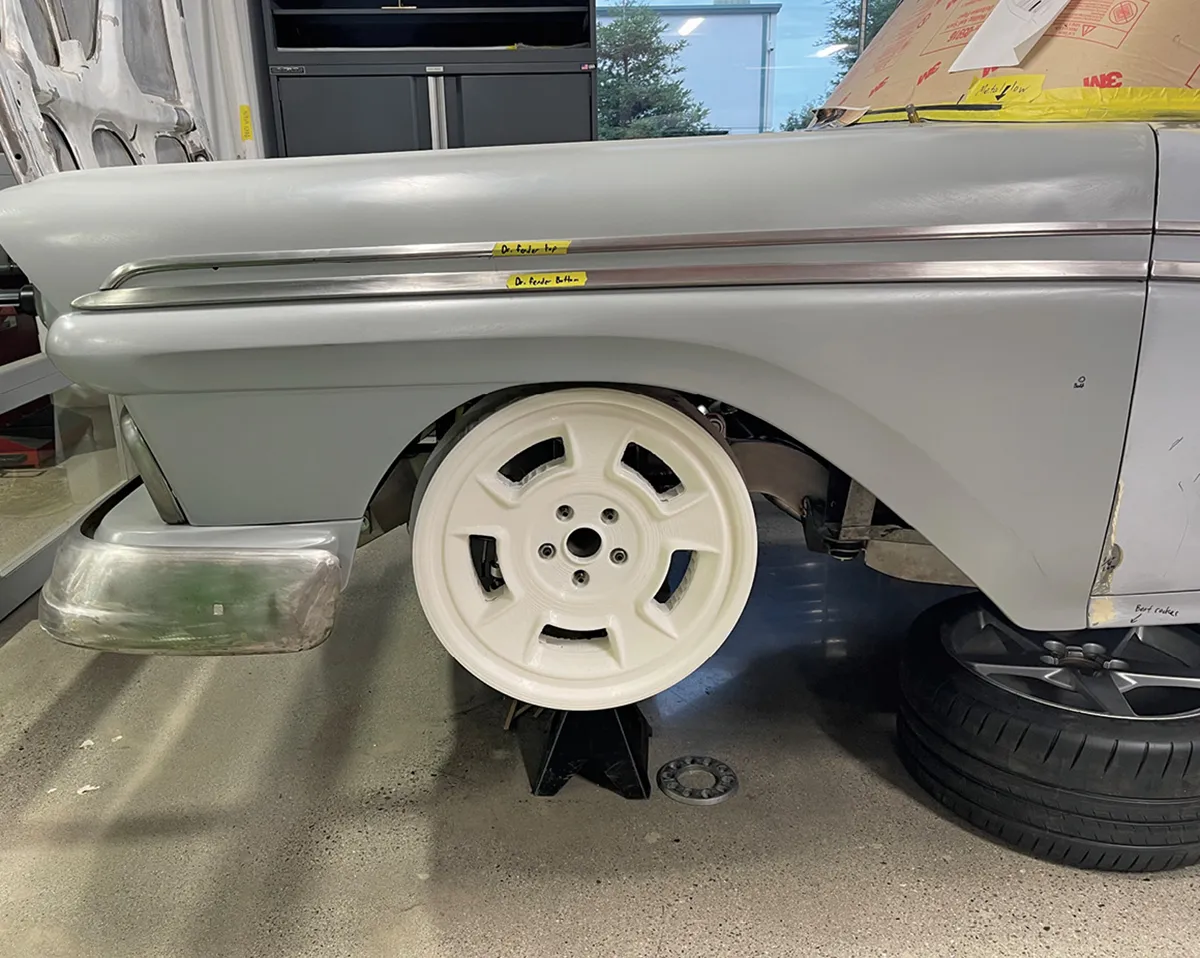
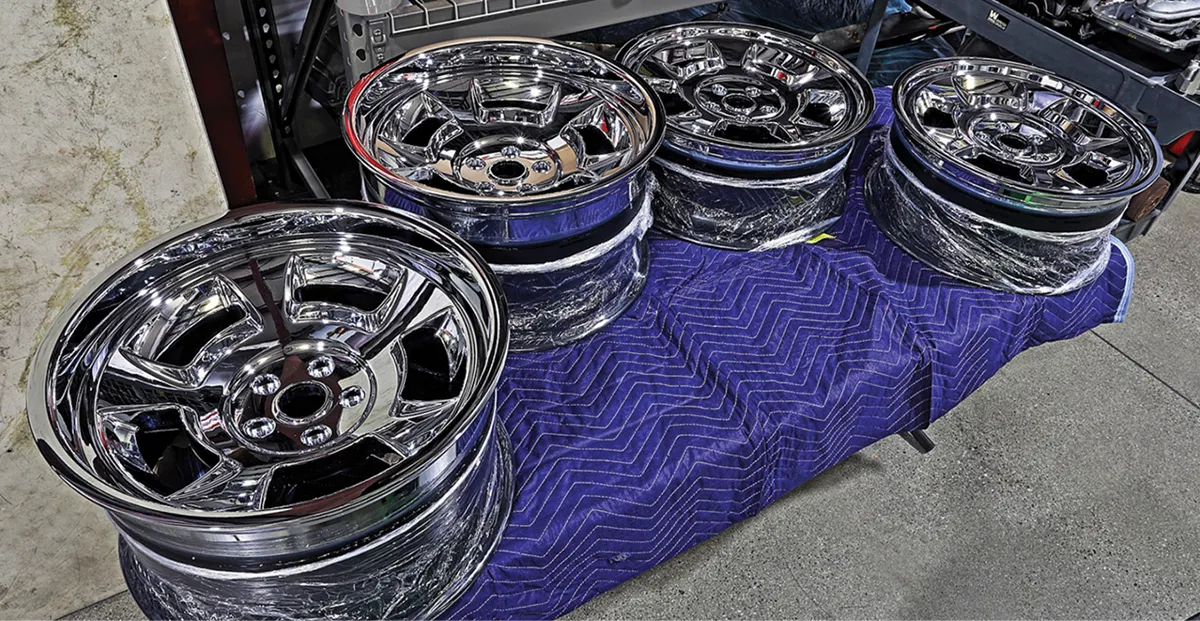
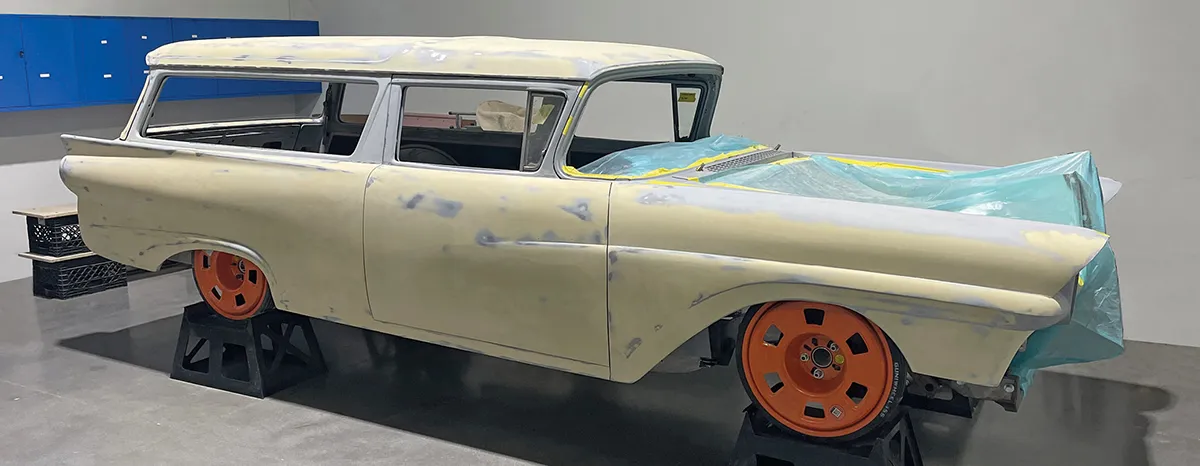
One-off wheels were designed for this project, inspired by Halibrand racing wheels of the ’50s. As with many other components on this car, the wheels were rough sketched by hand, then final design was done in CAD, and they were printed in plastic to make sure everything was spot-on before machining from billet aluminum. The wheels were machined by EVOD then polished to perfection and chrome plated for durability.

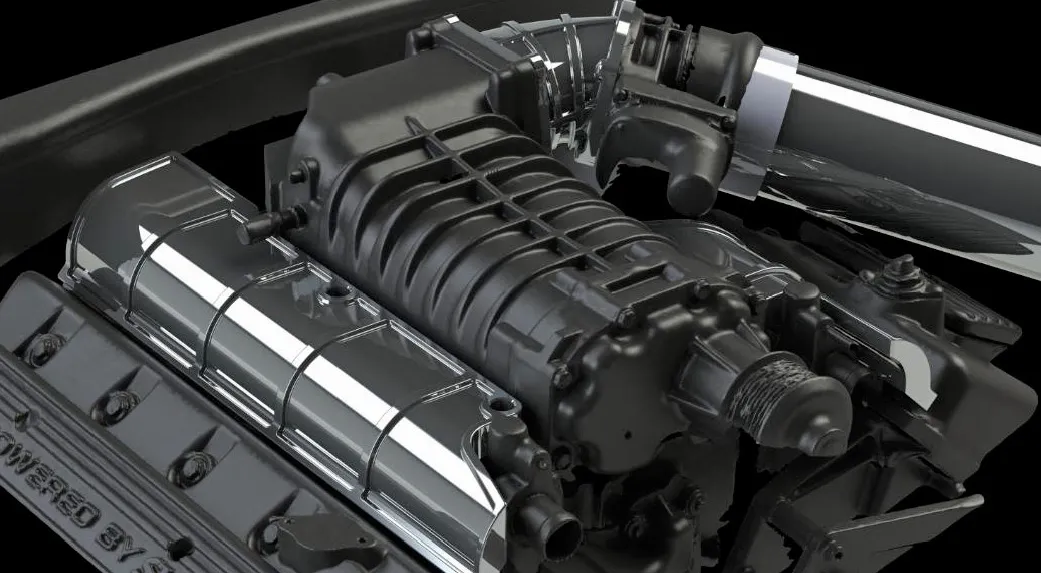
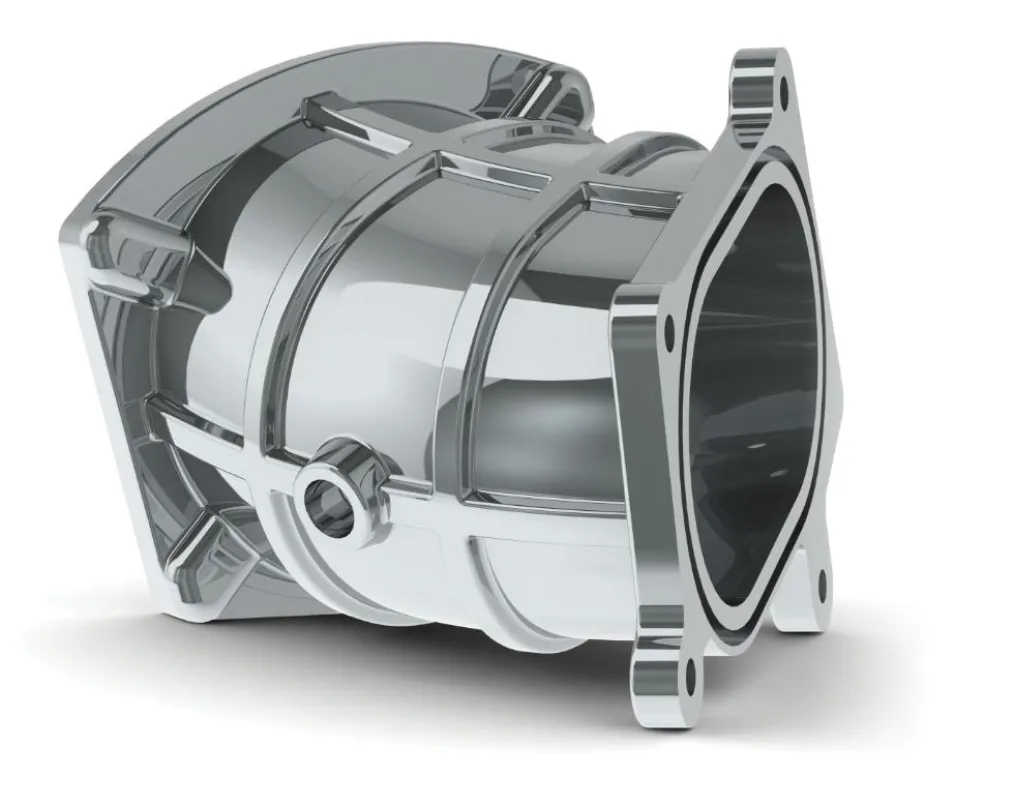
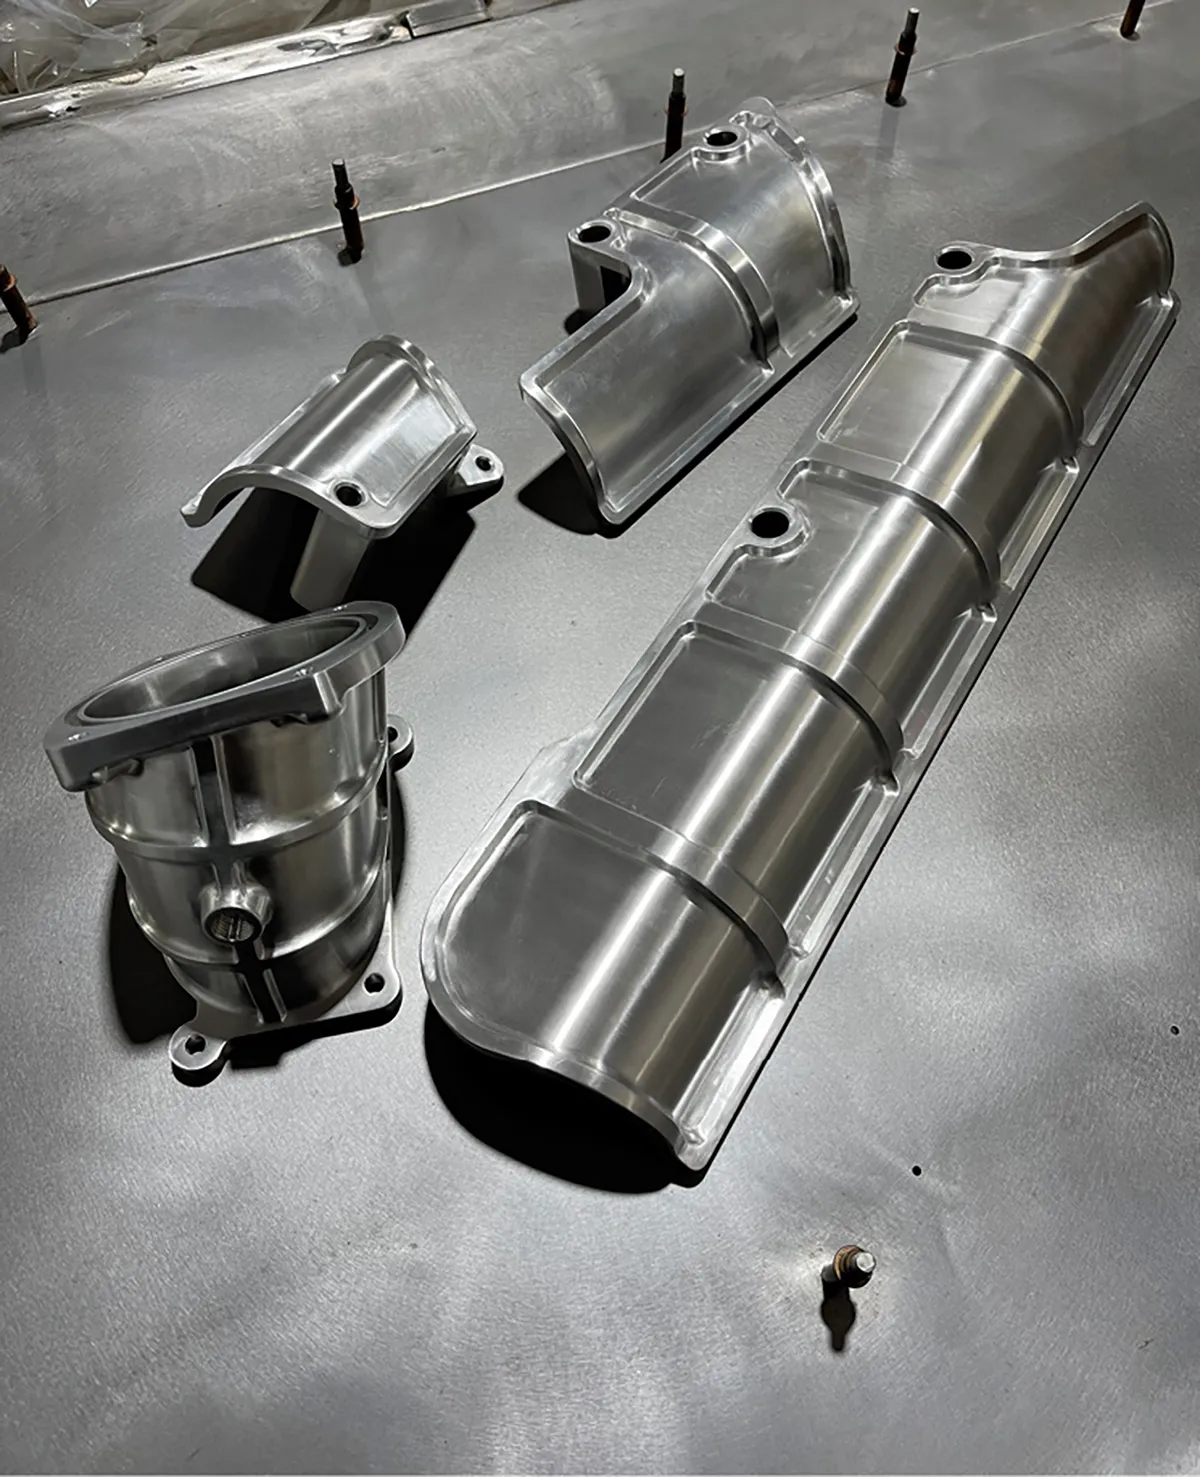
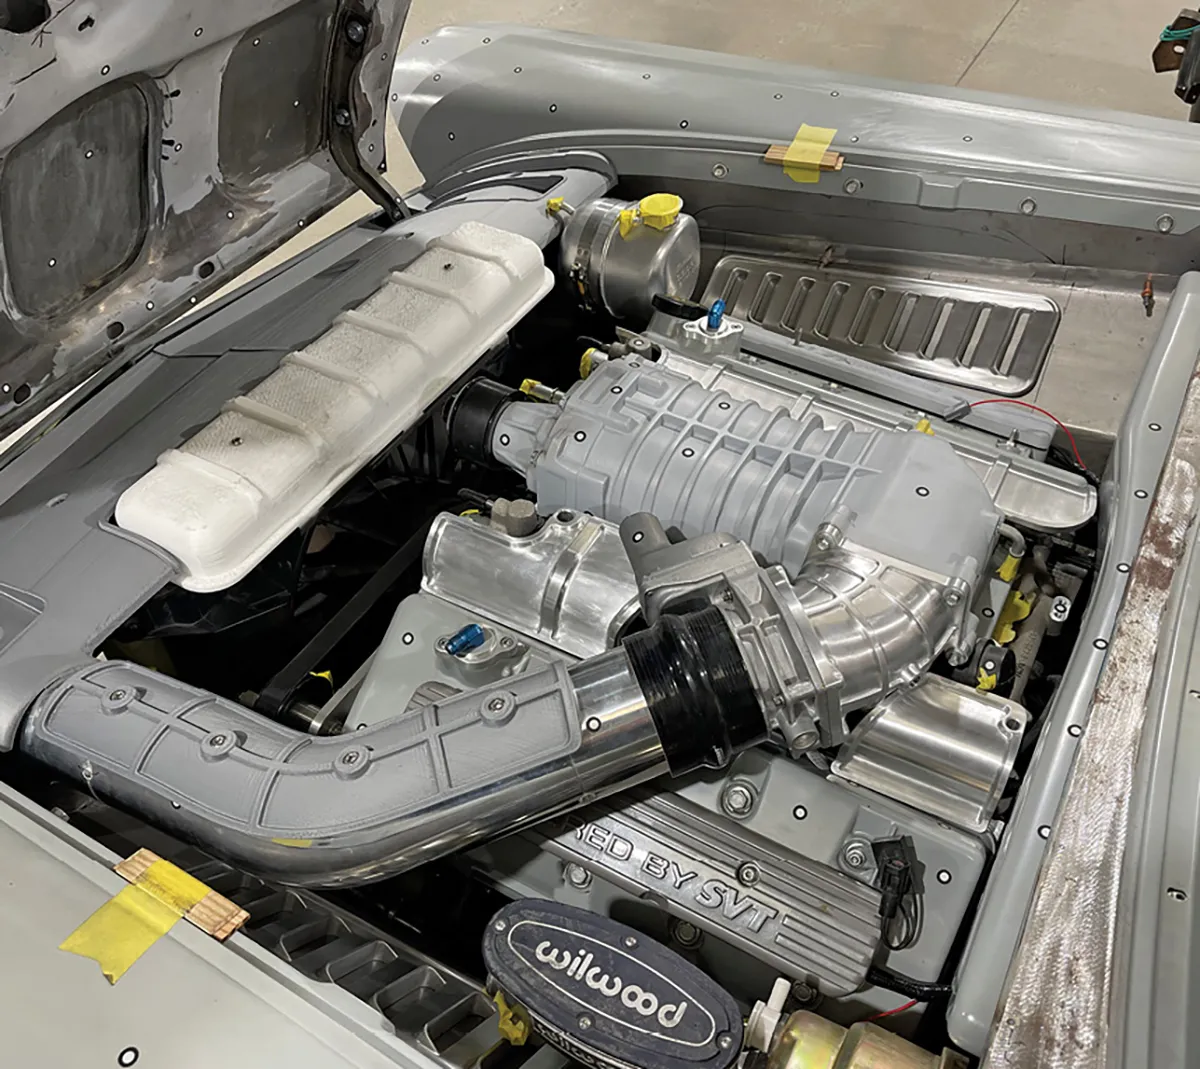
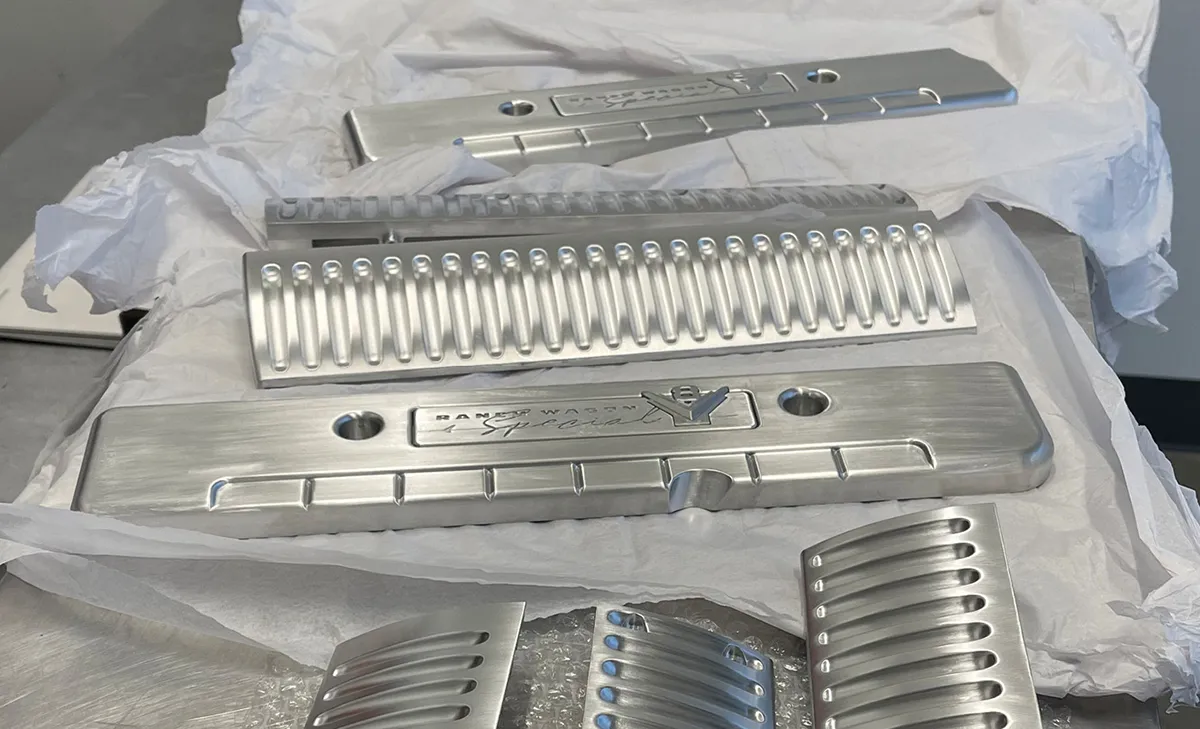
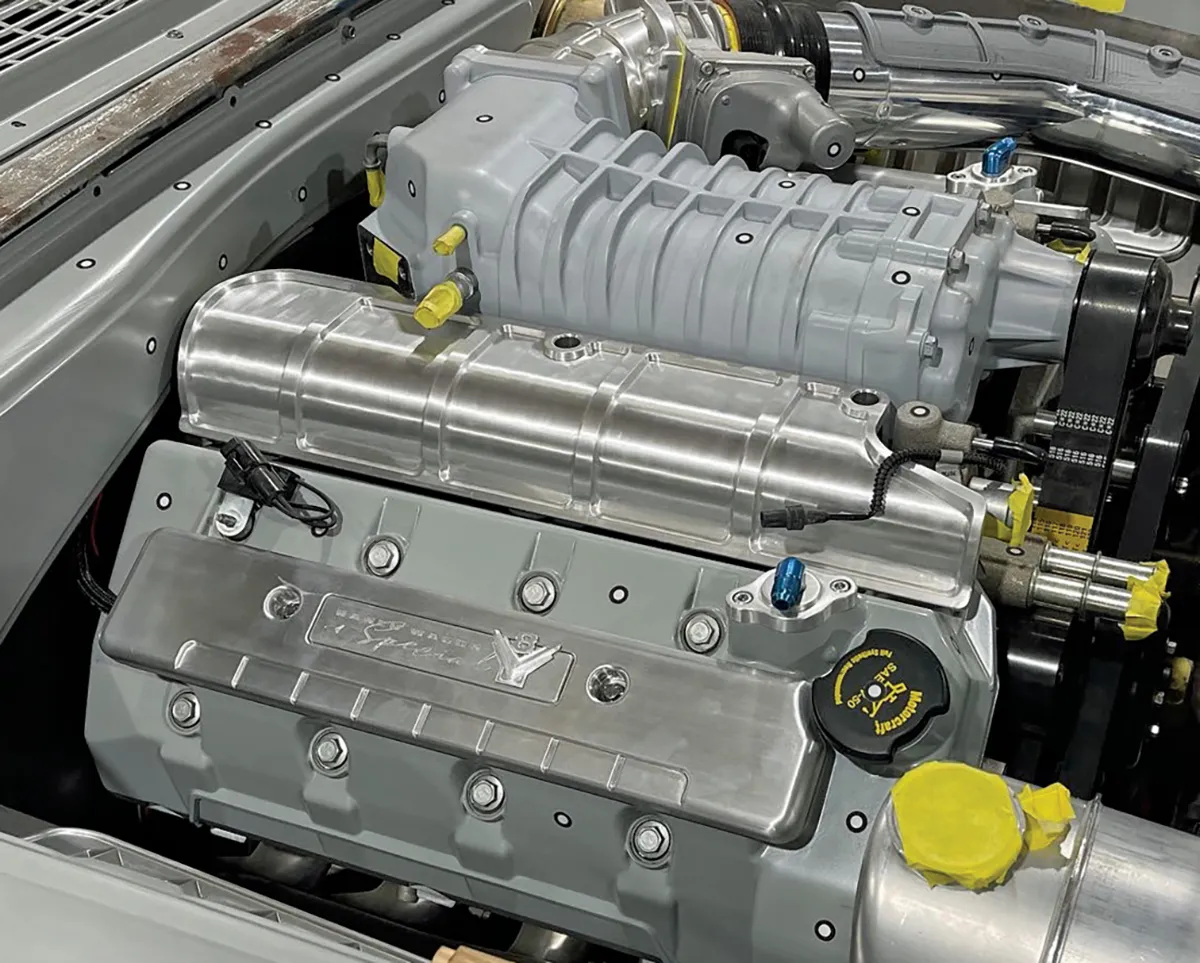
A huge amount of work went to the underhood area, with the goal of cleaning up every surface while keeping an OEM flavor. After exploring several variations, the inlet tube for the fuel injection was routed diagonally across the driver side cylinder head, which required a specially machined adapter to position the throttle body at a precise angle. It is ribbed and contoured so it is consistent with the styling theme used underhood. Special covers were machined to hide the plug wires and the injector wiring, and special grilles with curvaceous louvers were machined for the inner wheelwells.

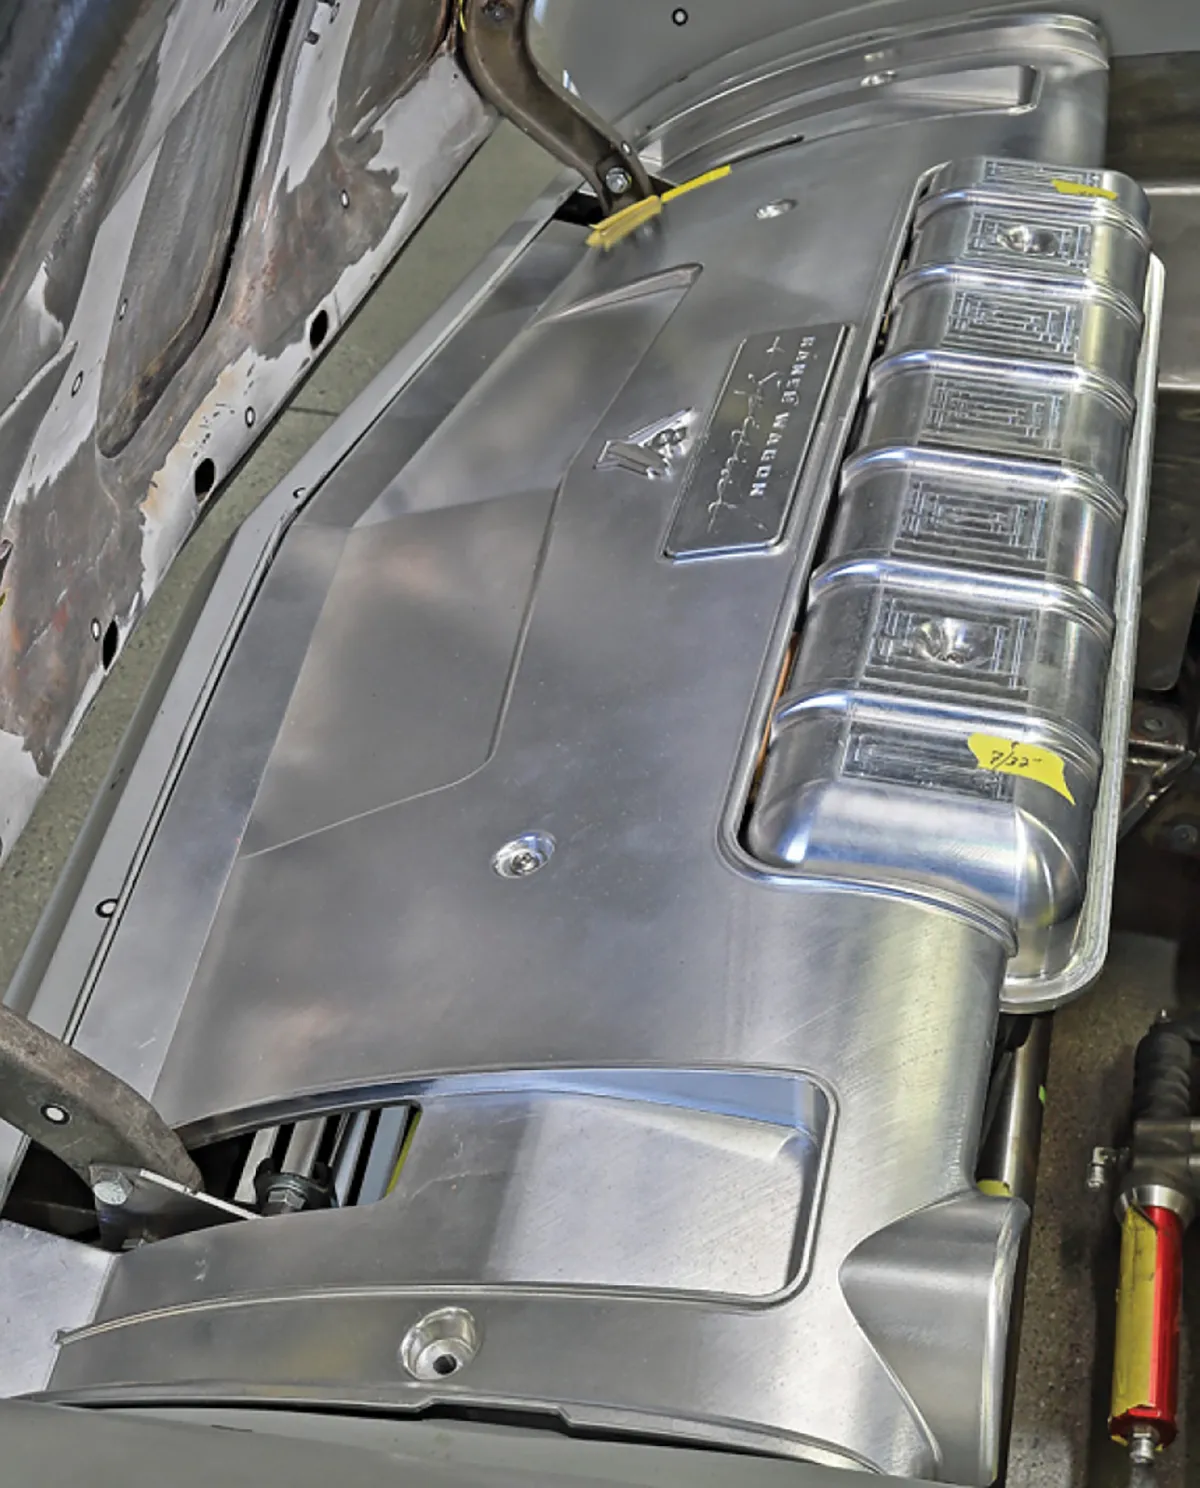
Perhaps the crowning touch under the hood is the elaborate cover that stretches between the fenders just forward of the radiator. This elegant construction fits closely around the hood hinges and features a custom-machined badge that closely resembles what Ford might have put on such a cover.

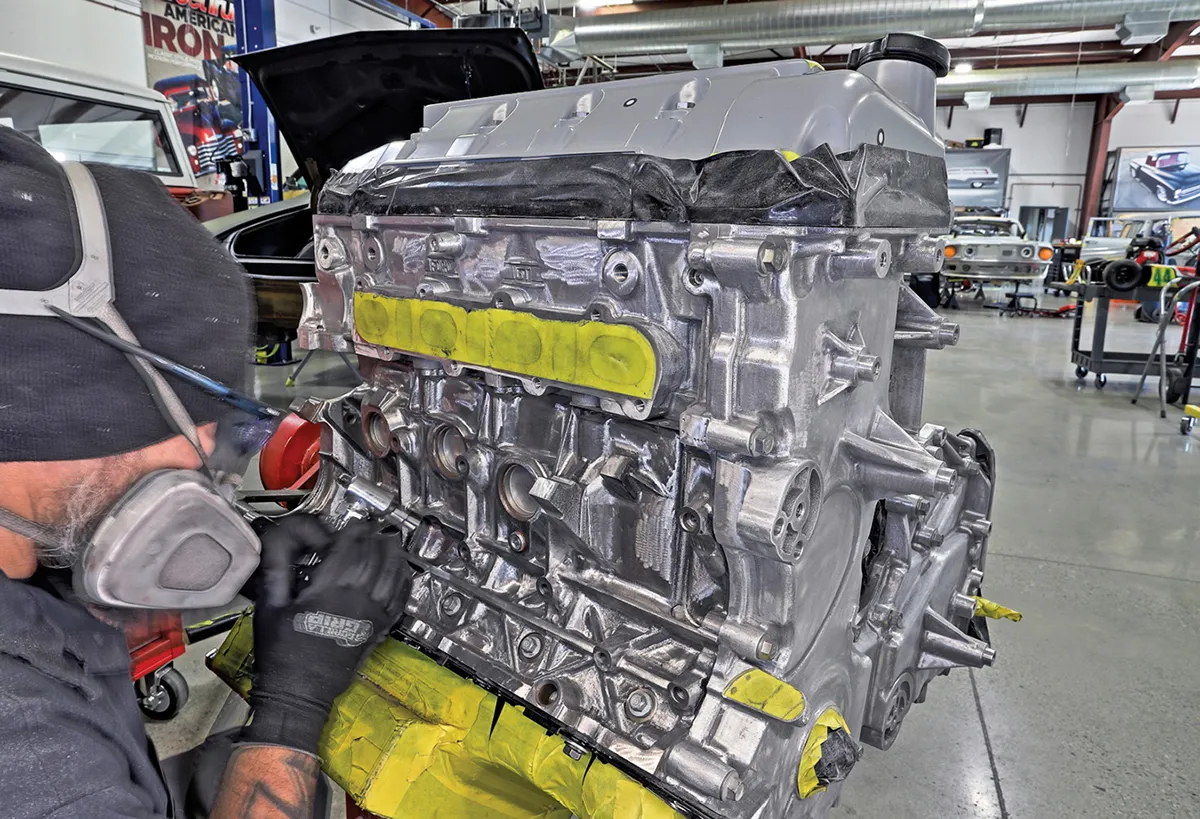
The heads and the entire engine block were painstakingly ground smooth, so they would be as nicely finished as any other detail on this top-level build.

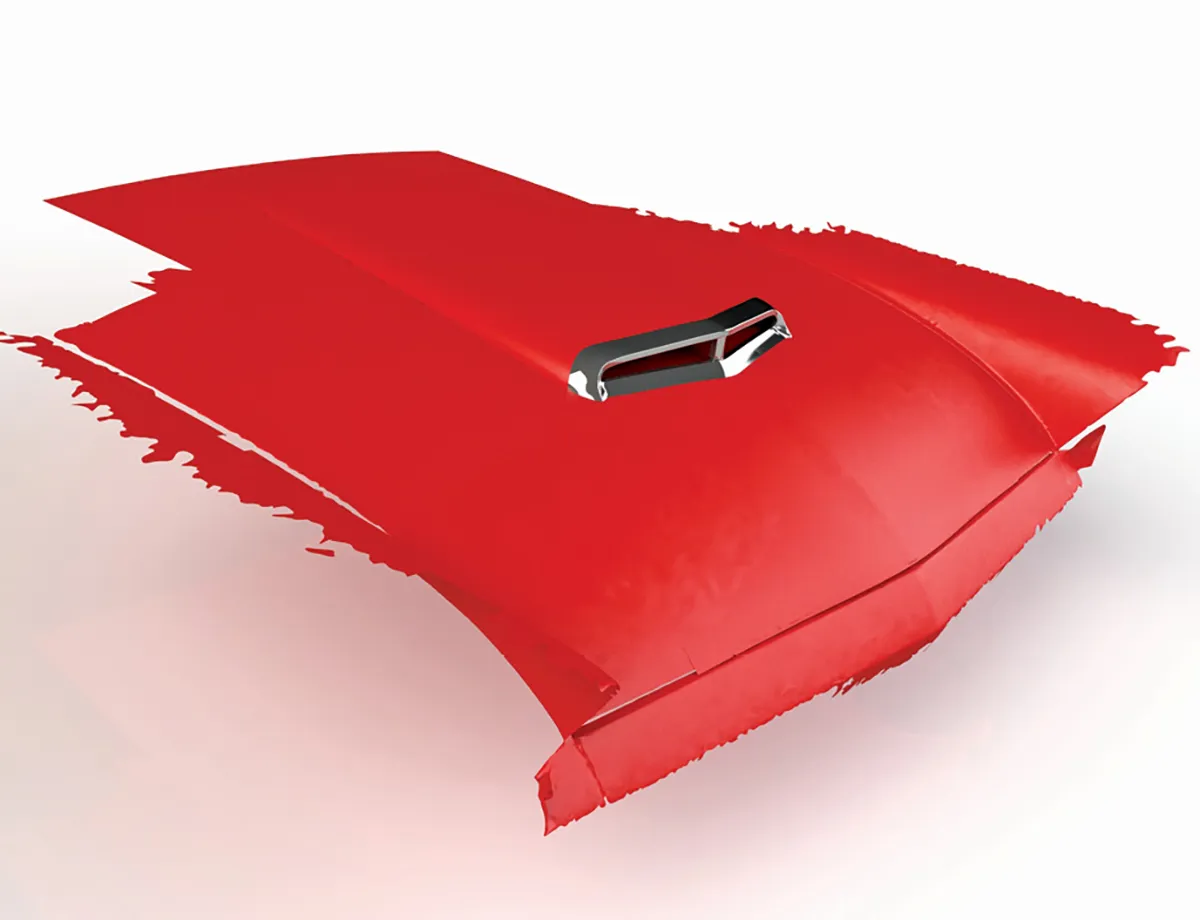
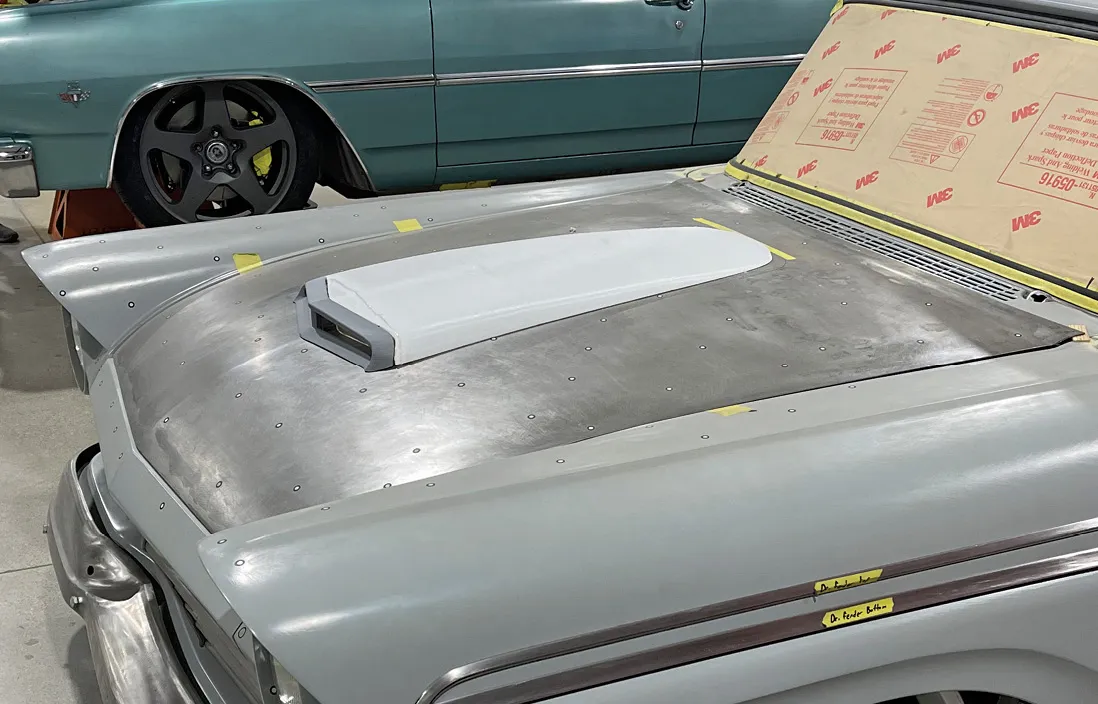
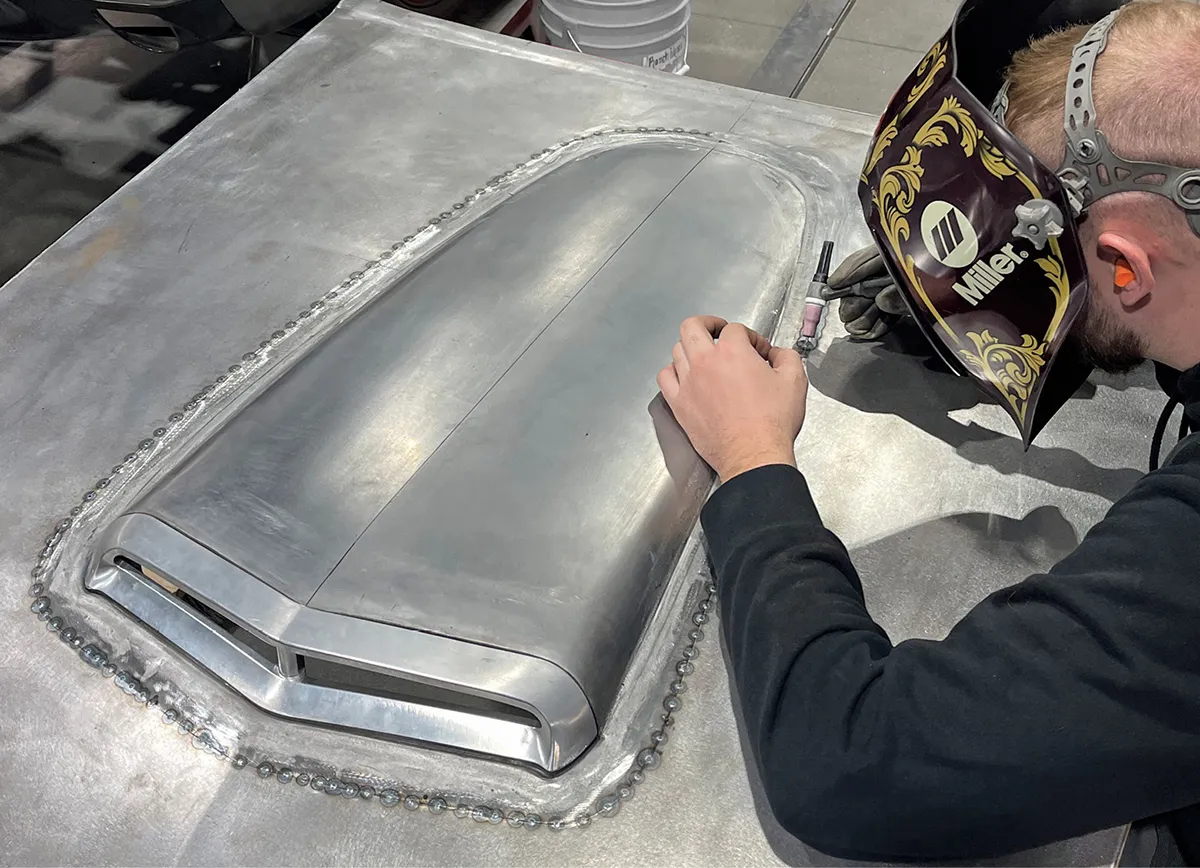
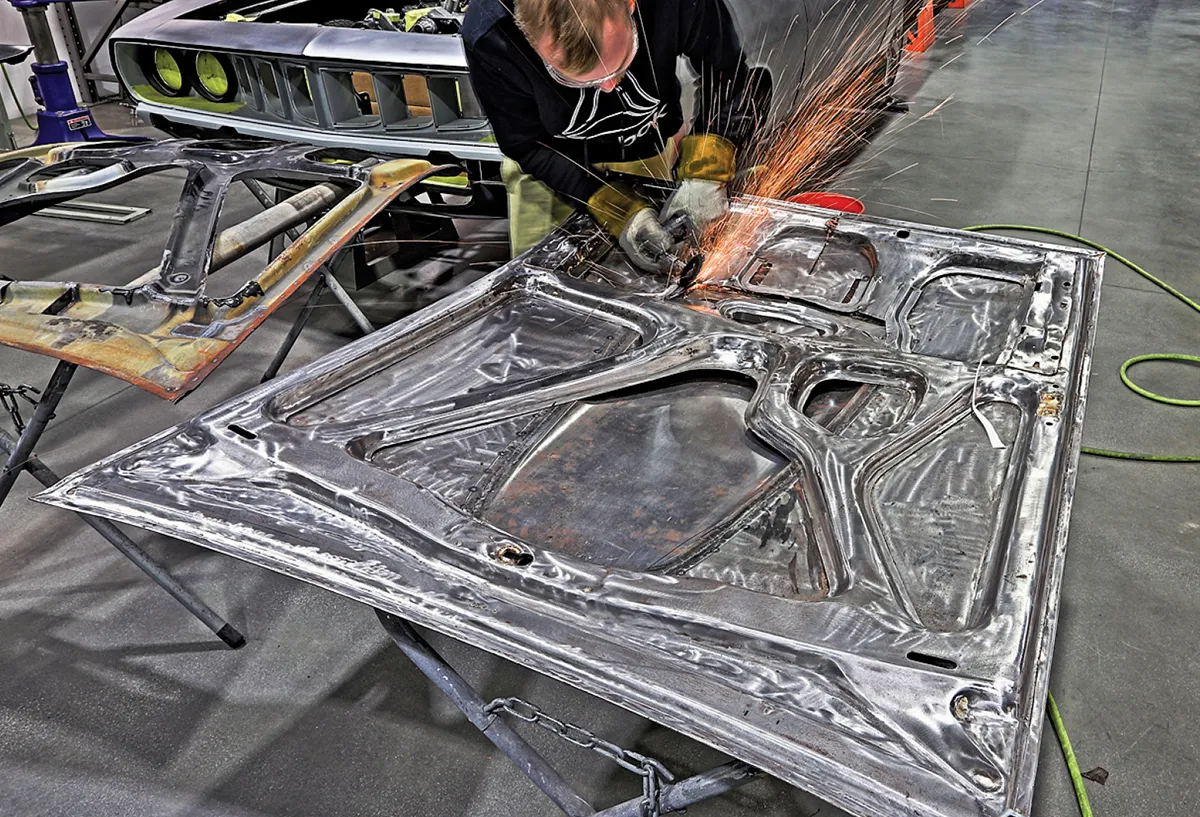
You may remember from the last article that the interior of the car was modeled on the style of the ’60 Ford Thunderbird. A special hood scoop was designed and fabricated to pay further homage to the vintage ’bird, and as with many other details it was first freehand sketched, then computer modeled, and printed in plastic to check the fit and design before any metal was cut. This was a major undertaking and comprises the biggest change to the exterior sheetmetal. The results are outstanding, and the scoop and its bezel look like they were factory-designed for this car.

The finished bodywork is just being completed as we wrap up this article, and it won’t be long until you see the finished result on these pages. Be sure to tune in for that!

A custom set of wheels was designed for the car. The styling is very traditional but with larger windows and unique detailing.
2. A custom set of wheels was designed for the car. The styling is very traditional but with larger windows and unique detailing.
As with many of the elaborate components of the car, a test piece was printed to allow a careful review before committing to making the parts from expensive aluminum billet.
3. As with many of the elaborate components of the car, a test piece was printed to allow a careful review before committing to making the parts from expensive aluminum billet.
The printed wheel is put into place to check the fitment, along with the proportions of all the details on the wheel face.
4. The printed wheel is put into place to check the fitment, along with the proportions of all the details on the wheel face.
After both the front and rear wheel sizes and profiles were verified, these are the “real deal,” beautifully CNC machined from billet by EVOD, then polished and chrome plated.
5. After both the front and rear wheel sizes and profiles were verified, these are the “real deal,” beautifully CNC machined from billet by EVOD, then polished and chrome plated.
A tremendous amount of work went into detailing the underhood area. After several studies, the intake tube was positioned at a 45-degree angle, which required a special, angled throttle body adapter.
6. A tremendous amount of work went into detailing the underhood area. After several studies, the intake tube was positioned at a 45-degree angle, which required a special, angled throttle body adapter.
Here’s a close-up shot of the adapter mockup for the Nick Williams throttle body being used with the Holley Dominator Electronic Fuel Injection system.
7. Here’s a close-up shot of the adapter mockup for the Nick Williams throttle body being used with the Holley Dominator Electronic Fuel Injection system.
This computer model shows the angled throttle body adapter, plus the covers for the fuel injection components on the tops of the cylinder heads.
8. This computer model shows the angled throttle body adapter, plus the covers for the fuel injection components on the tops of the cylinder heads.
Here’s a highly detailed computer model of the custom throttle body adapter.
9. Here’s a highly detailed computer model of the custom throttle body adapter.
These are the final components just after being machined from aluminum billet.
10. These are the final components just after being machined from aluminum billet.
The machined components are installed here. A trial fit is done on the printed covers for the intake tube, the radiator, the front valence panel, and vented grilles for the inner fender panels.
11. The machined components are installed here. A trial fit is done on the printed covers for the intake tube, the radiator, the front valence panel, and vented grilles for the inner fender panels.
Here is the front valence panel beautifully CNC machined from aluminum billet.
12. Here is the front valence panel beautifully CNC machined from aluminum billet.
A side view of the valence and radiator cover gives a different perspective. Note how beautifully everything fits together.
13. A side view of the valence and radiator cover gives a different perspective. Note how beautifully everything fits together.
The CNC machined components are carefully hand-detailed before polishing.
14. The CNC machined components are carefully hand-detailed before polishing.
You can see how much these components clean up the engine compartment while still maintaining an OEM flavor.
15. You can see how much these components clean up the engine compartment while still maintaining an OEM flavor.
All surfaces of the block and heads were meticulously hand-detailed to smooth any bumps and texture.
16. All surfaces of the block and heads were meticulously hand-detailed to smooth any bumps and texture.
Early in the project a plan was hatched to add a Thunderbird-style scoop to the hood. Many renderings were made. This one was selected as the best of the bunch.
17. Early in the project a plan was hatched to add a Thunderbird-style scoop to the hood. Many renderings were made. This one was selected as the best of the bunch.
With the general design finalized, a computer model was made to guide the fabrication.
18. With the general design finalized, a computer model was made to guide the fabrication.
The scoop and bezel were printed in plastic to check the size and placement before committing to metal.
19. The scoop and bezel were printed in plastic to check the size and placement before committing to metal.
Here the hand-fabricated sheetmetal scoop is placed on the hood, and it’s being checked with the printed bezel.
20. Here the hand-fabricated sheetmetal scoop is placed on the hood, and it’s being checked with the printed bezel.
The bezel was CNC machined from billet, fastened to the scoop, and here they are being joined to the hood.
21. The bezel was CNC machined from billet, fastened to the scoop, and here they are being joined to the hood.
All surfaces on the body will be highly detailed. Here the underhood bracing is stripped and smoothed.
22. All surfaces on the body will be highly detailed. Here the underhood bracing is stripped and smoothed.
A coat of primer is used to seal the hood, top side, and bottom.
23. A coat of primer is used to seal the hood, top side, and bottom.
Here’s a shot of the body, completely smoothed, gapped, and ready for the start of the painting process. Look for an article on the finished car coming soon.
24. Here’s a shot of the body, completely smoothed, gapped, and ready for the start of the painting process. Look for an article on the finished car coming soon.
SOURCE
IRONWORKS SPEED & KUSTOM
(661) 399-8999
ironworksspeedandkustom.com
Modern Rodding
VOLUME 4 • ISSUE 38 • 2023