Modern Rodding Tech
InTheGarageMedia.com
By Tommy Lee Byrd Photography by THE AUTHOR
Budget Brake Job
Refresh Your Brake Calipers Without Breaking the Bank
C

hances are likely that you’ve performed your share of brake jobs. Whether it’s a daily driver, a hot rod, or an old truck, a good day’s work (as long as things go smoothly) can give you a sense of satisfaction that your vehicle will now be safe and dependable for thousands of miles. But what if you buy an old car that runs and drives great but looks terrible underneath? No matter how nice it drives, you’ll pick away at the details until the appearance meets your standard. Some might use this as an excuse to upgrade to an aftermarket brake kit. We were pleased with the performance and simply wanted a new look.

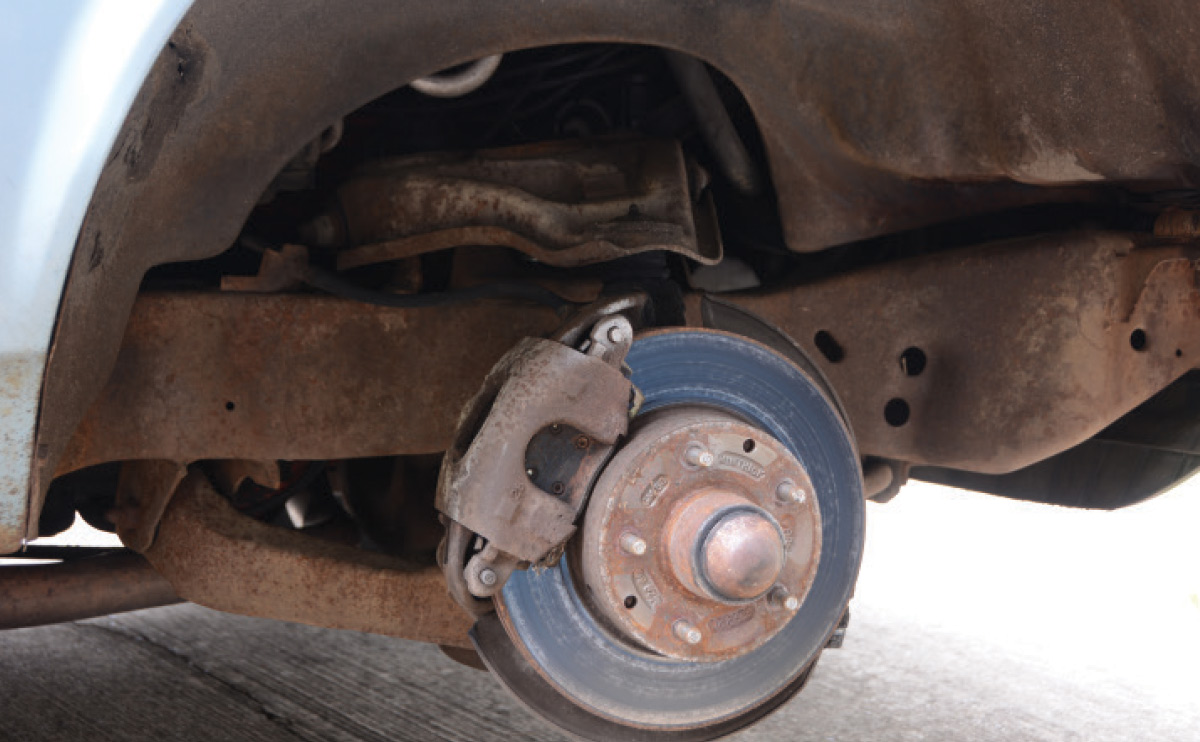
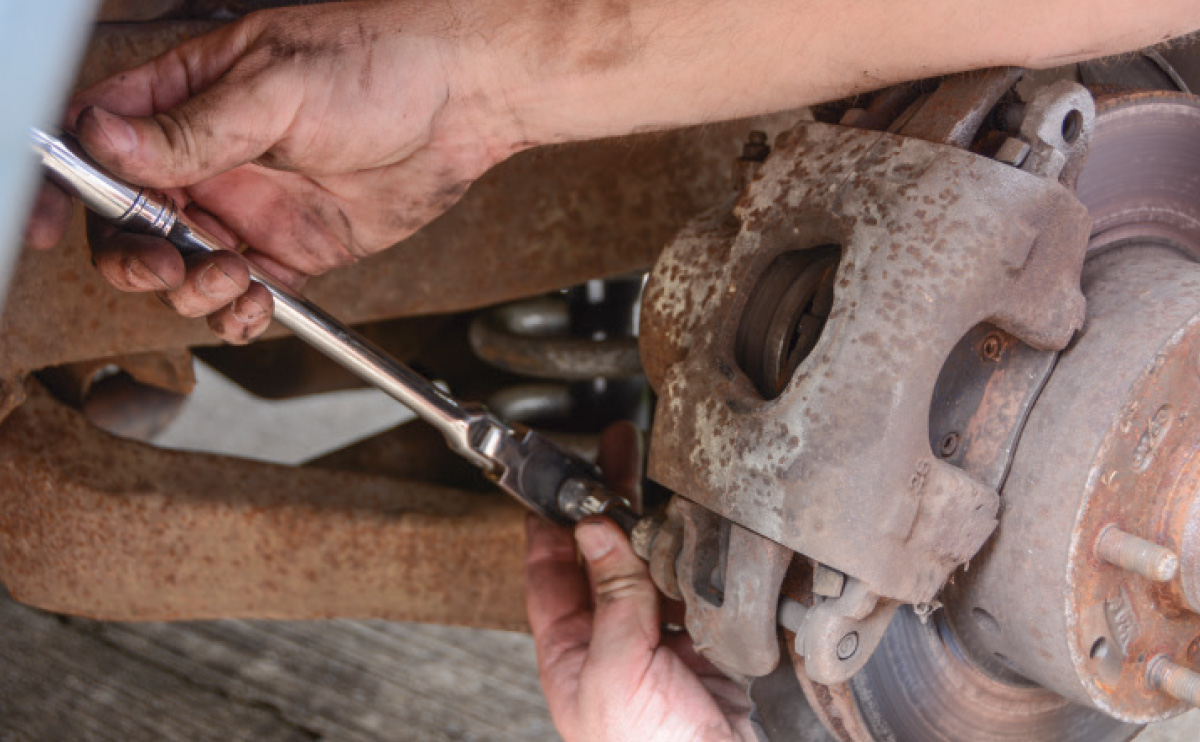
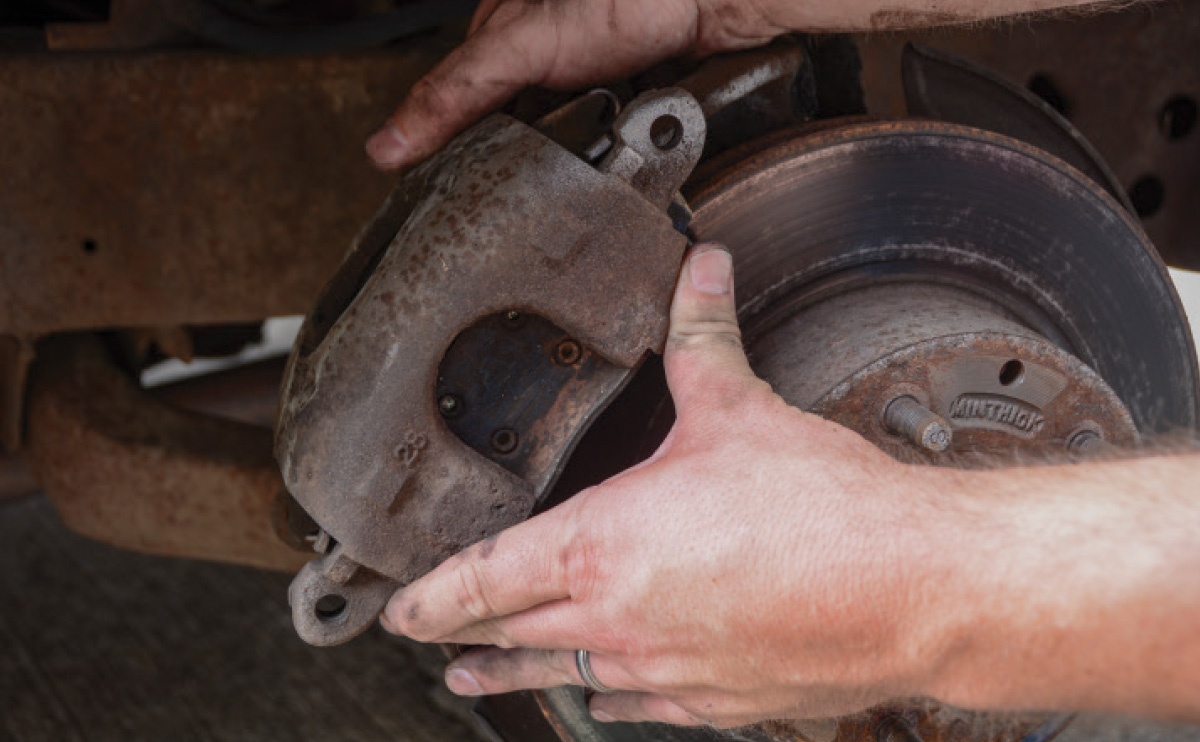
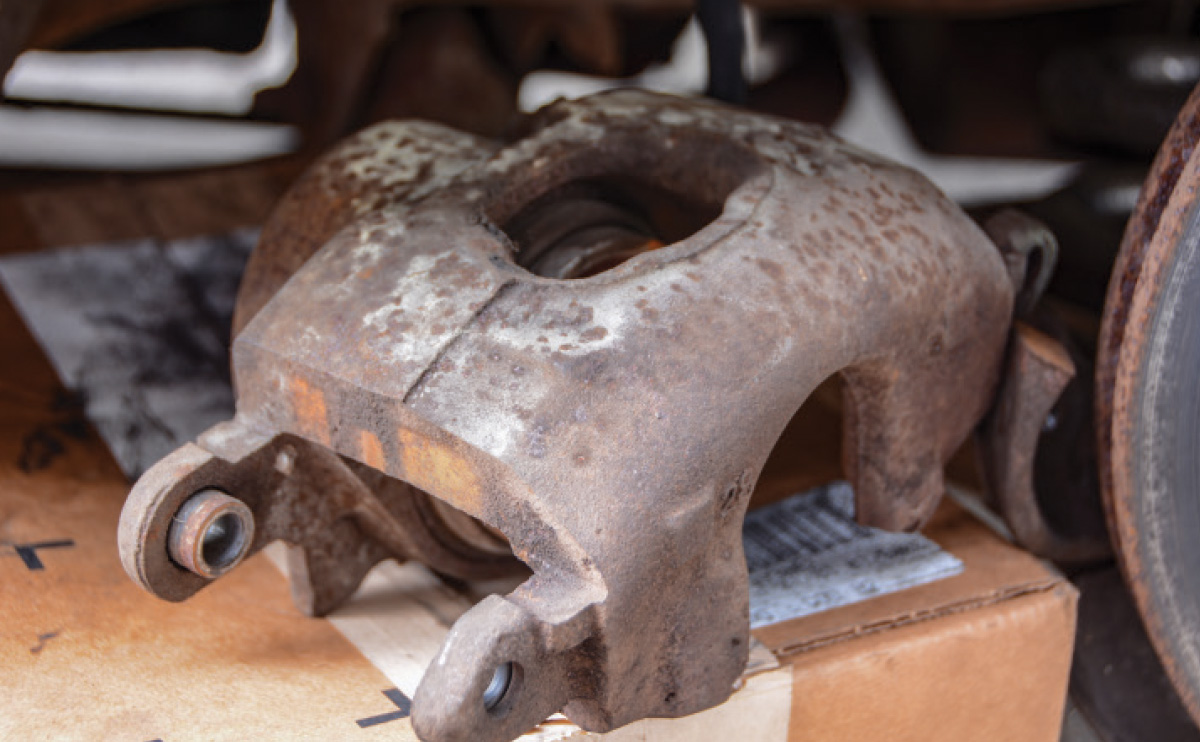
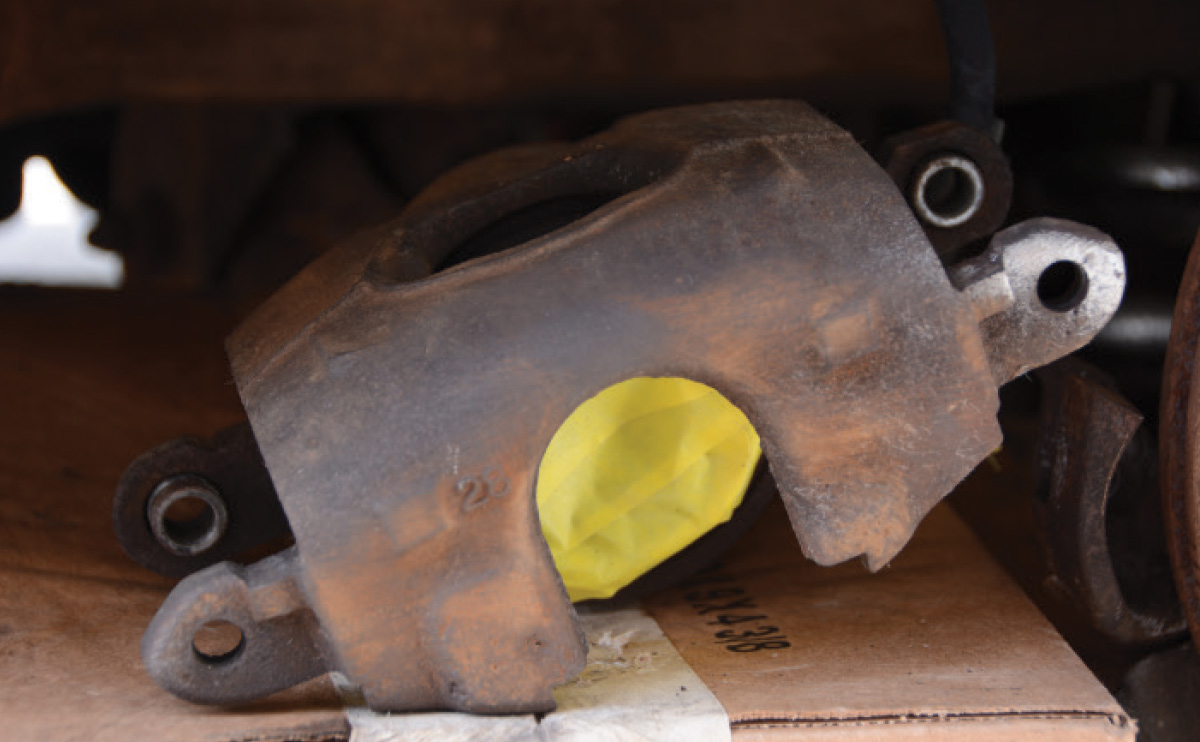
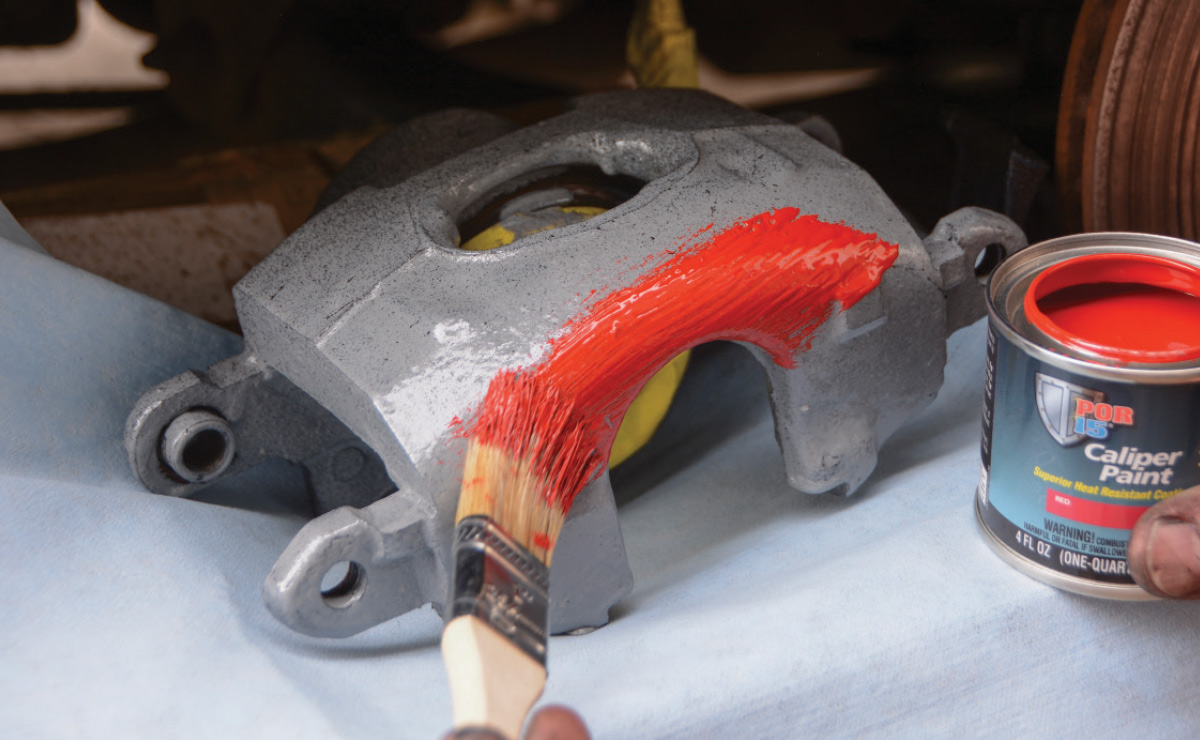
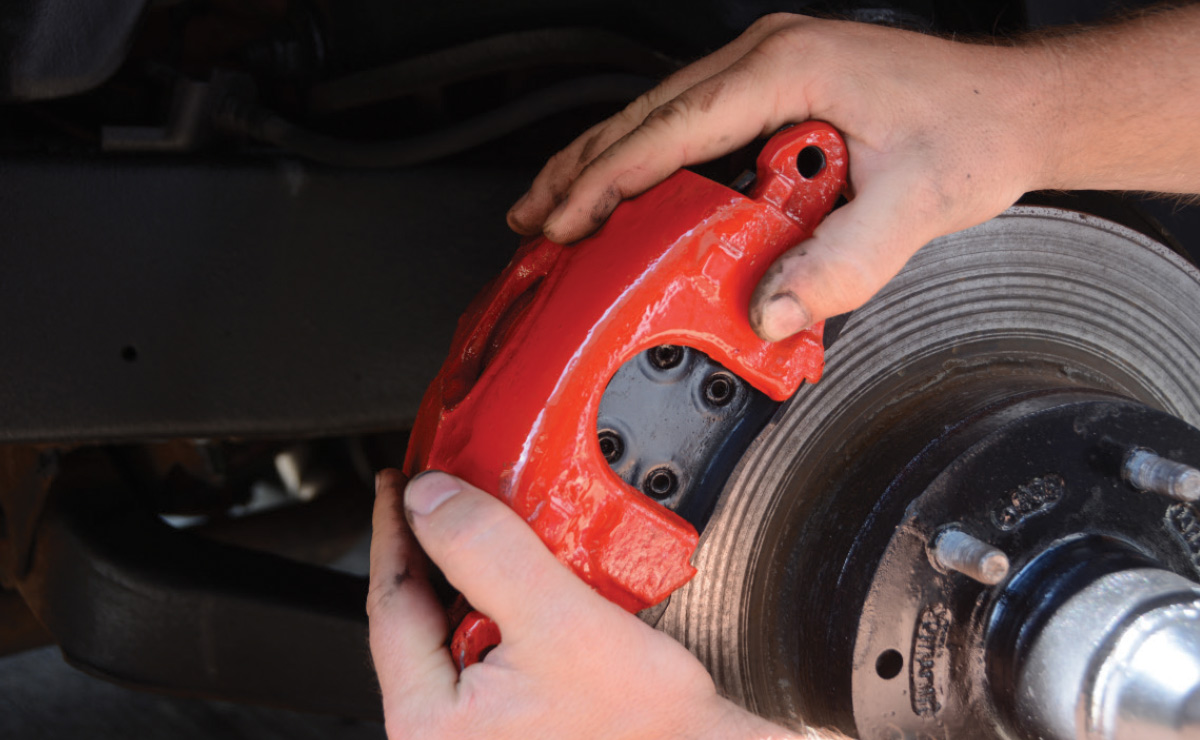
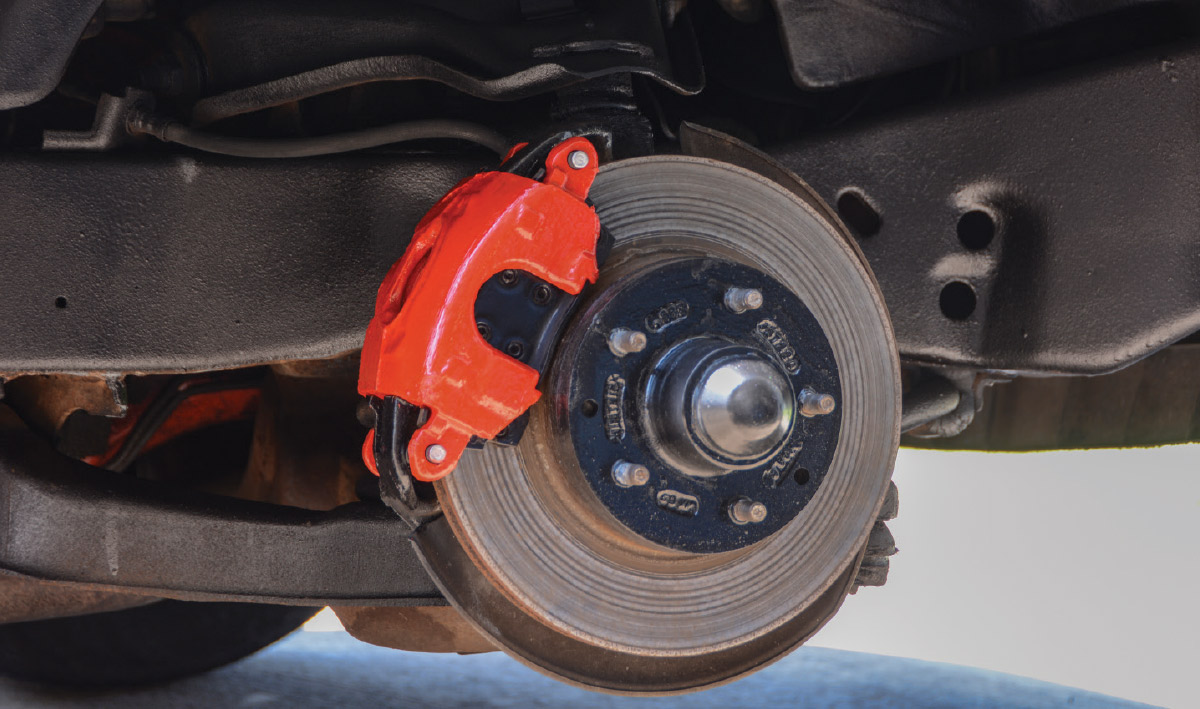
The car we’re working on already has disc brakes that work nicely. Upon inspection, the rotors look a little worn but they still function properly and have many more miles of service ahead of them. However, when we decided to swap to a new set of wheels, we realized that everything in the wheelwell shared the same shade of rust. This was especially apparent after we slid a new wheel over the studs and saw the crusty old brake caliper making itself visible between the spokes. It was time for a quick fix that would not only help our immediate dilemma, but also prevent rust from damaging the components.

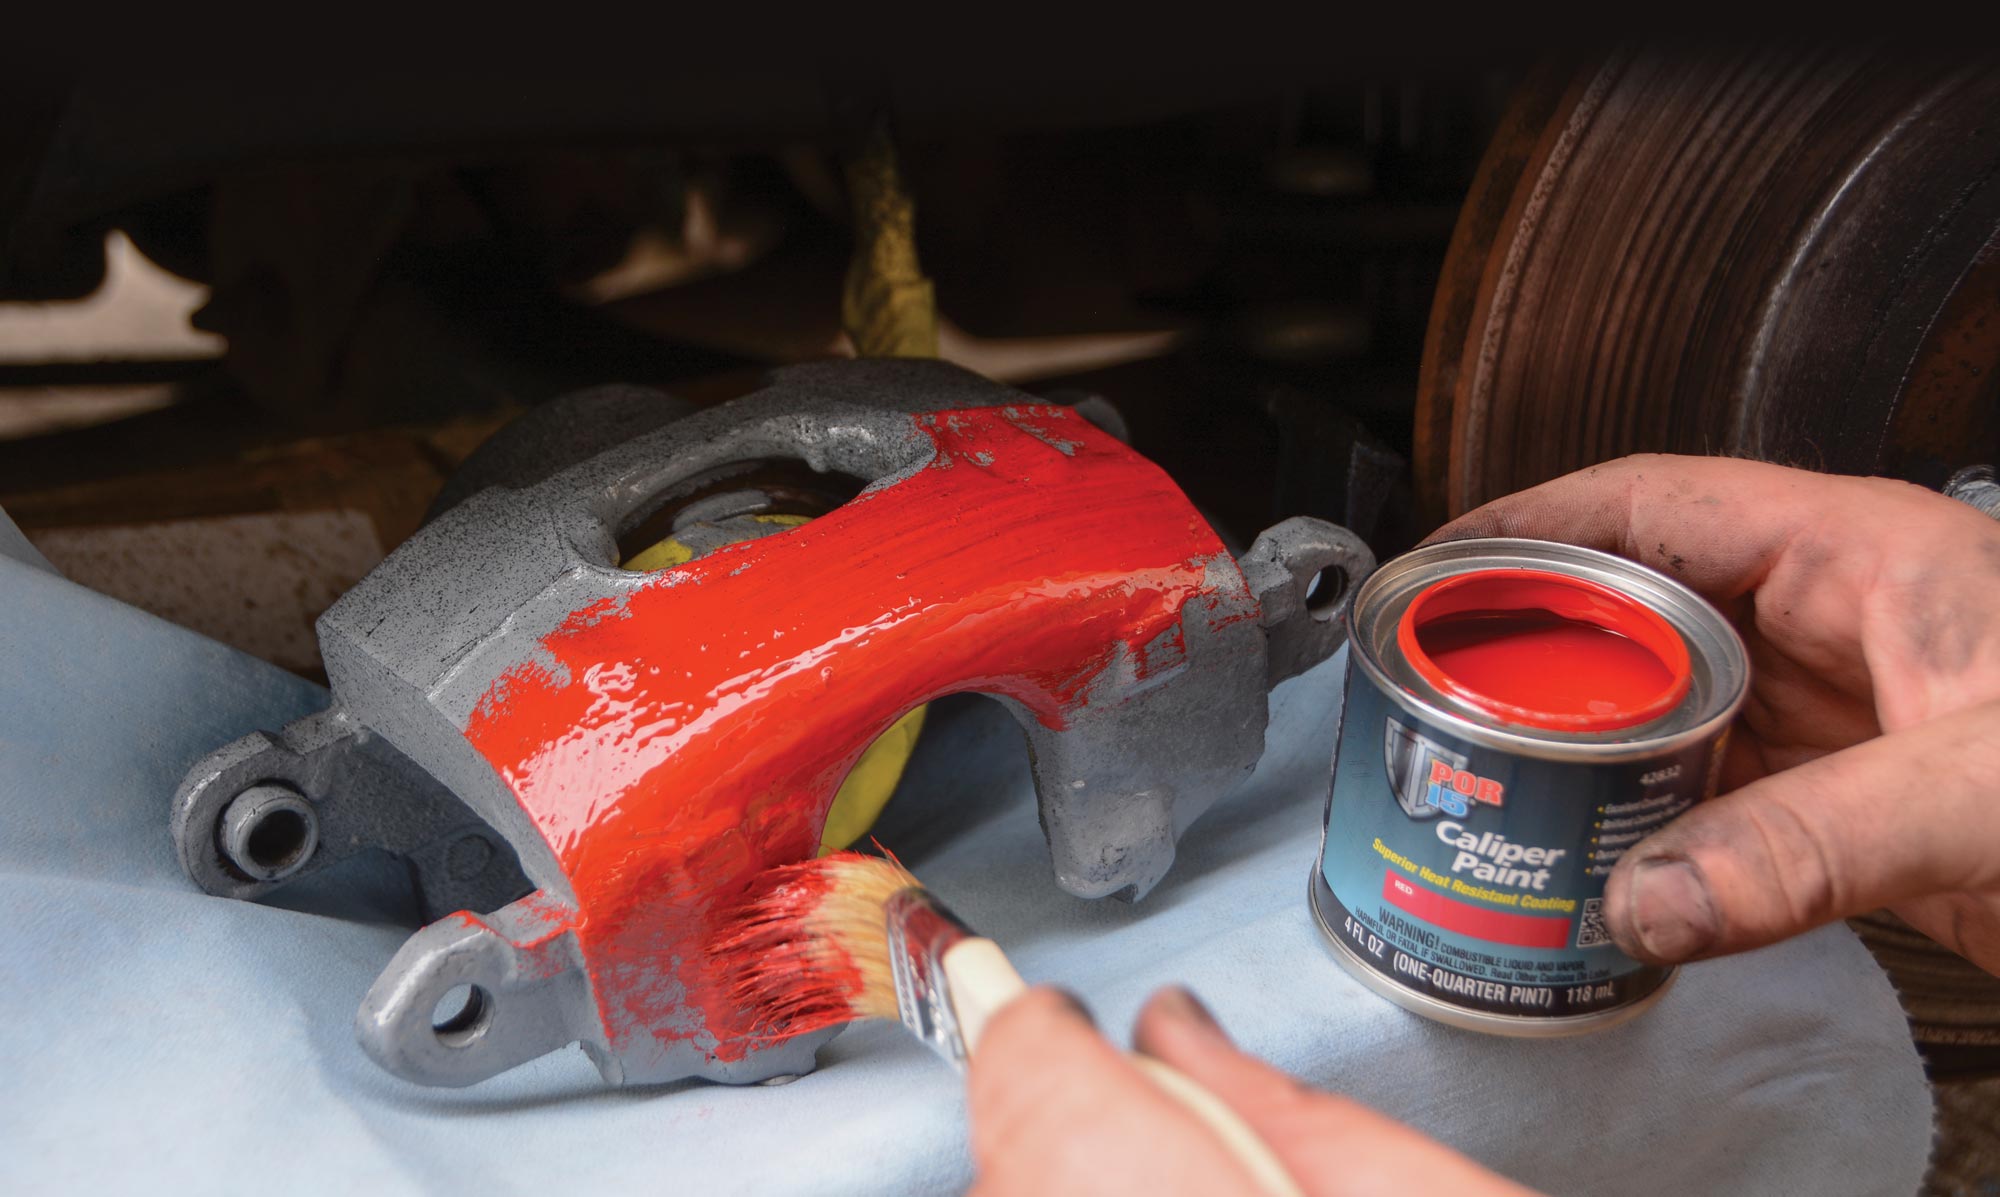
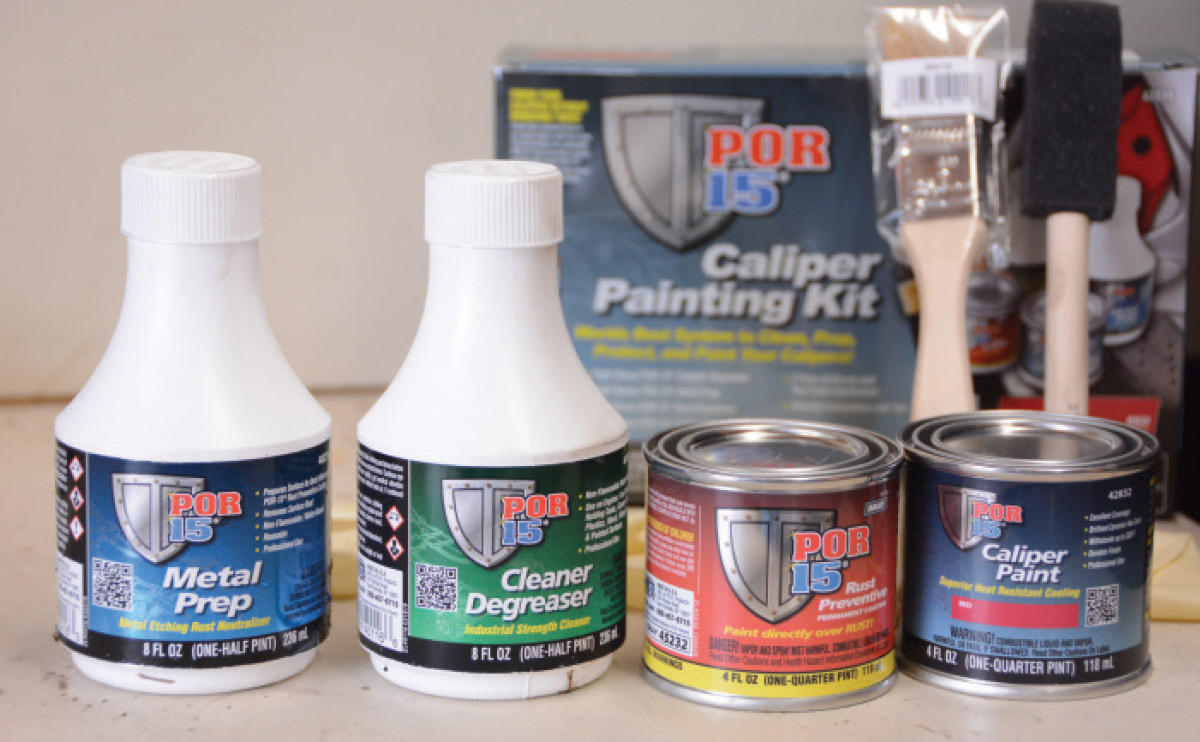
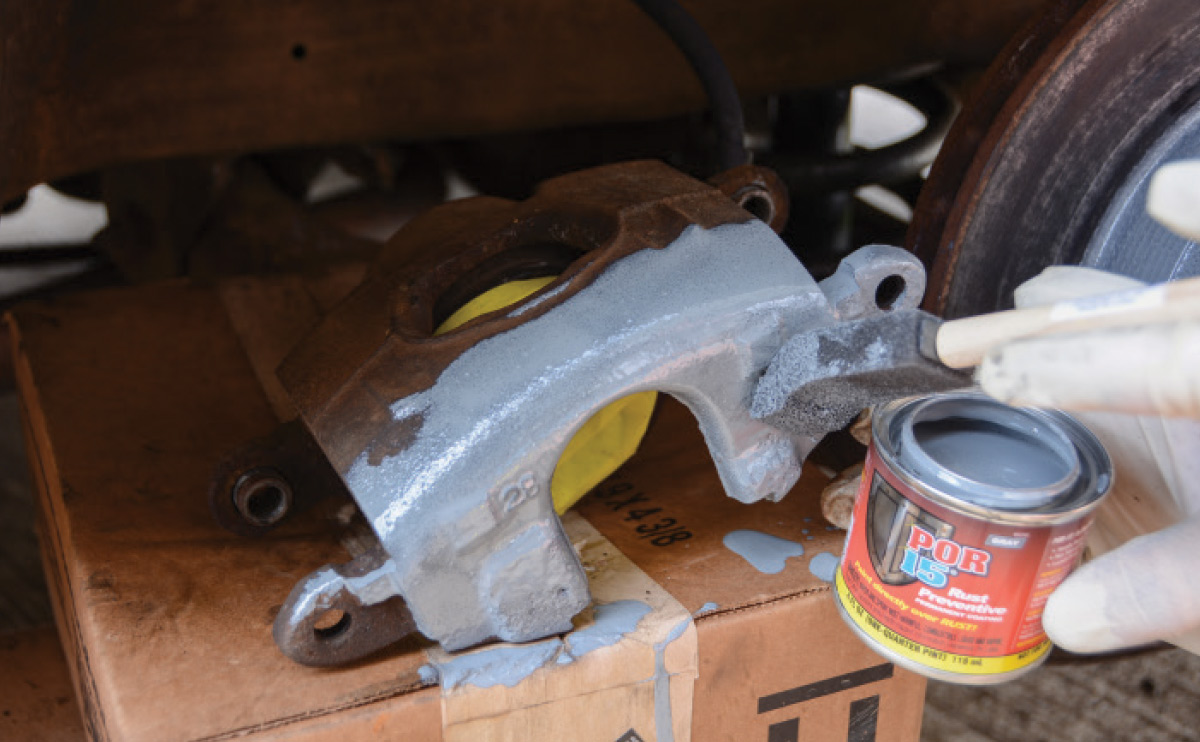
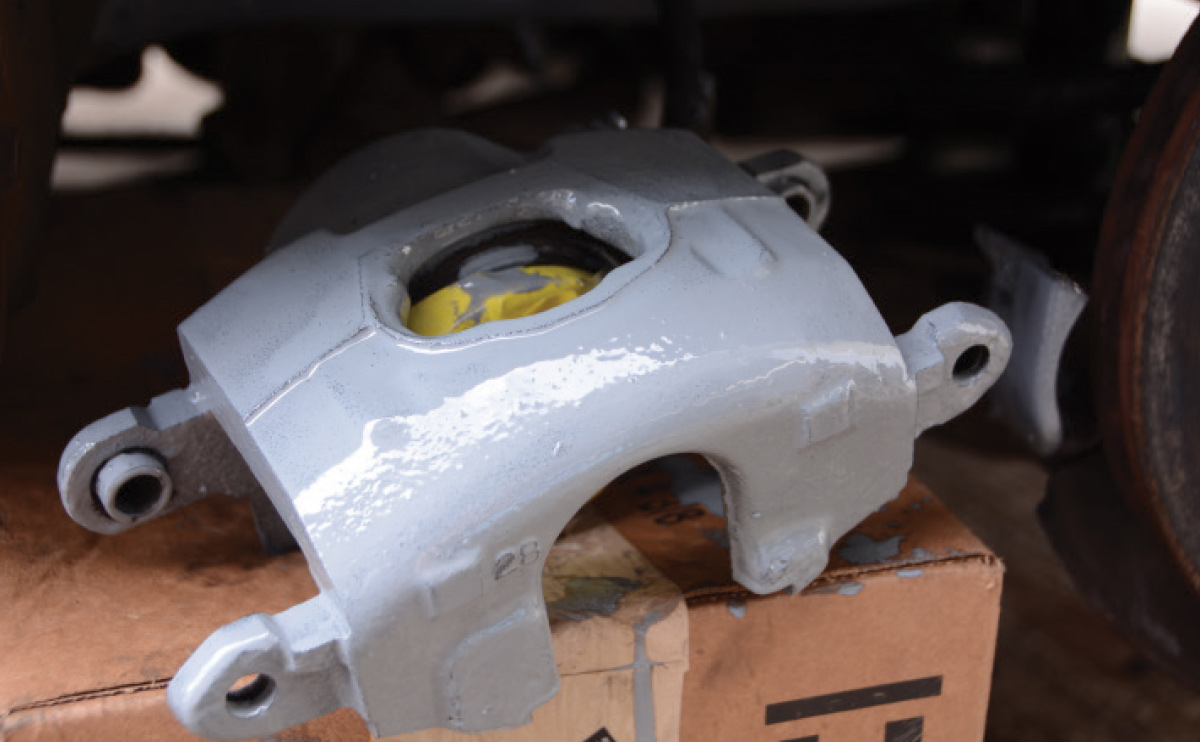
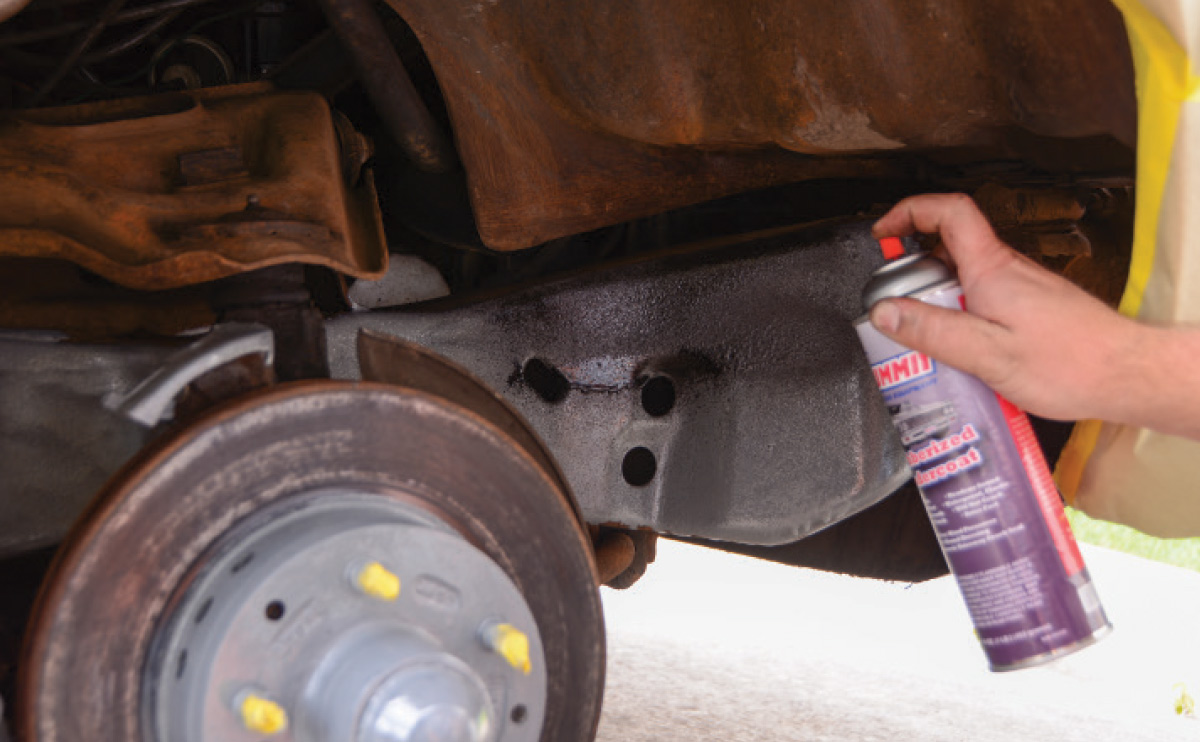
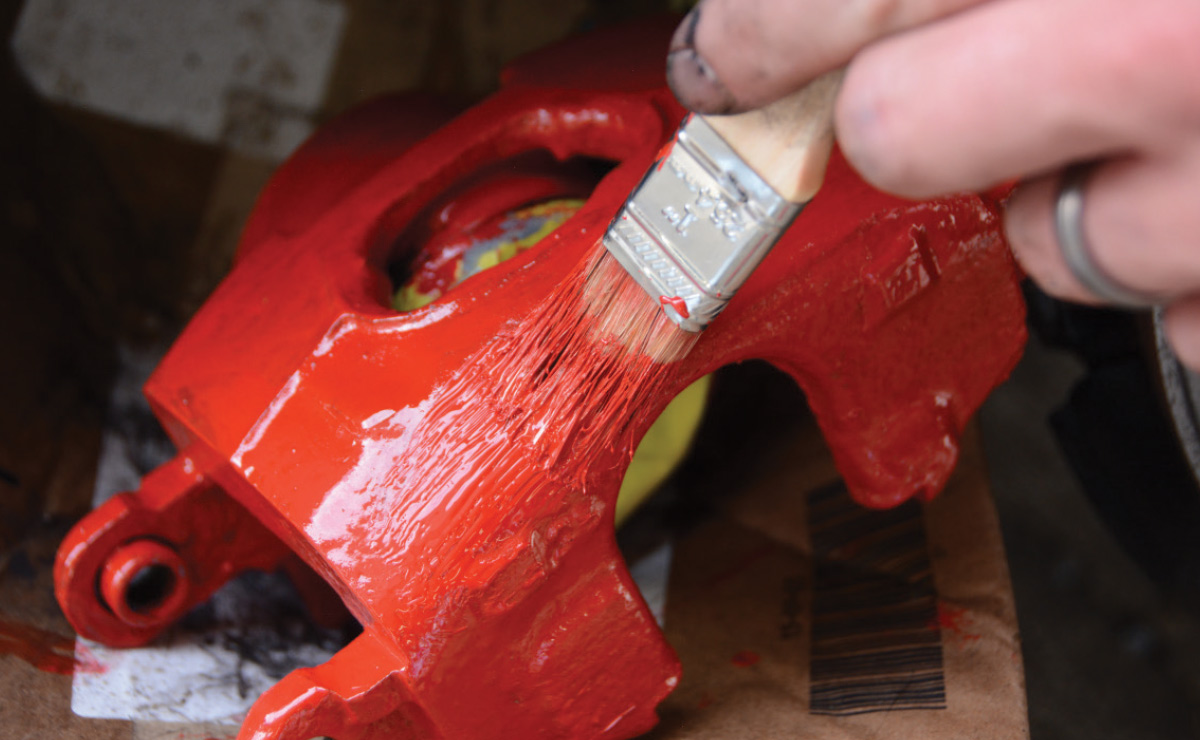
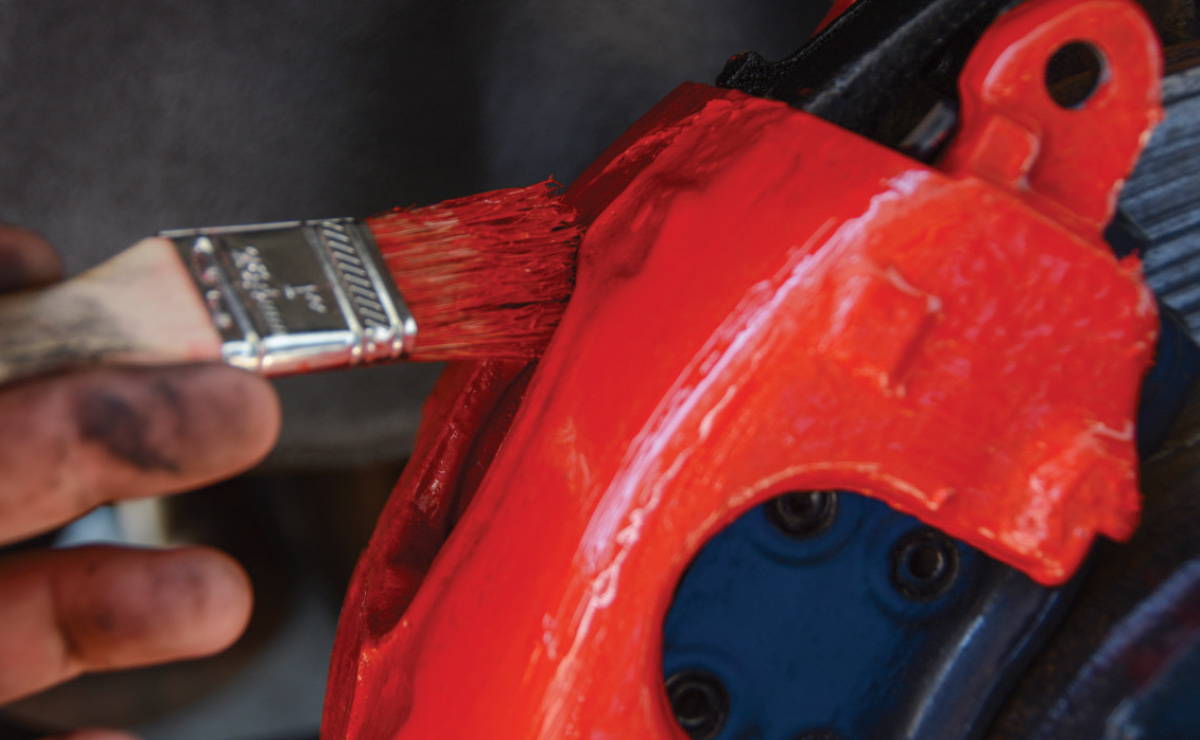
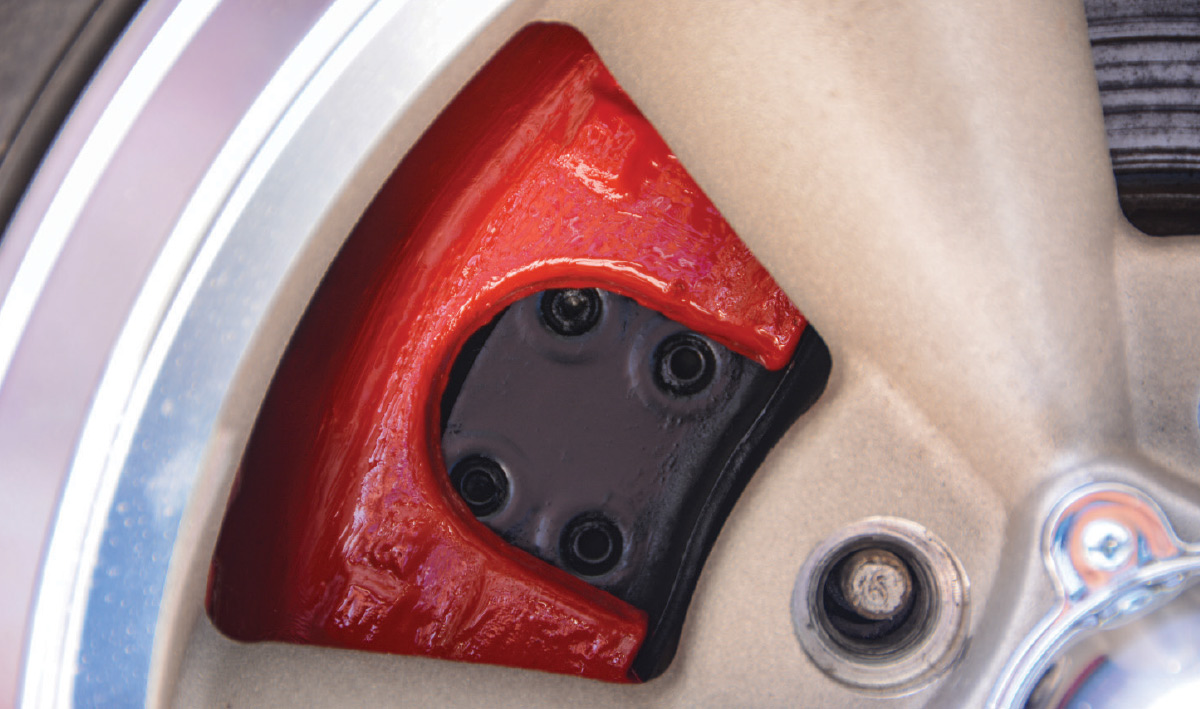
Our search sent us to SummitRacing.com and we immediately found an extremely affordable option produced by POR-15. It’s a caliper painting kit (PN POI-42839) and it included everything we needed for a quick refresh on our brake calipers. We also wanted to freshen the inner fender, framerail, and suspension pieces, so we grabbed a can of Summit Racing Rubberized Undercoating (PN SUM-941232). Our bill came out to about $50 and the materials arrived a couple days later. After a few hours of work we were able to make a huge difference in our hot rod project for less money than it takes to fill the gas tank.

Budget Brake Job
Surface rust has taken over the entire subframe, suspension, and braking components
1. This car drives like a dream, but the appearance is more like a nightmare. Surface rust has taken over the entire subframe, suspension, and braking components. With a few bucks and a few hours we’re going to refresh it.
3/8-inch Allen head bolts that hold the brake caliper in place
2. The first step is to remove the two 3/8-inch Allen head bolts that hold the brake caliper in place. We’re not going to remove the caliper completely, so we leave the brake hose in place to keep from having to bleed the brakes when we’re finished.
Bolts out of the way, we lift the caliper and remove the brake pads for inspection
3. With the bolts out of the way, we lift the caliper and remove the brake pads for inspection. We saw minimal wear, no cracking and nothing out of the ordinary.
Brake caliper supported so that it doesn’t hang by the rubber flex hose
4. It’s important to keep the brake caliper supported so that it doesn’t hang by the rubber flex hose. We’ll handle most of our work with the caliper resting on the box that the caliper paint kit shipped in.
POR-15 Caliper Painting Kit
5. The POR-15 Caliper Painting Kit we got from Summit Racing contains 8 ounces of cleaner, 8 ounces of metal prep, 4 ounces rust preventative paint, 4 ounces of caliper paint, a foam brush, a regular brush, and gloves.
POR-15 Cleaner/Degreaser bottle
6. First, we found a pump from a glass cleaner bottle and trimmed the straw to fit into the small POR-15 Cleaner/Degreaser bottle. Then, we sprayed the caliper and other crusty components that we plan to paint.
A wire brush helps loosen
7. A wire brush helps loosen any of the grease and grime and helps the degreaser reach into the coarse surface. After brushing, we give it another round of cleaner and let it air dry.
POR-15 Metal Prep spray
8. Next is the POR-15 Metal Prep spray. This solution immediately starts working into the rust, and reaches deep into the surface. The Metal Prep is also allowed to air dry.
Caliper dries, we mask off a few key components
9. After the caliper dries, we mask off a few key components, including the piston, the rubber flex hose, and the bleeder screw.
POR-15 rust preventative coating comes in gray
10. The POR-15 rust preventative coating comes in gray. We applied it with the supplied foam brush. If your parts are as crusty as ours, you might consider investing in a couple more foam brushes, as the rough surface takes its toll on the delicate foam.
We allowed the rust preventative coating to dry for about 30 minutes and then applied another coat
11. We allowed the rust preventative coating to dry for about 30 minutes and then applied another coat. The instructions say to let this sit for a couple hours before applying a topcoat.
Rust preventative coating to dry, we wire brushed the framerail, inner fender, and control arms
12. While we waited on the rust preventative coating to dry, we wire brushed the framerail, inner fender, and control arms. Then, we applied the Summit Racing Rubberized Undercoating. One can offered plenty of material to cover both sides.
Summit Racing offers these POR-15 kits
13. Now it’s time to start applying the caliper paint. Summit Racing offers these POR-15 kits in a variety of colors (red, yellow, silver, black, and blue). We chose red for a nice contrast against all of the black components.
The supplied 1-inch brush is a great size to make quick work of the caliper
14. The supplied 1-inch brush is a great size to make quick work of the caliper. The paint is thick and flows out nicely so the brush strokes disappear as it dries. We went back with a second coat.
Slid the caliper back into place and tightened the original caliper bolts
15. After the paint dried, we slid the caliper back into place and tightened the original caliper bolts. Also notice that we applied a quick coat of black paint on the hub area to prevent further surface rust.
The paint dries with a nice gloss and offers a durable finish in a high-heat environment
16. With the caliper in place, we can do any final touch-ups. The paint dries with a nice gloss and offers a durable finish in a high-heat environment. We had plenty of paint leftover after tackling the front calipers, so a 4-ounce can will cover four calipers with ease.
Installed Brake
17. A few bucks and a few hours later, we’ve given our project a quick makeover and we’re ready to bolt the new wheels into place and hit the road. Now we’ll repeat the process on the other side.
Vintage Wheel Works V45 wheels
18. We’re pleased with the new view between the spokes of our Vintage Wheel Works V45 wheels and we’re ready to continue refreshing this tired Chevy without breaking the bank.
 SOURCE
Summit Racing
summitracing.com
Modern Rodding
VOLUME 2 • ISSUE 14 • 2021