Modern Rodding TECH

InTheGarageMedia.com

red '55 Bel Air hardtop hot rod
1. Beginning your project with the best car you can find is always a good idea. This restored ’55 Bel Air hardtop was by no means a Concours restoration, but it was a solid start for a Pro Touring hot rod.
INDEPENDENCE DAY
Four-Wheel Independent Suspension for the Tri-Five Chevy
By Gerry Burger Photography by Chadly Johnson
D

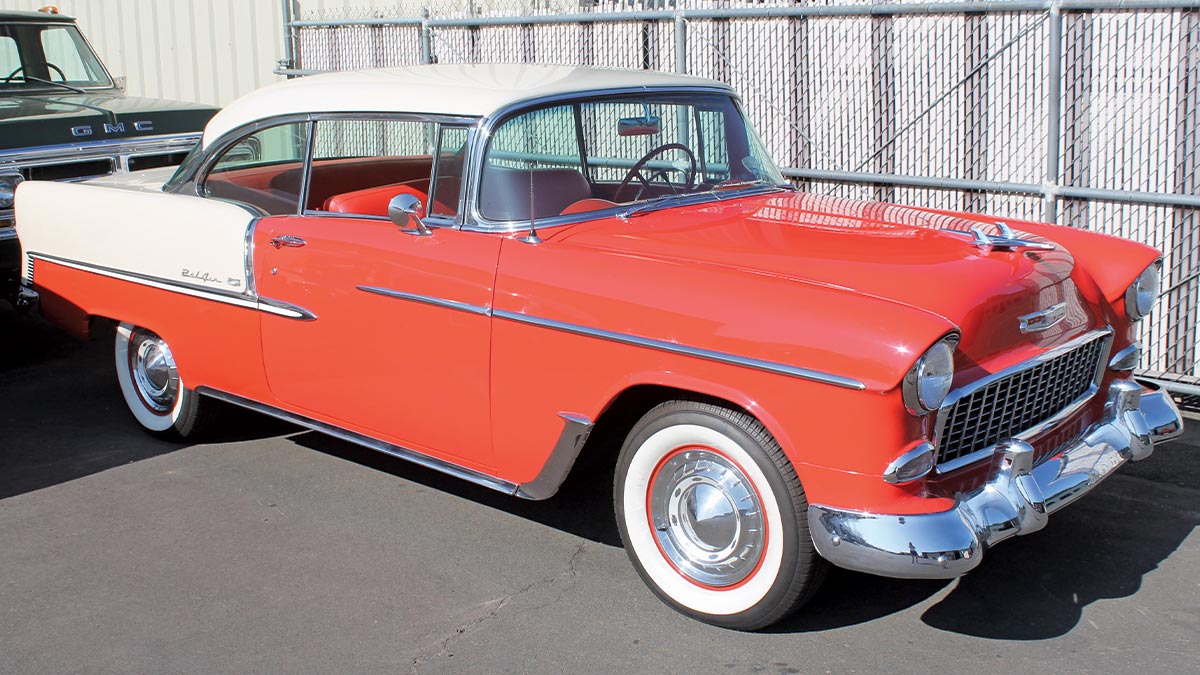
avid Goodwin is like most of our readers: he has been a car lover his entire life. His first new car was an SS 396 Chevelle, so you know he enjoys performance, too. Growing up in the ’60s Goodwin remembers several hot rod ’55 Chevrolets; he once owned a more traditional hot rod ’55 Chevy before he began scheming to build a Pro Touring Bel Air. So, he set about doing two things; first was finding a good car to modify. Goodwin knew there was no better money spent than on the original car. Paying a bit more up front for a good example saves you money in the end and leads to a better-finished product.

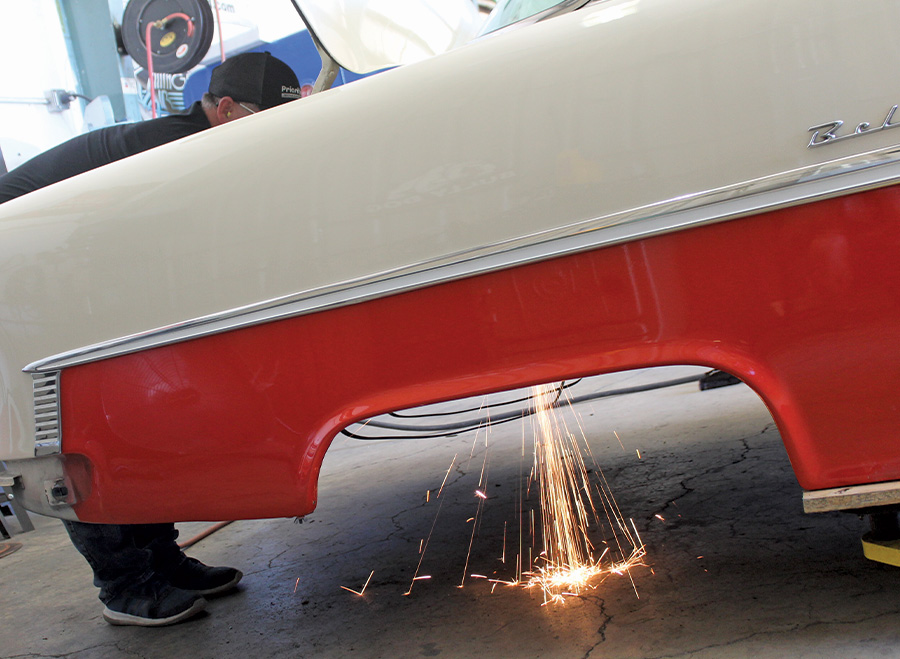
He located a restored ’55 Chevrolet Bel Air hardtop on eBay. It appears the car was subject to a “body-on” restoration in the past and was represented as an excellent car. As we all know, one man’s excellent is another man’s just average. Like many purchases based solely on photographs and descriptions, this purchase came with some surprises, but we would still classify the ’55 as a good start. While the car was far from perfect, it had good “bones,” making it an excellent candidate for the desired modifications. Keeping the body mostly original was the easy part. Going the Pro Touring route by adding four-wheel independent suspension, Detroit Speed power rack-and-pinion steering, big Wilwood disc brakes on all four corners, and modern LS9 horsepower underhood sounded a bit more involved.

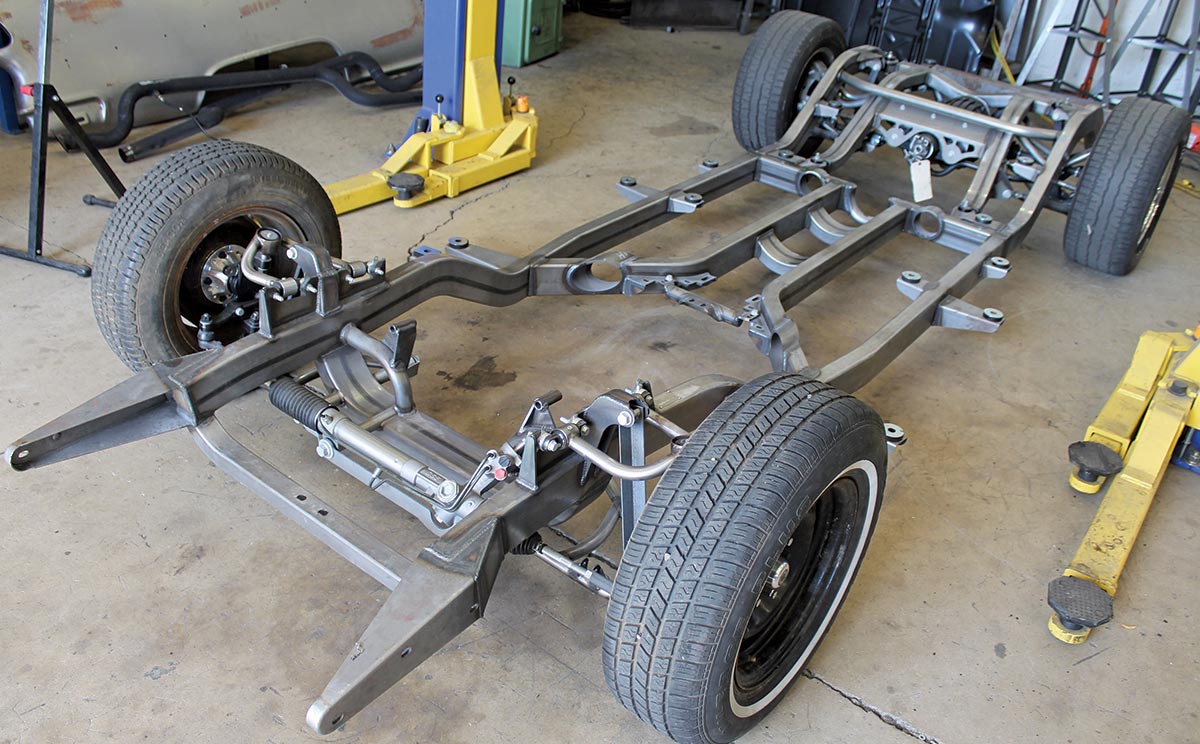
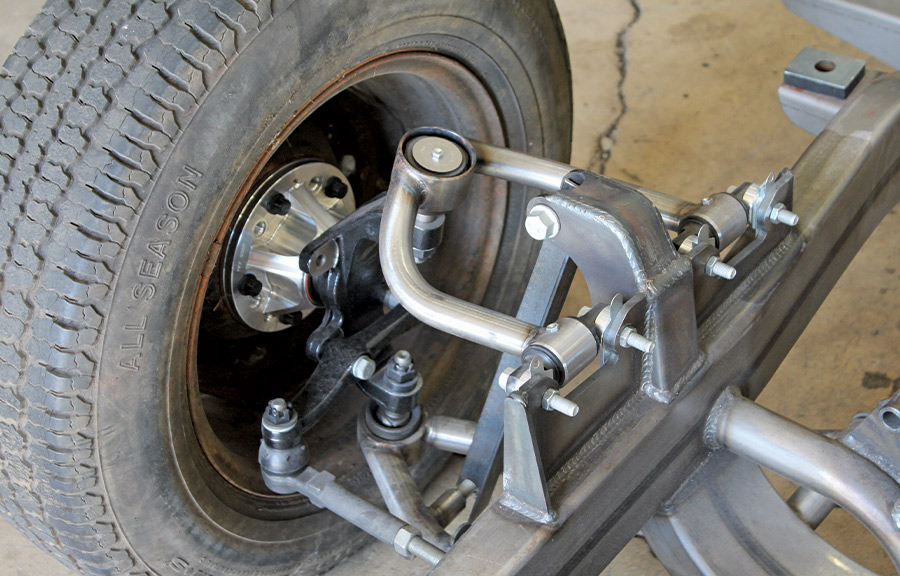
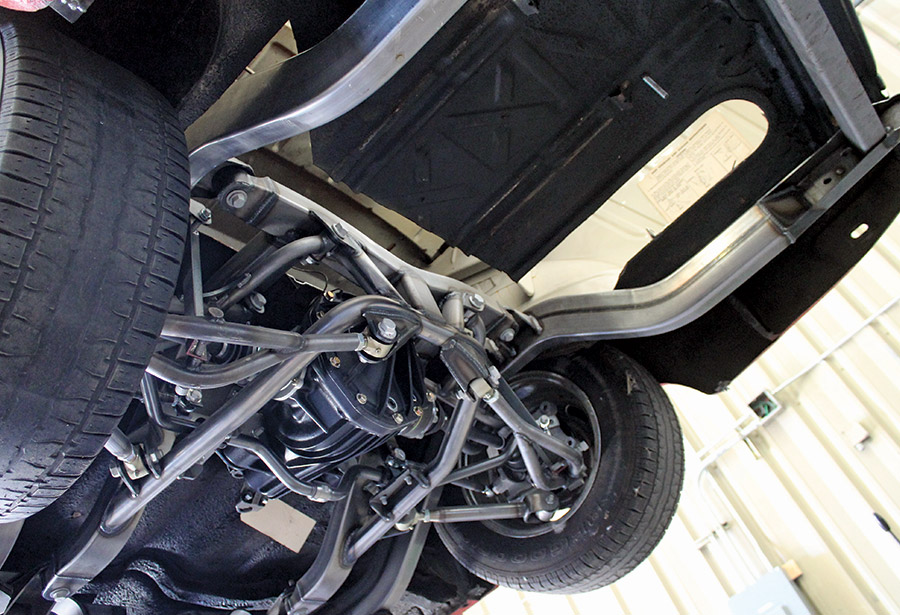
This brings us to the second thing he set out to do: Finding the right shop for the build. After checking out MetalWorks Speed Shop in Eugene, Oregon, Goodwin knew he had found the perfect shop to perform the Pro Touring transformation. Before any work began there would be a detailed one-on-one consultation with shop owner Jon Mannila to be certain they were “on the same page.” Could the original chassis be modified? Certainly. However, there is a simpler, more cost-effective and far superior way to achieve the desired goal in one very clean rolling package from Art Morrison Enterprises (AME).

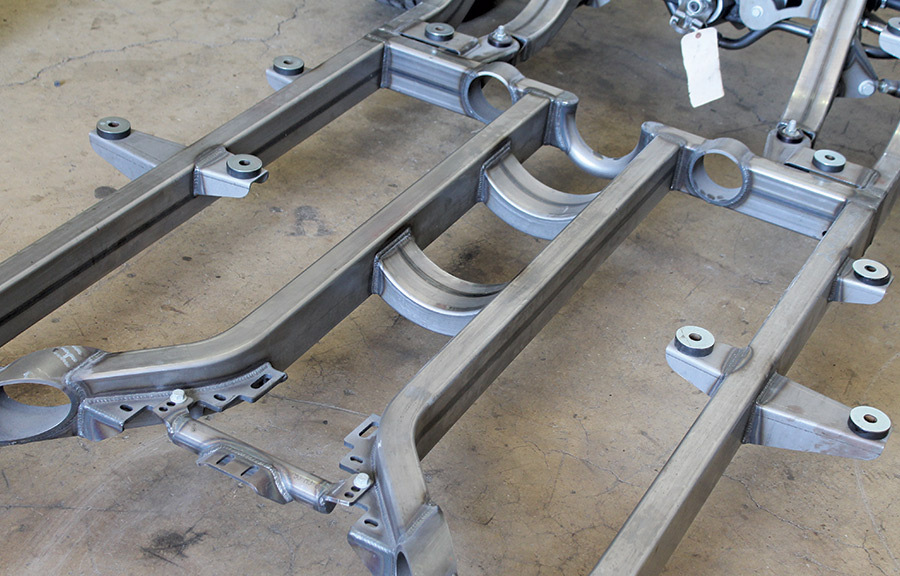
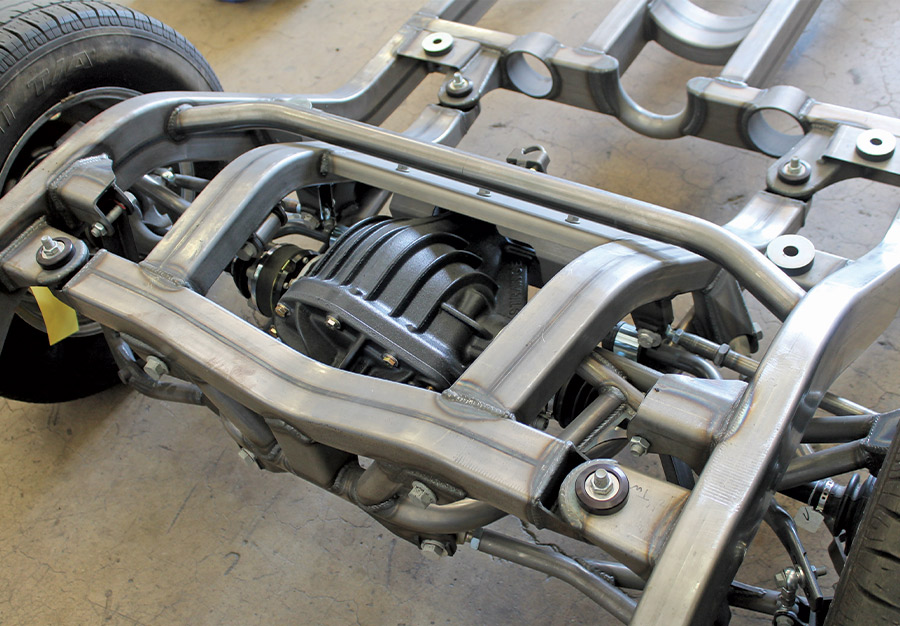
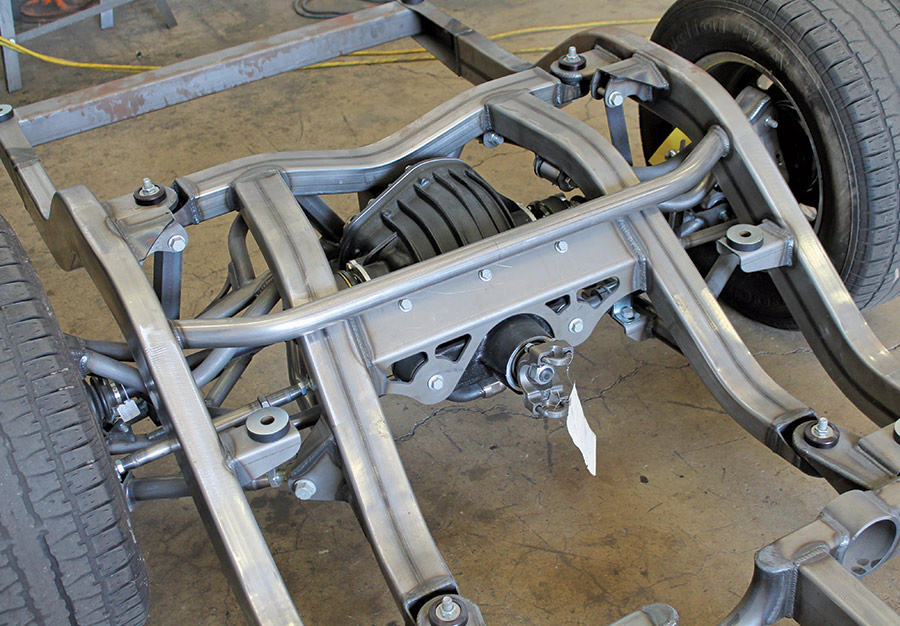
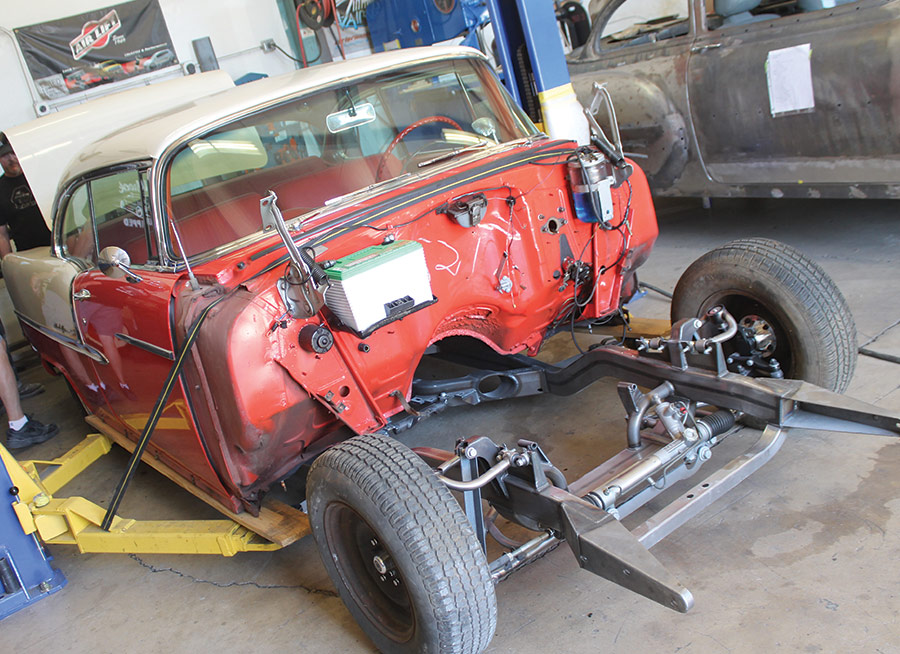
The Tri-Five chassis has long been a mainstay for AME, and it can be configured to your needs. It turns out AME has a package that embodies everything needed for the Pro Touring conversion. It was a simple matter of placing an order for a complete, new AME chassis.

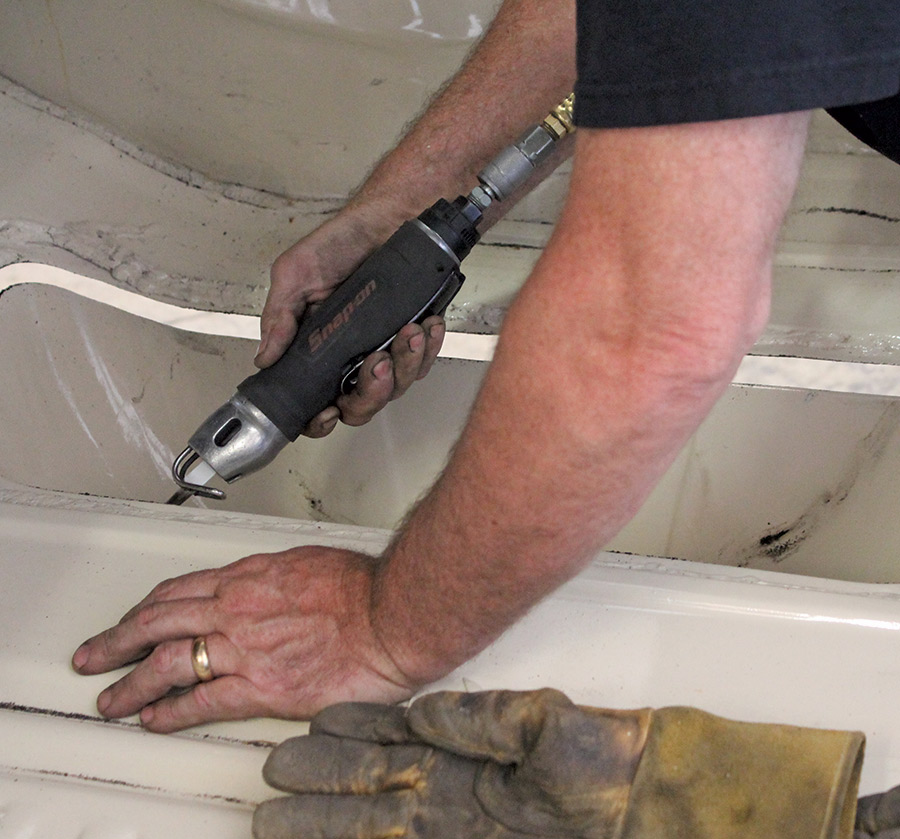
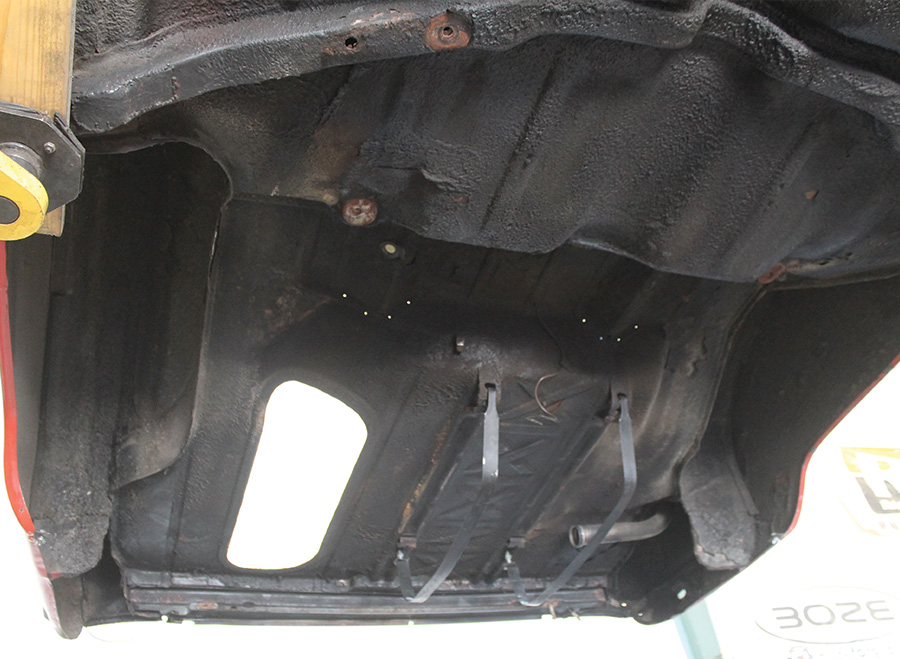
While they were waiting for the new chassis to arrive, the body was separated from the original restored chassis and prepared for mounting on the new frame. During this disassembly process, the car was examined closely for rust, rot, and other defects. It turns out the car was in above-average condition but still requiring some rust repair. It was a good start.

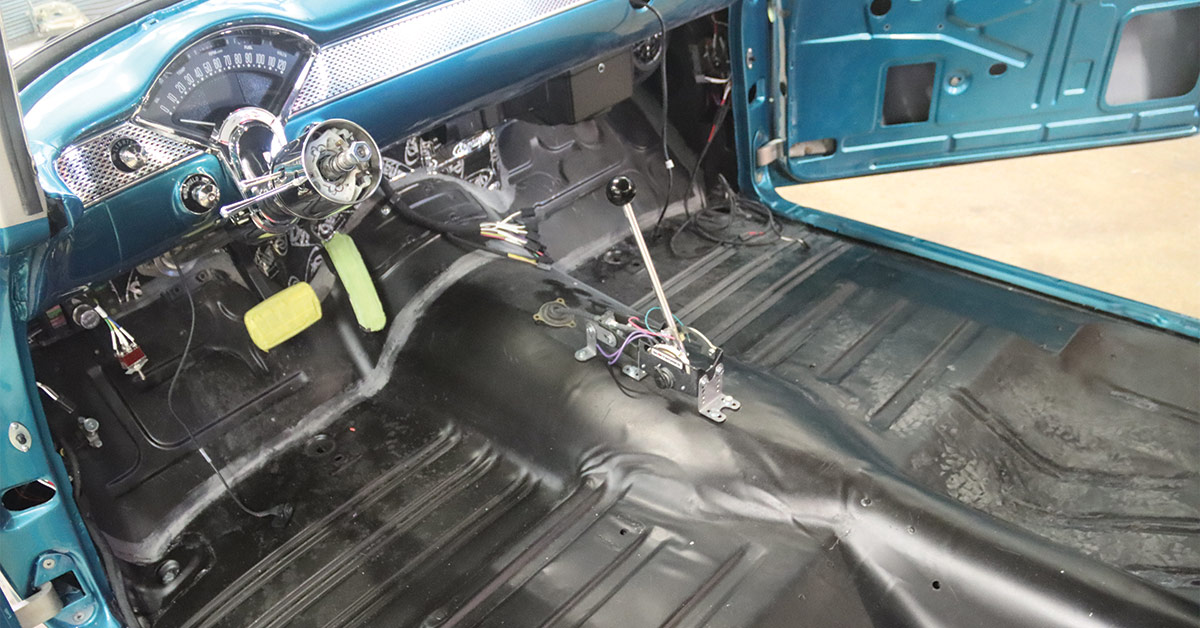
Once the chassis arrived the car was mated with the new AME chassis. Because of the desired independent rear suspension, the trunk floor was removed and replaced, including the original spare tirewell. A reproduction floorpan was used in the trunk area, and it blends perfectly with the custom-formed panel that covers the new rear suspension. This custom floor panel then joins the original front floor area. New, larger inner wheelhouses were welded in place to facilitate the 20×12 Budnik rear wheels and Michelin tires.

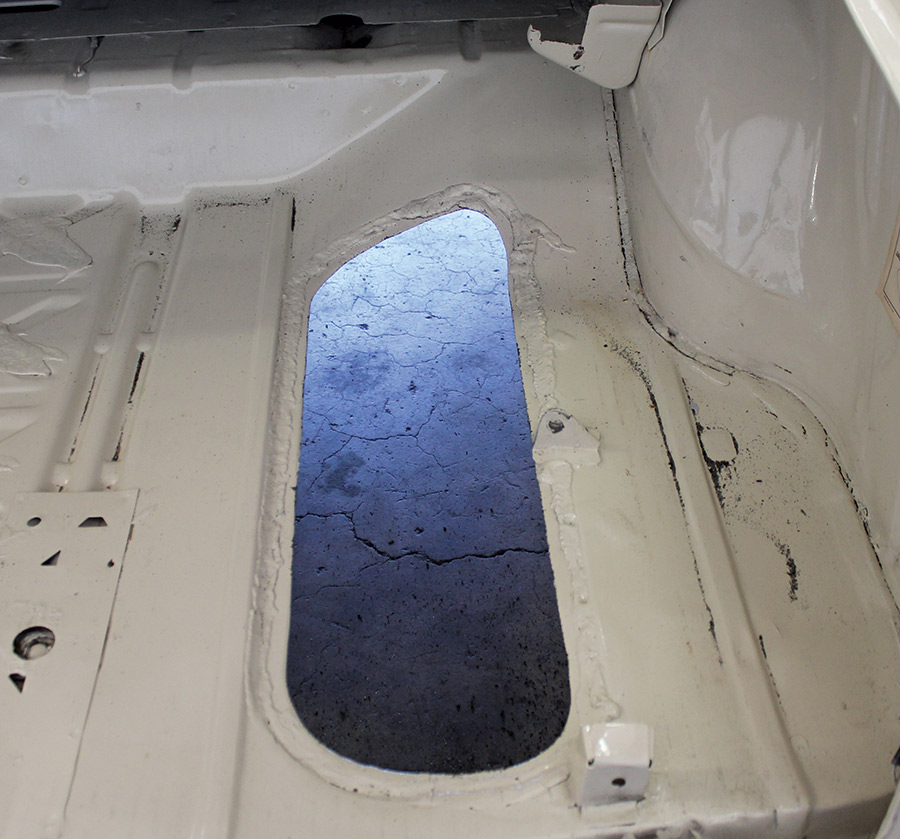
Up front, the original transmission tunnel remains and the minimal rust on the floor was neatly repaired. Since the battery would be removed from the firewall, along with numerous other holes to be filled, it was determined a new firewall would be cleaner and provide the perfect backdrop for the Wegner Motorsports–built LS9 engine.

And so, with a bit of judicious cutting, grinding, and welding, the floor was now neatly shaped to fit the chassis. By using the original-style trunk floorpan the view from under the car might have you thinking the floor was never cut. There can be no higher compliment than making a major modification look like nothing has been touched. And just like that, we have a Pro Touring roller.

Art Morrison Enterprises chassis
2. The days of modifying the original chassis are over. In today’s world, rolling a completely new chassis under the original body is the order of the day. This Art Morrison Enterprises (AME) chassis will transform the ’55 in every way.
closeup of Art Morrison Enterprises chassis
3. Up front tubular control arms, power rack-and-pinion steering, and motor mounts for the LS9 motor were all in place. Coilover shocks will replace the angle iron struts between the control arms.
closeup of the AME front suspension
4. A closer look at the AME front suspension shows flawless welding and stout mounting brackets for the front control arms. There is no doubt this chassis is superior to the original frame in every way.
closeup of the center of an AME chassis to show the large ports in the X-member
5. The center of the chassis is equally as strong as the formed box tubing crossmembers. Large ports in the X-member allow for high-performance exhaust systems and note all factory body mounts are present.
view of the chassis rear suspension
6. Independent rear suspension will provide a great ride and improved handling. This suspension requires a modified rear floorpan. The team at MetalWorks Speed Shop handled the transformation with ease.
closeup of the chassis frame
7. Looking from the front you can see the IRS is contained in its subframe that mounts to the main chassis at four points. Bushing at the mounting points reduces noise and vibration from the rear suspension.
closeup of person removing the original stock floor
8. With the ’55 Chevy body off the original frame it was time to remove the stock floor to make room for the new IRS. First, the original spare tirewell was removed.
view of the car floor with the spare tirewell removed
9. With the spare tirewell out of the car you can see this was a solid car. Note the step up in the original floorpan; this would not be enough to clear the new IRS.
view of the underside of the car
10. Looking from the bottom you can see the fuel tank must be relocated. Those original wheelhouses are too small for high-performance Pro Touring–style tires. Factory undercoating covers most of the floor.
person removing the floor from the trunk area
11. Let the sparks fly! It’s time to remove the entire floor from the trunk area and up under the package tray.
chassis being rolled underneath the original '55 Bel Air
12. After removing the trunk floor, the chassis was rolled under the original ’55 Bel Air. All body mounts align perfectly on the AME chassis. That battery will be relocated to the trunk area.
'55 Bel Air outdoors
13. Rolling the ’55 out into the daylight the Bel Air takes on a pronounced Pro Touring stance—performance, style, and function all in one modern package.
IRS protruding into the trunk floor area
14. Here we see the IRS protruding up into the trunk floor area. The remainder of the floor will be removed after the car is brought down to bare metal.
view of the AME IRS from underneath
15. Looking from underneath at that AME IRS sure is impressive. Stance, handling, and exotic good looks all wrapped in one neat package.
view of the modified reproduction floorpan
16. In the end the entire trunk floor was replaced with a modified reproduction floorpan. A custom-formed panel goes from the front of that floorpan and connects to the original floors in the car.
view of the custom-formed floor panel
17. The custom-formed panel that goes over the front of the IRS blends perfectly with the original floorpan. The completed floor has a real “factory-installed” look. Only the rearmost section of the driveshaft tunnel was modified.
view of the front floorpans after being repaired by MetalWorks Speed Shop
18. We mentioned this was a good solid car. Those are original front floorpans and just a couple of rust areas were masterfully repaired by MetalWorks Speed Shop. The original transmission tunnel mates to a new firewall.
view of the new wheelhouse
19. OK, fast-forward to the finished floor. New wheelhouses could pass for factory units despite the increased size. The battery is neatly located over the rear axles, the perfect location for weight distribution.
Nick McMath laying down a layer of Dynamat int he interior of the car
20. MetalWorks’ Nick McMath lays down a layer of Dynamat to keep noise and heat gain to a minimum. This material will mute noise and vibration from the interior of the car.
view of the finished trunk
21. Here’s the finished trunk area, ready to head to the upholstery shop. Even with the IRS, there is ample room for luggage for those upcoming Pro Touring road trips in David Goodwin’s thoroughly modern ’55 Chevrolet.
SOURCES
Modern Rodding
VOLUME 5 • ISSUE 44 • 2024