Modern Rodding TECH

InTheGarageMedia.com

’34 Chrysler Fordor Sedan
1. Terry Thompson’s ’34 Chrysler sedan had been updated with disc brakes, tube shocks, and a steering box change sometime in the past. These were typical modifications in the past century but they had served their time; out with the old and in with the new.
Independent Thinking
Less Weight, Modern R&P Steering, and Improved Braking in One Tidy Fatman Fabrications Package
By Gerry Burger Photography by Kenneth Denney
T

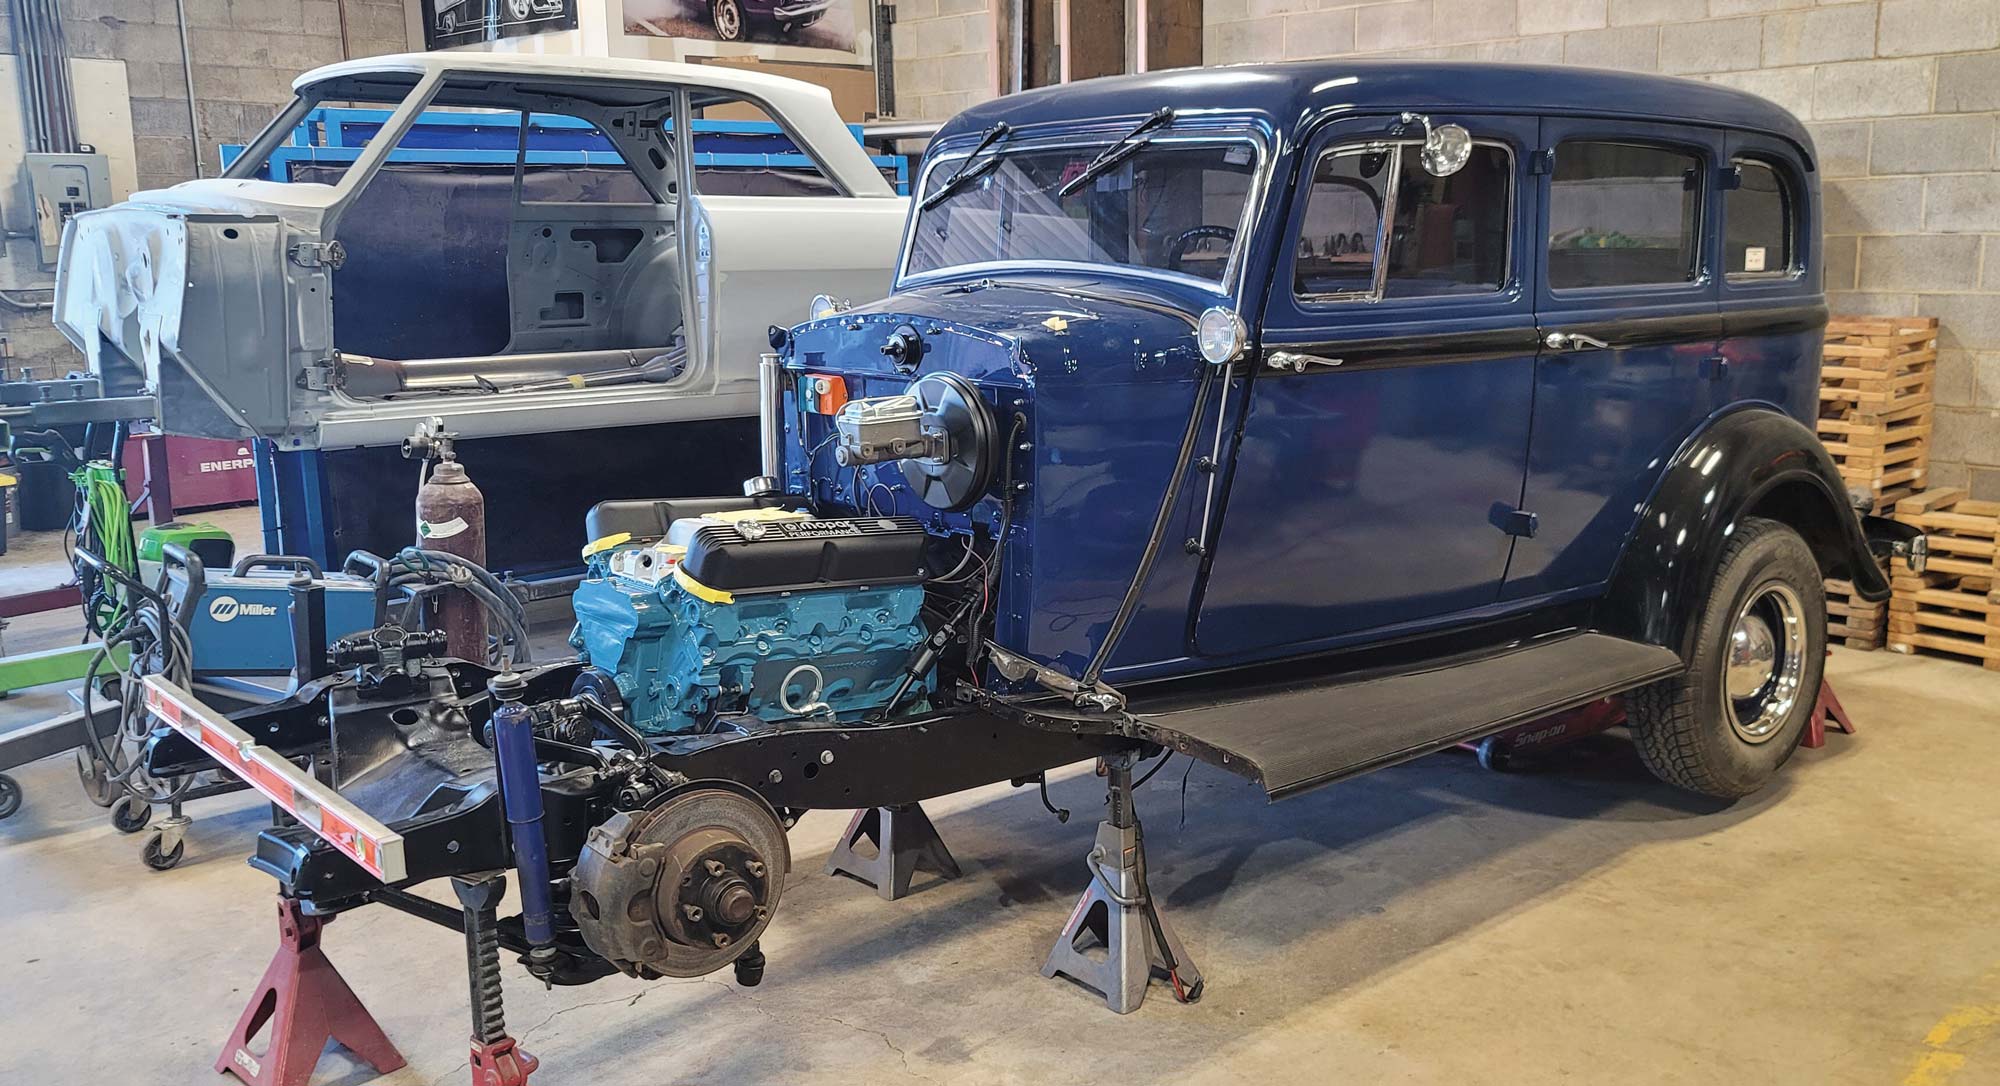
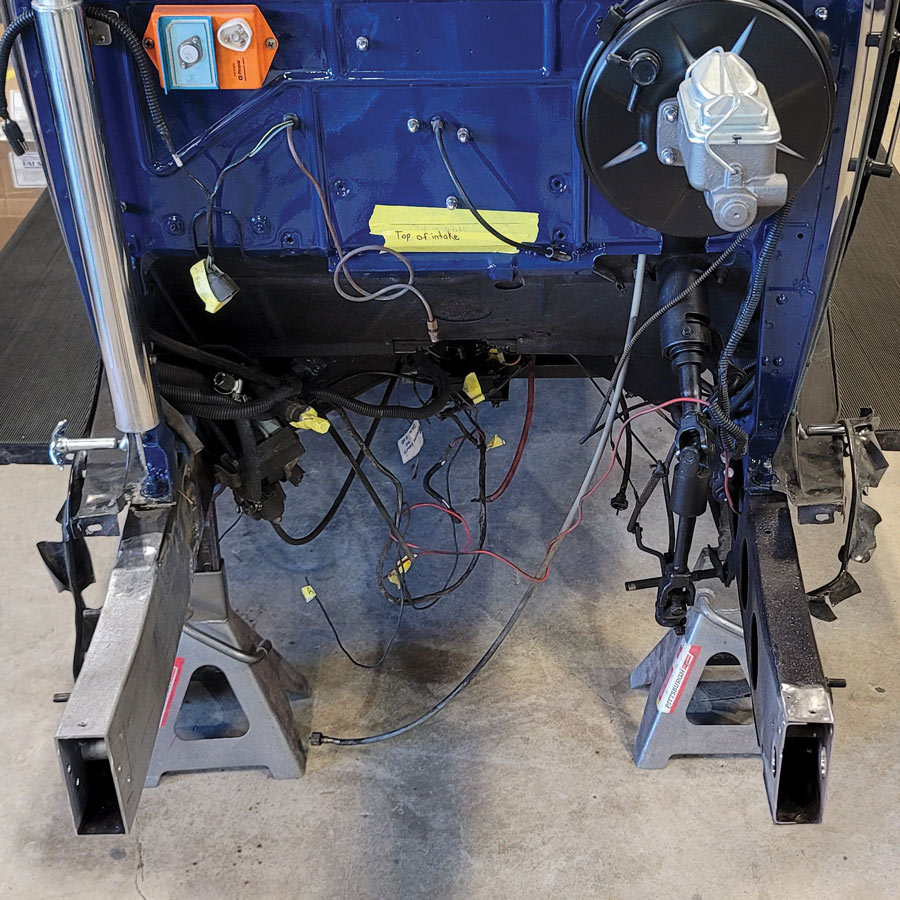
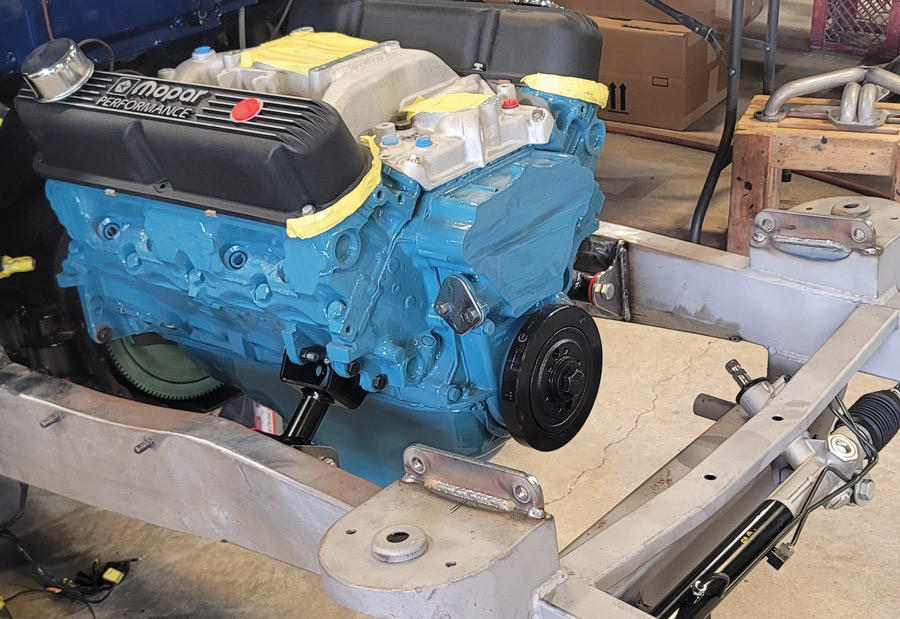
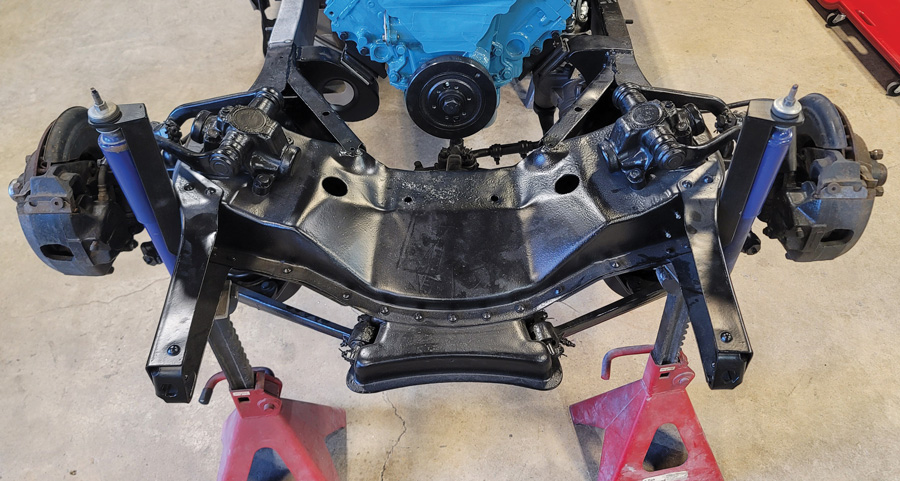
here is no doubt that complete chassis swaps have become commonplace in the world of street rods, but oftentimes that doesn’t fit budget or driving requirements. The basic concept of street rodding is to improve the power, handling, and braking of a vintage car. To that end this old ’34 Chrysler had already seen plenty of road miles with the original suspension upgraded to a late-model steering box, tube shocks, and disc brakes. (In an upcoming issue we will show you how to repair the frame damage on this Chrysler. We followed along as Ken Denney and the team at Hot Rod Specialties repaired some frame damage on Terry Thompson’s ’34 Chrysler Fordor Sedan. This repair was in preparation for a complete front suspension swap.)

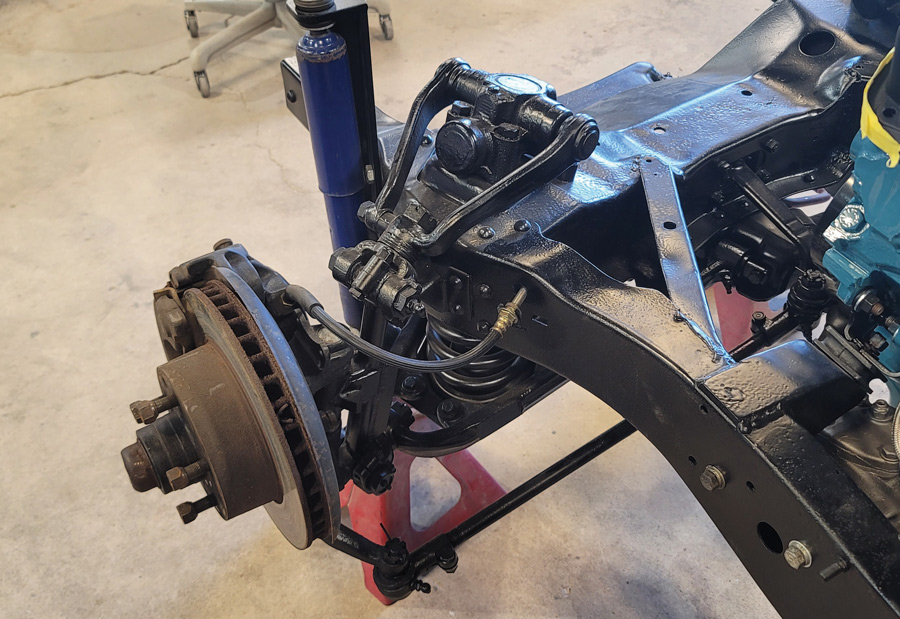
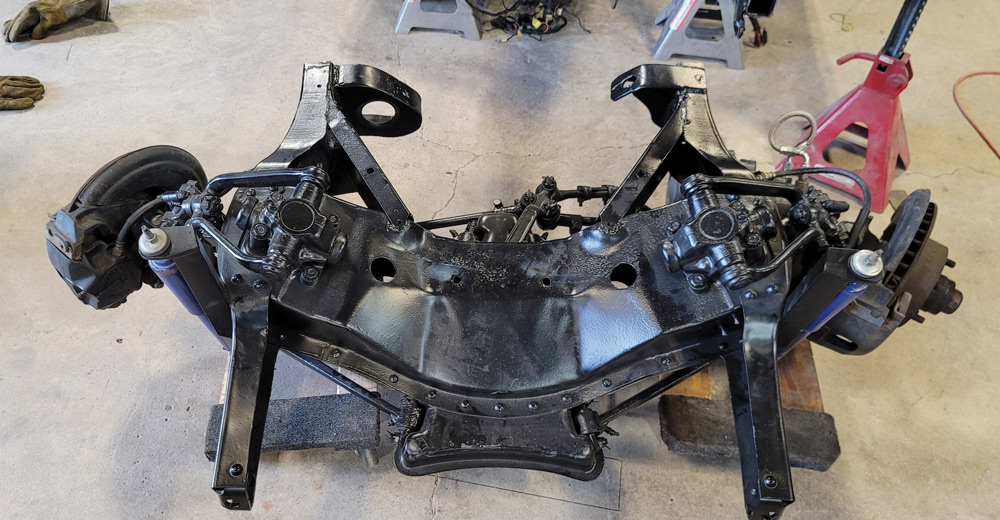
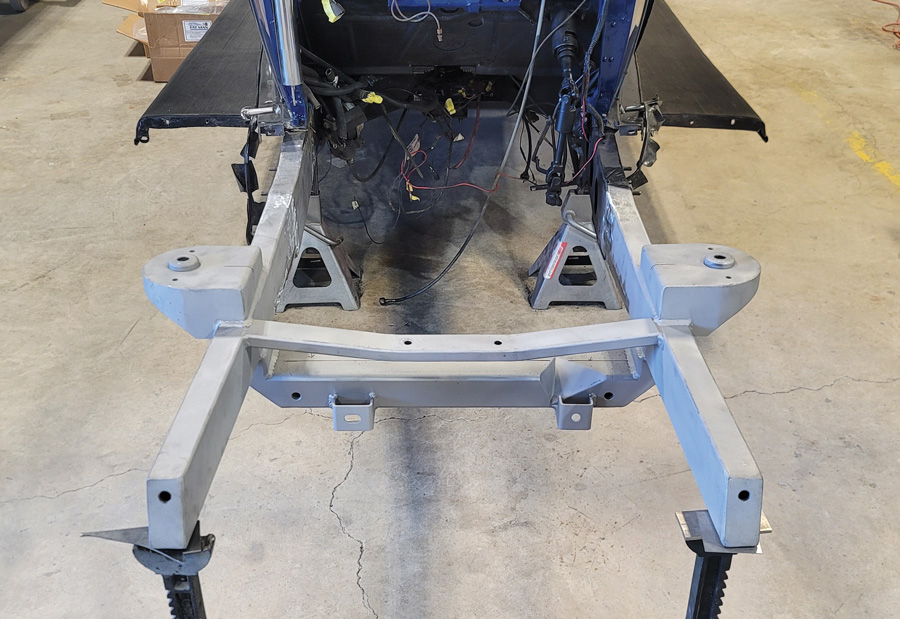
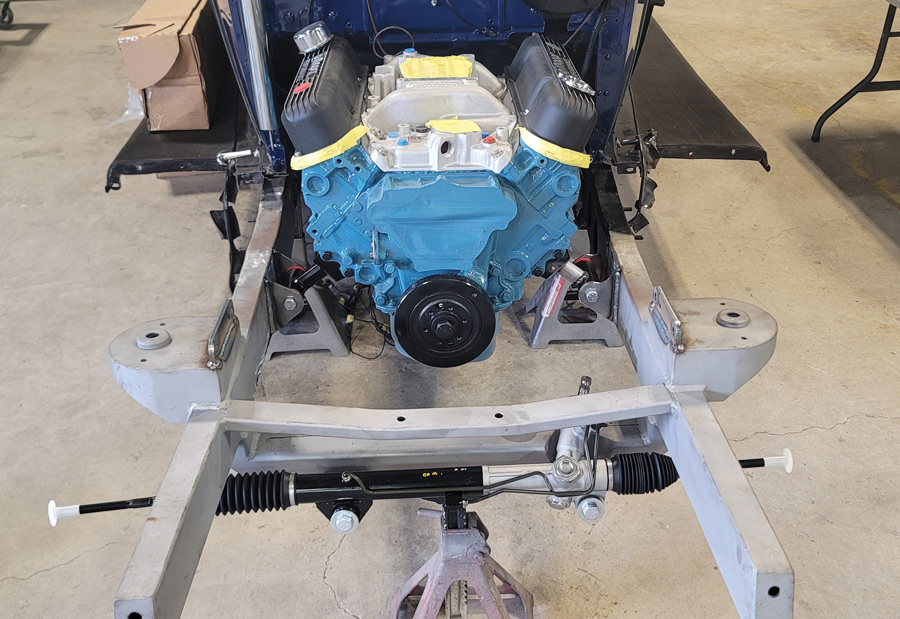
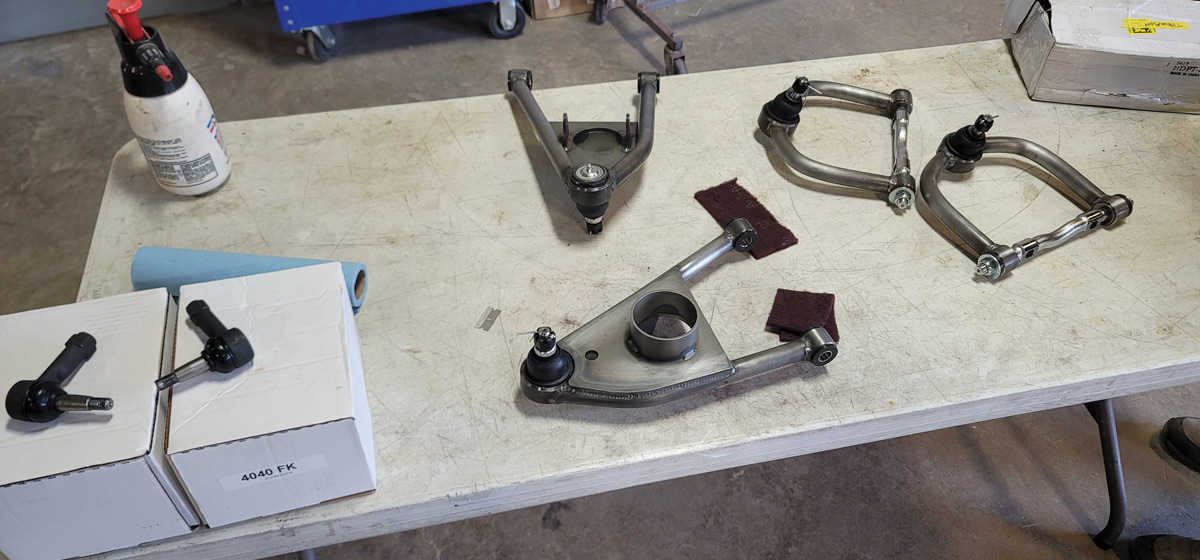
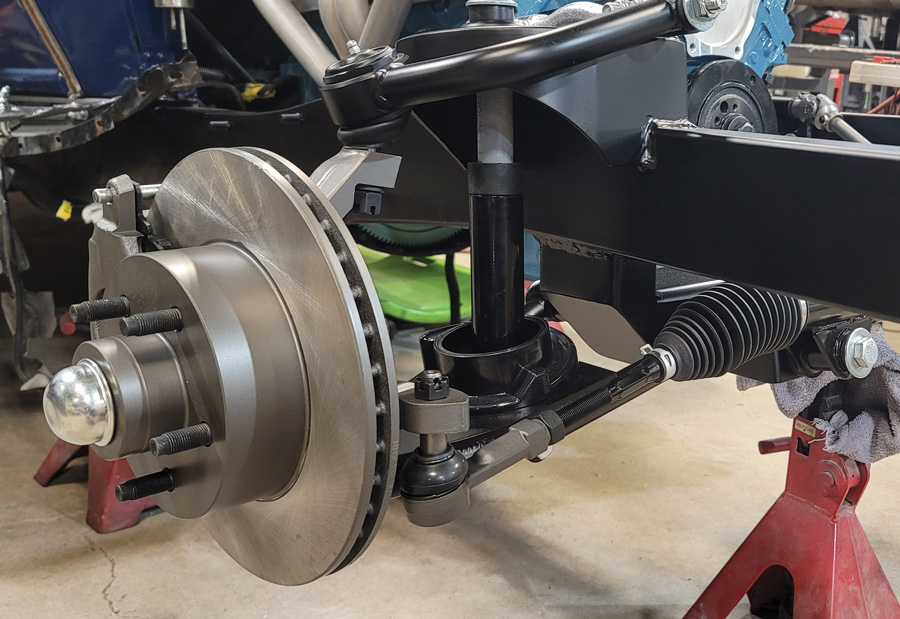
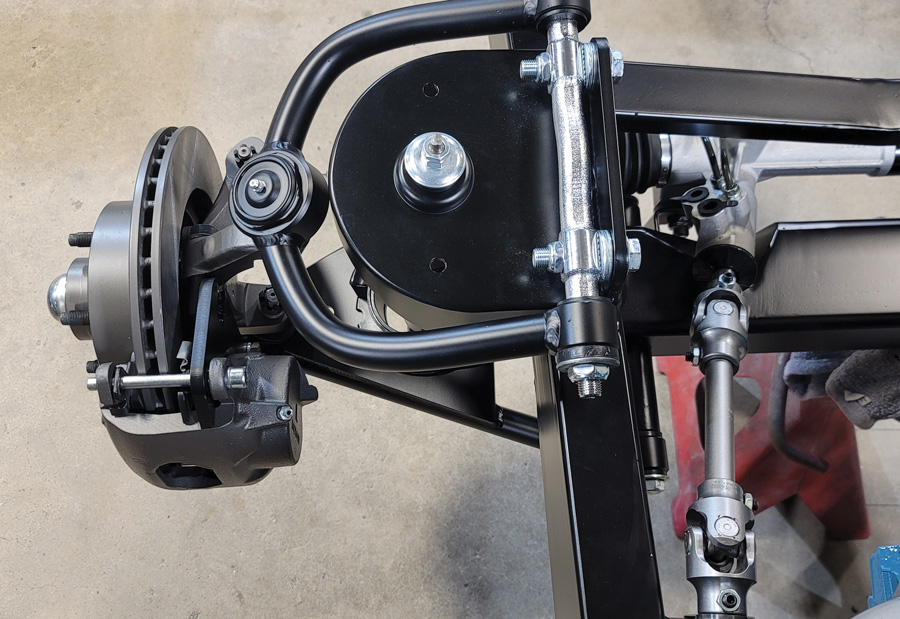
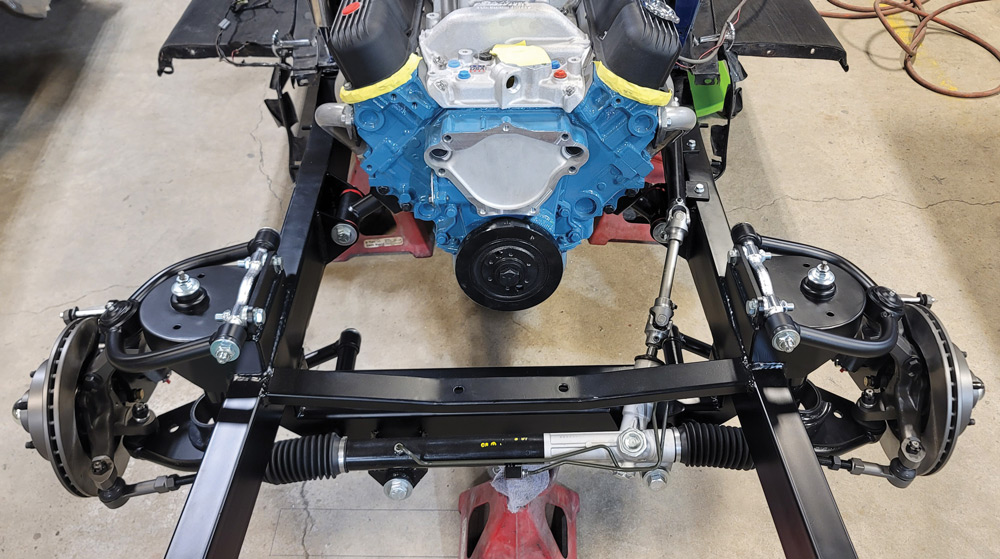
Thompson wanted an improved stance and more modern suspension for his Chrysler, which included power rack-and-pinion steering, tubular control arms, and a better spring rate. Denney and his team at Hot Rod Specialties (HRS) decided a Fatman Fabrications stub would be just what the doctor ordered. A straightforward front frame clip that would effectively do away with the old and in with the new and result in better handling, better stance, and an overall safer hot rod. As an added bonus there was a substantial weight savings.

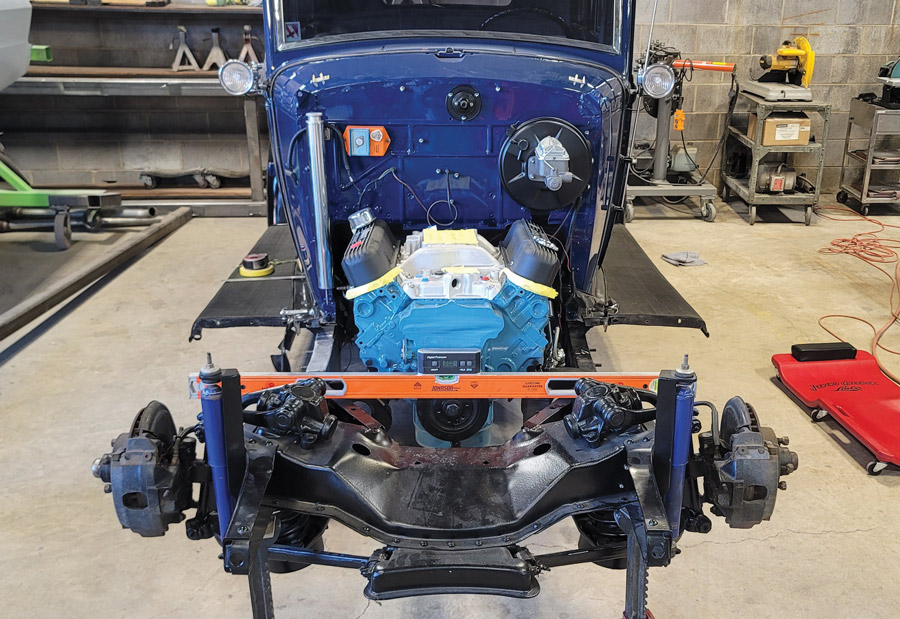
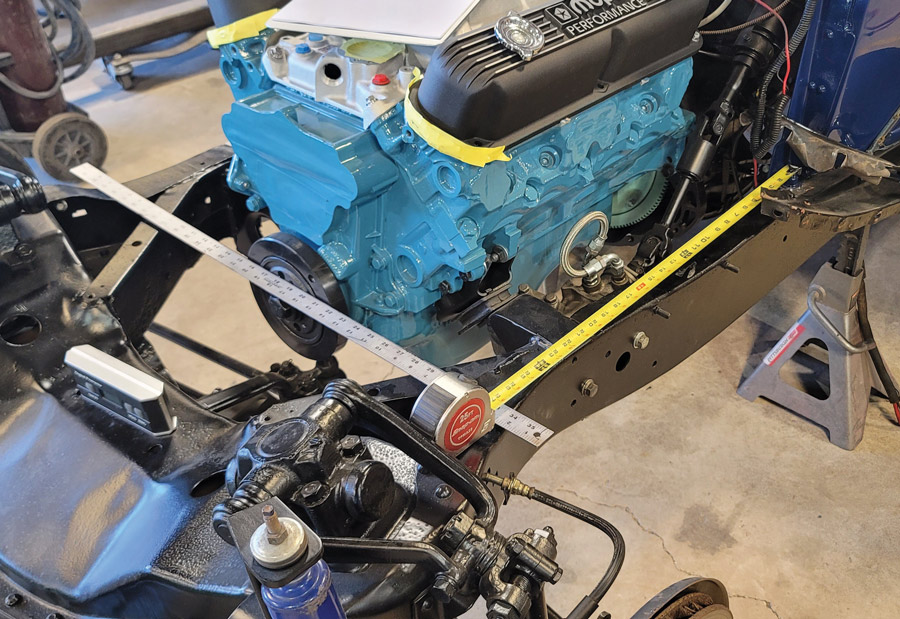
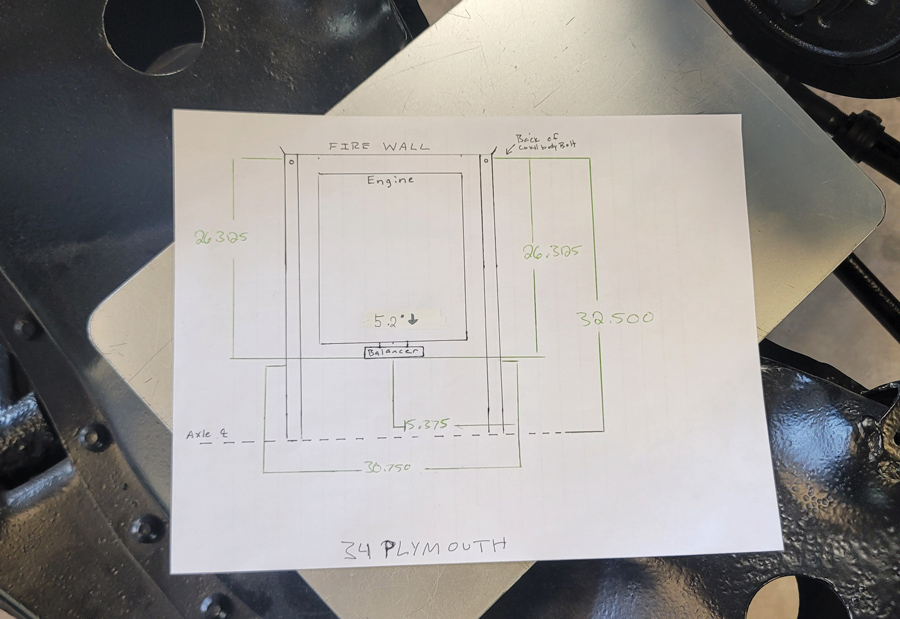
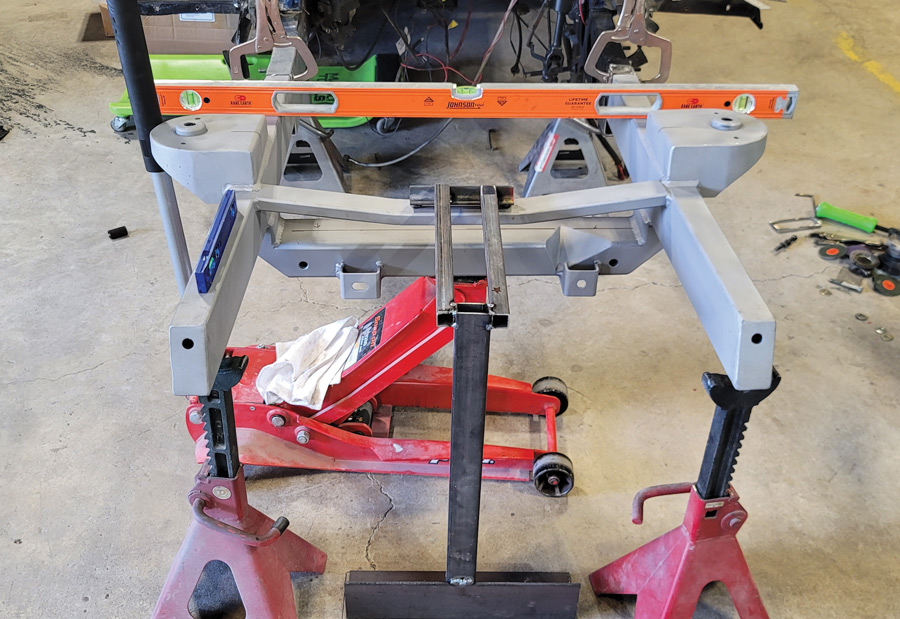
The process is very straight forward and over the years many of the Fatman Fabrications front stubs have been installed in backyard shops. Like any chassis work the key is to establish a level chassis and get the critical measurements, such as engine mount location, height of the front crossmember, and the front axle centerline. The height of the front crossmember/radiator mount is very critical as it dictates the fitting of the hood. It pays to leave it just a little bit low as you can always shim the mount up to the desired height. Making a simple but accurate chassis blueprint is always a good idea, using a plumb bob, critical locations, such as axle center line, can be marked on the shop floor as a secondary check point. Measure from a common point on each side of the original framerail. Once the critical measurements have been established, it’s time to measure twice and cut once.

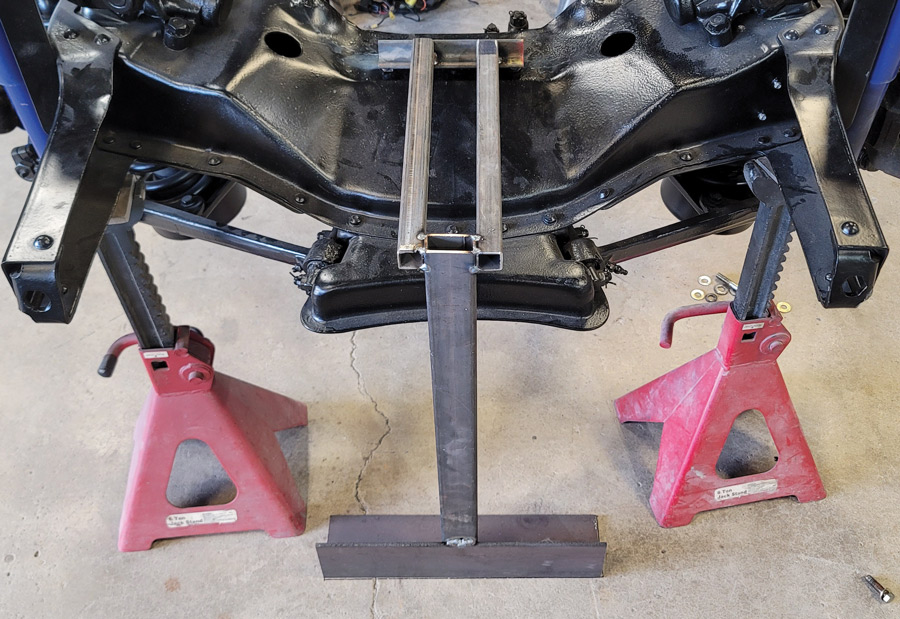
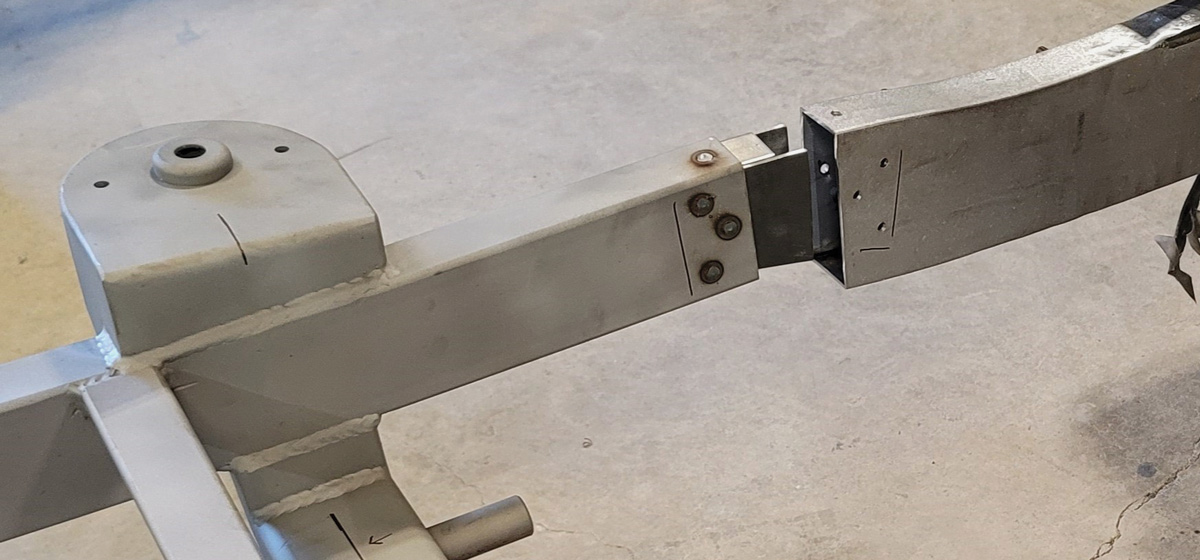
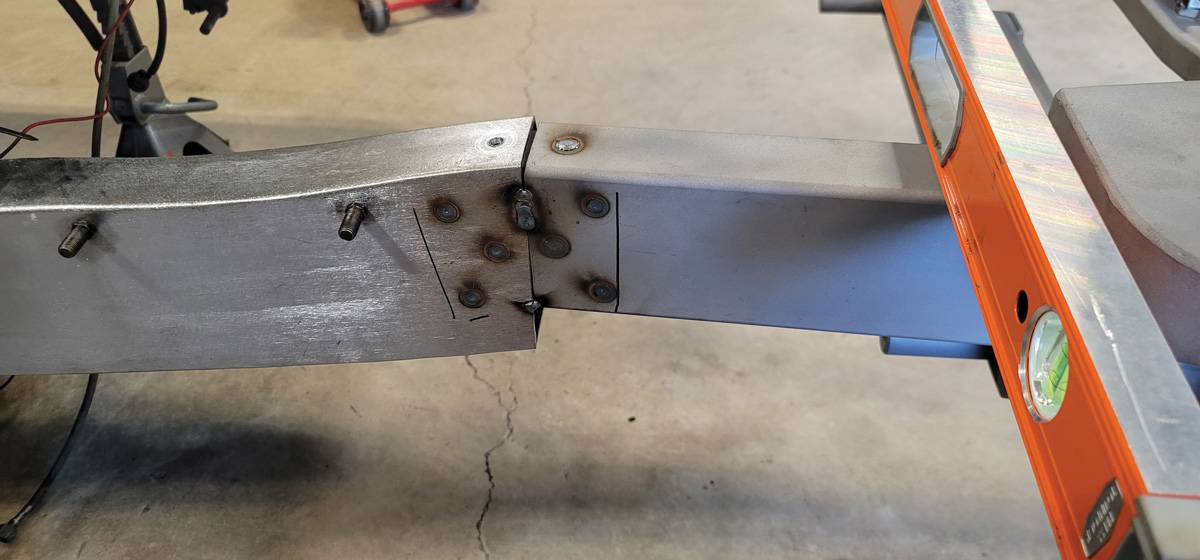
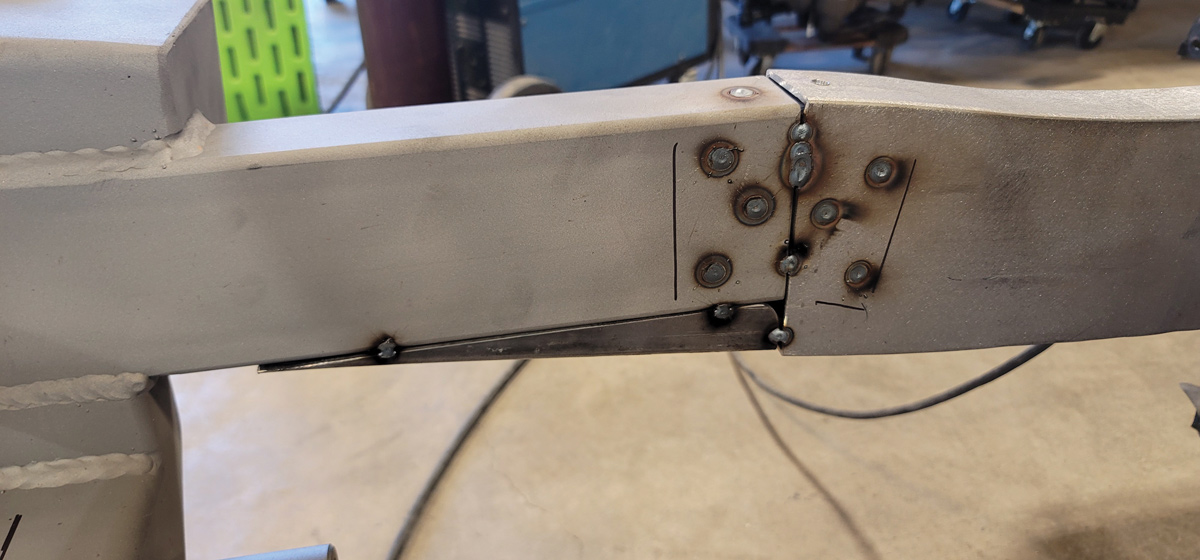
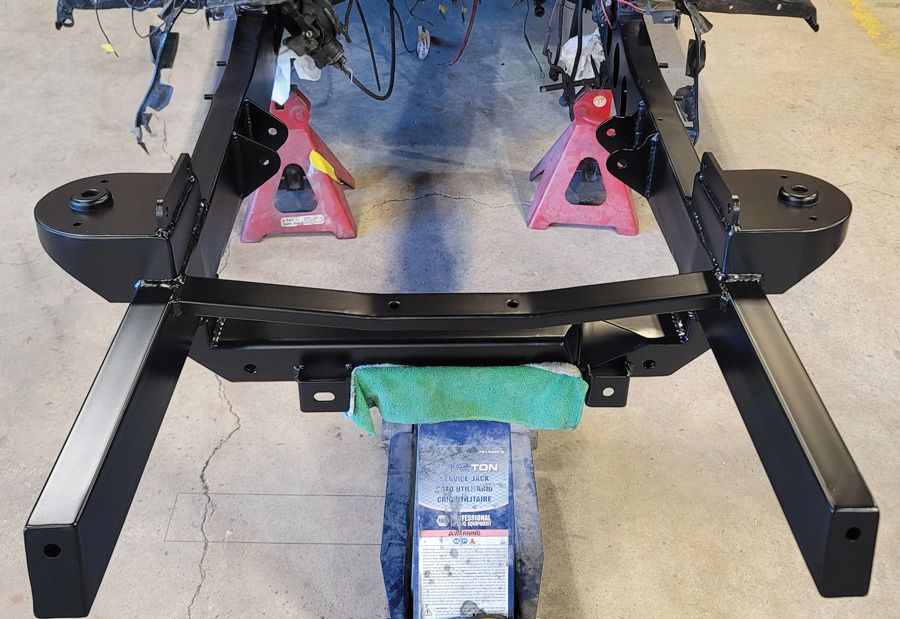
The original chassis is cut at a nice straight area of the framerail, then the Fatman stub is slipped into place. When doing any chassis clip it is imperative that you fishplate the joint by several inches. Team HRS first fit things up with the fishplate welded to the Fatman stub. Several holes were drilled in both sides of the original chassis for plug welds into the fishplates. After a couple substantial tack welds, double check all your measurements.

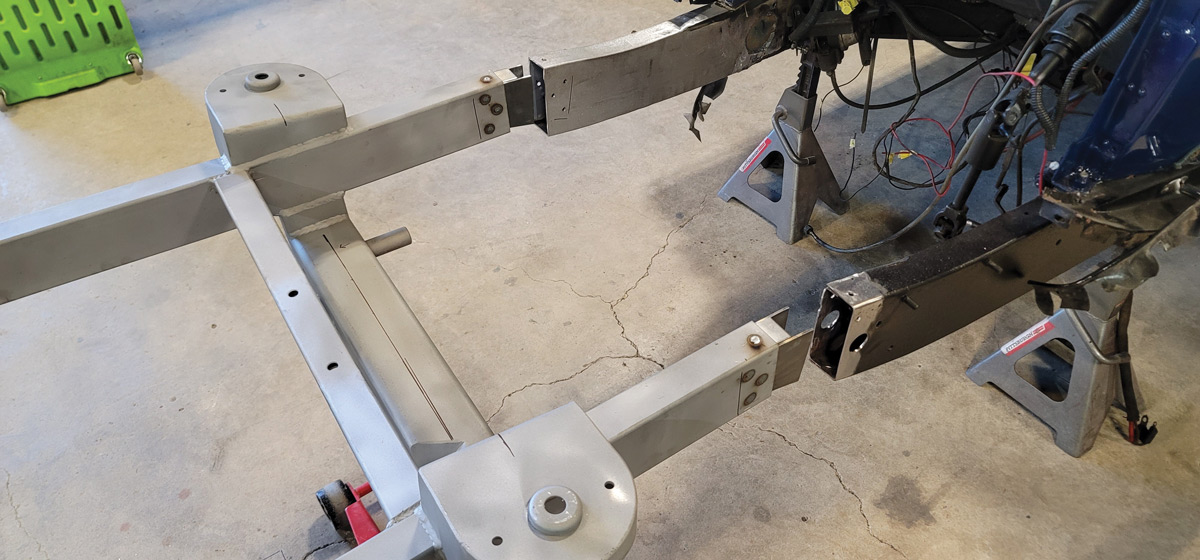
Since the ’34 Chrysler frame is taller than the Fatman framerail a wedge was cut from rectangular tubing to form the lower transition between the two framerails. Tack the wedges in place and measure again. Measure both straight down the framerail and diagonally to be certain the new Fatman clip is perfectly square to the original frame. Once you are certain everything is still square, do the final welding. Alternating side to side with short welds helps prevent unwanted movement caused by the heat of welding.

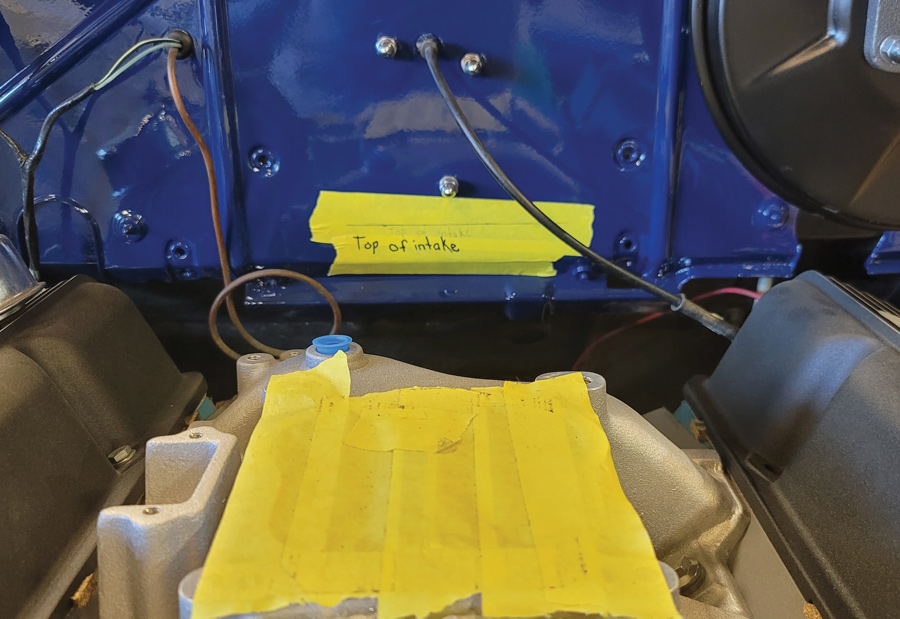
Assembling the tubular control arms, springs, spindles, brakes, and power rack-and-pinion is all straightforward wrench spinning. The directions that come with a Fatman stub are very good, so you should have no problem with assembly. Using a tape measure and an angle finder you should be able to get that frontend aligned close enough to drive to your local frontend shop for a precise alignment. That is the general procedure, follow along with the photos to see how the pros at HRS handled the job.

leveling chassis
2. The first step was establishing a level chassis side to side, front to back. Working “on the bubble” is fine, but today digital levels are incredibly precise. At HRS they use the long level to span the framerails and a digital indicator to match the bubble.
measuring tapes on chassis
3. Next, we will locate the cut points on the original framerails. Measure from a common point on the original chassis. Things to consider before cutting are original fender mounts, the shape of the framerail, and the location of existing motor mounts.
label made of yellow tape on firewall
4. To graft the Fatman stub to the original frame the engine must be removed. The exact location of the top of the intake manifold was established and marked on the firewall. This ensures the driveshaft angle will not change and exhaust components will fit.
measurements on paper
5. A simple blueprint of the measurements is important. Measurements include axle centerline to the existing frame reference point, front of harmonic balancer to a chassis reference point.
view of motor mounts
6. After much consideration, it was decided the ideal location for the cut was behind the existing motor mounts and in front of the two studs that serve as fender mounts. This keeps the front fenders in the original location.
gauge made of metal
7. Before cutting the front crossmember free of the car one last location was established. This simple gauge was fabricated to locate the exact height of the radiator cradle mount. This is critical for proper hood and grille shell alignment.
front suspension
8. Before doing any cutting be certain the car is safely supported. Cutting off this mammoth front suspension will result in a dramatic shift in weight. Note the motor mounts are attached to this discarded front suspension.
chassis with no front suspension
9. After removing the original front suspension crossmember the ’34 Chrysler chassis looks very clean and simple. Since the Fatman Fabrications front stub was designed for this chassis things will literally slide into place.
checking fitment
10. A preliminary check shows the Fatman stub is a perfect fit, including the radiator cradle mounting points. Jackstands are shimmed to perfectly locate the framerails, while the level is used to locate the stub side to side.
fishplate splice piece
11. The Fatman Fabrications stub has a fishplate splice piece that fits inside the new stub and inside the existing ’34 Chrysler chassis. Talk to Fatman and they will custom build a stub to fit any car.
another angle of fishplate splice piece
12. Here we see the fishplate splicer pieces are plug welded to the new Fatman stub and ready to slide into the original framerails. Be certain to properly grind the original framerails to clean metal.
welds on conjoined pieces
13. After one last check of the level and critical measurements the stub can be plug welded to the original framerail. Tack welds on the seams are also seen.
another view of welds
14. The box tubing used for the new stub is not as tall as the original framerail. A simple piece of box tubing was wedge-cut to form a transition piece on the bottom for the framerail.
finished front stub with primer
15. Here we see the finished front stub joined to the ’34 Chrysler frame. Thanks to the engineering at Fatman Fabrications and the skilled installation at HRS, this now looks like a factory framerail.
front view of chassis
16. Viewing from the front the chassis has a simpler, cleaner look. The chassis is now ready for new motor mounts for the ’69 Mopar 340 engine. This hot rod is pure Mopar.
engine and new engine mounts
17. The team at HRS crafted these custom motor mounts with their own frame adapters in combination with aftermarket motor mounts. The result is a superclean and strong installation.
side angle of engine on new subframe
18. Looking from the side we see the motor mounts and the engine is in the exact same position in the frame. The power rack-and-pinion is bolted in place so steering linkage can be fabricated.
new control arms
19. These tubular control arms will provide improved handling and substantial weight reduction compared to the vintage ’34 Chrysler parts.
semi-black painted chassis
20. After all the welding and grinding was completed a coat of chassis semi-flat black paint provides a clean, functional look to the frame.
brand new rotor and caliper
21. Rotors and calipers are bolted in place along with the upper and lower control arms. This car is a driver so once again chassis black is the perfect finish.
entire suspension and steering rack
22. The view from above shows the utter simplicity of the entire suspension. Completely modern in design, the rack-and-pinion steering will be much more responsive than a steering box. Note the two universal joints connecting the rack to the steering column.
front view of fully assembled subframe with motor and suspension
all new subframe and suspension
23-24. We couldn’t resist this side-by-side comparison of the ’34 Chrysler front suspension and the new Fatman Fabrications suspension. The improved handling and braking will make driving this old hot rod a real pleasure for many years to come.
Fatman Fabrications
(704) 545-0369
fatmanfab.com
Hot Rod Specialties
(317) 802-7762
tech@hotrodspecialties.com
Modern Rodding

VOLUME 4 • ISSUE 32 • 2023