Modern Rodding Tech
InTheGarageMedia.com
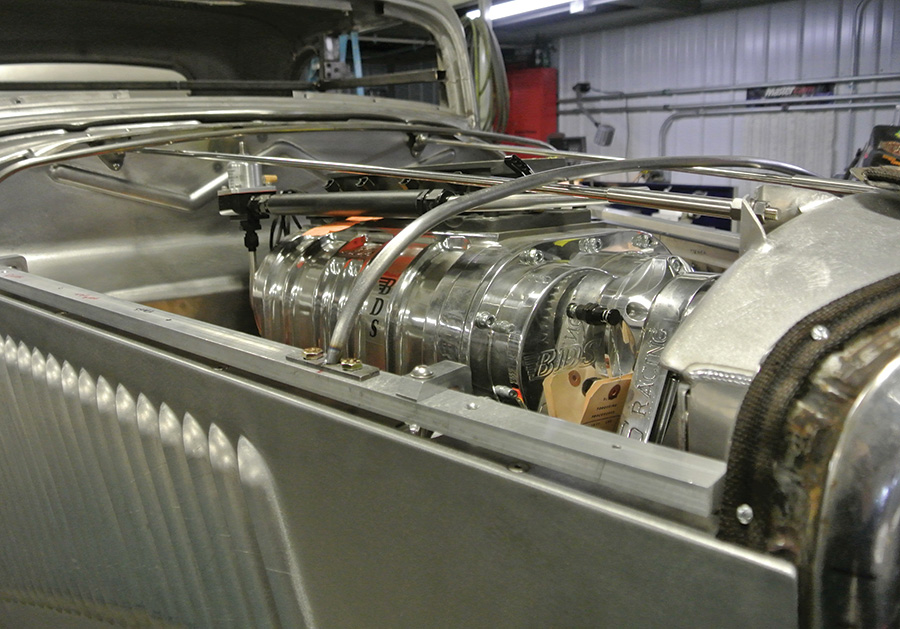
Bill Sather ’s 1934 five-window is pure hot, and that whirring sound you hear is from the 3-inch drivebelt on the BDS 4-71 blower.
COVERING A BLOWER MOTOR CAN BE … A STRETCH
Stretching a Three-Piece Hot Rod Hood
By Gerry Burger
B

ill Sather has been around hot rods for a long time. Living in the Austin, Texas, area you just know he has an eye for traditional hot rods. Sather acquired this coupe a few years back as part of a trade. It was just an old 1934 five-window coupe body with typical battle scars but well worth saving. Sather purchased the chassis from a fellow in California, part of a stalled project, but Sather liked the magnesium Halibrand wheels, quick-change rearend, and the dropped front axle with hairpins. So, the coupe was mounted to a vintage hot rod chassis and with the top chopped it became the classic image of a bad-boy hot rod coupe. Oh, and did we mention Sather has a thing for blowers? Adding a BDS 6-71 blown small-block to the profile completed the hot rod packaging. There was just one problem, while the profile was there, the craftsmanship was not up to contemporary standards. A call to BBT Fabrications in Mahomet, Illinois, would take care of that problem. After talking with Troy Gudgel, Sather was certain he could come up with the perfect blend of old-school hot rod attitude and world class craftsmanship.

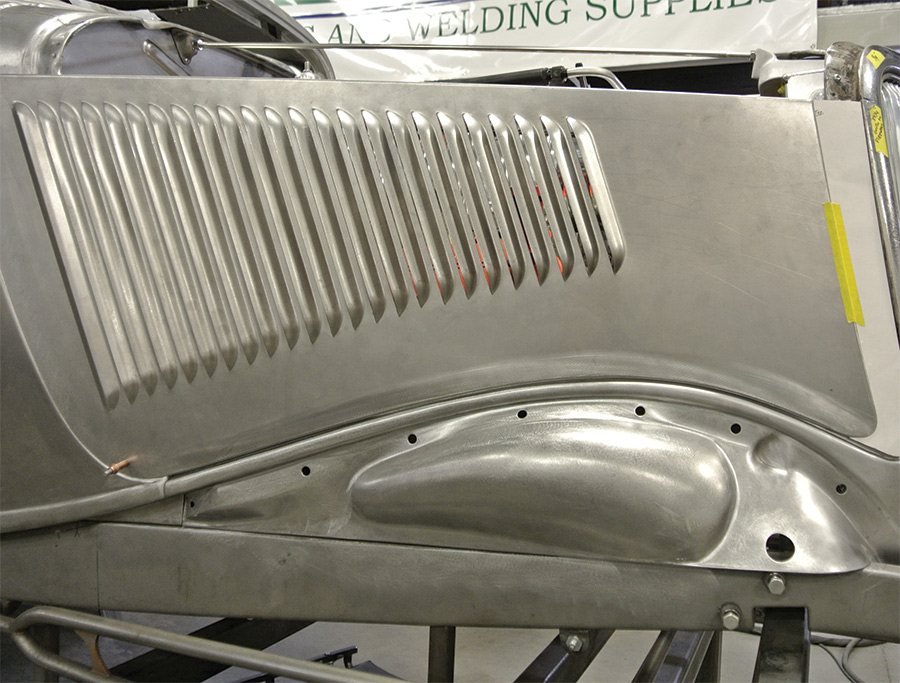
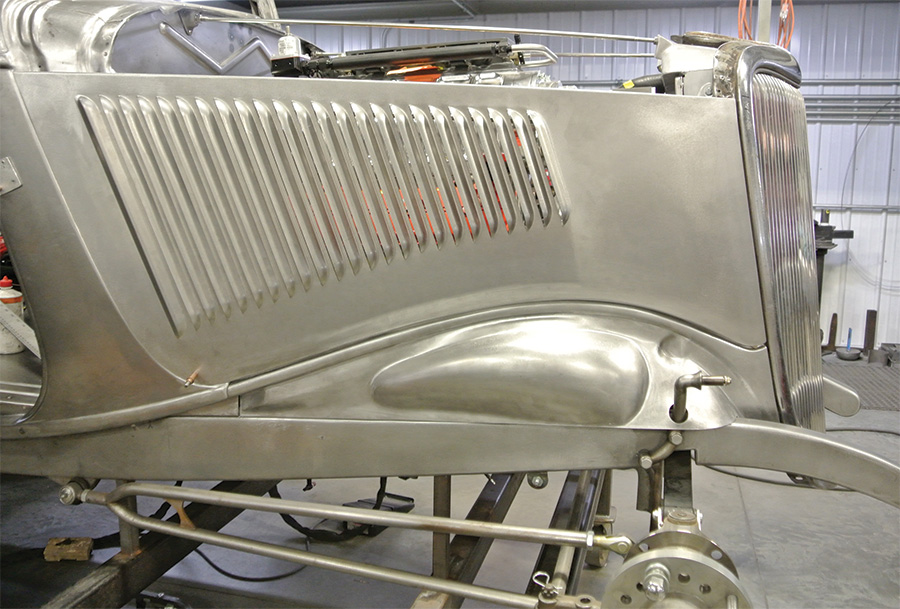
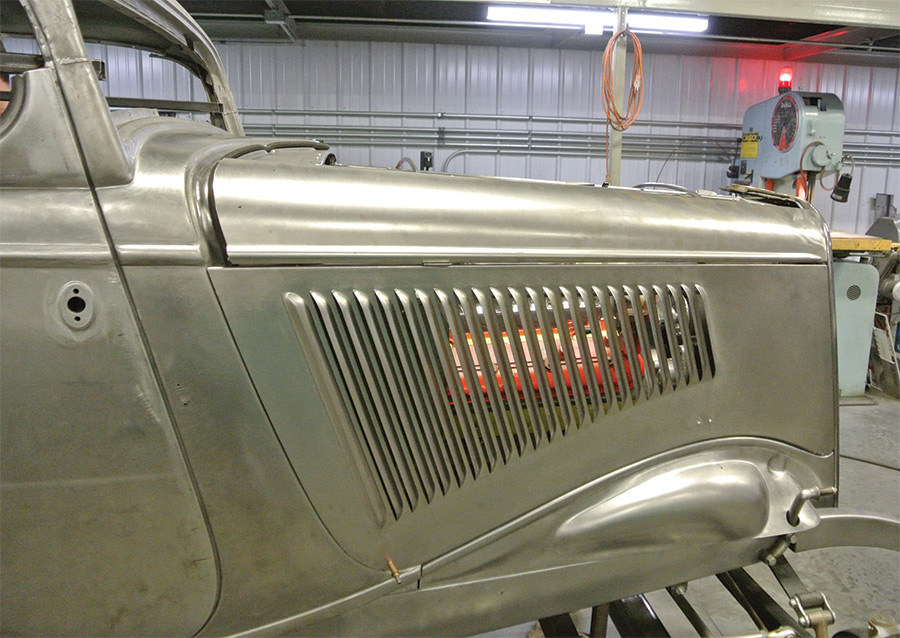
The coupe was shipped up to BBT Fabrications and work began. The metalwork was extensive and so we decided to follow along, starting with fitting the hood. The coupe came with an original four-piece hood but that was set aside in favor of a new three-piece Rootlieb hood. This three-piece configuration would allow for four vintage-style breathers to protrude through the hood. The hood sides carry stock louvers but without the lower body reveal and the two holes for the hood latch handles.

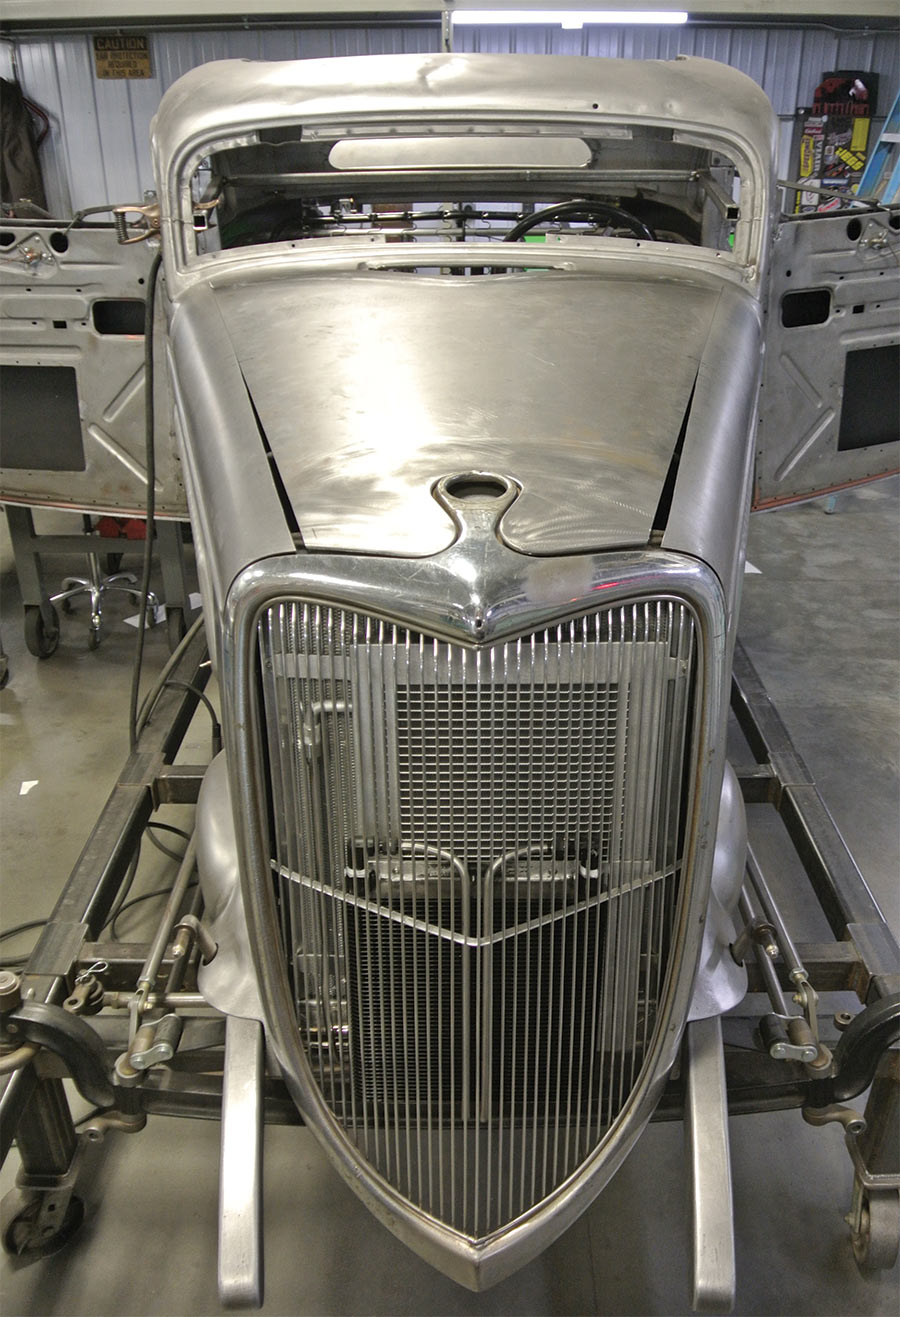
To properly fit a hot rod hood you must first establish the opening that it will cover, and that entails a lot of work. On a 1934 highboy you must first establish the location of the grille shell and the angle of the grille shell. In this case the radiator was moved forward to clear the 3-inch beltdrive on the BDS blower. Since this was going to a non-stock, stretched hood, the angle of the grille shell did not have to conform to the stock hood sides. The angle of the grille shell was largely done “by eye” and it is close to the angle of the windshield. With the angle and radiator established, new radiator rods were fabricated and mounts were welded to the aluminum radiator. This established the fore/aft location of the front of the hood.

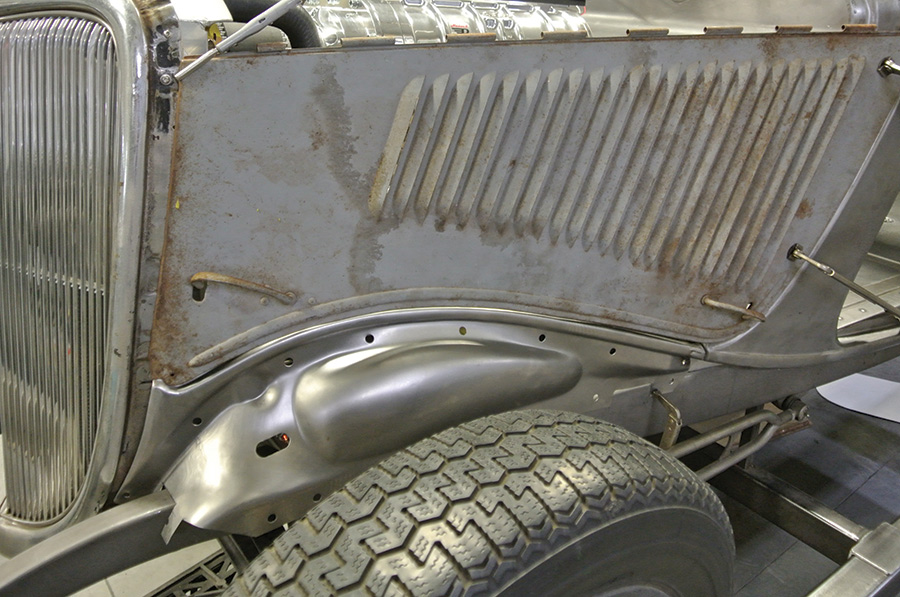
Before the hood sides could be mounted the inner splash aprons must be mounted. Gudgel began with a set of reproduction splash aprons, knowing they would have to be modified for this application. The aprons would also require a bit of slicing, dicing, and extending to make the lower body reveal align perfectly. Remember, these aprons were built to be mostly under the fender, so Ford didn’t worry about perfect fit. After the splash aprons were shaped the basic opening for the hood sides had been established.

Again, starting with a Rootlieb hood, the hood side was fitted to the cowl first and held in place with a couple Cleco fasteners. This established the proper gap at the firewall and the splash aprons. A template was made and the front of the hood was extended. This is a gross over simplification of the process, so follow along with the photos to see the work involved.

With both hood sides properly located, the hidden hood latch system was installed and a pair of hood top braces were also installed. The top of the hood was fitted to the front around the radiator cap and grille shell. The original radiator cap was retained to carry on the traditional theme of the car. While the hood sides only required straight forward extension, the hood top was much more complicated.

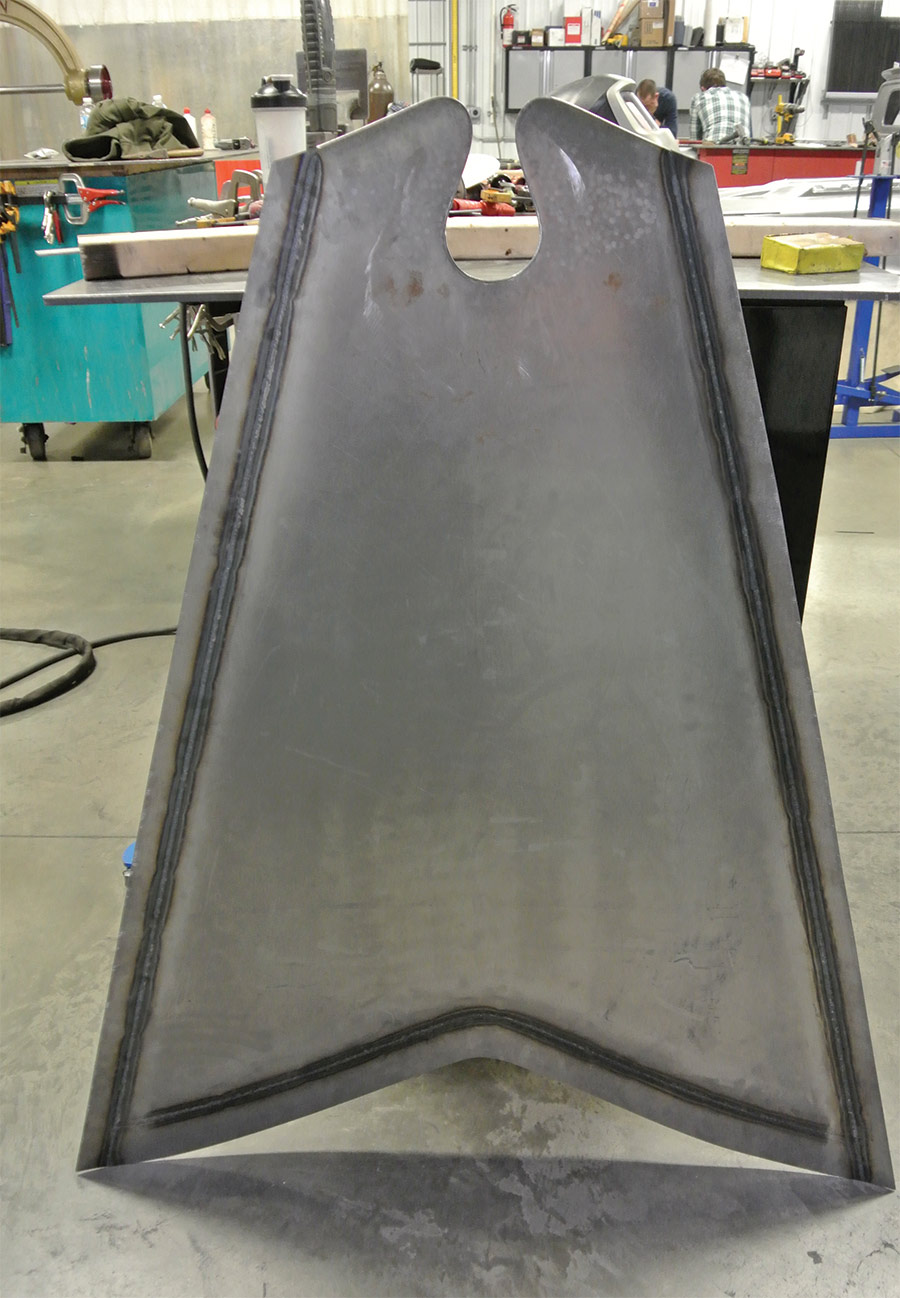
While the front and the rear of the hood would both fit the grille shell and the cowl respectively, because the distance between the cowl and the grille shell had been extended, the gradual taper of the hood from cowl to grille was changed. The hood top was cut into three pieces, with two sides pieces being fit to the opening. Then the remaining hood skin was wedge cut to adjust the taper (see photos). The wedge cuts served to establish the shape of the centerskin, a metal strip was added to each side of the skin, and then it was cut to fit the opening. The metalwork and metal finishing exhibited here is extraordinary.

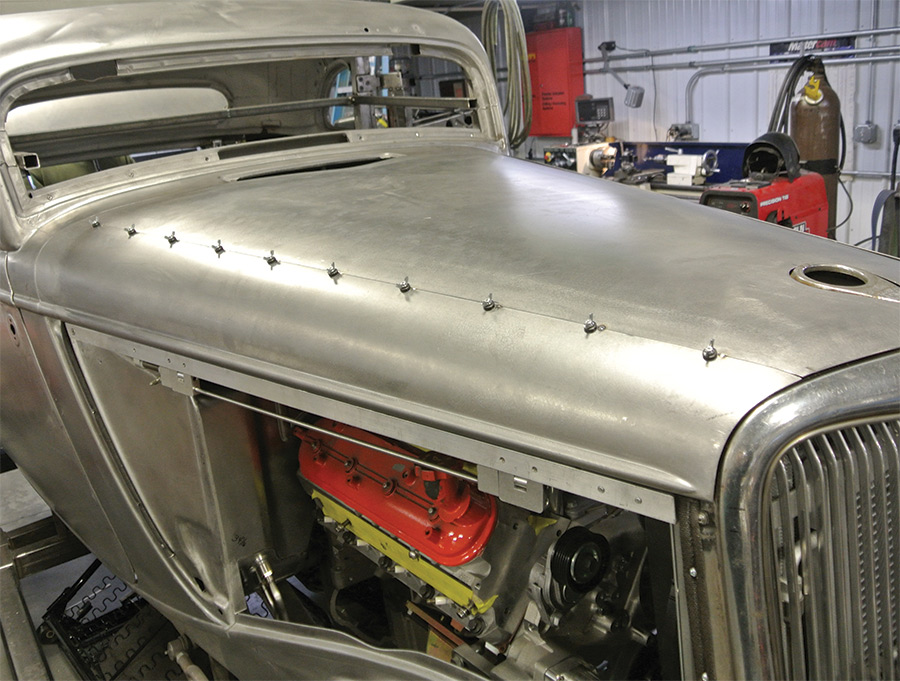
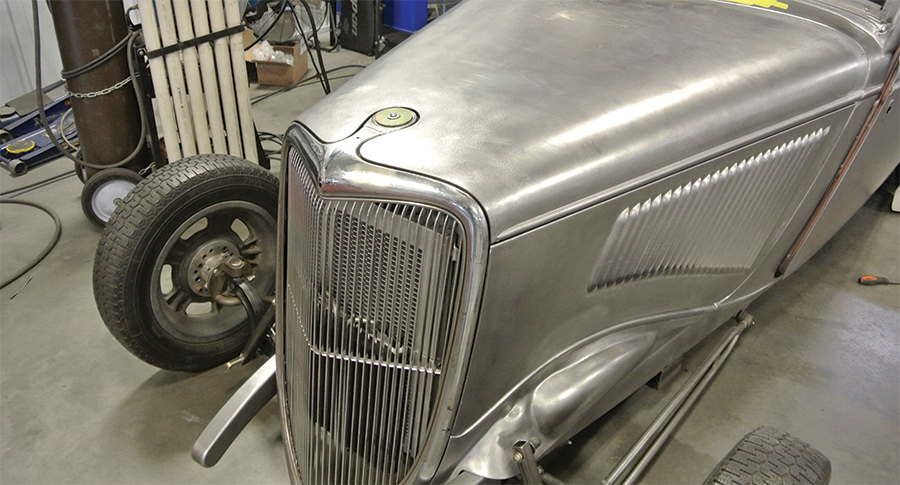
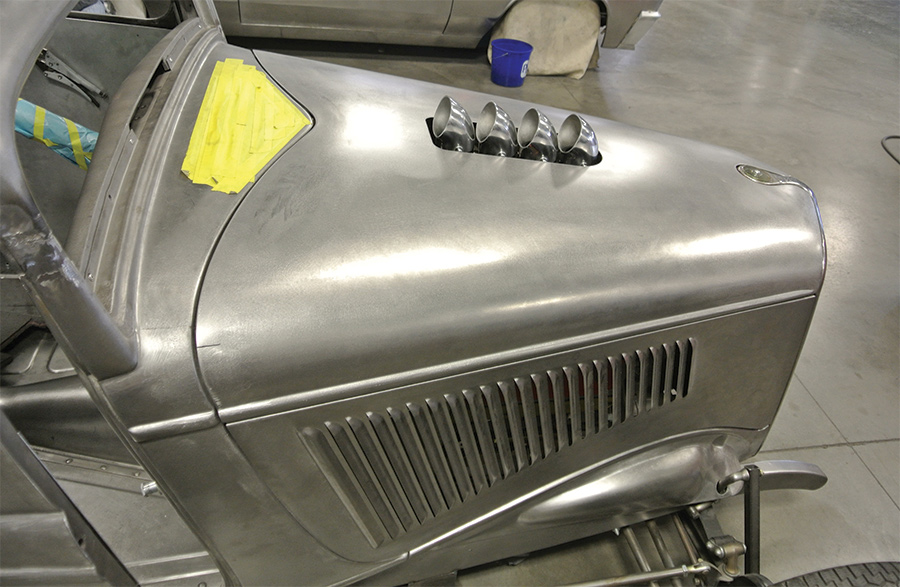
Now the modified centerskin was rejoined to the two other hood top pieces with panel clamps and after many, many tack welds the finish welding and metal finished was completed before the hole was cut in the center of the hood for those vintage-style breathers. In the end Gudgel had fabricated a custom three-piece hood with great fit and finish that combined modern craftsmanship with vintage style.
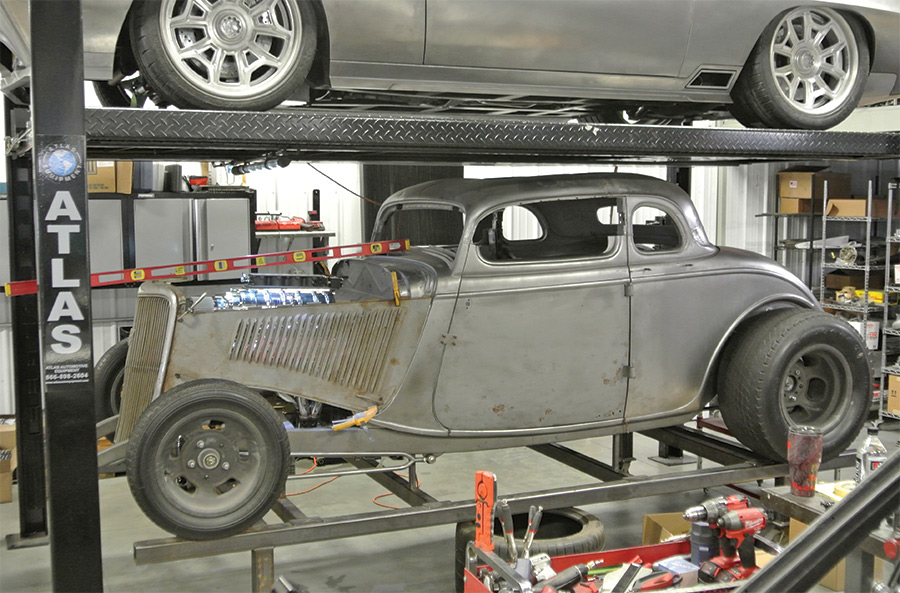
coupe profile ready for rebuild
1. The coupe had a wicked profile but it would require extensive metalwork to build the world-class hot rod Sather envisioned. The car was shipped to BBT Fabrications in Mahomet, IL, where Troy Gudgel and his team could work a little metal magic.
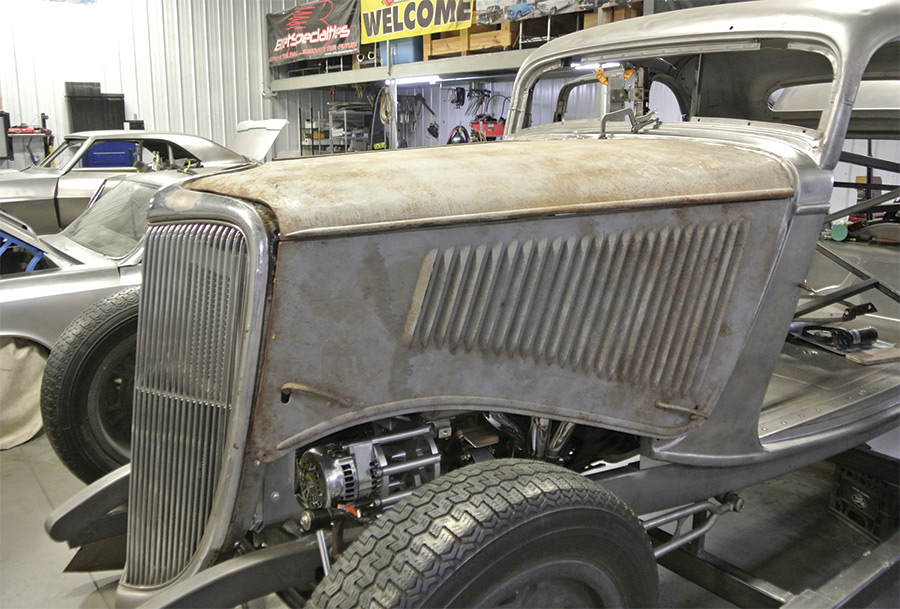
original hood rough and bent
2. The original hood was pretty rough with bent louvers and typical wear and tear. Beyond that, the hood would need to be extended to allow room for the blower drive. A new three-piece Rootlieb hood made the perfect starting point.
hood being fitted
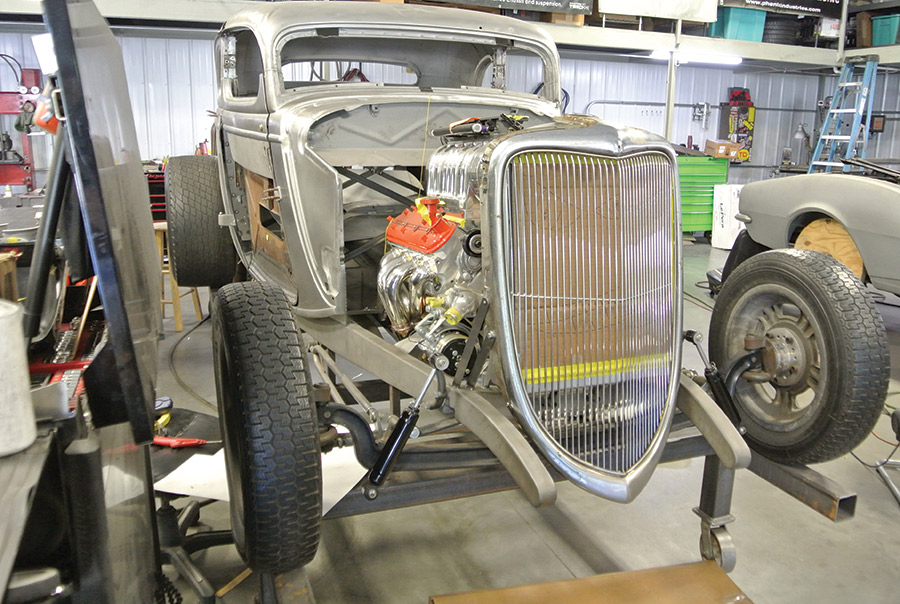
3. To properly fit a hood, you must first define the opening. That begins by mounting the grille shell. It must be centered in the frame at the proper height and the fore/aft angle must be set.
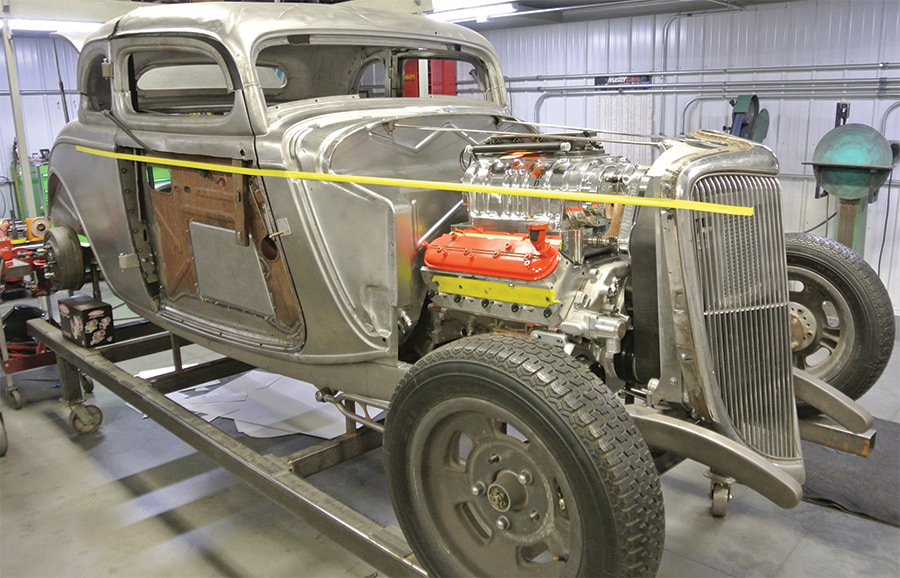
masking tape down the body
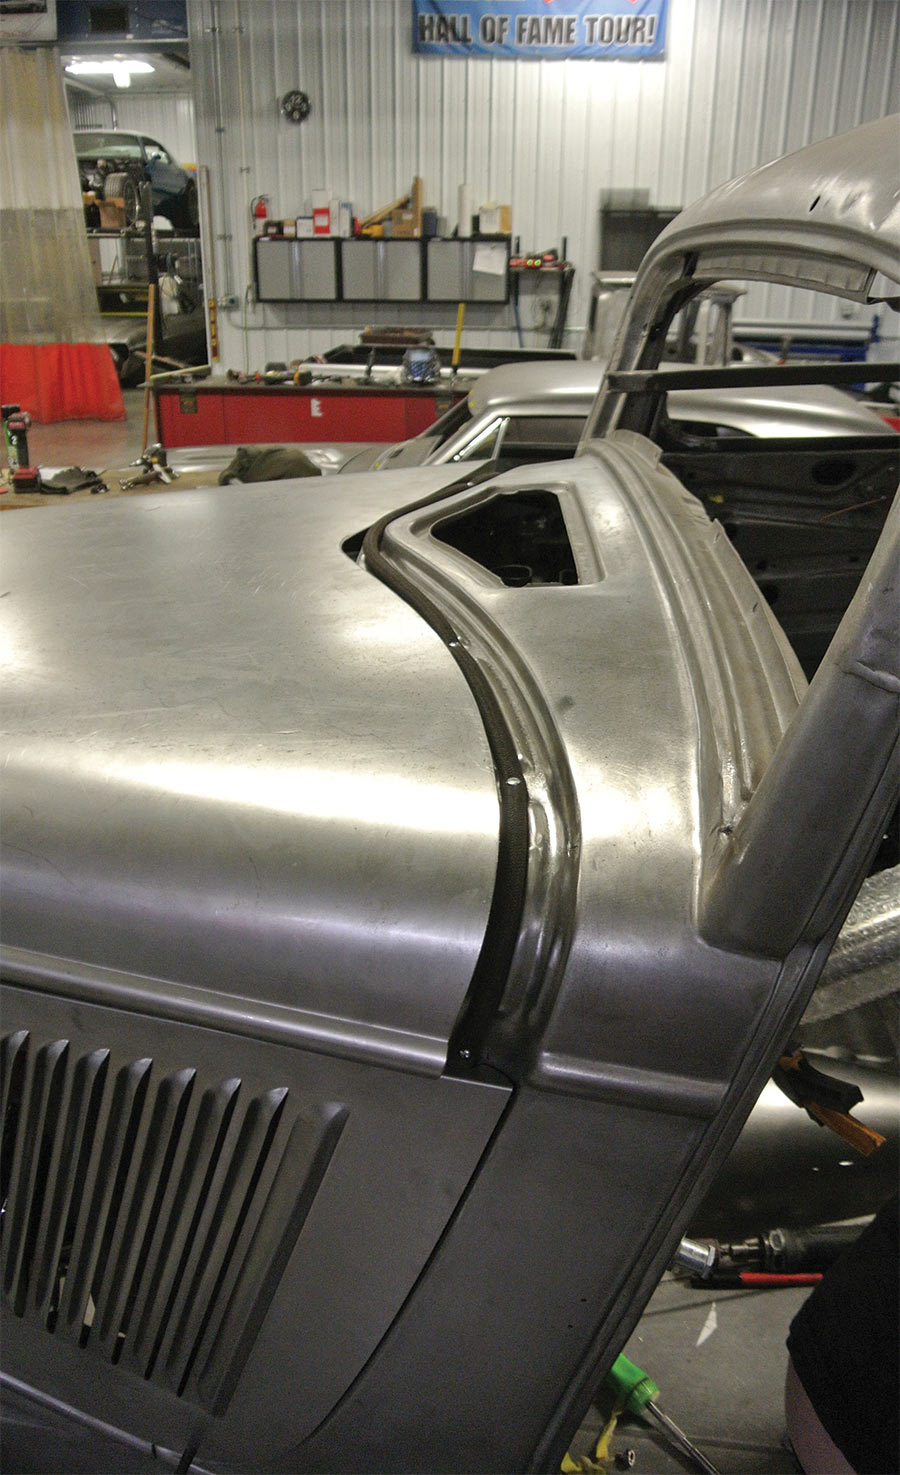
4. Stretching masking tape down the body reveal provides a good sight line that helps dictate the height of the grille shell.
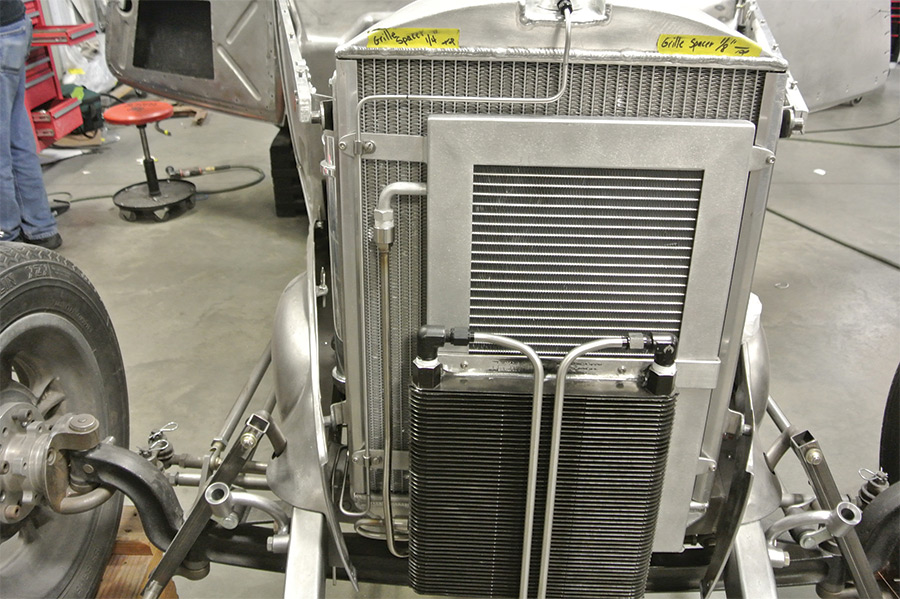
the coolers and A/C components being mounted
5. All the coolers and A/C components have been mounted and plumbed to ensure there is room behind the grille shell.
the radiator and grille shell height being determined
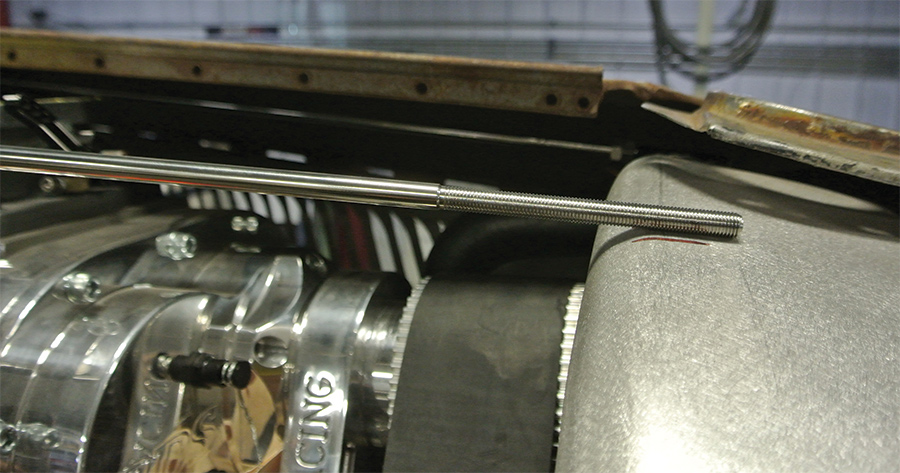
6. With the radiator and grille shell height determined it was time to fabricate radiator rods that run from the stock mounts on the firewall to the top of the aluminum radiator. Here the stainless steel rods have been cut and threaded.
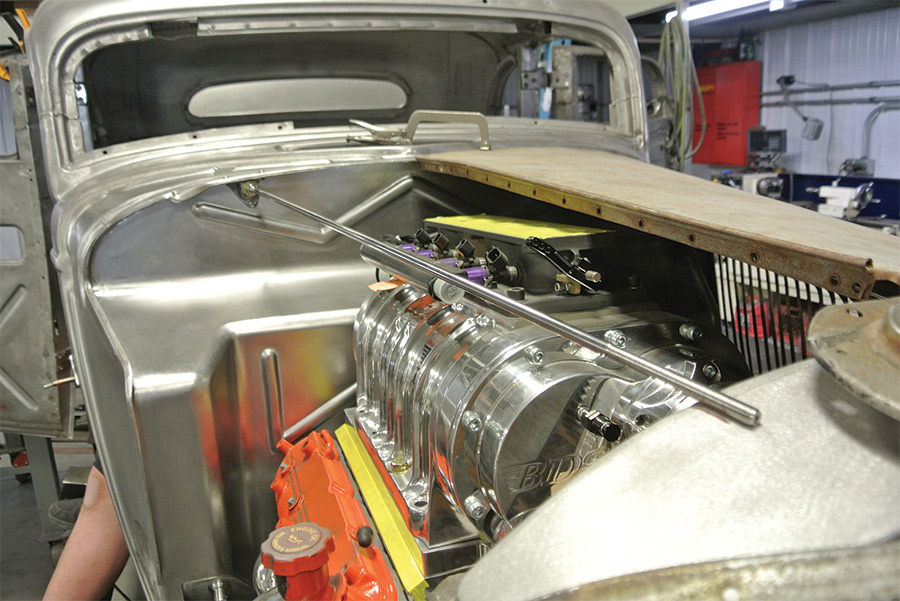
the blower drive almost touching the radiator
7. As you can see the blower drive is almost touching the radiator tank. The radiator rods will move the top of the radiator forward just enough to provide clearance.
sanitary radiator rod mounted
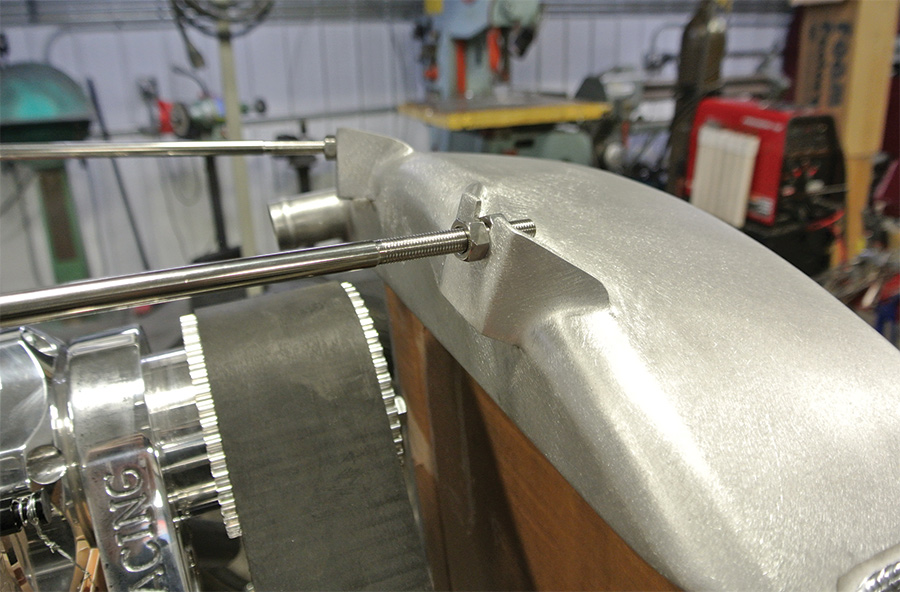
8. These sanitary radiator rod mounts are a good example of the metalwork at BBT Fabrications. Remember these brackets must also include clearance for the hood top. Note the blower drive now has ample clearance, too.
the grille being fitted for a set of reproduction steel
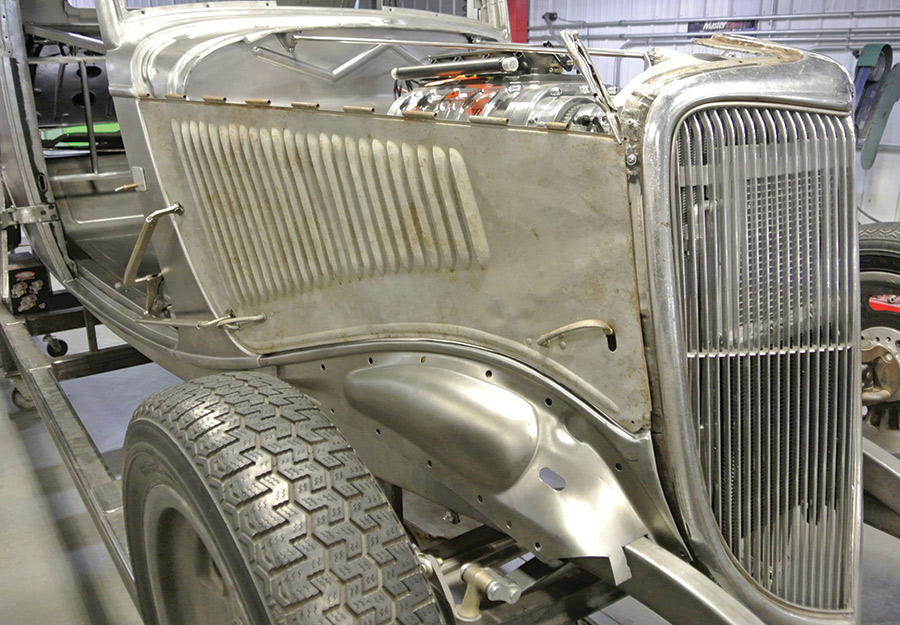
9. With the grille located it’s time to begin fitting a set of reproduction steel inner splash panels to the car. Here the stock hood side is used for initial splash apron alignment.
the original hood clamped in place
10. Moving to the front, the original hood is clamped in place to get an idea of how the splash aprons fit and what changes will need to be made to fit the new hood to this extended opening.
test-fitting done on the driver side
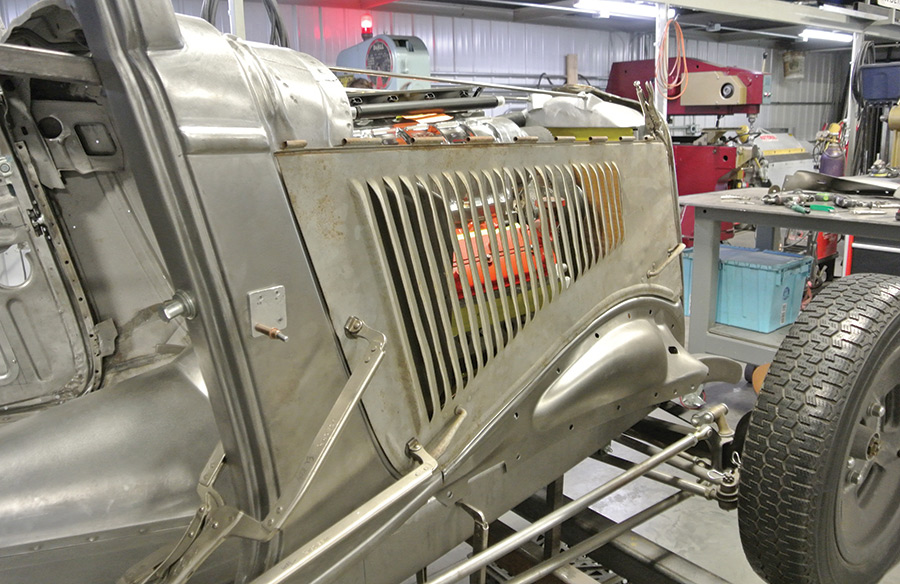
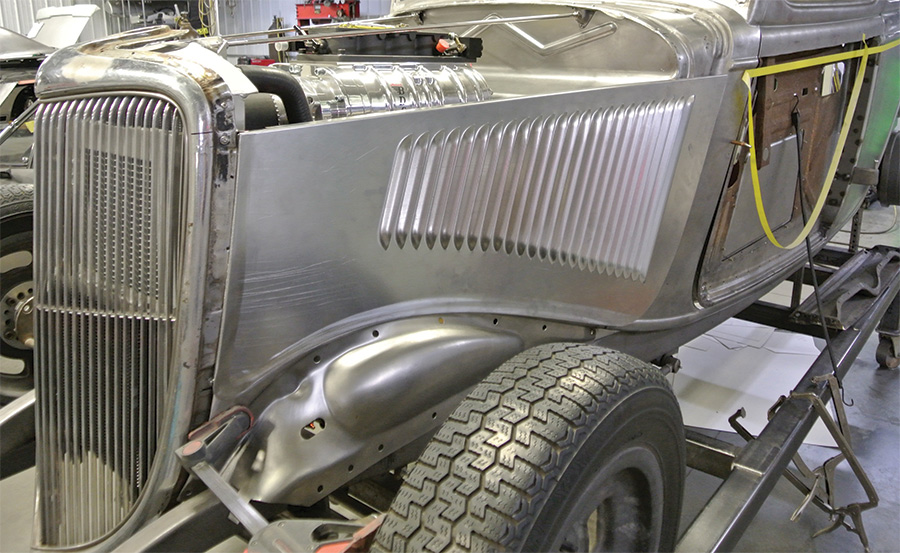
11. A similar test-fitting was done of the driver side. This helps establish the location of the splash apron height on the framerail along with the gap between the hood and the splash apron.
the new Rootlieb hood being fitted
12. Fitting the new Rootlieb hood to the splash aprons was a similar exercise. Here the hood is clamped in place. Notice the new hood carries stock-style louvers but no hood latch handles and the lower reveal on the hood was eliminated. The gap between grille and hood is seen here, too.
the splash aprons located on the frame
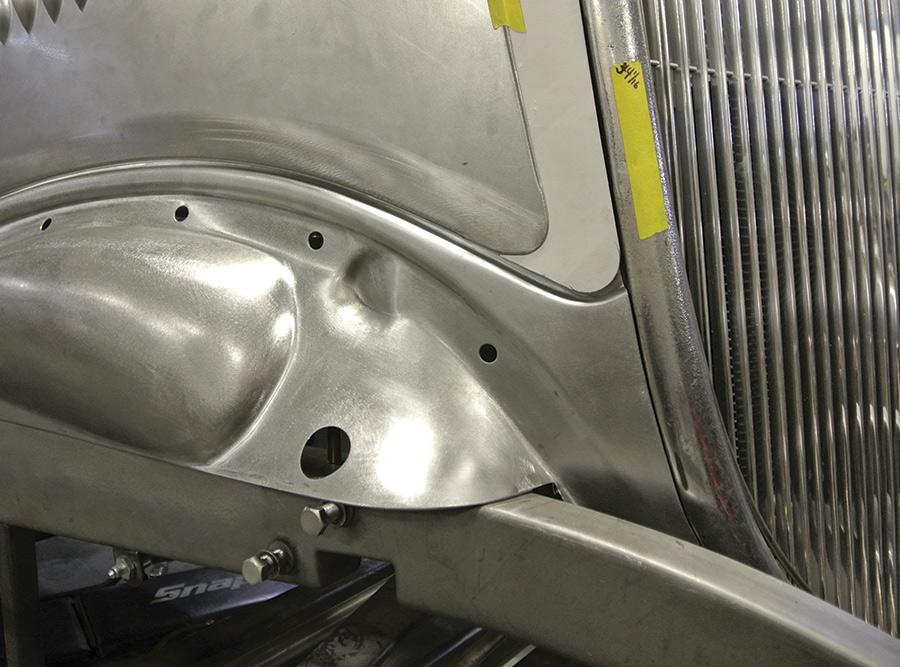
13. After some trimming and fitting, the splash aprons are located on the frame. Now attention is turned to fit and alignment of the body reveals.
splash apron reveal shown being narrower than the reveal on the body
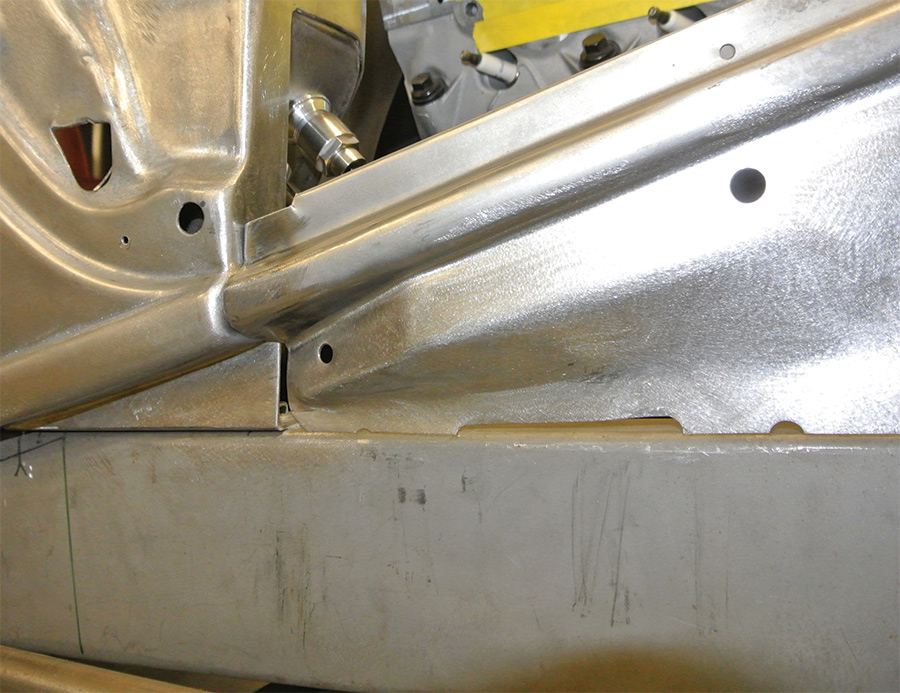
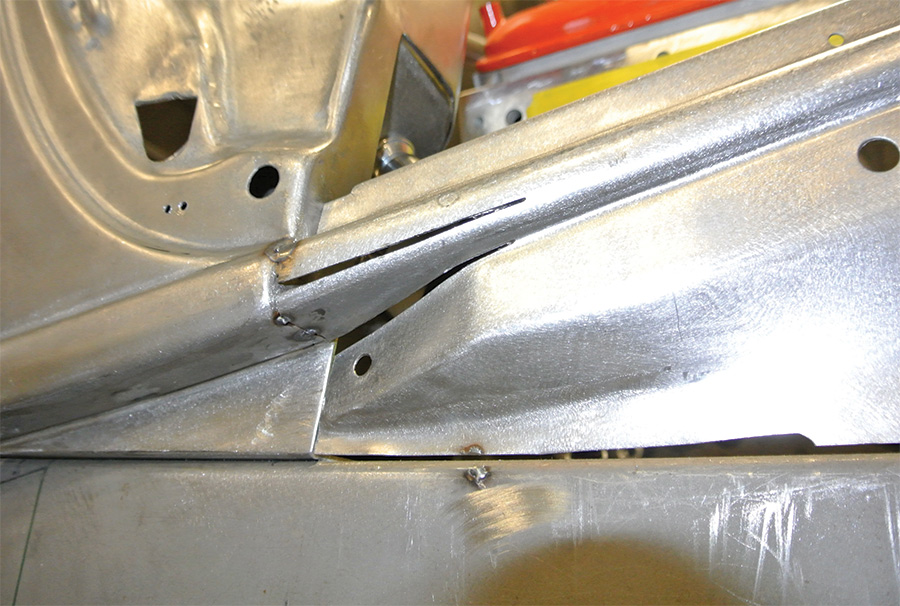
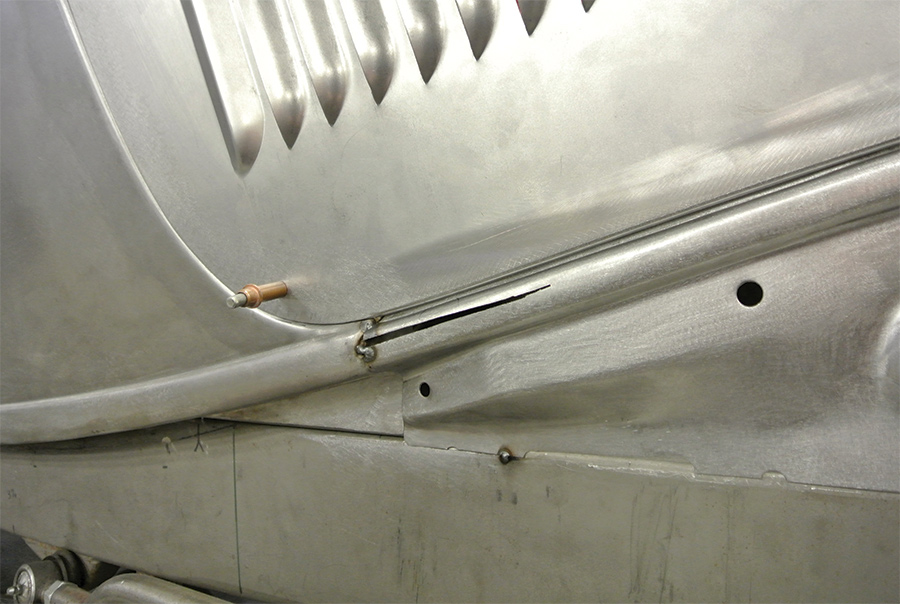
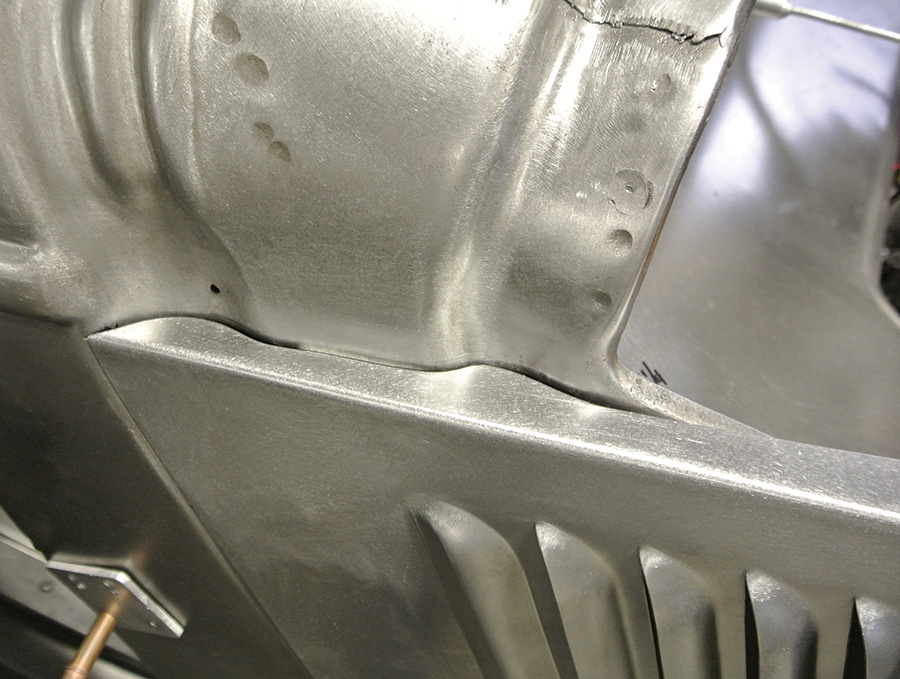
14. The splash apron reveal was narrower than the reveal on the body. Chances are this was the way original Fords fit. However, in a world class hot rod panel alignment must be precise. Wedge cuts allow the panel to be spread to proper alignment.
A single Cleco fastener holding the hood in place above the apron
15. After spreading the splash apron reveal, the hood was test-fit to be sure that expansion did not interfere with the hood gaps. A single Cleco fastener holds the hood in place above the apron.
the top of the apron being cut
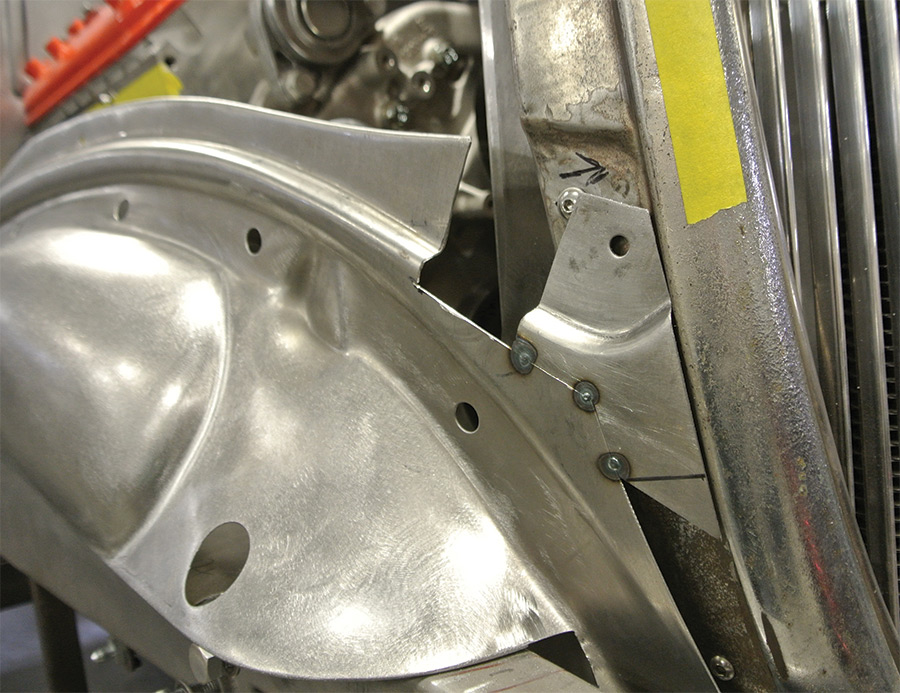
16. Moving up front, the top of the apron is cut and the front piece is moved forward and fit to the perfect gap on the grille shell. Three small tack welds hold it in place.
Filler pieces formed and welded in place
17. Filler pieces were formed and welded in place, followed by some masterful massaging of the metal to make it appear like a single stamping.
fabricated bottom piece to close off the splash apron
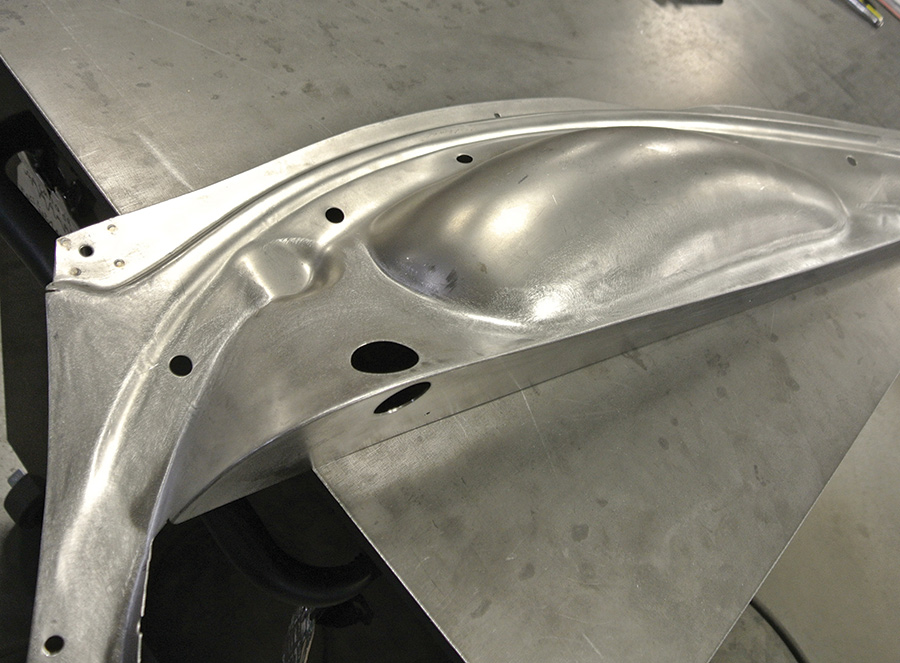
18. This is the finished splash apron. Note that Gudgel fabricated a bottom piece to close off the splash apron and those two big holes are for the front shock mount. The series of holes above that were designed to mount fenders; they will be filled.
hood fitted to the cowl and the splash apron
19. With hood fitted to the cowl and the splash apron, a posterboard template was cut to fill the void between the grille shell and the new hood.
template transferred to a piece of 18-gauge sheetmetal
20. That template was transferred to a piece of 18-gauge sheetmetal and carefully TIG welded to the leading edge of the new hood. All welds were metalworked both sides; note the impeccable fit of these new panels.
A notched piece fabricated to fit the top front corner of the hood
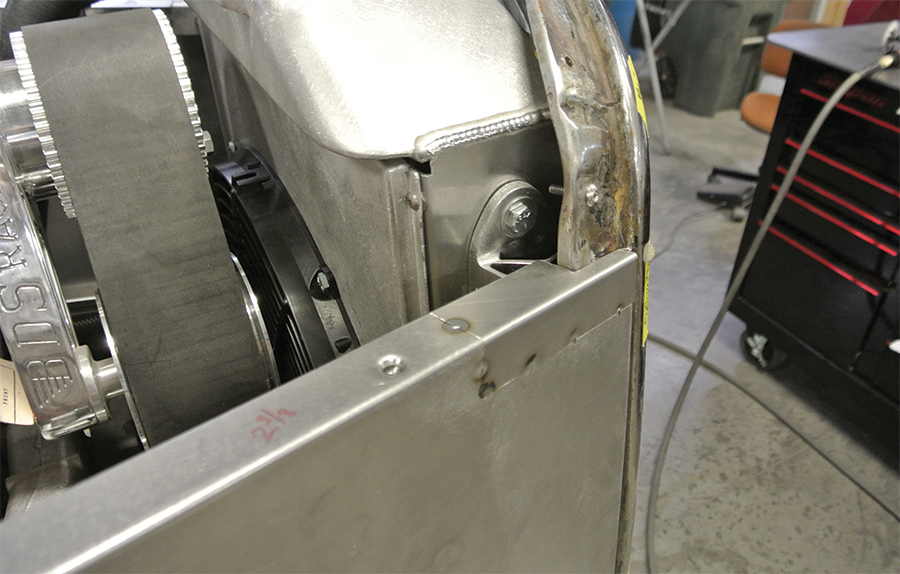
21. A notched piece was fabricated to fit the top front corner of the hood where it meets the grille shell. Once again, the clearance between the blower drive, the radiator tank, and the electric fan can be seen.
the hood ledge sculpted
22. Where the hood meets the cowl, Gudgel carefully sculpted the hood ledge to follow the shape of the cowl. Room must be left between the panels to account for future paint to prevent rubbing.
both splash aprons and hood sides modified and fitted
23. Once both splash aprons and hood sides were modified and fit it was time to fit the top of the three-piece hood. The hood top braces mount to the hidden latching system. The front brace had to be modified due to the hood extension.
top of the hood test-fitted on the new hood sides
24. The top of the hood was first test-fit on the new hood sides. Here the amount of hood extension required can be seen. Because the distance between the cowl and the grille has changed, the shape of the hood top will change as it tapers toward the grille.
both sides cut free from the center of the hood
25. Gudgel decided the best method would be to cut both sides free from the center of the hood. This would preserve the required radius on the outer area of the hood. These pieces would be fit to the car first.
all three panels roughly laid in place
26. With all three panels roughly laid in place, Gudgel was able to determine the best method to mate the three pieces and join them back together.
outside panel fitted to the grille shell
27. The outside panel was fit to the grille shell and then a template was made to fabricate the filler place required at the rear of the hood. The same process was completed on the driver side outer panel.
both outer panels fitted to the car and the centerskin of the hood
28. With both outer panels fit to the car the centerskin of the hood was carefully aligned around the stock radiator cap. Note the wedge-shaped openings that must be filled to create the proper taper on the elongated hood.
filler panel on the rear of the hood fabricated and carefully tack-welded in place
29. The filler panel on the rear of the hood was fabricated and carefully tack-welded in place. Finish welding will be completed by alternating between these tack-welds to control any potential warpage that could be caused by excessive heat on the panel.
two filler strips fabricated and welded to the sides of the top hood panel
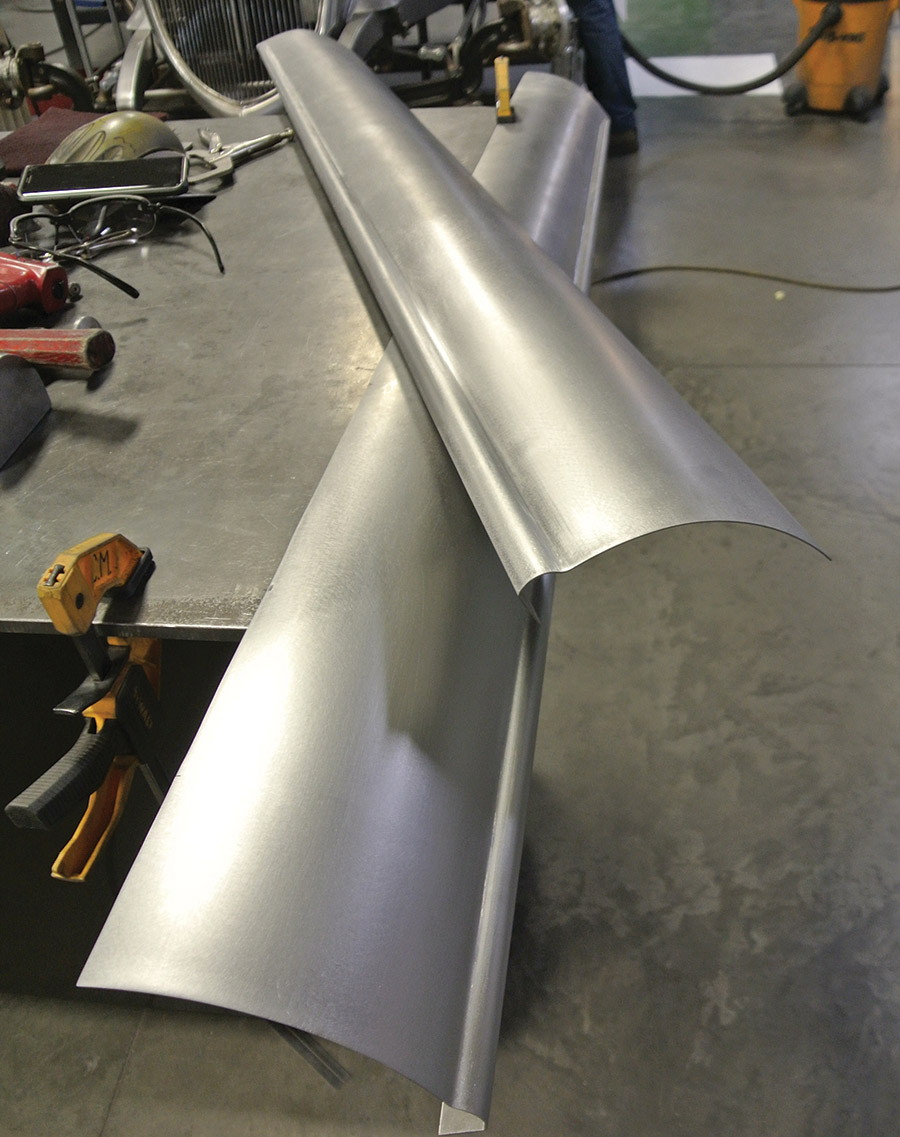
30. Next, two filler strips were fabricated and welded to the sides of the top hood panel. This will allow the proper taper to be established to the top hood panel. Once again, welding long panels like this requires great welding skill and constant awareness not to overheat the panel.
the top hood panel after surgery completed
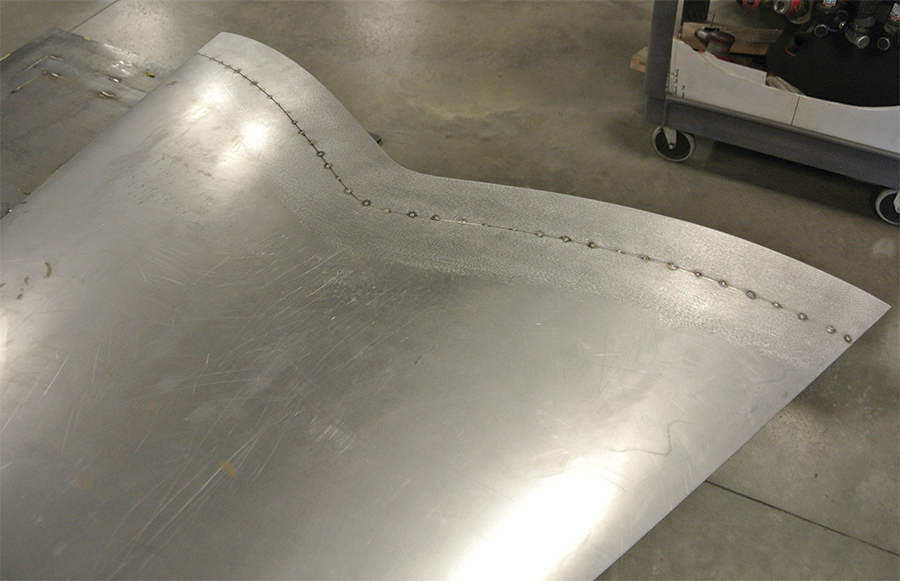
31. This is the top hood panel after surgery has been completed, and it illustrates the large amount of welding involved. Now the hood top panel has ample metal to provide the perfect taper between the cowl and the grille.
top panel laid over the two outer panels
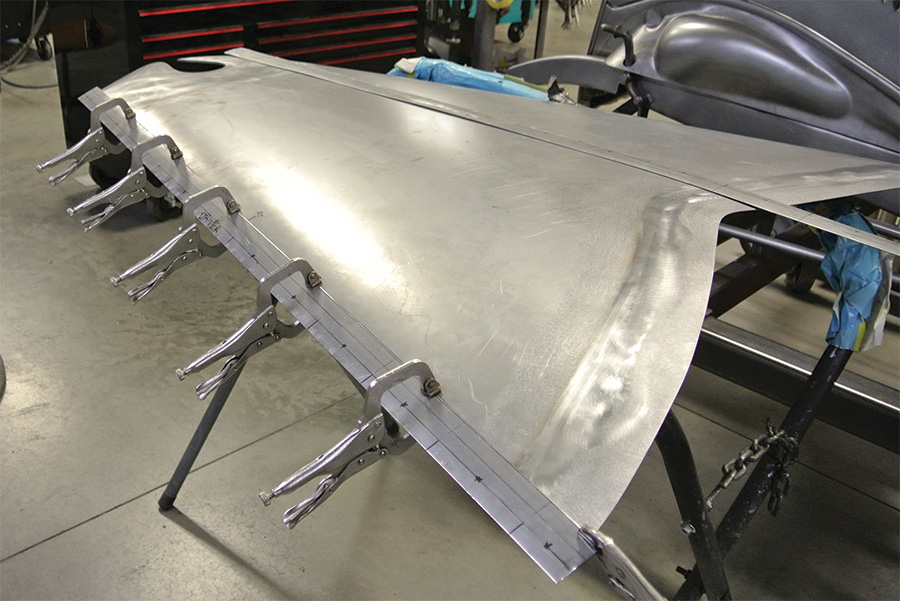
32. The top panel was laid over the two outer panels and carefully centered on the radiator cap contours. The top panel was then scribed and cut to a perfect fit. Panel clamps hold the three pieces together and then three pieces are tack-welded together on the car.
the risk of grossly simplifying the process
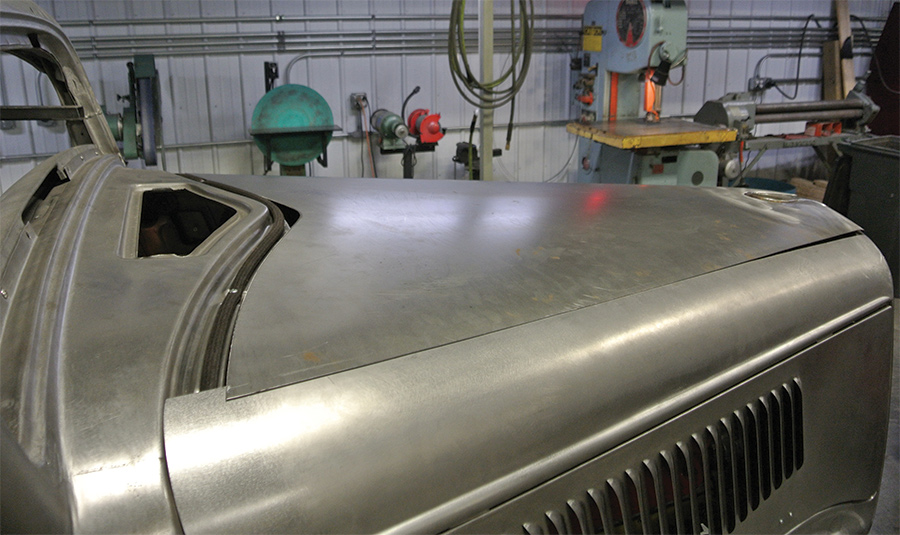
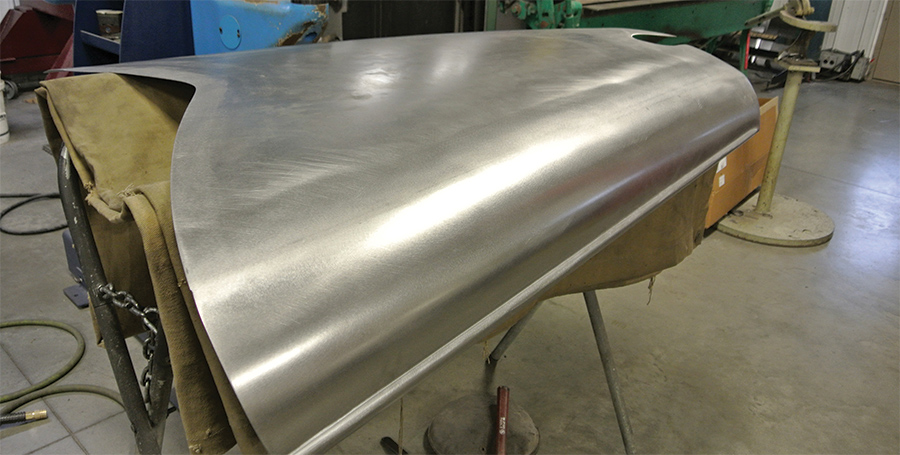
33. At the risk of grossly simplifying the process, here is the hood top with all three pieces rejoined. The welding is complete and the metal finishing nothing short of amazing. Note the hammers, dollies, spoon, and shot-bag on the floor, all tools of the trade.
The hood top now fitted to the two new extended hood sides
34. The hood top is now fit to the two new extended hood sides and as you can see the gaps are all spot-on.
cutting the hole in the hood top so four scoops can protrude and gulp air
35. The finishing touch is cutting the hole in the hood top so four scoops can protrude and gulp air into the big BDS blower below. This adds the perfect hot rod flavor to the custom formed and stretched hood. It also will provide the perfect view when seated behind the wheel of this hot rod coupe.
 SOURCES
BBT Fabrications
(217) 586-5699
bbtfabrications.com

Rootlieb
(209) 632-2203
rootlieb.com

Modern Rodding
VOLUME 2 • ISSUE 8 • 2021