Modern Rodding Tech
InTheGarageMedia.com
Fabrication specialists sanding and preparing a roadster chassis for finishing touches in a restoration shop
1. “Molding the frame,” a customizing trend popularized by 1960s chopper builders, the Shadow Rods 1932 framerails wheelbase stretched 2 inches and was modified by Johnson’s Hot Rod Shop.
One Step Beyond
Super-Detailing for Winning Results
By John GilbertPhotography by Jessica Roach
T

here are more intricate details to MeKenzie Murphy’s Triple Crown of Rodding–winning 1932 Ford roadster than meets the eye. The good news for the DIY guy is these refinements require investing more labor than spending money. The truth is it takes more than just one step beyond normal preparation to mold a frame and smooth an engine in a show car for show-winning results, but “One Step Beyond” sounded like a cool title. Whether it’s stacking up points on a judging sheet or taking a judge’s trained eye to decide whether a car is a First Place winner, the intricate details add up.

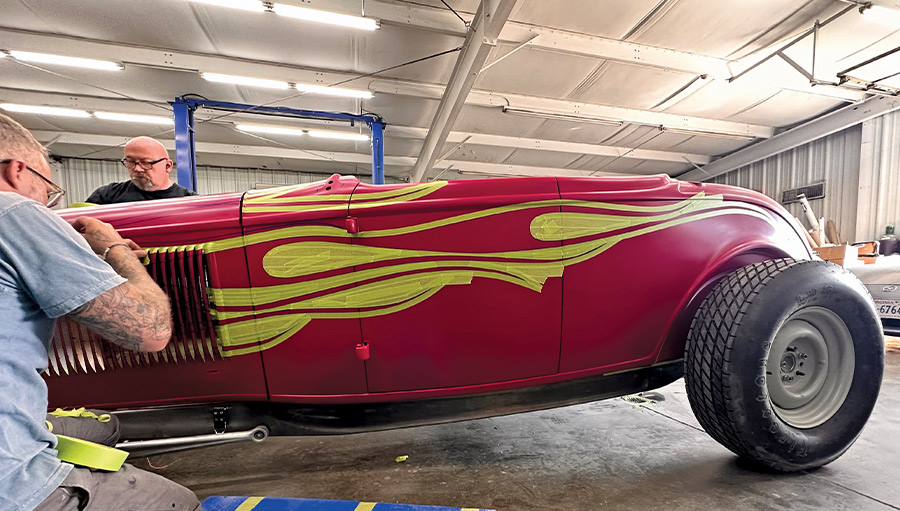
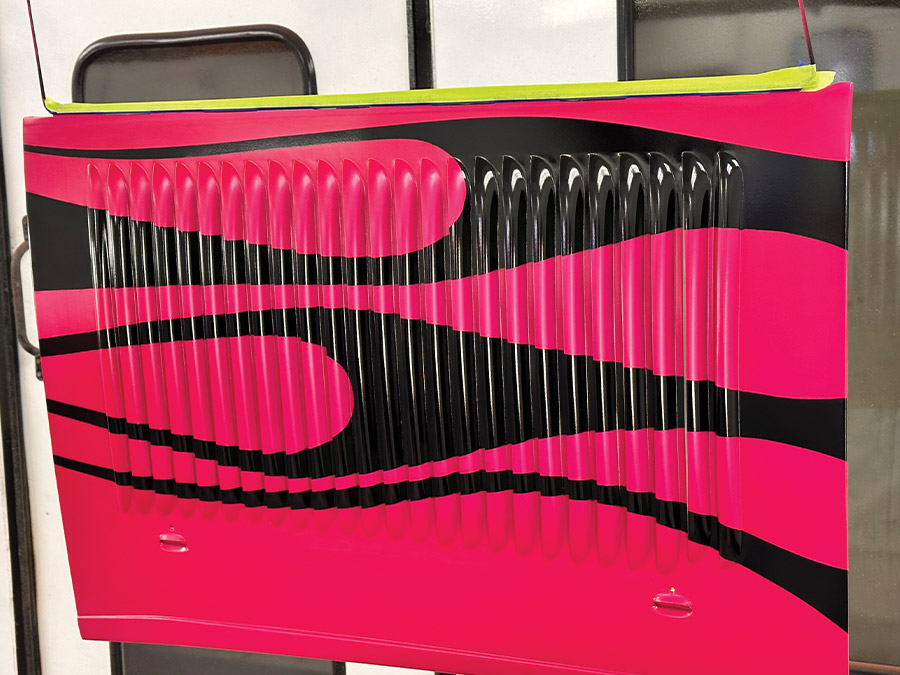
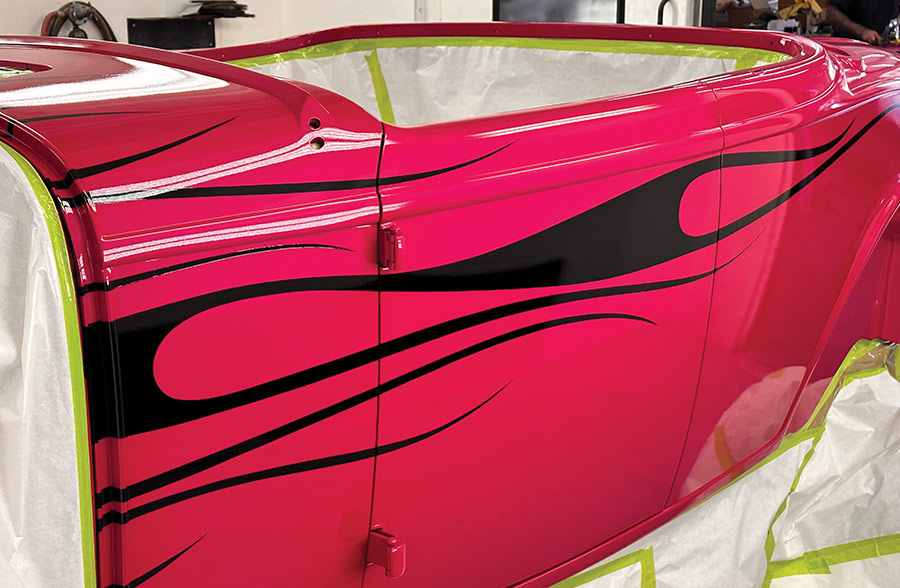
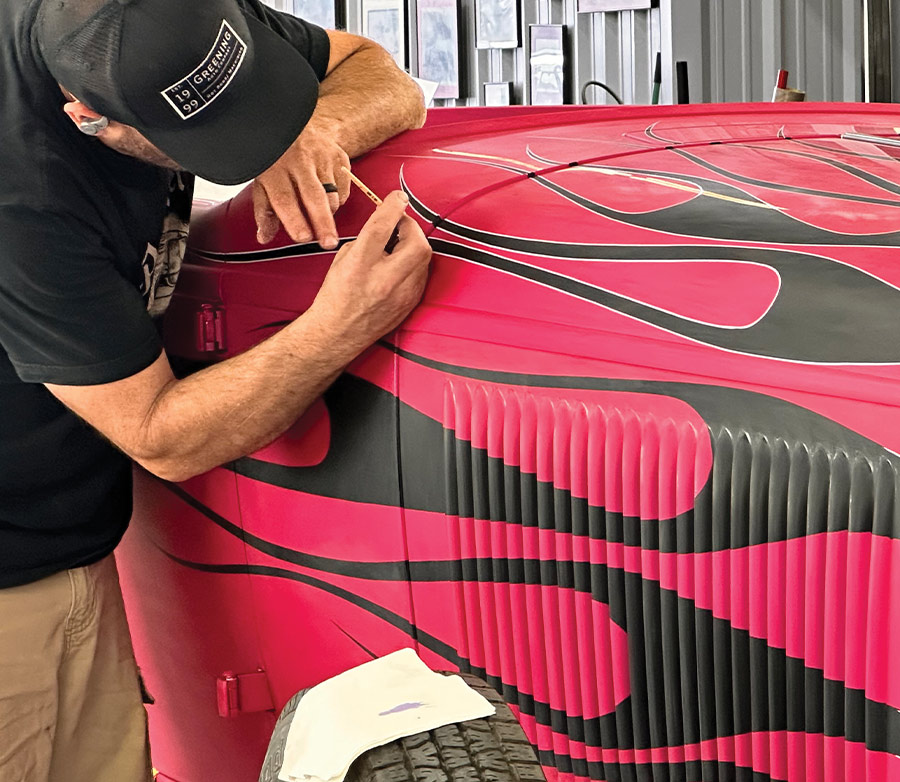
The first thing a custom painter will appreciate when seeing Murphy’s 1932 Ford roadster in person is how perfectly aligned the flames pass over the louvers on the hood sides, maintaining a perfect flow. For a photographer, it’s how intensely the 1932’s candy pearlescent Magenta paint pops and lights up a photograph. For a ’32 Ford aficionado, it’s the front view looking face onto the black radiator shell that looks like a stock ’32 and then at three-quarter view bursts into black flames engulfing most of the body, ignoring the difficulty of flaming louvers in favor of a flowing design.

The debut of 19-year-old Murphy’s Johnson’s Hot Rod Shop–built 1932 Ford roadster was in Pomona, California, as an America’s Most Beautiful Roadster contender at the 2024 Grand National Roadster Show, and it was a favorite for many showgoers. From Pomona, Murphy’s ’32 went to the 2nd Annual Triple Crown of Rodding in Nashville where it took the Best Street Rod Award and garnered the Modern Rodding Dec. ’24 cover.

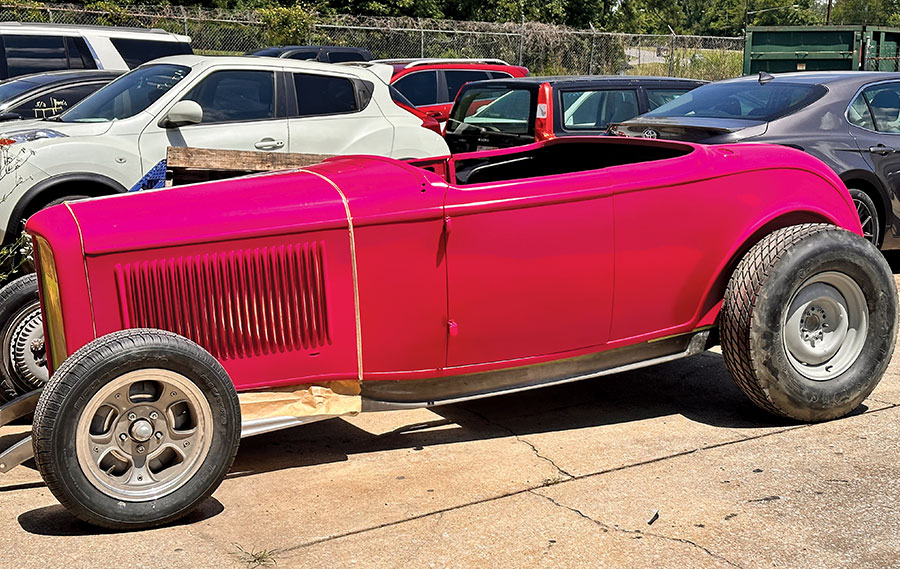
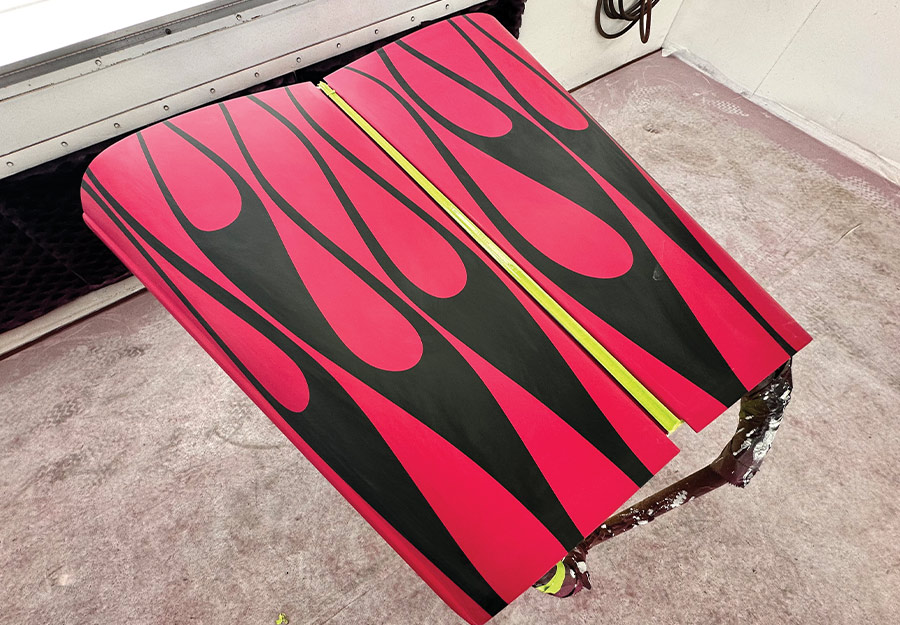
It’s been almost two decades since pinstriper/custom painter Josh Shaw laid his trademark “Ohio-style” flames in pearlescent pink on Murphy’s baby stroller. It was Gary Ragle of Ragle Design, knowing Shaw would be laying flames on the ’32, who penned the concept illustration for Johnson’s Hot Rod Shop engulfed in Shaw’s Ohio-style flames. It was Murphy’s input, desiring a nostalgic look back to her pink flamed stroller, that the magenta color emerged. It wasn’t a snap decision to choose a vibrant shade of pink. Johnson’s Hot Rod Shop had numerous spray-outs to decide on Magenta by custom mixing Axalta’s candy pearlescent pink. The steps to achieving the stunning candy pearl pink color are described step-by-step in the captions.

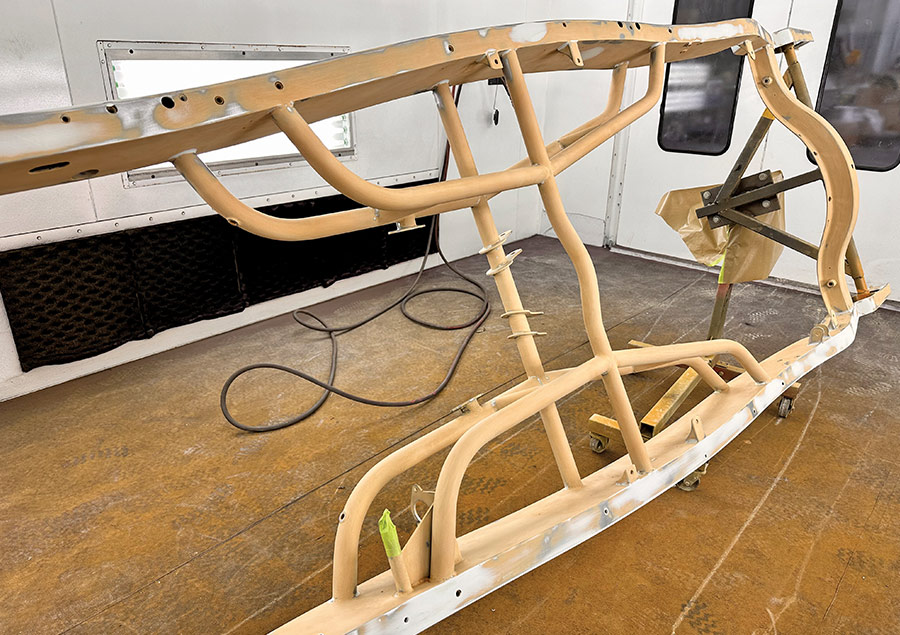
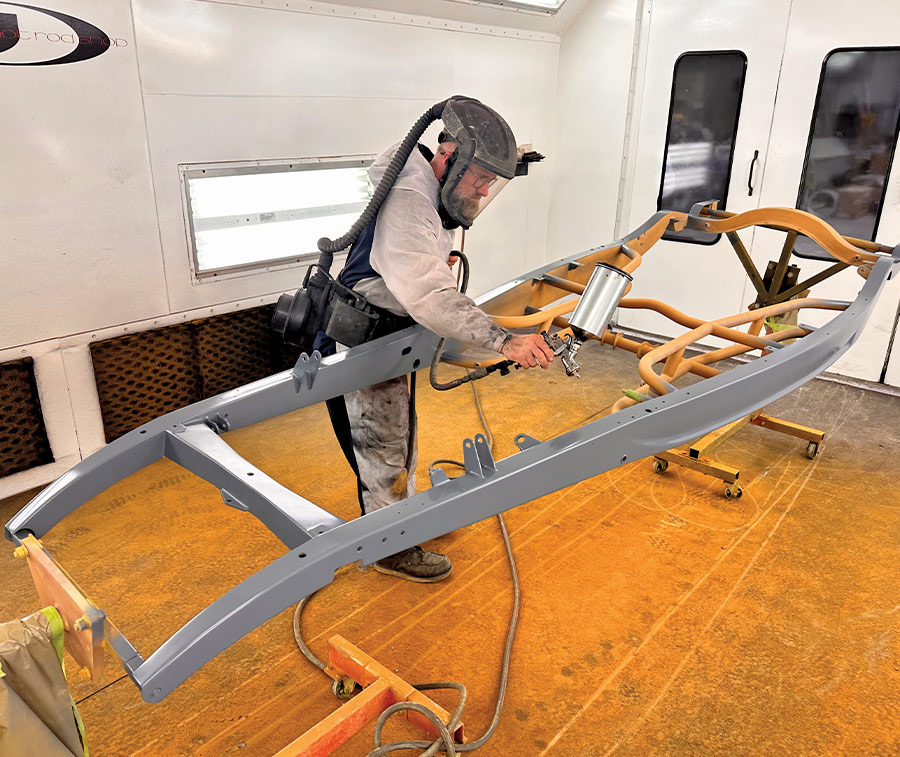
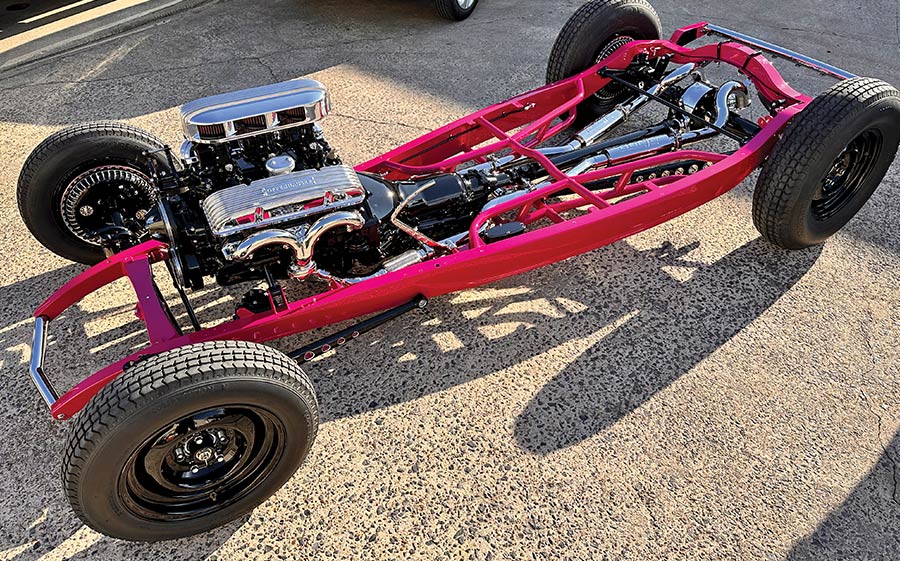
Molding the frame and smoothing the engine, trans, rearend, and suspension are where many hours of intensive labor are spent preparing the frame. The bare metal was sanded with 80-grit; any high spots in the welds were ground low before the welded joints were molded and the framerails skim-coated with Spies Spray Polyester and block sanded perfectly flat.

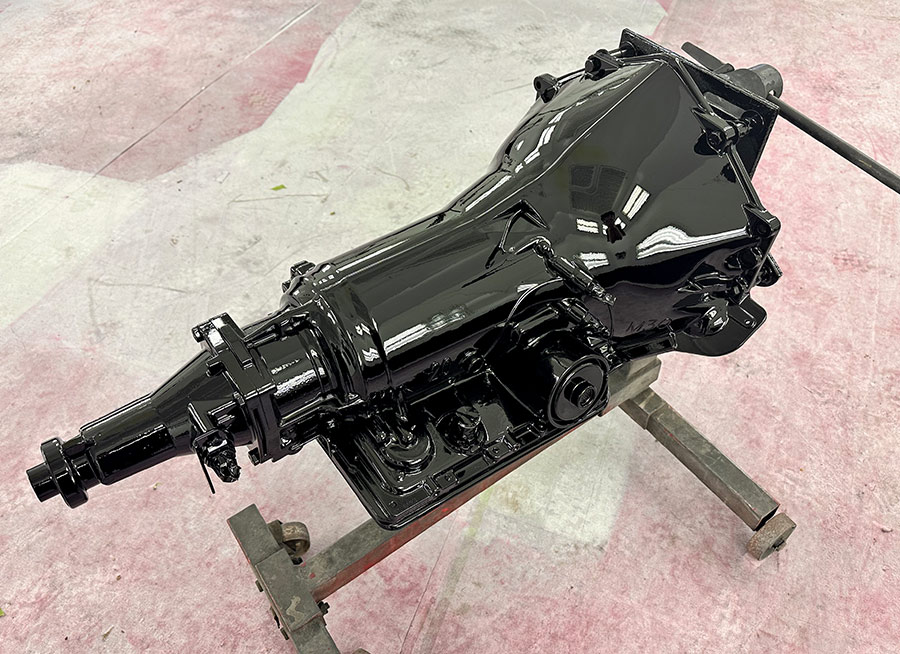
Smoothing the engine and associated components to look slick as black porcelain took grinding and sanding, blocking heavy coats of primer, and shooting a black basecoat buried in clear, which was then color-sanded and rubbed. The final stages of custom painting the 1932’s body and related parts beyond what is discussed here were cutting and buffing the paint. (Cutting and buffing paint is covered step by step in issue # 34 of Modern Rodding.)

There are different degrees of painting a car, from an Earl Scheib $29.95 “splash job” to prepping a car in an extreme manner. Johnson’s Hot Shop (specifically Greg Chalcraft and Scott Falotico) prepared Murphy’s ’32 Ford highboy. All it takes is developing an eye for detail and a willingness to spend hours working to obtain it.

Close-up of bracket reinforcements on a meticulously sanded and primed custom roadster frame
2. It’s an over-the-top practice. Fully molded means every single joint and weld, even if it will never be seen when the car is assembled, is treated like an eternal visual priority.
Tubular roadster chassis in primer, showcasing its intricate structure for durability and performance
3. Spies & Hecker Raderal Spray Polyester 3508 is a DTM (direct to metal) hi-build polyester primer that provides a thick, meaty coating to block sand the surface flat.
Freshly painted roadster frame in vibrant yellow primer, prepped for additional coats
4. The frame is fully molded and in its final Spies & Hecker coating. Notice two engine stands have been adapted to serve as a rotisserie.
Technician spraying a roadster frame with gray primer in a professional paint booth
5. The final primer was completely sanded starting with 80-, 120-, 180-, 220-, 320-, and 400-grit—before applying sealer.
Bright pink finish being applied to the tubular frame, emphasizing its bold custom design
6. After primer, the next steps to achieve the custom-mixed Axalta Candy Pearl Magenta final color were to spray four coats of pink pearl basecoat.
Glossy hot pink roadster frame with rear suspension components being reassembled for final assembly
7. Following the pearlescent pink basecoat were four coats of candy magenta clear basecoat, which were then topped off for the final finish with four heavy coats of clear urethane.
Transmission refinished in high-gloss black, emphasizing a sleek and durable appearance
8. Not one component, the engine, transmission, or the differential end tubes, escaped “smoothing.” The basecoat is black under clear and then the color is sanded and rubbed.
Completed black-painted transmission, ready for installation in the custom roadster
9. There are a lot of areas on an automatic transmission that are nearly impossible and incredibly labor-intensive to sand smooth the aluminum case.
Engine block coated in glossy black paint, enhancing its appearance for a high-performance restoration
10. The 400-inch small-block Chevy engine required a lot of labor to grind and sand the cast-iron block smooth before a slick coating of black urethane was applied.
Bare-metal 1932 Ford roadster body prepped for primer in a professional restoration booth
11. The beauty of starting with a Brookville steel body rather than a “genie” body is that prepping rust-free steel begins with 80-grit sanding. The same products used to prepare the frame were used to finish the body.
Roadster body coated with orange primer, ready for sanding and additional layers of paint
12. Block sand, guidecoat, and repeat the body, doors, hood, and grille progressively with 80-, 120-, 180-, 220-, and 320-grit readied it for Spies Hecker 5450 gray Permasolid Spectro sealer.
Fully assembled 1932 Ford roadster with a vibrant pink finish parked outside the workshop
13. Now in color and clearcoated, the moving parts, body, doors, hood, hood sides, and radiator shell, were adjusted tightly into place to ensure the artwork (flames) would be perfectly aligned.
Custom flames being outlined on a hot pink 1932 Ford roadster by a skilled technician
14. After sanding the clear with 400-grit, Josh Shaw pulled 1/4-inch 3M Blue Fineline tape freehand to flame the 1932, not stopping at the door and hood opening gaps.
Close-up of blue flame patterns drawn on the side of the roadster for a custom paint job
15. Notice the area that will be covered by the windshield posts was outlined with Blue Fineline to ensure the flow of the flames would not be broken up or covered when the windshield posts were installed.
Yellow masking tape used to outline intricate flame designs on the roadster’s body
16. To mask off the negative space areas, Shaw laid 3M 3/4-inch green masking tape, which is made to resist solvents (thinned paint) and moisture.
Side profile of the roadster with taped flame patterns being finalized for paint application
17. Shaw says masking the flames running over the hood side louvers was tedious and required absolute precision. Any slop would cause the flames to end up choppy and misaligned.
Hood panel masked and prepped for dual-tone black and pink flame detailing
18. Choppy lines are almost an optical illusion viewed at different angles. As shown here, the flames are ready for black. The striping brush can correct slight irregularities.
Painter peeling masking tape to reveal sharp black flame patterns on the roadster’s hood
19. It’s probable that the very first parts Scott Falotico pulled off the masking paper and pulled the tape back on were to see how the flames on the louvers turned out.
Completed hood panel featuring bold black flames over a hot pink base, showcasing precise custom work
20. To get as close to perfect as possible, the next step was to clearcoat all the flamed parts and the body to create a safety barrier should an errant move during striping occur.
Hood panel painted with bold black and pink flames, featuring sharp contrast and precision
21. Shaw stripped the parts removed from the car and then reinstalled them to verify the stripes were in perfect alignment before receiving four coats of clear urethane.
Side panel of the roadster showcasing a glossy black flame design over a vibrant pink base
22. Notice that the tail of the top flame on the cowl reflects raised edges. These edges were block-sanded flat before pinstriping began.
Painter preparing custom pinstriping paint for detailed hand-applied accents
23. Shaw thought a white pinstripe would work at first, but it looked too bright, so he custom-mixed House of Kolor light lavender with a touch of Roman Red to create Latvian Lavender.
Artist adding white pinstriping details to outline black flames on the roadster's pink body
24. Shaw pulled the longest portion of the stripes on the body; body parts were removed from the car but left aligning the stripes where they met with everything mounted to ensure a matchup.
Close-up of meticulous pinstriping work highlighting the contours of the flame design
25. At the end of the flame tips, Shaw started with a sharp point and broadened the stroke as he pulled the stripe in a reverse direction to match the width.
Overhead view of the hood, revealing symmetrical black flames with white pinstriped edges
26. From this aerial view, it can be observed that the flames wrap into the ’jambs and hidden areas between the front of the hood, the radiator shell, and the rear of the hood and the cowl.
Roadster chassis painted pink with a fully assembled drivetrain and chrome components
27. Fully molding the frame and smoothing the engine and transmission along with suspension and driveline components while holding to a two-color theme was very effective.
Nearly completed 1932 Ford roadster featuring striking pink and black flames, ready for final assembly
28. During final assembly, continuing to wrap areas with 3M 301 Performance Yellow masking tape ensured those spots were protected from unnecessary damage.
SOURCES
Modern Rodding
VOLUME 6 • ISSUE 54 • 2025