Modern Rodding TECH

InTheGarageMedia.com

a mechanic uses simple tools on a work table, leaning in close to a piece of steel trim
Peck & Polish typography
1. Simple tools and a truckload of patience bring this stainless steel trim back from the dead.
Peck & Polish
How to Repair Damaged Stainless Steel Trim
By Tommy Lee Byrd Photography by THE AUTHOR
W

hen it comes to the final details of a project car, the trim can be one of the most tedious parts of the process. Even if the trim is in good shape, polishing it and reinstalling it can present challenges. Some applications have a huge selection of aftermarket replacement parts, but many purists would rather repair an original piece. In some cases, like our ’66 Chevy II project car, the trim pieces simply aren’t available, so you must repair the original parts if they are damaged or scour swap meets to find suitable replacements.

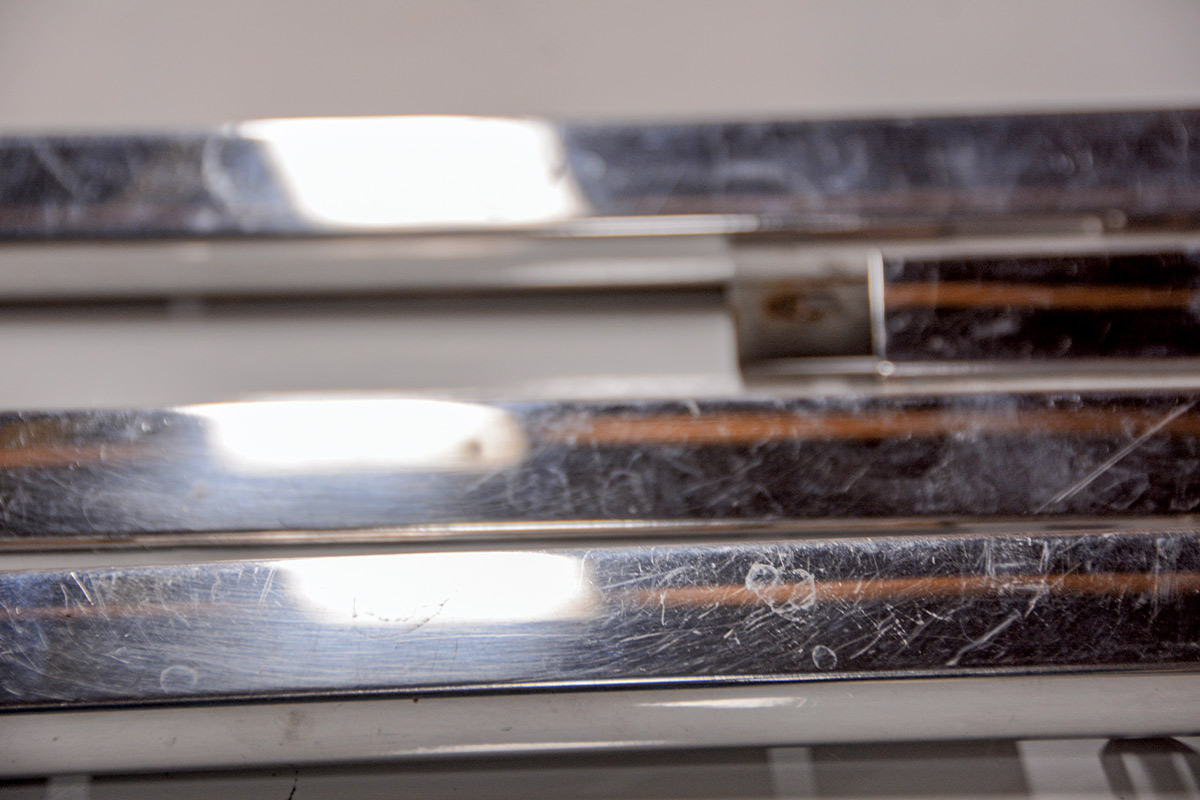
On the ’66 Chevy II, the trim is made from a variety of metals. The side trim is aluminum, while the hood and trunk trim pieces are diecast (pot metal) with chrome plating. Pieces like the rear window molding and upper door and quarter-panel reveal moldings are stainless steel.

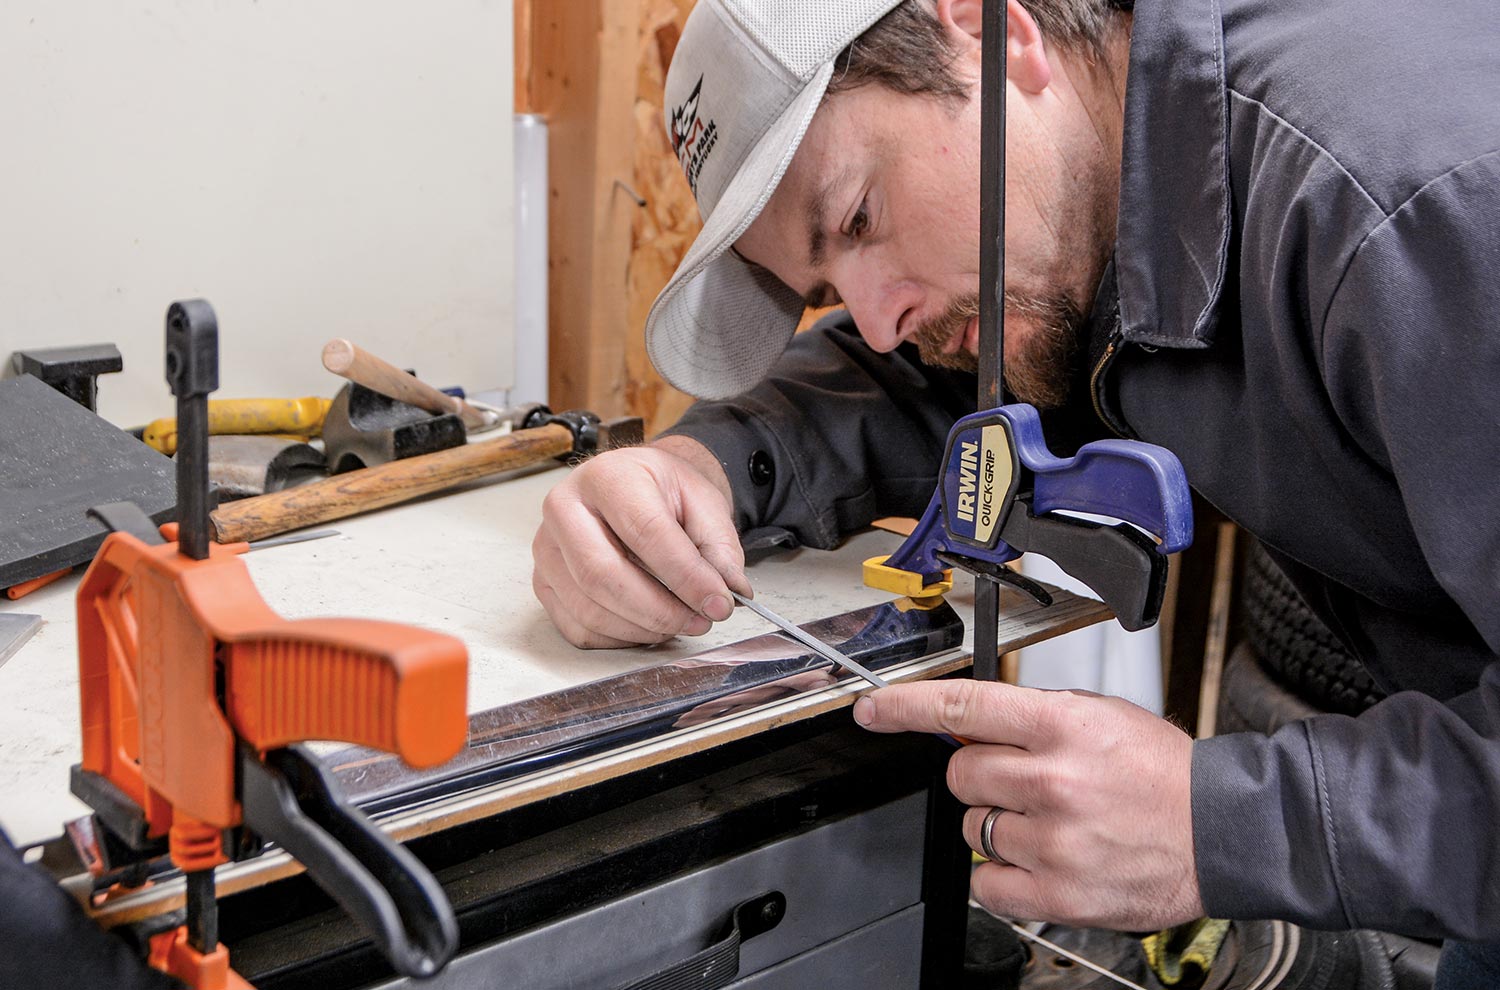
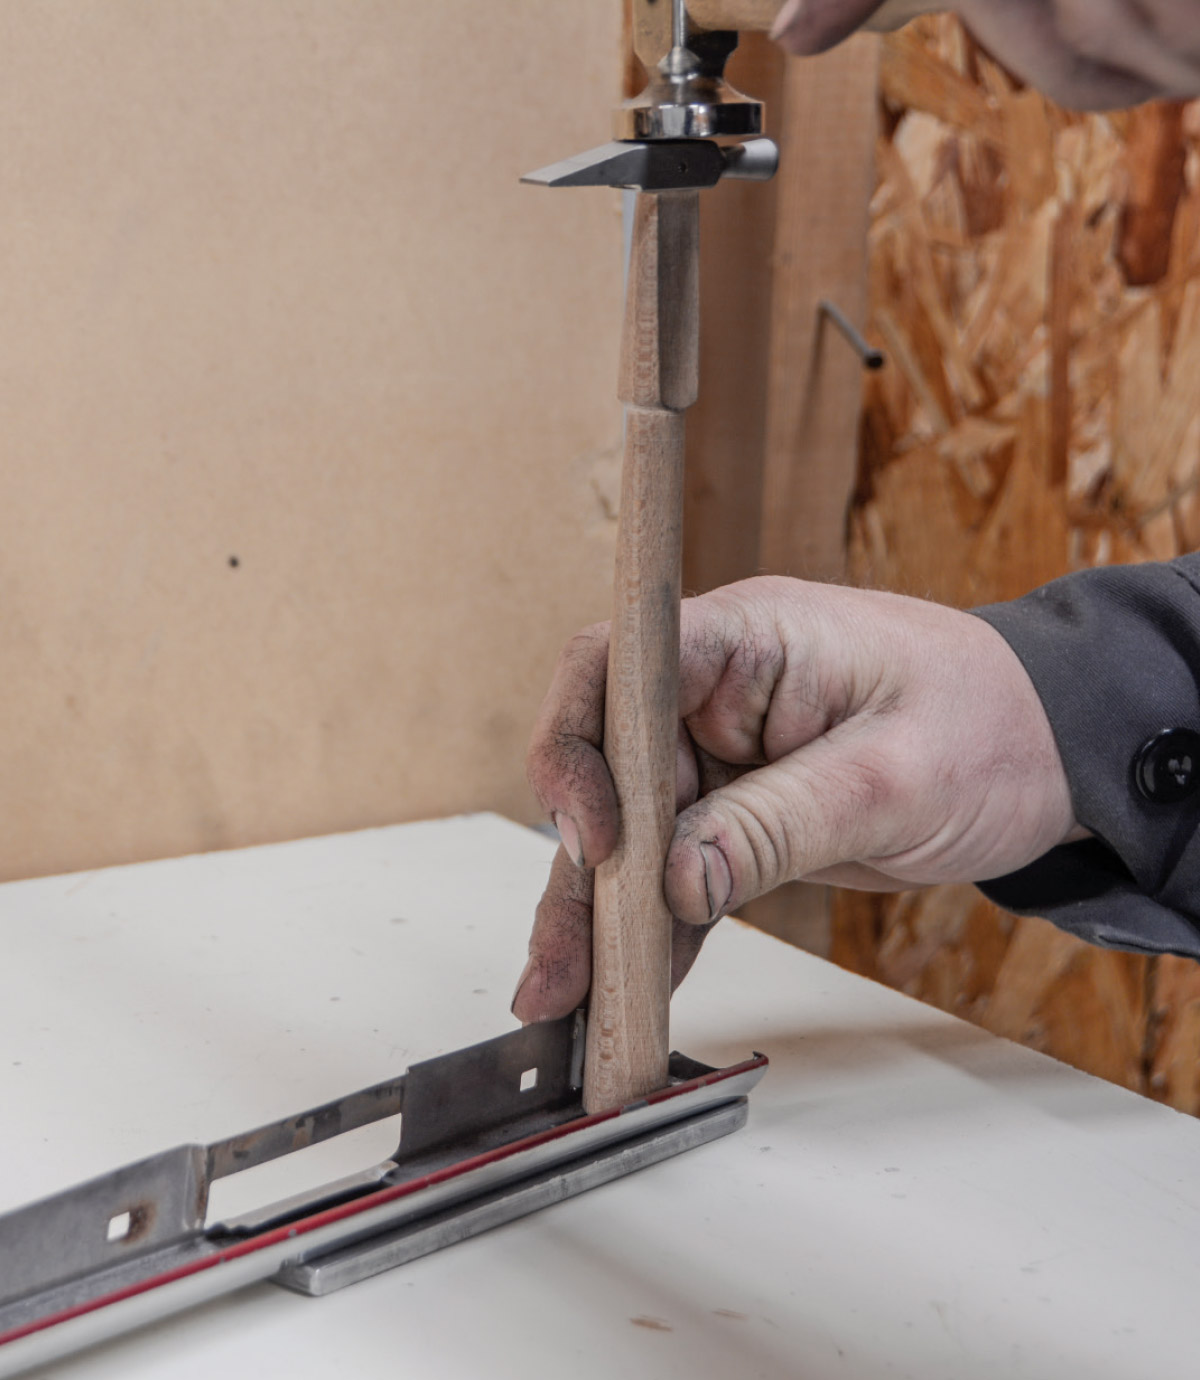
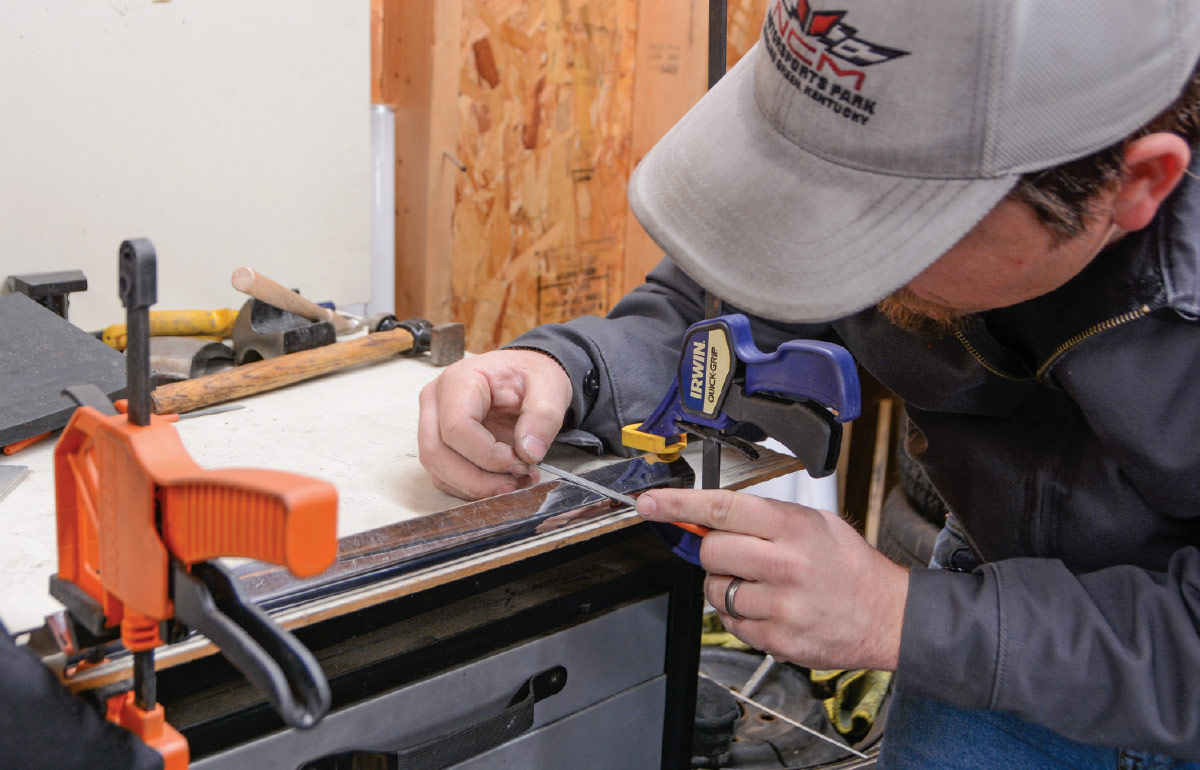
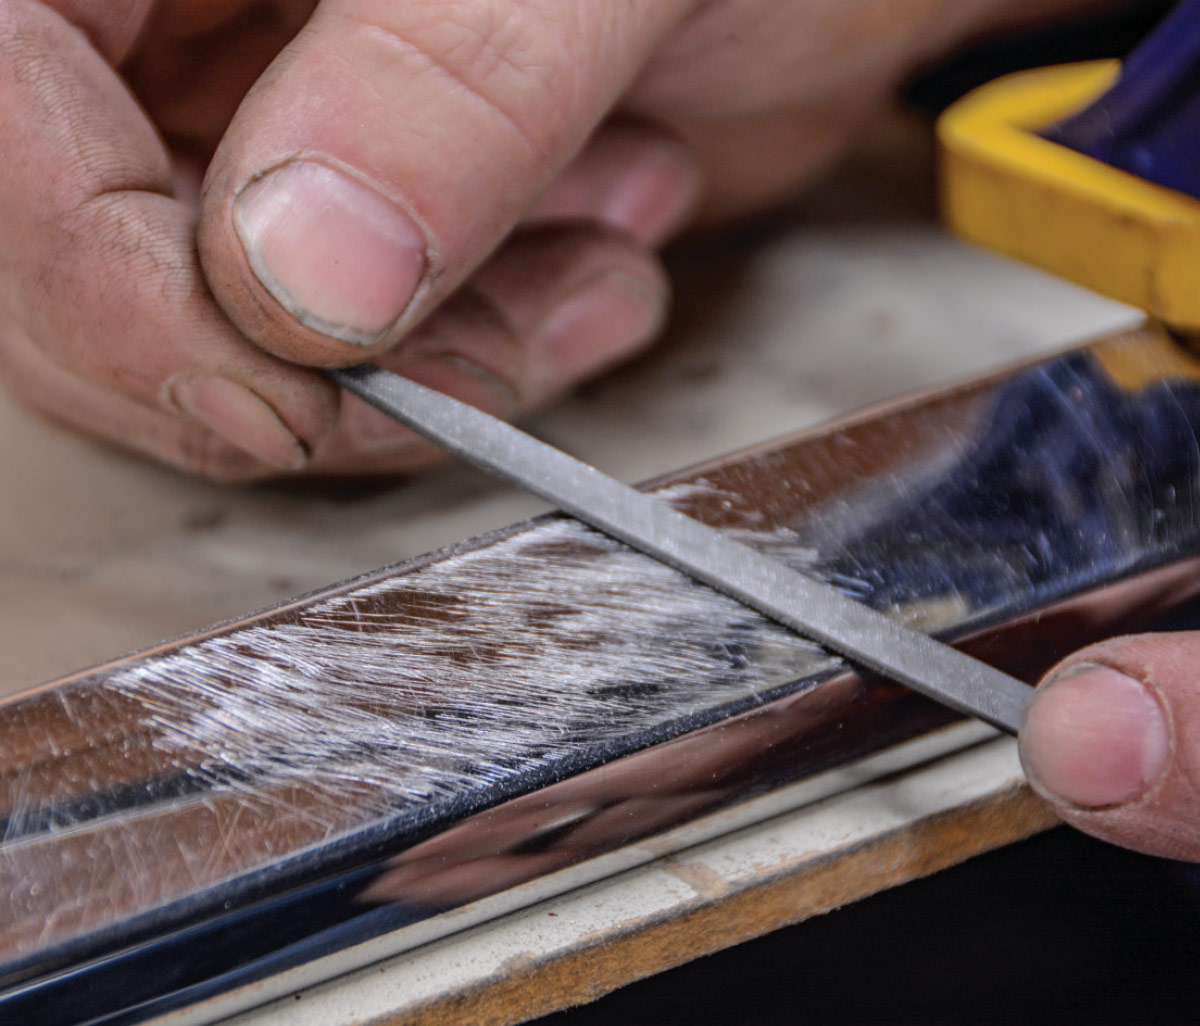
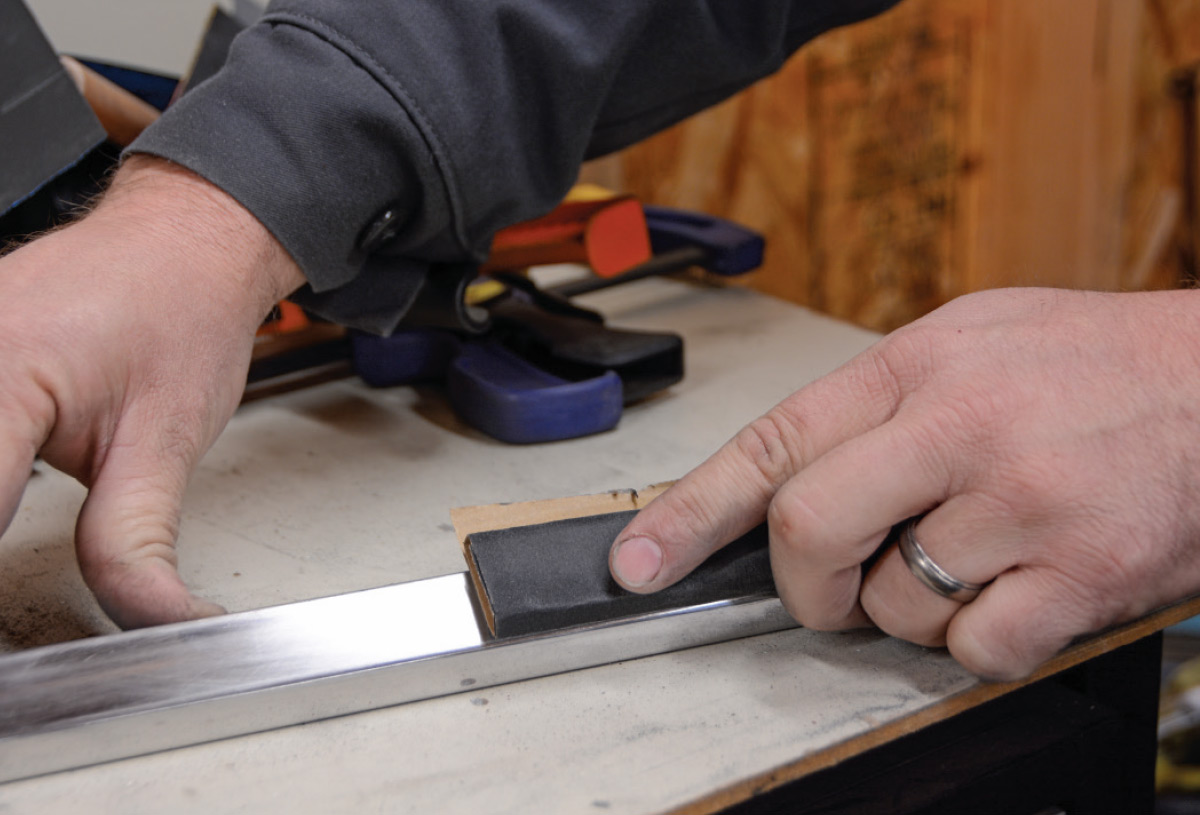
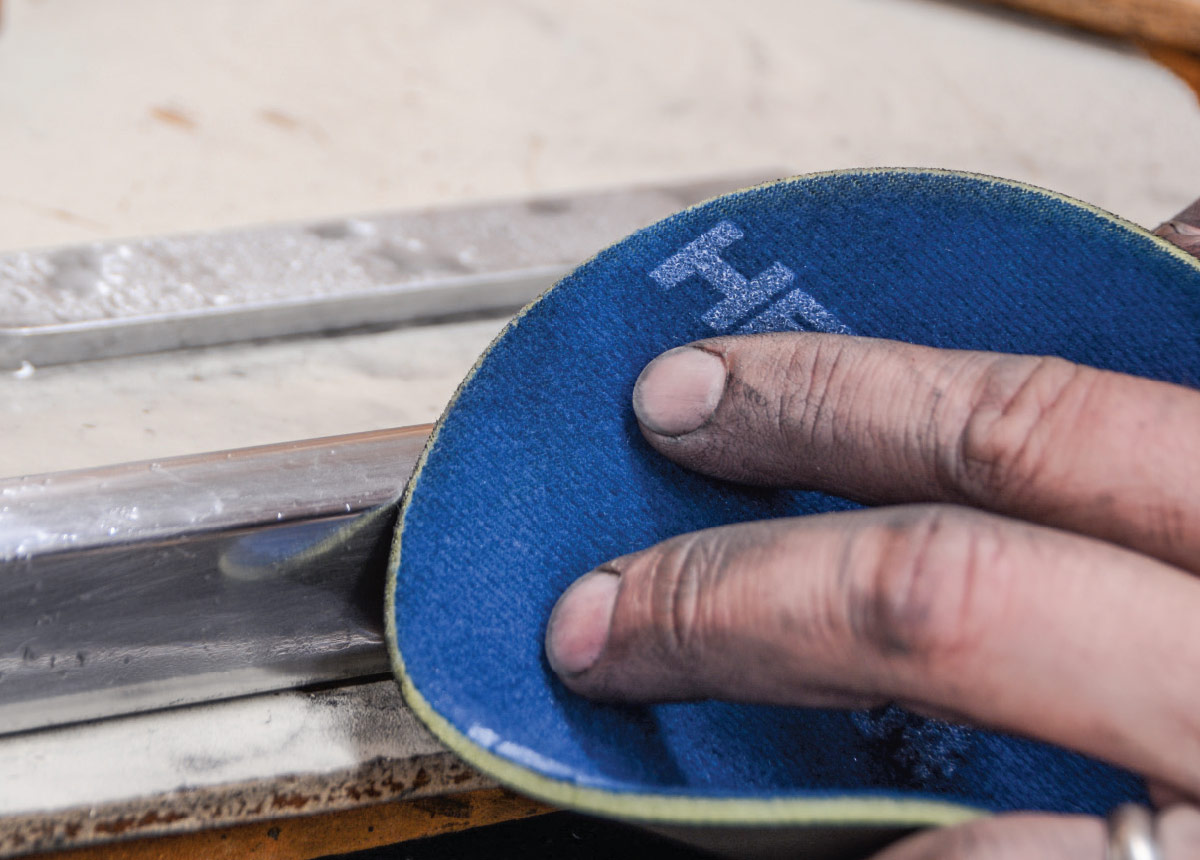
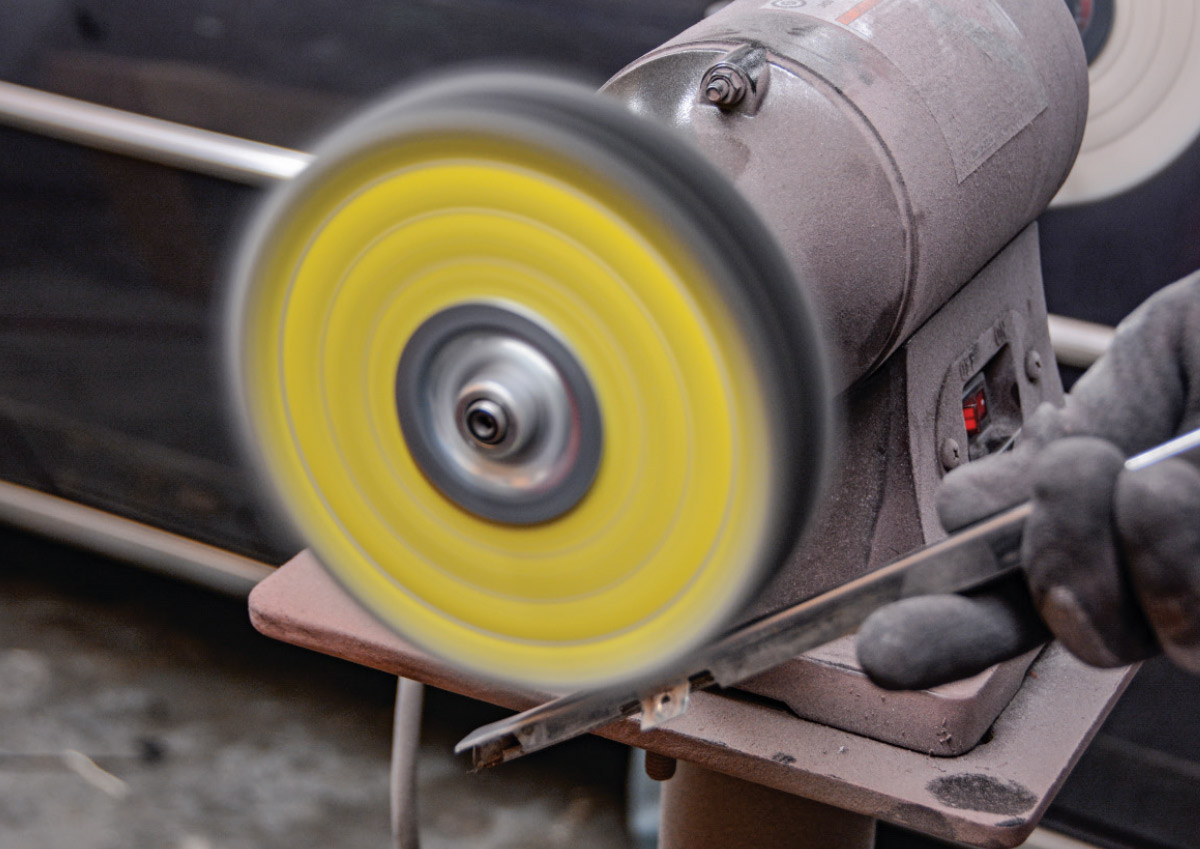
We were unable to source new upper door and quarter-panel reveal moldings, so we needed to repair the four pieces. There are polishing shops and plating shops that take on jobs like this but we wanted to try our hand at repairing the trim in our garage. For this, we needed some specialty tools to make the job a little easier. We picked up a Dagger Tools Trim Repair Kit from Summit Racing (PN CTI-TR-KIT-II), which features multiple hammers, dollies, files, and other tools to help straighten the trim. After we pecked around and got all the dents hammered out, we moved onto polishing. We also used various grits of wet or dry sandpaper to sand out any scratches or imperfections and a bench grinder/polisher to bring it back to a nice shine. We used a Summit Racing Polishing Kit (PN SUM-905027), which comes with a total of three 6-inch buffing wheels of various constructions and four compound bars to allow us to perform a multistep polish.

We spent several evenings in the shop pecking and polishing the four pieces. The process is much quicker for pieces that only need polishing, as the damaged areas certainly slow things down. Follow along as we remove dents, sand out scratches, and buff the pieces to a mirror-like finish, providing an excellent finishing detail for our ’66 Chevy II project car.

close view of the ’66 Nova's rough trim pieces

2. Our ’66 Nova project isn’t a show car, but these upper door and quarter-panel reveal trim pieces are too rough to reinstall on a freshly painted car.

close view of two stainless steel trim pieces with dents and scuffs
3. Stainless steel is stronger than the thin aluminum trim used during the ’60s and ’70s, but any trim piece is susceptible to dents or damage.
close view of the end of a door trim with a sizable dent

4. The most challenging dent was on the end of a door piece. The dent doesn’t have any sharp areas, splits, or creases, so we should be able to straighten it.

back view of the door trim showing red overspray from a previous paint job
5. We flipped the trim over and found overspray from a previous paintjob, which is a good thing because that means someone didn’t try to pry the trim off the car. That is usually when most damage is done.
close view of a hand using a cloth to wipe the trim down

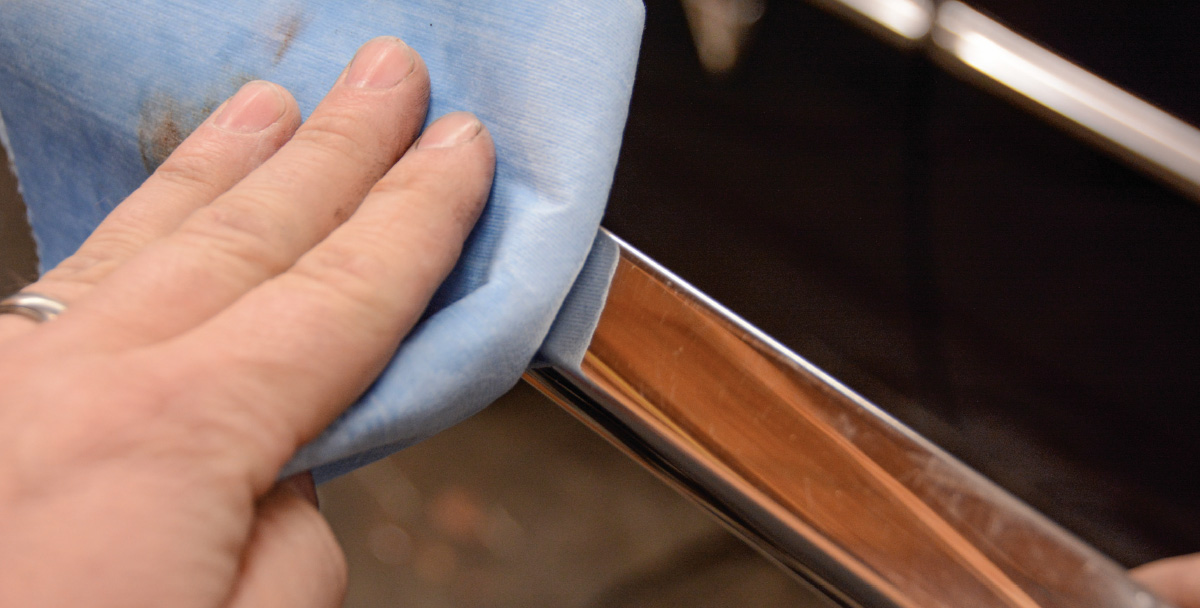
6. Before we get started, we wipe the trim down with wax and grease remover and make note of the dents and problem areas that need to be addressed.

a small hammer and a piece of flat aluminum stock are used to begin repairing a trim piece

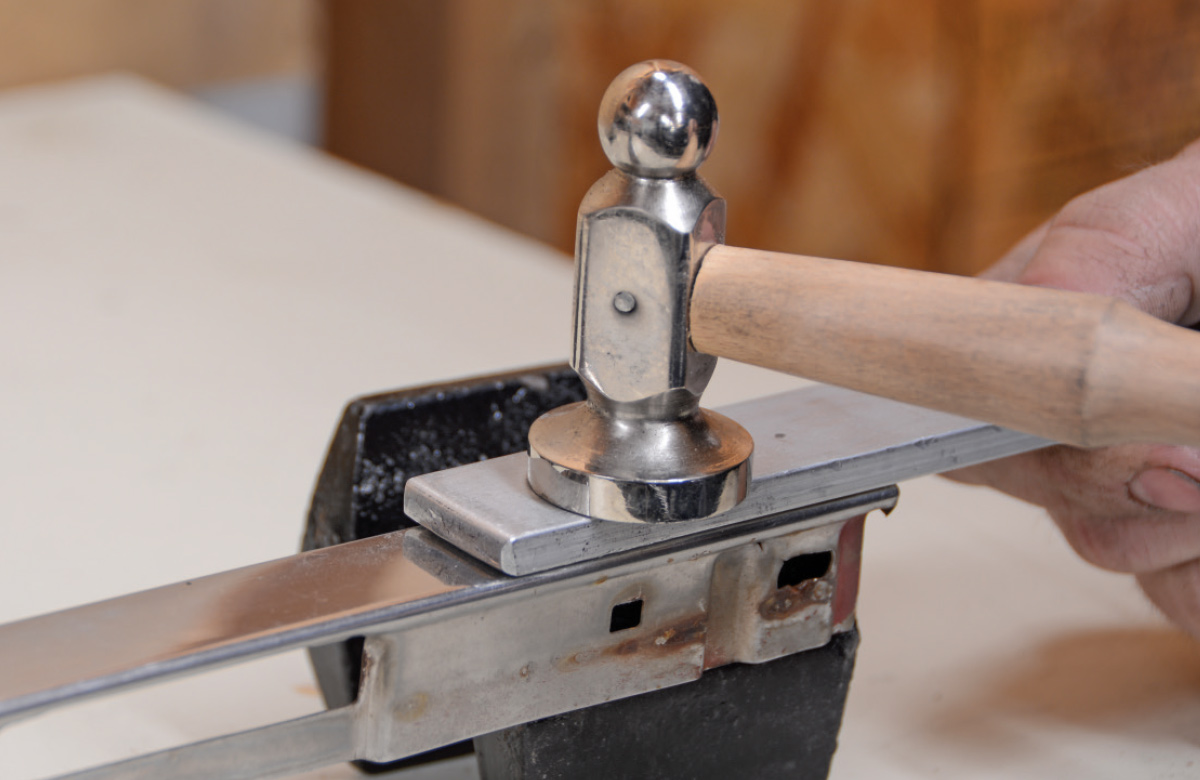
7. The Trim Repair Kit from Summit Racing comes with a variety of hammers, dollies, and other tools that come in handy for trim repair. We start with the small hammer and use flat aluminum stock as a dolly.

the door trim dent is lightly bumped with the use of a hammer handle as a peen and a separate hammer for hitting
8. The larger dent requires a larger surface area, so we used the hammer handle to press downward into the dent and eventually used another hammer to lightly bump the dented area. Again, the flat aluminum stock is used as the dolly since the top surface of the trim is flat.
flat stock is used to transfer a blow from a hammer and spread the load across the entire area of the worked trim
9. The flat stock is also useful to transfer the blow from a hammer and spread the load across the entire area. Here, we have flipped the trim and have a dolly underneath to straighten out the bumps from our previous hammering.
close view of a file tip pointing to ding from a hammer showing through to the surface of a trim piece
10. When a dolly isn’t used to spread the load you’ll end up with dings from the hammer strikes. These pimples can be flattened out with careful hammering and dollying.
a mechanic leans in close to file an area on a piece of trim clamped to a work table
11. A file is only used in extreme situations where dent repair needs fine-tuning. The variety of files in the Trim Repair Kit allows for different cuts, but any file work requires a tremendous amount of sanding to remove the marks.
close view of the small file being used on the trim piece
12. The files that came with the Trim Repair Kit are small and easy to use. Notice the dark areas, which are low spots. We can continue to peck those low spots out and file the metal down for a slick finish.
the harsh file marks are cut with a dual-action sander with 80-grit
13. We used a dual-action sander with 80-grit to cut into the harsh file marks. We only used the sander in the affected area.
a variety of sandpapers with varying grits
14. Next, we used a variety of wet or dry sandpaper. We start with 180 on the areas that saw file work and start with 400 on the areas that simply need to be polished. The stainless steel dulls the paper very fast, so get plenty.
flat aluminum stock is wrapped in a piece of sandpaper to create a sanding block
15. Once again, we’re using the flat aluminum stock that came with the Trim Repair Kit. This time, we’re using it as a sanding block. We wrap the paper around the block and sand over the previously dented areas to ensure it is straight.
a spray bottle applies water to the trim piece
16. Water is used to lubricate the sandpaper and wash away debris. It makes a mess, but it’s a crucial part of a nice result.
the trim piece sanding is continued with a higher grit sandpaper
17. Hand sanding requires a lot of patience, as stainless steel requires intense sanding to remove the scratches from the previous grit of sandpaper.
a hand holding a 3,000 grit pad continues working on the piece of trim
18. Finally, we make our way to the 3,000 grit, which starts putting a shine on the stainless steel. Even finer grits are available, but 3,000 is sufficient final sand before polishing begins.
close view of the freshly sanded and cleaned trim piece
19. After sanding, clean the trim pieces again and inspect the problem areas. A closeup shows the light sanding scratches, but you can also see the gloss is already starting to show.
the sanded trim piece is held to a bench grinder with a yellow Sisal cloth buffing wheel attached
20. We used a bench grinder with three levels of 6-inch buffing wheels, which were part of Summit Racing’s Polishing Kit. We start with the yellow Sisal cloth wheel with black emery cake compound. Then, switch to brown rouge compound on the same wheel.
the trim piece is held to a circle-sewn muslin buffing wheel on the other side of the bench grinder
21. Next, we swap to the other side of the bench grinder, where a circle-sewn muslin buffing wheel is used with a white rouge compound. This starts bringing a shine to the stainless steel.
the trim piece is held to a one-row sewn cotton buffing wheel
22. The final buffing wheel is a one-row sewn cotton wheel, and we dress it with red rouge buffing compound before making our final passes on the trim.
close view of the end of the door trim, once bent and scratched, now with a glossy surface and clean reflection
23. We used liquid compound for one final round of polishing by hand. This is the area that had the large dent, and it now has an excellent reflection without any signs of our intense work.
the two door pieces and two quarter-panel pieces sit polished with new clips attached
24. The two door pieces and two quarter-panel pieces are polished and ready to install on the car. We ordered new clips from Classic Industries for an easy installation.
close view of the restored trim reinstalled on the ’66 Nova's driver side door
25. With the trim in place, the ’66 Nova has a great look. The many hours of tedious work resulted in a great final product on our driver-quality Chevy.
SOURCE
Modern Rodding
VOLUME 5 • ISSUE 42 • 2024