Modern Rodding TECH
InTheGarageMedia.com

 Photography by THE AUTHOR
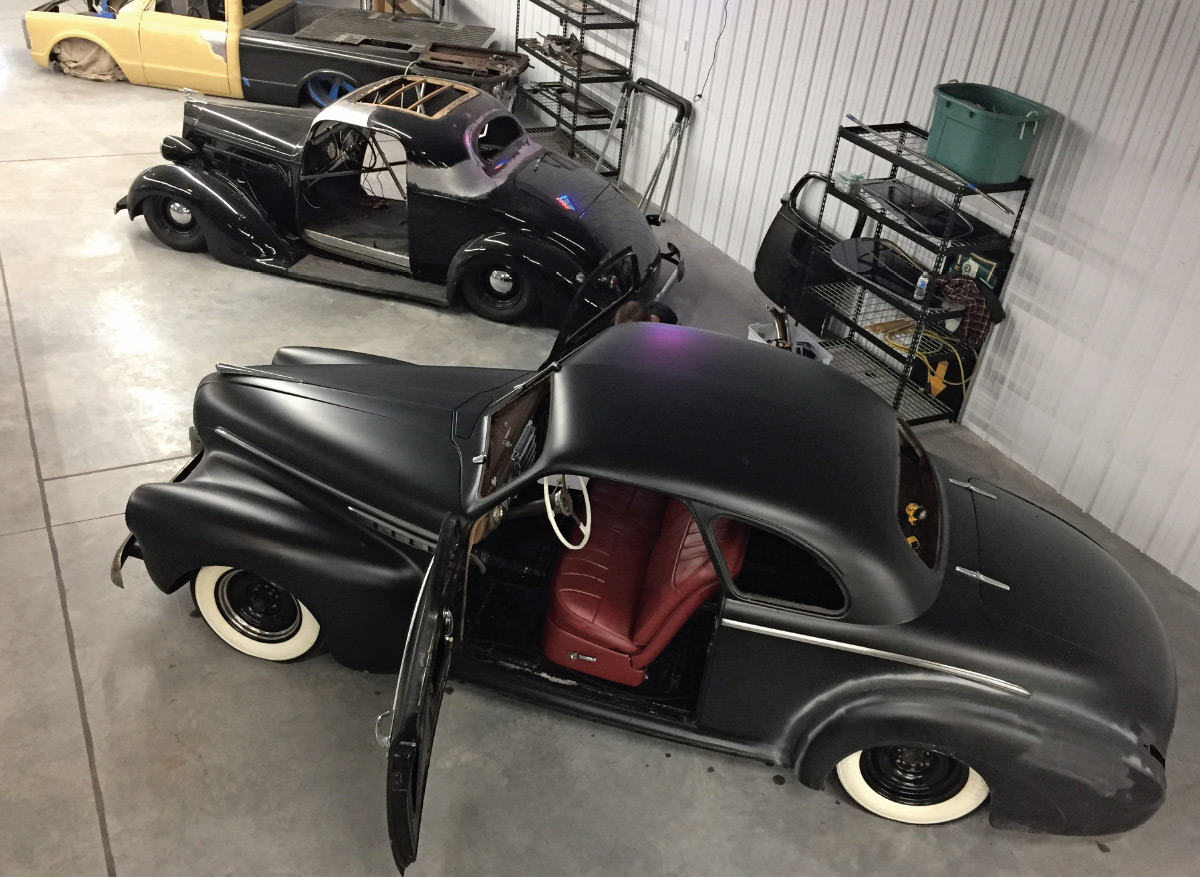
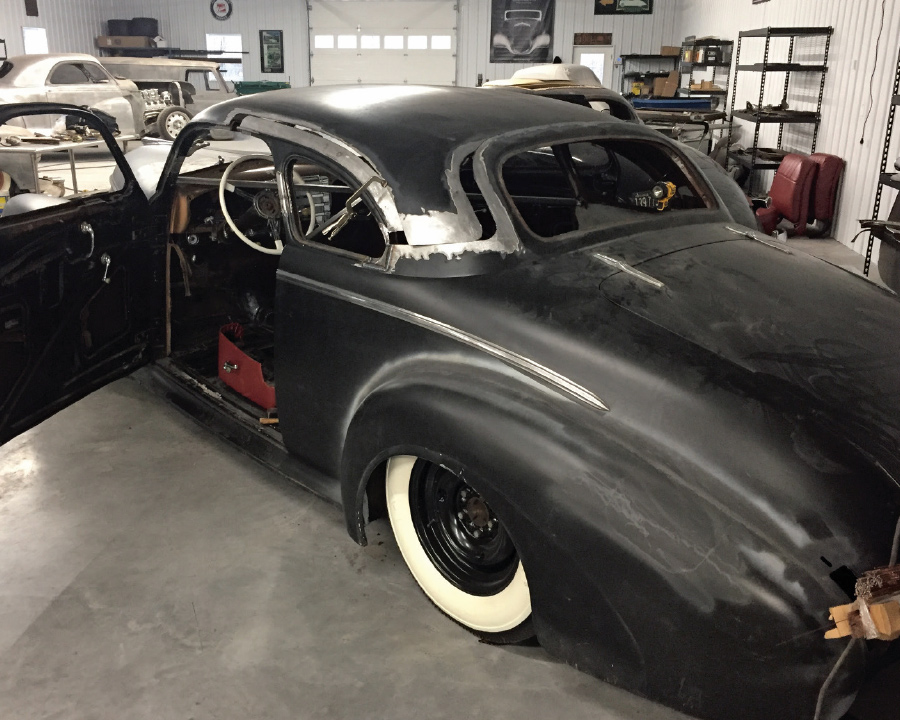
hen customizing originated, the goal was to refine the lines Detroit provided and, in some cases, restyle more common marques to resemble their up-model counterparts. When I bought my ’41 Buick Super I felt like I had a head start. Prewar Buicks were part of that up-model bracket to begin with, boasting sleek body lines, long wheelbases, powerful overhead valve engines, and some deluxe interior appointments. But there’s always room for improvement, and since I wanted to build a late-’40s/early-’50s–style custom, a chopped top was always part of the plan.
As with any project of this magnitude, it’s important to start with a plan. There’s plenty of reference material out there, so take the time to research examples of cars like yours to see how they were chopped. When you find a profile you like, try to track down the owner or builder and ask questions. Often, they’re happy to share information and sometimes even construction photos detailing their efforts.
If you’re paying a shop to chop your car, there are a few things you can do that will save money. First, don’t underestimate the time it takes to remove everything that needs removing. Decades-old rubber window gaskets will fight you every step of the way—and if you intend to save your curved glass backlight you’ll need to work carefully. Make notes on how window regulators and other door internals come apart, and bag and tag fasteners to ease reassembly later. Naturally, the seats, door panels, carpet, and headliner will need to be removed to avoid damage (or fire) once the cutting and welding begin. And don’t forget to number the headliner bows from front to back as you take them out. If you’re on a budget, there’s no sense paying a shop’s hourly rate to handle these tasks you can easily do yourself.
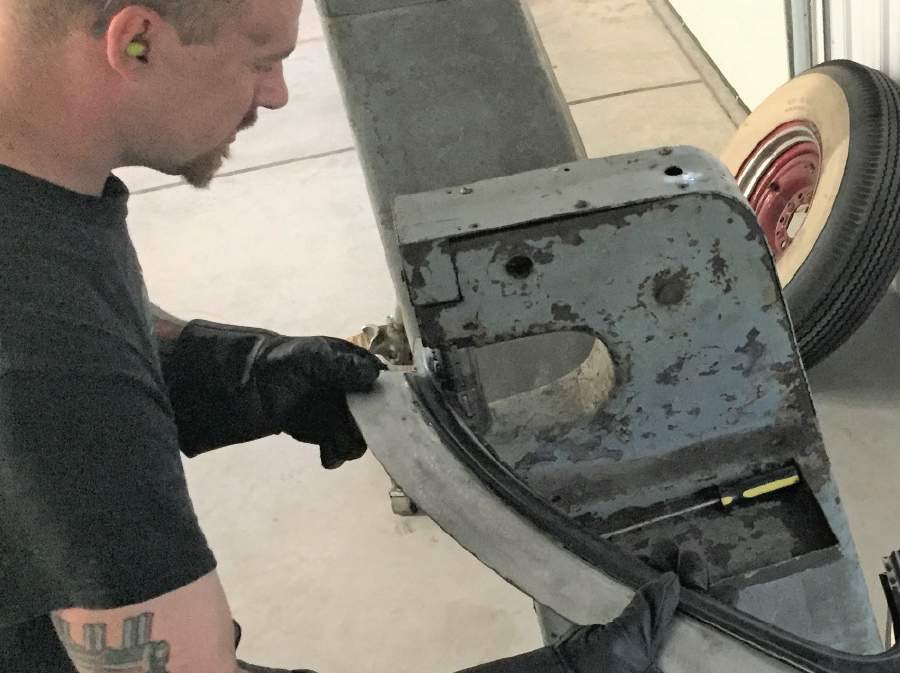
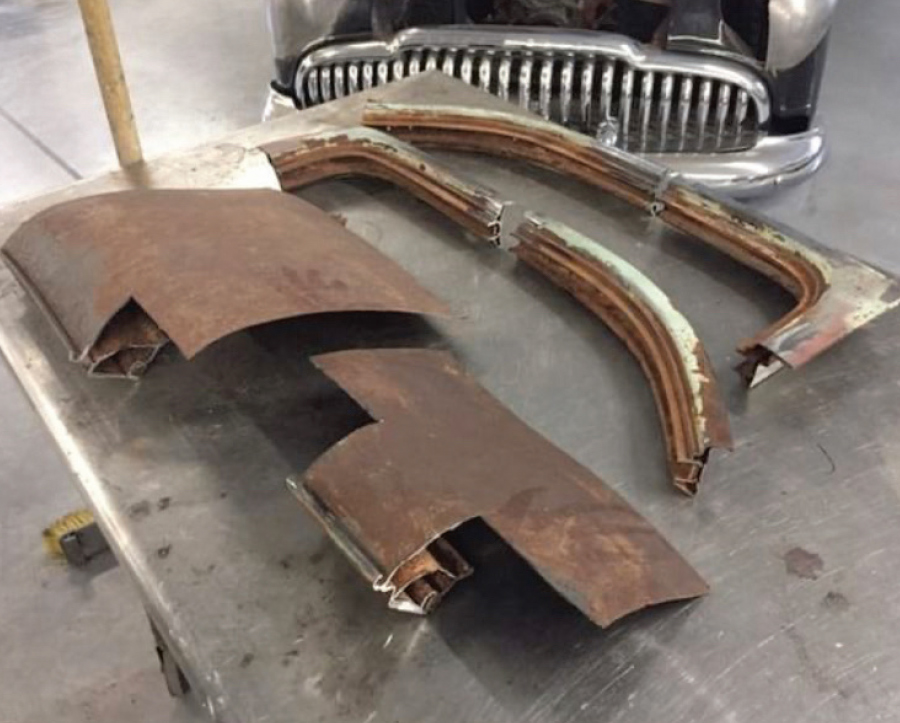
Chopping a top has been compared to chopping an egg; when you remove the middle and reunite the top and bottom portions, there’s going to be some extra material needed to make everything fit back together. If you can locate a donor car and harvest some spare sheetmetal from key areas you’ll be ahead of the game. An extra pair of window frames (cut from the sills up) and the corresponding interior moldings will help because the tops of the chopped frames will need to be lengthened. A four-door donor will do just fine since the section that will need to be lengthened is straight. It will also be helpful to have a chunk of the donor’s roof taken from just above the doorframes, encompassing the driprail, inner doorjamb, and about 8 inches into the roof itself. If you can’t find these parts locally, call some boneyards around the country that specialize in vintage tin. I sourced what I needed through “Flat-Top Bob” Owens at Owens Salvage in Texas who had a ’41 Buick four-door sedan that he was willing to aerate for me.
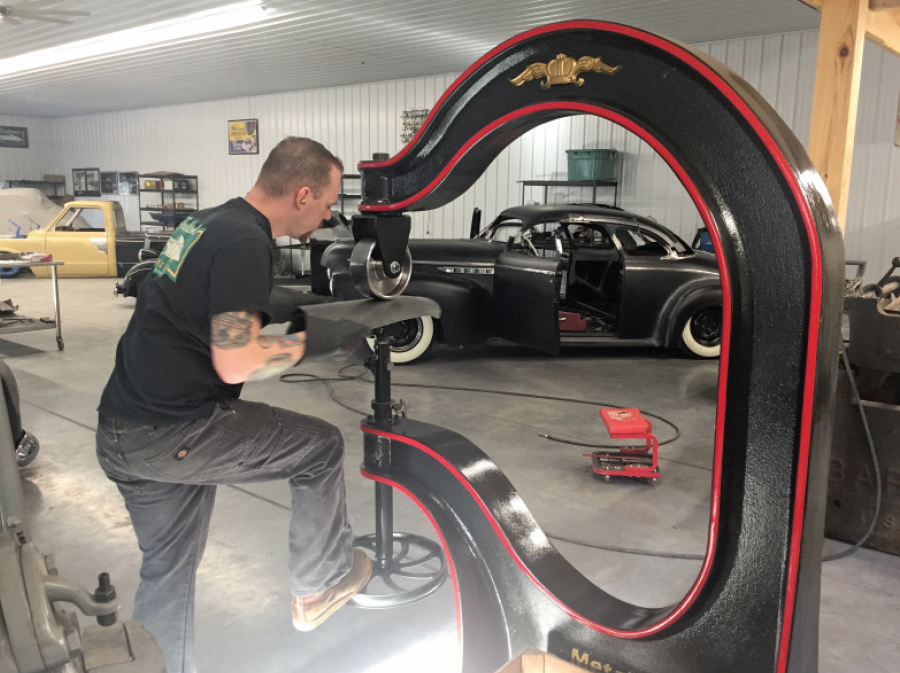
The last couple of planning and preparation steps involve bracing the body to keep things square (1-inch square tubing welded in an “X” within the cabin will suffice) and laying out your cut lines. At Traditional MetalCraft, Walls uses strips of thin, flexible plastic in varying widths (1, 2, or 3 inches) to mark off top chops and section jobs. Start with a conservative amount. Once you remove material and see how things look, it’s easier to cut more off than to add it back on.
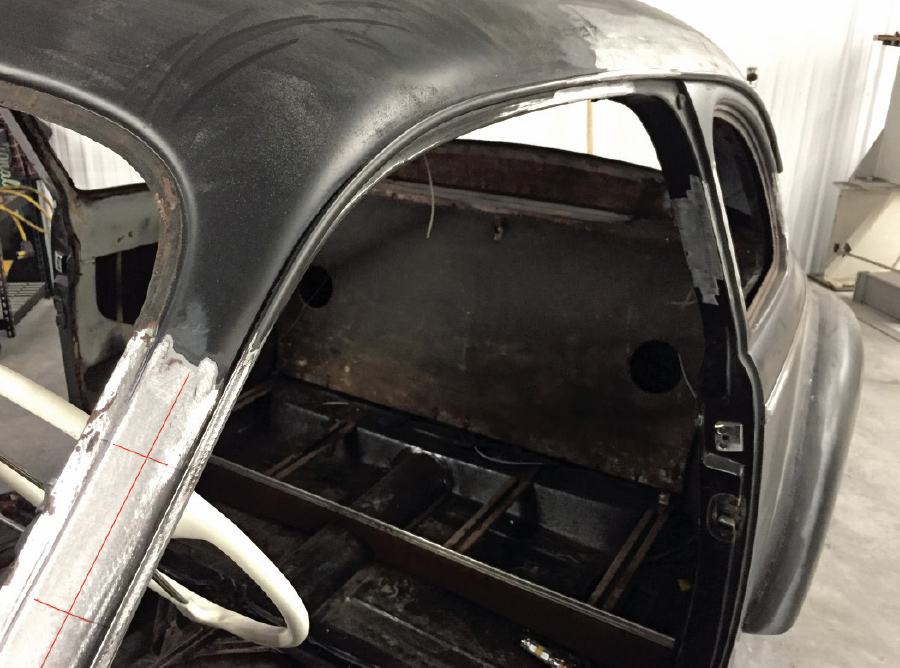
We began with the 3-inch templates, marking the top and bottom cuts using a ballpoint pen. Pen contrasts with bare metal better than scribe lines (unless you’re using Dykem) and, unlike tape, it won’t burn back when you start cutting. Marking the vertical centerline of the pillars with a straightedge will help with realignment when you weld everything back together.
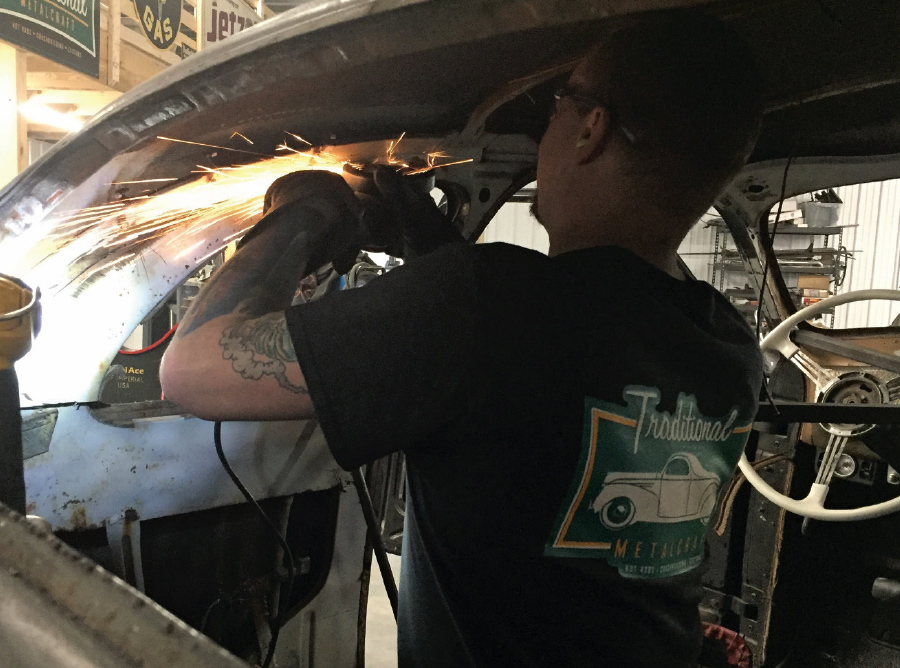
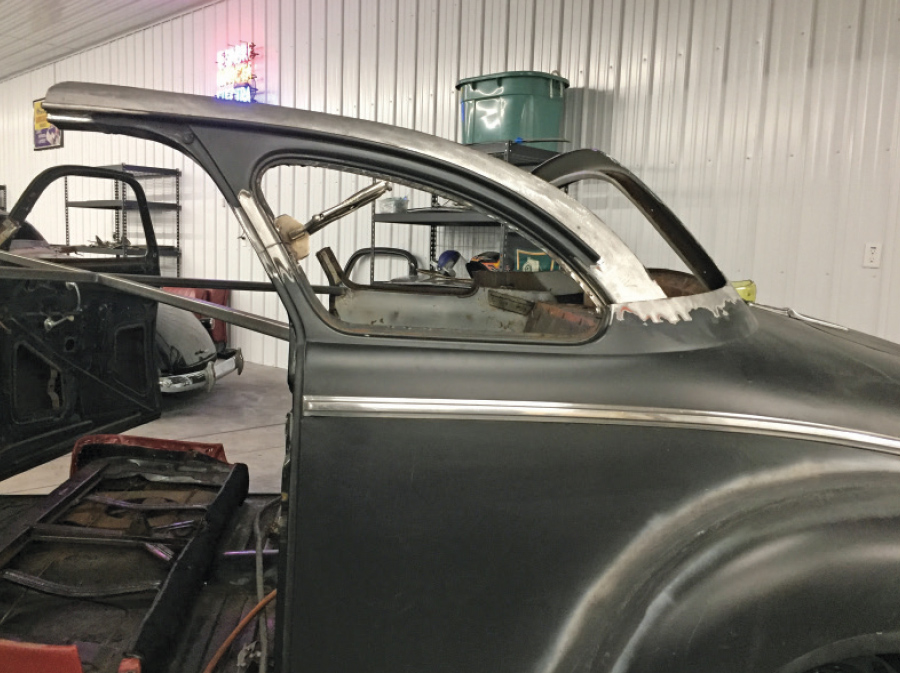
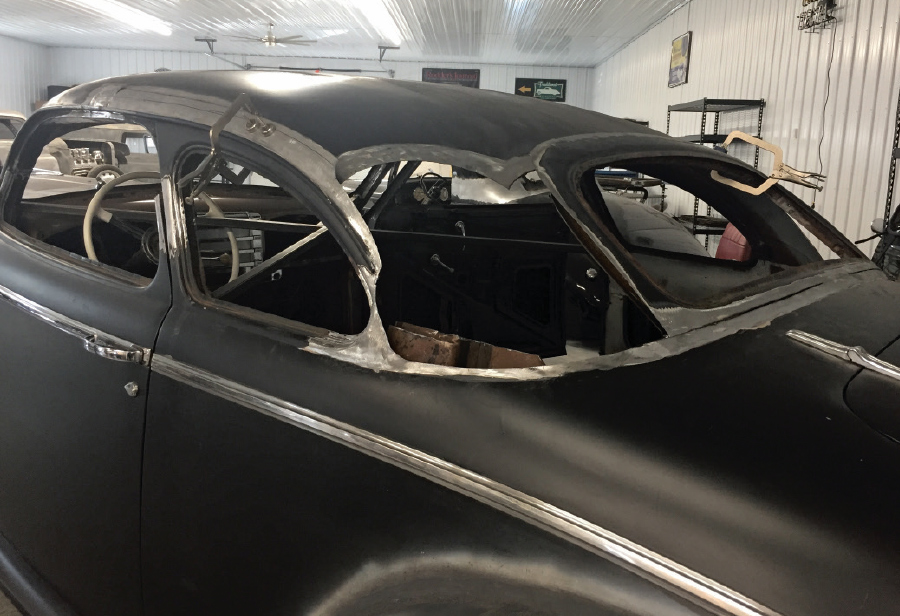
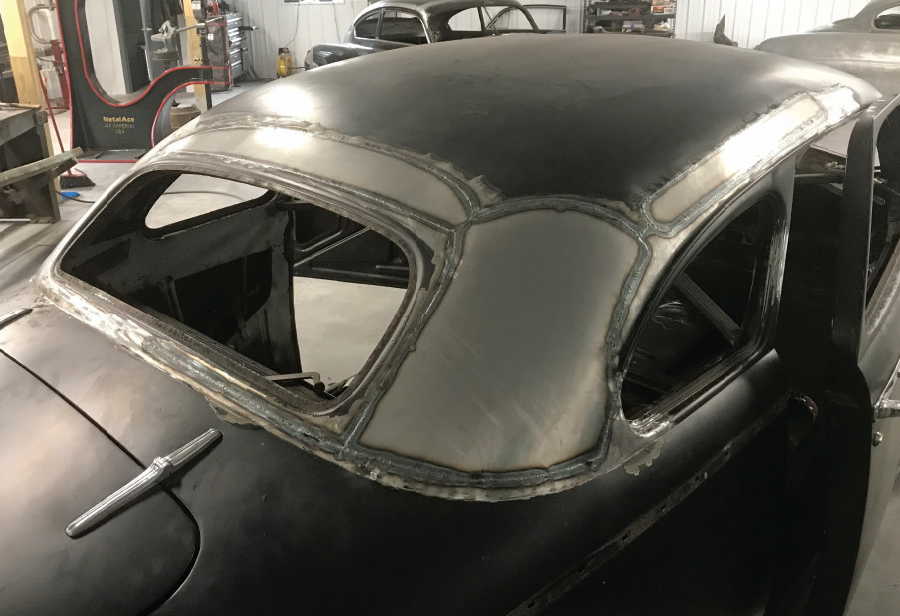
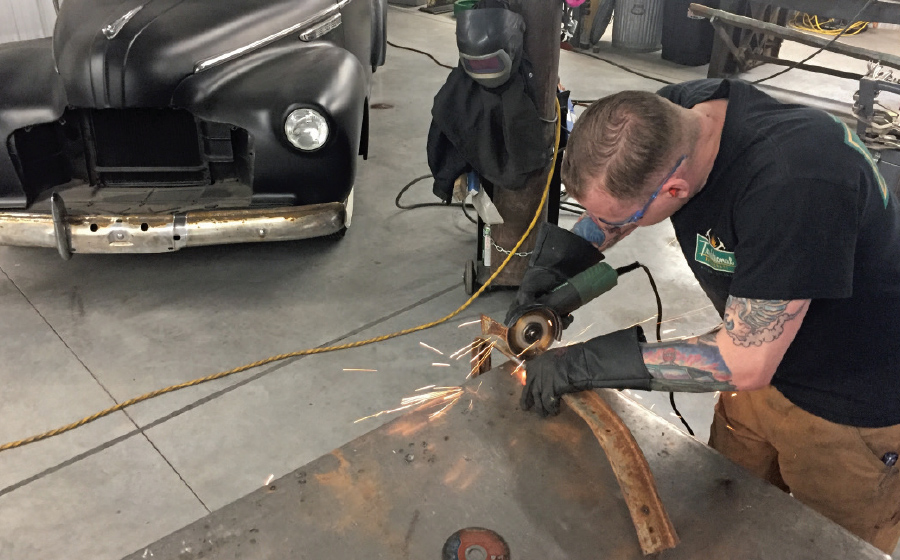
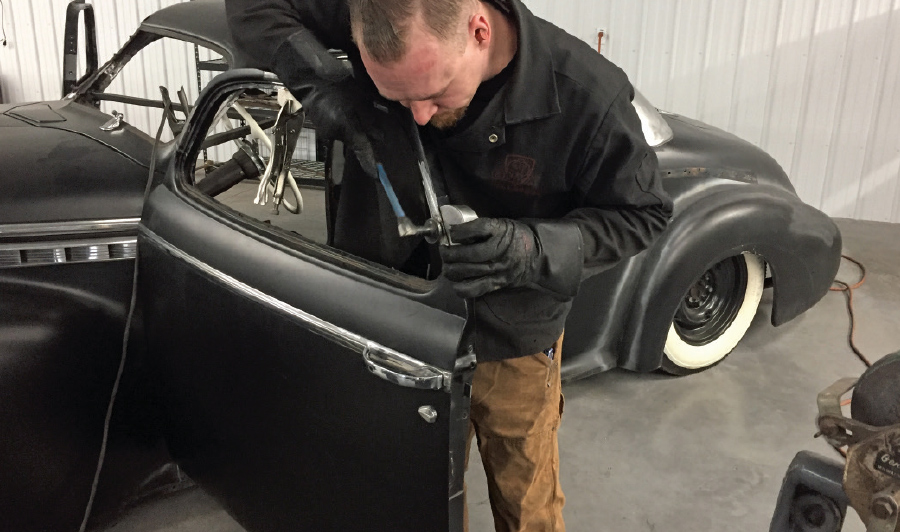
In many cases, you can leave the backlight surround attached to the car and just lean it forward, but if you are removing it be sure to mark the centerline (on the surround and the roof). Anywhere the cut lines make a sharp turn (like going up and around the backlight), radius the corners rather than marking hard right angles to reduce shrinking when welding seams. When it’s time to start slicing, cutoff wheels are faster and more accurate than hacksaws or Sawzalls. Spring for the metal wheels; they’re a little more expensive than composite, but they’ll last longer and won’t explode if the wheel gets stuck in the middle of a cut.
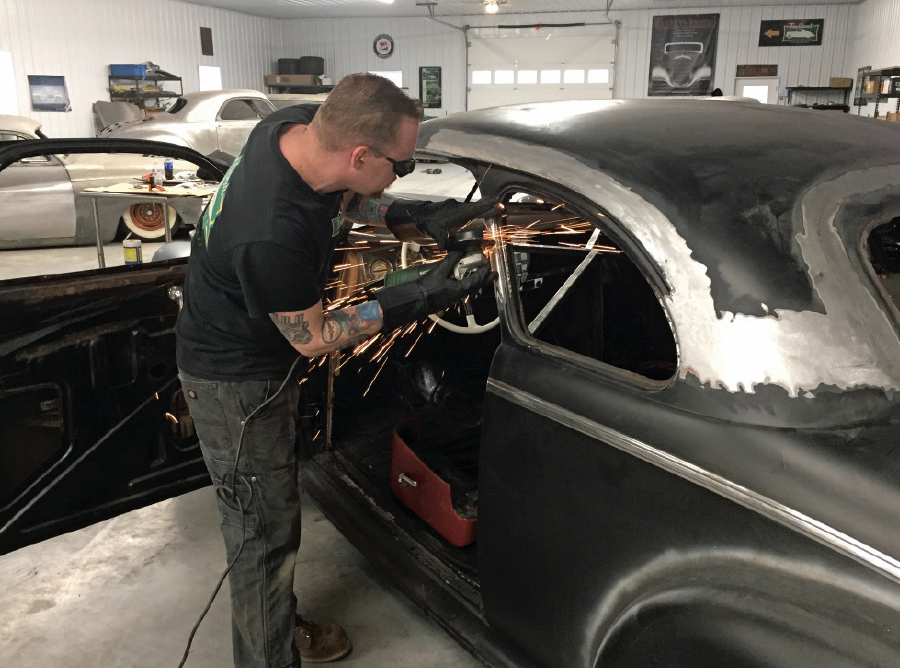
Whenever you encounter multilayer structural steel that inhibits being able to reach the back side of the roofskin (like the inner structure around the quarter windows, for example), don’t be afraid to temporarily remove it. That steel will need to be modified anyway, and having easy access to the back of the skin will help you accomplish better results. You can always replace those inner steel pieces after the hammer-and-dolly work on the roofskin is complete.
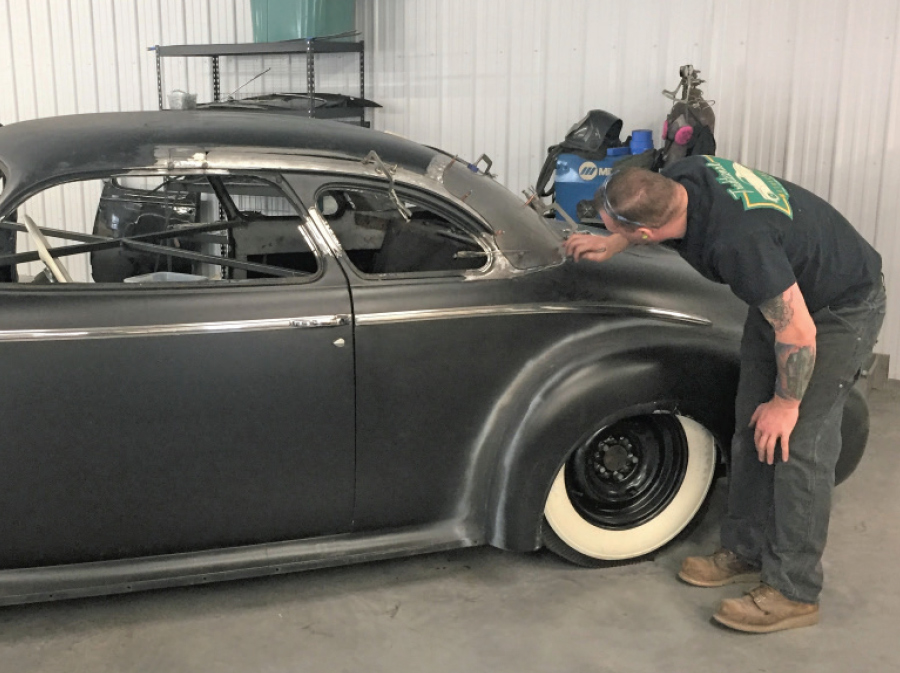
There are a few things that have been explained in other top chop how-to articles that bear repeating. First, start by cutting the top off at the upper marks, then chop the pillars while they’re still attached to the body. Trying to cut pillars on the roof once it’s separated from the car is a difficult proposition. Also, eyeball your work throughout the process. All the measuring in the world won’t tell you if a chop looks right; you’ve got to use your eyes. And pay close attention to the size and shape of the quarter windows. So many chops go wrong because the quarter windows become too small as the top moves down (and forward).
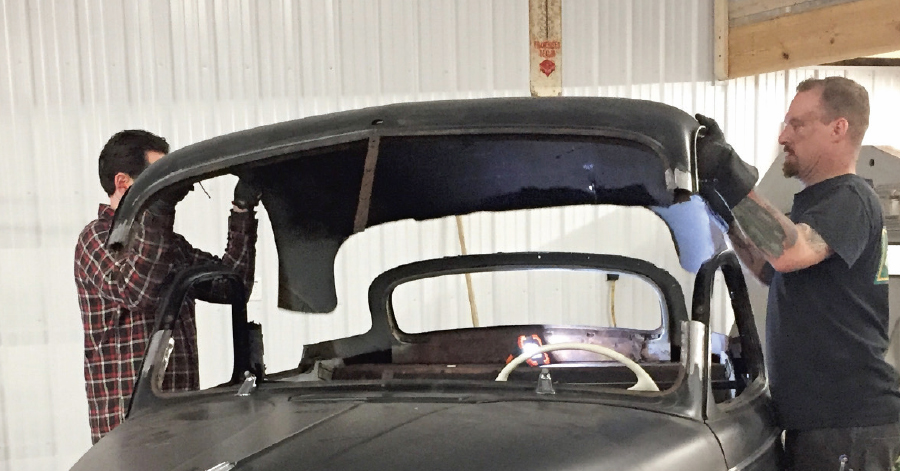
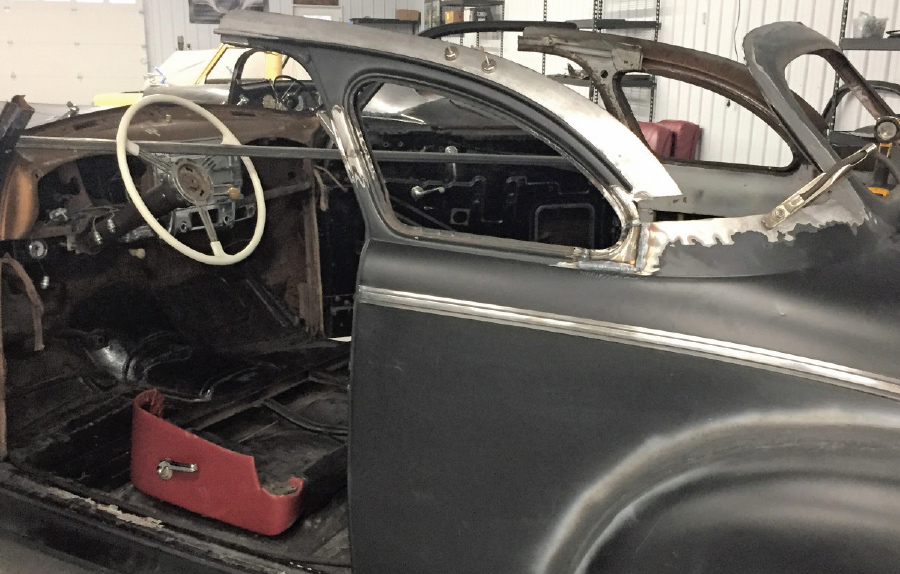
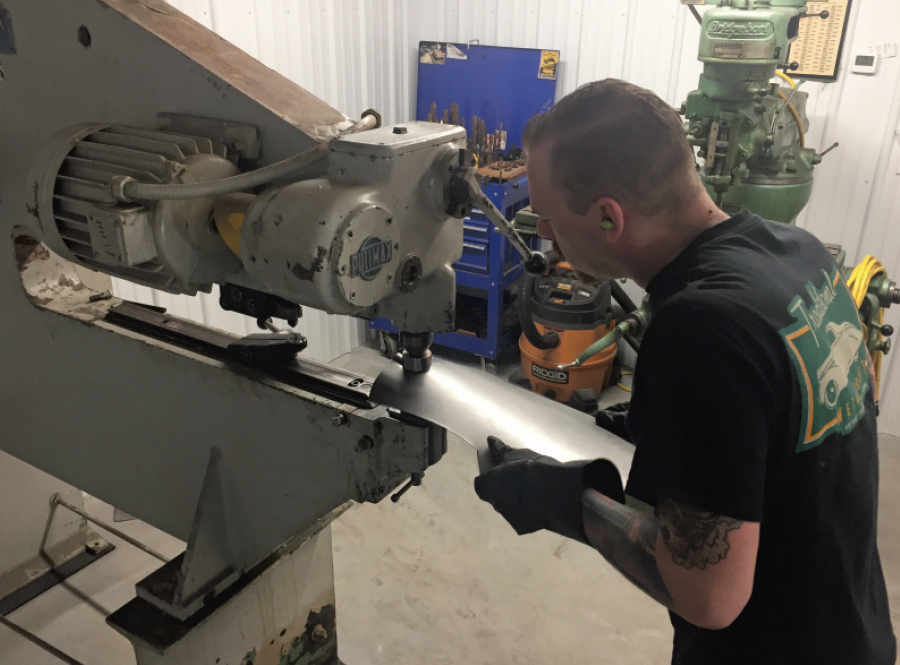
In many cases, the main sections you’ll need to fabricate from scratch are the sail panels. Posterboard is handy for determining size and shape and it can also serve as templates when you’re cutting the new panels from 18-gauge steel. Since they’re one big compound curve, Walls uses a Pullmax and an English wheel or power hammer to do his shaping. This could also be done with a mallet, a beater bag, and a benchtop English wheel. That said, if you don’t have the tools or skills to form them on your own, consider having a properly equipped sheetmetal shop tackle them for you. Having a properly shaped panel as opposed to a conglomeration of pie-cut sheetmetal strips will result in a smoother profile—and a lot less filler.
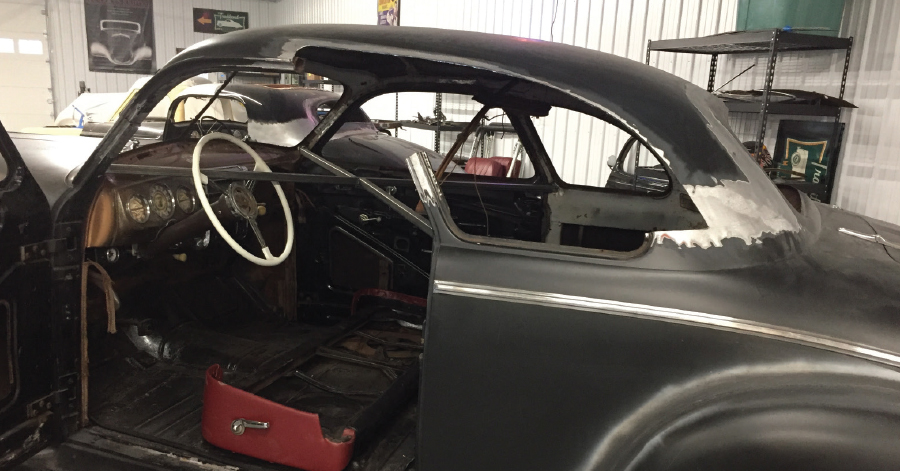
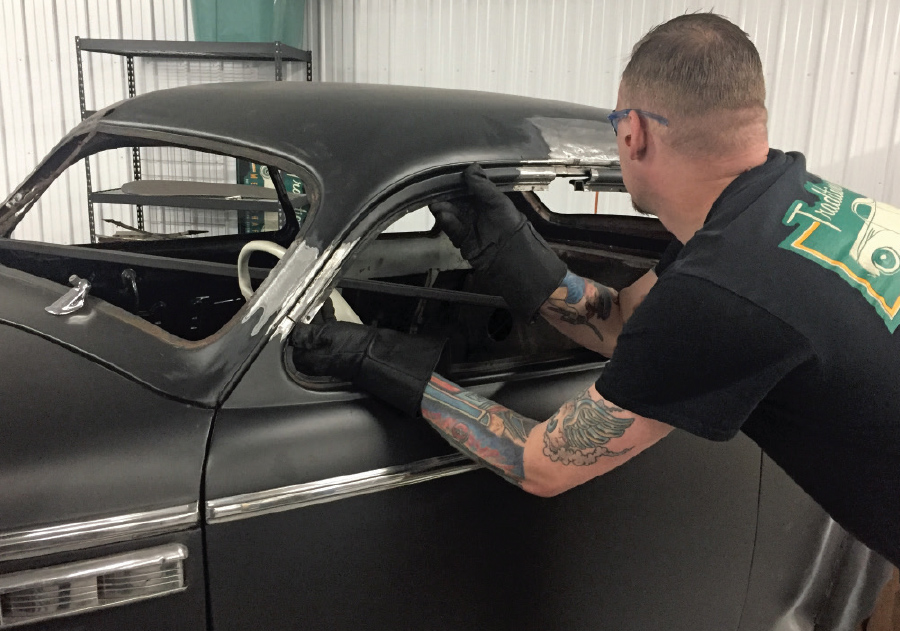
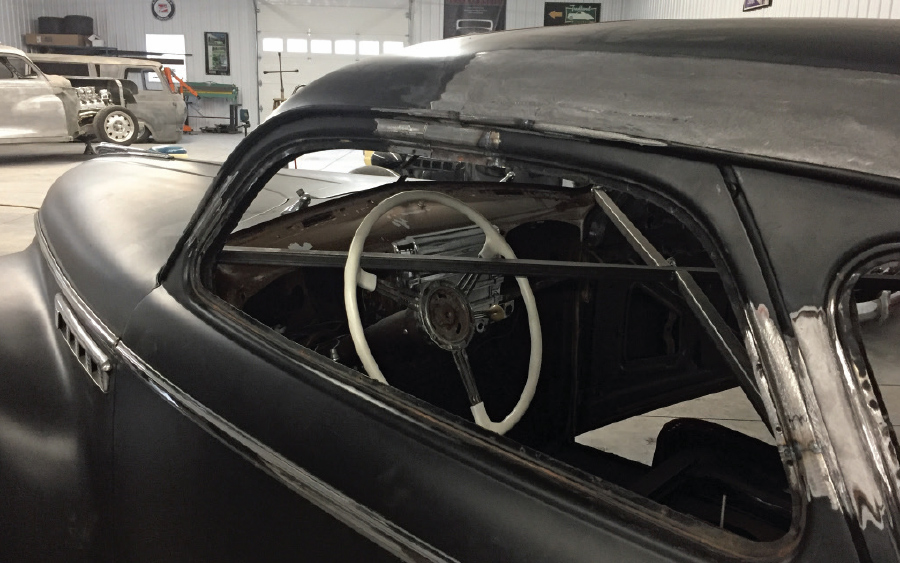
As the roof comes down, it will also slide forward so that the tops and bottoms of the A-pillars meet. In the back, you’ll fill the extra space by leaning or repositioning the backlight and filling the gaps with new steel. Around the sides, you can make up the gaps in the window frames and the sides of the roof using the parts you harvested from the donor car. If you can’t find a donor, these pieces can also be formed from scratch. Just take the time to replicate the inner structure, driprails, and any feature lines that run through the window frames.
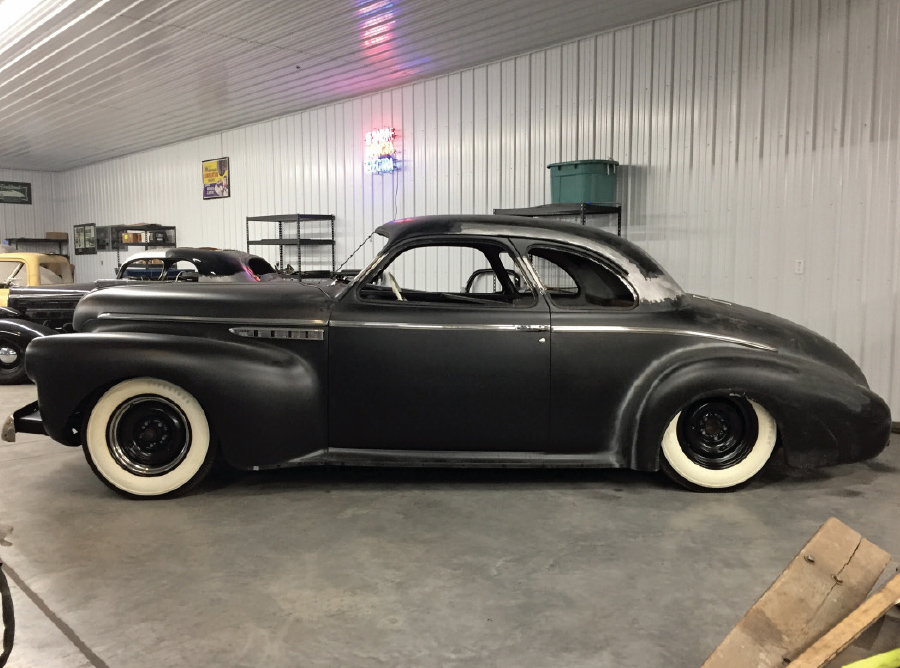
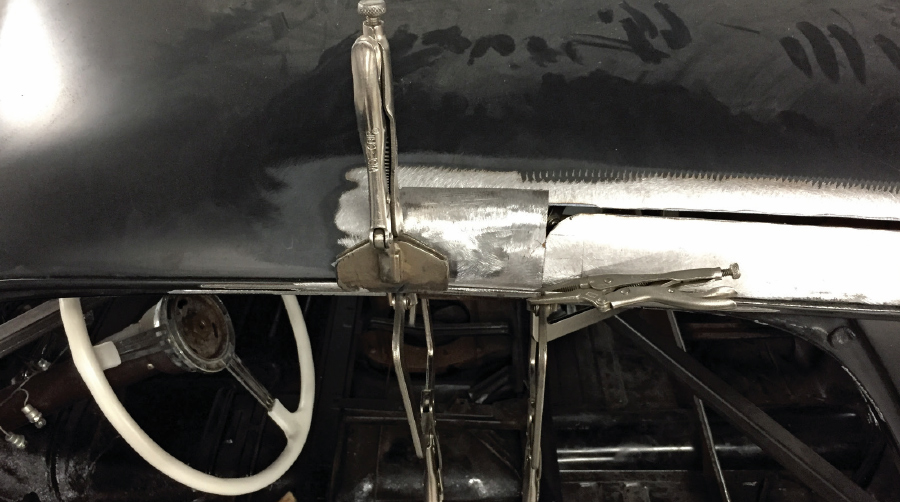
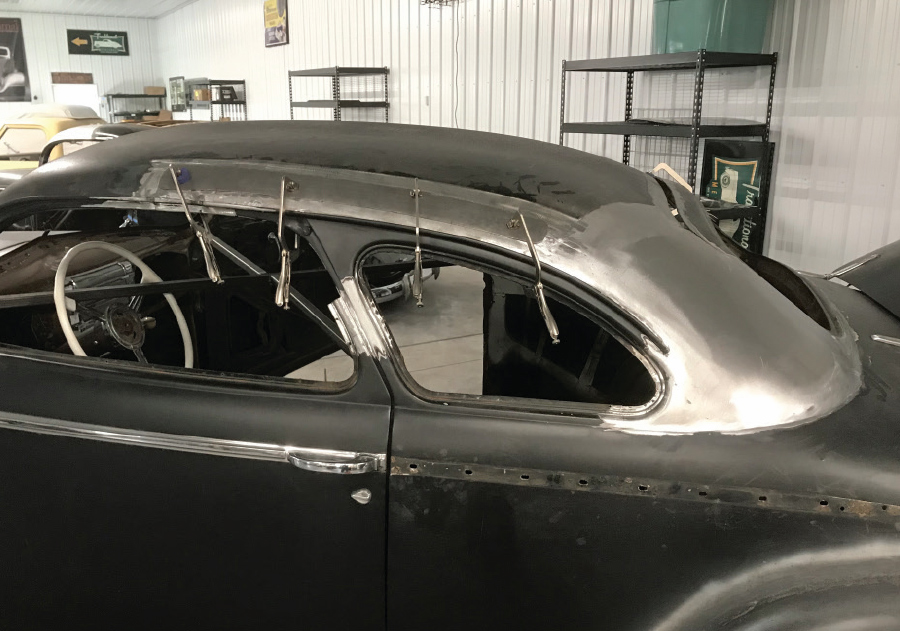
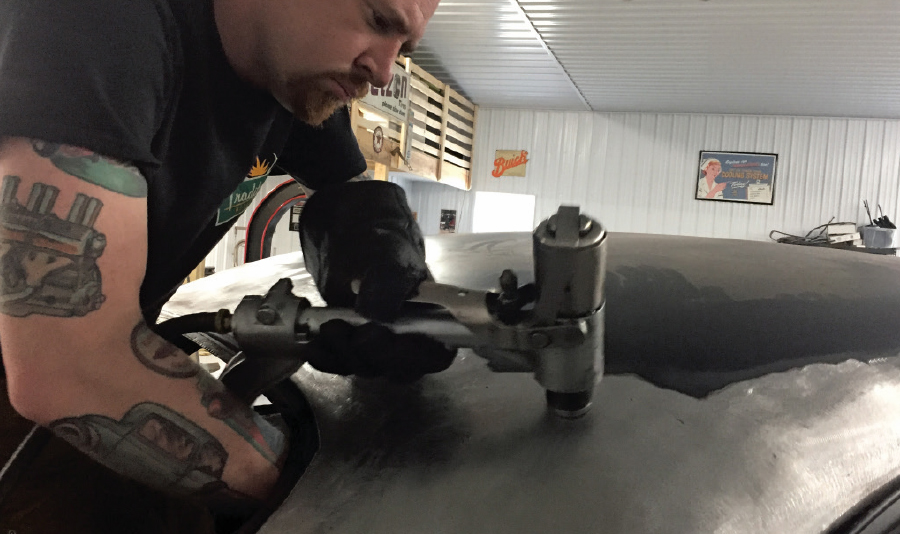
Once everything is tacked back in place, push the car outside or to the middle of your shop and take a good look at it from every angle. If the proportions look right and the lines flow it’s time to weld everything up. TIG or oxyacetylene welding will yield the best results since they can be planished (hammer-welded), whereas MIG welds are harder and can only be ground smooth. Heat is inevitable in any type of welding, so regardless of the welding process you choose, it will be necessary to massage the expanses of steel once everything is stitched back together. Walls uses a combination of hand hammers and dollies as well as a portable, pneumatic planishing hammer, working one section at a time to planish the welds and address any high or low spots. Spending extra time at this stage will reduce the amount of filler needed before paint.
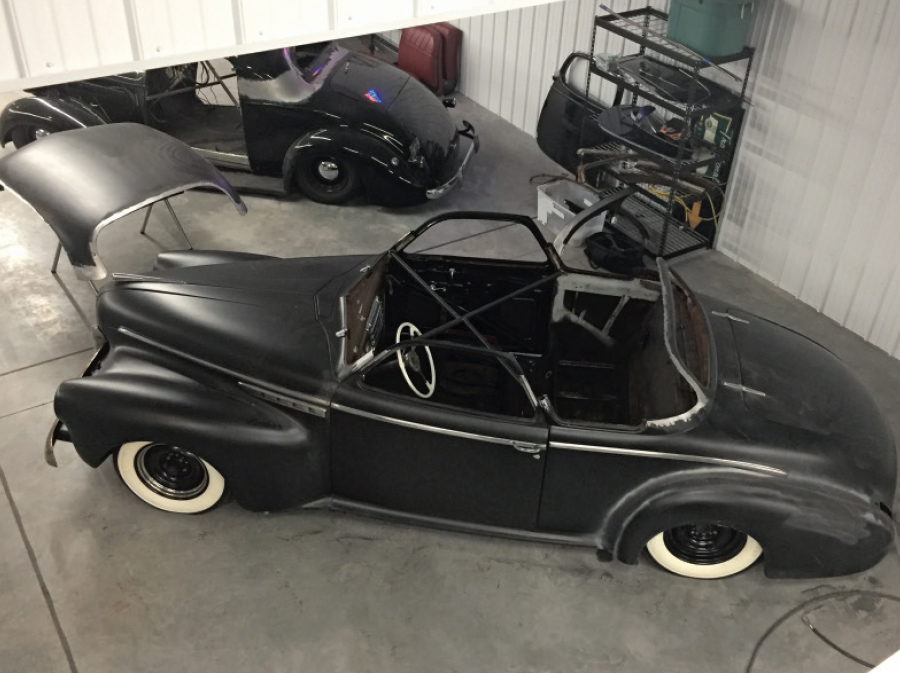
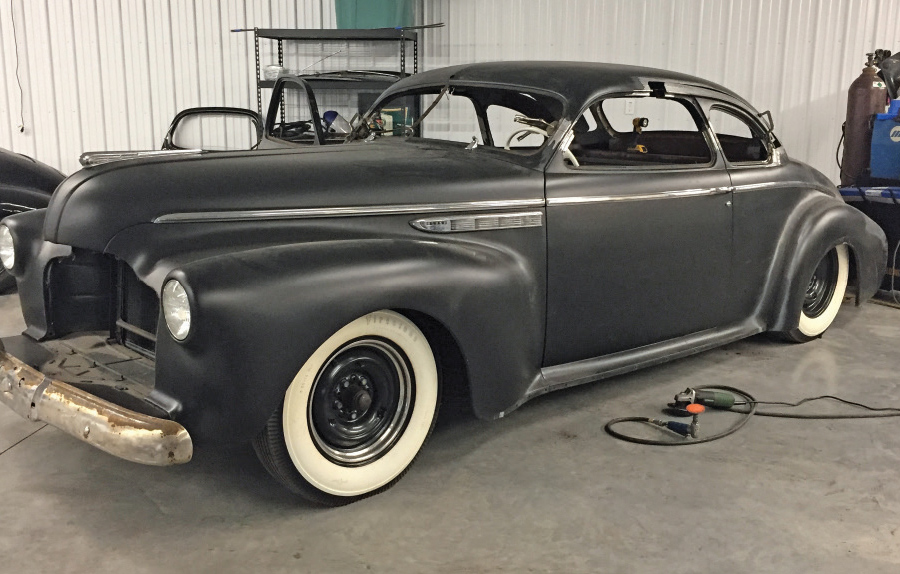
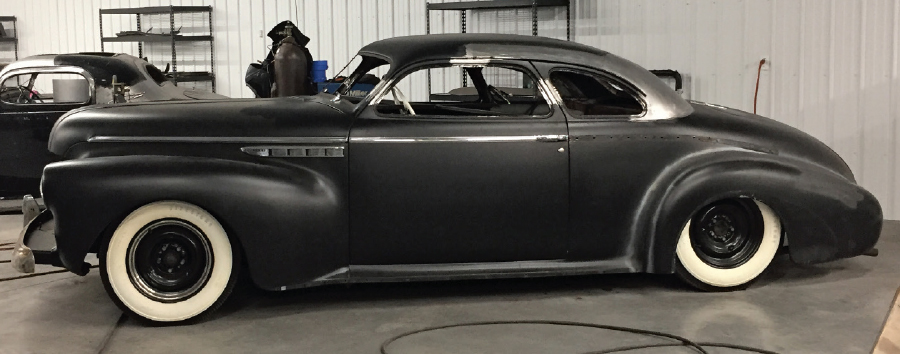
While at this point it may feel like the lion’s share of the work is complete, there’s still work to be done before the chop is truly finished. Interior garnish moldings will need to be chopped and reshaped, glass will need to be templated and cut, and then there’s the whole reassembly process. (You did bag and tag all those fasteners, didn’t you?) But all of that will have to wait for our next installment. Now is the time to stand back and take in your car’s newly restyled, full-custom profile.


 SOURCE