Modern Rodding TECH
InTheGarageMedia.com

 Photography by Cody Walls
hen it comes to traditional customizing techniques, sectioning a car is arguably the most complicated. The process involves removing a horizontal band all the way around the car’s body to thin the profile—kind of like chopping a top, only you’re chopping the whole body. Done right, the results can be dramatic. Done wrong, you can wind up with an expensive collection of vintage scrap metal.
Cody Walls has been hard at work building a unique, sectioned ’49 Buick custom for his wife, Erin, at his Delaware-based shop, Traditional MetalCraft. What started as a low-mile original destined for a small-block swap and some mild modifications quickly turned into a full custom concept car. By the time you read this, it will have debuted at the 2023 Grand National Roadster Show where it was invited to compete for the vaunted Al Slonaker Memorial Award.
Inspired by the conceptual designs of Harley Earl and his Art and Color Section at GM—and particularly by Earl’s personal tour de force, the Buick Y-Job—Walls set about refining the already svelte lines of the ’49 Sedanette using every trick in the customizer’s playbook with remarkable subtlety. When the car’s finished, perhaps what will be most noticeable at first glance will be the lack of visible headlights. It’s a design cue taken directly from the aforementioned Y-Job, which jettisoned the headlight doors in the fenders and tucked the lights behind the grille, just as Walls has done. But the real heavy lifting was in tackling the chopped and pancaked roof and the 2-inch section job.
Two inches may not seem like much, and visually it’s not. Typically, when a customizer is going through the monumental effort of sectioning, they’ll remove a significant amount from the beltline to really reset the look of the car. Consider the most famous examples of sectioned cars from the heyday of customizing, like Barris’ “Kopper Kart” or “Parisienne,” Winfield’s “Jade Idol,” Bob Metz’s ’50 Buick “XM-105,” or the Rod & Custom “Dream Truck,” all of which had large swaths removed from their sheetmetal. Valley Custom is another shop that is often associated with the practice of sectioning, and they’ve pulled off some of the most eloquently restyled customs in cars like the ’50 Olds “Polynesian” or Ron Dunn’s ’50 Ford “Capri.” With their drastically cinched beltlines combined with stock-height roofs and subtle, organic colors, these Valley creations had an almost European flavor to their design.
But Walls’ goal wasn’t to radically reshape the Buick. In true custom spirit, it was to refine what Detroit gave him in a way that wouldn’t hit you over the head. In fact, the casual observer may not realize the amount of work that’s been done. But to attain that goal, first he had to figure out how to section a car (this would be his first attempt), then he’d have to figure out how to do it by himself. See, Traditional MetalCraft is a one-man shop—and sectioning is typically not a one-man job. The solution he came up with is pretty cool.
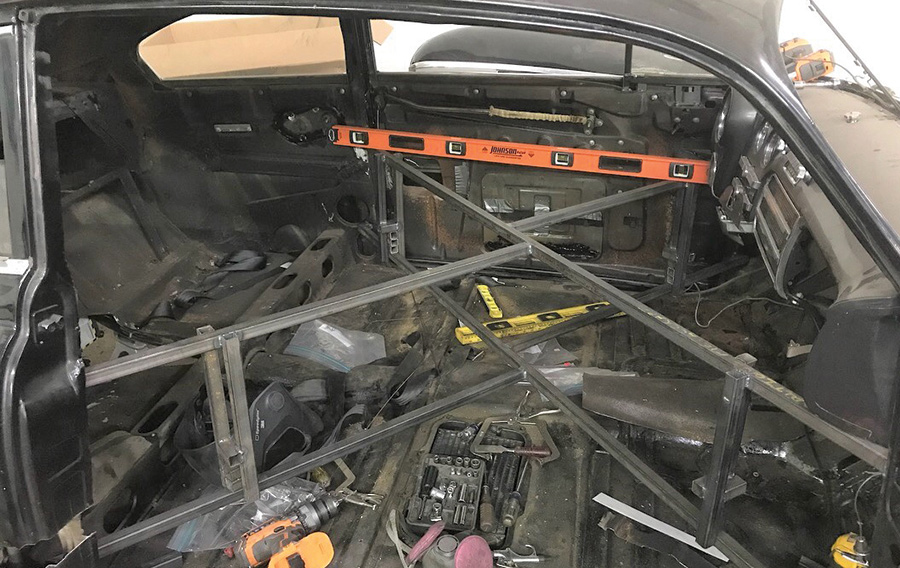
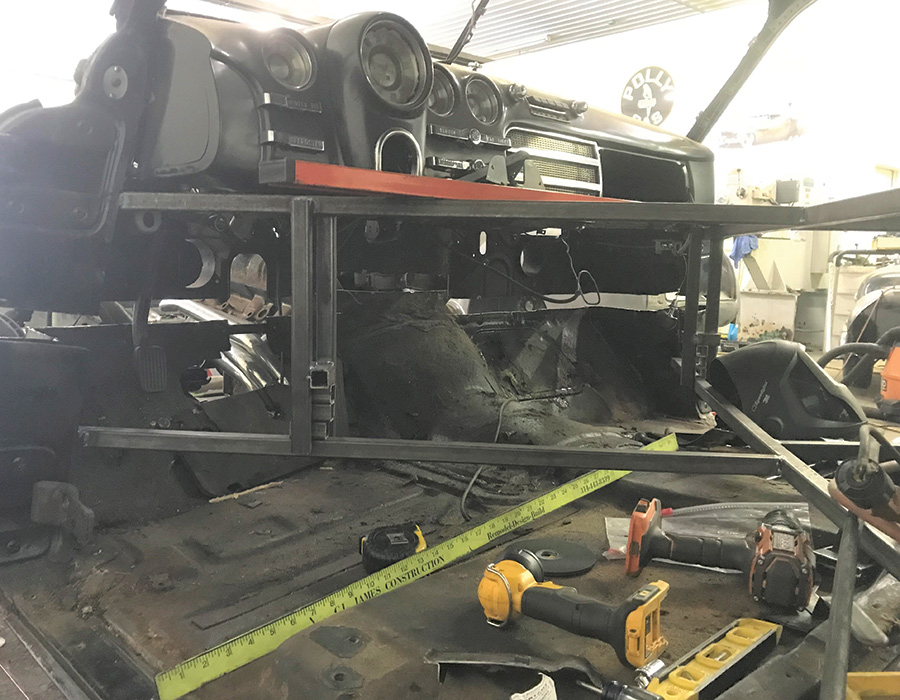
As with a top chop, sectioning requires crossbracing the body to prevent things from getting out of shape. Walls used that bracing to his advantage by fabricating duplicate X-shaped structures that were installed parallel to each other (one above the other) and acted as jigs for the top and bottom halves of the body. They were kept in register with each other by pairs of vertical supports welded to the ends of the upper X-brace that straddled the lowered brace. Those vertical supports would keep the top half of the body square with the bottom half once the horizontal section of sheetmetal was removed. And to keep that top from crashing down on the bottom, several 1-inch spacers were stacked between the two X-supports at each corner. When the body was sectioned, the two halves of the body would not only remain square with each other, but the top would be suspended until the spacers were removed. Then they could be taken out one at a time, allowing Walls to see the effect of the section job by lowering the top half of the body 1 inch at a time until the proportions looked right.
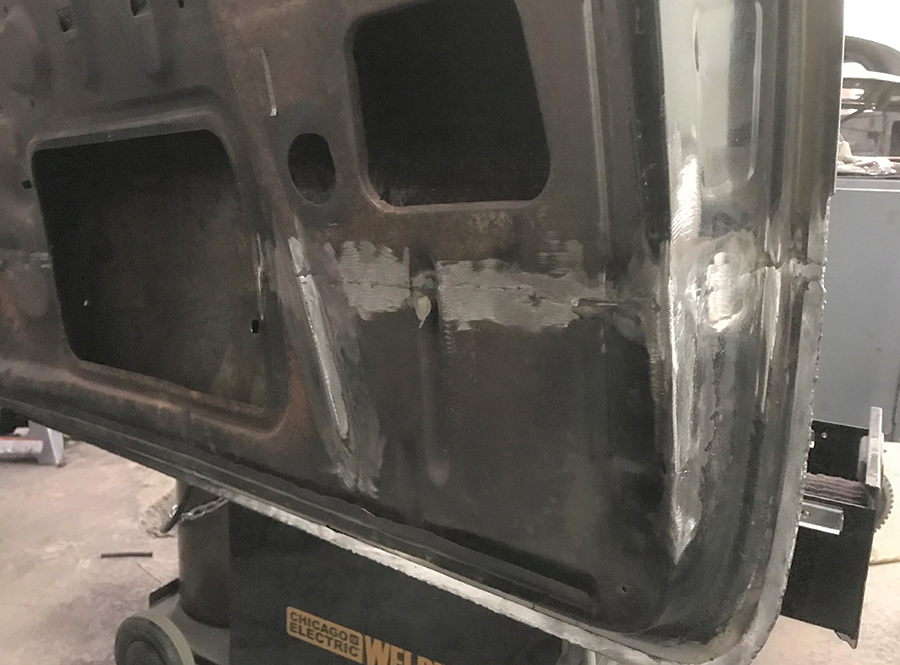
Once the jig was fabricated and welded in place, Walls carefully planned his cuts all the way around the car. It’s best to take each individual body panel into account during this planning stage rather than simply drawing a horizontal line from stem to stern. For example, it may be easiest to cut horizontally through the doors right around the middle because that’s where the contour of the doorskin is the most subtle and flat, which will make it easier to stitch back together. Then moving rearward, where the quarter-panels are sectioned may be exactly in line with the cuts you’ve planned for the doors, or it may be a few inches higher or lower. It really depends on the shape of the specific car you’re working on.
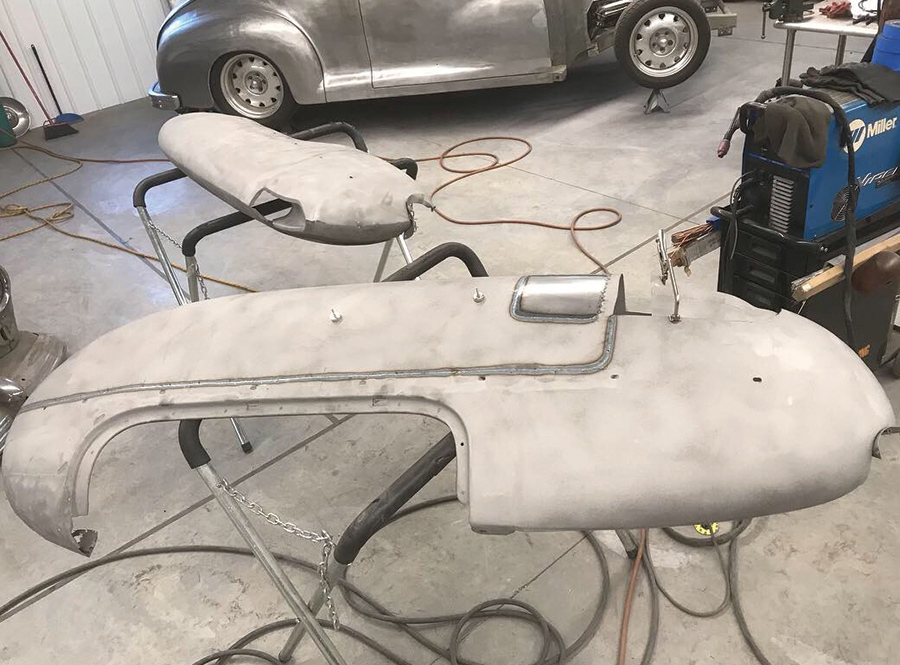
For example, with slab-sided cars that have integral rear fenders and wheel openings, like a shoebox Ford, the section may run in a straight, horizontal line from front to back. But with models like this Buick, with its pontoon-like rear fenders that are separate from the body, the fenders and the quarter-panels will be sectioned separately, and the strip of sheetmetal being removed from the quarters may jog up and down as you move rearward to minimize cuts in the compound curves of the fenders. Even though the fenders and quarters will be sectioned separately with the fenders off the car, it’s important to carefully plan those cuts at the same time to ensure you’ll wind up with a fender profile that not only flows but fits back on the car when the cutting’s done.
Walls points out that it’s also important to think about how the tail of the car will be sectioning when planning the cuts made through the rear quarters and fenders. For example, will the cuts be made through the decklid or through the tail section below the trunk? Where the sheetmetal will be removed from the tail of the car may inform what cuts need to be made through the quarters and fenders to accomplish a cohesive look.
How the front clip is sectioned will obviously depend on the car, but in many cases the front fenders can be effectively sectioned by just trimming the bottoms of the fenders. Not that this is a simple process, as you must anticipate the effect this will have on the grille surround, splash aprons, bumper placement, and wheel openings, but it’s sometimes not quite as intricate an operation as the rear quarters and tail sections.
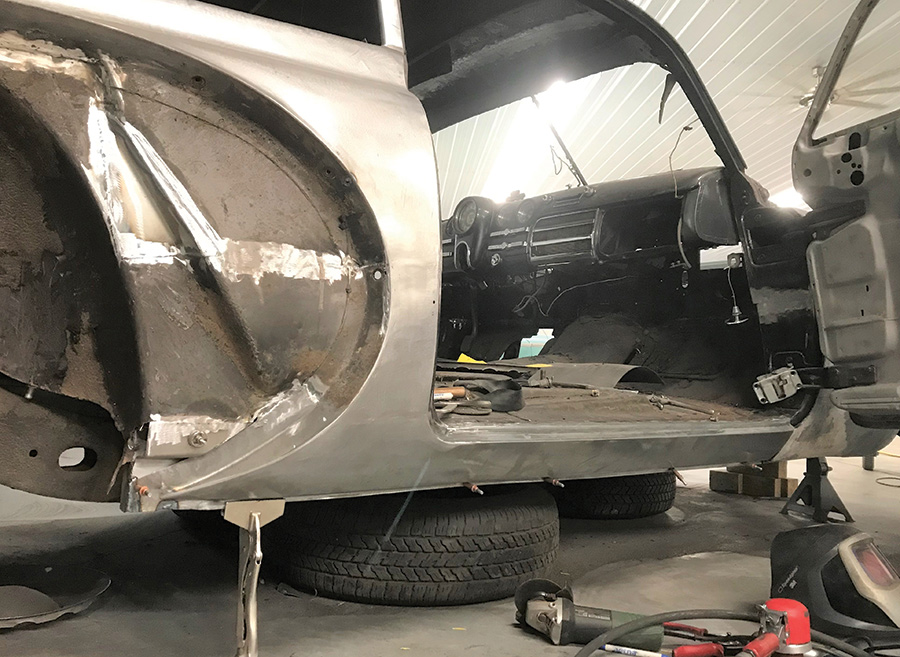
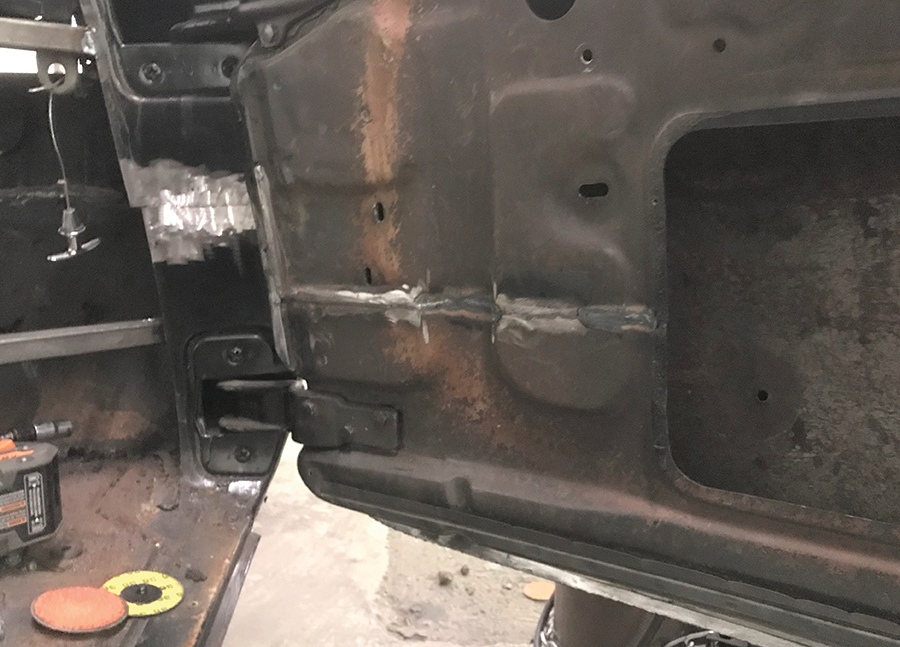
Beyond considering the overall aesthetics you’re trying to achieve with your section job, there are several other details that are important to keep in mind. Every cut made to the exterior sheetmetal also must be made to the internal structural steel. For example, when sectioning the rear quarters, it’s important to pay attention to the shape of the inner wheelwells. You’ll need some modicum of tire clearance when the job is done, so cuts should be laid out in a way that either keeps the factory wheelwell intact or leaves enough room to recreate a well that won’t interfere with the tires when the suspension is active. In the case of the doors, you’ll want to evaluate where all the internal mechanisms are located, like window tracks and regulators, wing window attachment points, and door hinges. Sure, you can relocate those items if necessary. But if it’s possible to cut through the doors in a way that will avoid having to do so, you’ll have that much less work when it’s time to reassemble everything.
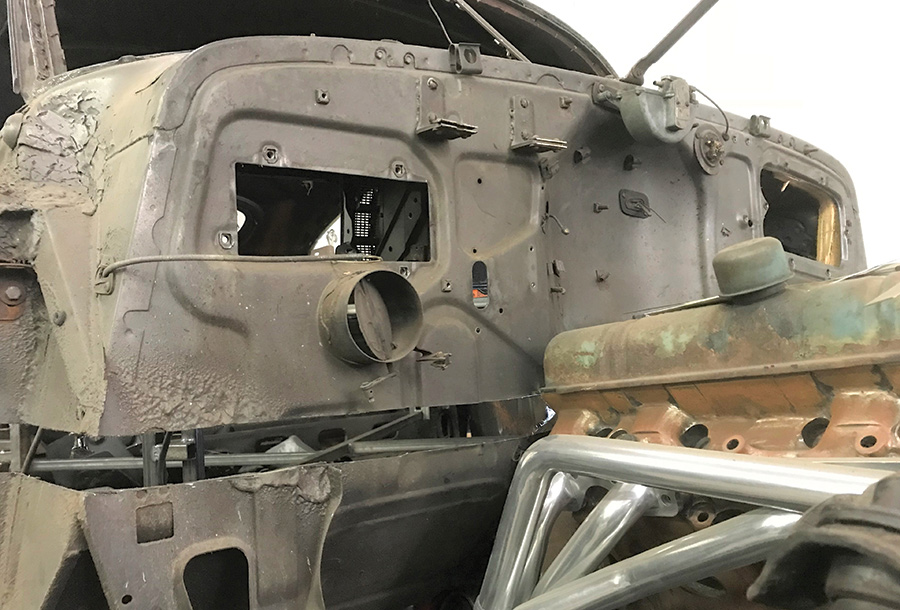
The same can be said for planning how the firewall will be sectioned. In this case, because Walls replaced the inline eight-cylinder with a mid-’60s Nailhead, a significant amount of fabrication work was required to solve some clearance issues at the firewall. But regardless of how much of the original firewall you’ll be using, you’ll want to pay attention to the placement of items like pedals, steering column, wiring pass-through, voltage regulators, and so on. It will also be helpful to consider the location of factory reliefs and beads. That way you can plan your cuts to minimize the amount of metal shaping that will be required to keep those beads and reliefs in line with each other when the top and bottom halves of the firewall are mated back together.
Walls recommends getting a sheet of thin, flexible plastic from a hobby supply store that you can cut into strips in 1/2- or 1-inch increments to use as templates for marking where you’ll make your cuts. And, of course, remember that it’s always easier to remove more sheetmetal from the body than it is to add it back in, so make your cuts as straight and clean as possible—and if you’re not sure how much to remove, be conservative in your first pass with the cutting wheel. In the case of the Buick, Walls started by removing 2 inches of steel all the way around. After removing two of the spacers from the jig and dropping the top half of the body down to meet the bottom, the proportions looked right, and he didn’t cut any more.
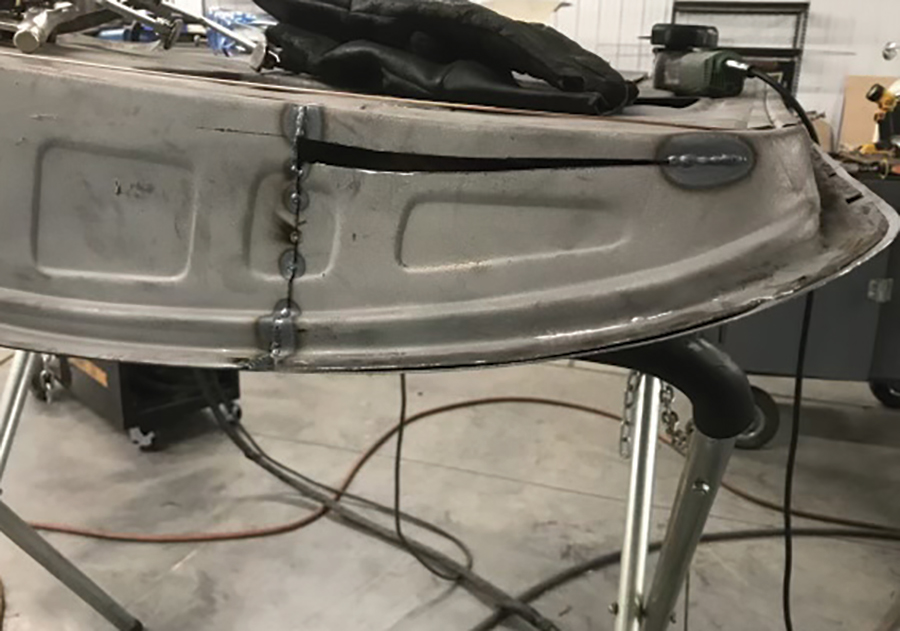
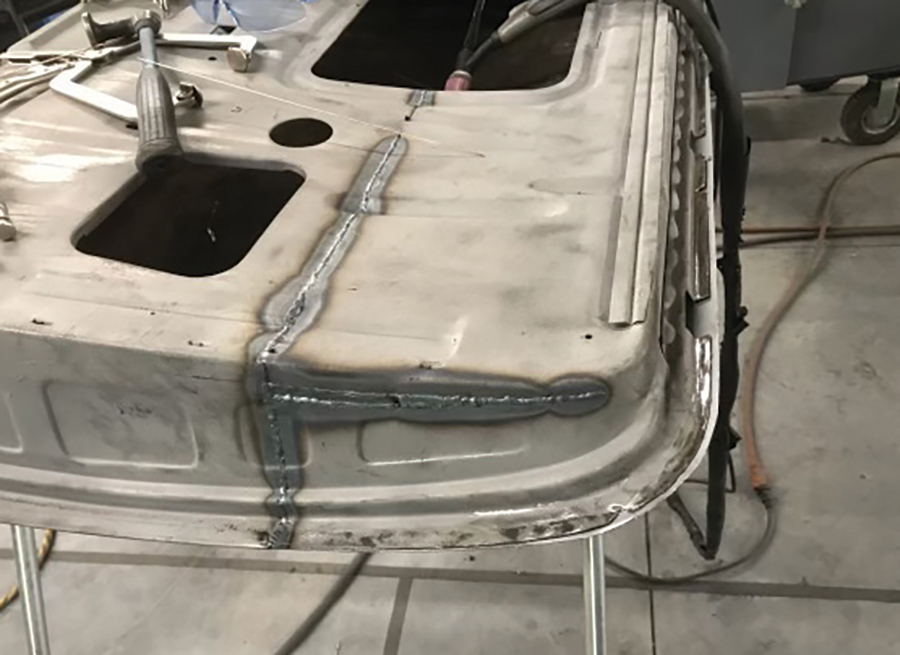
In most instances the outer sheetmetal can be welded back together without adding additional steel fillers or patch panels. Since hammer and dolly work will be necessary to straighten out the panels after they’re welded, Walls removes a larger amount of the internal structure (in areas like the quarter-panels and doors) to provide access to the backside of the outer skins. That way the inner steel that will be covered by upholstery can be welded back into place after the outer steel—the visible panels—is welded and metalworked to perfection.
It would be impossible to cover every aspect of sectioning in one story since each car presents its own unique challenges, but the accompanying photos and captions should shed some light on the process. As with any major sheetmetal modification, the most important thing is having a complete, carefully laid-out plan. The more thought you put into every single cut you’ll make, the easier it will be to fit the puzzle pieces back together when the sparks stop flying.


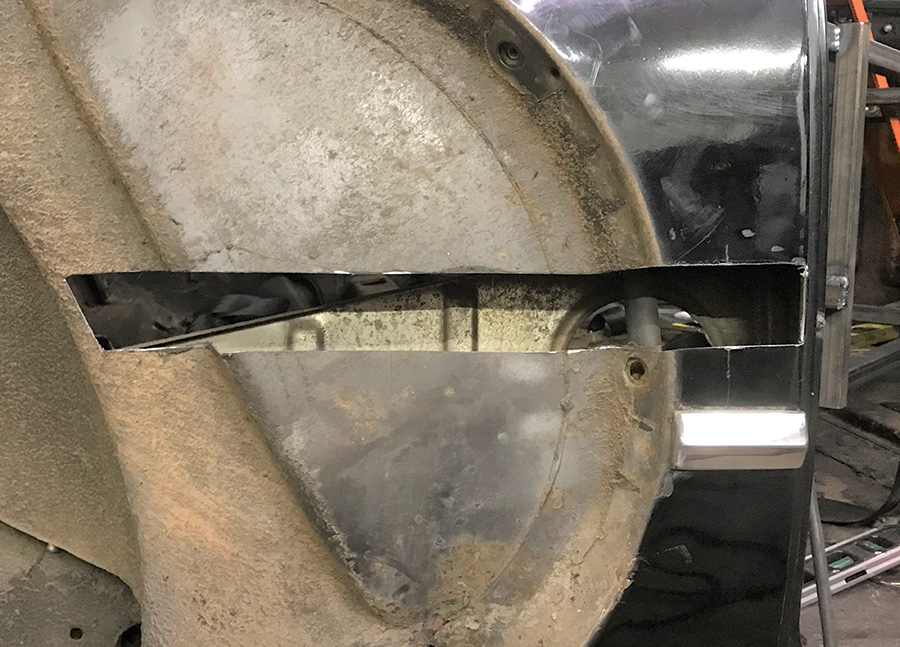


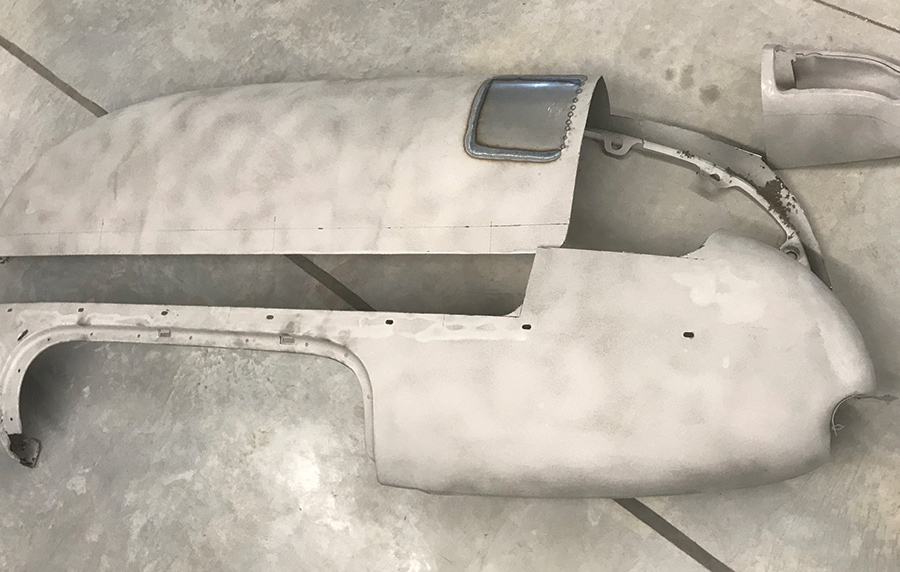

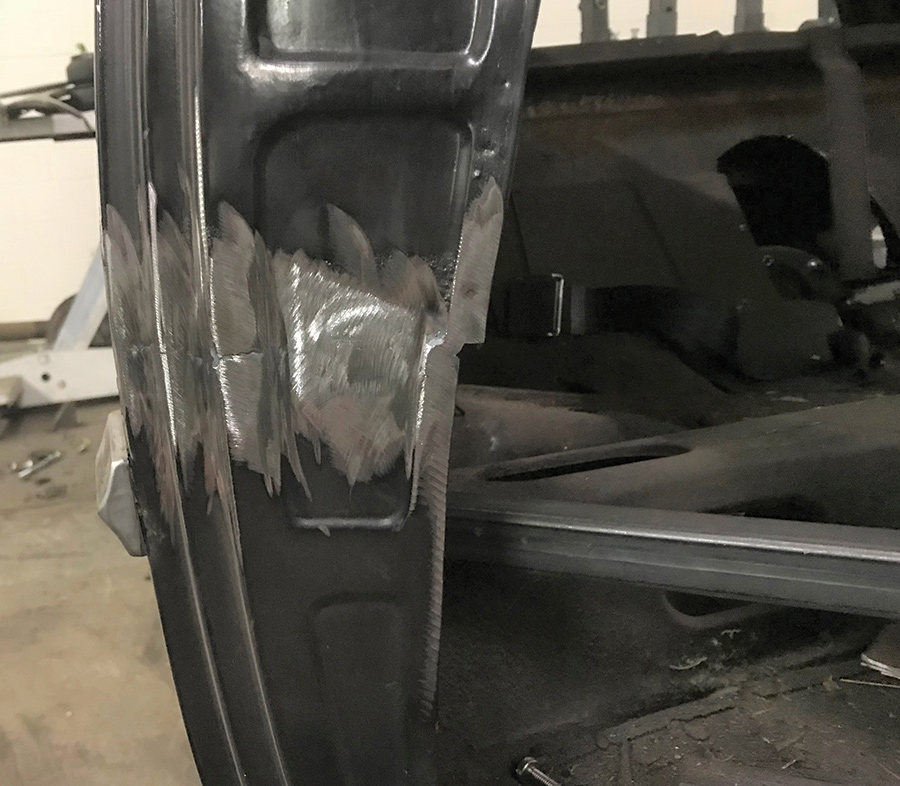


26. The front fenders were sectioned behind the wheelwell, but ahead of the wheelwell nothing was removed. This brought the lower edge of the fenders in line from front to back. The overall impact of the mild sectioning is subtle but effective.
VOLUME 4 • ISSUE 30 • 2023