Modern Rodding TECH
InTheGarageMedia.com

By “Rotten” Rodney Bauman  Photography by The Author
very now and then, even old hot rodders come upon a car that we’d agree just shouldn’t be modified. Even so, we can’t help ourselves, can we?
Out here in Northwestern Montana we’ve had The Flathead Ford Museum to enjoy for many years. Its curator, Lyle Aklestad, is a knowledgeable hands-on restorer, preserver, and collector who’s kindly shared his passion with likeminded Ford fans and curious passersby alike. Long story short, the Flathead Ford Museum’s recent liquidation was an opportunity for buyers. If by chance you were already a friend of Aklestad’s, there were noteworthy bargains on tap.
Our subject ’40 Ford Standard Tudor is an unrestored original, displaying only 46,000 miles on its odometer. New owner, Willie Steele, understands that it shouldn’t be modified. A subtle stance-enhancement, however, wouldn’t be an undoable deed to be frowned upon—perhaps not even by the purest of purists. Nowadays it can be done (or undone) for the most part by simply twisting nuts and bolts.
For comparison’s sake, let’s rewind and review some earlier methods for lowering a fat-fendered, buggy-sprung Ford—like just removing spring leaves and/or heating ends of main leaves. The once-common practice of heating main leaves near the eyes would indeed lead to sagging as the torch would weaken spring steel to create unsightly kinks.
Reversing main leaf eyes was an acceptable hot tip. Stretching the ends of an I-beam axle was, too, but not so much for the do-it-yourselfer. If you’re a grizzled hot rod veteran, you may recall shops that specialized in such jobs. You may also recall that from wishbone to kingpin a stretched axle would usually end up a little narrower than stock. That rarely caused a problem, but there’d also be tie rod interference at the wishbone, which would require tie rod modification, steering arm modification, or both.
No matter which of the lowering methods we might’ve chosen back then, there would’ve been guesswork involved. It would’ve taken experience with a dash of keen instinct to predict the result. The one thing we could pretty much count on was that the job well-done would have an old Ford riding like a creeper.
The process of lowering a fat-fendered, buggy-sprung Ford is simplified today. For the job at hand, we’ll simply order up the proper combination of brand-new parts—all from Speedway Motors. By doing so, that guesswork we’ve been talking about can be largely eliminated.
Suspension Time
From Speedway Motors, the cast-steel I-beam has a 4-inch drop, so we know approximately where we’ll end up. Also from Speedway Motors, the reversed-eye rear spring has a 2-1/2-inch drop, so we have an approximate idea of where we’ll end up there, too.
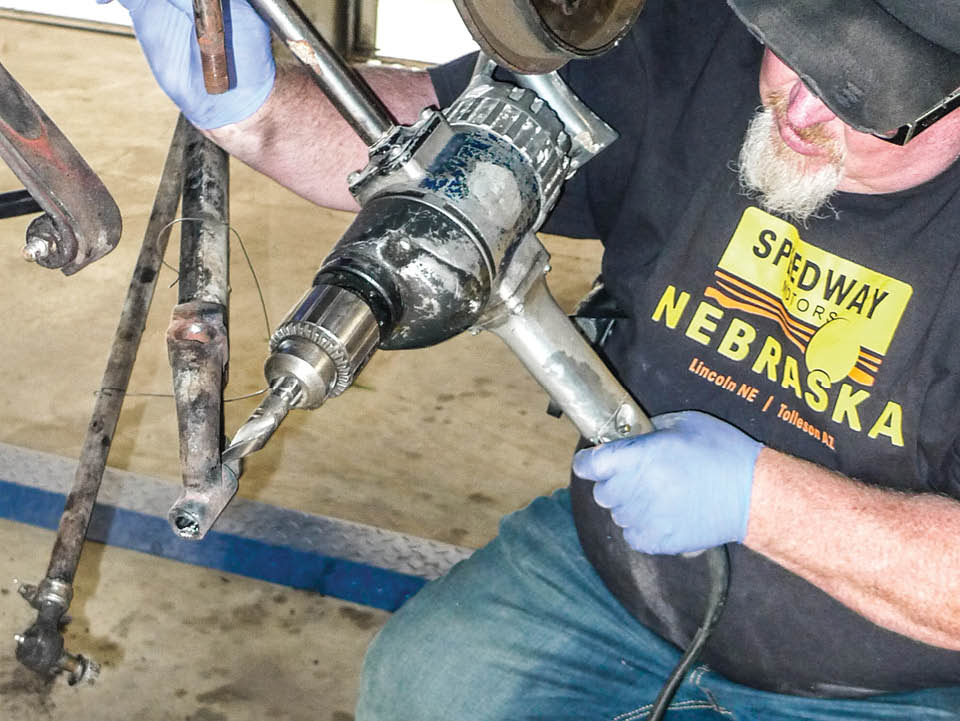
So, if we’re discussing springs and axles, we’d best address our steering arm differences. To accommodate our frontal 4-inch drop, our new Speedway Motors spindles have bolt-on arms with a 3-¾-inch drop built in. In addition, they feature a two-way taper so our tie rod can be installed high-or-low as necessary for wishbone clearance.
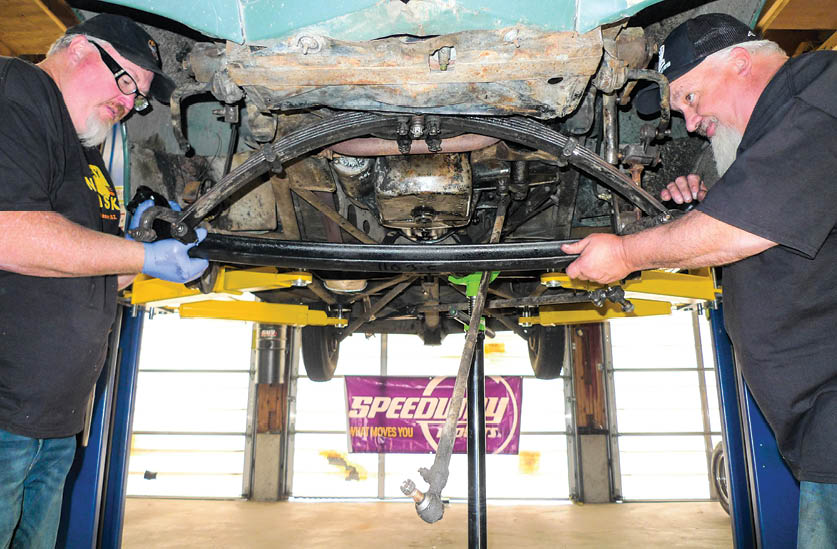
As is often the case, the difficult part will be initial disassembly. The struggle you’ll witness will involve original spring shackles. They’re in good condition. We can remove the original axle without harming them, but the new dropped axle won’t clear to slip right in. By design, the original shackles won’t just fall apart for us. They’ll end up quite destroyed, but it’s OK. We’re planning to replace them with nylon-bushed shackles from Speedway Motors anyway.
Doing most of the work here will be this old Ford’s new owner, Willie Steele. He’ll be assisted by his brother, Paul, who we’ll bring in as the ringer. Oh, what’s the name of that nationwide chain of tire stores? As the alignment guy out back, Paul worked there for 30 years. Throughout his career he’s done his share of dirty jobs. With a brand-new lift in Willie’s barn-based shop, this job shouldn’t be so bad.
Coming up shortly as we go, we’ll be sure to list Speedway Motors part numbers for the new front axle and rear spring, as well as other related componentry. Our thought here is to make this as easy as possible for you, should you desire to do the same job on your own.
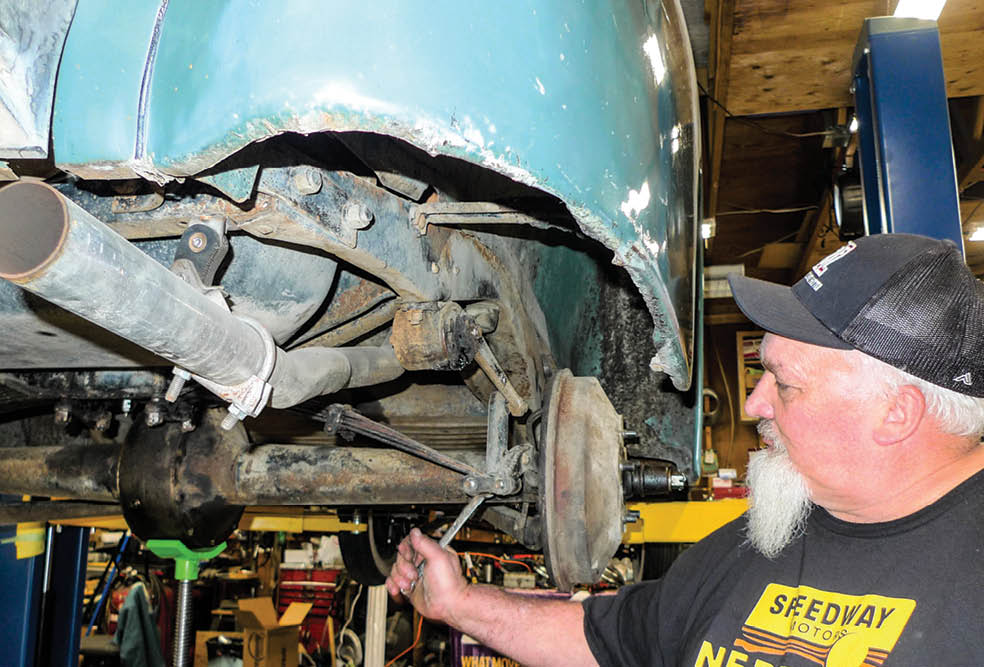
While this old Tudor is up on the lift look at its pristine underside! This may indeed be one of those cars that just shouldn’t be modified. Even so, we can’t help ourselves, can we?
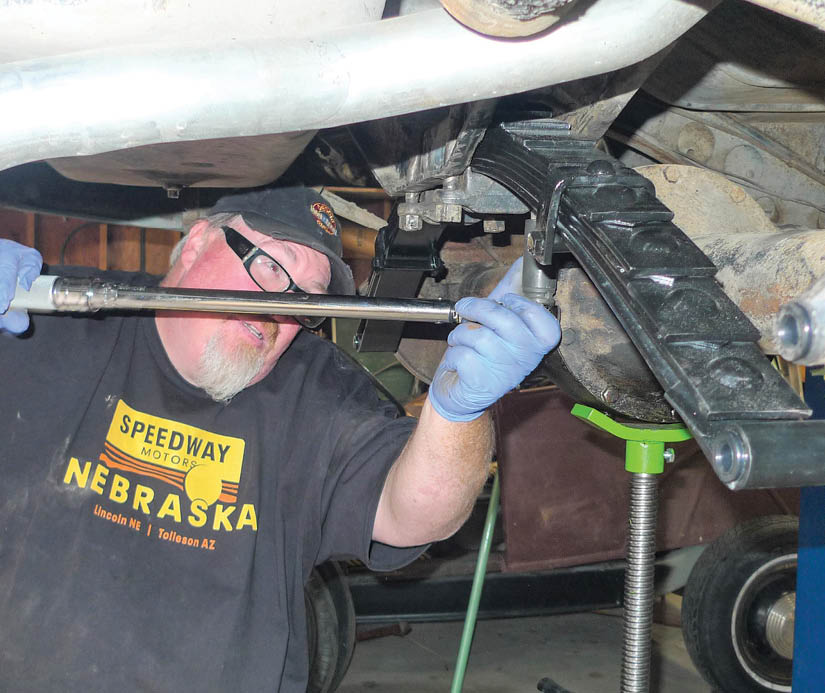
Tire Time
At this stage we’ve invested roughly 10 hours. Our drop job is pretty much done, apart from alignment and tires. By our own way of thinking, a ’40 Ford this original deserves bias-ply tires. We did consider whitewalls but that might be a bit fancy for a stripped-down Standard—especially since there’s no other white on the car.
The next step seemed obvious, so a call went out to Coker Tire for Firestone Classic blackwalls. We’ll stagger sizes, so in the end we’ll gain a bonus bit of rubber rake, which will further-enhance the new sneaky stance.
Since we’ll retain this old Ford’s original 16-inch steelies, and since they’re riveted wheels, we’ve ordered up brand-new Hartford inner tubes, also from Coker Tire: PN 663500, Firestone Classic blackwall 650-16; PN 639750, Firestone Classic blackwall 550-16. Tube sizing, PN 85366 Hartford 550R16/700R16 tubes.

2. In front, Speedway Motors PN 7022860 axle (4-inch drop), PN 9100439 spindles, PN 7022756 steering arms, and PN 91033324 2-inch spring shackles.
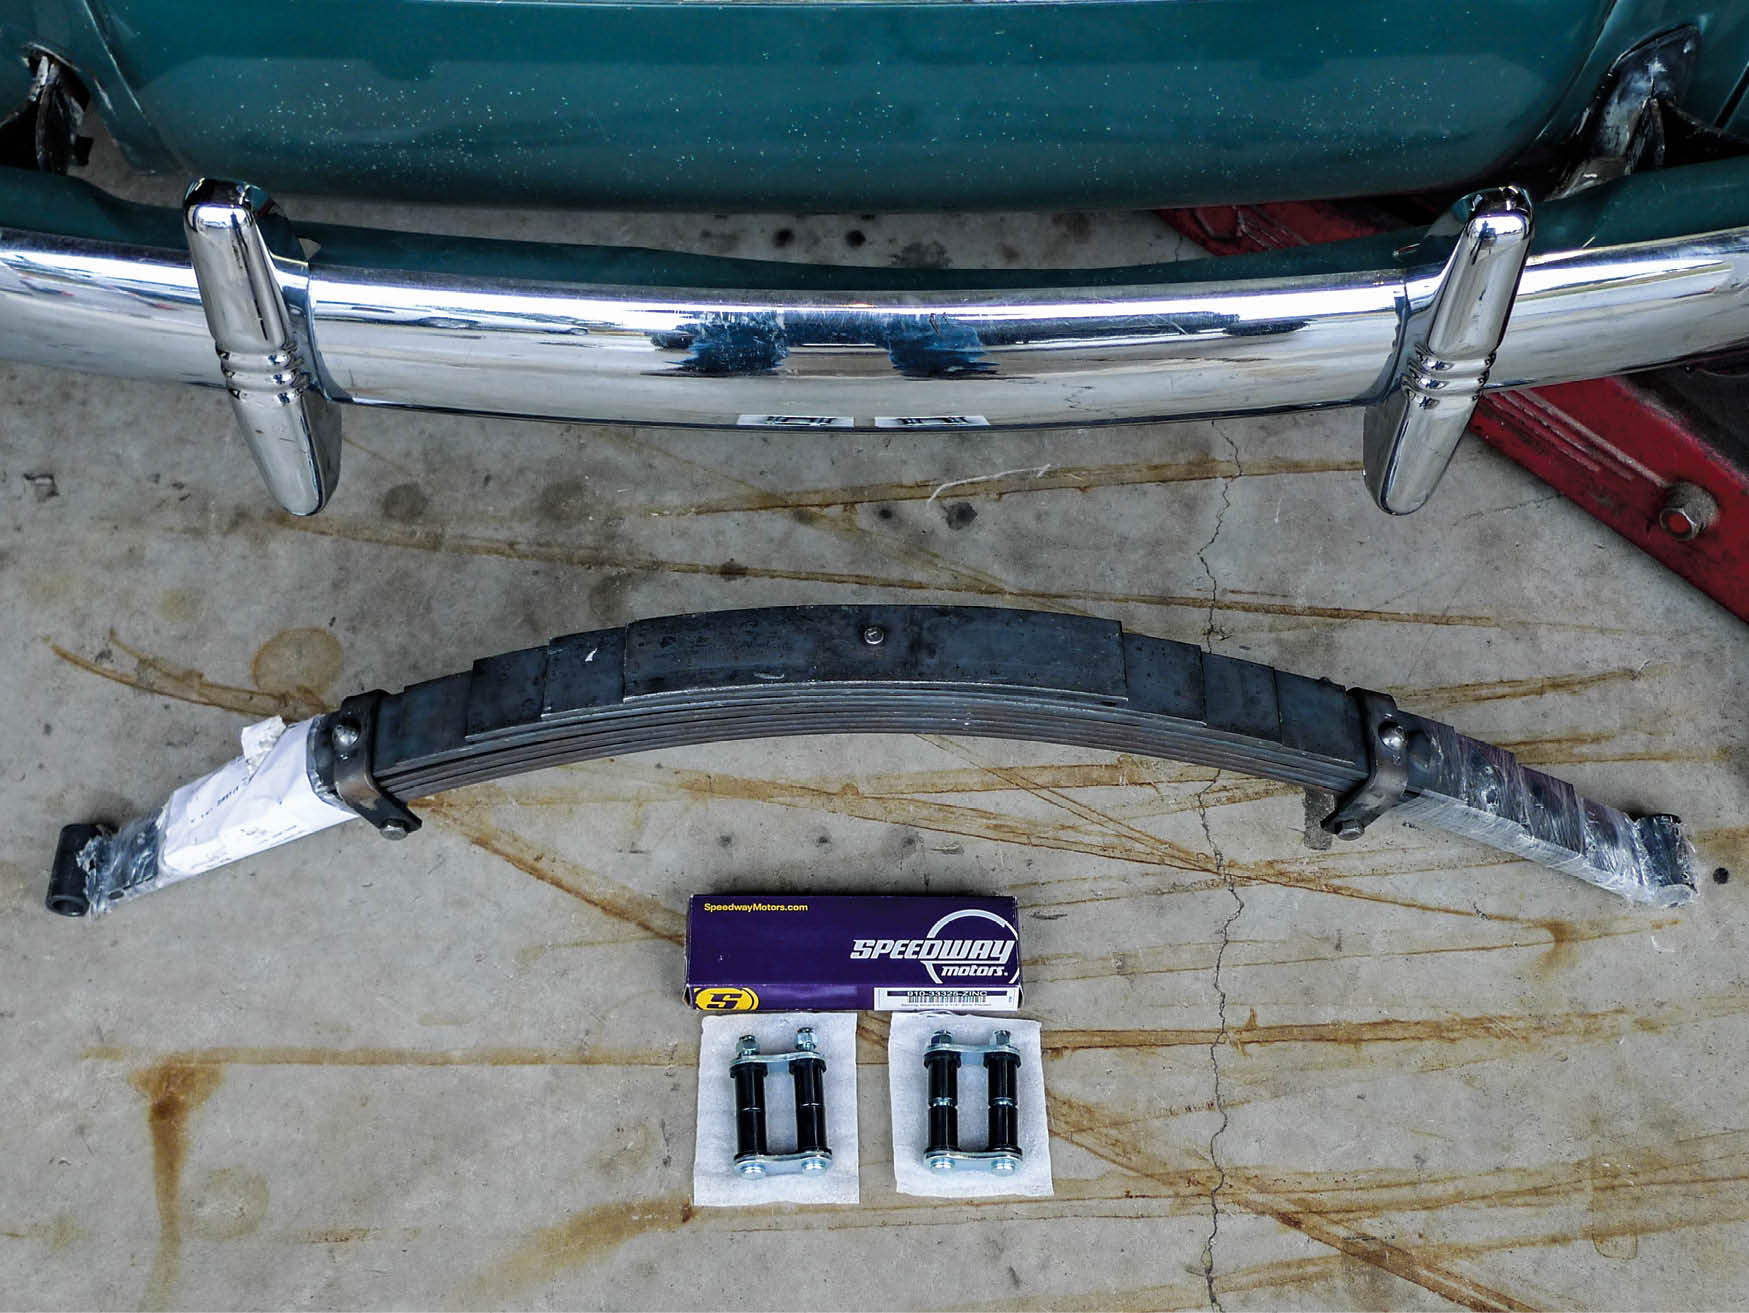
3. In back, Speedway Motors PN 5803740 rear spring (2-1/2-inch drop) and PN 91033324 2-1/4-inch spring shackles.

4. To begin, Paul Steele pulls a tapeline measurement from spindle center to wheel lip center. Since we’ll be changing tire sizes, this is better than measuring from the floor.

5. Having been together since 1940, the original axle and spring perches are being rather stubborn. The torch in Paul’s hand was his grandfather’s, too.


18. In back, Willie’s multi-purpose tool is again invaluable for supporting heavy iron. This and still-attached lever shocks should keep things stable enough.


VOLUME 4 • ISSUE 30 • 2023