Modern Rodding Tech

InTheGarageMedia.com

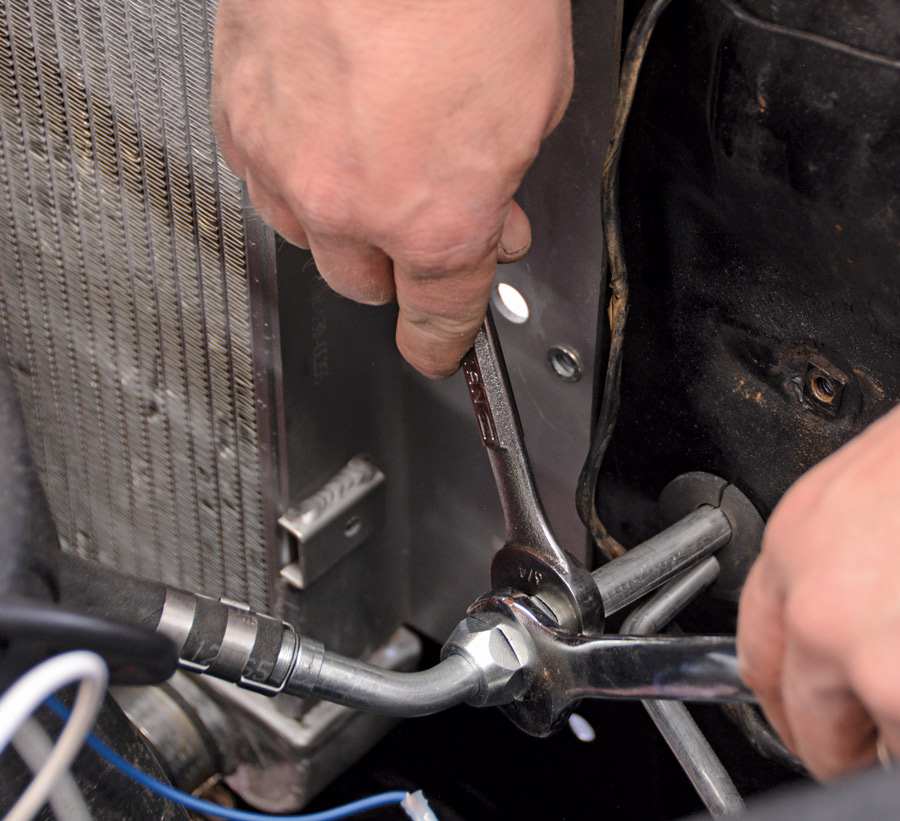
1. Inexpensive and easily used tools made the installation of the Vintage Air E-Z Clip Universal Refrigerant Hose Kit (PN 547002) a quick project.

E-Z Does It Title Typography
1. We have a slight change to an old expression. “What you see is what you get … and then some!” truly applies with this project–and it’s not all good.
Simple and Clean A/C Hoses You Can Build at Home

By Tommy Lee Byrd Photography by THE AUTHOR

I

f you’ve ever installed an air conditioning system on your car, you’ve likely installed refrigerant hoses. We’ve tackled this project on several cars through the years. Some kits come with lengths of hoses and an assortment of fittings, which allow you to custom fit your hoses. Vintage Air leads the way in terms of aftermarket heat and air conditioning systems and recently came out with a new way for enthusiasts to build their own refrigerant hoses in the comfort of their own garage. The tools are affordable and the installation process is simple, so we jumped at the opportunity to try out the new E-Z Clip Universal Hose kit (PN 547002) on a Chevy project.

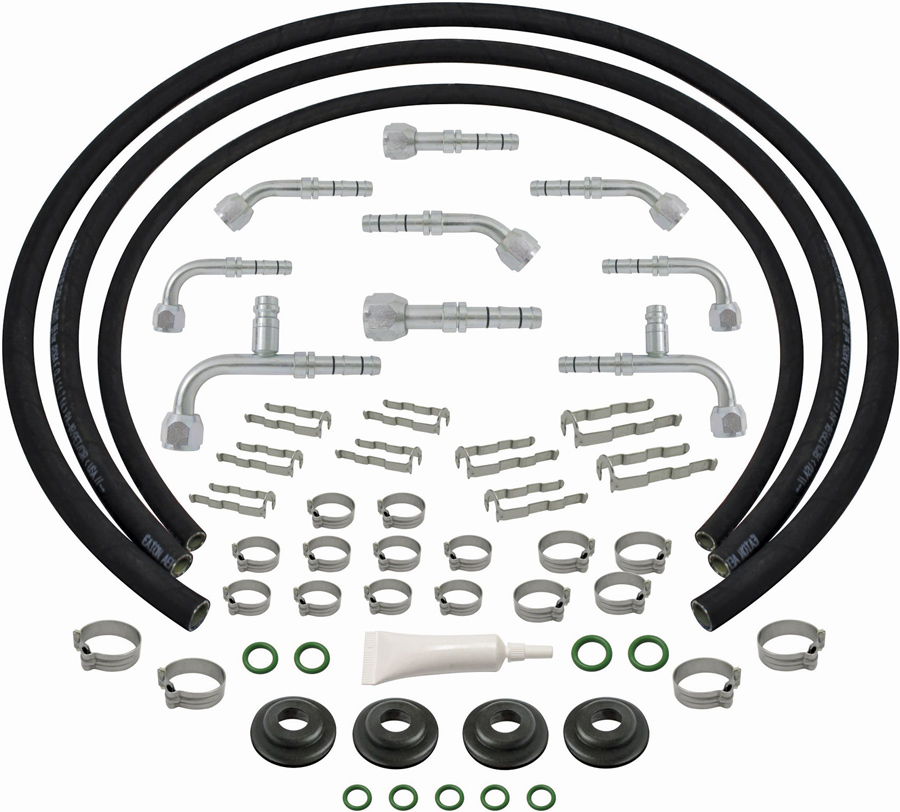
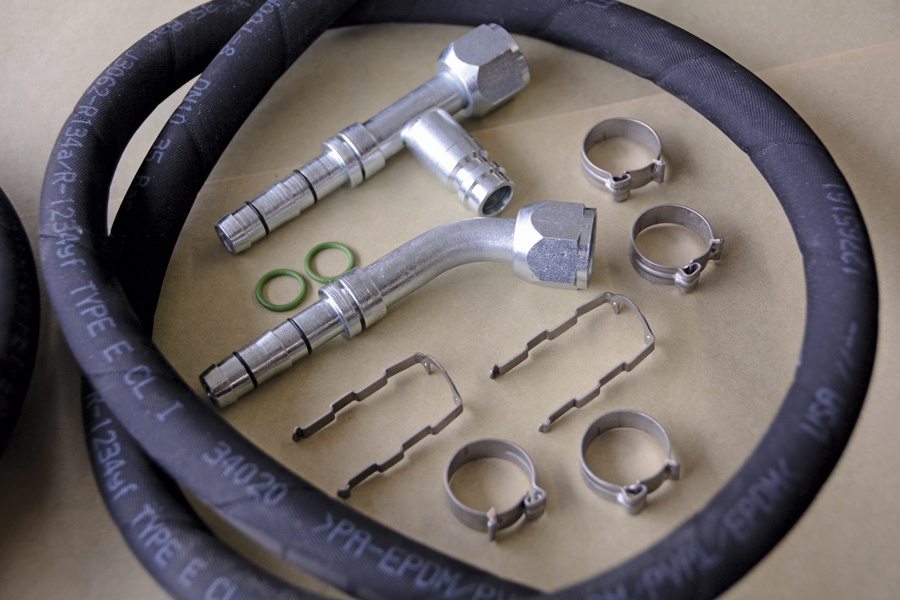
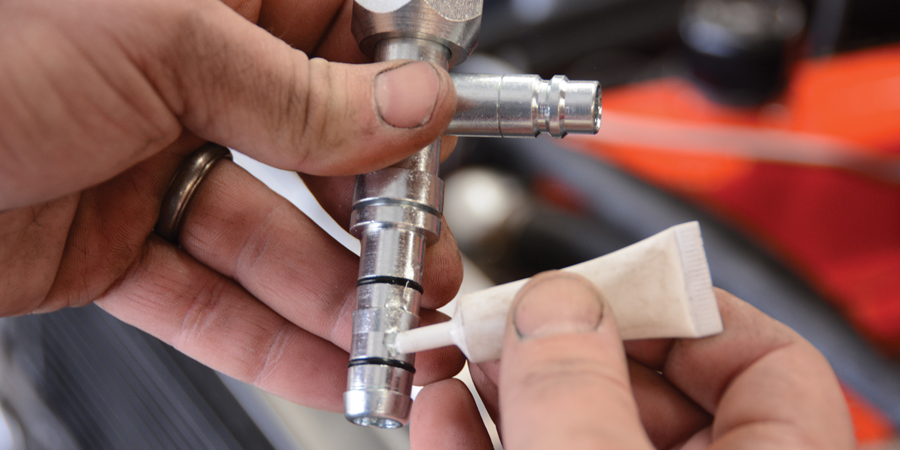
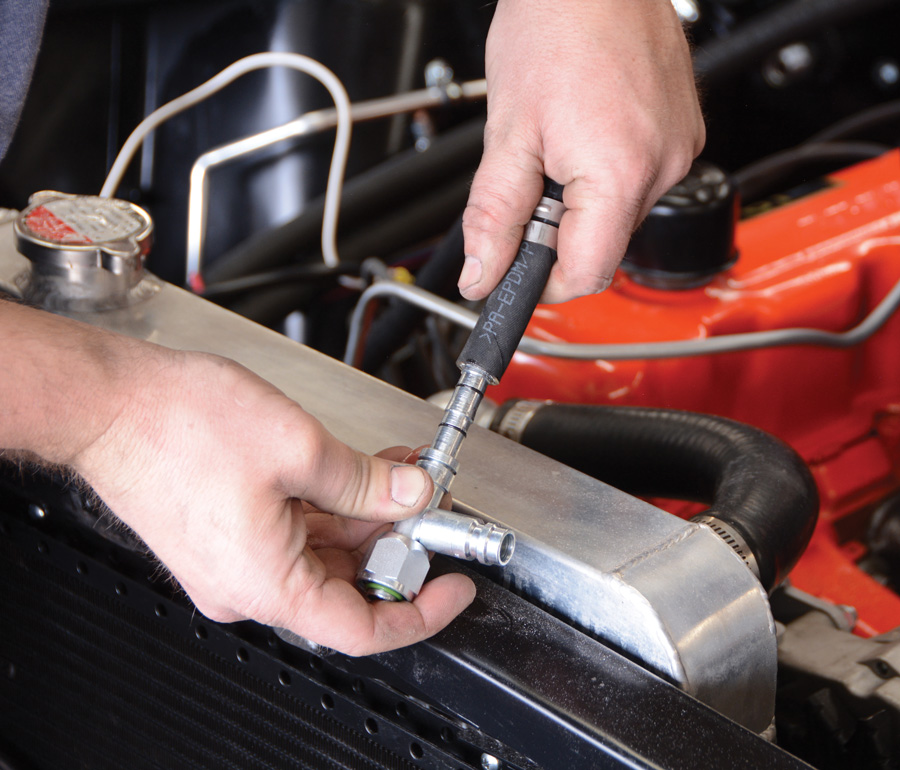
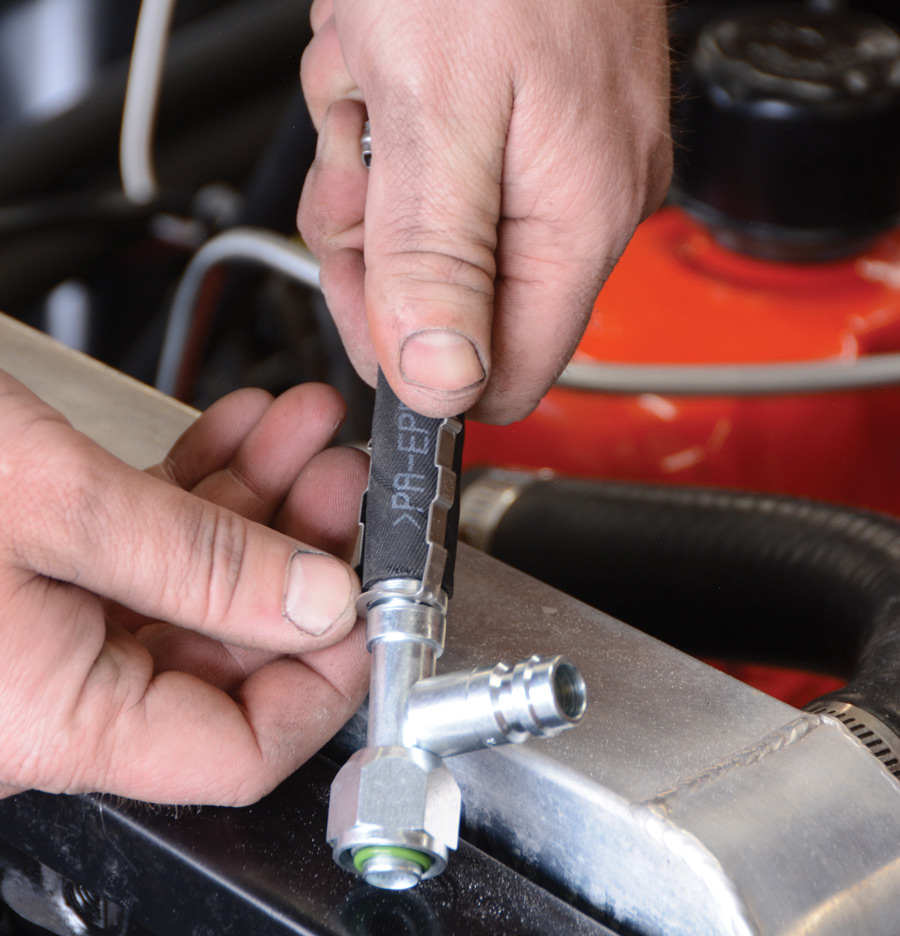
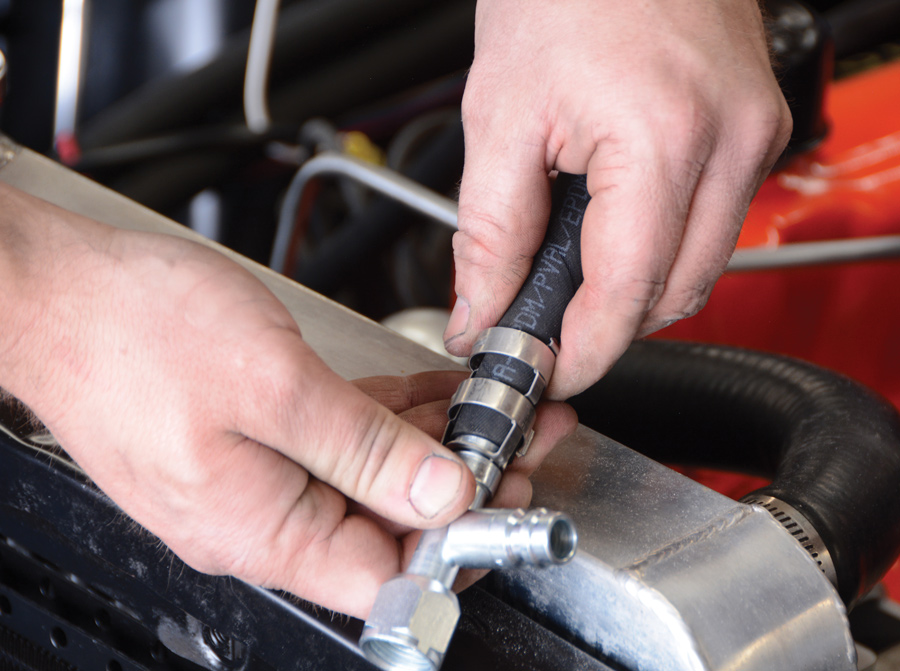
The car already has a Vintage Air system installed and the only item remaining on our to-do list was installing the refrigerant hoses. When the hose kit arrived we were surprised by the small size of the hoses. The typical hoses feature a large outer diameter, but these are much smaller and feature a different texture than the standard refrigerant hoses. Keep in mind that the inner diameter of the hose is still the same, but an added benefit of the E-Z Clip system is a smaller outside hose diameter. Also in the kit is an assortment of clips, cages, fittings, and O-rings to get us to the finish line of this project.

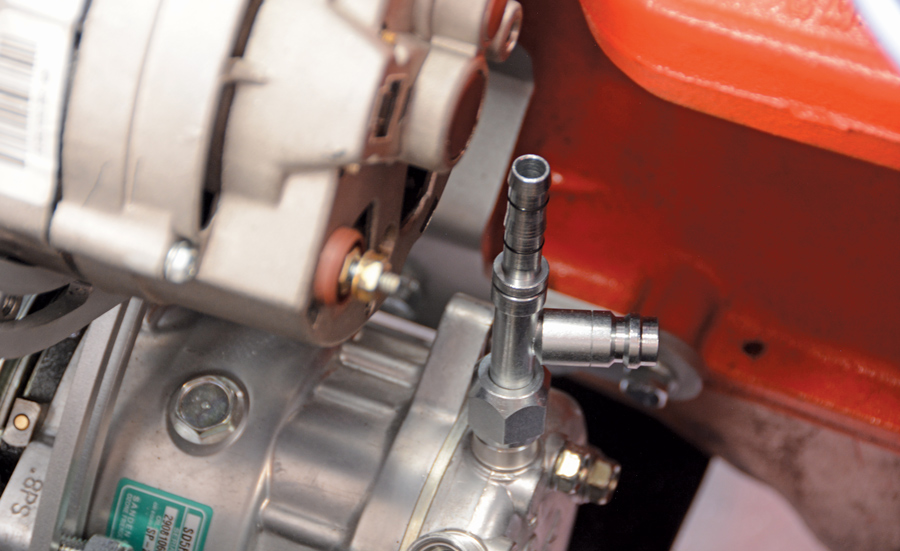
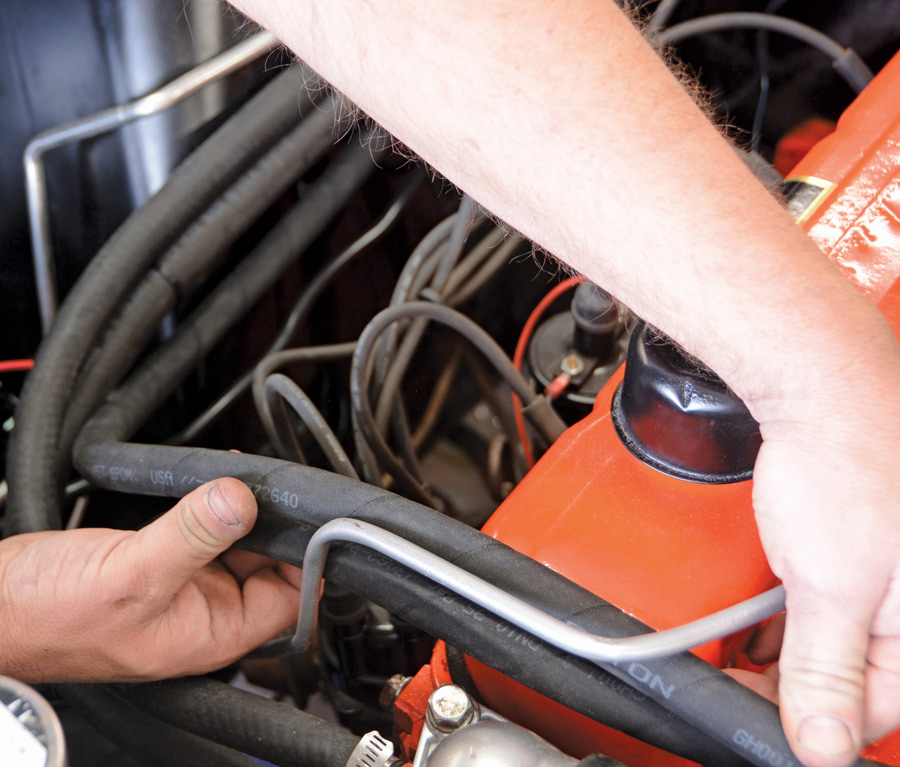
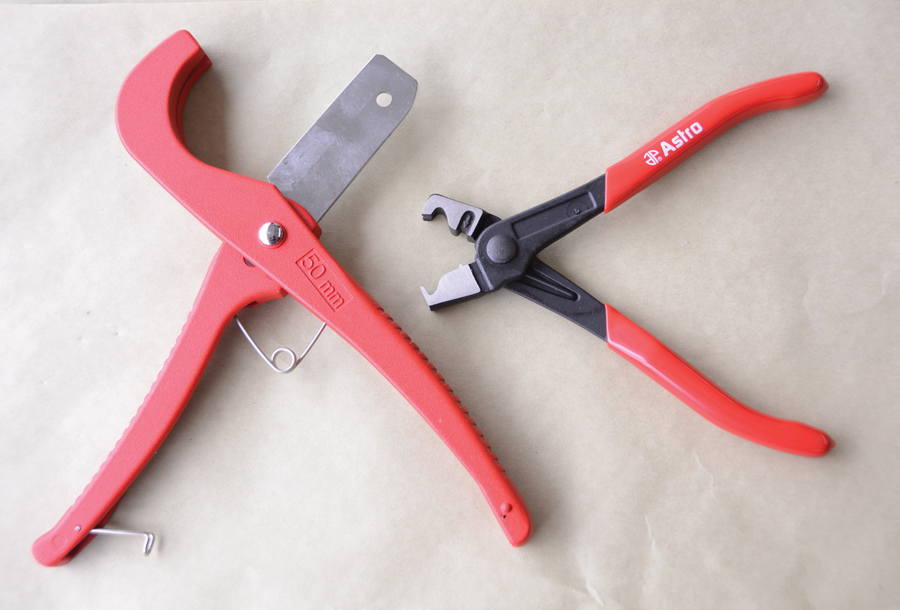
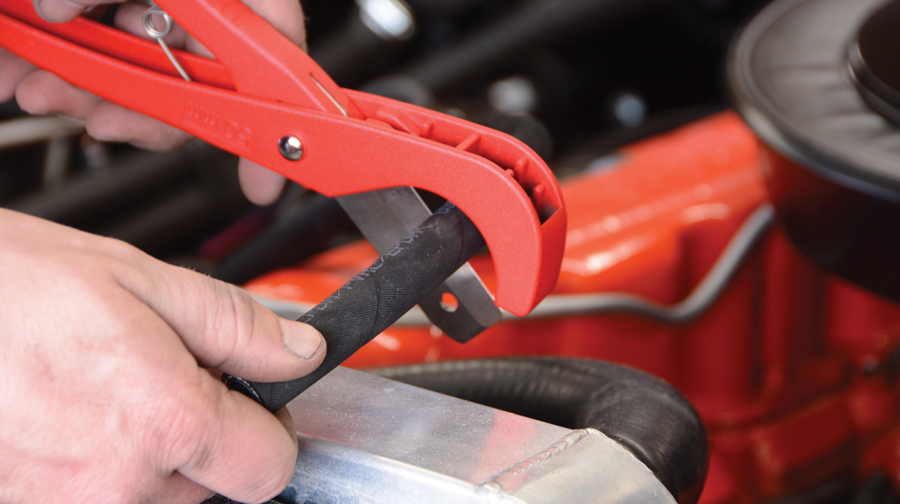
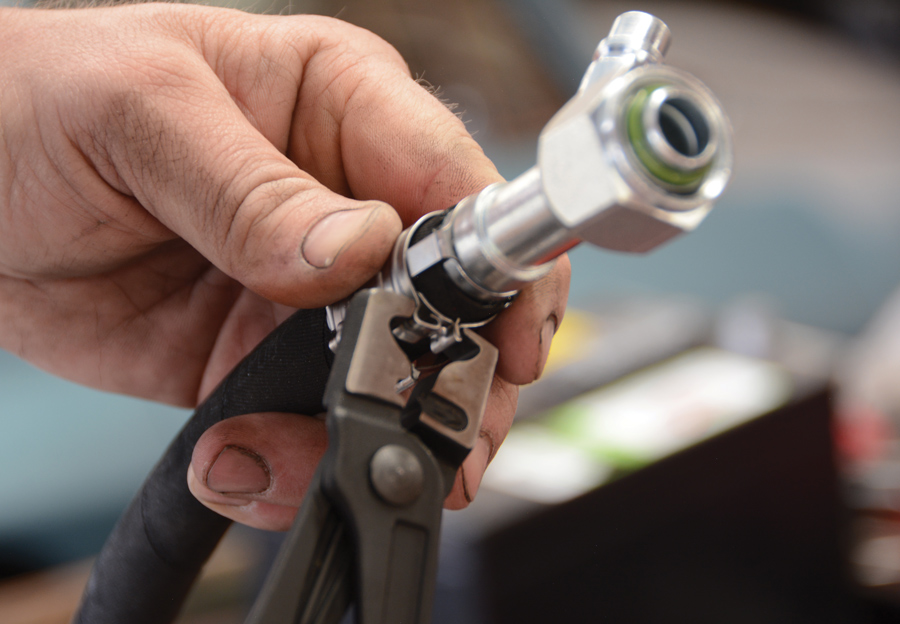
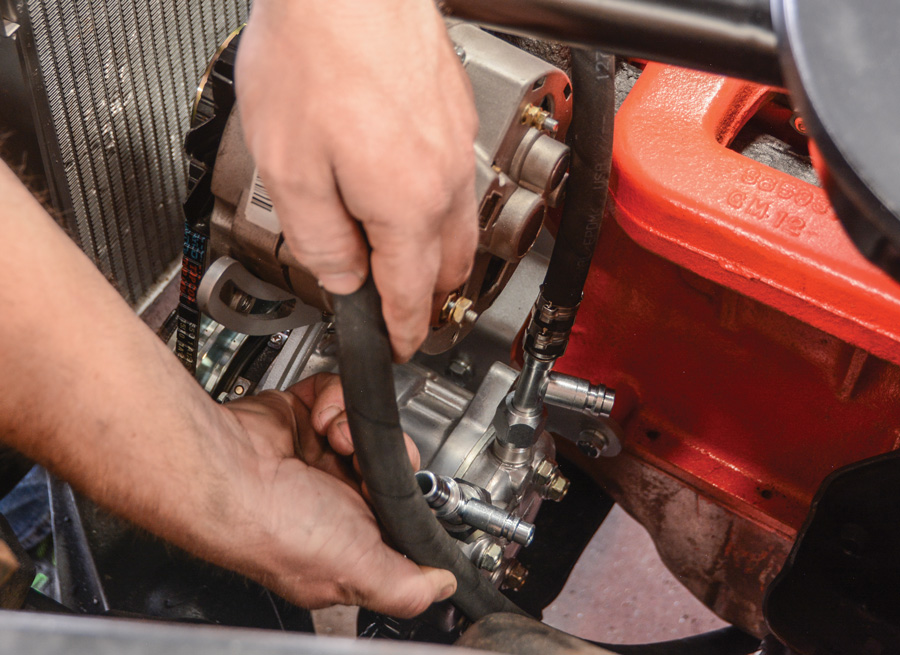
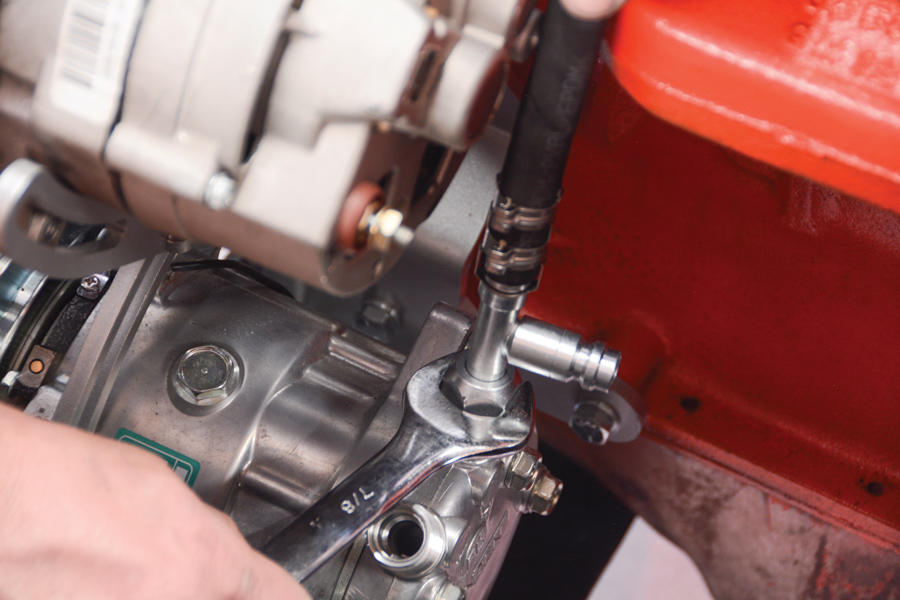
We ordered two tools from Vintage Air to complete the job. A hose cutter (PN 420001-VUR) and a special pair of pliers (PN 420000-VUR) are all that we need to assemble the hoses. (The jaws on the crimping pliers have two different angles. Orienting them one way secures the clip and flipping them over and reversing the orientation will unlock the clip.) We started by mocking up the hoses and fittings to determine the proper routing and then made our cuts and performed the final assembly. Overall, we spent about an hour fitting, measuring, and assembling the E-Z Clip Universal Hose kit. It gave our Vintage Air system a custom touch and a sanitary appearance, while also speeding up the installation process. Now, we can fill it with refrigerant and begin enjoying our climate-controlled surroundings.

The E-Z Clip kit comes with all that you will need plus easy-to-read and follow detailed instructions.
2. The E-Z Clip kit comes with all that you will need plus easy-to-read and follow detailed instructions.
Although most Vintage Air kits come with standard refrigerant hoses and fittings, we wanted to build custom hoses in the comfort of our own garage. The E-Z Clip kit (PN 547002) comes with the hoses, fittings, and hardware needed for the conversion.
3. Although most Vintage Air kits come with standard refrigerant hoses and fittings, we wanted to build custom hoses in the comfort of our own garage. The E-Z Clip kit (PN 547002) comes with the hoses, fittings, and hardware needed for the conversion.
We start by threading the fittings into place for mock-up. The Universal kit comes with 90-degree fittings for use on the compressor, but we called and ordered these straight number 8 and number 10 fittings with the service port. This was a better fit for our application.
4. We start by threading the fittings into place for mock-up. The Universal kit comes with 90-degree fittings for use on the compressor, but we called and ordered these straight number 8 and number 10 fittings with the service port. This was a better fit for our application.
After the fittings are hand tightened, we can mock up the hoses and mark them for trimming. Notice that the hoses are much smaller than standard refrigerant hoses, but still feature the same inside diameter needed for proper flow.
5. After the fittings are hand tightened, we can mock up the hoses and mark them for trimming. Notice that the hoses are much smaller than standard refrigerant hoses, but still feature the same inside diameter needed for proper flow.
These are the only tools needed for the E-Z Clip install. First is the hose cutter (PN 420001-VUR), which makes easy work of the thick hose material. Next are the special pliers (PN 420000-VUR) designed to clamp the clips into place.
6. These are the only tools needed for the E-Z Clip install. First is the hose cutter (PN 420001-VUR), which makes easy work of the thick hose material. Next are the special pliers (PN 420000-VUR) designed to clamp the clips into place.
After mocking up the fittings and hoses and double-checking the hose routing, we can trim the hoses with the hose cutting tool. There are other cutting tools on the market, but this one gave us a nice square cut, which is very important for proper sealing.
7. After mocking up the fittings and hoses and double-checking the hose routing, we can trim the hoses with the hose cutting tool. There are other cutting tools on the market, but this one gave us a nice square cut, which is very important for proper sealing.
The kit comes with a small tube of refrigerant oil, which is used to lubricate the fittings. Notice the two small O-rings that are pre-installed on the nipple. They are made from a different material than the standard green O-rings you’ll use on the fittings.
8. The kit comes with a small tube of refrigerant oil, which is used to lubricate the fittings. Notice the two small O-rings that are pre-installed on the nipple. They are made from a different material than the standard green O-rings you’ll use on the fittings.
We like to slide two appropriately sized clips onto the hose before pushing the hose onto the fitting so that we don’t forget. Otherwise, you could damage the clips trying to spread them out to fit.
9. We like to slide two appropriately sized clips onto the hose before pushing the hose onto the fitting so that we don’t forget. Otherwise, you could damage the clips trying to spread them out to fit.
 Firmly push the hose onto the fitting until it seats against the shoulder. It’s designed to be a tight fit.
10. Firmly push the hose onto the fitting until it seats against the shoulder. It’s designed to be a tight fit.
Now, the supplied cage can be snapped into the retaining groove, which is cut into the fitting. There are different sized cages to coordinate with the various hoses and fittings in the kit.
11. Now, the supplied cage can be snapped into the retaining groove, which is cut into the fitting. There are different sized cages to coordinate with the various hoses and fittings in the kit.
The clips that we already slid over the hose can now be installed on the cage. Each clip fits into a recess in the cage.
12. The clips that we already slid over the hose can now be installed on the cage. Each clip fits into a recess in the cage.
 It’s time to grab the special pliers and firmly squeeze until we feel a positive clicking of the clip. Feel free to index the clips so they’re both facing the same direction.
13. It’s time to grab the special pliers and firmly squeeze until we feel a positive clicking of the clip. Feel free to index the clips so they’re both facing the same direction.
The refrigerant oil is used to lubricate the provided O-rings with the kit. The green O-rings are available in number 6, 8, and 10 sizes, so choose accordingly and begin final assembly of the custom hoses.
14. The refrigerant oil is used to lubricate the provided O-rings with the kit. The green O-rings are available in number 6, 8, and 10 sizes, so choose accordingly and begin final assembly of the custom hoses.
After assembling the first hose and lubricating the O-ring we can tighten the fittings, which connect to the condenser and compressor. Note the use of a backup wrench when tightening fittings
15. After assembling the first hose and lubricating the O-ring we can tighten the fittings, which connect to the condenser and compressor. Note the use of a backup wrench when tightening fittings
We repeat the process for the second refrigerant hose. First mocking it up, then trimming it, and finally installing the E-Z Clip cage and clips to secure the hose to the fittings.
16. We repeat the process for the second refrigerant hose. First mocking it up, then trimming it, and finally installing the E-Z Clip cage and clips to secure the hose to the fittings.
Using a 7/8-inch wrench, we tighten the fittings on the A/C compressor after lubricating the O-ring and making sure it is seated properly. With the hoses installed, now all we need to do is have the system filled with refrigerant and begin enjoying our Vintage Air A/C.
17. Using a 7/8-inch wrench, we tighten the fittings on the A/C compressor after lubricating the O-ring and making sure it is seated properly. With the hoses installed, now all we need to do is have the system filled with refrigerant and begin enjoying our Vintage Air A/C.
Vintage Air
(800) 862-6658
vintageair.com
Modern Rodding

VOLUME 3 • ISSUE 18 • 2022