
Modern Rodding Tech
1957 Ford Ranchero
1. Nothing beats “metal finish” for showcasing all the modifications. Before the painting and upholstery, you can see the craftsmanship that shows where and how it was applied. The finished 1957 Ford contemporary custom from Tin Man’s Garage (TMG) will be on display and running at outdoor rod runs this summer.
Part 1: How To Encompass Your Interior With Trim
BY BRIAN BRENNAN PHOTOGRAPHY BY NOTSTOCK PHOTOGRAPHY & TIN MAN’S GARAGE ILLUSTRATIONS BY JIMMY SMITH CONCEPTS
T

he fullsized Ford Ranchero was originally built in 1957 and continued through 1959. It was based on a two-door station wagon and had the full complement of engines and transmissions typical of passengers of that era. From 1960-65, it was reclassified as a “compact” and then from 1966-79 it was reclassified again as a “midsize” utility vehicle. (It prompted Chevrolet to build the El Camino in 1959 to compete with the Ranchero.) The 1957 Ranchero seems to be the most popular of the first three years and the only one with a single headlight. We are beginning to see more of the Rancheros (and El Caminos) at rodding events.

We spoke with Brian Limberg of Tin Man’s Garage (TMG) to ask what his customer wanted and what he thought would make for an improved version of the 1957 Ford Ranchero. Limberg pointed out to us that, “Thankfully, Mike Long, the owner of ‘Cool Ranch,’ owns a machine shop. TMG utilized this benefit to its fullest extent.” Turns out Long is a longtime hot rodder and has done a great deal of the custom machine work for the project, even going to the extent to make a custom set of keys for his Ranchero.

Before we unveil the feature on the Cool Ranch (1957 Ranchero), we will showcase in three parts how some of the sheetmetal underwent its transformation. This month, we are going to look at how the dash and accompanying interior trim were developed. Pay particular attention to the development of the one-off aluminum wrap around the trim.

In Part 1, you will see that interior trim was added. According to Limberg, “The factory dash was screaming for something in the empty void after all the items were removed that were no longer needed. Most original cars just had a different color painted in the center of the dash, and some models even had random pieces of trim. After discarding all the dash accessories, the original trim couldn’t be used due to the hole locations. That’s why the custom interior metalwork was done.”

In Part 2, we will explore how the bed trim was handled and continue with the theme of “wrap-around 360-degree trim.” After spending a lot of time cleaning up the factory bed trim on this vehicle, the idea was formed to incorporate that design into the interior. Once that idea was conceptually proven, the decision was made to make the trim wrap completely around the interior. Limberg told us, “The bed trim wraps all the way around the bed, so why not make the interior trim do the same?”

We will conclude in Part 3 with what TMG did to restyle and “tighten” the front bumper’s fit and we probably won’t be able to resist throwing in some final assembly photos as a teaser of what you can expect in the final feature.

Technical sketch of Ranchero exterior modifications.
2. Jimmy Smith of Jimmy Smith Concepts teamed up with Brian Limberg of TMG to create this redesigned 1957 Ford Ranchero.
Interior and bed technical sketch annotations.
3. Although there are many modifications inside and outside of this Ranchero, the original design and appearance have been preserved, proving once again “Don’t modify for modification’s sake.”
Elijah Schroeder inspecting a blue dashboard.
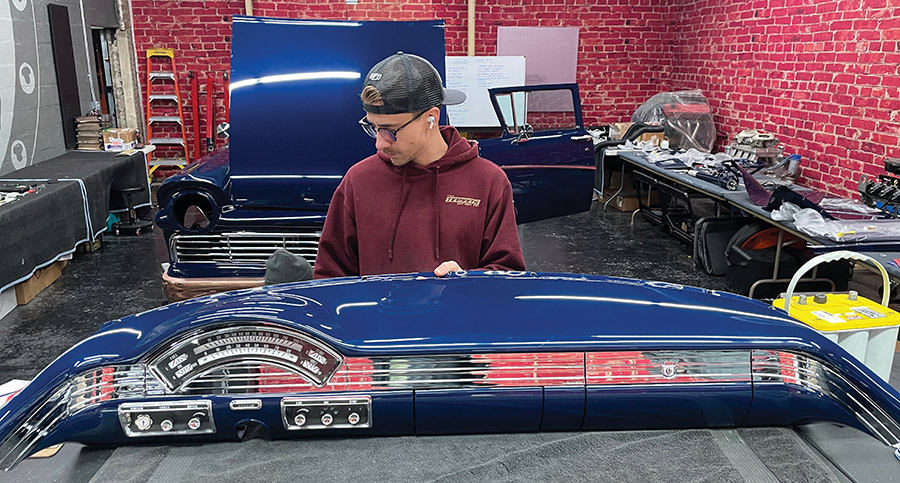
4. Elijah Schroeder of TMG is checking over the completed and ready-for-installation custom dash into the 1957 Ford Ranchero.
3D CAD design of custom gauge bezel.
5. The project started with redesigning the original gauge cluster. A custom bezel was created in CAD to look more refined, featuring a raised trim ring and recessed gauge face. The ribbed bead detail was inspired by the original bed trim.
Original gauge eyebrow cut from dashboard.
6. The original gauge eyebrow was cut out and replaced with a fabricated piece of sheetmetal. Removing the unnecessary seam simplified the new look of the dash. Notice the sheetmetal that was removed above the steering column area.
Fabricated sheetmetal eyebrow welded to dash.
7. The eyebrow was fully welded into the dash and metal finished. A new piece was crafted to fit around the aftermarket steering column. A small, raised bead detail was added to give the appearance of a factory stamping.
Instrument cluster and switches in blue dash.
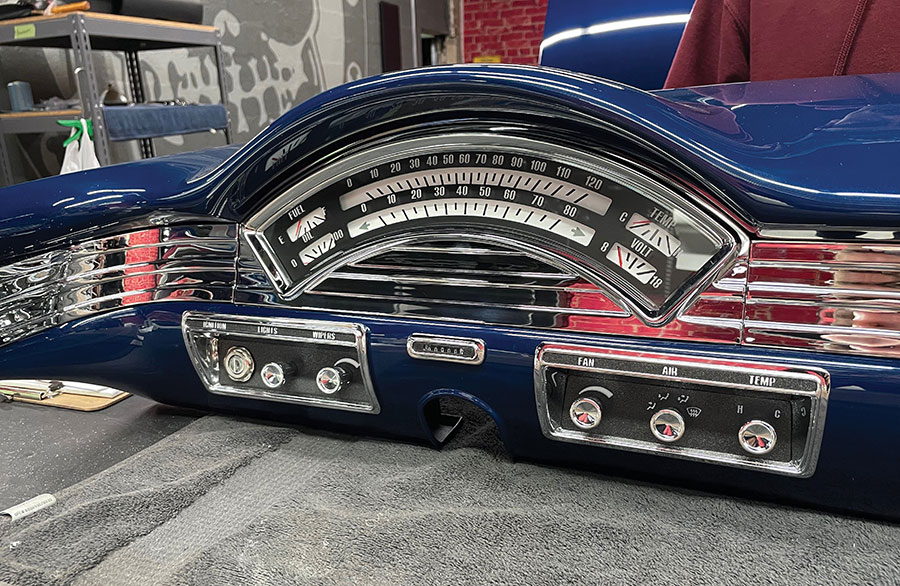
8. A closeup of the instrument cluster and switches now located in the redesigned dash. The gauges are from the Instrument Customization Unit (ICU) at Classic Instruments and feature “faces” designed by Jimmy Smith.
Tapered bead detail created using Pullmax.
9. The tapered bead detail was created on a small sheet of metal by repeatedly running it through the Pullmax in multiple passes. The taper was achieved by gradually increasing the depth of the die engagement with each pass, stopping just short of the previous depth.
Tapered detail fitted to dash bottom panel.
10. The tapered detail was fit to the bottom of the dash and aligned with the previously made piece that surrounds the top of the column. Note that the bead detail continues around the bottom of the column in the underdash panel (the dash is upside down on the workbench in the photo).
Smoothed dashboard installed during metal fabrication.
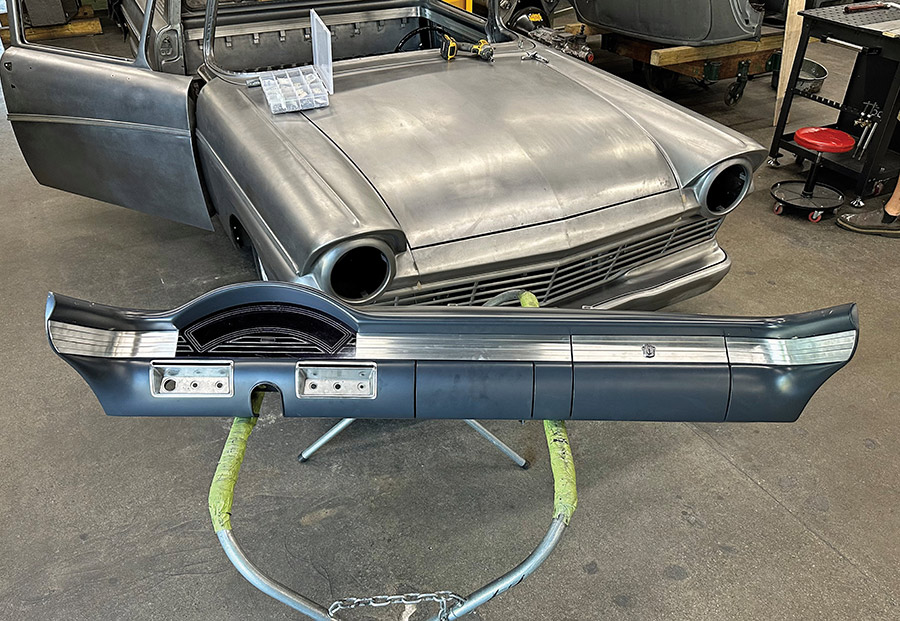
11. An overview of the smoothed dashboard after removing the unnecessary holes. An extra glovebox door was added in the center of the dash to hide the radio/head unit. At this stage, the dash was 3-D scanned to capture the dimensions and curves of the surfaces.
Wiring harness connected to back of gauges.
12. The back of the Classic Instruments gauge cluster shows off the initial wiring that will now hook up with the American Autowire Highway 22 Plus system. TMG commonly uses Deutsch connectors for easy removal of sub-assemblies and if repairs are ever needed down the road.
Aluminum trim segments and dash curvature test.
13. Aluminum was machined to create the trim. The corners were shaped in a slip roll to match the dash curvature. A mockup piece was used as a placeholder for the gauge cluster while the actual panel was being machined and then produced by Classic Instruments.
Trim marked with machinist ink for scribing.
14. Specific areas were built up with welds and then sanded smooth. The trim was marked with machinist ink and scribed. The welded areas were hand-filed and sanded to ensure the bead detail transitions seamlessly into each adjacent trim piece.
Masking tape applied for fine-tuning trim fit.
15. Fine-tuning the fitment was necessary to achieve the precision needed for each piece to seamlessly connect with the next.
Polished chrome dash trim close-up detail.
16. A close-up of the custom dash trim, all done in-house at TMG, now that it’s polished and the dash is painted. All the chrome plating was completed by Advanced Plating.
Custom trim transition from dash to door.
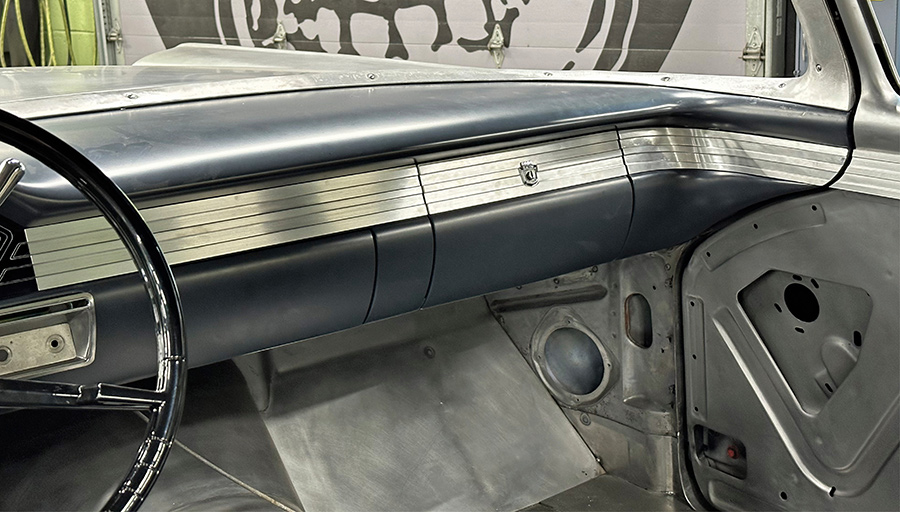
17. Completed trim installed in the dash leading into the door. The factory Ford emblem detail was retained on the glovebox door latch button.
Manual assembly of the glovebox and radio.
18. Shown here is the assembly of the glovebox. A second glovebox door is used to hide the radio (left) portion of the dash.
Vintage Air controls integrated into stock bezels.
19. The Ranchero is now equipped with Vintage Air A/C, defroster, and heat, all controlled through the stock bezels but rewired with rotating knobs—using Vintage Air switches but repackaged.
Installed gauge bezel with remote odometer detail.
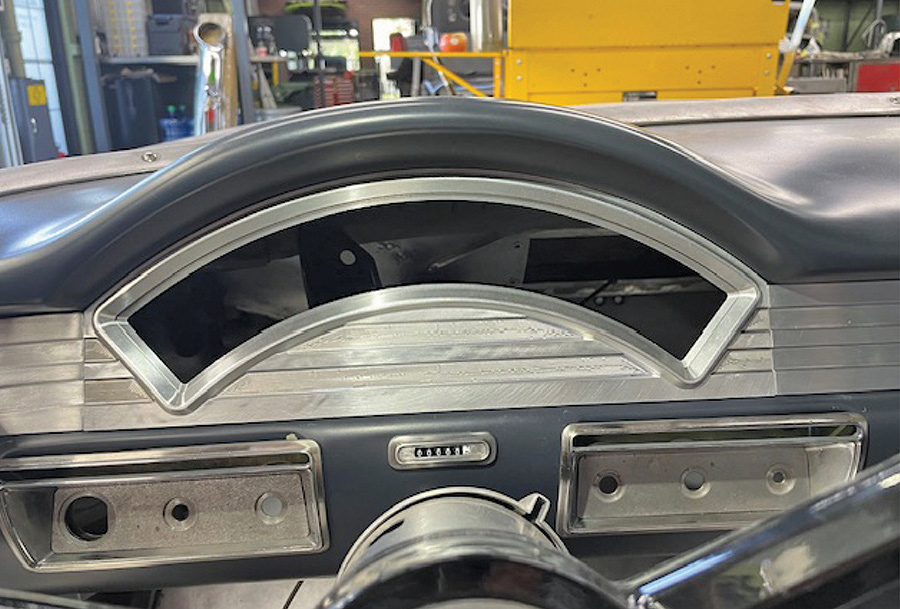
20. The completed gauge bezel and trim are installed. Notice the custom-machined remote odometer (above the column) bezel that was made to mimic the original knob bezels on both sides of the steering column.
Factory-style switch bezel with 3D printed inserts.
21. To the left of the Flaming River steering column is a factory-style bezel housing “Ignition,” “Lights,” and “Wipers” switches. TMG 3-D printed backlit inserts with switch functions. The factory originally used Plexiglass, but TMG replaced it with a “warm” LED light.
Tubing and clamp fixture for metal forming.
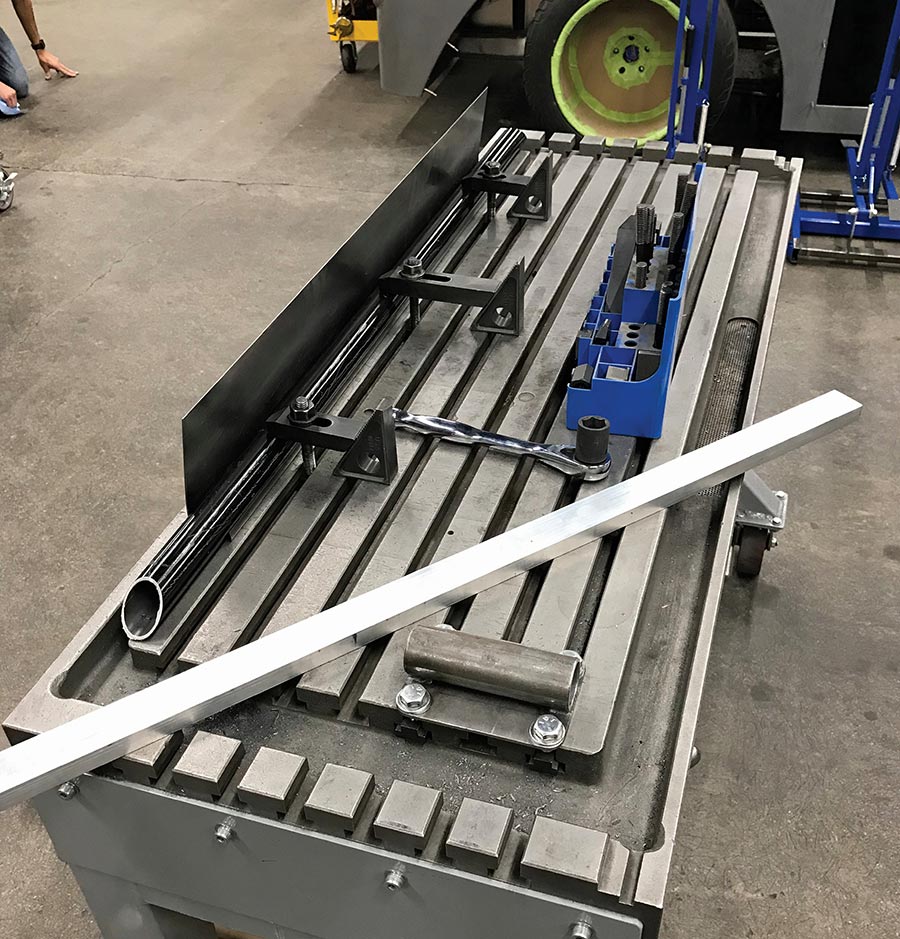
22. A simple forming fixture was made from a scrap piece of round tubing clamped to a T-slot workbench with vertical mill hold-down clamps. A piece of square aluminum tubing was secured to the edge of the sheetmetal. The sheetmetal form was easily “muscled” by hand using leverage over the tube’s radius.
Formed mounting flanges on interior trim pieces.
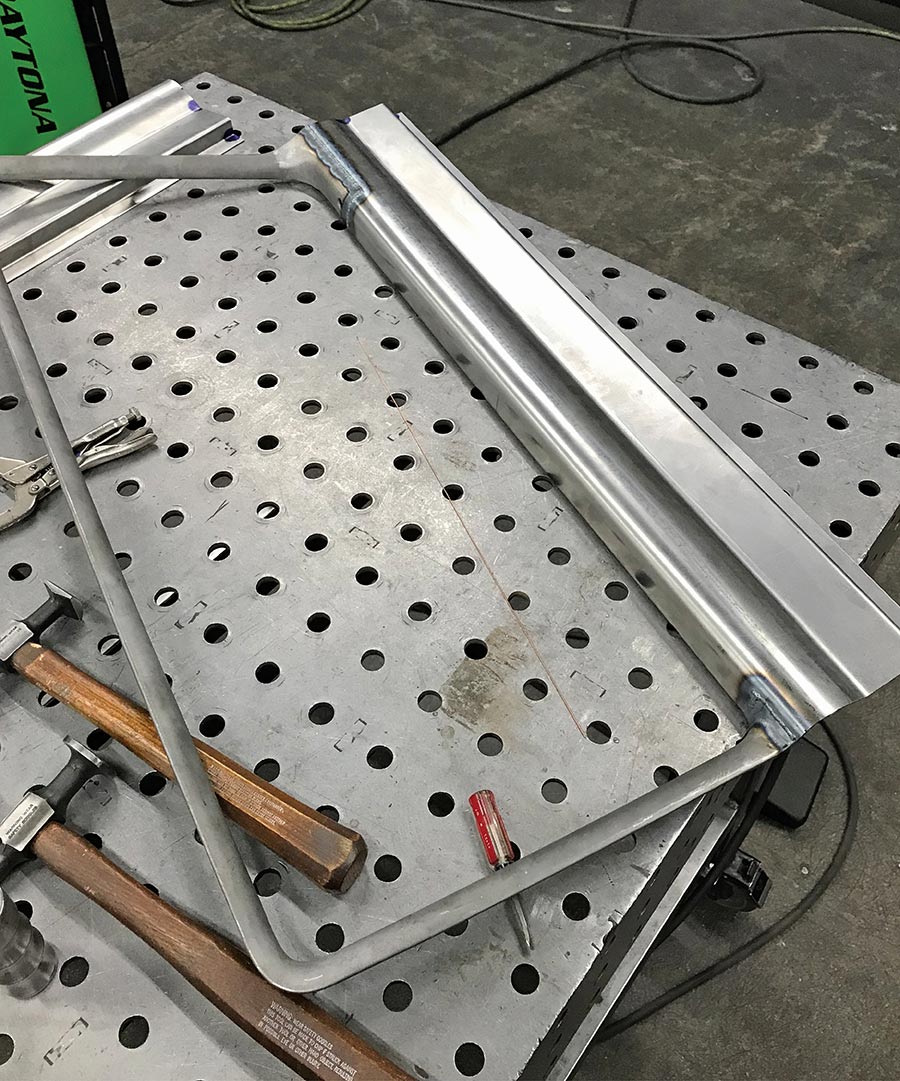
23. After the correct radius was formed, the mounting flanges were formed with multiple straight brake bends to create a specific profile to match the trailing edge of the dash.
Interior window trim spliced and tack welded.
24. The original interior window trim was cut and spliced into the formed panels that had been created earlier. It was installed on the car and tack welded in place to ensure proper fitment to the doorframe before final welding.
Steel hammer-form used to shape corner radii.
25. A steel hammer-form was borrowed from a previous truck bed project, which allowed torch heat to be used to shrink the extra material while forming the tight inside radius needed for the corners behind the seat where the original package tray was removed.
Sanded metal panels ready for mounting flange.
26. The left and right panels were sanded to remove the mill scale created from the heated forming process. The bottom flange was trimmed below the radius, and the back edge was broken up for a mounting/welding flange.
Curved panel seams welded and metal finished.
27. A curved panel with a lightly flared flange was fit up to the radius formed in the last steps. The seams were fully welded and metal finished before moving onto the next step.
Metal panel with welding tacks.
28. The straight back panel was formed with a set of custom Pullmax dies. It was fit in the car, then completely welded. Then the panel was removed and the metal was finished on a bench.
Finished rear wrap-around sheetmetal in interior.
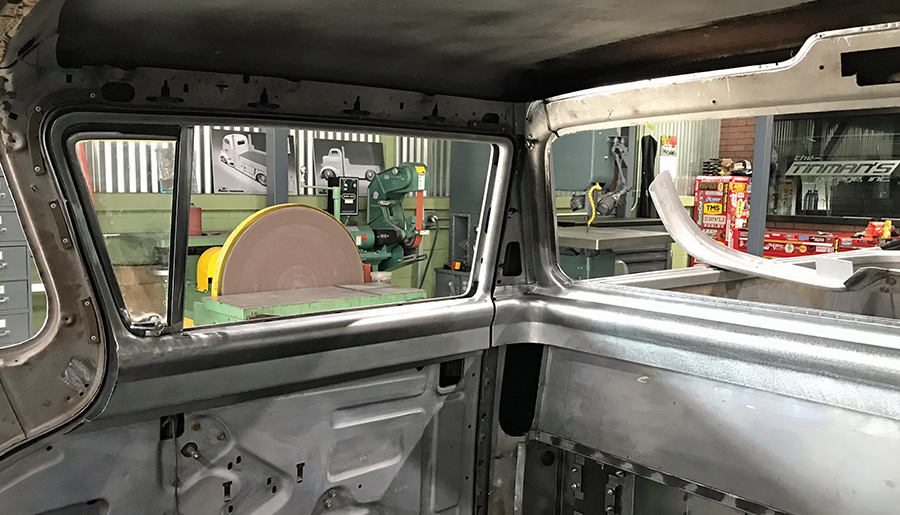
29. Wrap-around rear sheetmetal finished after welding and sanding. These new panels give a unique look that will serve as a mounting surface for the ongoing dash trim.
Sheetmetal end caps welded at corner seams.
30. Each end was capped with small pieces of sheetmetal cut out to the correct profile and corner-welded on the window trim and the corner seat wrap-around section.
New trim wrapping around the seat frame.
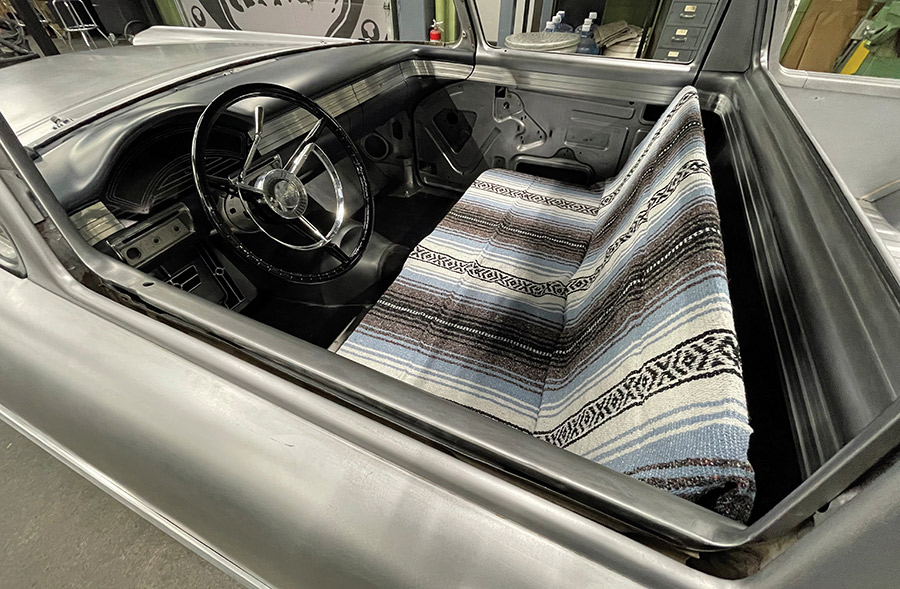
31. With the seat frame installed, you can get an idea of how the new trim looks wrapping around the back of the seat. This trim will be chrome-plated by Advanced Plating for final assembly, and the interior metalwork will be painted the same gloss color as the exterior.
In The Garage Media
Tin Man’s Garage

American Autowire logo

(800) 482-9473
americanautowire.com
Classic Instruments logo

(844) 342-8437
classicinstruments.com
Flaming River logo

(440) 826-4488
flamingriver.com
Vintage Air logo

(800) 862-6658
vintageair.com
Modern Rodding
VOLUME 7 • ISSUE 69 • 2026