Modern Rodding TECH

InTheGarageMedia.com

’36 Ford Roadster title
’36 Ford Roadster at a car show
1. The nearly completed car was shown in the Rad Rides booth at the 2024 Grand National Roadster Show. We expect to see this car as a contender for the America’s Most Beautiful Roadster award at this show in 2025.
’36 Ford Roadster title
Part 6: Innovative Dash, Headlight, and Shock Mounts
By Ron CovellPhotography by Adam Banks & Brian Brennan
T

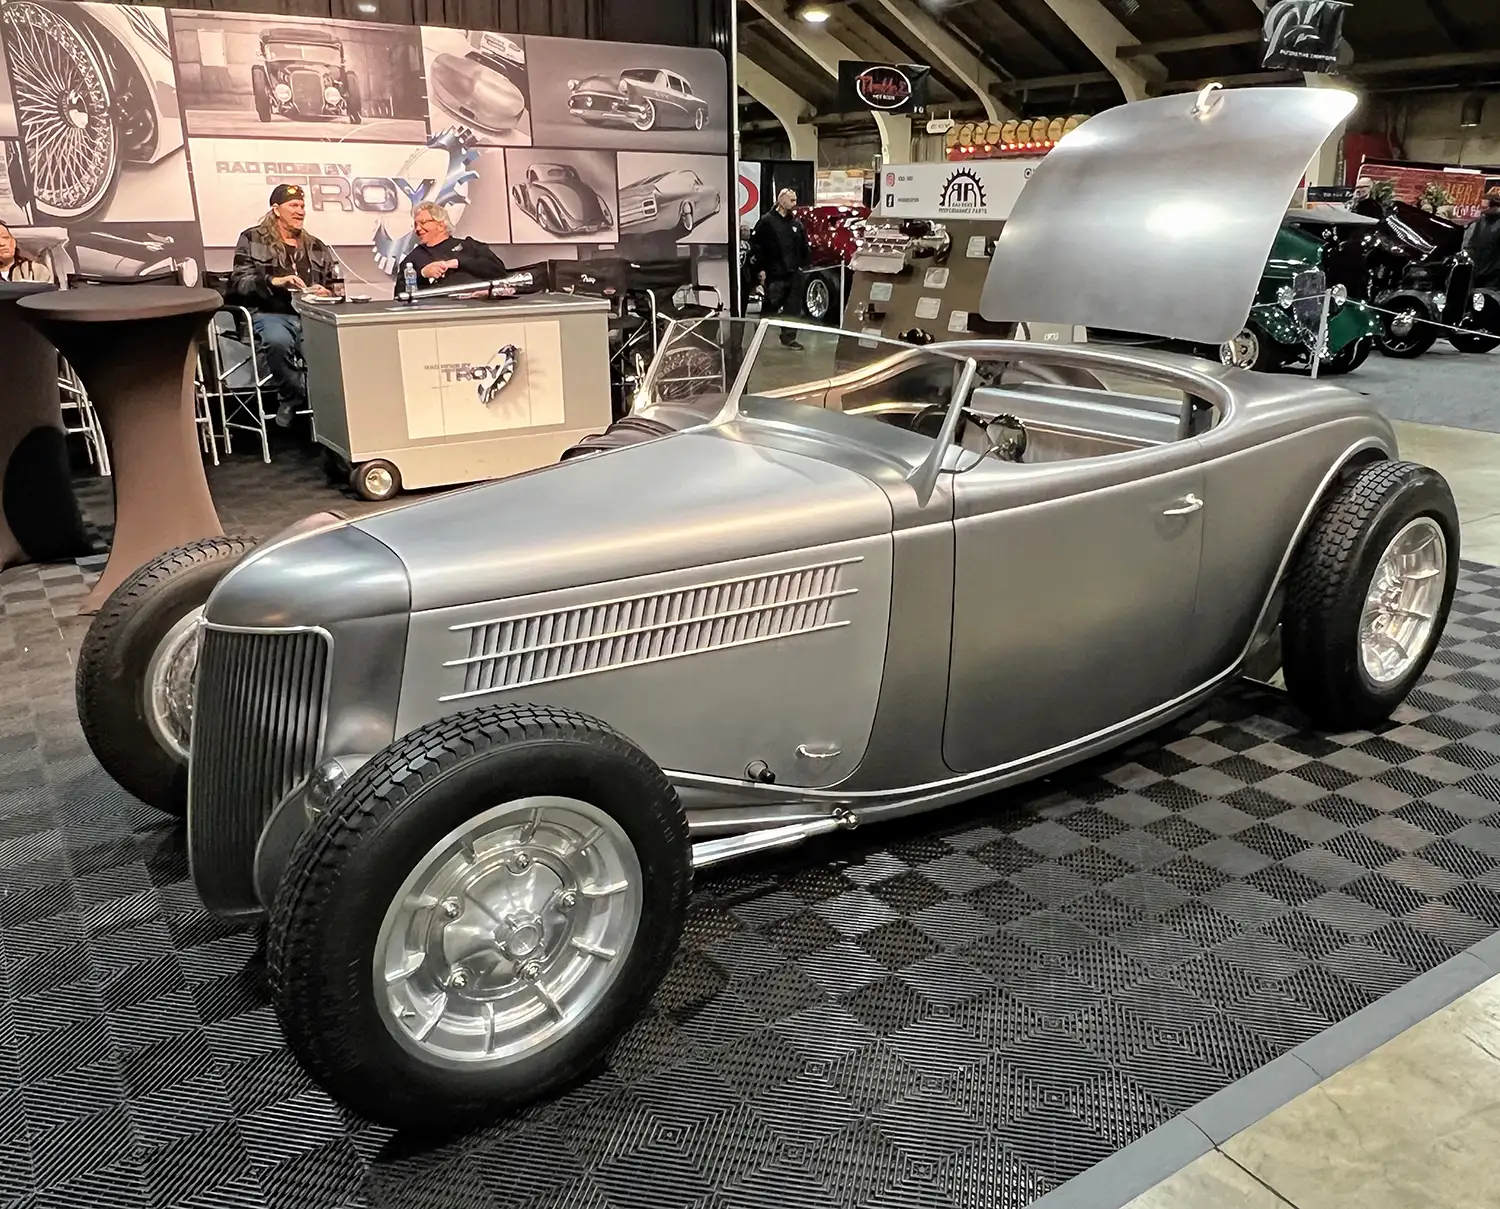
his is the last in the series of articles about the “Fenderless ’36 Roadster” being built at Rad Rides by Troy for Ross Myers. The metal fabrication is nearly finished at this point, and in this article, we will focus on a couple of very special details: the innovative headlight and shock absorber mounts and the custom-built dashboard.

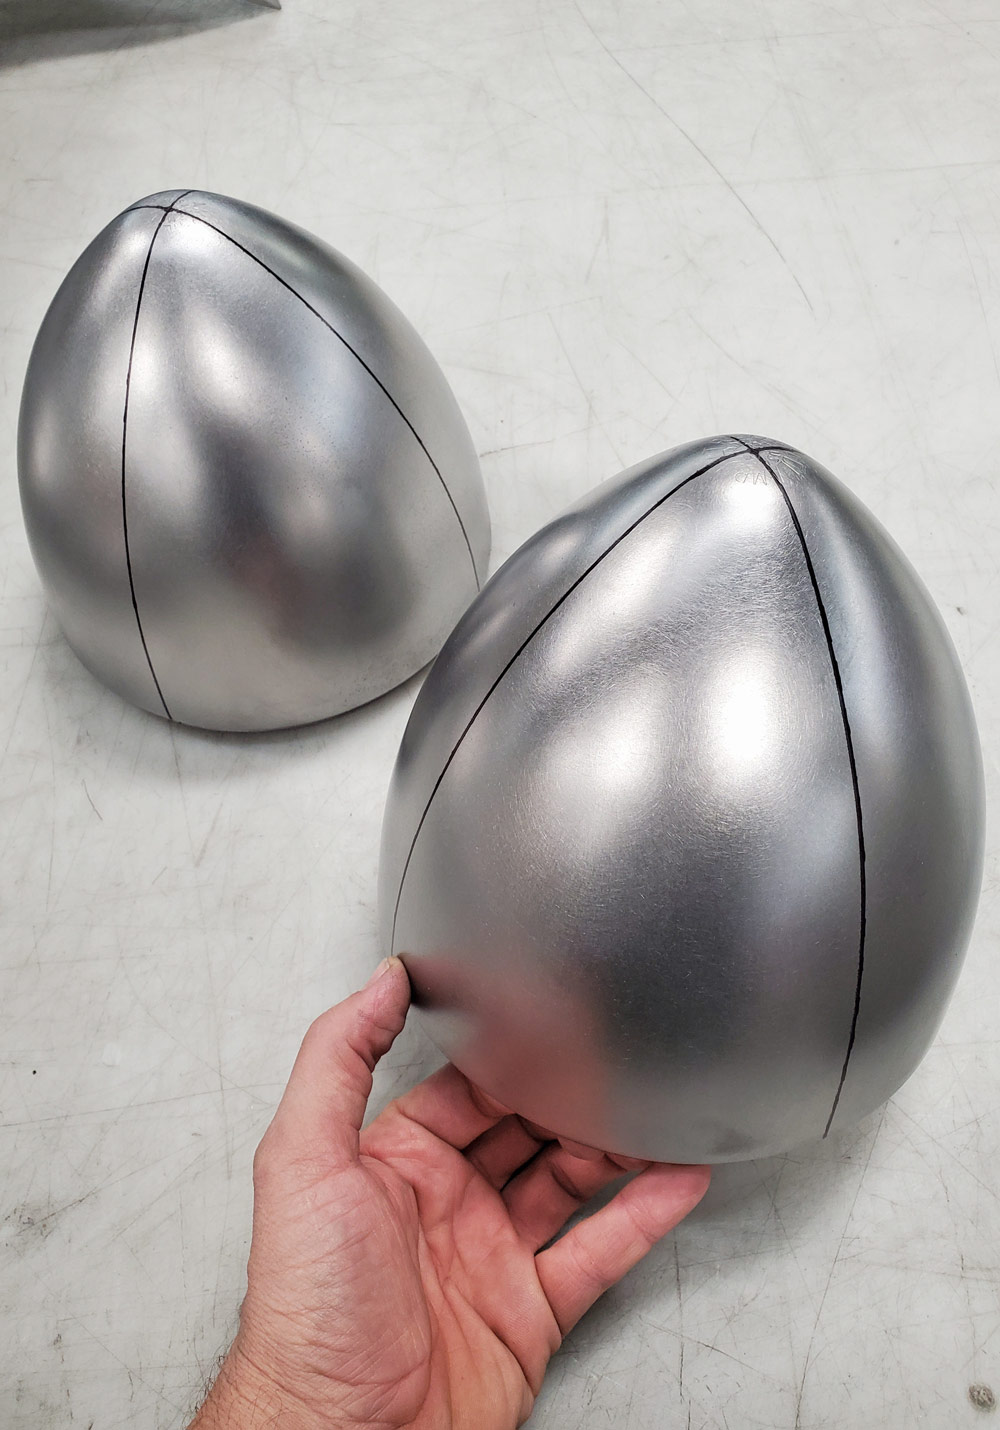
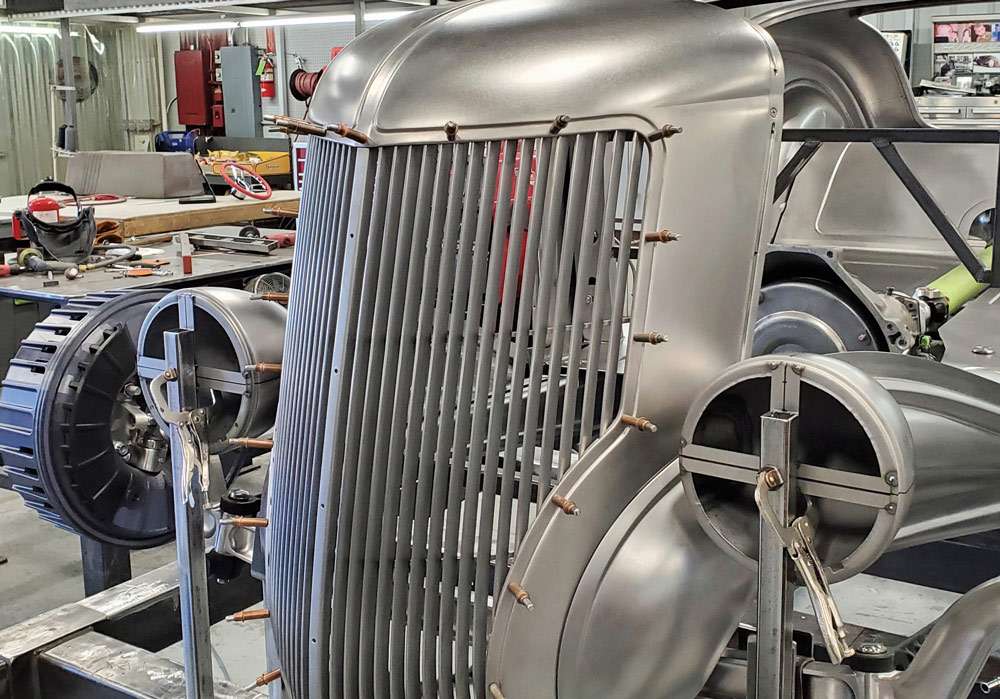
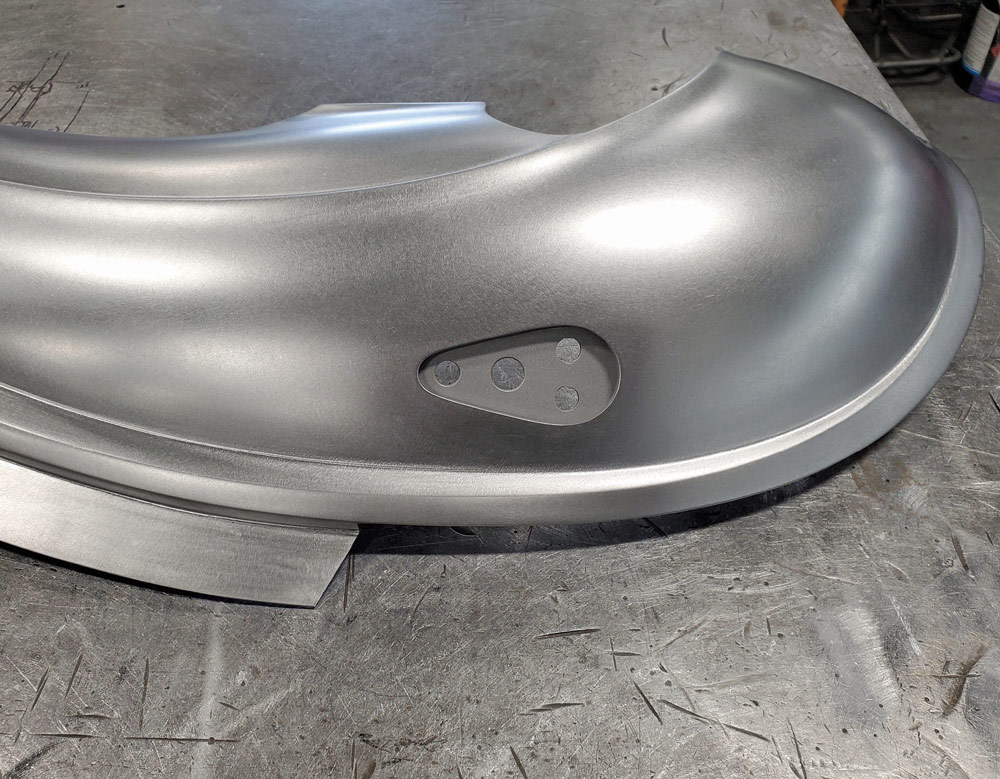
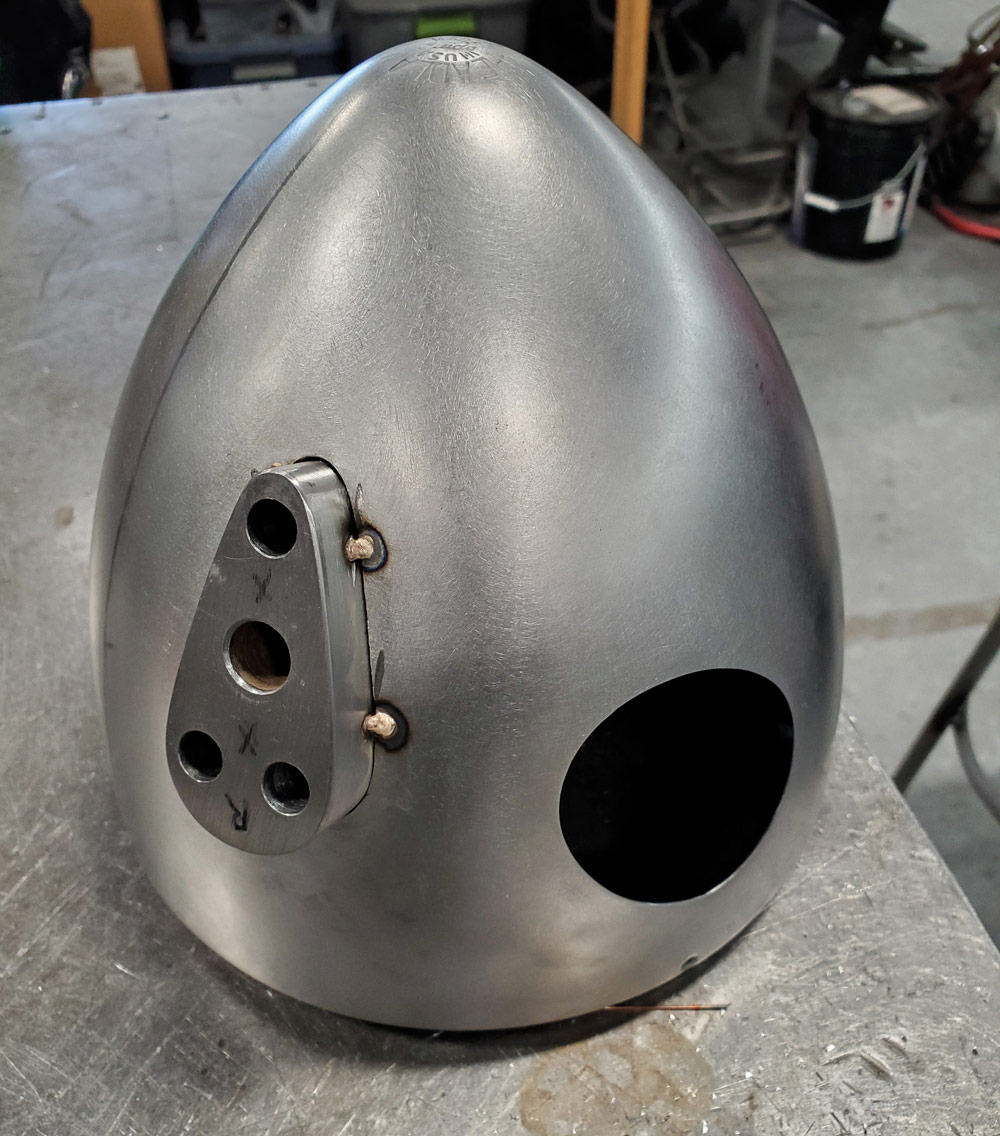
On any fenderless car, it helps to minimize the visual complexity of the front suspension. The crew at Rad Rides developed a way to conceal the top portion of the shock absorber inside the headlight bucket and use one sturdy bracket for both the headlight and shock. This detail requires a great deal of careful fitting, and all the parts must be strong enough to withstand the hammering of the shocks as the car is driven. Not only do the components need to be stout and compact, but they must be easily assembled after all the parts are painted and plated.

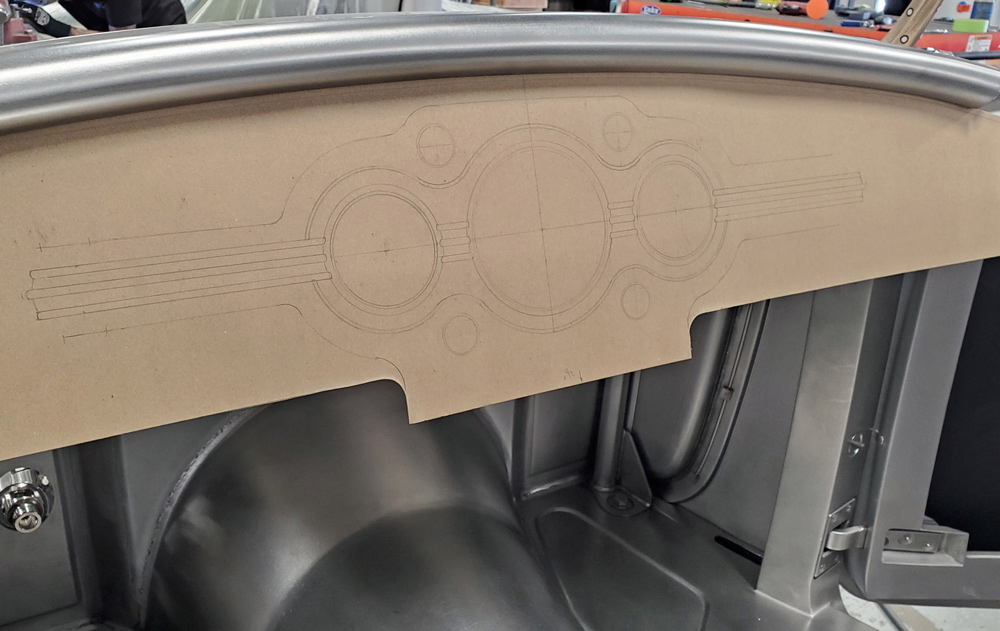
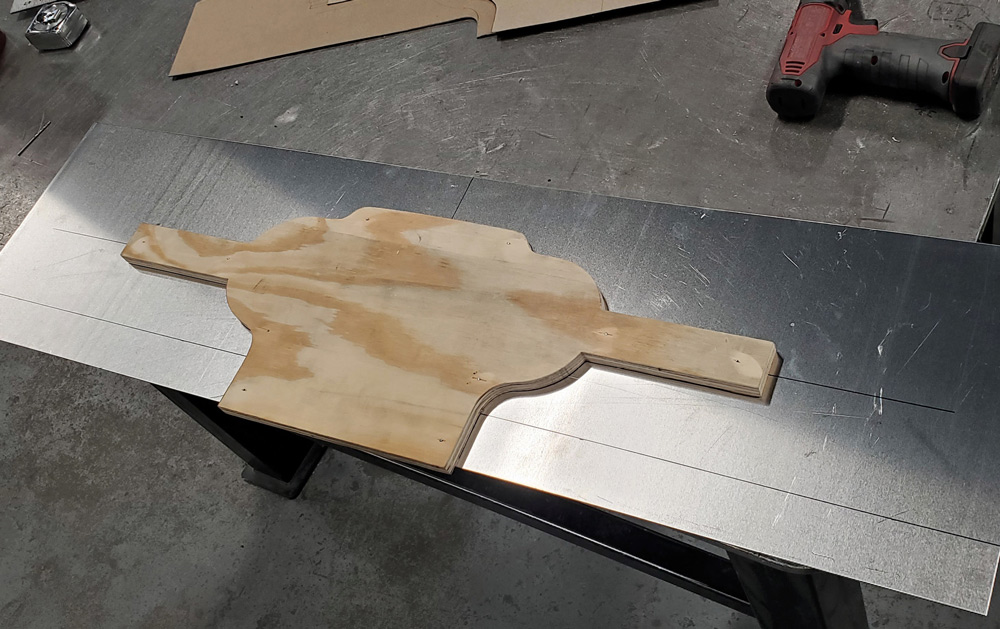
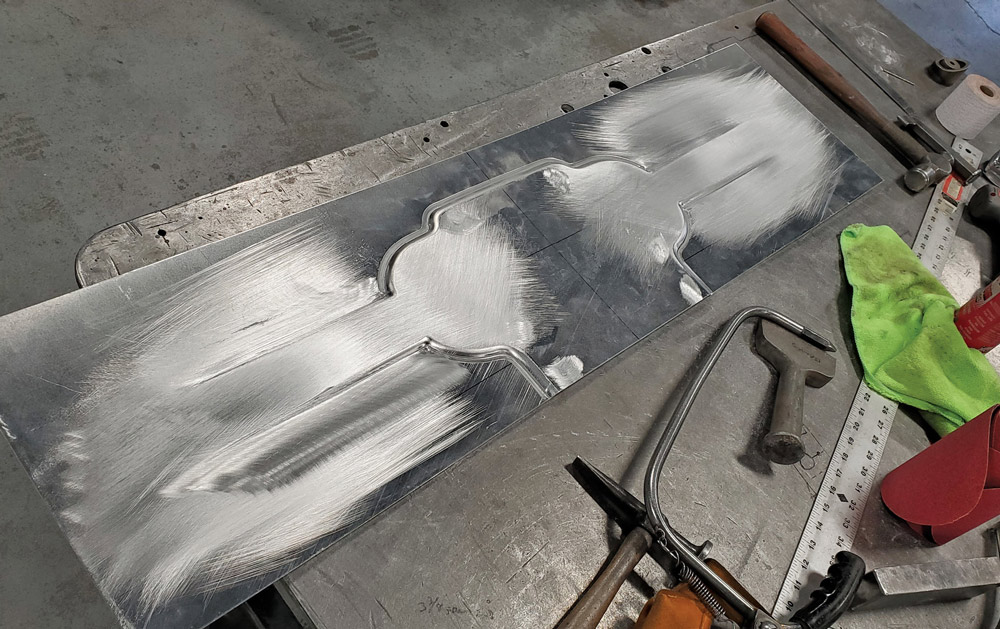
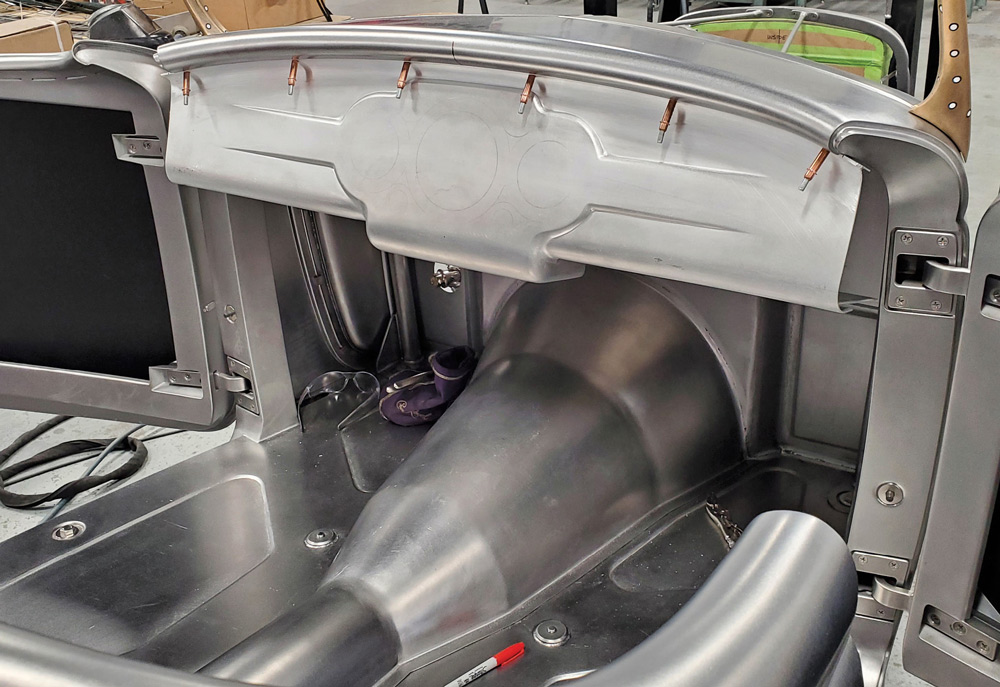
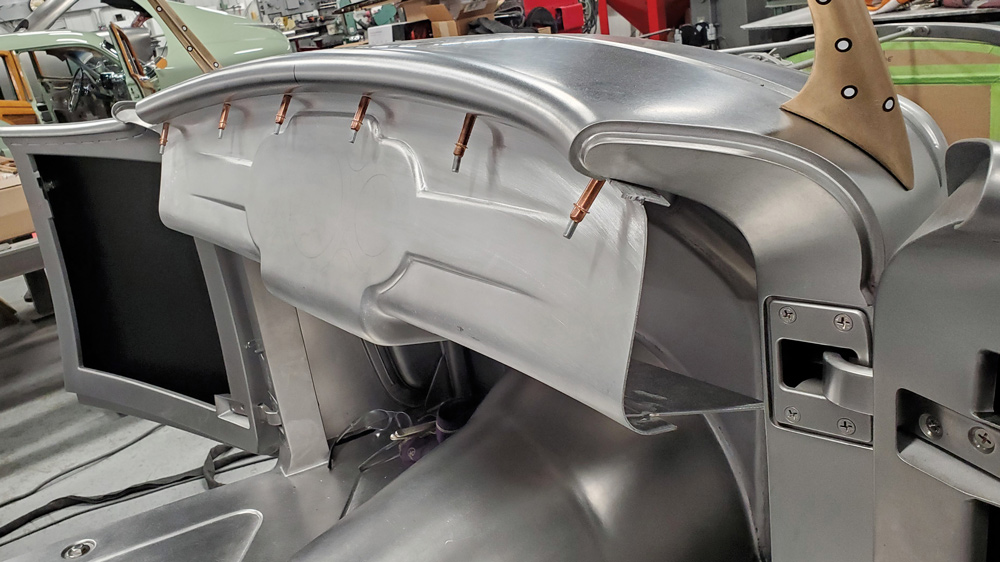
The dashboard for this car has a unique design. The center has an embossed detail that augments the custom-machined instrument cluster, and this was formed with a variety of tools. First, the area was pre-stretched with a power hammer, then a blank of plywood was cut in the shape of the embossed area and then used as a guide for the Pullmax machine to form the stepped edge. After the initial forming, the embossed section was worked with hand tools to taper the edges; then it was metal finished to remove all tooling marks. This is slow, painstaking work, but the results are striking.

Special air conditioner vents were positioned below the dash, and the design has an intricate, vintage look to it, like something you might see in an expensive European car.

It “takes a village” to build a masterpiece like this one, and Troy Trepanier wants to credit the key people on his staff who were involved. Adam Banks is the lead fabricator for the body and chassis, assisted by Casey Modert and Colby Marshall. The CNC design and machining were done by Lawrence Laughlin, Jake Murry, and Jack Trepanier.

You can expect to see an article on the finished roadster in the not-too-distant future, and we believe the timeless design and hyper-attention to detail will make this car a new benchmark for state-of-the-art hot rod construction.

hand holding a rusted Chevrolet “Tilt Ray” headlight
2. Chevrolet “Tilt Ray” headlights were chosen for the project. The plan is to smooth them up and conceal the upper shock mount inside.
headlight shells smoothed to perfection
3. The first step is filling all the extraneous holes and smoothing the headlight shells to perfection. Lines have been placed on the shells to get them plumb and level when mounted.
temporary mounting fixtures attached to the chassis table
4. Temporary mounting fixtures are attached to the chassis table to hold the headlight buckets in the correct location as the headlight and shock mounts are constructed.
mounting brackets
5. The shock absorbers place heavy loads on their mounting brackets, so the design for the headlight and shock mount needs to be very stout. This robust bracket is solidly attached to the core support.
top shock mounting bracket being fabricated
6. The top shock mounting bracket is being fabricated here. It must be assembled inside the headlight bucket, leaving adequate clearance for the lighting element and reflector. This is tricky work, indeed!
top shock bolt placed in double shear
7. The top shock bolt is placed in double shear. Note the projections on the studs to align the nuts during installation. Details like this really help in the assembly stage.
valence panel and solid steel spacer
8. The valence panel needs a recess below the hood side. The opening is trimmed here, and the fabricated recess is positioned on the left. The solid steel spacer on the right will be welded to the headlight bucket.
recess welded into place
9. Here’s the recess welded into place. The large center hole will accommodate the headlight wiring.
solid steel spacer tack-welded to a headlight bucket
10. Here’s the solid steel spacer tack-welded to the headlight bucket. The large round hole is to clear the body of the shock absorber.
headlight bucket
11. In this close-up shot, you can see the precision of the fabrication and how well all the parts fit inside the headlight bucket. It takes a lot of planning to pull off a job like this, but the benefit is a remarkably clean look for the front of the roadster.
headlight and shock mount
12. From the rear, you can really appreciate the tidy appearance of the headlight and shock mount—it’s about as unobtrusive as you can get.
front view of headlight
13. Here’s a front view with the headlights and shock mounted showcasing the masterful execution.
pencil layout on chipboard of dashboard design
14. The dashboard design is totally unique. A pencil layout was done on the chipboard to determine the proportions of the instrument cluster and the position of the switches.
piece of cut plywood
15. A piece of plywood is cut as a guide for the Pullmax machine, forming the embossed detail in the center of the dash.
dash after running through the Pullmax embossing dies
16. Here is the dash after running through the Pullmax embossing dies.
embossed section of dash panel
17. Various tools were used to subtly taper the embossed section, and once the tapered edges of the “plateau” were refined, the dash panel was completely metal-finished.
dash being test-fitted against the cowl
18. The dash is test-fitted against the cowl. Note the subtle reveal at the top and how the top edge follows the contours of the cowl’s “eyebrow.”
new material is added to the bottom of the dash
19. New material is added to the bottom of the dash to create the bottom radius.
dash being test-fitted into place, held temporarily with Clecos
20. The dash is test-fitted into place one more time and held temporarily with Clecos.
filler piece added to the sides of the dash panel
21. A filler piece will be added to the sides of the dash panel to blend it in with the doorjamb area.
filler piece after welding and metal finishing
22. Here’s the filler piece after welding and metal finishing. Note the consistency of the gaps around all the edges.
matching filler piece made for the front corners of the doors
23. A matching filler piece is made for the front corners of the doors to blend them in with the dash.
finished dash with the instruments, switches, and air conditioning vents in place
24. Here’s the finished dash with the instruments, switches, and air conditioning vents in place. It looks like an OEM panel; the craftsmanship is flawless.
SOURCE
Modern Rodding
VOLUME 5 • ISSUE 45 • 2024