Modern Rodding Tech
InTheGarageMedia.com
Simple Solutions for Sorting Out the
Essentials
Lokar Performance Products Provides Three Components Necessary for Every Build
By Ryan Manson Photography by the Author
C

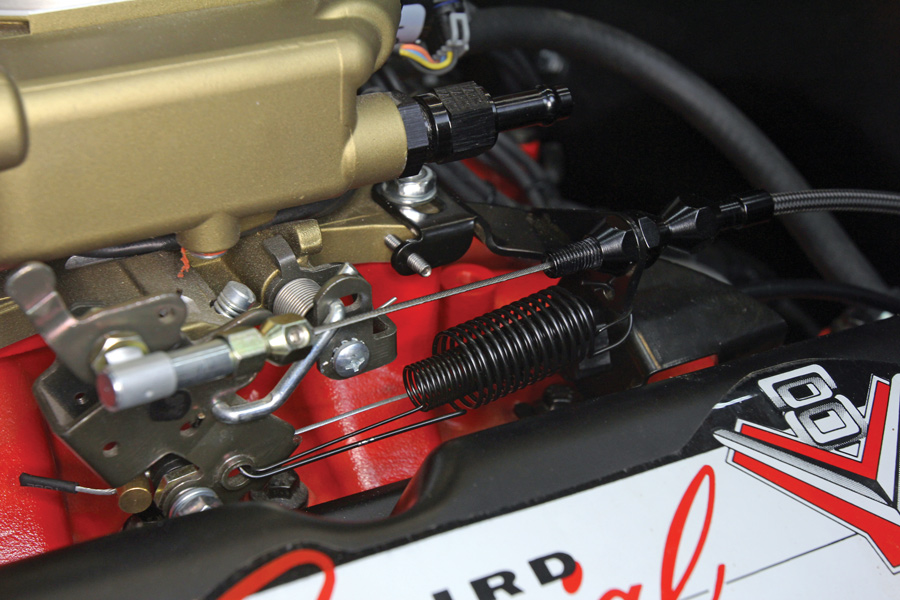
onnecting all the components on a street rod build is a huge part of the final assembly process and one that can oftentimes leave many things overlooked. Safely shifting that automatic transmission, accurately accelerating that carburetor or throttle body, and economically engaging that emergency brake is a necessity not an option. The proper assembly of these items is part and parcel to a safely operating hot rod. A cheap shifter that drops into gear while parked or throttle linkage that doesn’t return to idle properly is not only a huge inconvenience, it’s incredibly unsafe. It was with the frustration of the components available and the unsafe elements that came with them that Lokar Performance Products was established.

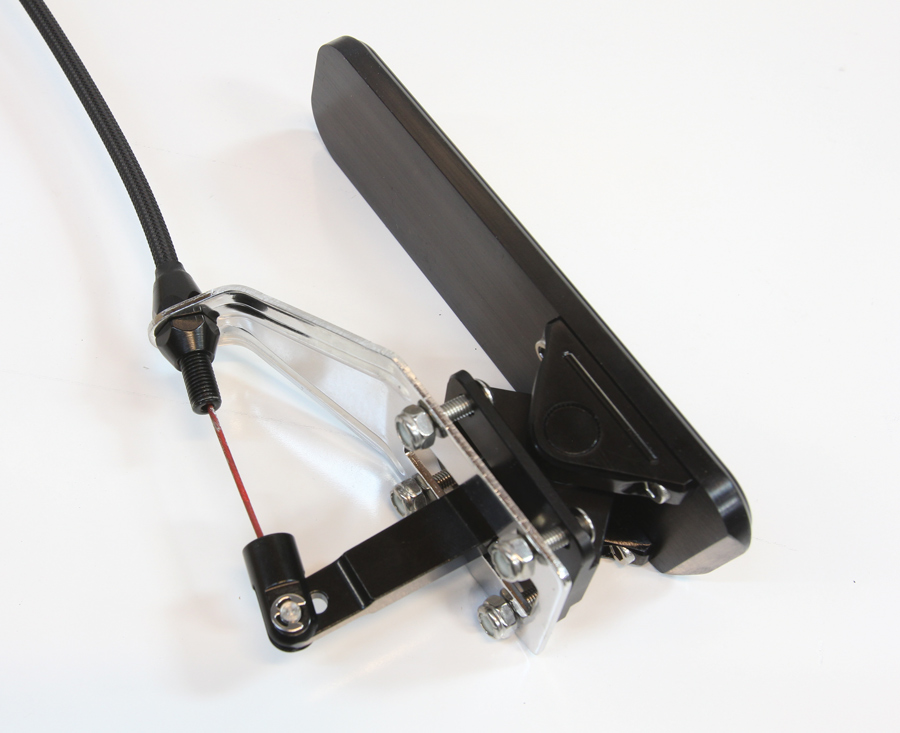
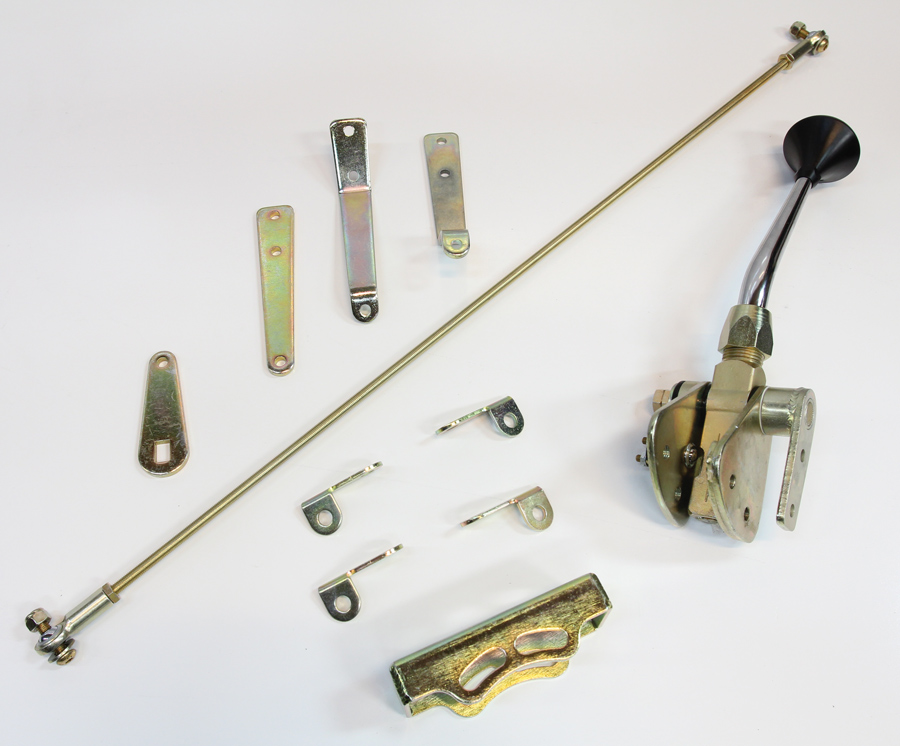
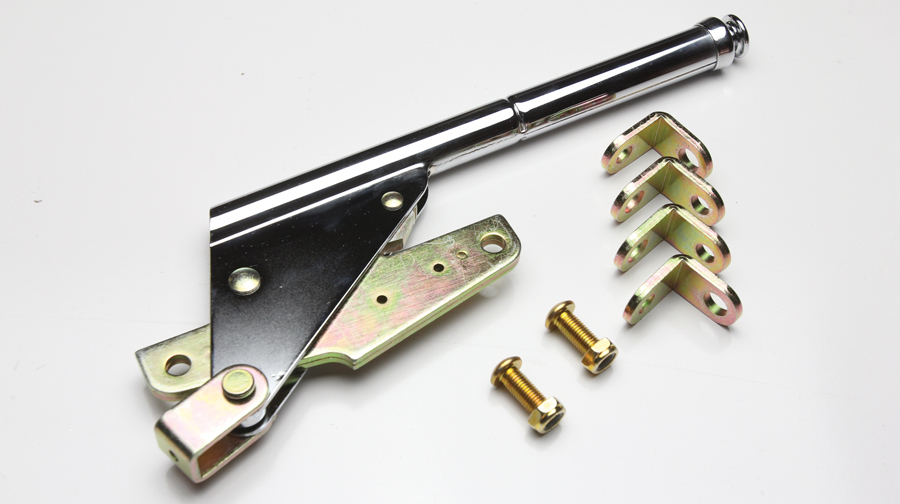
Most hot rodders are no doubt familiar with many of Lokar’s products, as they’ve been a staple in the street rod world for over 30 years. But what many folks don’t realize is the number of products they manufacture that could find themselves at home on every street rod, muscle car, and classic truck, regardless of the year, make, or model. Throttle cables, return springs, brackets, emergency brake components, and transmission shifters are just a few items from their product line that can be used on nearly any build. These are products that every build requires, with few alternative options that work as well as Lokar’s products do.

It was with this in mind, as we started to screw together a 1957 Ford Thunderbird build, that we created a short list of items necessary to connect and control a myriad of components. The car lacked a throttle pedal, so we needed something to handle that responsibility. Likewise, we’ll need to connect that new pedal to the existing throttle body. The car was equipped with a floor shifter from the factory, but the drivetrain had been changed, which made using the stock shifter moot. Instead, we’ll replace the stock unit with a Lokar floor-mounted shifter in the same location. Mixing and matching parking brake components can make using the stock lever with aftermarket disc brakes a puzzle, to say the least. Alternatively, we’ll keep things simple by using Lokar components, from the handle to the caliper.

As you’ll see, these components are not particular to any style build, year, make, or model, but rather standard equipment on any motor vehicle. Be it a 1932 Ford roadster or a 1972 Chevelle, the need to safely operate the various elements of an automobile remains standard across the board. See how we solved connecting the components on our build using Lokar Performance Products and perhaps you’ll see something that will help you out with yours!

throttle pedal
1. One of the first items we had to tackle was the throttle pedal. Our project arrived without one, so we opted to use Lokar’s Eliminator Floor Mount Throttle Pedal (PN XFMG-6098). Consisting of a pedal pad and throttle pedal assembly, stainless steel pedal/cable bracket, and cable pull arm, these pedals eliminate the need to route cables through the firewall, resulting in a superclean install. A billet aluminum splined shaft mates the throttle cable to the pedal, resulting in a flexible design that can be adjusted to fit a variety of floor and toeboard angles.
The Eliminator Floor Mount Throttle Pedal is designed to be mounted on the angled toeboard
2. The Eliminator Floor Mount Throttle Pedal is designed to be mounted on the angled toeboard, just below the vertical firewall, not on the horizontal part of the floor.
After finding the most comfortable location for the throttle pedal, its location is marked using masking tape to outline the pedal assembly
3. After finding the most comfortable location for the throttle pedal, its location is marked using masking tape to outline the pedal assembly. The underside of the toeboard area is then checked for any potential interference before proceeding.
Marking screw-holes for pedal bracket
The pedal bracket is then used as a template to lay out the four-hole mounting bolt pattern
4-5. The pedal bracket is then used as a template to lay out the four-hole mounting bolt pattern as well as the slit for the cable pull arm.
pedal assembly can then be installed on the toeboard
6. The pedal assembly can then be installed on the toeboard.
Lokar’s Stainless Housing Throttle Cable and Bracket
7. To mate the Eliminator pedal to the throttle body, Lokar recommends using Lokar’s Stainless Housing Throttle Cable and Bracket (PNs XTC-1000HT36 and our XTCB-40HS), which consists of a 36-inch stainless steel throttle cable and braided housing, stainless steel mounting bracket, and double return spring.
throttle cables are cut-to-fit with a fixed end on the pedal side
8. Lokar’s throttle cables are cut-to-fit with a fixed end on the pedal side, which will be installed first.
carb end assembly is installed on the throttle body’s linkage
9. Up on the engine, the carb end assembly is installed on the throttle body’s linkage, the bracket installed on the driver side rear carb stud, and the throttle cable adjusters fully seated. The cable housing can then be cut to fit, followed by the inner cable. The double return springs mount between the bracket and the carb linkage. Depending on your transmission, a kickdown cable may also be added to this assembly. In this case, we’re using a 4L60E and had to mate a remote TPS cable to the lower carb bracket, visible behind the return springs.
Lokar automatic transmission shifter
10. The second component in our trio of necessities is a Lokar automatic transmission shifter (PN FM4L60EEKB). Lokar’s shifters feature an exclusive Safety Lock-Out Button on the shift knob that prevents accidental shifting into Reverse from Park or Neutral. Available for most GM, Ford, and Chrysler automatic transmissions, Lokar’s shifters come in three mounting options: case mount, tail mount, and floor mount, providing a myriad of solutions for nearly any vehicle. For our application, we wanted to locate the new shifter as close to the stock location as possible, which made the floor-mount option ideal. In addition to the main shifter assembly, mounting bracket, and hardware, our shifter kit also came with three offset linkage arms, a trans gear lever, and threaded rod and rod ends to mate the two.
floor-mount shifter
floor-mount shifter
11-12. Lokar’s floor-mount shifters can be mounted either under the floor or on top by simply swapping the brackets around.
Example of above and below floor installation
13. In order to clear the Lokar’s shifter boot ring, it’s recommended to orientate the front mounting tabs as noted. Our application didn’t allow sufficient clearance due to the stock shifter hole, requiring all four tabs to mount in an outward position. When it comes time to mount the shifter boot, some fiddling may be required.
integrated neutral safety switch
14. All Lokar shifters feature an integrated neutral safety switch to prevent accidental starting while in gear.
mount shifter
15. Mounting the Lokar floor mount shifter is a simple matter of choosing the best location and drafting the mount hole locations using the shifter mounting brackets.
trans gear lever
16. The trans gear lever is installed and one end of the threaded rod linkage is assembled. The transmission is then shifted into Park.
 necessary to decide which offset linkage arm best suits the application
17. Next, it’s necessary to decide which offset linkage arm best suits the application. A straight, unencumbered line between the linkage arm on the shifter and the trans gear lever is most desirable.
threaded rod can be marked and trimmed to fit
18. With both the transmission and the shifter in Park and a rod end installed on the offset linkage arm, the threaded rod can be marked and trimmed to fit. It’s also possible to measure the distance between the mounting holes on the trans gear lever and the linkage arm and subtract 1-3/4 inch from that amount to derive the length of the threaded rod.
 entire linkage assembly
19. Here, the entire linkage assembly can be seen.
wire the neutral safety switch inline with the starter wire that travels from the ignition switch to the starter solenoid
20. The last piece of the shifter puzzle is to wire the neutral safety switch inline with the starter wire that travels from the ignition switch to the starter solenoid.
lever
21. Our application called for an 8-inch shift lever, but it should be mentioned that Lokar has levers available up to 32 inches with both single and double bend options. A Deco Black shift knob tops off our shifter for a timeless look.
upholstery
22. Our project won’t be ready for upholstery soon, but it’s worth mentioning the fact that Lokar carries a variety of shifter and hand brake boots and rings to finish off that installation (Lokar PN 70-FMB pictured).
emergency hand brake and cable set
23. The last component in our trio of parts is an emergency hand brake and cable set. Like their shifter line, Lokar offers a handful of different hand brake options. For our application, we chose Lokar’s Floor Mount Emergency Hand Brake (PN EHB-7000F). Designed after the automotive industry standard, the ratchet cut gear plate and lock are heat-treated for strength and safety. A four-point mounting arrangement similar to their floor-mount shifters make Lokar’s emergency hand brakes a truly universal component.
mounted the emergency hand brake next to the shifte
24. Lokar provides specifications in their instructions (1/2×3-1/2 inches) so that the floor can be trimmed to clear the hand brake assembly, but it’s always a good idea to assemble the component and check fitment prior to any cutting or drilling. We decided to mount the emergency hand brake next to the shifter.
mate the emergency hand brake lever to the actual brakes
25. To mate the emergency hand brake lever to the actual brakes, a Lokar Universal Emergency Brake Cable Kit (PN EC-80FU) will be used. In addition to a pair of 8-foot housings and 9-foot inner wires, the brake cable kit comes with the necessary clevis assembly and double cable adjuster bracket.
double cable adjuster bracket
26. The double cable adjuster bracket needs to be positioned so that the cables are being pulled in a straight line between it and the brake cable clevis. Here, we opted to mount the adjuster bracket under the floor in line with the e-brake lever. Note the routing of the cables prevent any interference with the exhaust or driveshaft.
clevis assembly in place and the inner cables attached to their respective brake caliper components
27. With the clevis assembly in place and the inner cables attached to their respective brake caliper components, slack is removed from the cables and the pinch bolts tightened in the cable union block. From here, the system can be adjusted as a unit by using the tension adjuster on the clevis assembly.
Lokar shifter and emergency hand brake in their installed location
28. The Lokar shifter and emergency hand brake in their installed location.
 SOURCES
Lokar Performance Products
(877) 469-7440
lokar.com
Clampdown Competition
clampdowncomp.com
Modern Rodding
VOLUME 2 • ISSUE 9 • 2021