Modern Rodding Tech
InTheGarageMedia.com
1. Amazing imagination, execution, and detail bring this LS V-8 to the head of the class.
Forward-Facing Shoebox Sheetmetal
Freshening Up a ’50 Ford Tudor Sedan’s Appearance
By Ron Covell Photography by Camren Beattie
J

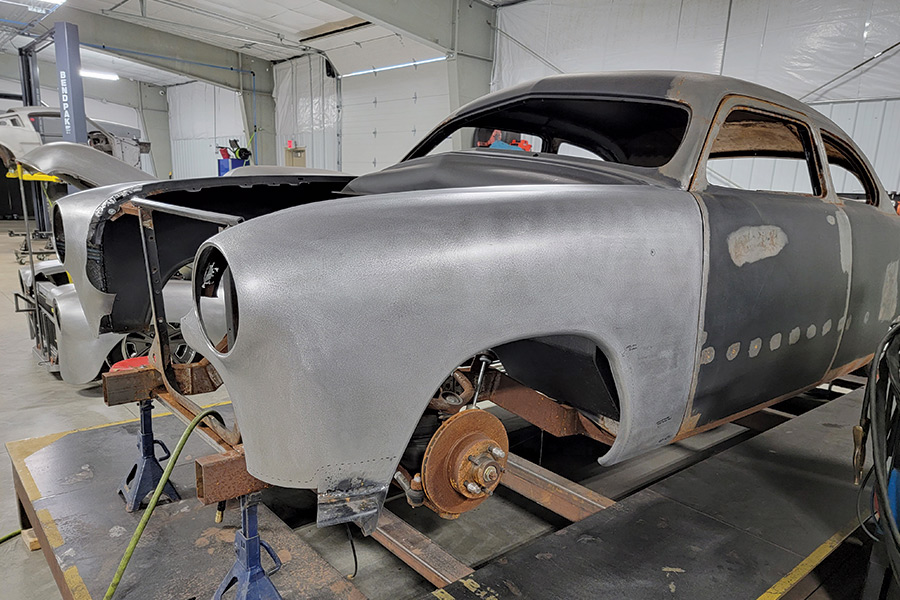
ust before World War II, most cars had fenders that stood proud of the main body structure in the style we now call “fat fendered.” When passenger car production resumed after the war, this style continued for a few years. Still, most manufacturers started tooling up for a new, slab-sided look where the fenders blended in seamlessly with the body. Ford made this transition in 1949, and the ’49-51 Ford is called the “shoebox,” reflecting this revolutionary styling feature. This car became immensely popular for car customizers and has remained in vogue ever since.

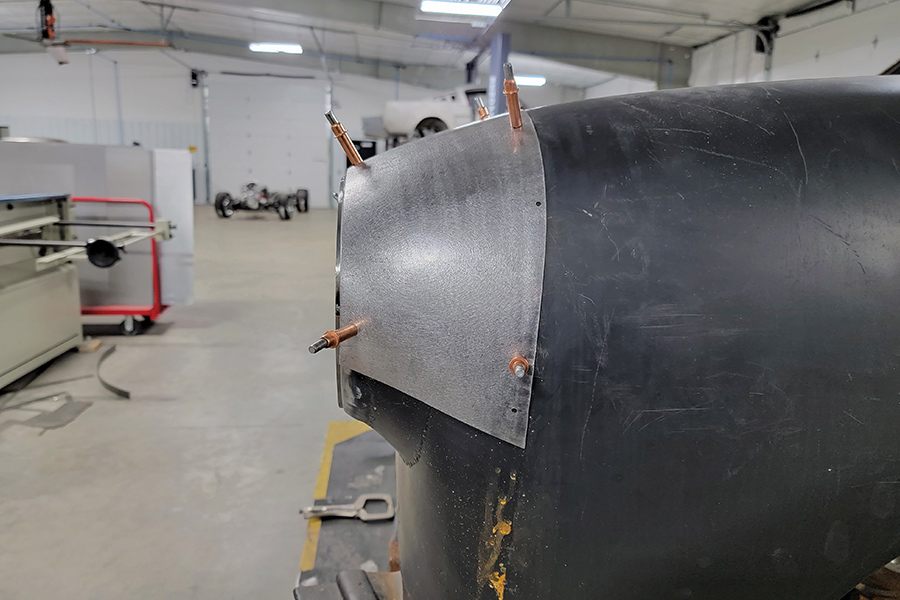
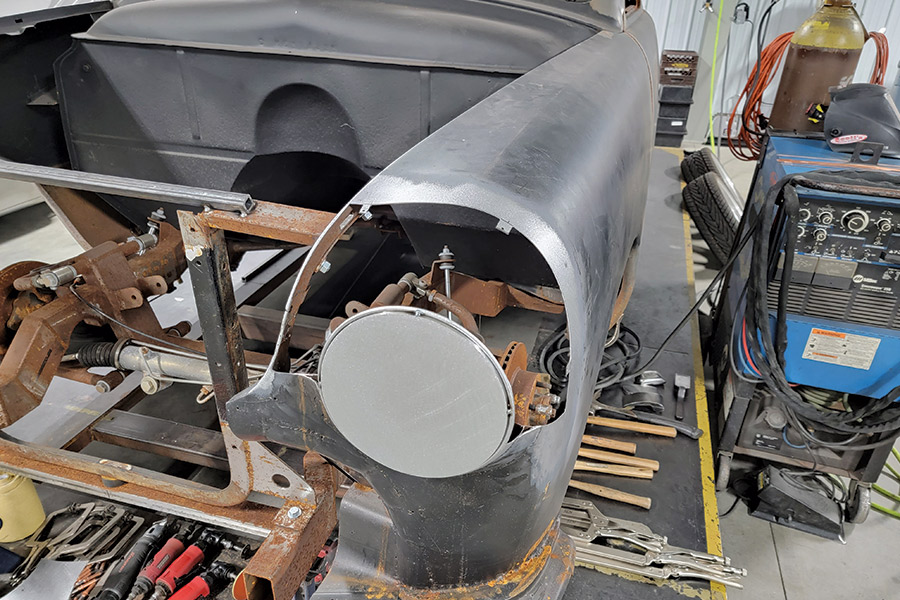
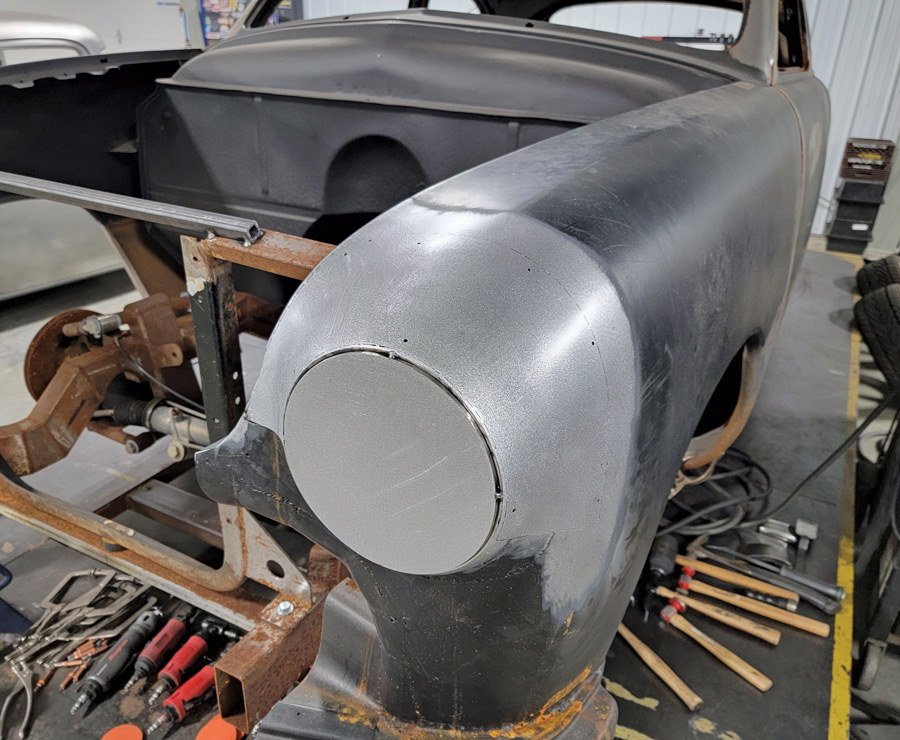
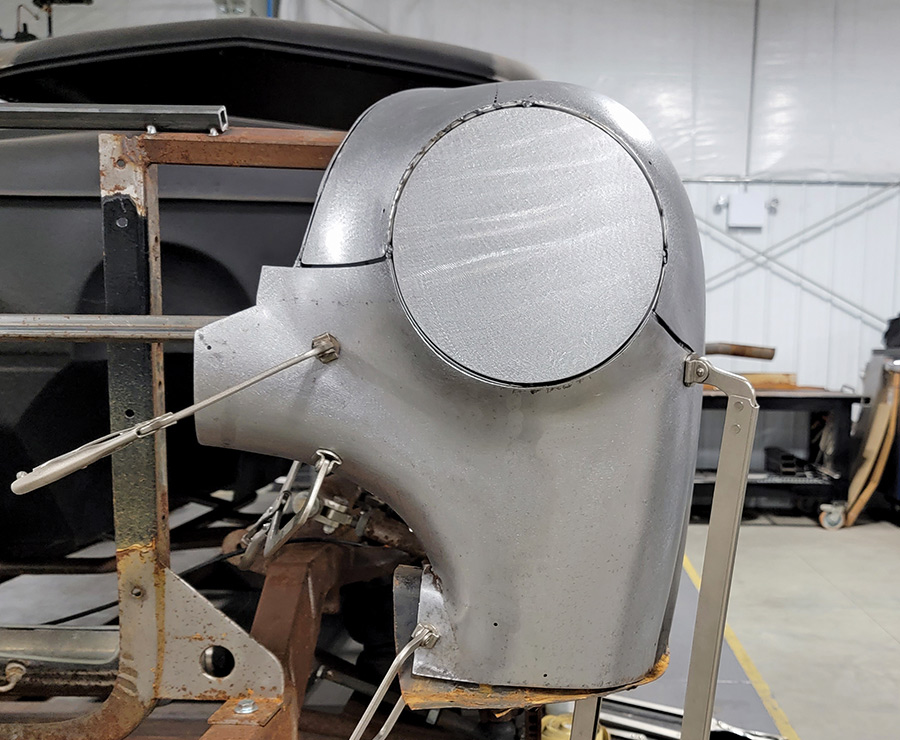
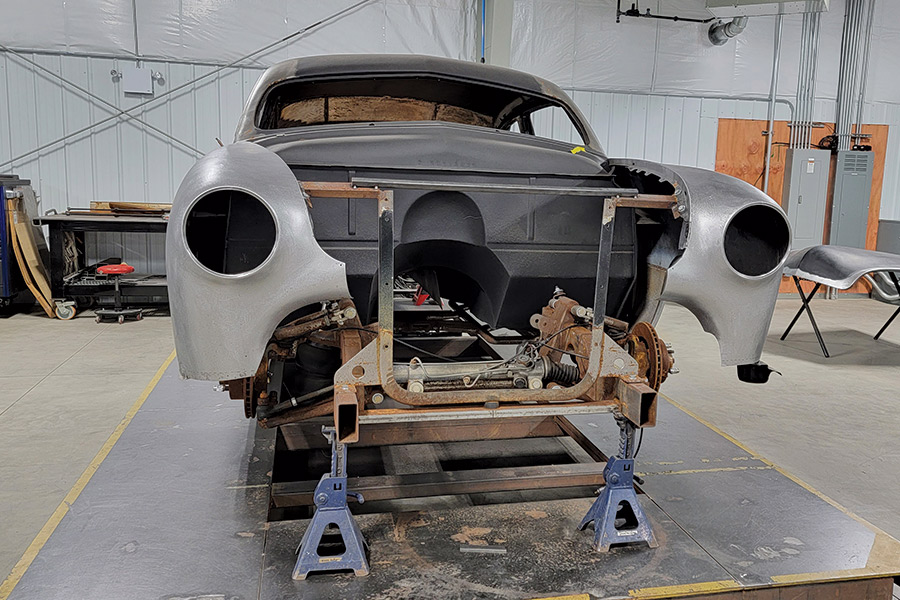
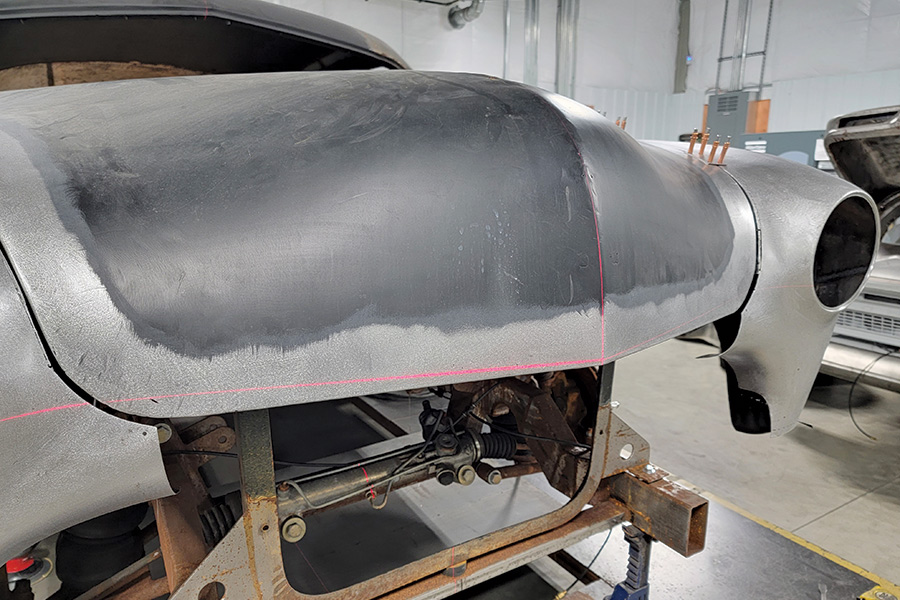
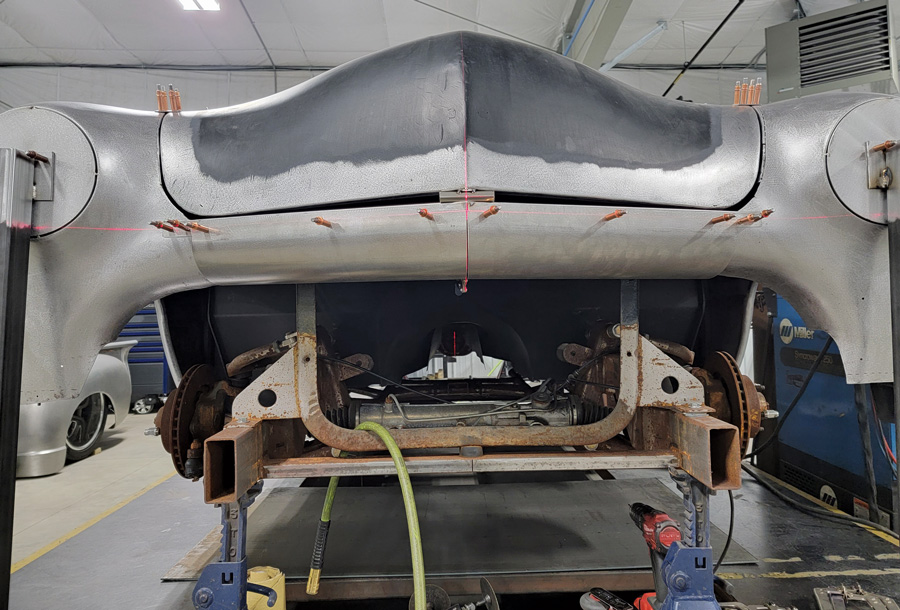
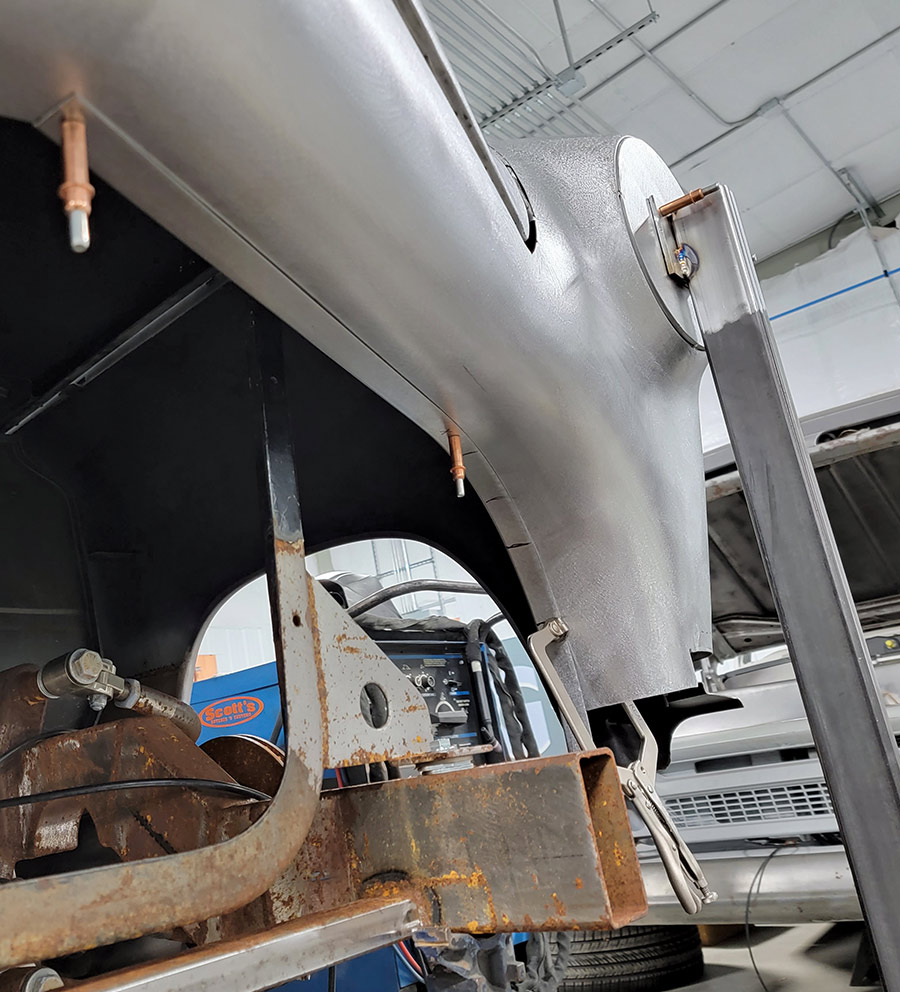
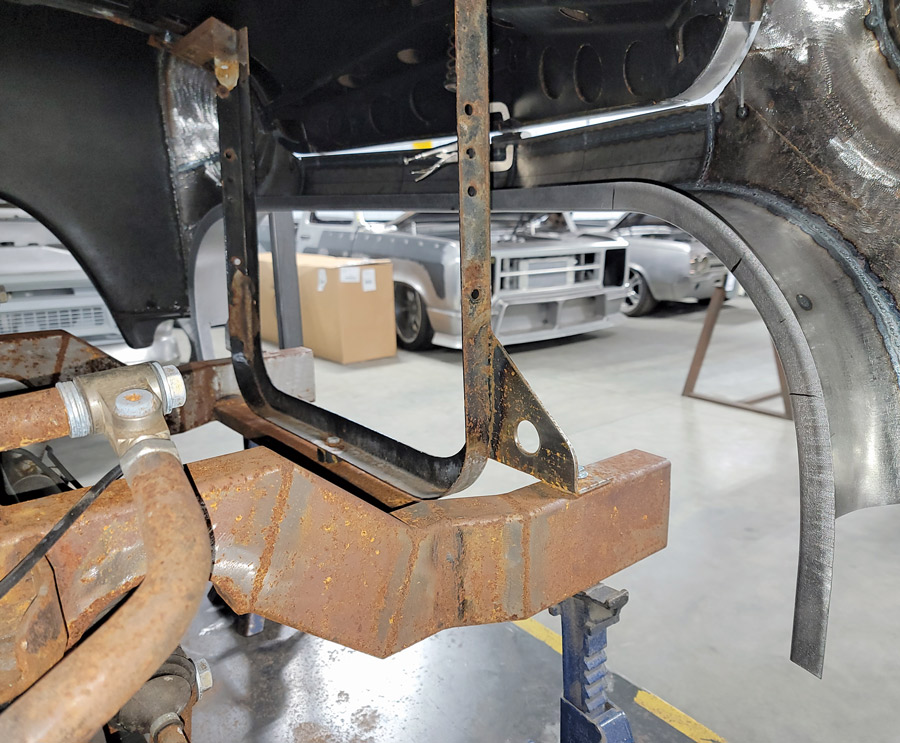
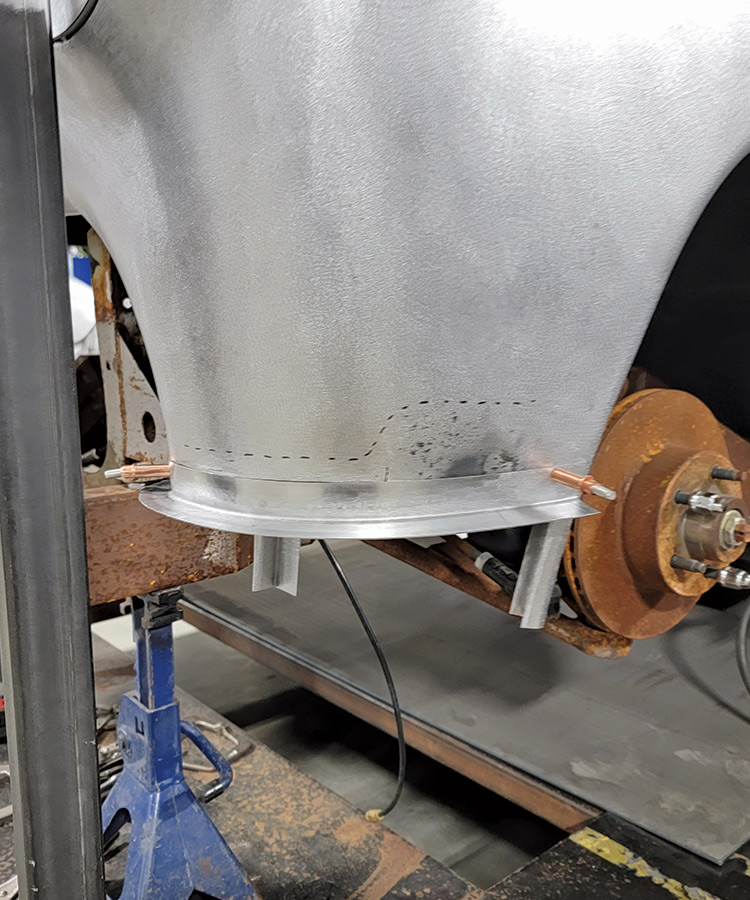
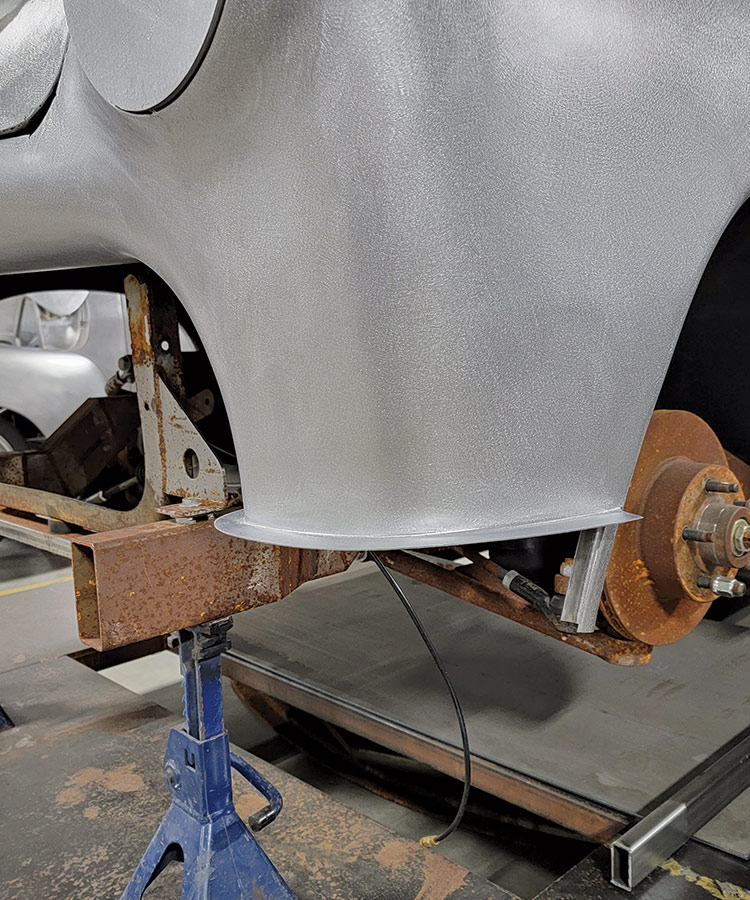
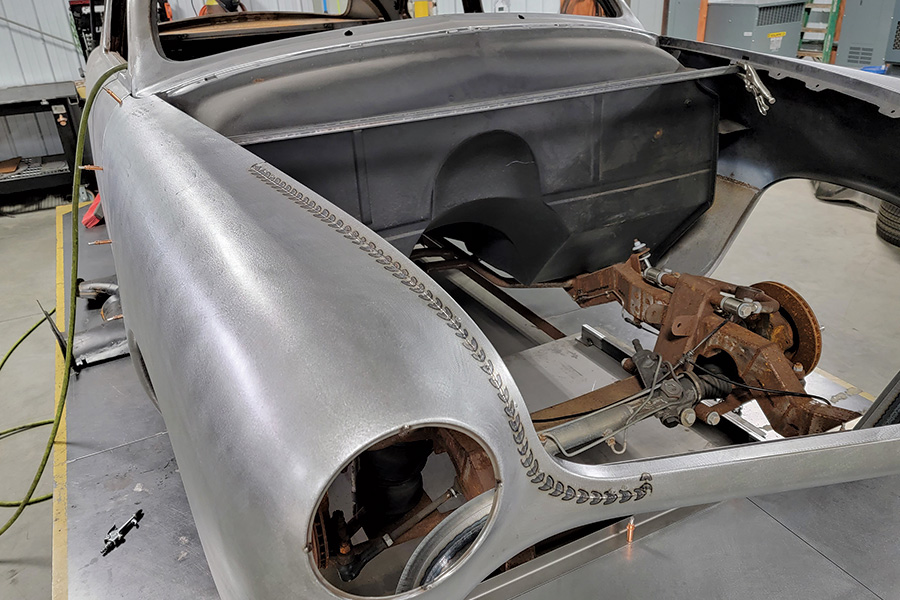
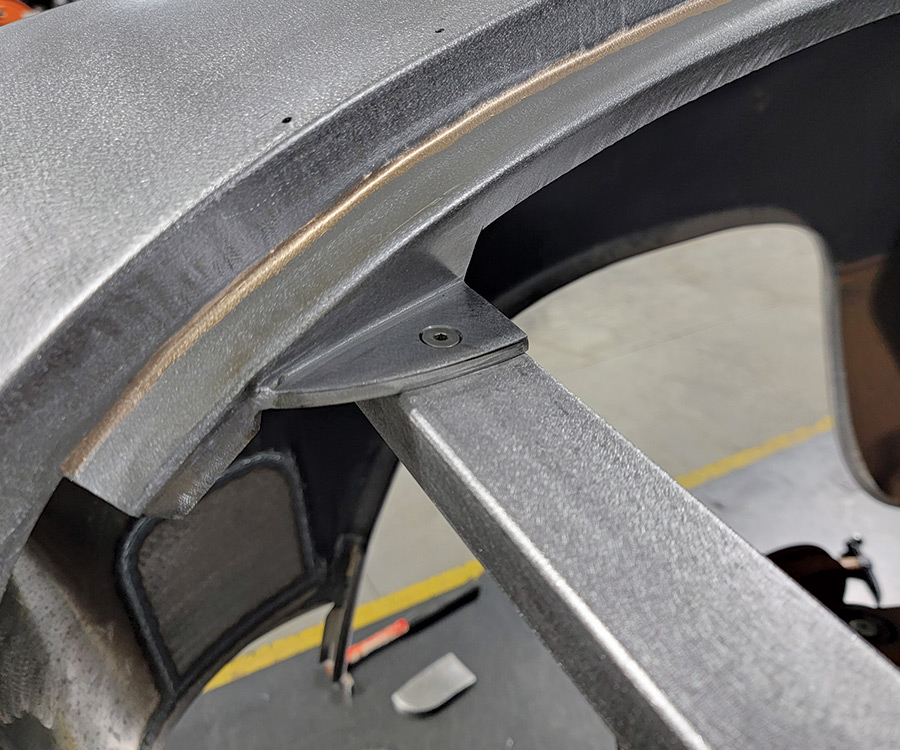
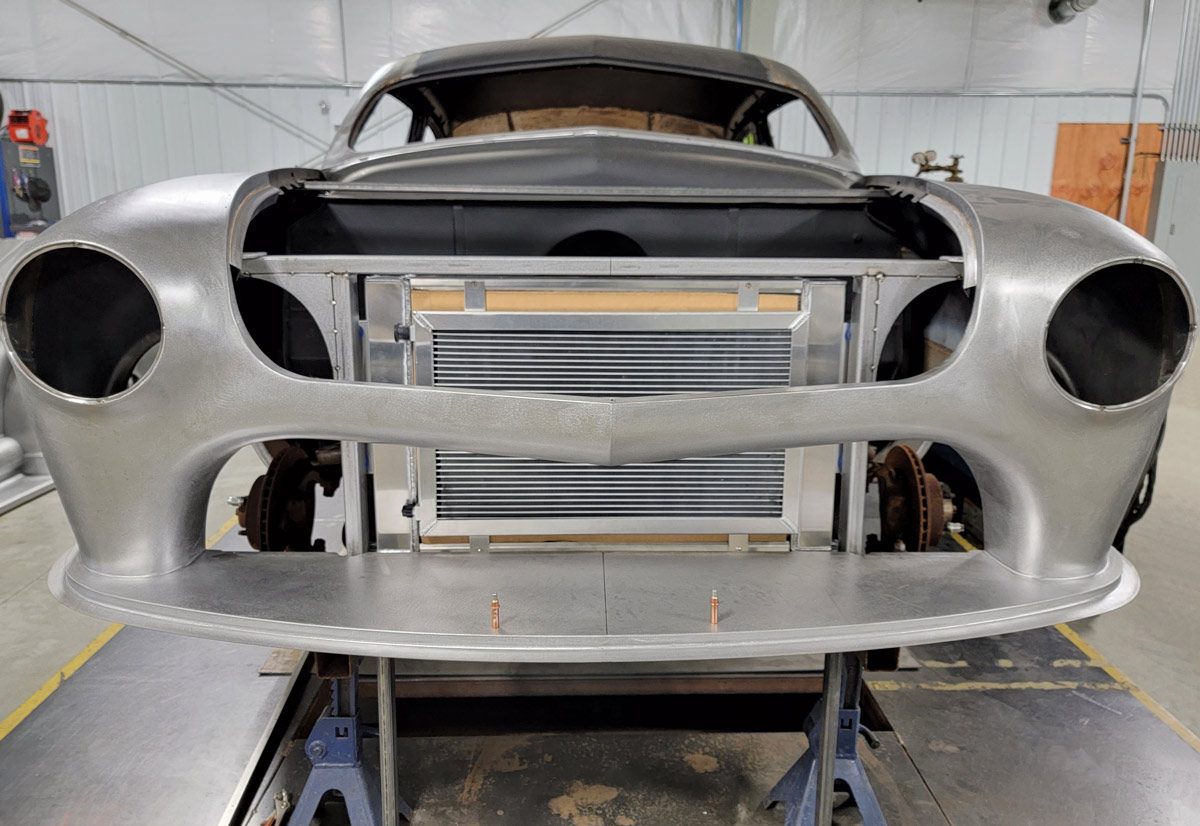
Scott’s Hotrods ’N Customs is building a custom Shoebox in the traditional style for Danny Rowe. The car is based on a ’50 Ford Tudor sedan, featuring a just-right chopped top. All the body modifications are geared toward a traditional look while adding sophisticated refinement. Ken DeKiserre is the primary craftsman on this project, and in this article we will take an in-depth look at the beautiful metalwork he is doing on the front end of the car.

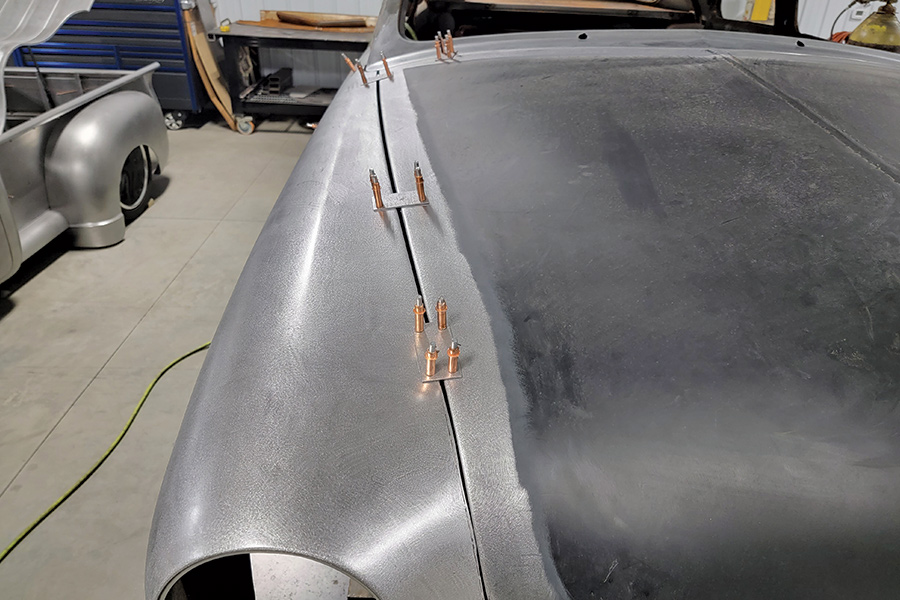
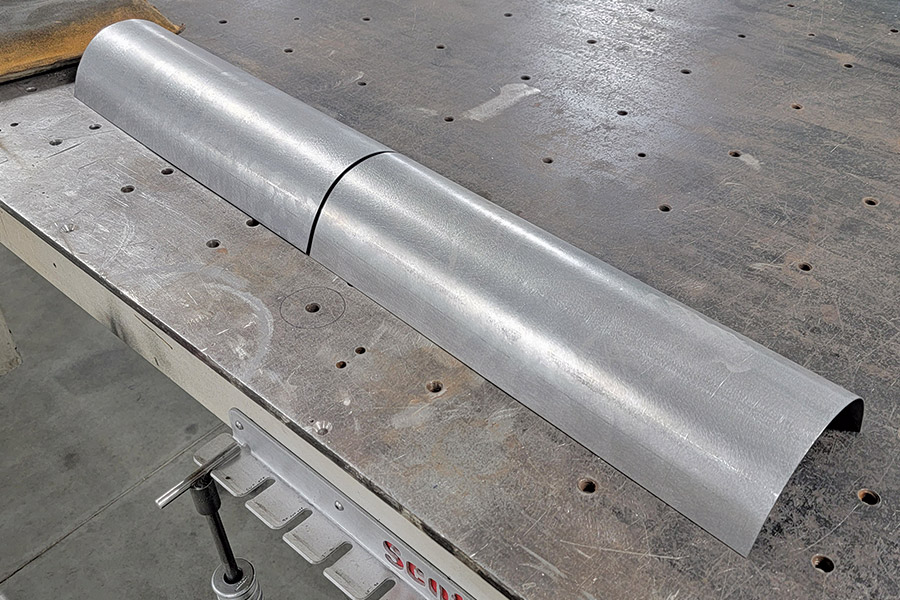
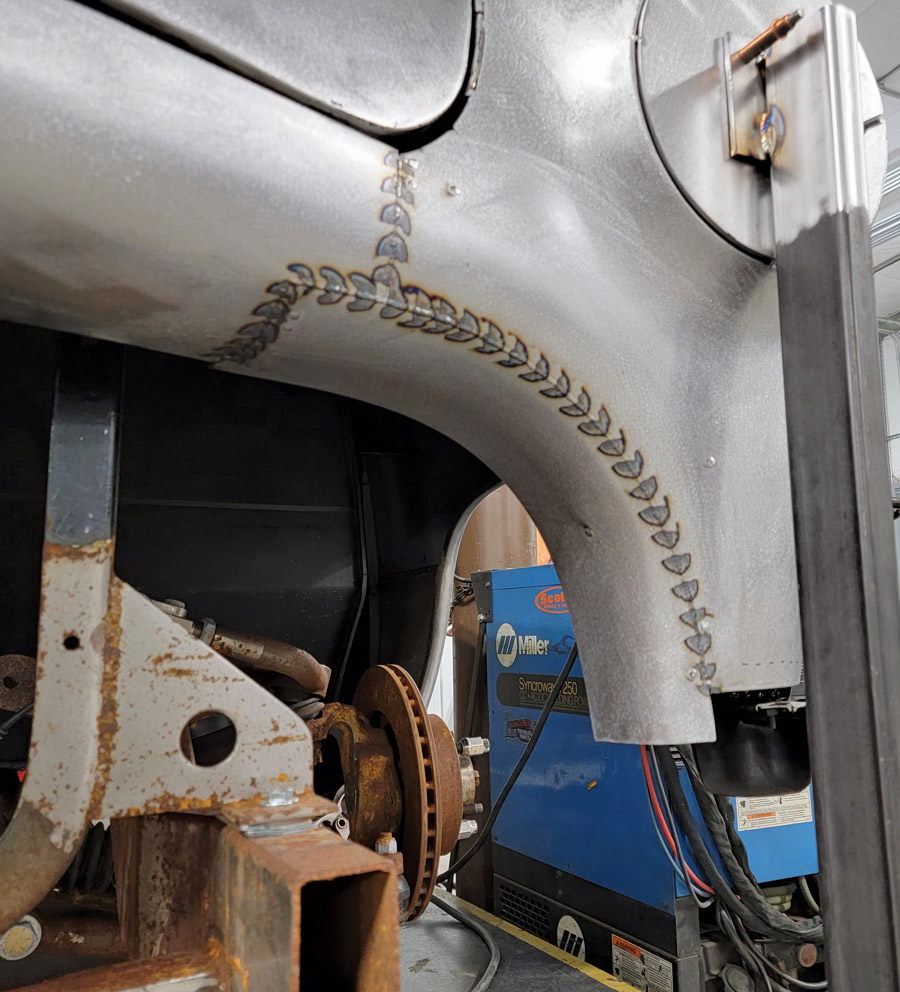
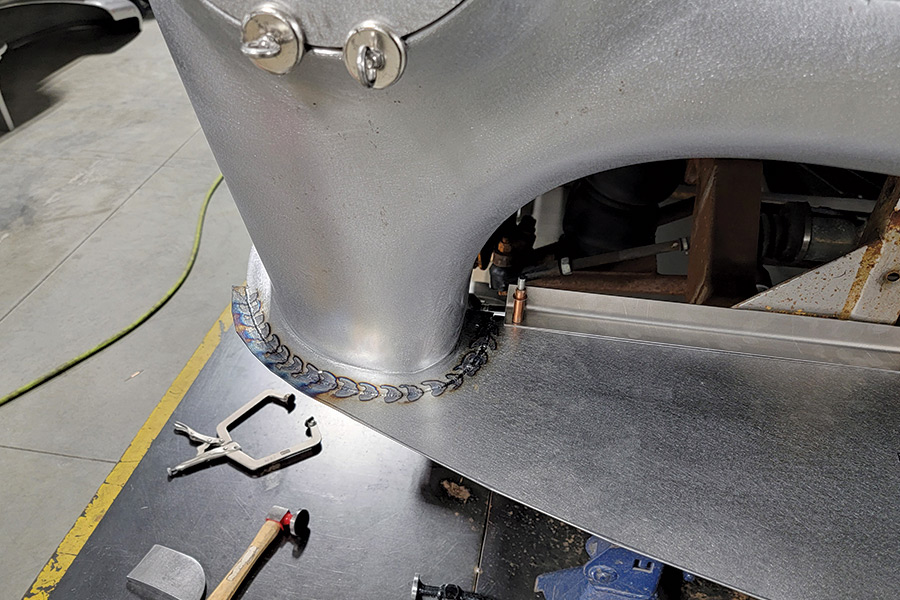
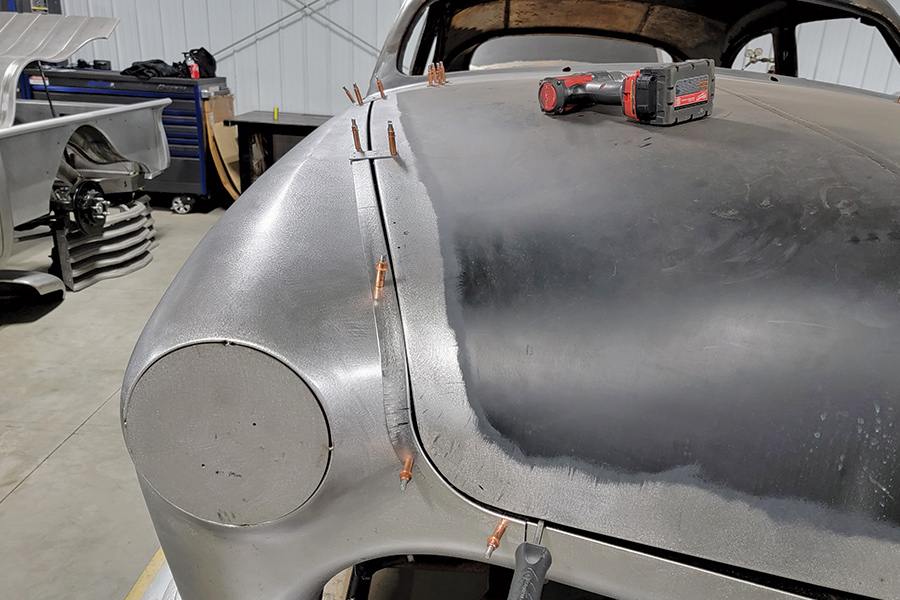
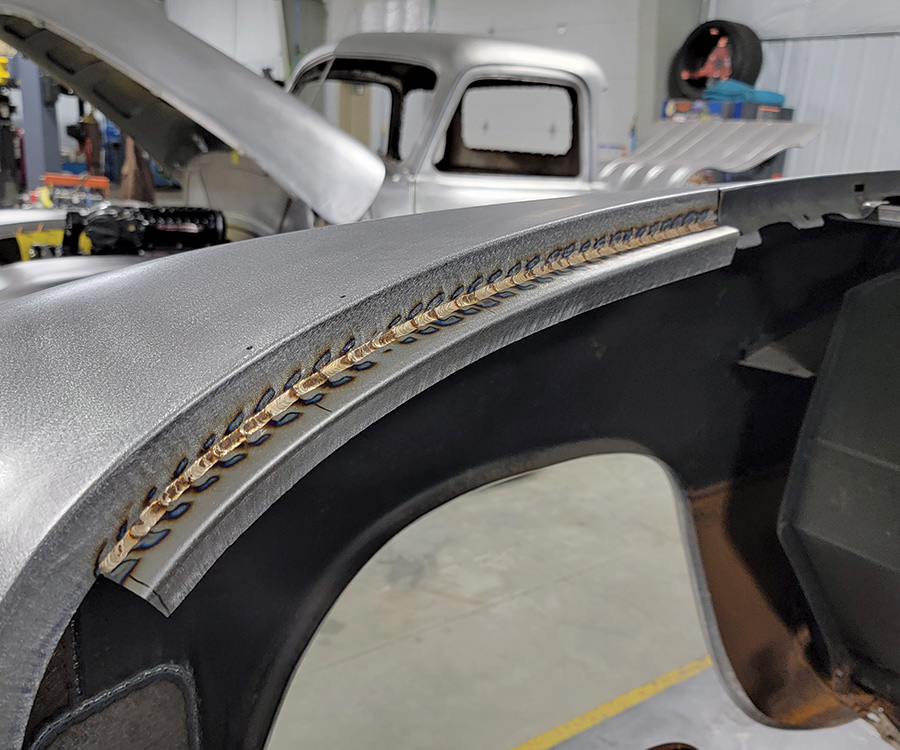
The car they started with was basically sound. Still, some earlier attempts at reshaping the front fenders and grille opening had to be cut out and replaced, and a lot of work went into making sure everything was smooth and symmetrical along with dialing in the hood gaps precisely.

There are some important lessons to be learned from the procedures used in this project, such as removing only selected parts of the body structure at a time so that the overall shape and integrity of the panels are not compromised. Lots of care was put into temporarily fitting and positioning each component before tack welding it into place and double-checking everything before finished welding. A laser level was used at key steps in the process to provide an accurate reference. These procedures are essential for keeping a project from getting out of control during extensive modifications.

We trust the photos will give you a lot of insight into the techniques used for high-level metalworking, and we hope it may inspire many of you to take on even more ambitious projects.

closeup of headlight extensions and grille opening
2. If you look closely at the headlight extensions and grille opening, you will see they are made of multiple, poorly formed pieces. This must be corrected.
sheet metal shaped for fender extension
3. Here, a piece of new metal has been shaped for the fender extension, which is held temporarily in place with Clecos.
headlight after old metal is cut away
4. The poorly formed metal is cut away, leaving temporary tabs for attaching the new metal. These tabs will be cut away at a later stage.
new metal in place before tack welding
5. Here’s the new metal held in place, ready for the tack welding. Doing the top and bottom sections separately retains the headlight location with precision.
new metal for headlight extension tack-welded
6. The metal is tack-welded here, and the fit is carefully checked before moving to the bottom.
front view of clamps holding lower panels in place
7. Clamps are used to temporarily hold the lower panels in place as the fit is carefully dialed in.
welded joints on headlight extension
8. Once the fit has been verified, all the joints are finished welded.
side view of shoebox ford with finished metal and tune-up
9. Here’s how the fender looks after the final tune-up and metal finishing.
front view of shoebox ford showing symmetry of fender
10. Keeping the shape of both sides the same is critical, and frequent checks are made to ensure symmetry.
hood with smoothed out edges
11. The edges of the hood are tuned up to smooth out any irregularities.
closeup of bridge pieces holding hood in place
12. The hood is carefully positioned with the gaps as even as possible and held in place with multiple “bridge” pieces and Clecos. The gap at the front will be reworked.
red laser outlining precise hood position
13. A laser is used to position the front of the hood precisely, as well as the grille opening.
hood positioned on new sheet metal angle
14. An angle formed from sheetmetal is positioned to be perfectly level. The hood will be reshaped to fit this reference.
curled piece of sheet metal
15. New metal is curled for the top portion of the grille opening.
laser pointed on new metal held in place with Clecos
16. The new metal pieces are held in place with Clecos, and the laser is used again to ensure that everything is properly aligned.
panels tack-welded in place
17. With the alignment verified, the panels are tack-welded into place.
new metal installed at the sides of a grille opening
18. A slight correction was needed at the sides of the grille opening, so new metal was shaped and fitted into place.
Clecos holding new flange on grille opening
19. Once all the metal around the grille opening was metal finished, a new flange was fitted to reinforce the back edge. Clecos are used to hold it as the fit is adjusted.
low angle view of grille opening and hood
20. This low-angle view emphasizes how smoothly the metal shapes flow together.
Looking from the inside, you can see how intricately all the pieces have been fitted together.
21. Looking from the inside, you can see how intricately all the pieces have been fitted together.
flanged section fitted to the front fender
22. A flanged section is being fitted to the front fender in preparation for installing a new splash apron to fit below the grille.
flanged section after welding and metal finishing
23. After welding and metal finishing, you can see the fit is flawless.
Chipboard under flanged section held in place with magnets and support blocks
24. Chipboard is used to make a pattern for the new splash apron. It is held in place with magnets and support blocks
splash apron welded into place
25. The splash apron is trimmed, fitted, and welded into place.
new splash apron angle installed
26. To finish and strengthen the front edge of the new splash apron, a formed sheetmetal angle is fitted into place.
closeup of hood gaps
27. On the top of the fender, a sheetmetal angle is shaped by shrinking and stretching the flanges to dial in the contour needed to perfect the hood gaps.
new fender edge being fitted to shoebox ford
28. The fit of the new fender edge is getting closer but still needs some more tweaking.
new fender edge being fitted to shoebox ford with headlight gap covered
29. You can expect to work tricky parts like this back and forth a few times until the fit is finalized. A few more small adjustments are needed here.
fender edge welded into place
30. The new inner fender edge is fitted and welded into place with the fit perfected.
another angle is fitted to the inner fender edge for additional strength
31. Another angle is fitted to the inner fender edge for additional strength. Silicon bronze filler rod is used here to reduce the distortion that may occur with a fillet weld.
closeup of mount attached to the top of the fender
32. Here, the fillet weld is sanded to a nice, smooth contour, and a graceful mount has been built to attach the top of the fender to the newly fabricated core support.
view of finished front end metal
33. With all the front end metal finished, you can see how beautifully everything fits together, which is the hallmark of top-notch metalworking procedures.
SOURCE
Modern Rodding
VOLUME 5 • ISSUE 46 • 2024