Modern Rodding TECH

InTheGarageMedia.com

The first step in making a track nose is to start with the known dimensions. Here the radiator is mocked-up and a strip of steel is being bent to check the desired profile
1. The first step in making a track nose is to start with the known dimensions. Here the radiator is mocked-up and a strip of steel is being bent to check the desired profile.
By Ron Covell Photography by Jon Hall & Dave Autin
Making a Hood and Nose
Custom Metalworking is Something We all Want for Our Hot Rods
T

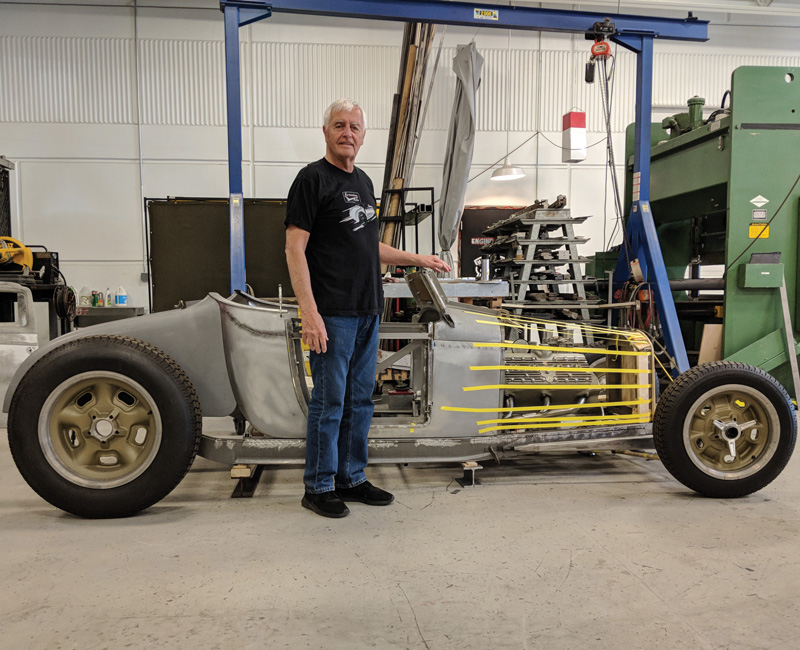
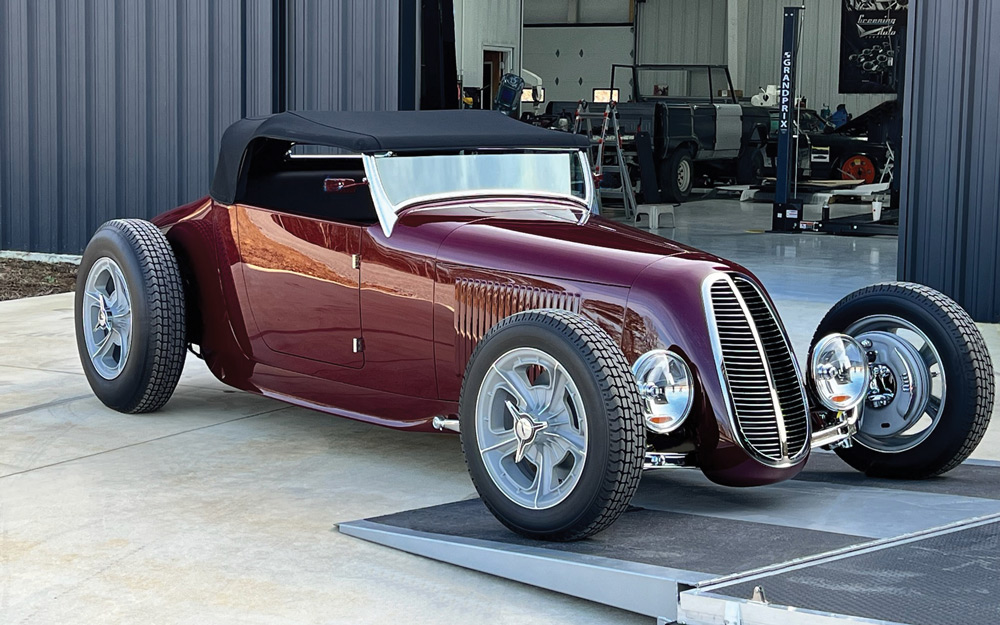
rack roadsters have been popular since the beginning of hot rodding. The style was first developed for pure race cars, but this iconic look has been used on street-driven cars for generations. Jon Hall, the founder of Shadow Rods, wanted to build a car based on one of his XL27 bodies that boasts a modern interpretation of this traditional theme.

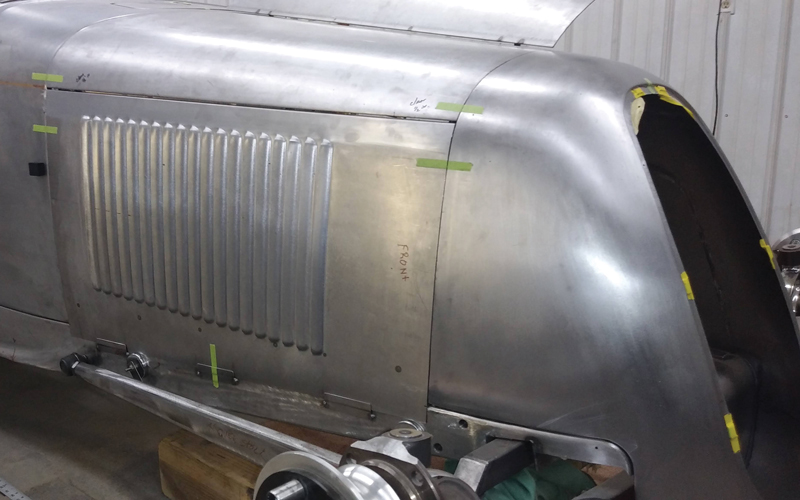
The car was meant to be special in many ways. It features the first all-cast aluminum Flathead V-8 engine from Motor City Flathead, a division of Shadow Rods. It is fitted with numerous, one-of-a-kind accessories; most are made of cast aluminum as well. Subtle modifications to the body and chassis abound, such as a wedge section to lower the cowl, lengthened and flush-fitted doors, and a Shadow Rods–stamped ’32 Ford–style frame that has been pinched in front and sectioned in height by 1 inch. All the bodywork on this car was custom fabricated from the unique stamped firewall forward. This article shows the details of this fabulous build.

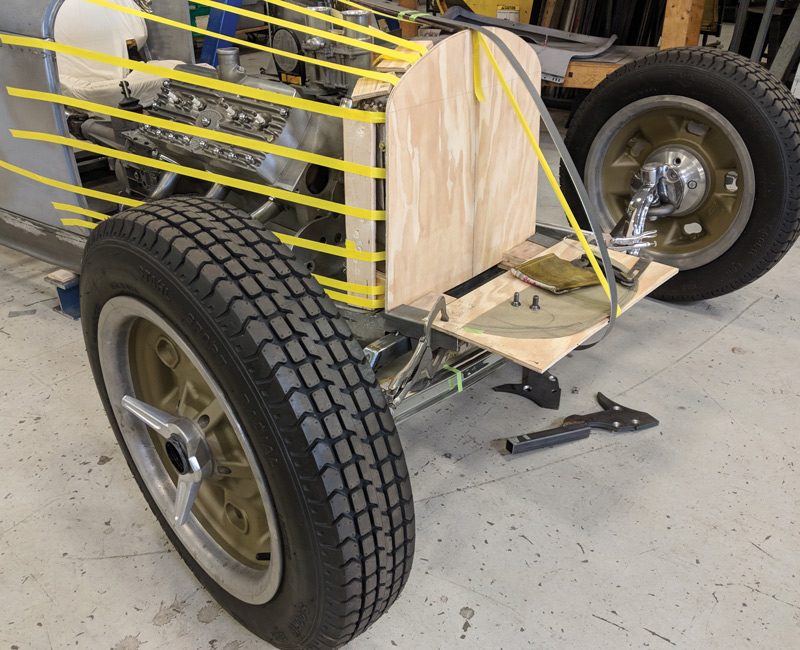
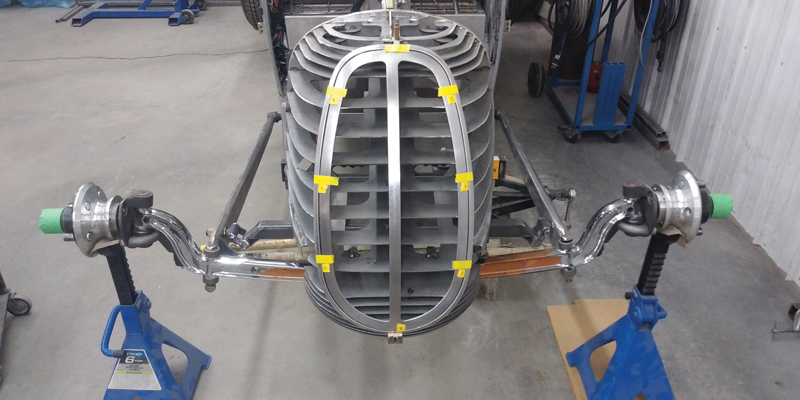
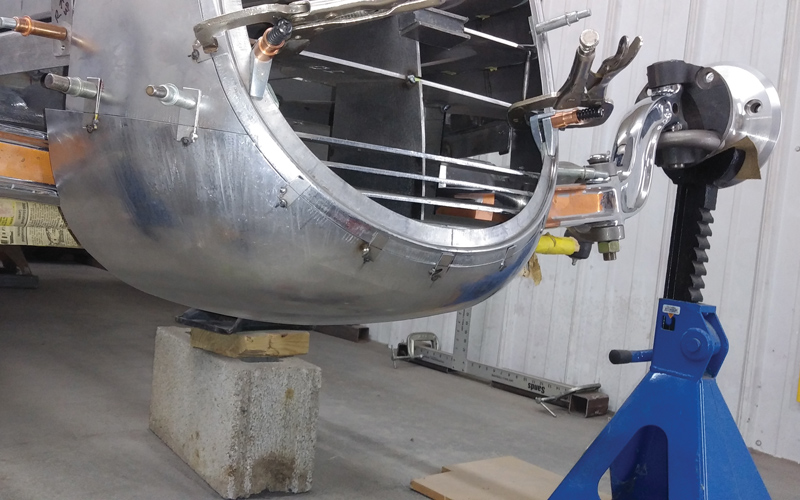
Hall wanted a very smooth appearance on the nose of this car, with no bumps, scoops, or protrusions to mar the sleek look he envisioned. The engine was mounted in the chassis as low as practical, allowing the hood line to slope down toward the front. A mock-up was made for the radiator and then the layout could commence for the hood and nose.

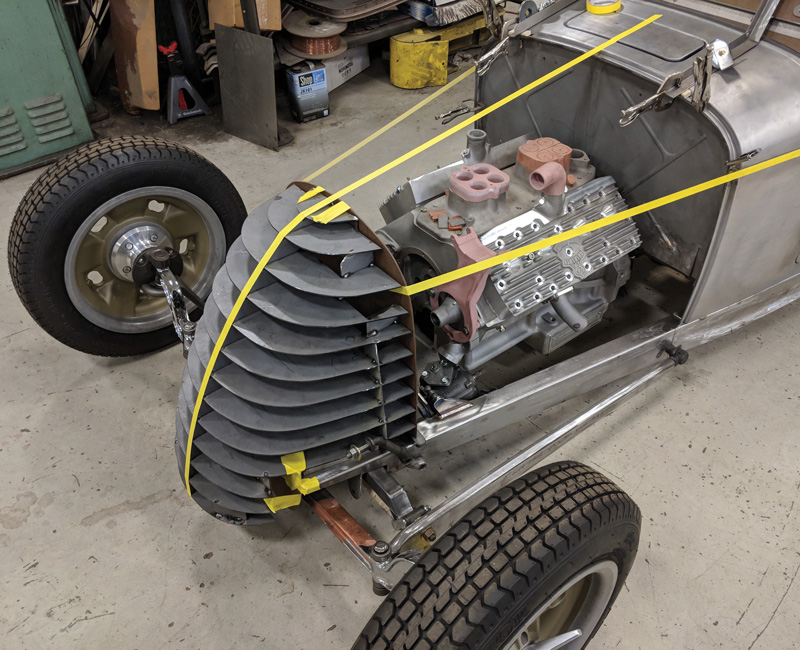
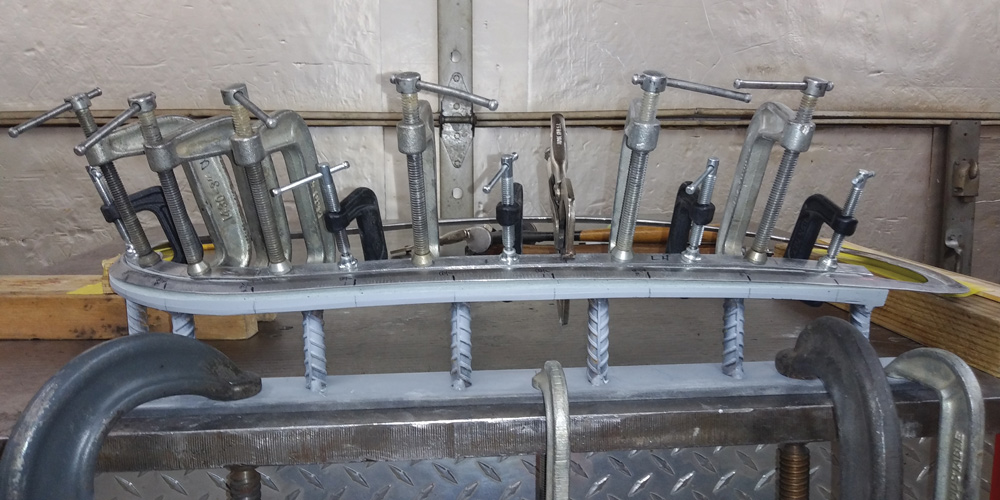
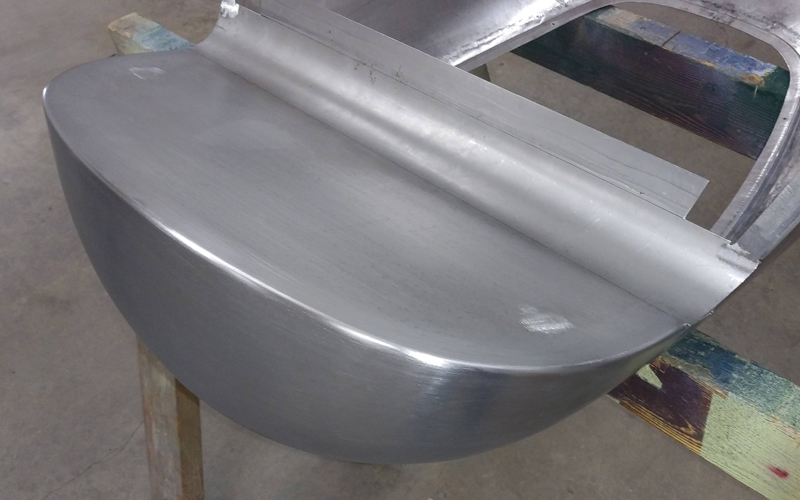
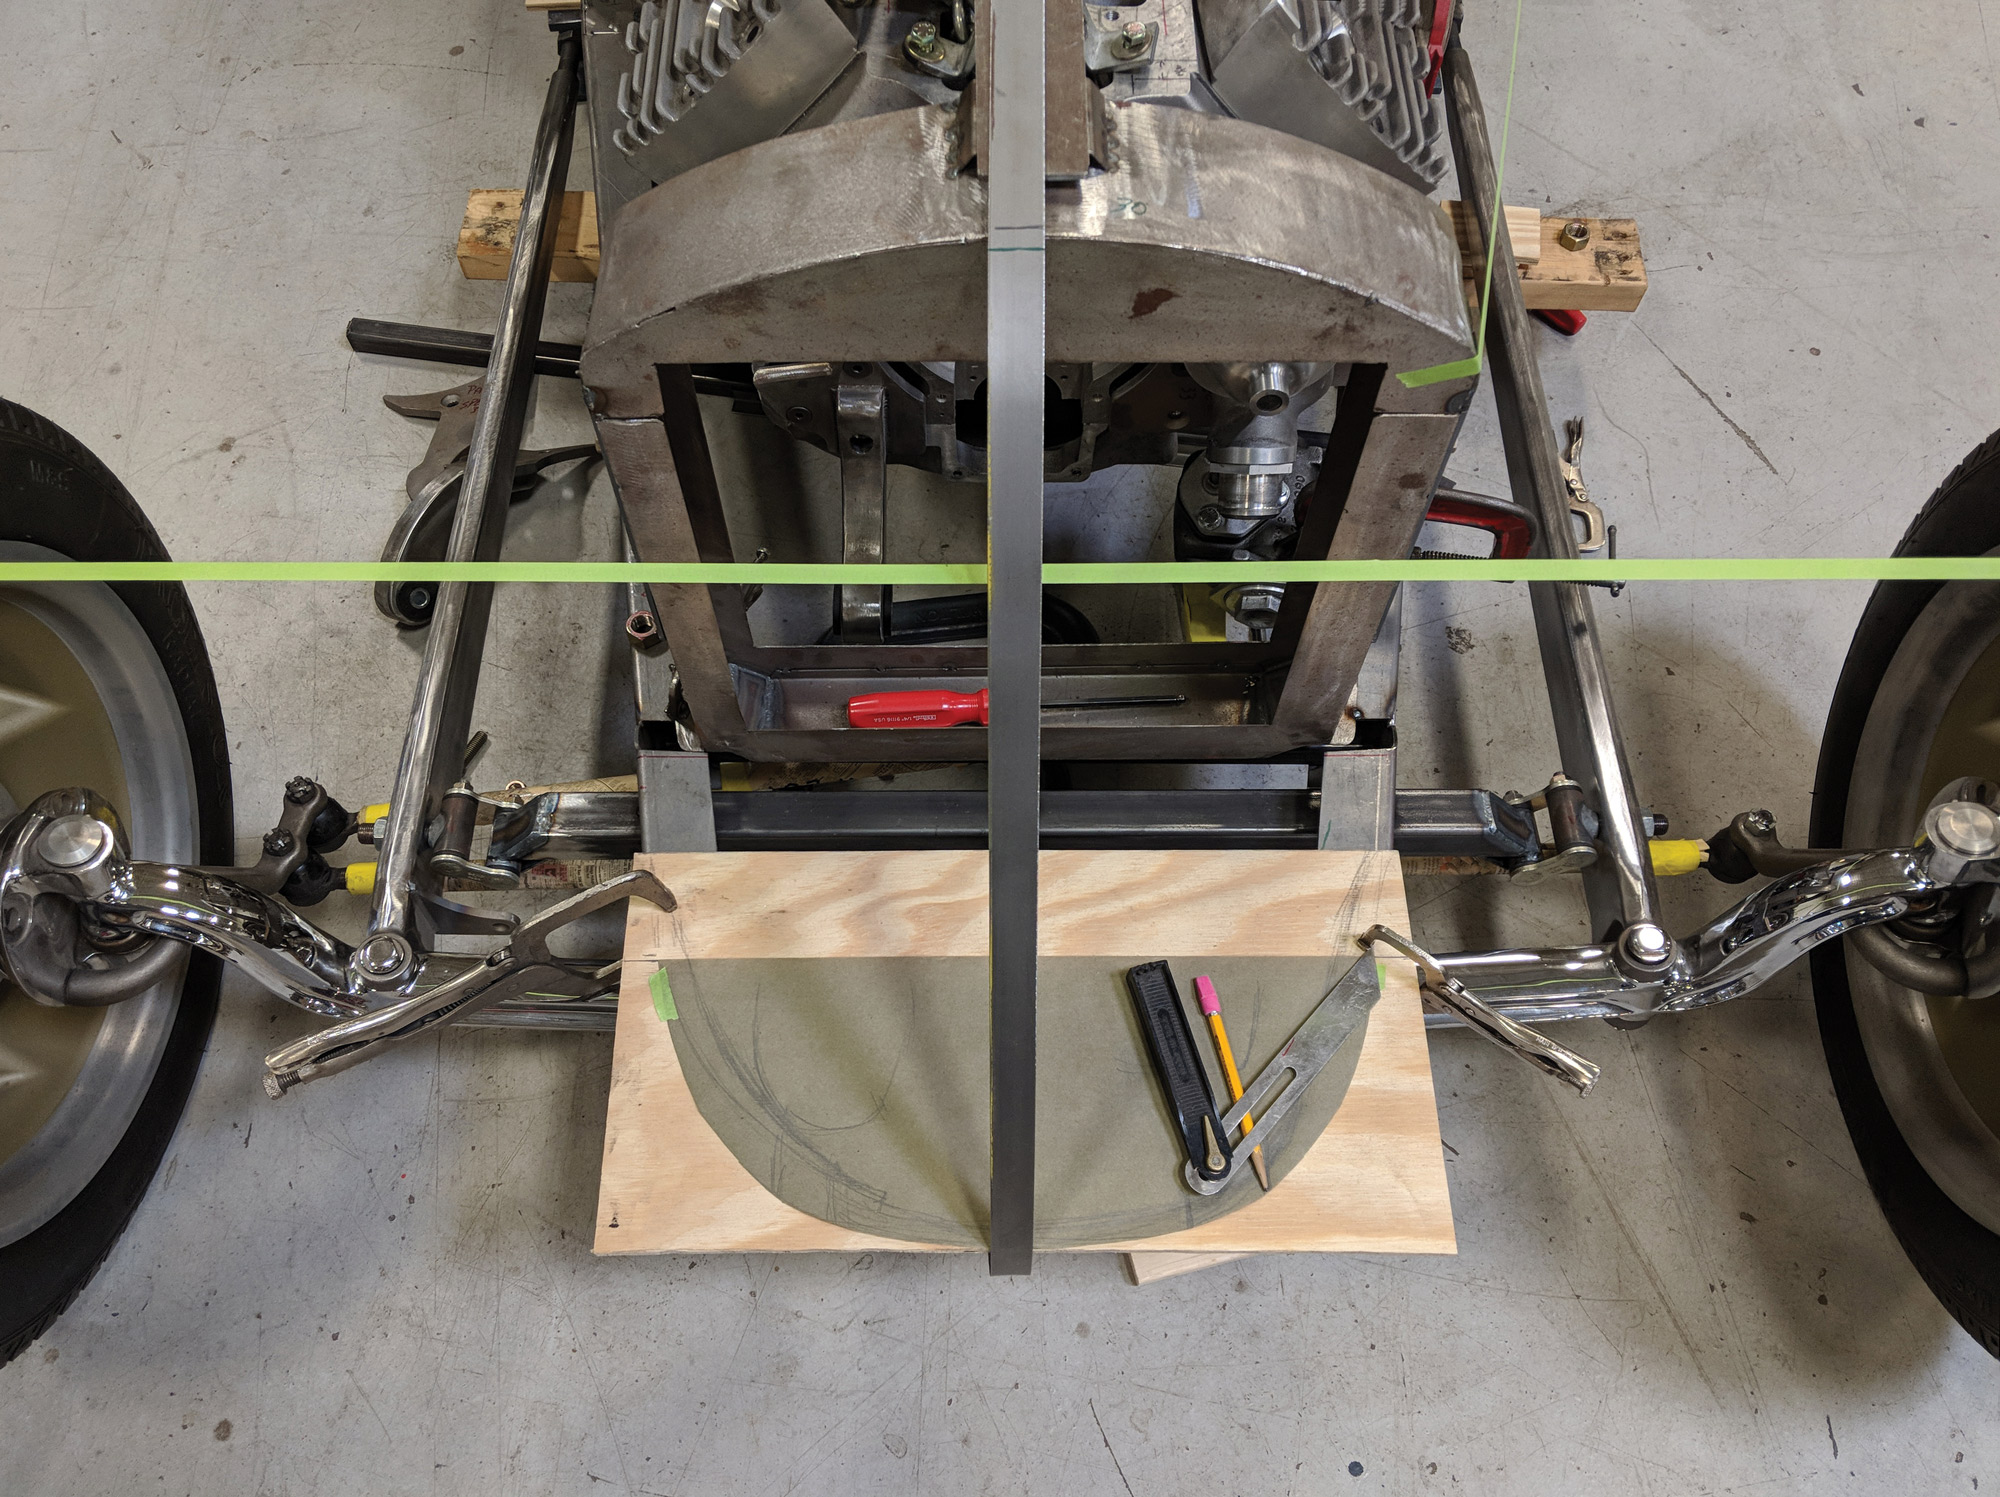
The team started with a strip of metal to represent the hood slope, which then curls down smoothly to create the profile of the nose. This step sets the style at the front of the car, so lots of tweaking and adjusting was done until it looked right from all angles. With the profile dialed-in, the next step was determining the shape of the nose at the top of the framerails.

The first templates were made from plywood, but since Jon has sophisticated CNC laser-cutting equipment in-house, the buck for the nose was made from 10-gauge steel sheet. This makes for a massively rigid framework to use for shaping the metal for the nose and grille.

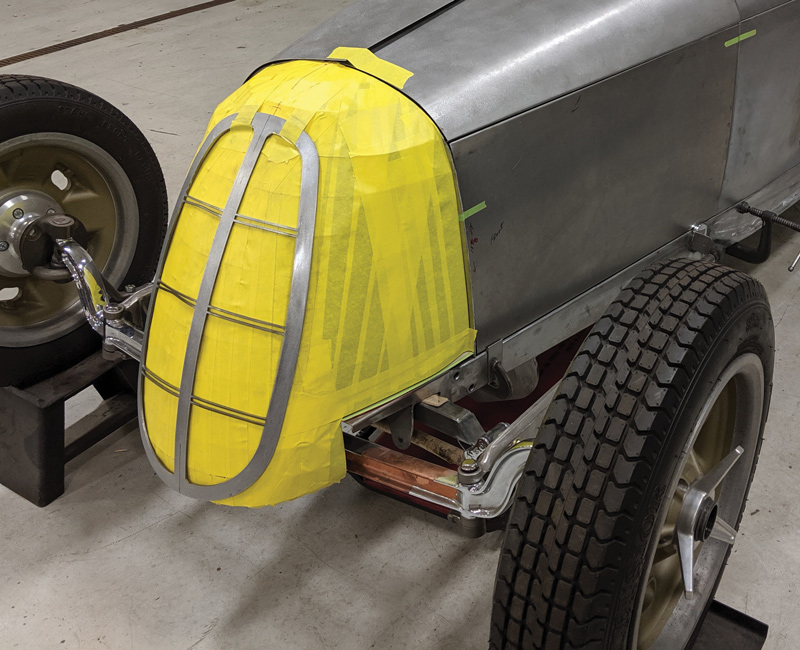
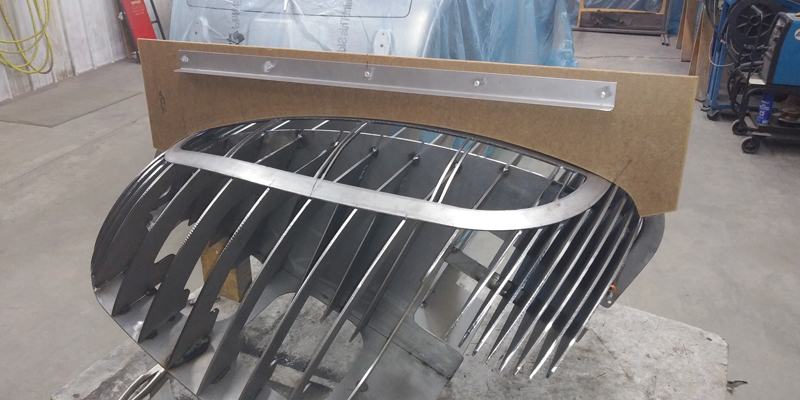
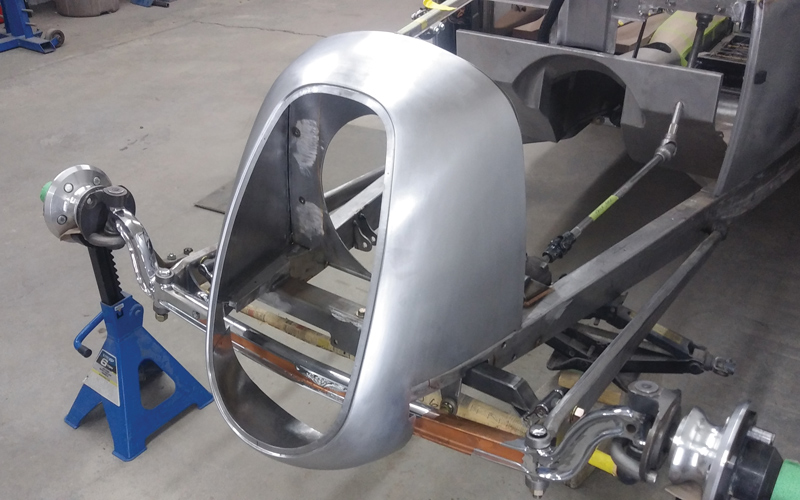
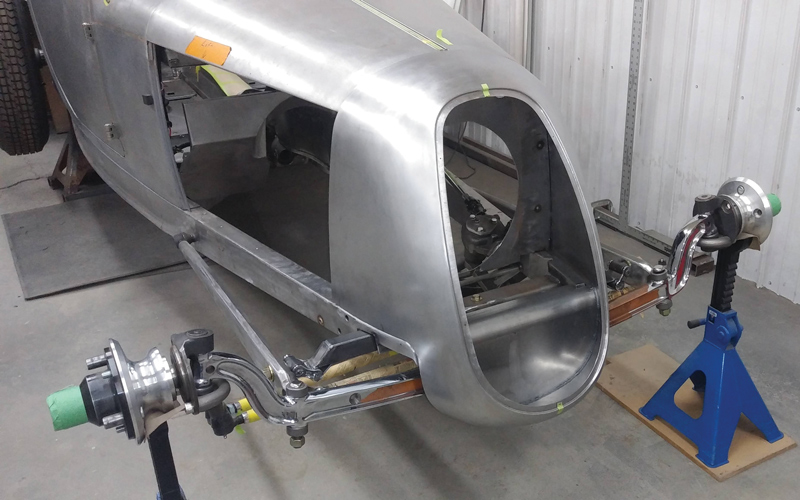
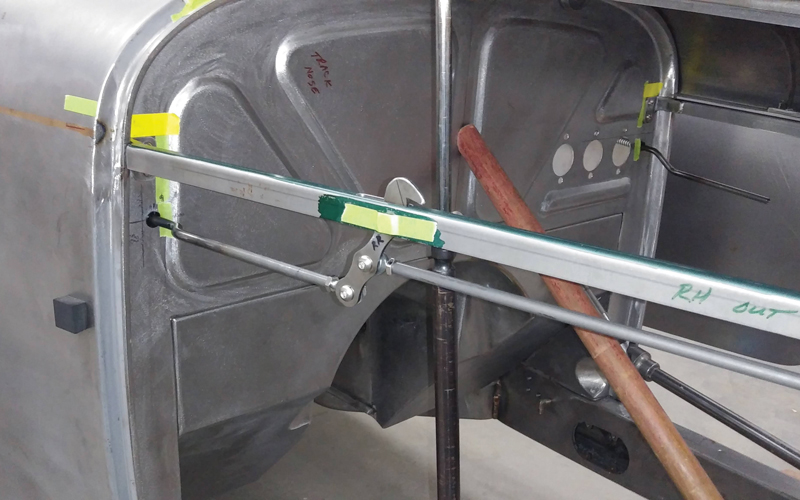
To keep things smooth, the grille was fitted flush, which required fabricating an intricate sheetmetal part for the grille to nest in. Having a beefy and accurate buck really helped at this stage, so the components could be held securely to the buck to check for fit and symmetry.

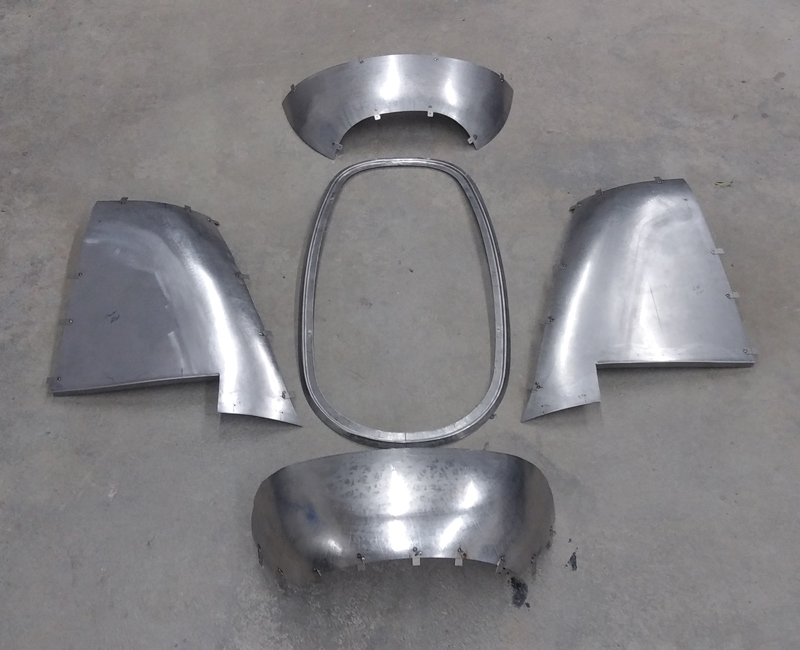
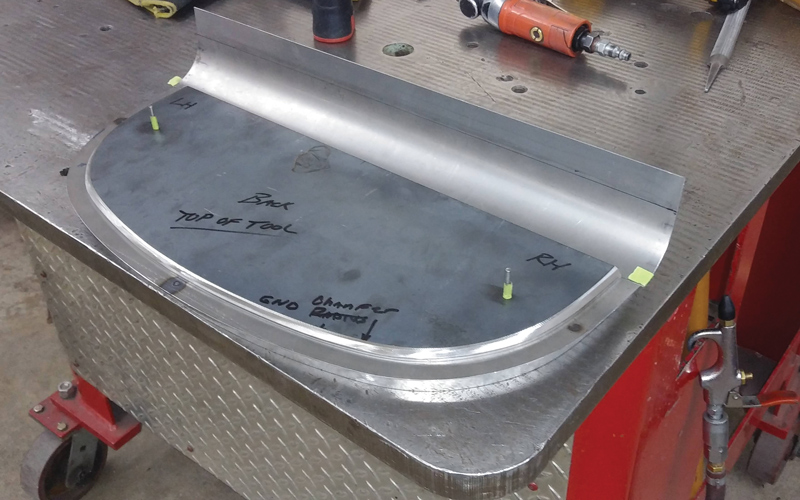
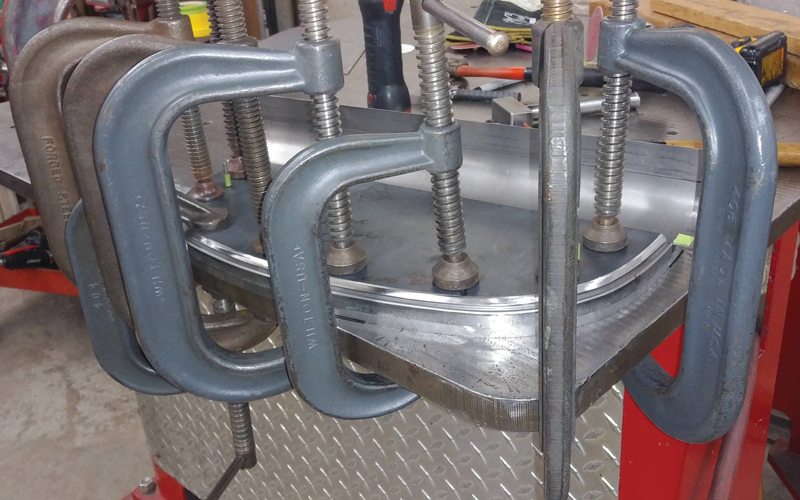
With the grille size, shape, and location finalized, the sheetmetal panels were shaped to fit the buck precisely. All the joints were carefully fitted for butt-welding, which is essential for attaining the smooth, metal finished surfaces they achieved.

There are lots of details that go into making an entirely new nose for a car, and the accompanying photos show the key steps used to create this masterpiece of design and engineering. Huge credit is due to the team who did the fabrication on the car: Jon Hall, Dave Autin, Randy Norton, Ashley Root, and Cliff Samual, and to Greening Auto Company who machined some very special components and did the painting and final assembly.

Plywood was used to make the initial templates for the profile of the nose just in front of the radiator and at the top of the framerails.
2. Plywood was used to make the initial templates for the profile of the nose just in front of the radiator and at the top of the framerails.
Masking tape is used to visualize the taper of the hood; Jon Hall is delighted with the profile at this stage. The height of the framerails has been reduced 1 inch.
3. Masking tape is used to visualize the taper of the hood; Jon Hall is delighted with the profile at this stage. The height of the framerails has been reduced 1 inch.
A more durable buck for the nose is laser cut from sheet steel and tack welded together. The engine in this car is a very special new aluminum Flathead from Motor City Flathead.
4. A more durable buck for the nose is laser cut from sheet steel and tack welded together. The engine in this car is a very special new aluminum Flathead from Motor City Flathead.
The buck is temporarily covered with tape to fill in the open areas, providing a blank canvas for laying out the grille shape. The hood panels are being test-fitted here, too.
5. The buck is temporarily covered with tape to fill in the open areas, providing a blank canvas for laying out the grille shape. The hood panels are being test-fitted here, too.
The grille perimeter is made from a 10-gauge steel sheet. The contour is checked with a template and the buck is recessed so the face of the band can be fit flush.
6. The grille perimeter is made from a 10-gauge steel sheet. The contour is checked with a template and the buck is recessed so the face of the band can be fit flush.
The sheetmetal recess for the grille is shaped from a 19-gauge steel sheet. This is a tricky part to form; note the heavy fixture used to hold the shape as the part is fitted and adjusted.
7. The sheetmetal recess for the grille is shaped from a 19-gauge steel sheet. This is a tricky part to form; note the heavy fixture used to hold the shape as the part is fitted and adjusted.
Many clamps are used to hold the grille surround and the sheetmetal recess together tightly. The shapes are tweaked until they fit perfectly.
8. Many clamps are used to hold the grille surround and the sheetmetal recess together tightly. The shapes are tweaked until they fit perfectly.
The grille parts are trial fitted to the buck and held temporarily into place. As you can see the fit is spot-on.
9. The grille parts are trial fitted to the buck and held temporarily into place. As you can see the fit is spot-on.
To make the top of the nose, 19-gauge cold-rolled steel sheet is shaped to the contours of the buck and trimmed to size.
10. To make the top of the nose, 19-gauge cold-rolled steel sheet is shaped to the contours of the buck and trimmed to size.
Here are the main pieces of metal that comprise the nose, each one precisely shaped.
11. Here are the main pieces of metal that comprise the nose, each one precisely shaped.
The top pieces of the nose are fitted to the buck in preparation for tack-welding.
12. The top pieces of the nose are fitted to the buck in preparation for tack-welding.
To join the pieces together, small tabs are tack-welded to one panel and Clecos are used to hold it in place. This facilitates making a nice, tight butt weld at the joint.
13. To join the pieces together, small tabs are tack-welded to one panel and Clecos are used to hold it in place. This facilitates making a nice, tight butt weld at the joint.
All the panels of the nose have been finish welded and metal finished. The quality of the metalwork is top-notch.
14. All the panels of the nose have been finish welded and metal finished. The quality of the metalwork is top-notch.
A separate panel is made to fill in the nose behind the grille, covering the front axle and the daylight behind it. A hammerform will be used to flange the edge of this panel.
15. A separate panel is made to fill in the nose behind the grille, covering the front axle and the daylight behind it. A hammerform will be used to flange the edge of this panel.
The hammerform is clamped tightly to the sheetmetal and a 1/2-inch flange is hammered around the perimeter.
16. The hammerform is clamped tightly to the sheetmetal and a 1/2-inch flange is hammered around the perimeter.
Here’s the panel welded into place. Note the crisp corner that is created by hammering over the form. It would be very difficult to get such uniformity if the weld was placed on the corner.
17. Here’s the panel welded into place. Note the crisp corner that is created by hammering over the form. It would be very difficult to get such uniformity if the weld was placed on the corner.
With the nose mounted on the chassis, you can see how beautifully the panels fit together.
18. With the nose mounted on the chassis, you can see how beautifully the panels fit together.
The hood sides were made oversized, then louvered; here they are being fitted into place. A flange will be formed on the bottom edge to give the hood strength and to mount the lower fasteners.
19. The hood sides were made oversized, then louvered; here they are being fitted into place. A flange will be formed on the bottom edge to give the hood strength and to mount the lower fasteners.
The hood is hinged in the center, with custom-built latches on each side. The latches are operated by knobs concealed behind the dash.
20. The hood is hinged in the center, with custom-built latches on each side. The latches are operated by knobs concealed behind the dash.
Here’s a preview of the finished car. This is one of the nicest track roadsters we’ve seen in a long time.
21. Here’s a preview of the finished car. This is one of the nicest track roadsters we’ve seen in a long time.
Greening Auto Company
(256) 352-8700
greeningautocompany.com
Shadow Rods & Motor City Flathead
(989) 754-1927
shadowrods.com
Modern Rodding
VOLUME 4 • ISSUE 34 • 2023