Modern Rodding TECH

InTheGarageMedia.com

1. Buick’s ’63-65 Riviera was a stunning example of the less-is-more design philosophy. The clean and simple lines have stood the test of time. Now, thanks to Aldan American, these cars can be as pleasing to drive as they are to look at.
By Ron Ceridono Photography by Brian Brennan
Making A Buick Better
Installing and Adjusting Aldan’s New Road Comp Suspension for Rivieras
A

t one time Buick’s advertising slogan was: “When better automobiles are built, Buick will build them.” Arguably some of the best examples of those better Buicks they made were the ’63-65 Rivieras. Marketed as a personal luxury vehicle, Rivieras were designed to compete with such cars as the Ford Thunderbird, Chrysler 300-J, Studebaker Avanti, and even the Pontiac Grand Prix.

Introduced in late 1963 as a ’63 model, along with the classy sheetmetal came a revised version of GM’s X-frame that would be the basis for the Riviera’s new E-body chassis. While the frame was in fact new, the suspension was standard Buick with the roll centers lowered to reduce body lean. As a result, automotive writers of the day gave the Riviera high marks for its excellent balance, comfort, and agility, but there is certainly room for improvement. To that end, Aldan America has found a way to make a good thing better.

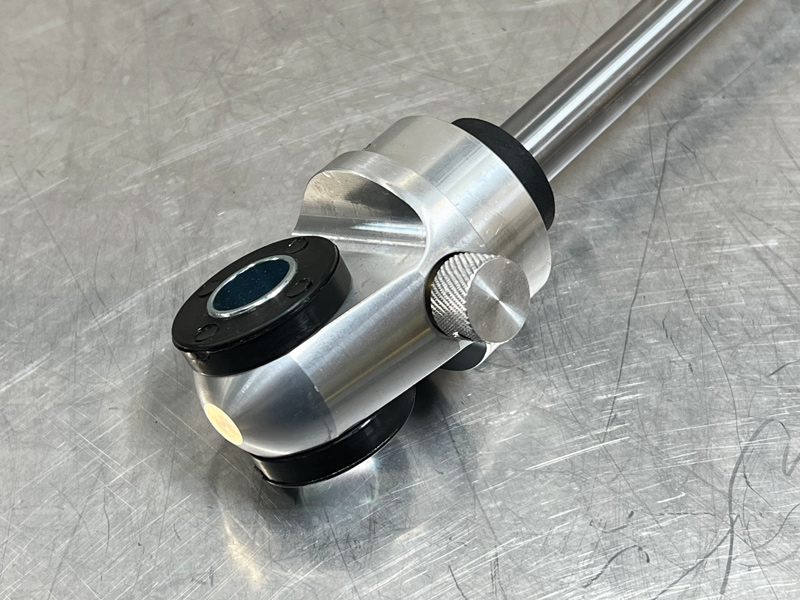
Aldan has been a leading manufacturer of suspension components since 1981. All their shocks and coilover kits are manufactured in the U.S. from lightweight, high-strength 6061-T6 billet aluminum, which makes them incredibly strong and lighter weight when comparing to forged steel shocks. In addition, aluminum dissipates the heat generated by the shock’s movements better than steel. For longevity Aldan shocks use low-friction Viton seals and O-rings and the shock’s shafts are heat-treated, chromed, and finish ground before final assembly to reduce seal friction. Aldan’s coilovers and shocks are fully serviceable and rebuildable and come with Aldan’s Forever Guarantee.

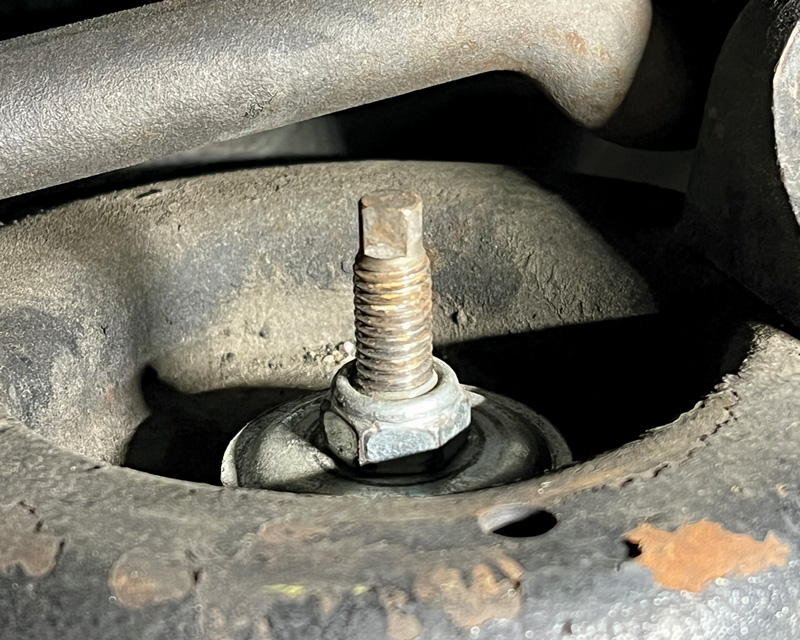
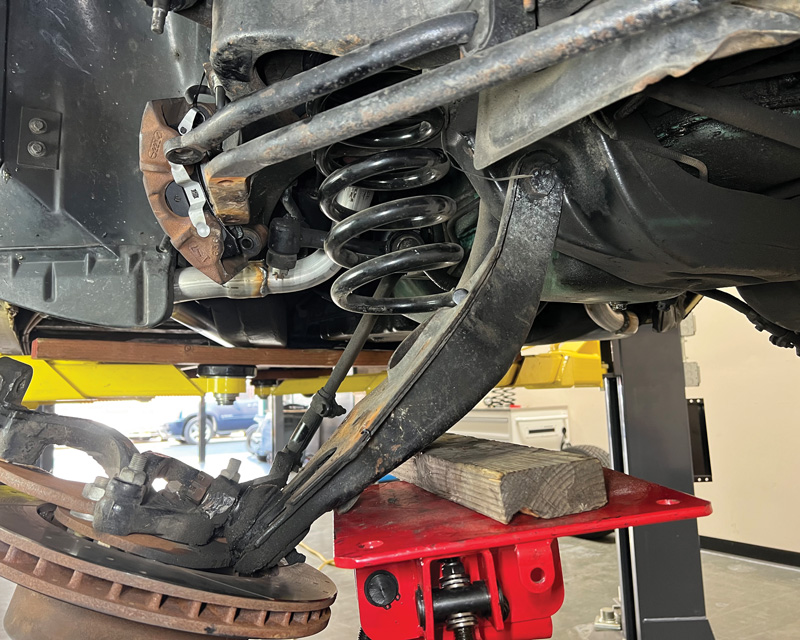
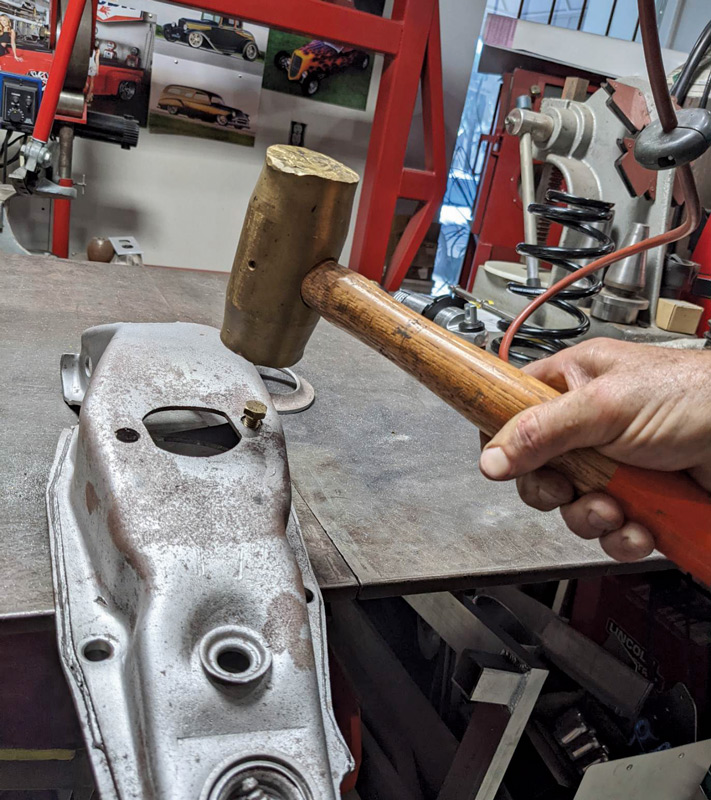
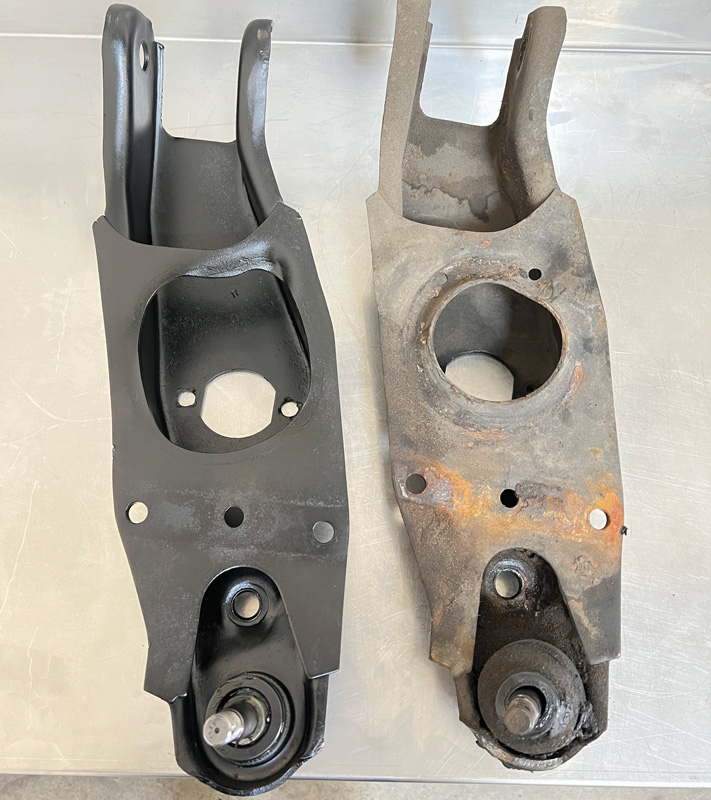
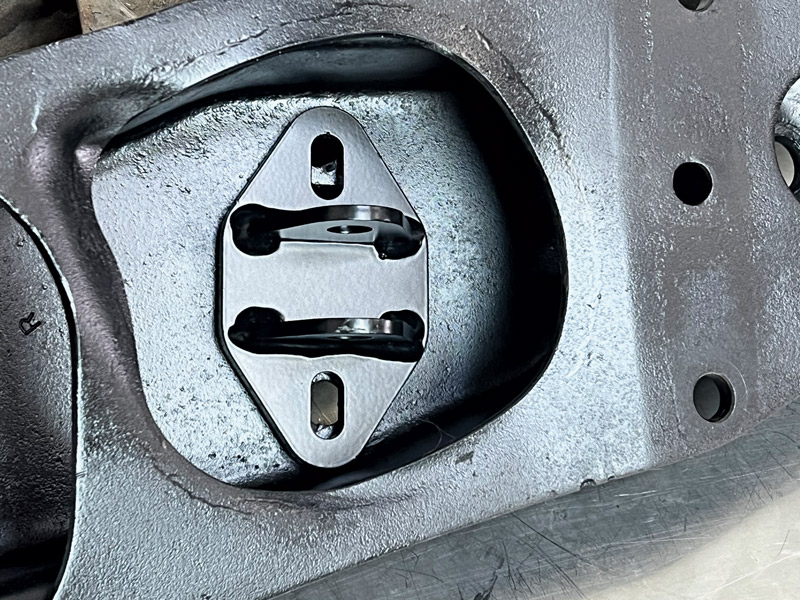
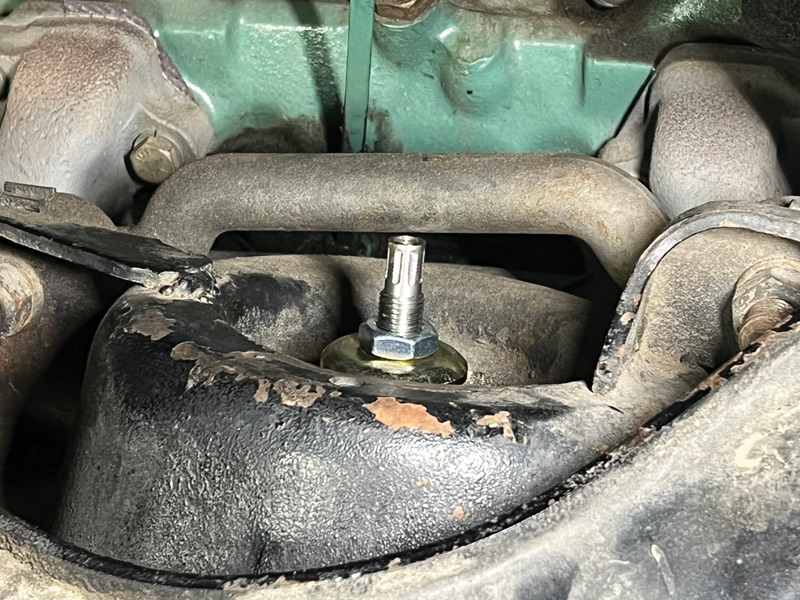
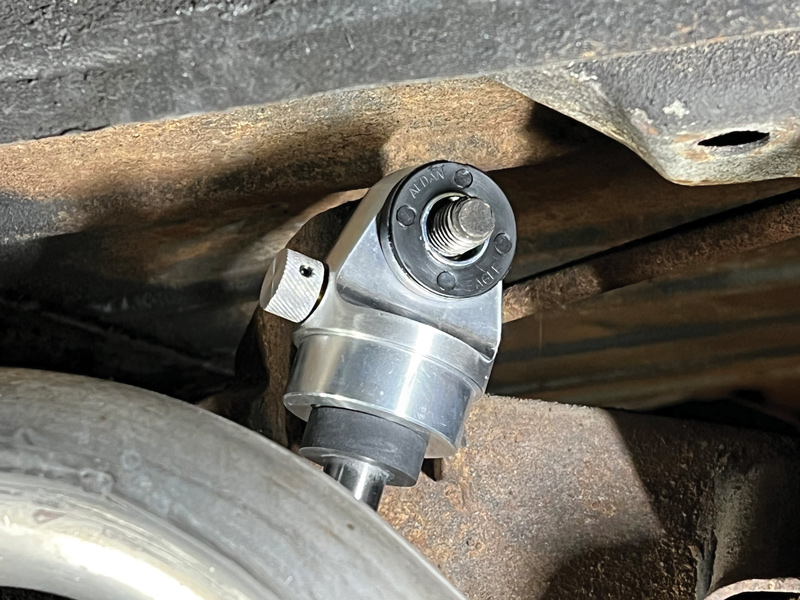
To add to their comprehensive product line, Aldan recently introduced a front suspension kit for ’63-65 Buick Rivieras in their Road Comp Series (PN 300351). It includes front coilovers with double-adjustable shocks and 750-pound springs. The only modification required for installation is enlarging the factory openings for the shock in the lower control arms. To update the Riviera’s rear suspension Aldan offers a direct bolt-on kit with a pair of TruLine single-adjustable shock absorbers (PN 300353). A complete Road Comp suspension kit package for the front and rear is also available (PN 300354).

Taking the Mystery out of Suspension Adjustments With Aldan’s Gary Nelson
To adjust the ride height of a vehicle with Aldan coilovers it’s a simple matter of changing the preload on the spring—increasing the preload by moving the adjuster up on the shock body raises the car, moving the adjuster down reduces the preload on the spring lowering the car. Aldan recommends starting with a baseline setting of 1 inch of preload on the springs, then adjusting as necessary. While preload changes to our Riviera were made easier with Aldan’s thrust bearing kit, adjustments should still be made with the car jacked up to take the pressure off the springs and the load on the threaded adjusters and shock bodies.

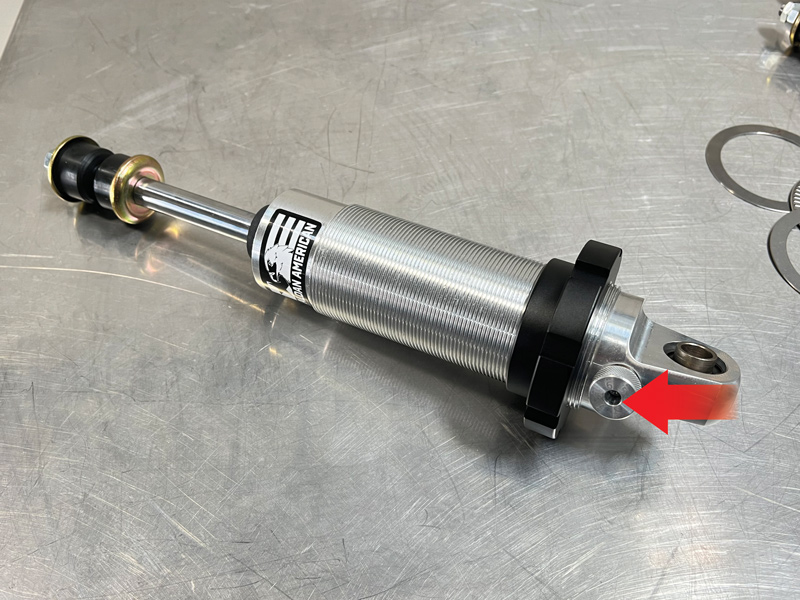
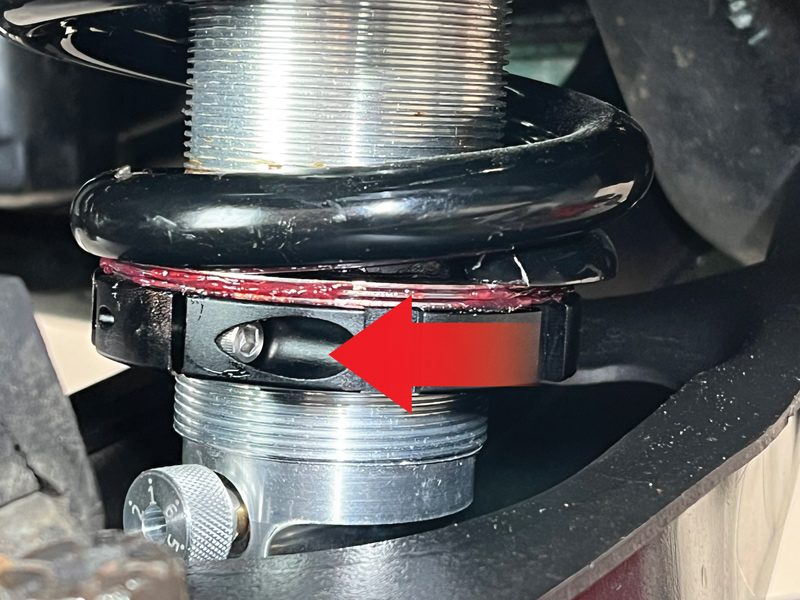
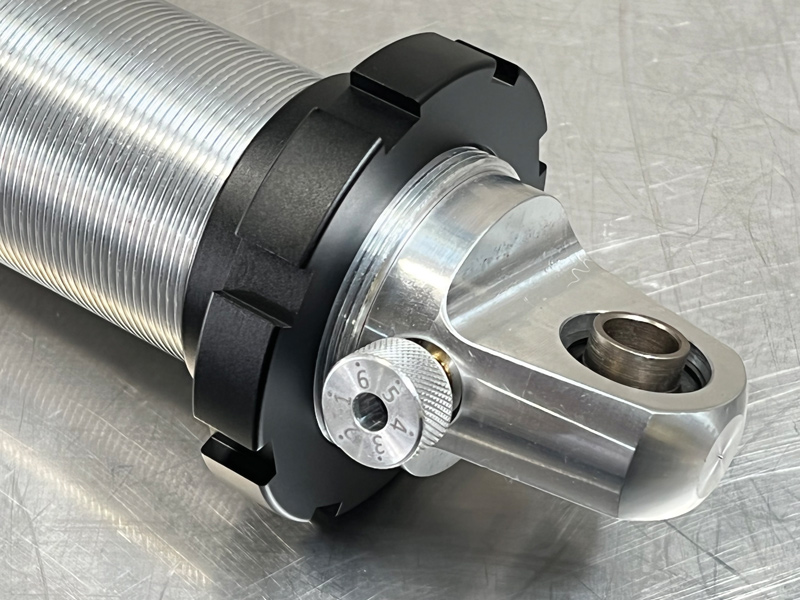
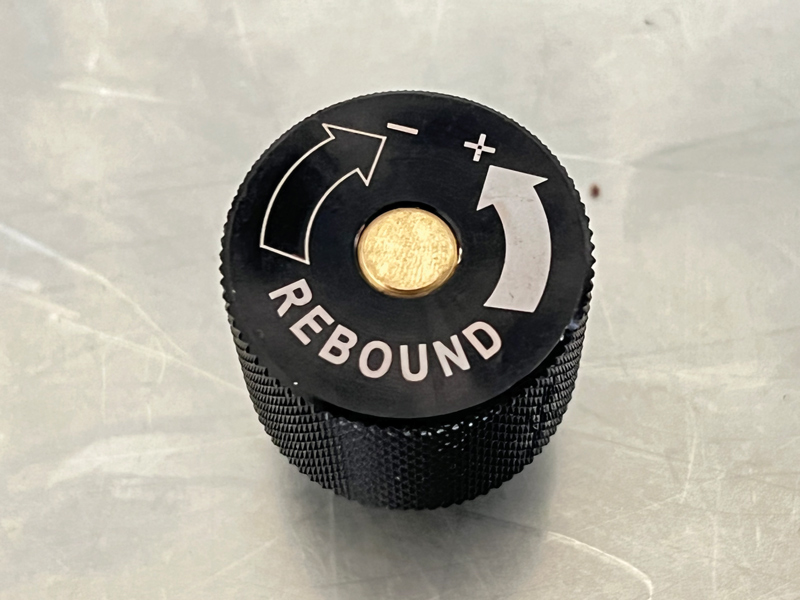
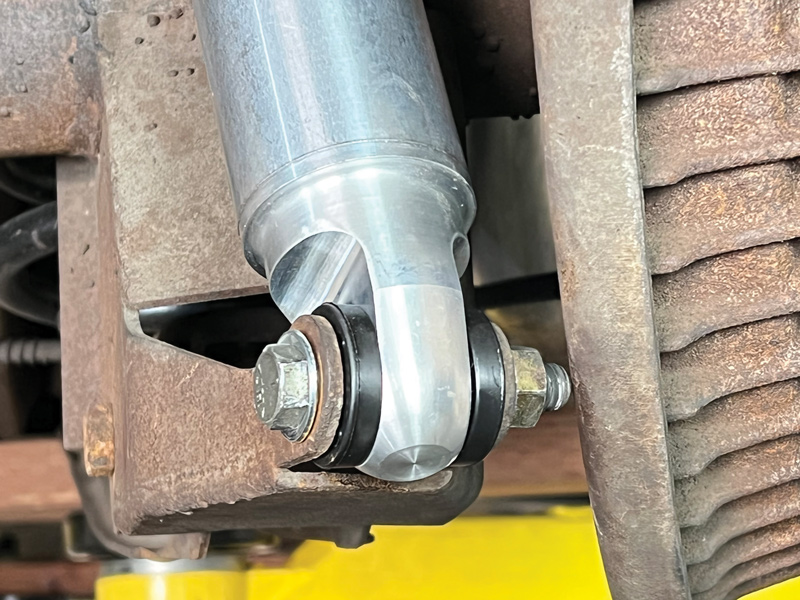
For those who want to fine-tune their car’s suspension system, Aldan offers single- and double-adjustable shocks. In the case of the ’65 Riviera shown here, the front coilover shocks are double adjustable, which allows compression and damping to be adjusted while in the rear the TruLine single-adjustable shocks allow the rebound damping to be altered. In both cases the rebound adjustment knob is at the top of the shock body, and for the front shocks the compression adjustment knob is at the bottom.

For initial settings start by turning the front rebound adjustment knob all the way clockwise to full stiff then backing off 10 clicks, which is the center of the adjustment range. For compression, damping begins with the knob on setting number two of the six positions available, then making further adjustments as necessary. Be aware the compression knob doesn’t have a stop and will rotate 360 degrees. As the adjuster is a barrel valve, if the knob is rotated past six it returns to position 1. In the rear, turn the rebound adjustment all the way counterclockwise to full stiff and back off three clicks.

To fine-tune the shocks, start with front compression damping. Find a stretch of road with a bump or dip, drive the car through it at 15-20 mph. If the suspension is too soft, increase the compression damping; if it is too harsh, decrease the damping. Repeat the process until the compression damping is optimized.

For rebound damping use the same driving evaluation. If the car is stiff on rebound and it stops moving and you don’t, that is if the seatbelt feels like it tightens up on return after compression, decrease the rebound setting. In the rear, start with the adjustment turned all the way counterclockwise, then back off three clicks clockwise, do the dip test, and adjust as necessary.

Aldan’s Road Comp system for Buick Rivieras allows the ride height to be lowered properly up to 2 inches. A wide range of adjustment options allow the suspension to be tuned to your liking;. Aldan shocks come with a lifetime warranty. That really is the way to build a better Buick.

man using impact gun to take off bolts on wheels
2. Aldan’s resident technical guru, Gary Nelson, took charge of installing the Road Comp front coilovers and rear shocks on this ’65 Riviera.
close up of mounting stud
3. The stock front shocks fit inside the original coil springs, the upper mounting studs fit through holes in the top and bottom rubber bushings.
close up of shock absorber
4. At the bottom the stock shock absorber attaches with a crossbar that bolts to the control arm. Note the bolts go in from the bottom.
removing black springs
5. With the spindles separated from the ball joints in the upper control arms and the strut rods, the lower control arm is slowly lowered on a jack to remove the spring.
all new shocks, springs, and hardware
6. Aldan’s complete kit for ’63-65 Buick Riveras includes front coilovers, rear shocks, mounting hardware, and the proper spring preload spanner wrench.
using hammer to break factory spot welds
7. To remove the nuts that secure the front shocks to the control arms, Gary has found smacking the bolts with a hammer easily breaks the factory spot welds.
old and new control arms side by side
8. Compare the stock Riviera control arm (right) to the modified arm (left). The factory coil spring pocket is cut away to make room for the coilover. A plasma cutter or small reciprocating saw works best.
brand new coil over without spring
9. The is the front coilover without the spring. The knob (arrow) is for compression adjustments.
applying antiseize to coilover
10. Before the springs are installed antiseize is applied to the threads on the shock body. Aldan recommends copper antiseize, adding “it doesn’t have to be frosted like a cake.”
new thrust bearing assemblies
11. To make ride height adjustments easier, Aldan supplies thrust bearing assemblies that go between the coils and the spring seats.
new springs
12. Aldan coilover springs are marked with the spring rate—the number of pounds required to compress the spring 1 inch. These are 550-pound springs, the Riviera uses 700-pound.
coilover mount
13. This is the lower coilover mount that fits inside the lower control arm.
new coilover installed
14. When installing the front coilovers position the shocks so the compression adjustment knob is accessible, and the spring has approximately 1 inch of preload.
coilover adjustment tool
15. Aldan supplies this tool to adjust the coilover’s spring preload.
close up of pinch bolt
16. Once the spring’s preload has been finalized, the pinch bolt (arrow) secures the adjustment.
close up of double adjustments
17. Aldan’s double-adjustable front coilovers and shocks provide 120 unique combinations of settings. The rear shocks offer 11 adjustment settings.
close up of adjustable knob
18. The rebound adjustment knob is located at the top of the shock; it must be removed during installation by turning it counterclockwise.
removing rebound knob
19. Follow the included instructions when removing the rebound knob. It’s not necessary to remove the setscrews on the knob. Also, use caution when there is also a floating pin that may come out.
upper shock bushings
20. When installing the upper shock bushings, the large diameters go against the washers, the small diameter projections fit into the frame.
adjustment knob
21. With the upper shock stud secured the adjustment knob can be reinstalled.
rebound adjustment
22. This is the rebound adjustment on the rear shocks for the Riviera. It’s located in the top mount. Turning it counterclockwise reduces rebound, clockwise increases it.
close up of top bushing
23. The rear TrueLine shocks have urethane bushing top and bottom. The upper mount fits over the factory stud.
On the lower end the rear shocks fit between the factory mounting tabs and are secured with the included hardware.
24. On the lower end the rear shocks fit between the factory mounting tabs and are secured with the included hardware.
Aldan American
(310) 384-7478
aldanamerican.com
Modern Rodding

VOLUME 4 • ISSUE 34 • 2023