Modern Rodding TECH
InTheGarageMedia.com
By Brian Brennan Photography by THE AUTHOR Videography By Ryan Foss Productions
Off With the Old and on With the Old
1. Out Project ’55 Chevy wagon resting in the In The Garage Media Tech Center ready for the roof swap.
55 Chevy Wagon in garage
1. Out Project ’55 Chevy wagon resting in the In The Garage Media Tech Center ready for the roof swap.
Keeping the Patina Look by Swapping Roofs
S

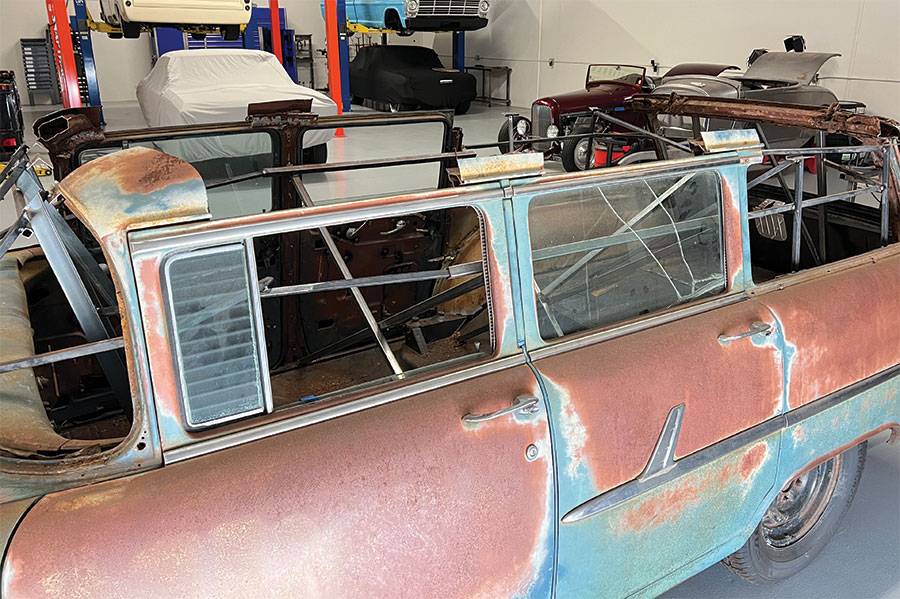
ometimes hot rodders have been known to “drive the long way around the barn” to get to their final goal. It sure seems like that’s the case for our Modern Rodding Project ’55 Chevy Wagon. We’ve been tinkering with small projects so far, like removing and replacing the spare tirewell as well as the tailgate (special thanks to Danchuk for helping us out on those projects). But the latest effort is a doozy. We want to keep the patina look but upgrade and make roadworthy the remainder of our ’55 Chevy wagon.

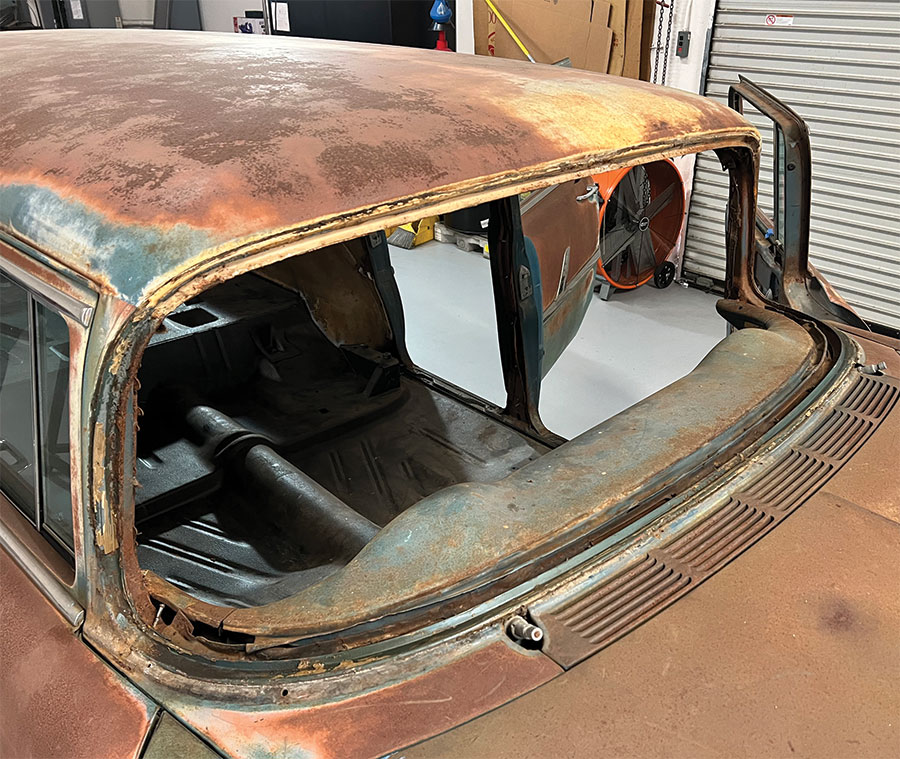
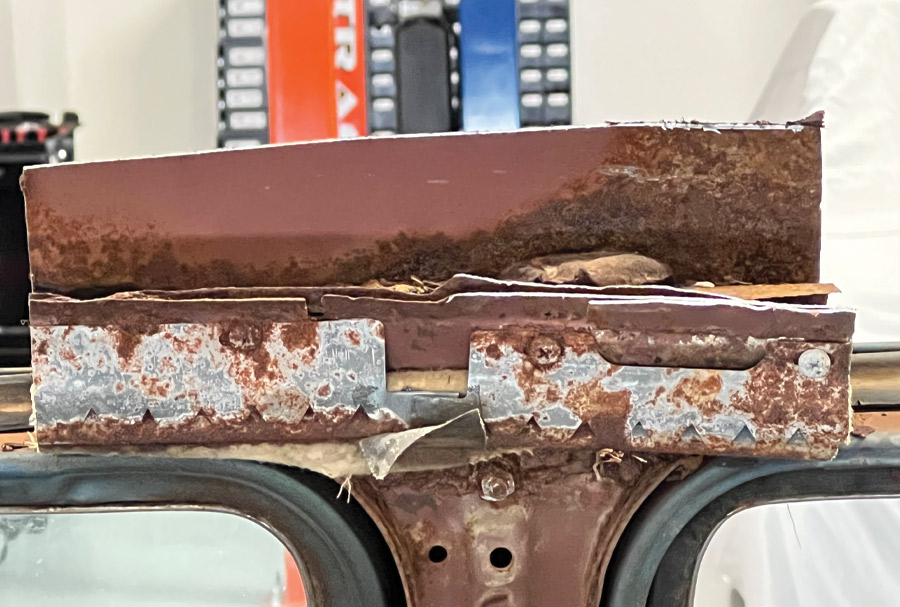
The first step was to go through the self-analysis of the sheetmetal. Well, it’s loaded with what you would expect from years of hard-earned patina—thoroughly abused paint (or lack thereof) and rust. Really good rust; you know, the kind that you can see through! That was our first clue that something had to be done to our ’55 Chevy wagon roof—patina is good, holes aren’t. Upon close inspection and the fact that we could see through the holes in the roof in the rain gutter area had us scratching our heads. Apparently, Plato, the Greek philosopher dude, had a rust problem on his Chevy wagon. His writings were once translated to say: “The true creator is necessity, who is the mother of our invention.” And that’s exactly where we found ourselves. We needed to think and come up with a solution.

Our solution was to find another ’55 Chevy wagon and cut the patina roof off of it and install it on our wagon. As I was writing this out it sure sounds like a marginal idea at best. But alas, that’s what we did. We found another patina-ridden wagon and removed the roof from it and took our Swiss cheese–looking roof off and replaced it with another one that looked just as “bad” minus the “rust windows.”

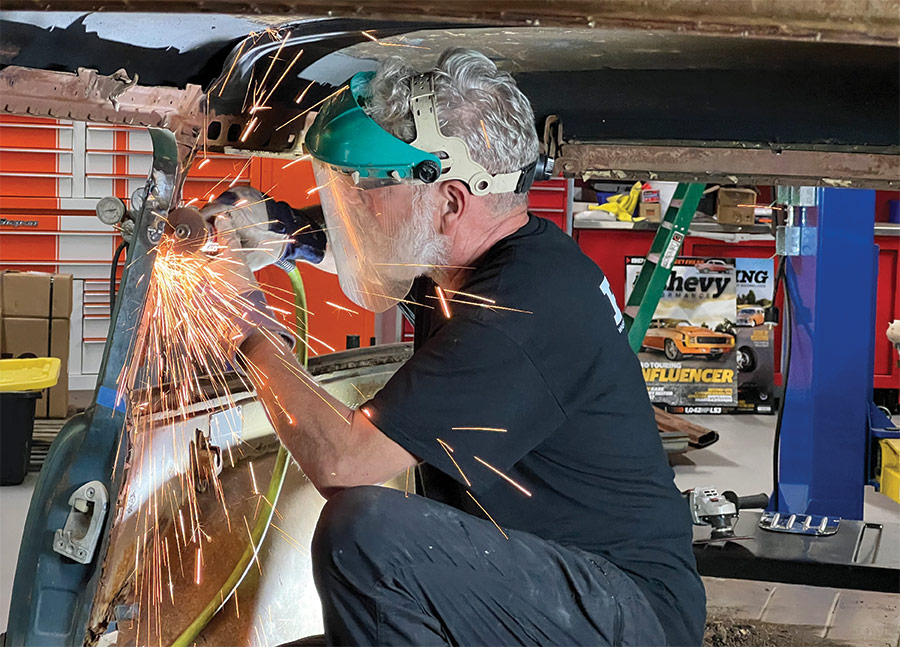
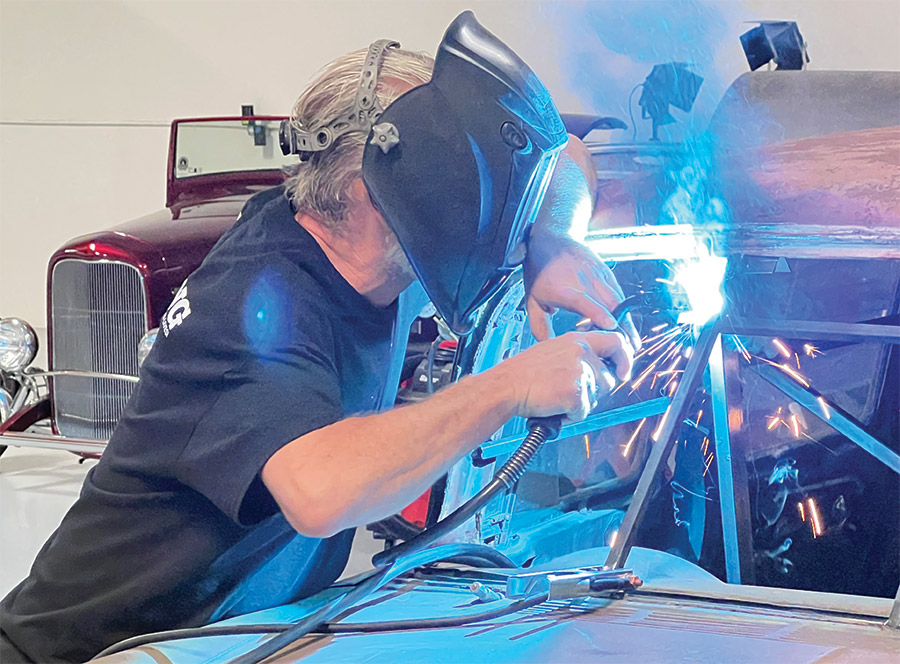
We figured if we came up with this idea there must be other rodders with equally as questionable intellect and we should share the step-by-step approach. Working in our In The Garage Media Tech Center we began the process. Since a project like this really requires a metal man with expertise and a great deal of confidence, we knew exactly who to go to. For this we turned to Kev Elliott of Kev’s Rod & Custom located nearby. Elliott is truly a metal man supreme, but he’s also a “magazine guy” so he understood our dilemma of needing the work done but also in such a way that we could share what was done for the rest of us to see.

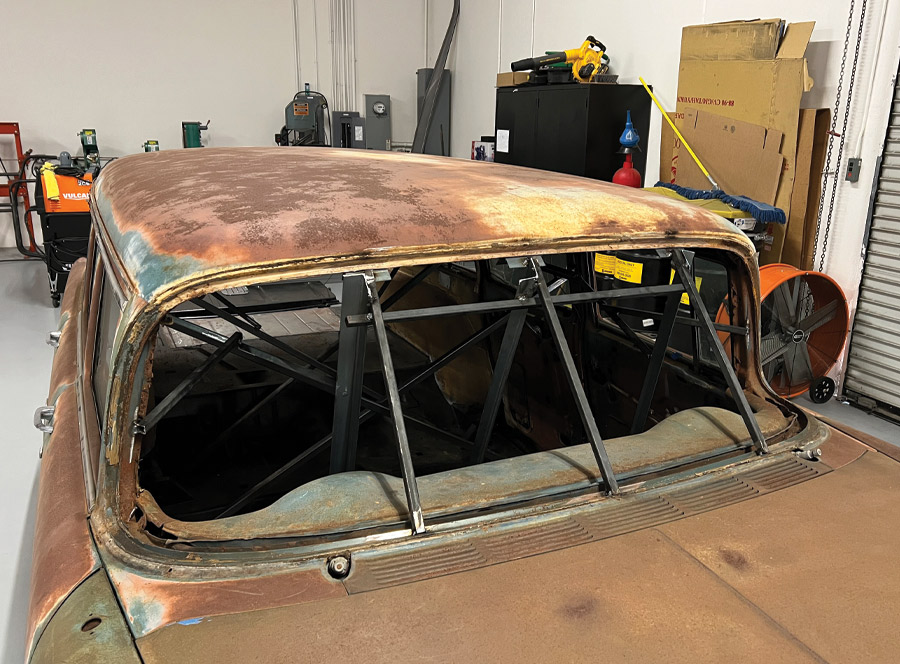
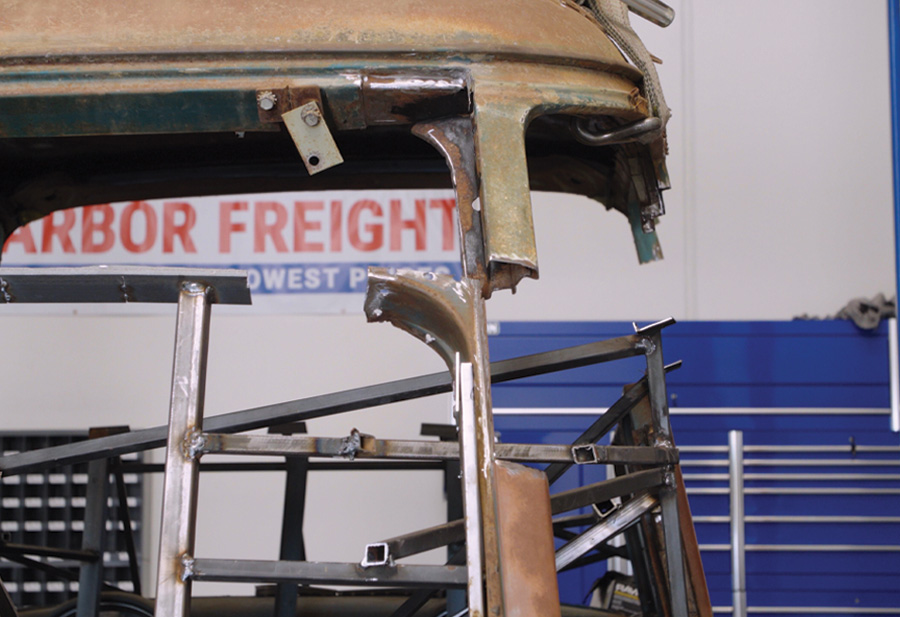
An important step was to brace the sheetmetal (doors, windshield, tailgate, and so on) areas other than the roof so nothing moves. We want the sheetmetal to stay in position so when the roof is removed it will stay in position so that the new top will drop into position. There will be some adjustment, but the new top should go on without much drama. There will be bracing in the windshield, side windows, across the back, and several X-braces throughout the interior. Once this bracing is in position, we can cut the roof off. Remember, there will be no bracing attaching to the roof.

Something to keep in mind, you might want to keep some POR-15 on hand as you will want to paint exposed areas within the pillars that show rust. (All the pillars will be showing rust.) Make sure not to get POR-15 on any areas to be welded; that’s a no-no.

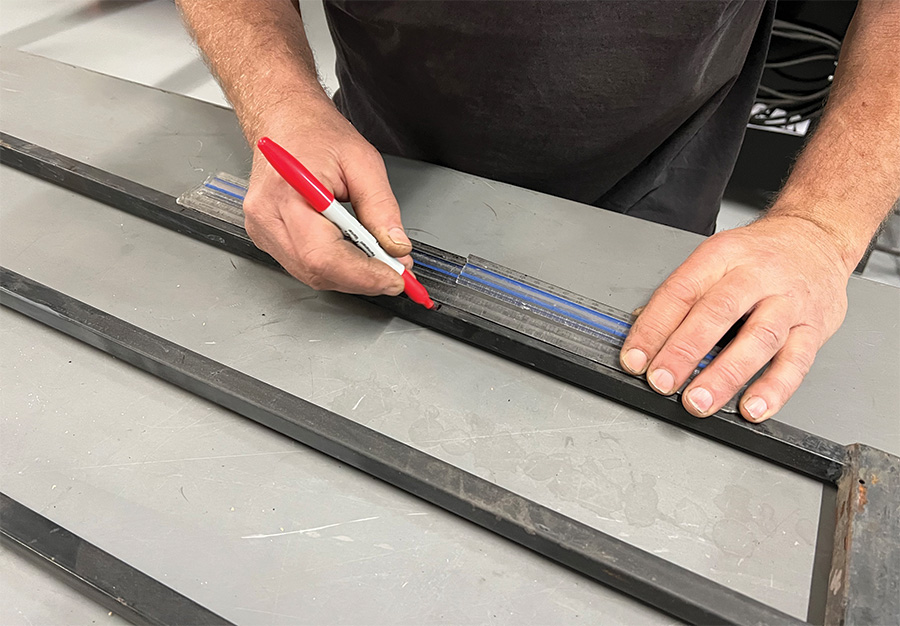
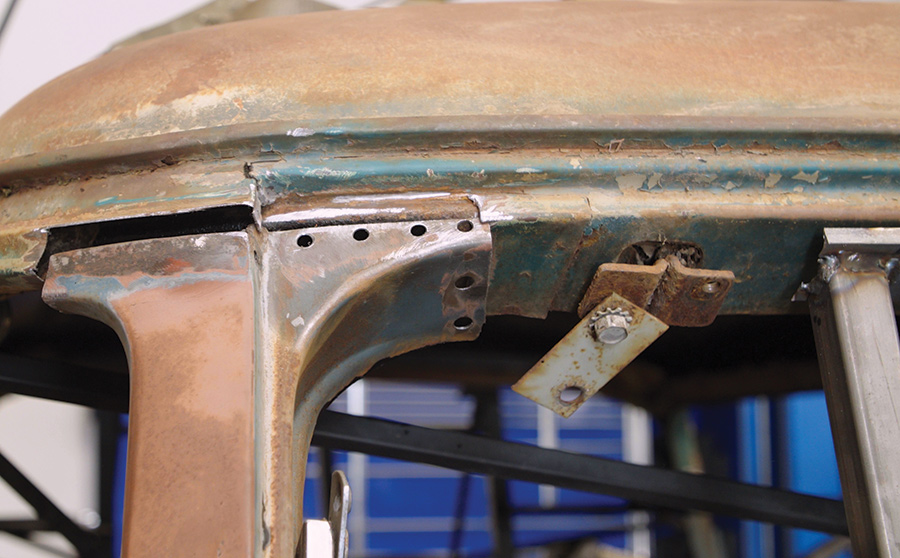
Next you are going to match the posts that remain on the car and what’s been removed from the new top. The curved area near each of the window pillars is particularly important. Elliott made cardboard templates from the curves on the car to now copy over to the new roof. It’s especially important at all the door/pillar areas.

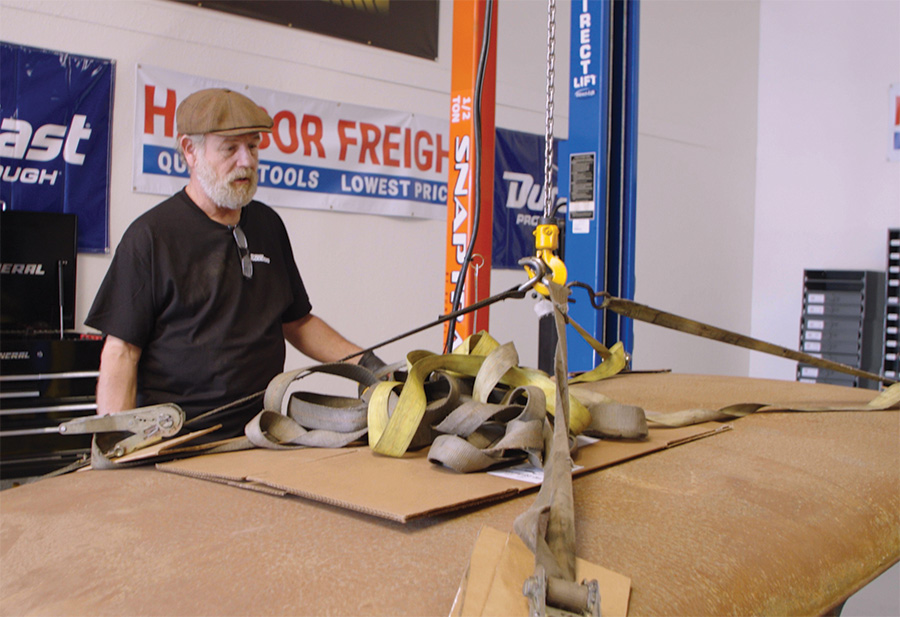
With the bracing in place, the appropriate cuts made it so the top can be pealed off. Once the cuts are matched to the new top and the original sheetmetal the top can be lowered into position. In our case we used our SnapTrac crane to easily move the top around and get it into position. If you don’t have some form of crane to lift the new top it will take at least four (six would be better) guys to lift, position, and lower into place.

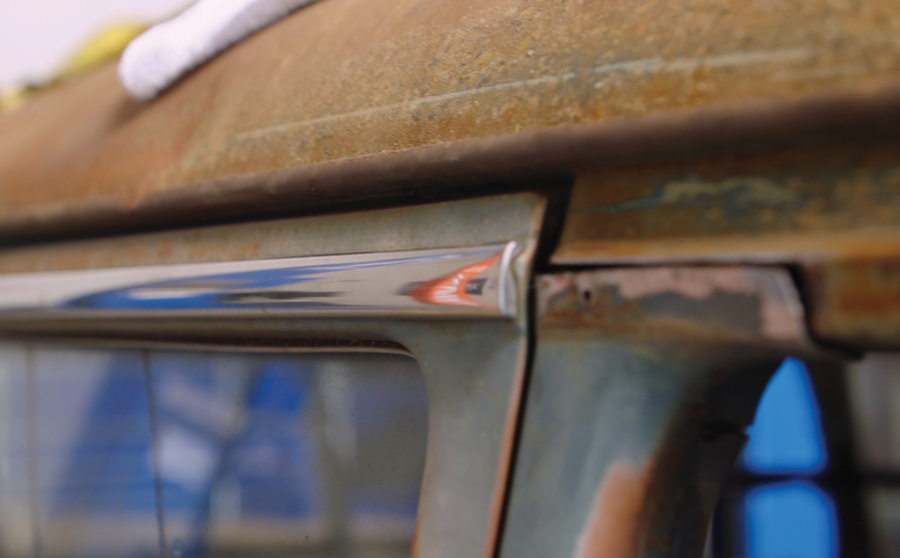
It will take some repositioning and trimming to make all the corners fit but patience will win out. The result is the removal of a very weak roof and a new sturdy one installed. Also, we have managed to keep the patina appearance, which was one of our primary goals. Next up, we will begin working on the suspension and the powertrain.

Kev Elliott, of Kev’s Rod & Custom, came over and handled our roof swap
2. Kev Elliott, of Kev’s Rod & Custom, came over and handled our roof swap. We’ve seen him tackle this job before with great results on his ’55 Chevy wagon a few years back.
The primary tool required for this effort will be a good weld
3. The primary tool required for this effort will be a good weld. Here we used the Harbor Freight Vulcan Omnipro 220 Industrial Multiprocess Welder with 120/240V input. It can be used for MIG, stick (DC), TIG (DC), or flux-core welding.
This Hercules battery-powered cutoff wheel from Harbor Freight was another very handy tool
4. This Hercules battery-powered cutoff wheel from Harbor Freight was another very handy tool. We used a 20V brushless, cordless angle grinder (PN 56903).
Another useful tool is this Chief Pneumatic 1/4-inch professional mini die grinder
5. Another useful tool is this Chief Pneumatic 1/4-inch professional mini die grinder (PN 64371).
First look with the glass out so that we can see the channels around the glass, looking for severe rust
6. First look with the glass out so that we can see the channels around the glass, looking for severe rust. So far pretty good.
The integrity of the roof is completely gone and to continue to use the car in this fashion isn’t doable
7. OK, now the problems start to make themselves known. Patina is one thing but the ability to see through the roof means there is a much bigger problem. The integrity of the roof is completely gone and to continue to use the car in this fashion isn’t doable.
We rounded up several pieces of scrap square or rectangular tubing
8. Now that we’ve made the decision to remove the roof, where do we start? We rounded up several pieces of scrap square or rectangular tubing. We began to measure, cut, and develop a skeleton framework that would rest inside the body before the roof is removed.
Measure carefully as this skeleton will hold the sheetmetal structure of the car in place once the roof is removed
9. It takes patience, and you will want to measure carefully as this skeleton will hold the sheetmetal structure of the car in place once the roof is removed. Elliott is seen here (along with Jason Scudellari from the tech center) measuring from within the windshield channel as this is the point where the skeleton will rest.
Once all the pieces are measured, cut, and positioned then you will go back with your handy welder and begin assembling the inner structure
10. Once all the pieces are measured, cut, and positioned then you will go back with your handy welder and begin assembling the inner structure. Remember, you will want to hold all phases of the sheetmetal body in exact position once the roof is removed.
Once the new roof is added it will be at the proper ride and you can then weld the new top into position
11. It’s simple but takes forethought to make sure you have positioned the framework in the proper location. Note this is the framework that will hold the windshield area in exact position. Once the new roof is added it will be at the proper ride and you can then weld the new top into position.
It’s beginning to look like the inner workings of a suspension bridge … or something along those lines
12. It’s beginning to look like the inner workings of a suspension bridge … or something along those lines. You are beginning to see that once the roof is removed the sheetmetal sides cannot move, that’s our (and your) goal.
It’s important to save as much of the inner structure as you can, as well as all the corners, door posts, and so on

13. It’s important to save as much of the inner structure as you can, as well as all the corners, door posts, and so on. It is these junction points that will help tremendously in making sure the roof fits properly. You can’t just butt weld the top to the existing posts … no strength. You need the inner structure that has remained an integral part of the sheetmetal to attach the new roof to.

The handy touch is necessary for removing factory lead in the front pillars

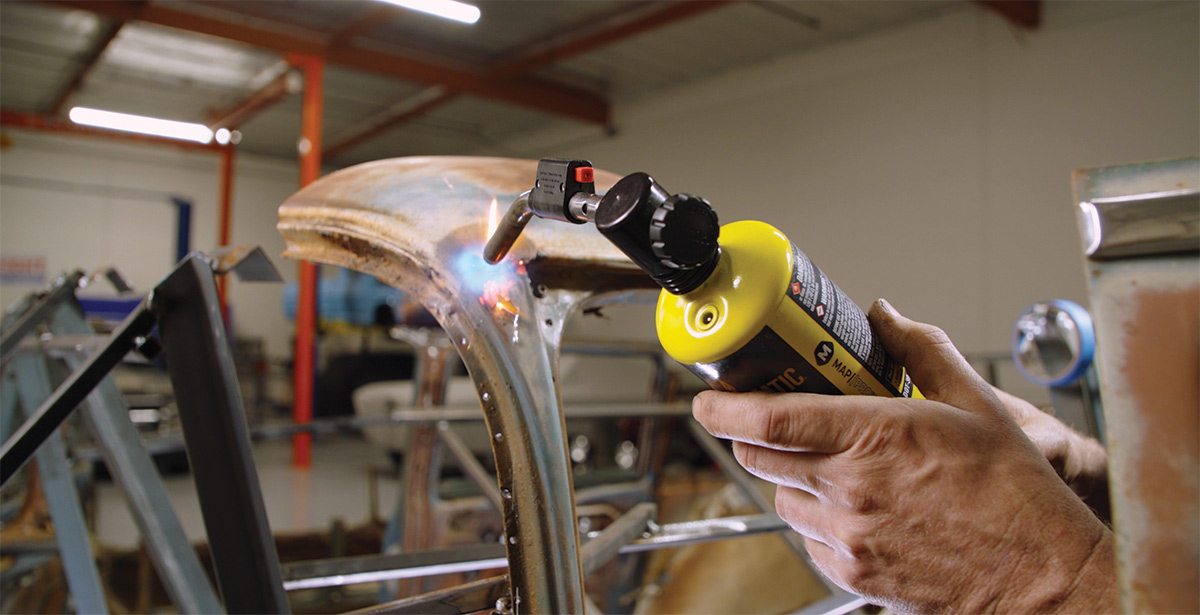
14. The handy touch is necessary for removing factory lead in the front pillars. It is at this area where the roof and the pillar join.

Drilling out the butt welds so that you can separate the inner structure from the outer posts
These corners are very important as they will provide the alignment points for the new roof as well as the inner structure that can be welded to

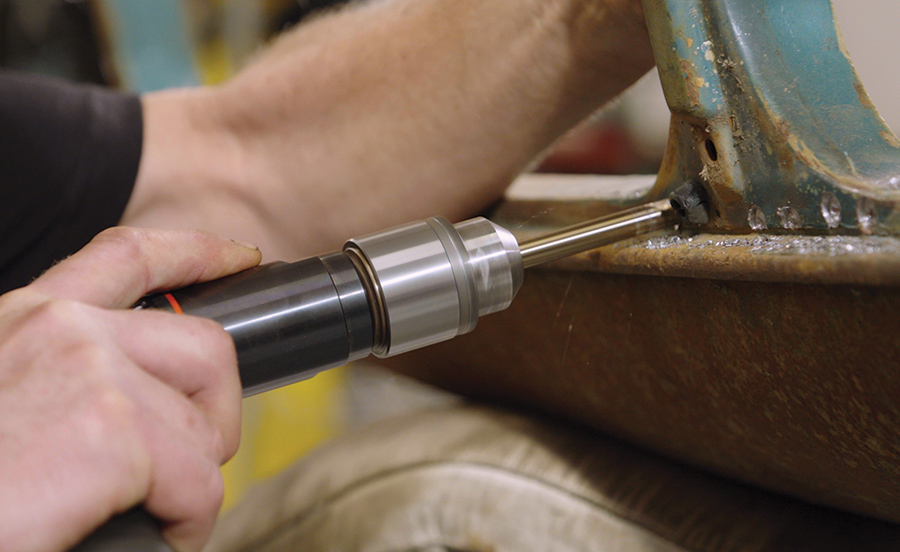
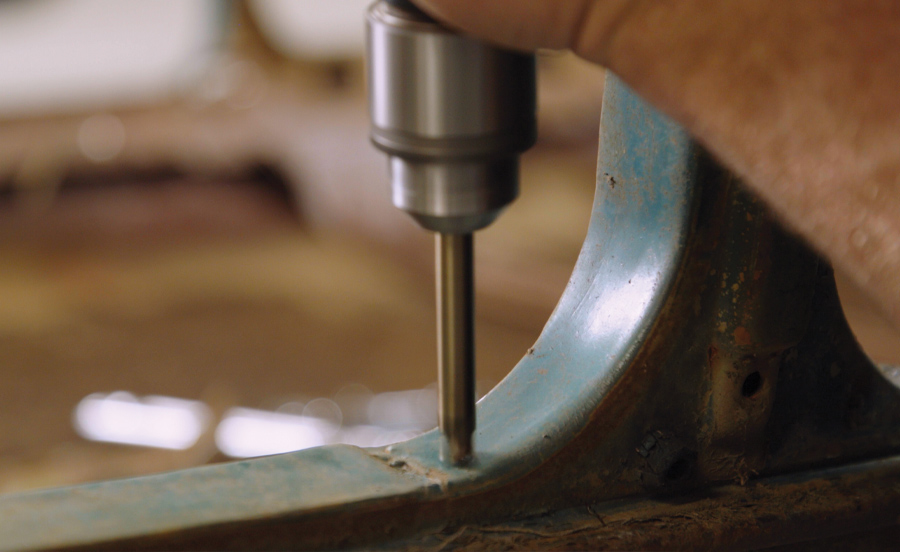
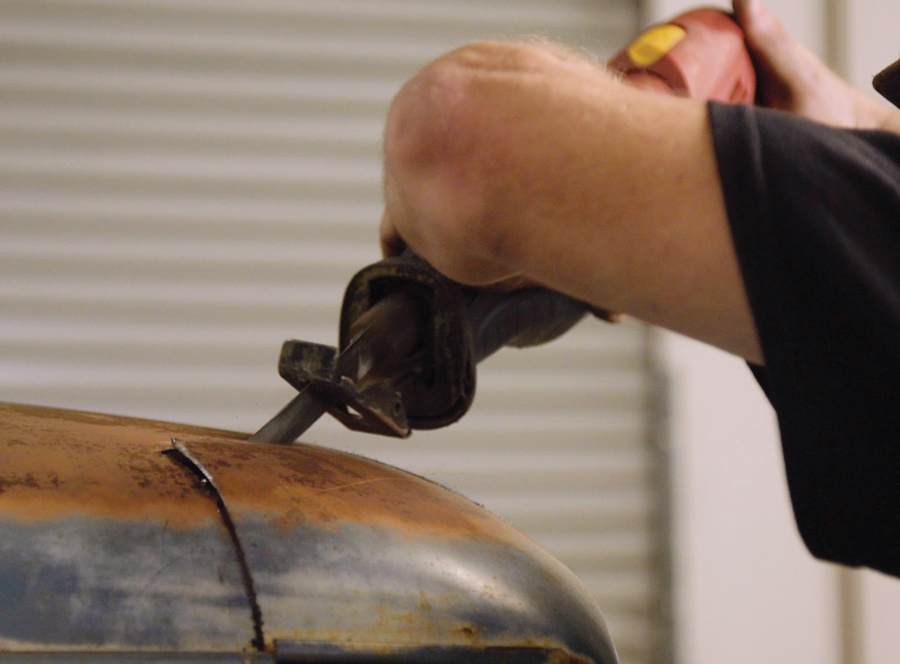
15-16. Drilling out the butt welds so that you can separate the inner structure from the outer posts. This is key. You will reuse the drilled holes as a point for new welds.

You will reuse the drilled holes as a point for new welds
17. These corners are very important as they will provide the alignment points for the new roof as well as the inner structure that can be welded to.
Overall view of the driver-side doors, outside and inside, are critical to making sure the roof aligns
You are sure to see how important the inner skeleton is to the job.
18-19. Overall view of the driver-side doors, outside and inside, are critical to making sure the roof aligns. You are sure to see how important the inner skeleton is to the job.
The door corners are especially important to making everything fit
Remember that all the stainless will have to be removed before you do any additional cutting or welding
20-21. The door corners are especially important to making everything fit. You can use cardboard templates at each of the curve points to transfer where you cut the metal on the old roof post and transfer these cuts to the new roof posts. Remember that all the stainless will have to be removed before you do any additional cutting or welding.
This is the driver side door post and the old metal around it has been cut away
You want to keep as much of this as possible as the inner structure provides the real strength that is needed
22-23. This is the driver side door post and the old metal around it has been cut away. You want to keep as much of this as possible as the inner structure provides the real strength that is needed.
Here Elliott has our “new” roof ready to be lifted into place
24. Here Elliott has our “new” roof ready to be lifted into place. You will need a minimum of four strong buddies to lift the new roof into position. Since we didn’t have any buddies available, we used our SnapTrac crane located in our In The Garage Media Tech Center.
We lowered the roof into position, making sure to properly align it
25. We lowered the roof into position, making sure to properly align it.
Elliott made the cuts on the new roof with a “little” extra metal available so that he could walk around and give a final trim to fit
26. You can see where the cuts were made on the original body/roof area as well as the new roof and how they go together like a jigsaw puzzle. Elliott made the cuts on the new roof with a “little” extra metal available so that he could walk around and give a final trim to fit.
You can see that the new roof is going to fit nicely
27. This was the problematic area originally where the stock roof was so rusted you could see through it. Make sure to remove the stainless steel as soon as possible. No need hurting it any more than it already is. You can see that the new roof is going to fit nicely.
Finish welding and bodywork will complete the roof swap
28. All the initial welding is done, and the top is in position. Finish welding and bodywork will complete the roof swap.
Our ’55 Chevy wagon is ready to move onto the next step
29. See, it looks the same except you can’t see through one side to the other. We have retained our patina appearance and the roof’s strength, thereby reaching our objectives. Our ’55 Chevy wagon is ready to move onto the next step.
In The Garage Media Tech Center
Kev’s Rod & Custom
(714) 686-8982
Modern Rodding

VOLUME 3 • ISSUE 22 • 2022