Modern Rodding TECH

InTheGarageMedia.com

'63 Impala brake system
1. We upgraded an original Impala with a CPP power brake conversion with dual master cylinder.
Double Pumper
Boosting the Braking Power on a ’63 Impala With Classic Performance Products
By Tommy Lee Byrd Photography by THE AUTHOR
B

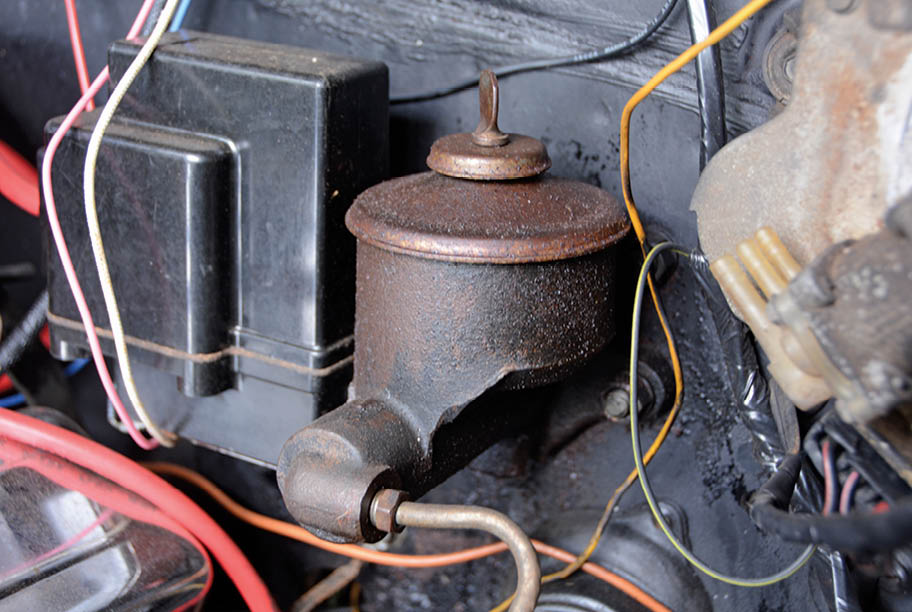
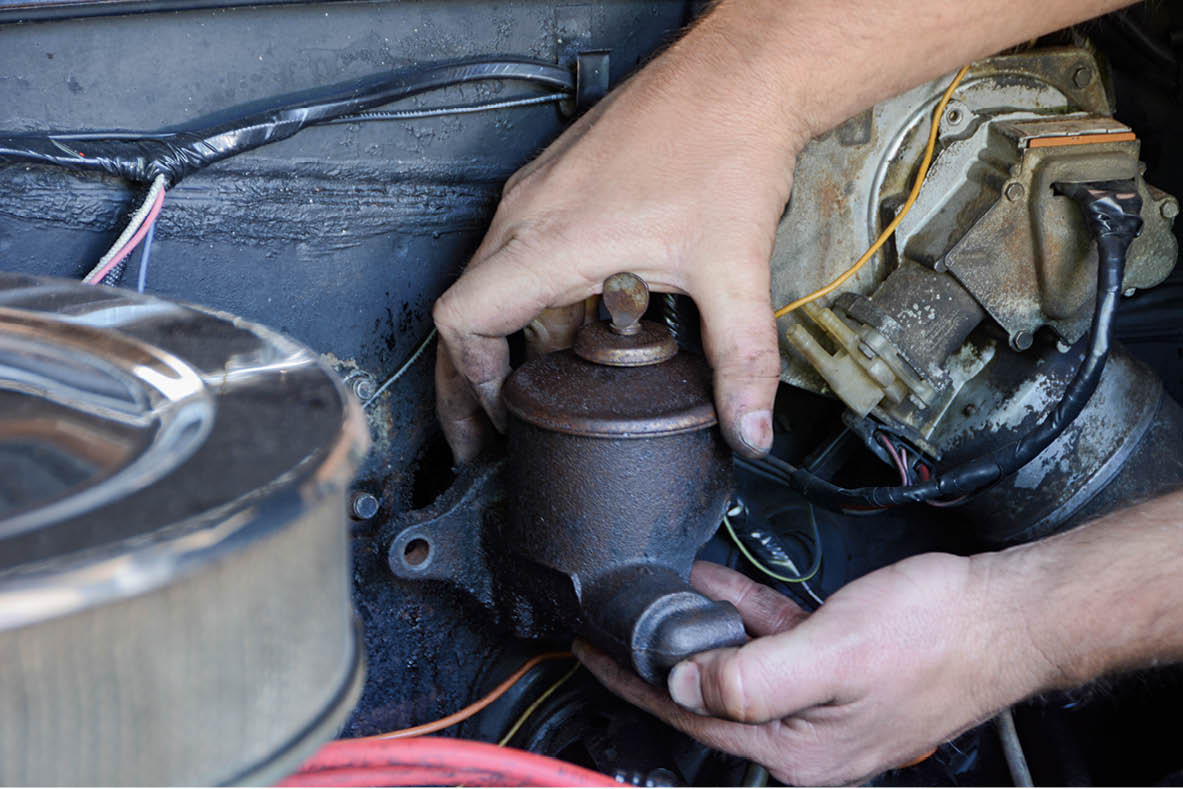
ack in the old days, no one had a second thought about driving a car with unassisted drum brakes and a single pot master cylinder. But as age creeps up on any car, the brake system can deteriorate. That means a simple leak can cause major driving concerns in a vehicle with a single pot master cylinder, as the car’s entire supply of brake fluid can be evacuated quickly. The government mandated dual circuit master cylinders for automobiles starting in 1967 to prevent these brake failures.

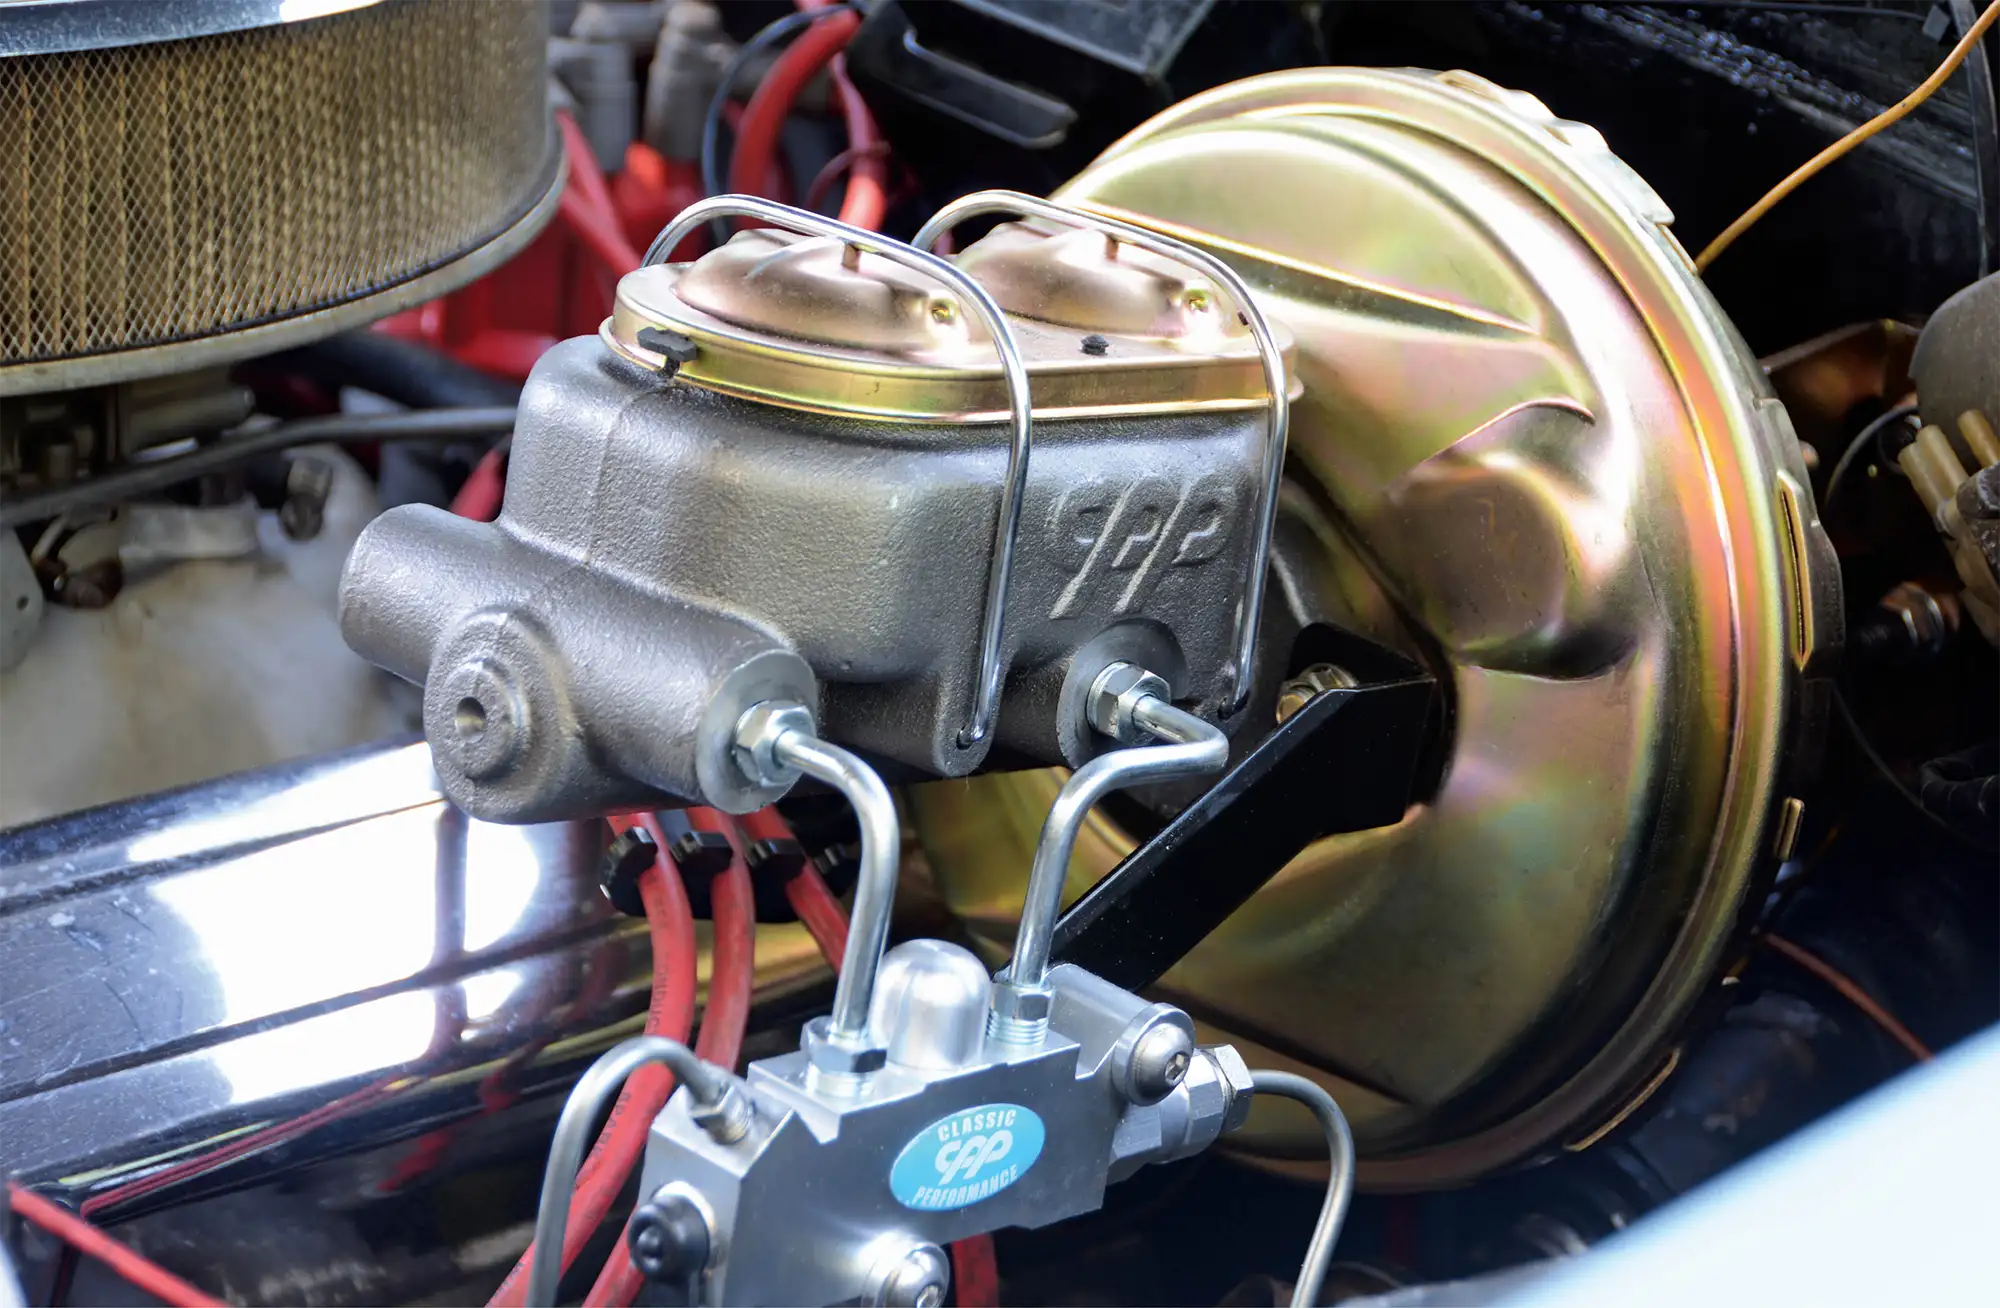
If you’re restoring a ’66 or earlier vehicle for points-style judging, then the single reservoir is a must-have item to be factory correct. If you’re planning to drive your car, a dual-reservoir master cylinder provides peace of mind that if you spring a leak under the car you’ll have at least two wheels of braking power. Dual reservoir master cylinders do not typically provide a difference in performance, but safety is the main concern. However, improper piston size or valving can create poor performance. That’s why pre-assembled kits work best for regular driving. Classic Performance Products (CPP) offers a booster and master cylinder combo that simplifies the conversion process on many makes and models.

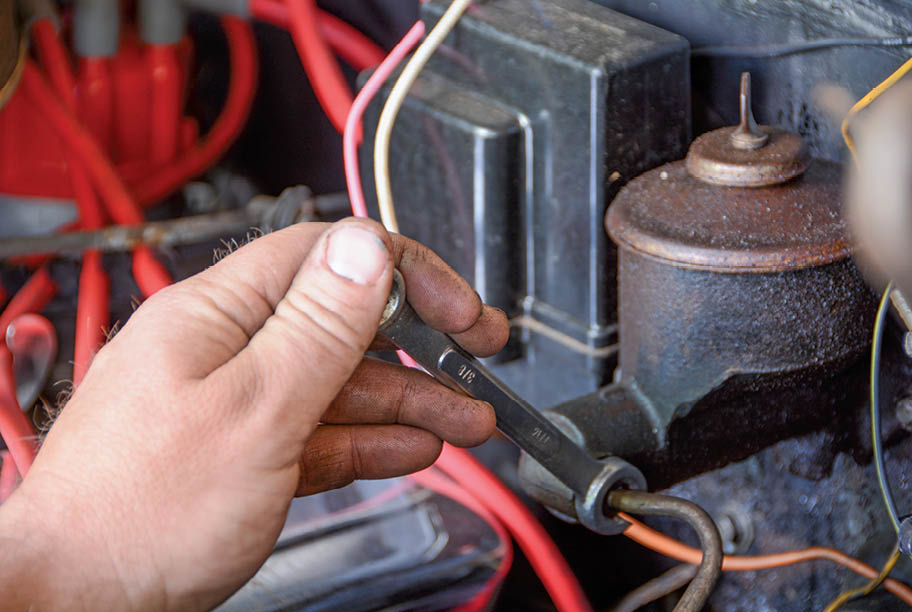
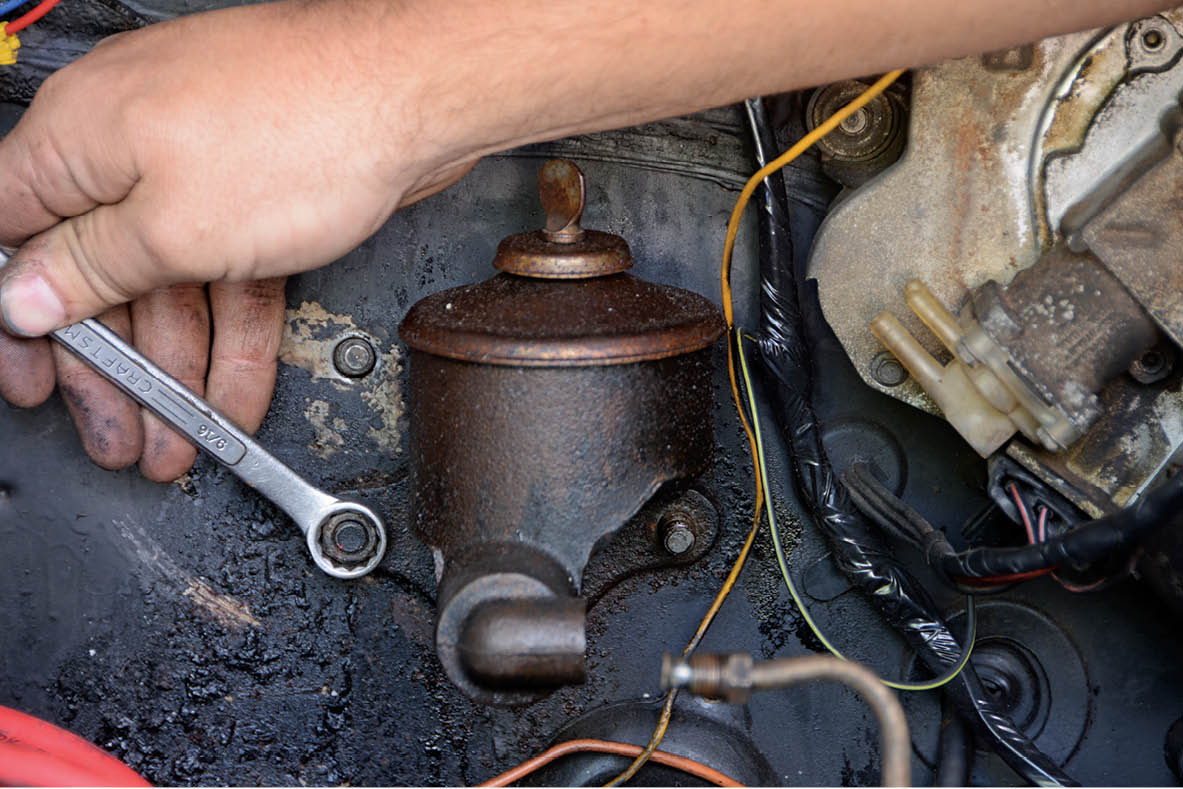
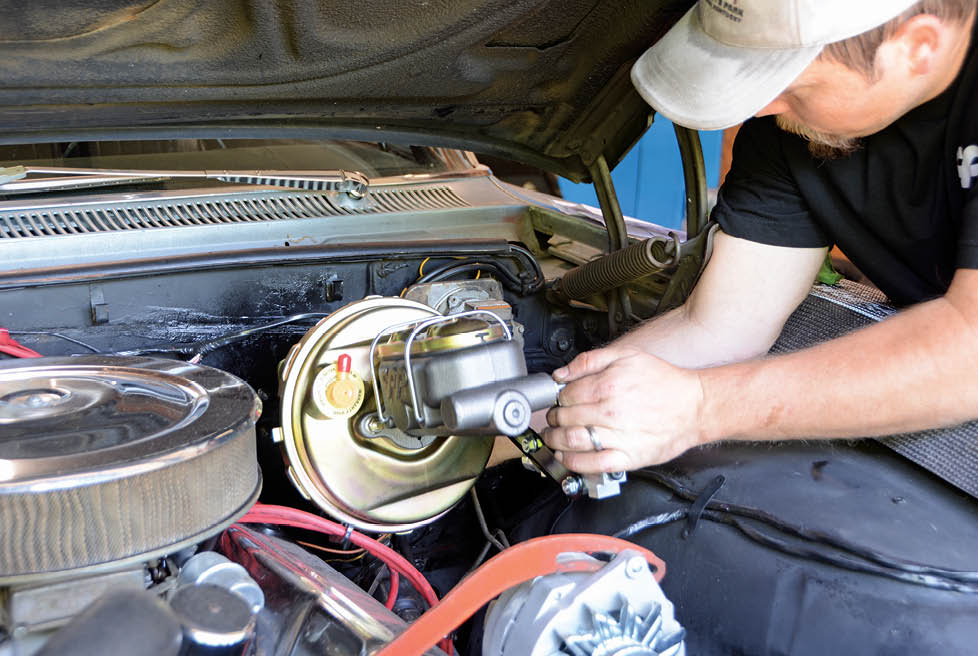
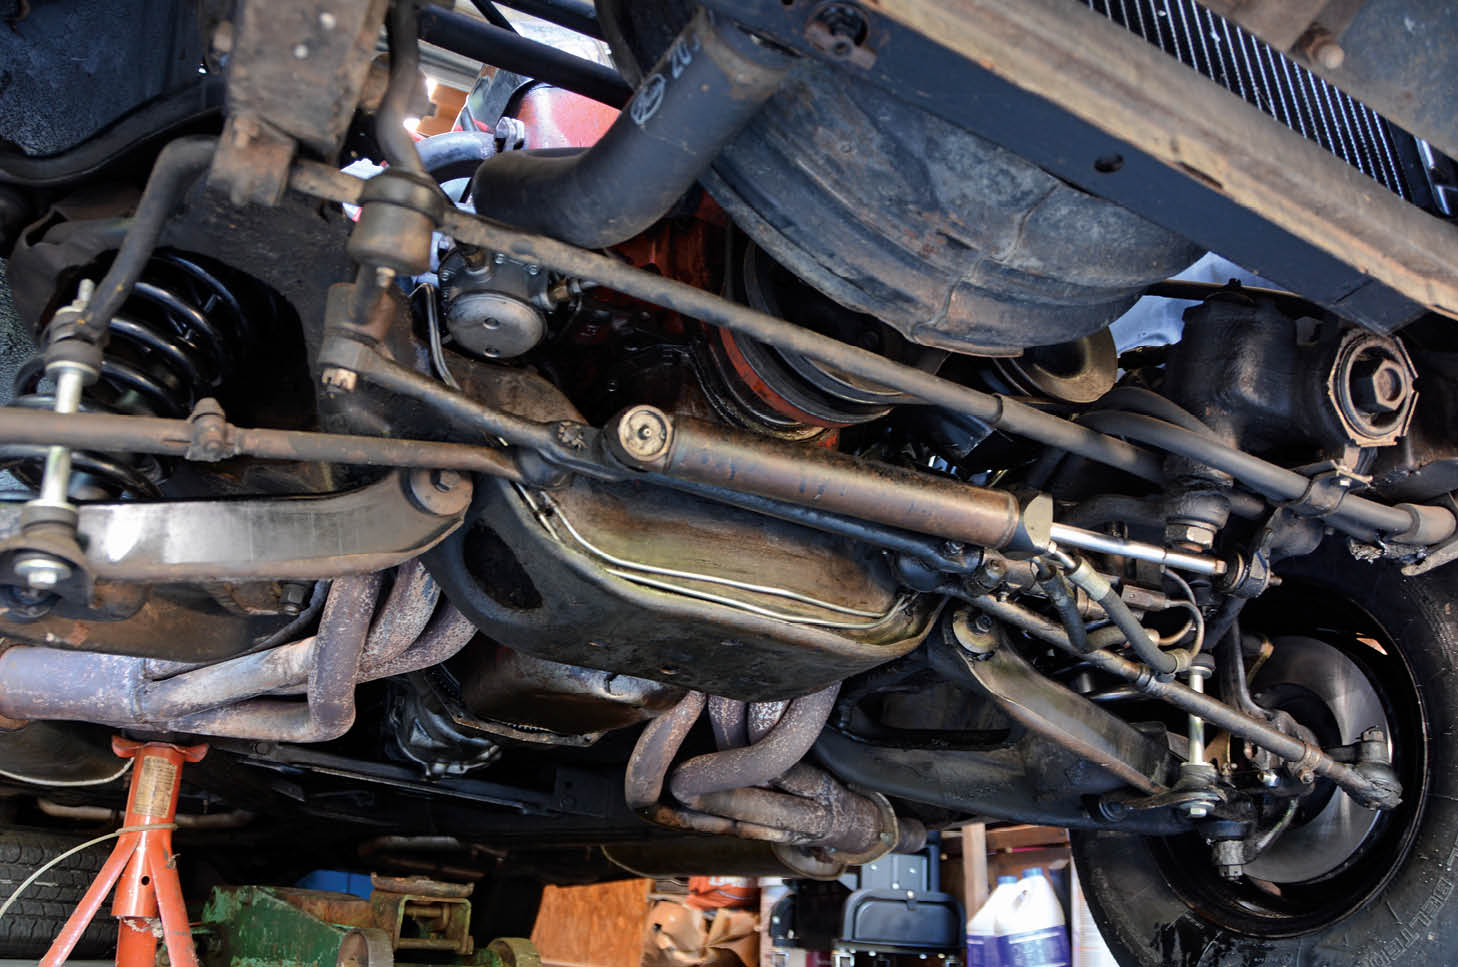
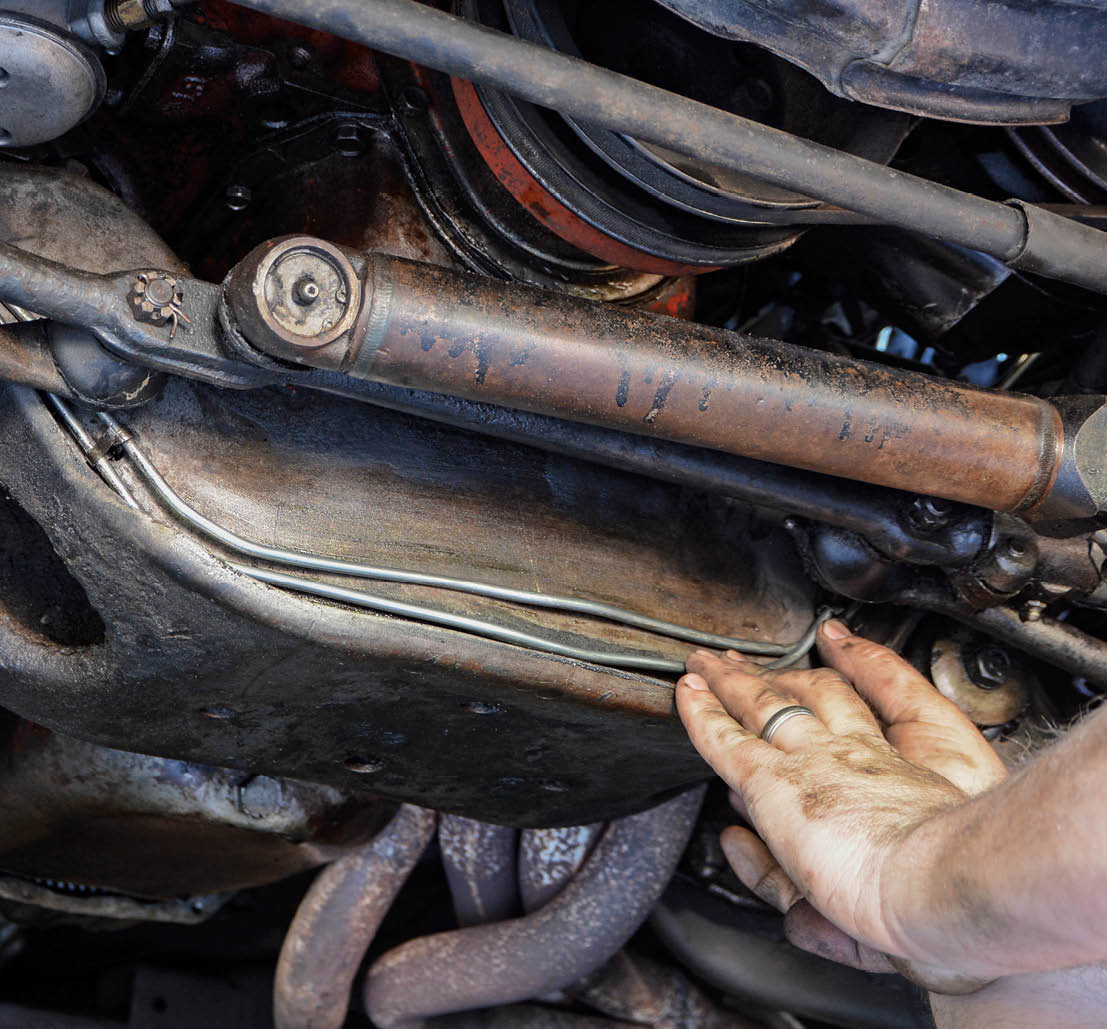
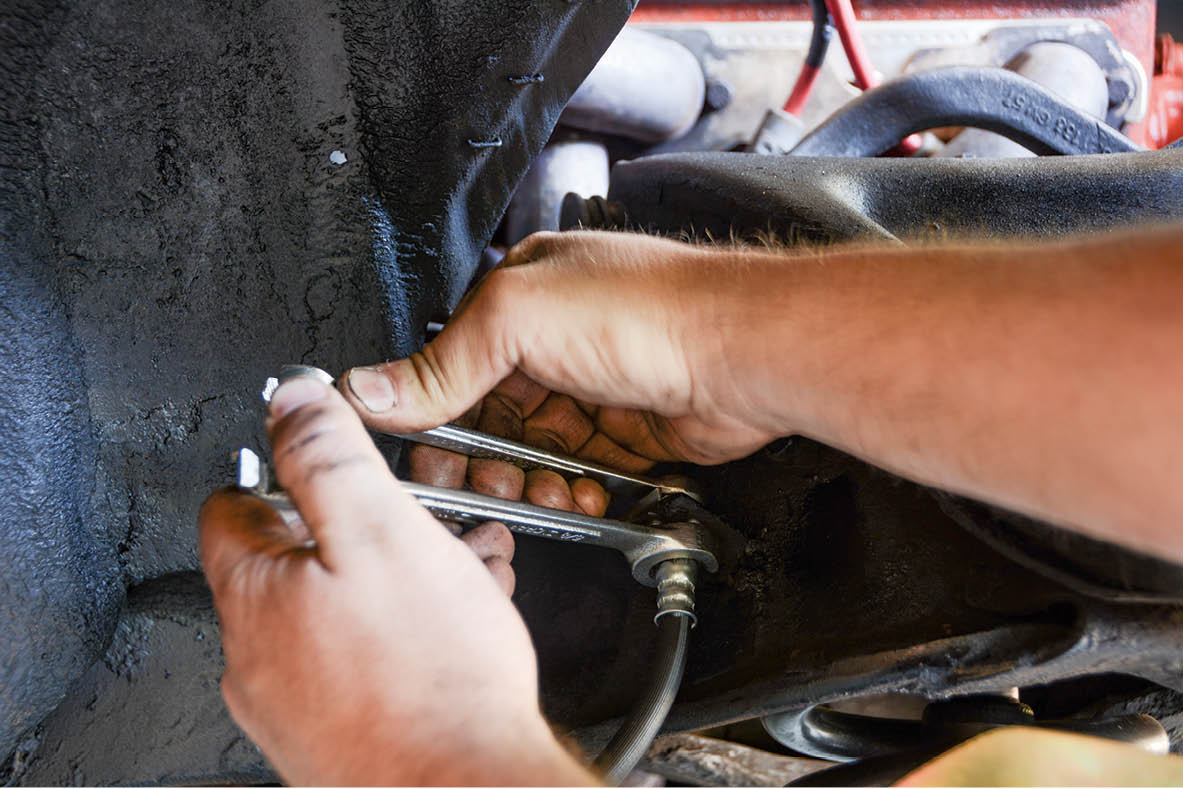
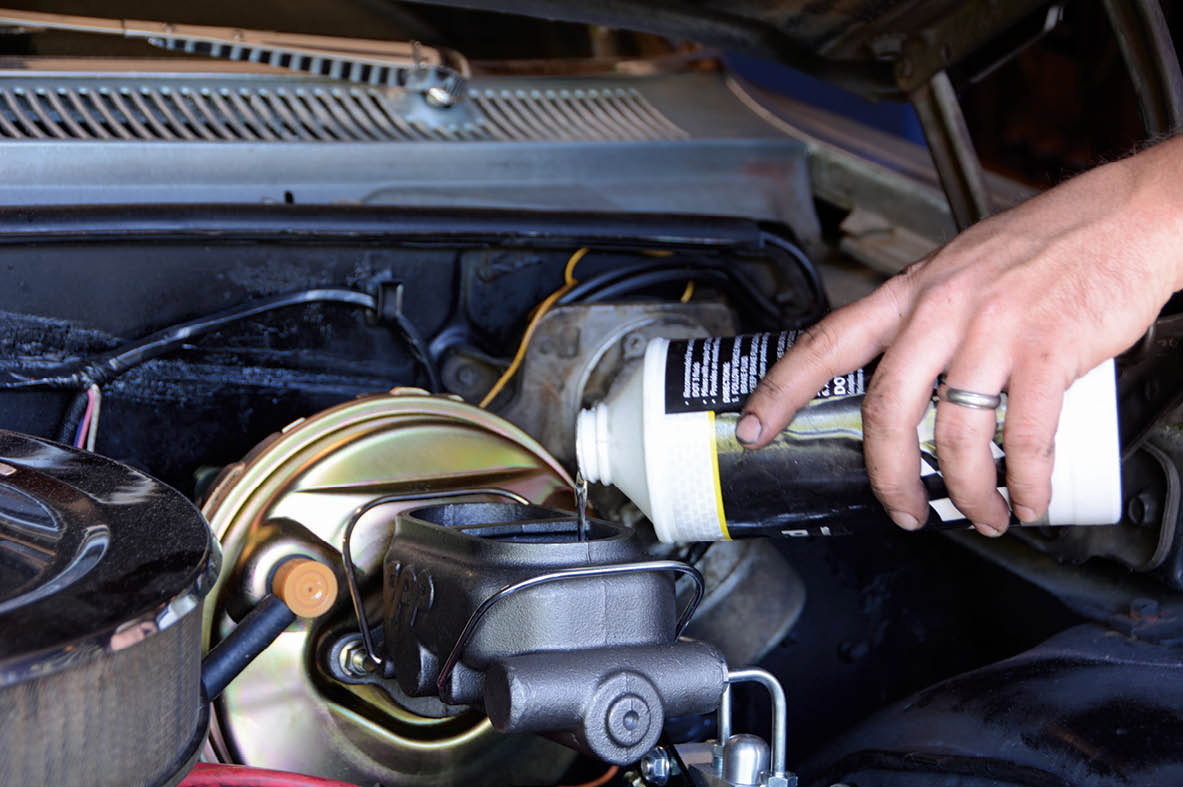
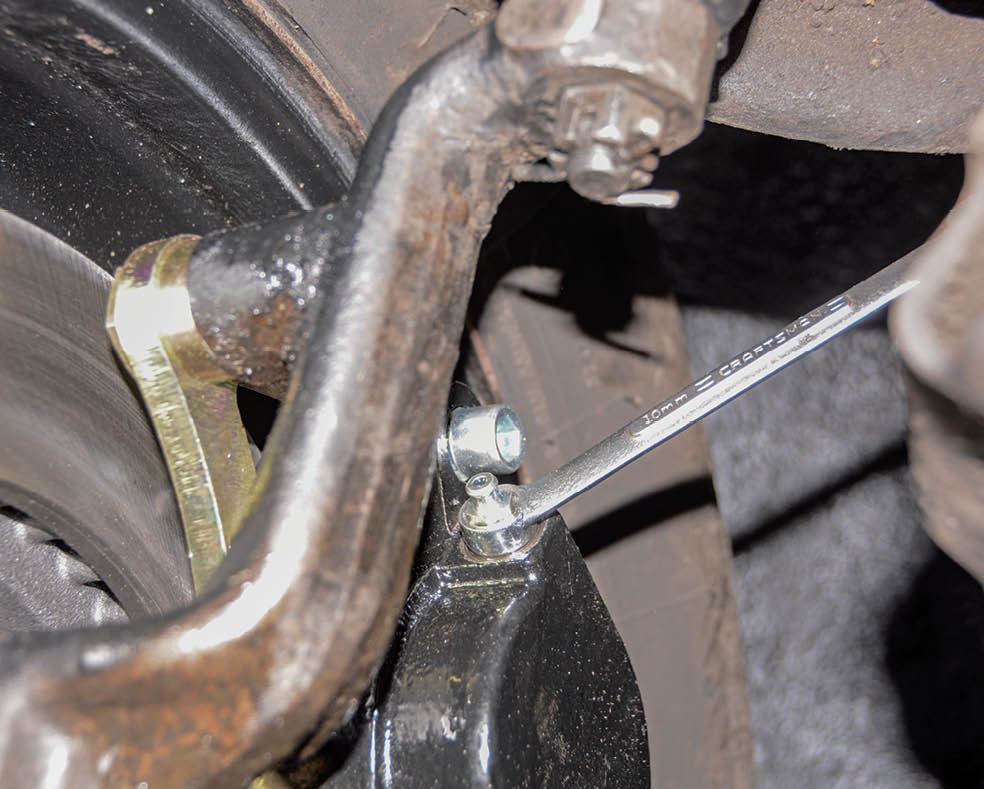
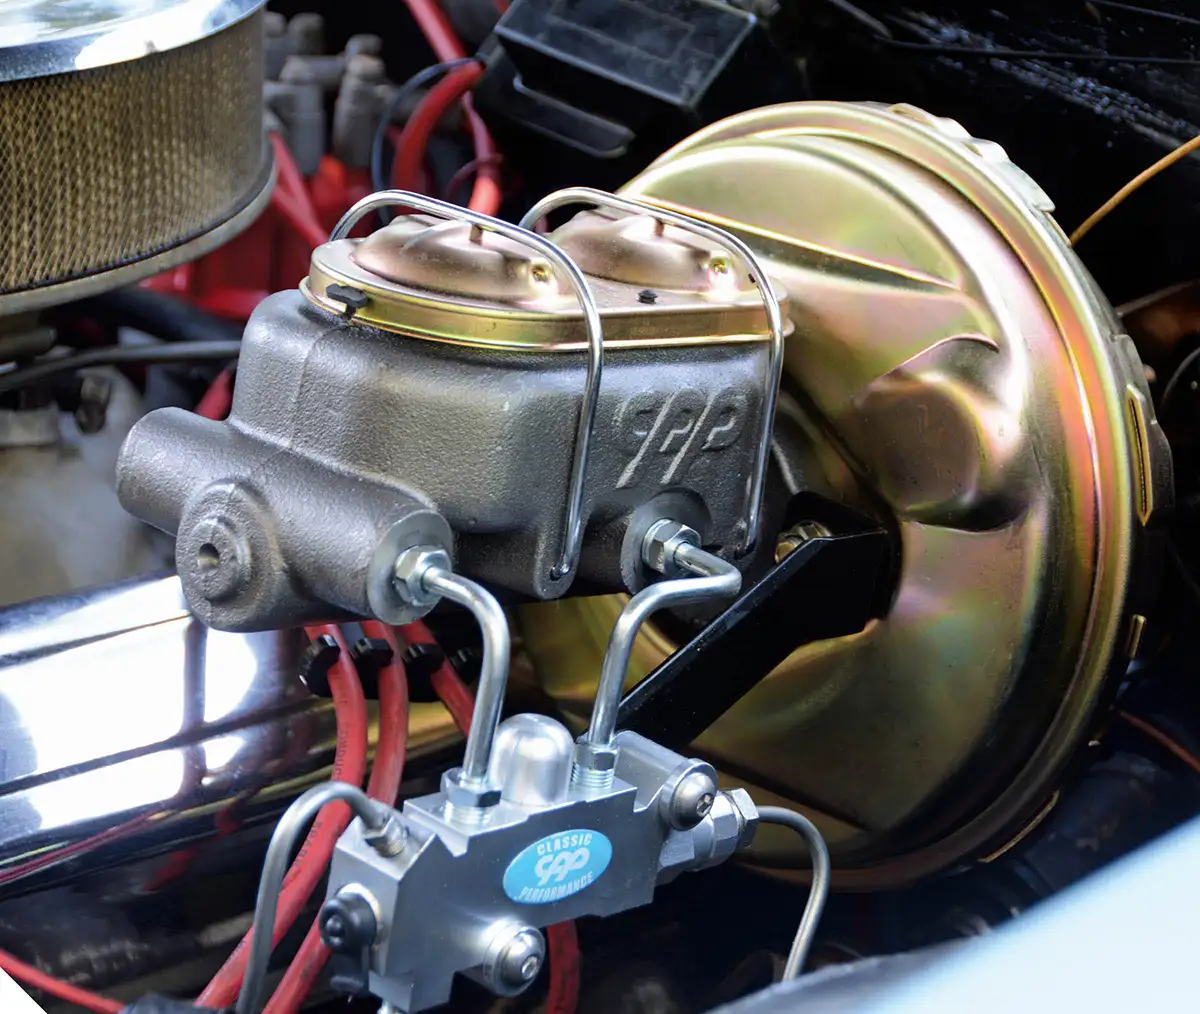
We have the ideal subject for a dual master cylinder conversion, a ’63 Chevy Impala, which has relied on a single-pot master cylinder and drum brakes its whole life. The owner wants a more reliable braking system, so the parts list includes a Classic Performance Products (CPP) firewall-mounted booster and dual master cylinder combo (PN 5864BB24). These kits can be ordered with offset mounting brackets to create more distance between the booster and engine. The kits can also be specified with various booster diameters and various valving for four-wheel drums, disc/drum, or four-wheel discs. Plumbing concerns were alleviated by a brake line kit that is designed for later Impalas (PN 5864FLK-OM).

In the next installment on this ’63 Impala we’ll be addressing the drum brakes with a budget-friendly CPP disc brake conversion, but for now we’re happy with the easy install and added dependability from the dual-reservoir master cylinder and power booster. Follow along with our tips and tricks to provide a smooth installation for your next project to ensure safe and reliable braking, no matter what you drive.

Age makes this ’63 Impala’s original singe-pot master cylinder a real hazard. A simple leak in the hard lines, flex hoses, or wheel cylinders will evacuate all the fluid and leave you in a bad situation.
2. Age makes this ’63 Impala’s original singe-pot master cylinder a real hazard. A simple leak in the hard lines, flex hoses, or wheel cylinders will evacuate all the fluid and leave you in a bad situation.
The original single line is removed from the master cylinder as well as the distribution block on the frame. It can be discarded.
3. The original single line is removed from the master cylinder as well as the distribution block on the frame. It can be discarded.
Next, the two 9/16-inch nuts are removed to free the master cylinder from the firewall.
4. Next, the two 9/16-inch nuts are removed to free the master cylinder from the firewall.
The master cylinder can slide off the firewall studs after removing the clip and retaining pin on the brake pedal.
5. The master cylinder can slide off the firewall studs after removing the clip and retaining pin on the brake pedal.
With the master cylinder removed, it’s a good time to prep and spray a little paint to protect the area from rust. While it dries, we can unbox the new CPP components.
6. With the master cylinder removed, it’s a good time to prep and spray a little paint to protect the area from rust. While it dries, we can unbox the new CPP components.
We’re using CPP’s firewall-mounted booster and dual master cylinder combo (PN 5864BB24). This kit installs easily, using the existing hardware on the firewall.
7. We’re using CPP’s firewall-mounted booster and dual master cylinder combo (PN 5864BB24). This kit installs easily, using the existing hardware on the firewall.
The CPP kit comes with a new pushrod, and we reused the original clevis, pin, and clip. After dialing in the adjustment, we slid the pin and clip into place.
8. The CPP kit comes with a new pushrod, and we reused the original clevis, pin, and clip. After dialing in the adjustment, we slid the pin and clip into place.
Next on our to-do list are the brake lines. Converting to a dual master cylinder means that the original front brake lines and blocks will not work. CPP offers a kit from a later Impala that works (PN 5864FLK-OM).
9. Next on our to-do list are the brake lines. Converting to a dual master cylinder means that the original front brake lines and blocks will not work. CPP offers a kit from a later Impala that works (PN 5864FLK-OM).
There are brake distribution blocks on the driver and passenger side framerails. Both blocks are removed and discarded.
10. There are brake distribution blocks on the driver and passenger side framerails. Both blocks are removed and discarded.
Underneath, we remove the old crossover brake line and replace it with the two new lines from the CPP kit.
11. Underneath, we remove the old crossover brake line and replace it with the two new lines from the CPP kit.
The lines are pre-bent but require some fine-tuning to fit in with the original retaining clips.
12. The lines are pre-bent but require some fine-tuning to fit in with the original retaining clips.
On the passenger side, you can see the straight brake line ties into the rear line with a junction fitting, while the pre-bent line goes directly to the bulkhead for the flex hose.
13. On the passenger side, you can see the straight brake line ties into the rear line with a junction fitting, while the pre-bent line goes directly to the bulkhead for the flex hose.
The hard lines are connected to the new rubber flex hoses, and new retaining clips are used to hold it in place.
14. The hard lines are connected to the new rubber flex hoses, and new retaining clips are used to hold it in place.
Now that the lower hard lines are installed, we can loosen the lines on the top side and remove the master cylinder for bench bleeding.
15. Now that the lower hard lines are installed, we can loosen the lines on the top side and remove the master cylinder for bench bleeding.
The CPP kit comes with the tubes and fittings needed for bench bleeding. We placed the master cylinder in a vise, being sure that it was level, and filled it with brake fluid.
16. The CPP kit comes with the tubes and fittings needed for bench bleeding. We placed the master cylinder in a vise, being sure that it was level, and filled it with brake fluid.
Using a broom handle, we depress the piston fully and watch for bubbles to pass through the clear hose. When the bubbles go away, all the air is out of the master cylinder.
17. Using a broom handle, we depress the piston fully and watch for bubbles to pass through the clear hose. When the bubbles go away, all the air is out of the master cylinder.
Now the master cylinder can be reinstalled on the brake booster studs, being sure to also attach the proportioning valve bracket.
18. Now the master cylinder can be reinstalled on the brake booster studs, being sure to also attach the proportioning valve bracket.
The hard lines that run from the master cylinder to the proportioning valve are reattached and tightened for the final time.
19. The hard lines that run from the master cylinder to the proportioning valve are reattached and tightened for the final time.
We topped off the fluid, using DOT 3 brake fluid. The lid can be fastened, but we’ll have to top it off one more time after bleeding the system.
20. We topped off the fluid, using DOT 3 brake fluid. The lid can be fastened, but we’ll have to top it off one more time after bleeding the system.
Whether you’re running discs or factory drums, it is important to bleed the system. We start with the right rear and work our way closer to the master cylinder.
21. Whether you’re running discs or factory drums, it is important to bleed the system. We start with the right rear and work our way closer to the master cylinder.
The final aspect of the installation is connecting the vacuum source to the booster. We did so by installing the provided 90-degree fitting in the intake manifold. Then, a rubber hose connects it to the booster.
22. The final aspect of the installation is connecting the vacuum source to the booster. We did so by installing the provided 90-degree fitting in the intake manifold. Then, a rubber hose connects it to the booster.
Our new CPP booster and master cylinder completely changed the driving experience in this old Chevrolet for the better and made it safer.
23. Our new CPP booster and master cylinder completely changed the driving experience in this old Chevrolet for the better and made it safer.
One last splash of AMSOIL Synthetic DOT 3&4 brake fluid and we’re ready for a testdrive.
24. One last splash of AMSOIL Synthetic DOT 3&4 brake fluid and we’re ready for a testdrive.
SOURCES
AMSOIL INC.
(800) 777-7094
amsoil.com
CLASSIC PERFORMANCE PRODUCTS
(800) 522-5004
classicperform.com
Modern Rodding
VOLUME 5 • ISSUE 40 • 2024