Modern Rodding TECH

InTheGarageMedia.com

Concept sketch of a Ford Roadster
1. This project started with a concept sketch, done by Adam Banks, the individual responsible for most of the fabrication of the car.
'36 Ford Roadster
Part 1: Rad Rides By Troy Builds a One of a Kind
By Ron Covell Photography by Adam Banks
U

nless you’re new to the hobby, you should recognize the name Troy Trepanier and his company Rad Rides By Troy. He has been building highly innovative, tastefully styled, and performance-oriented cars since 1995, winning a multitude of awards, including the Ridler award at the Detroit Autorama and the America’s Most Beautiful Roadster award at the Grand National Roadster Show in California.

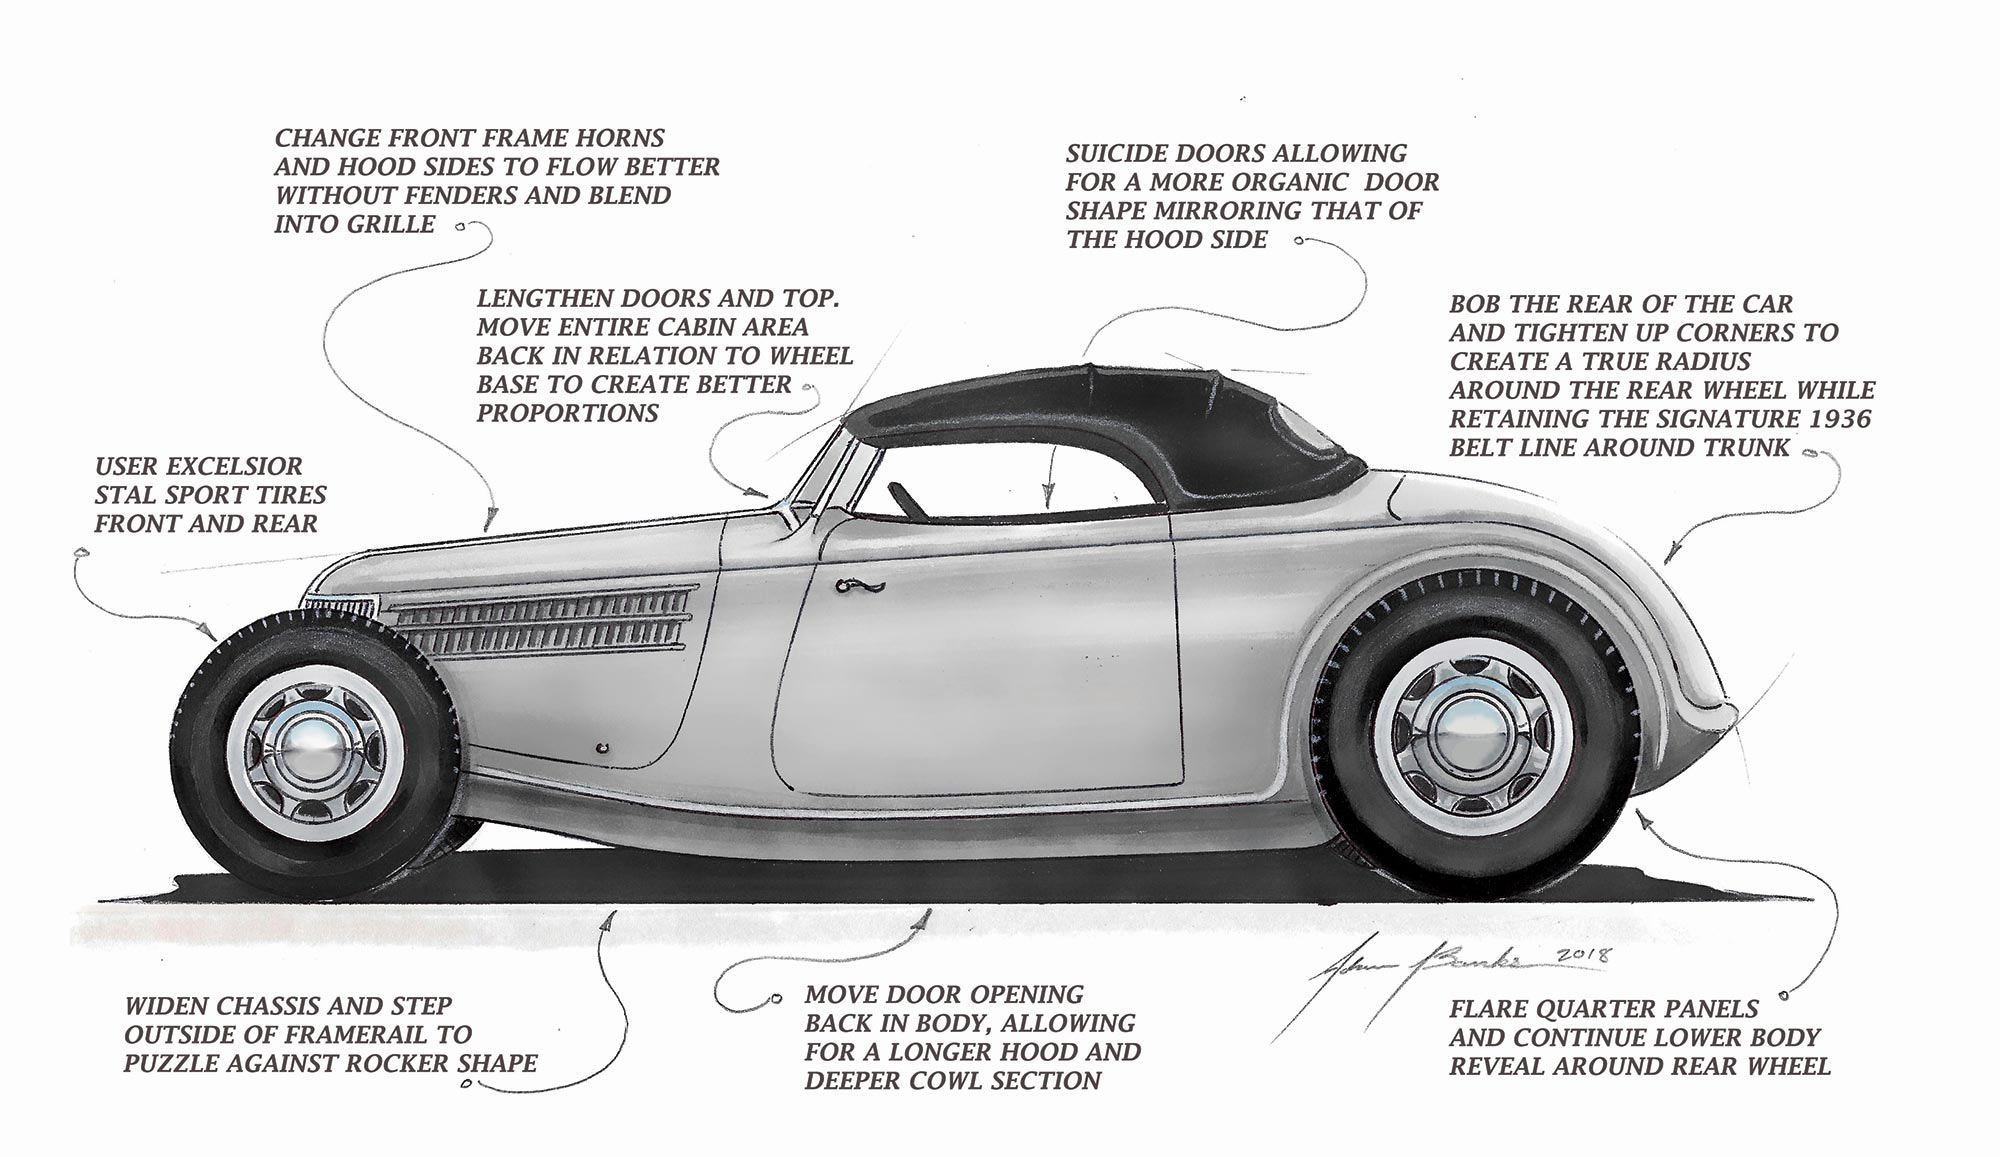
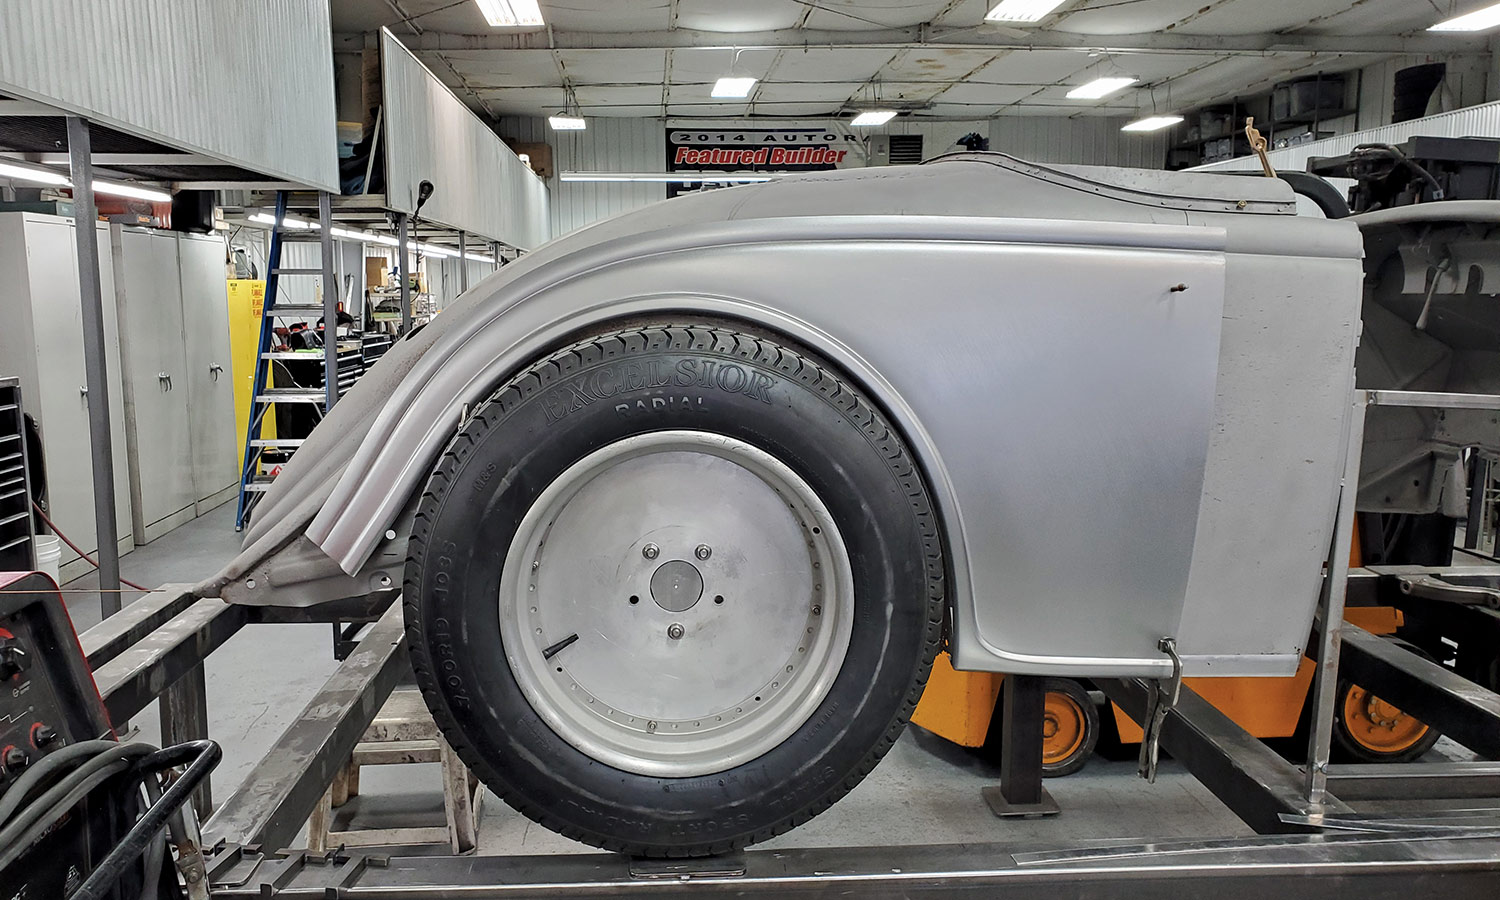
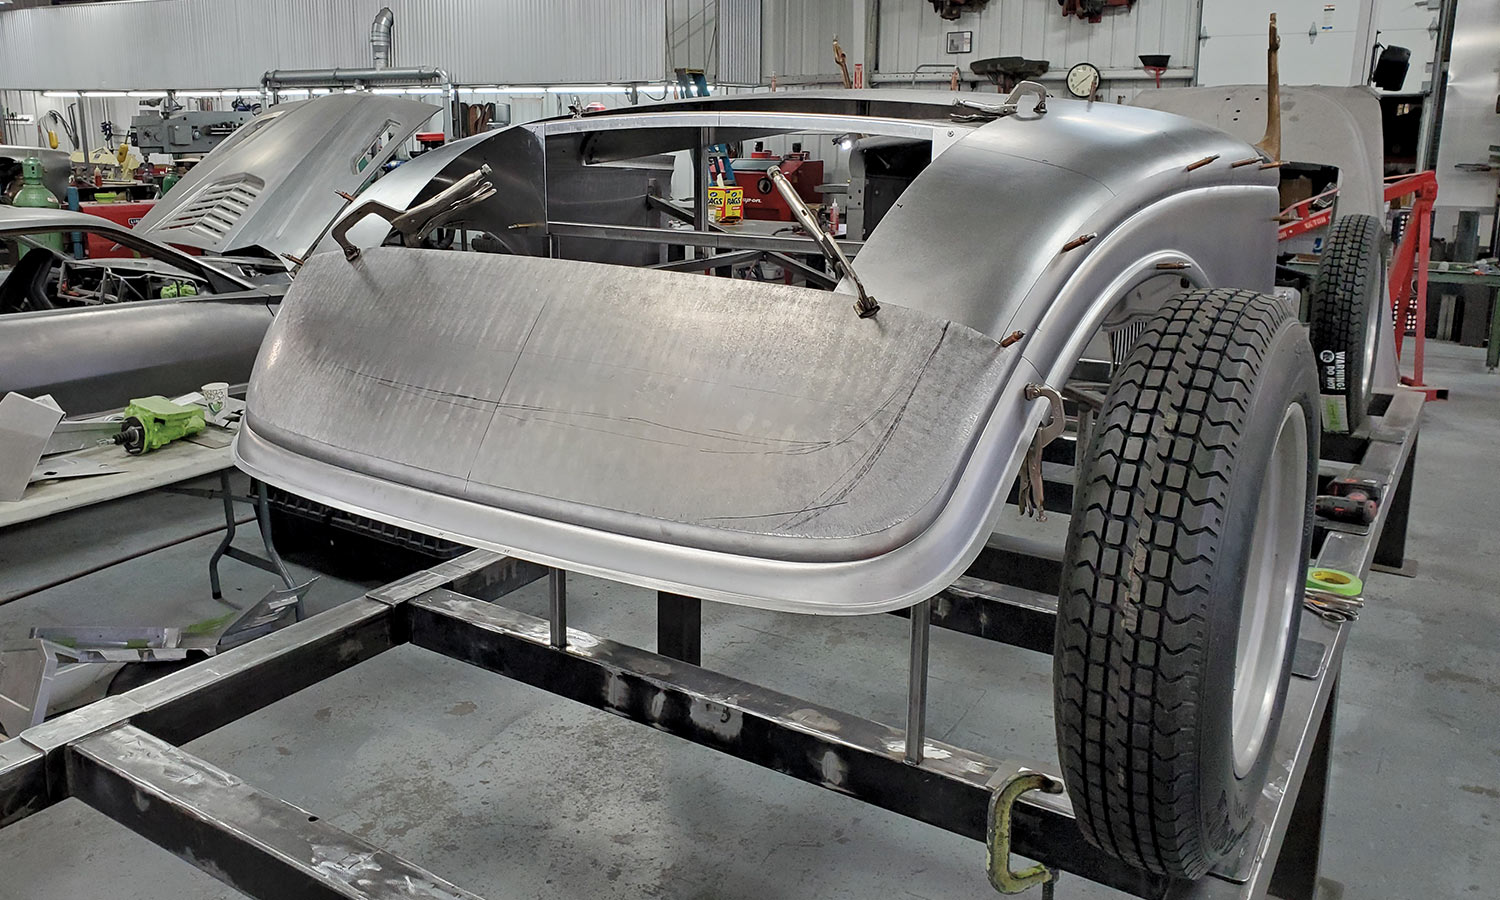
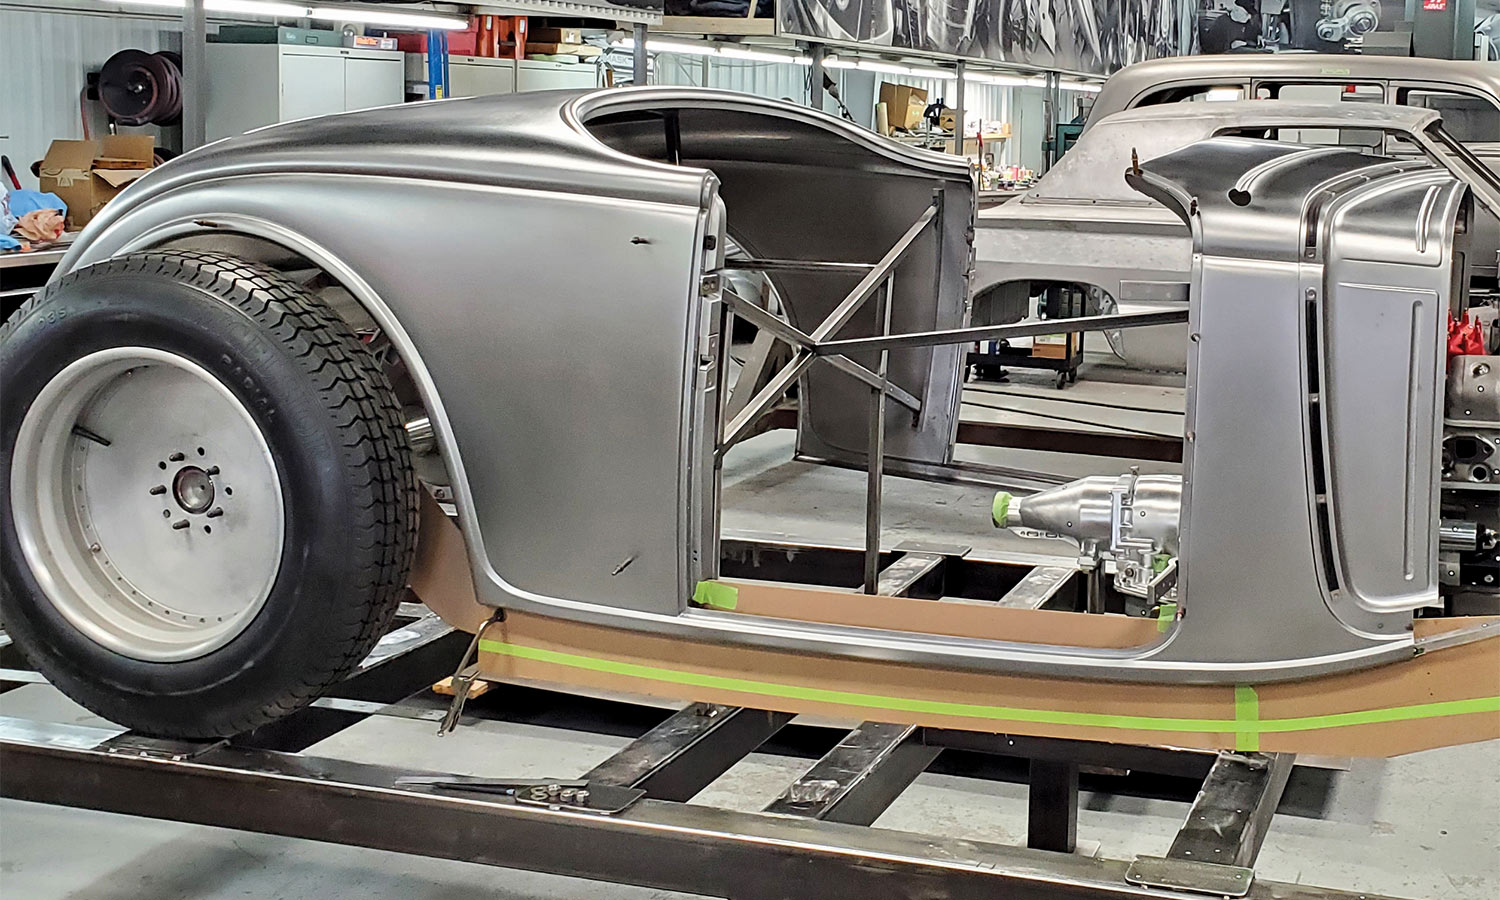
Trepanier built a Ridler-winning ’36 Ford coupe for Ross Myers in 2007. The idea to build a fenderless ’36 was hatched a few years later. This is a body style you rarely see presented with no fenders, since the fat fender body style can look awkward when shorn of its fenders.

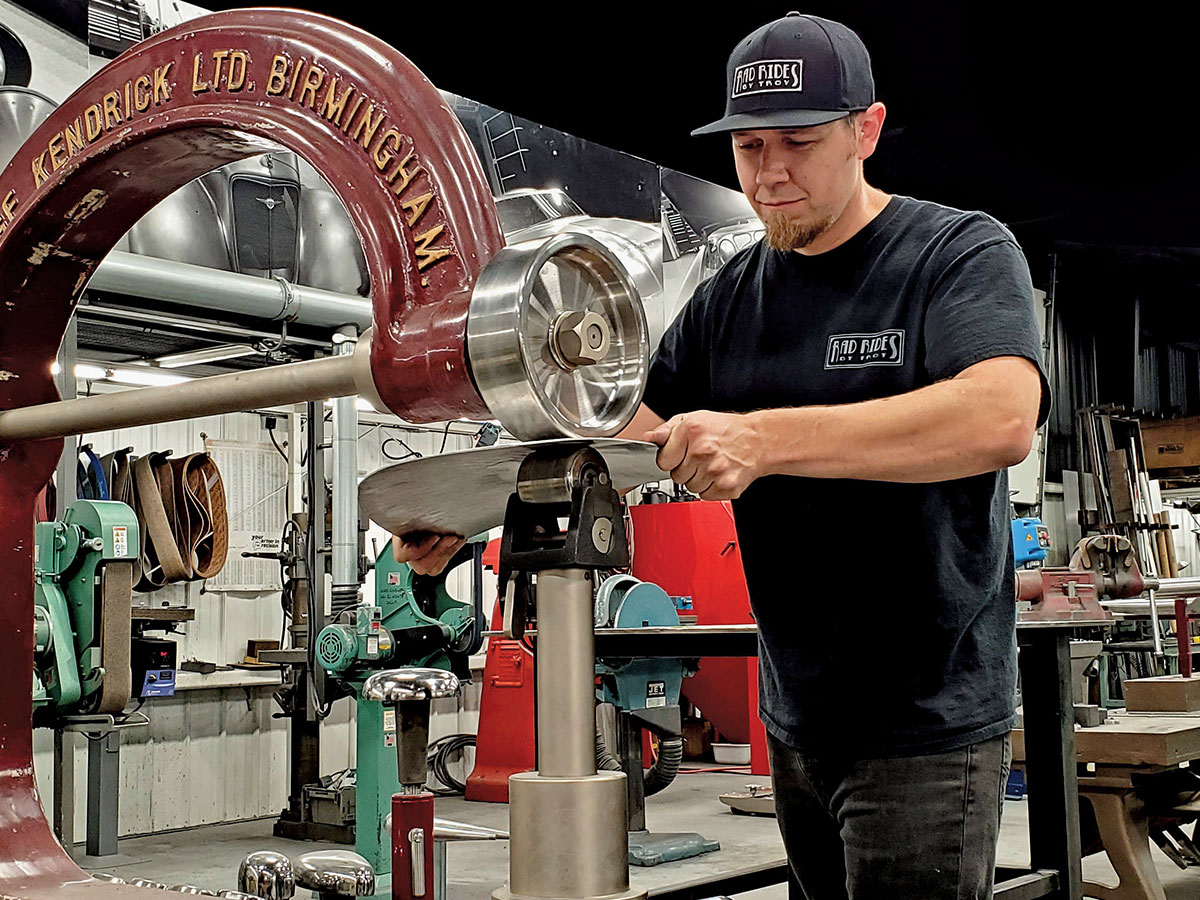
Myers presented Trepanier with the challenge to see what he could do with this design brief, and he had so much confidence from his previous dealings with Trepanier that he allowed the Rad Rides By Troy team to build this new car in the best way they could imagine, with essentially no restrictions on the design or complexity. From this point Adam Banks is now in charge of the project and is responsible for most of the work on the project.

Trepanier always builds cars that perform exceptionally well, so Myers knew that would not be an issue. To keep the Ford theme, they designed the car around a blown Y-block engine, which you’ll see in later installments.

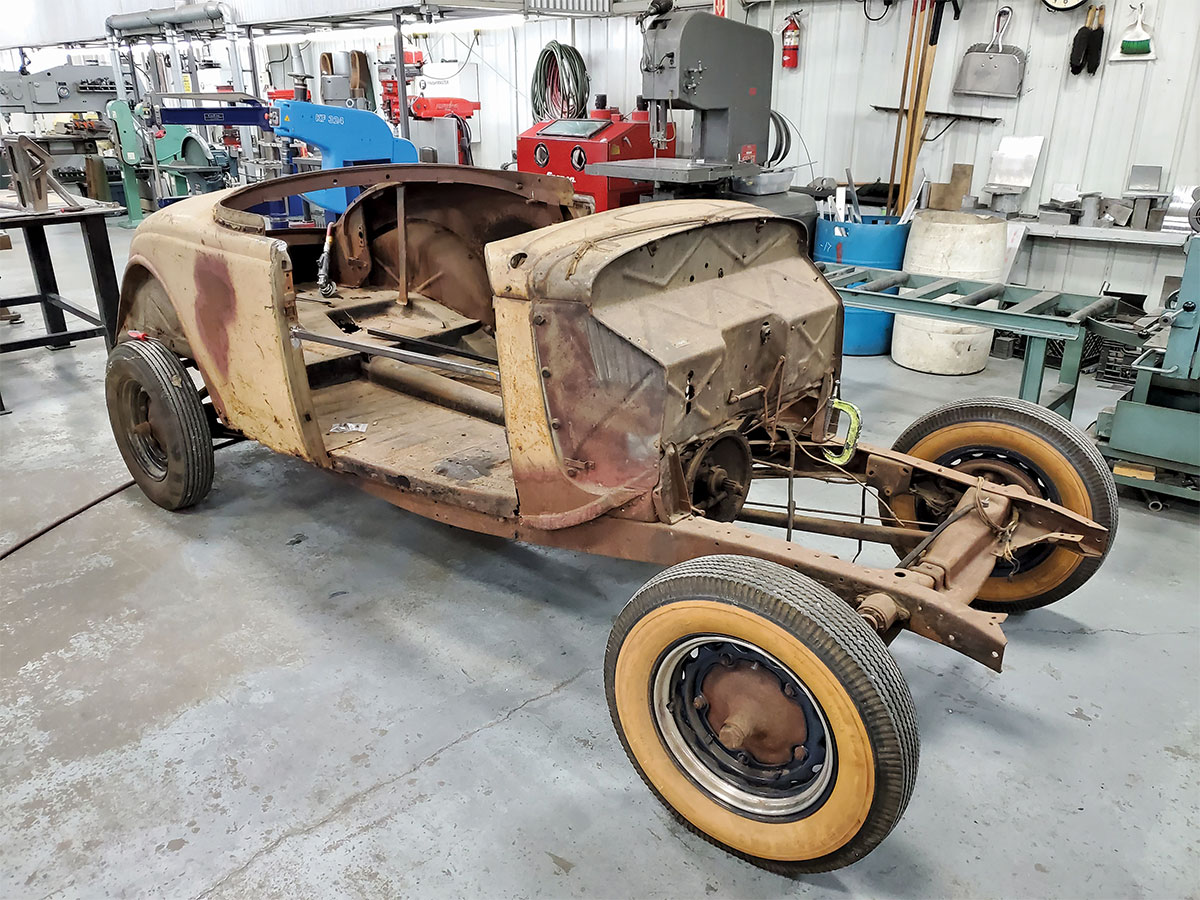
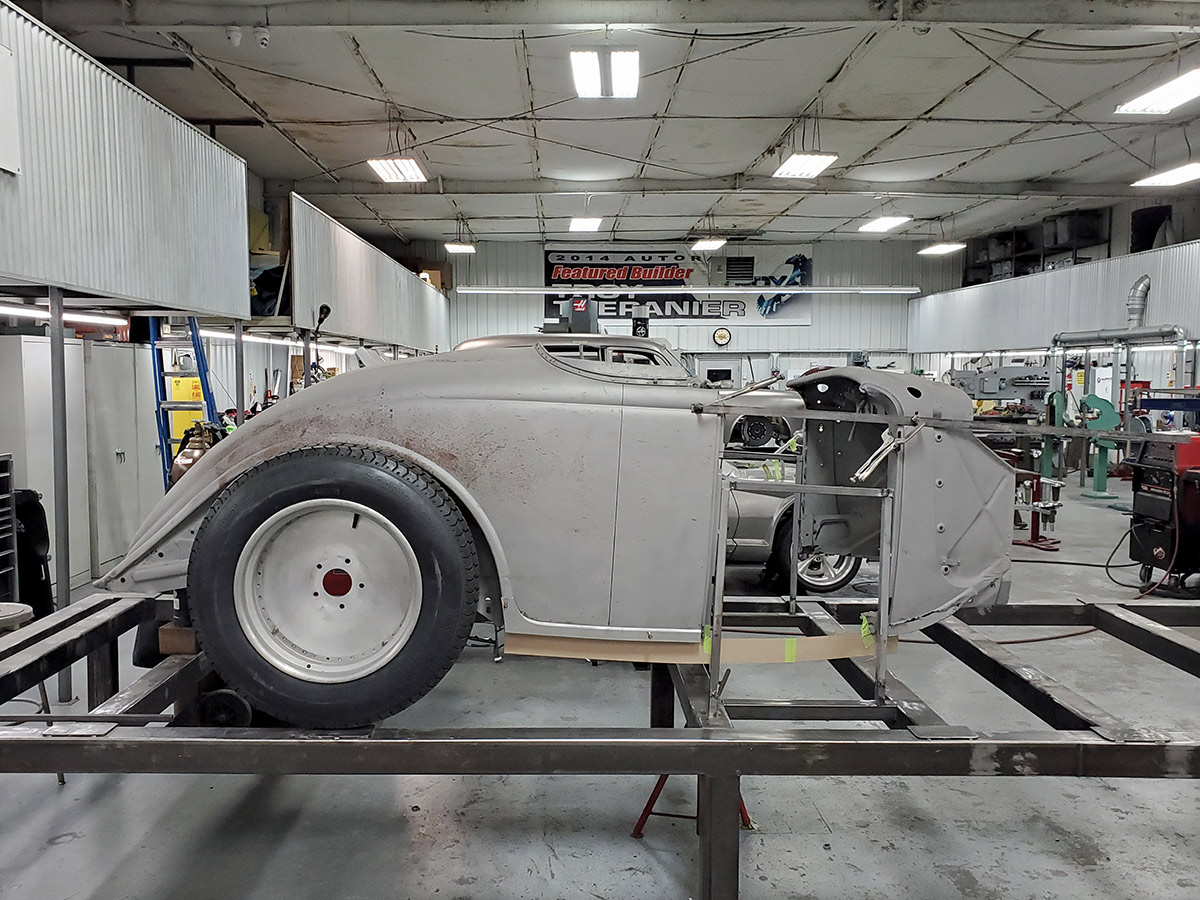
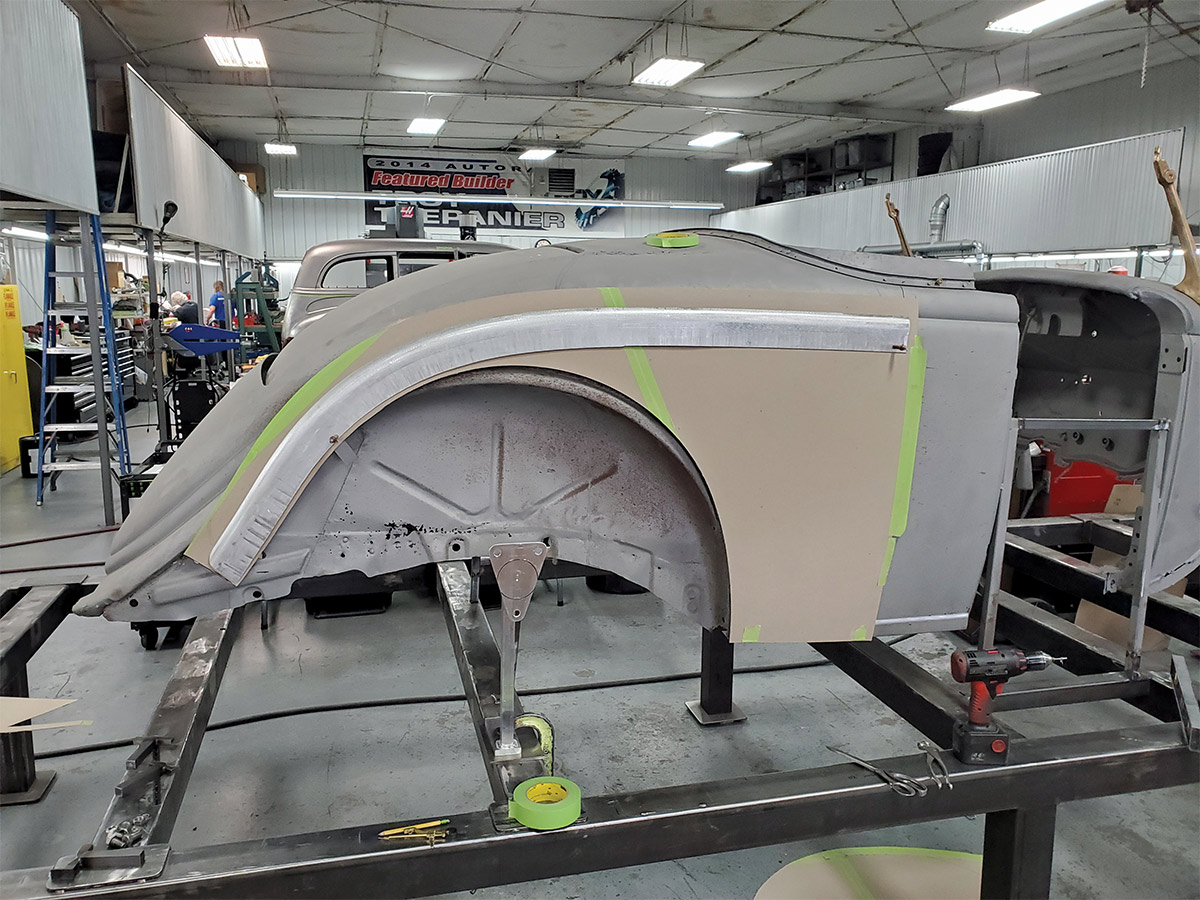
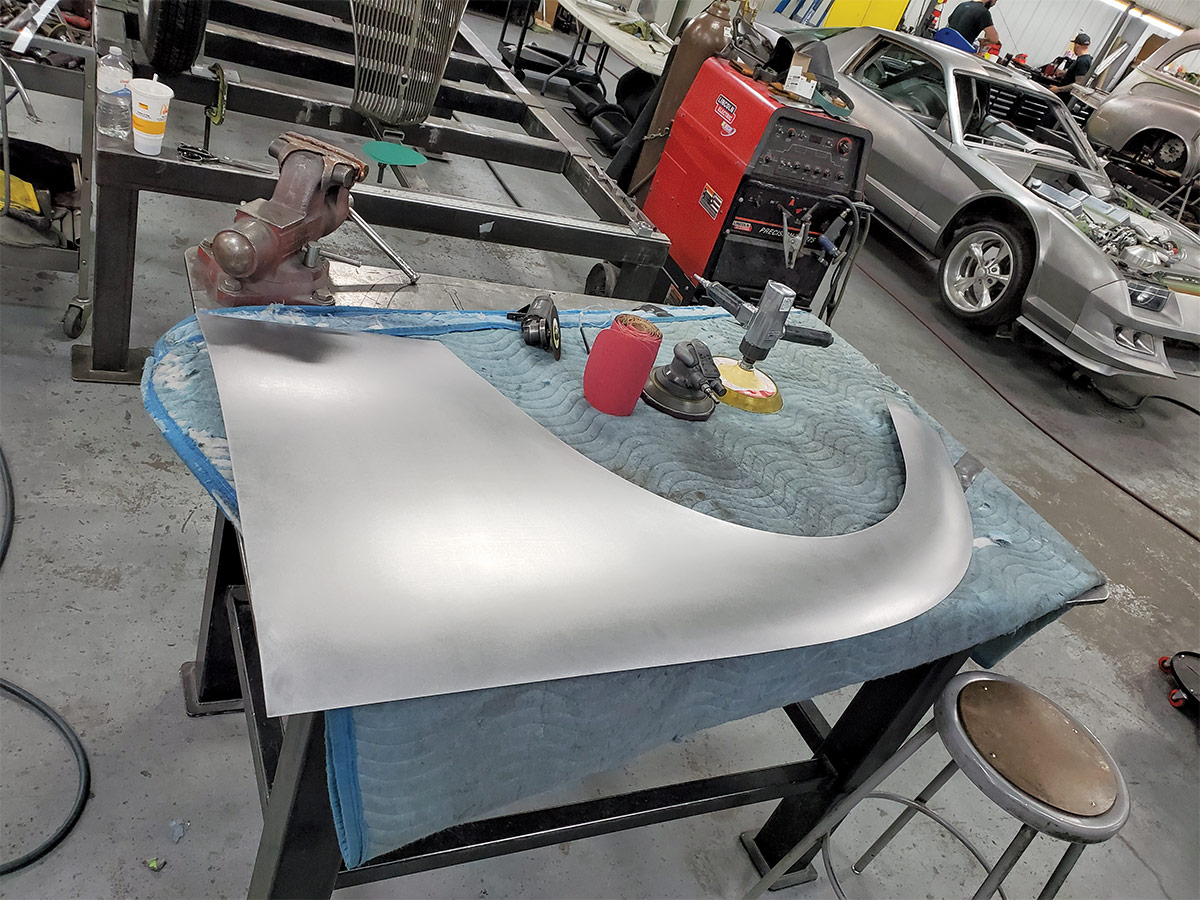
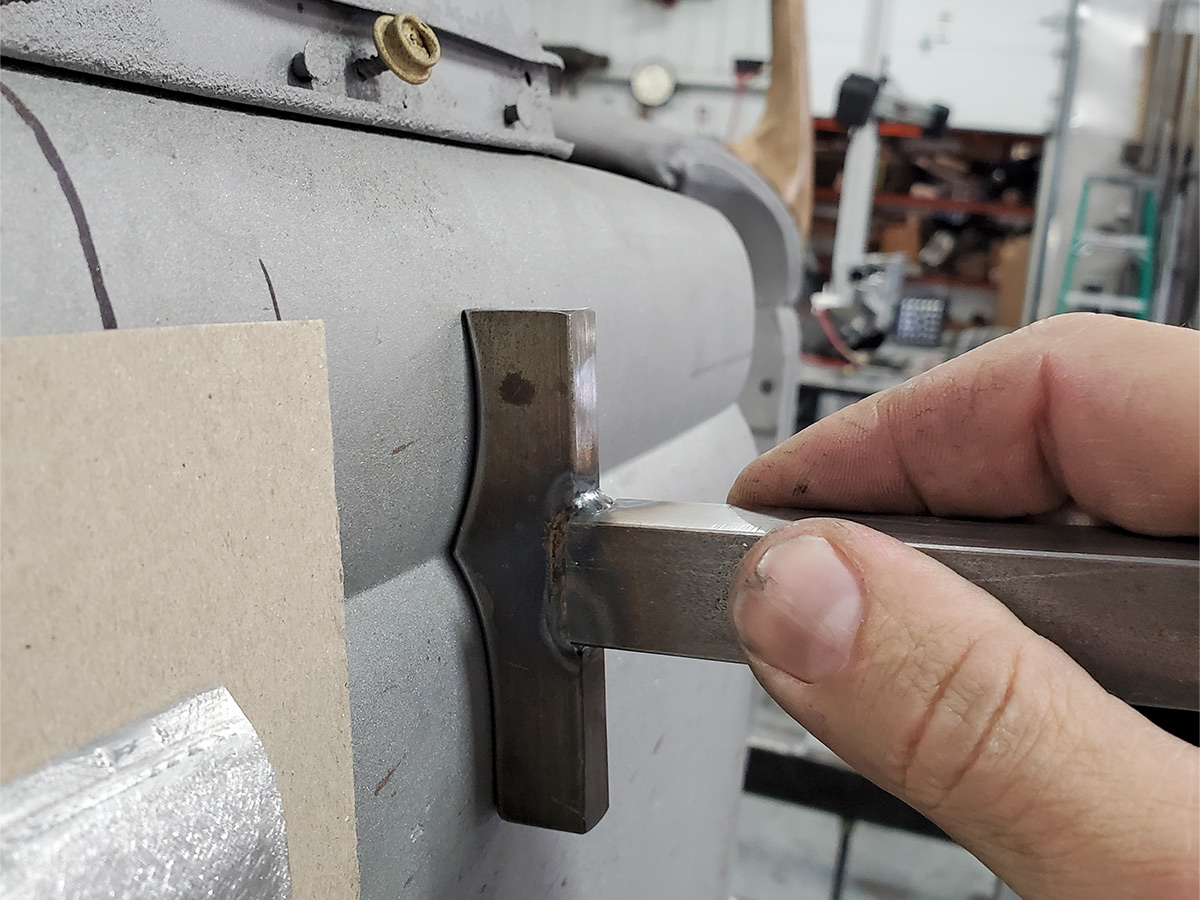
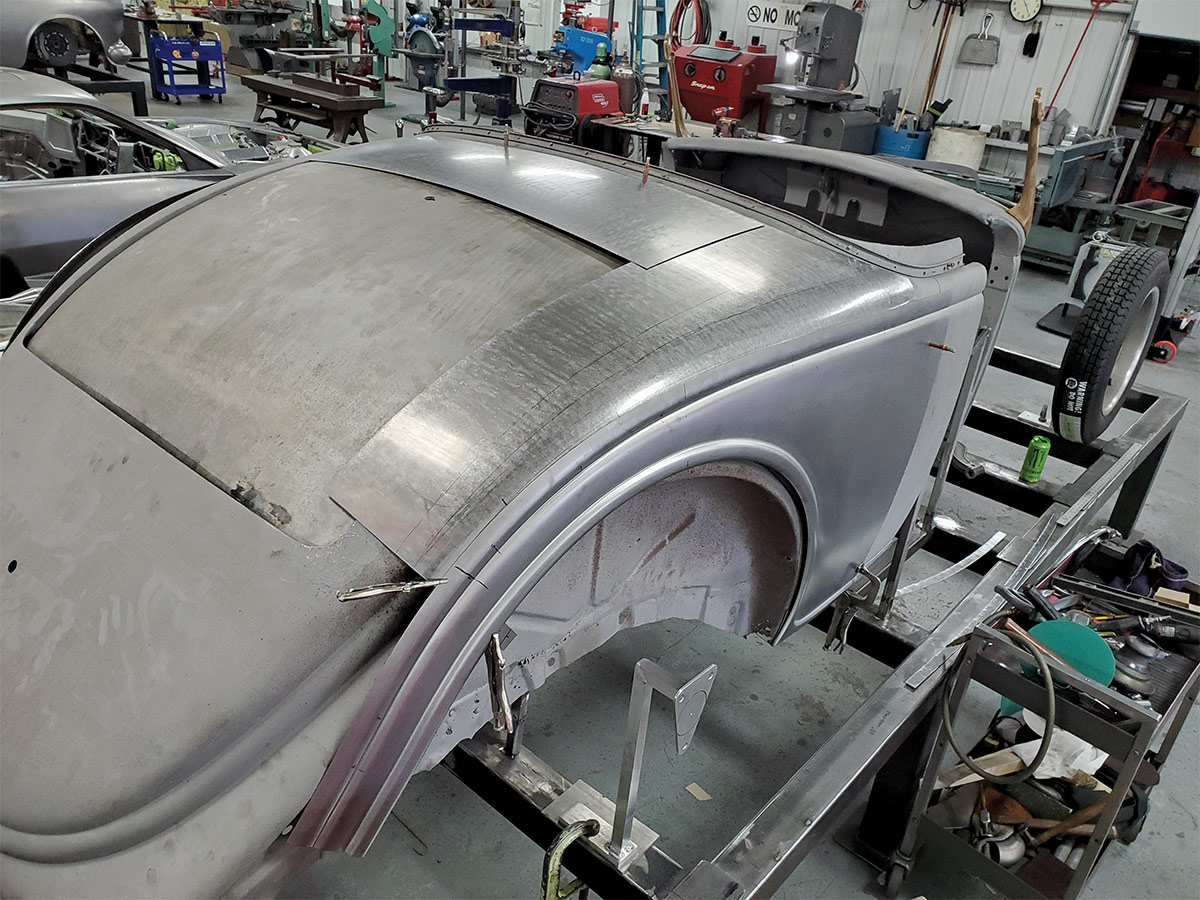
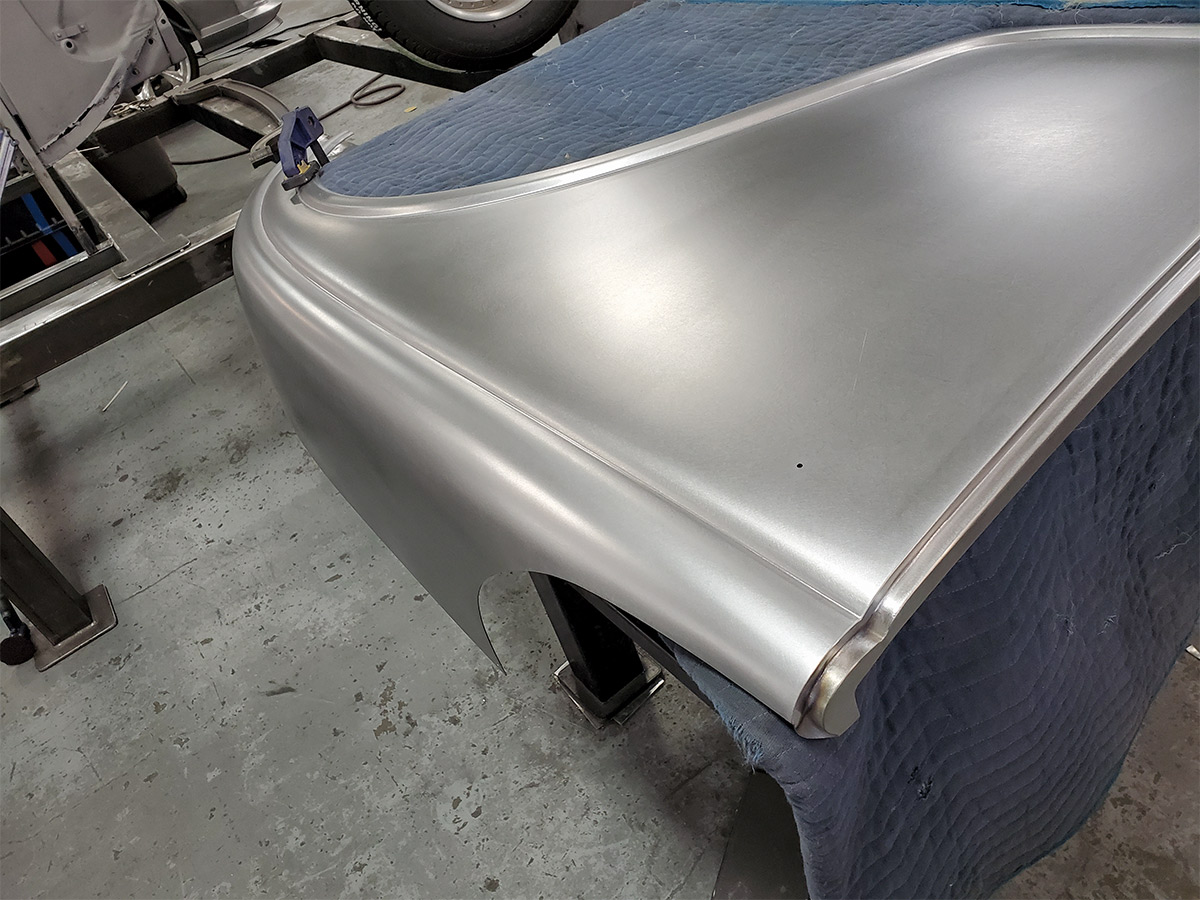
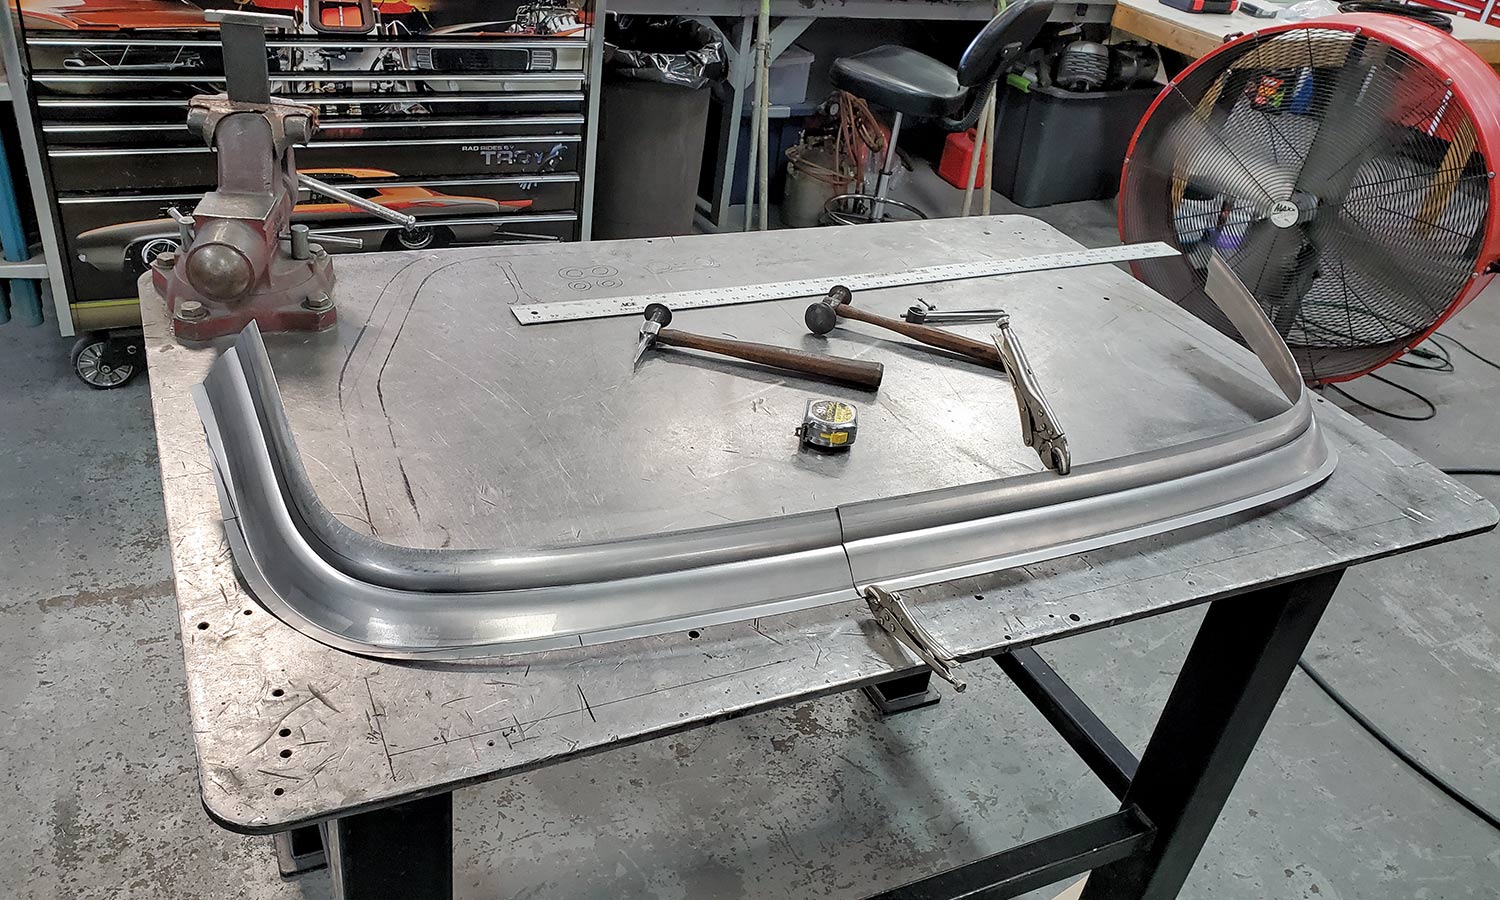
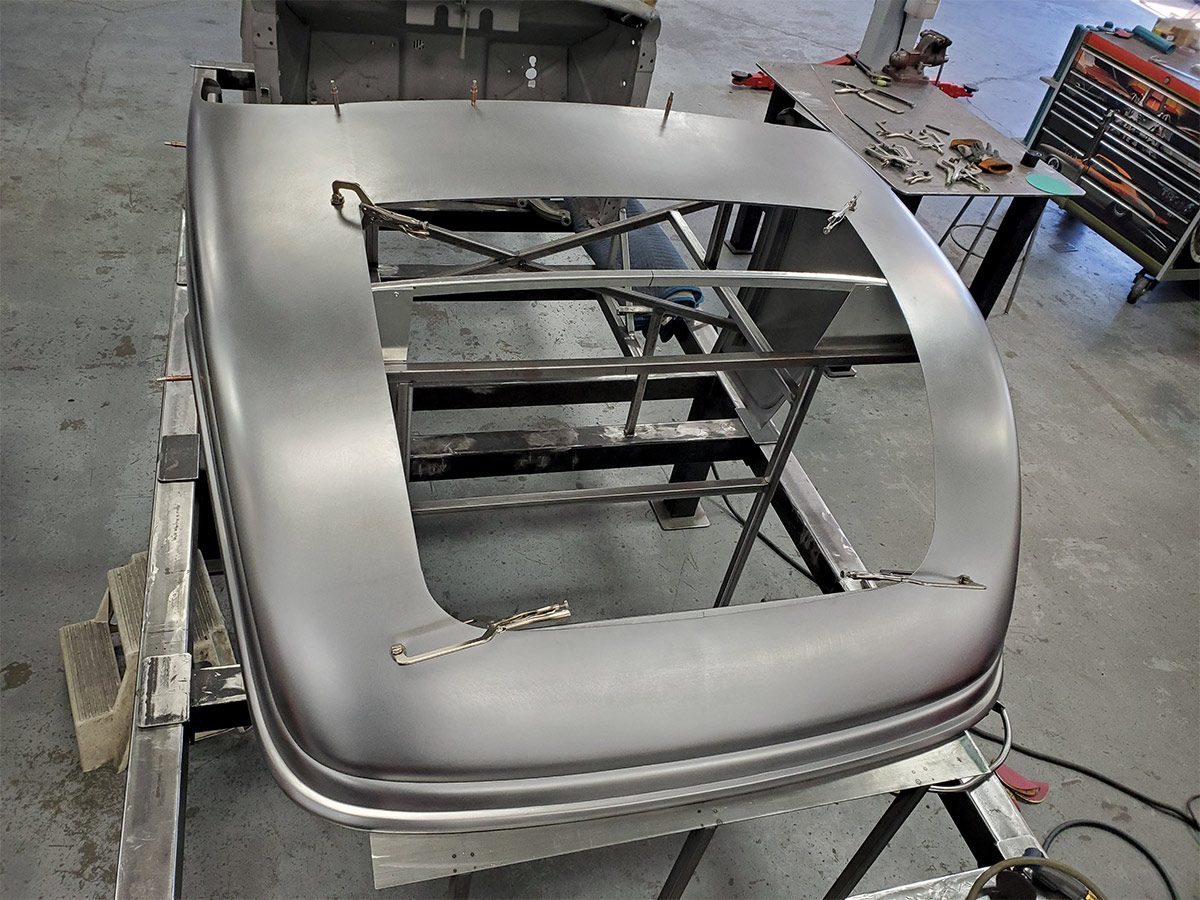
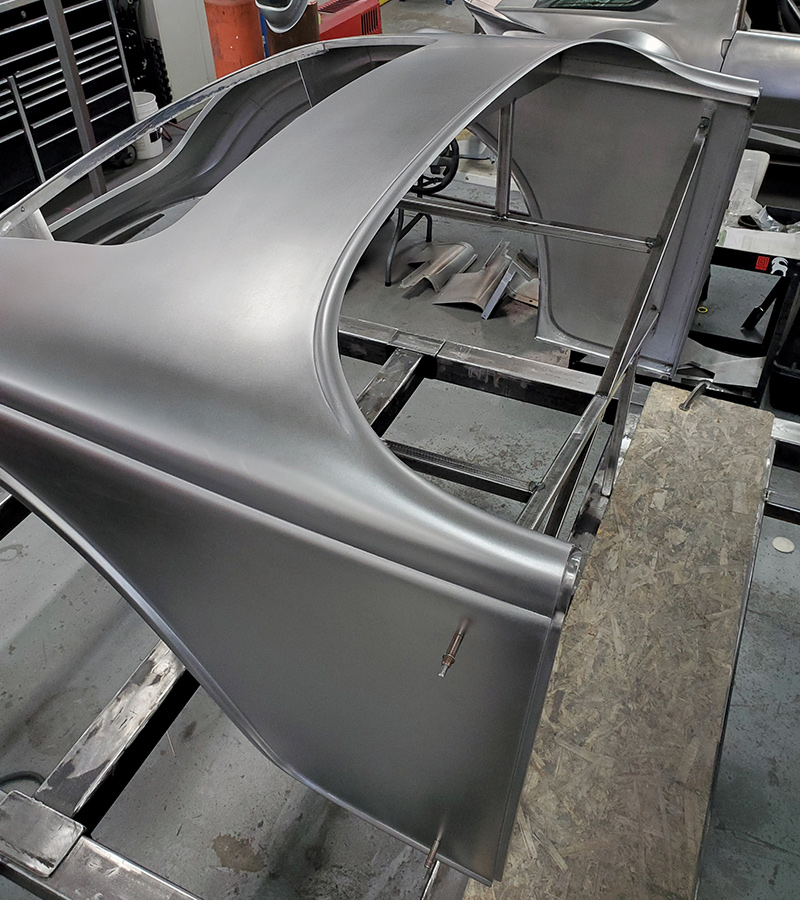
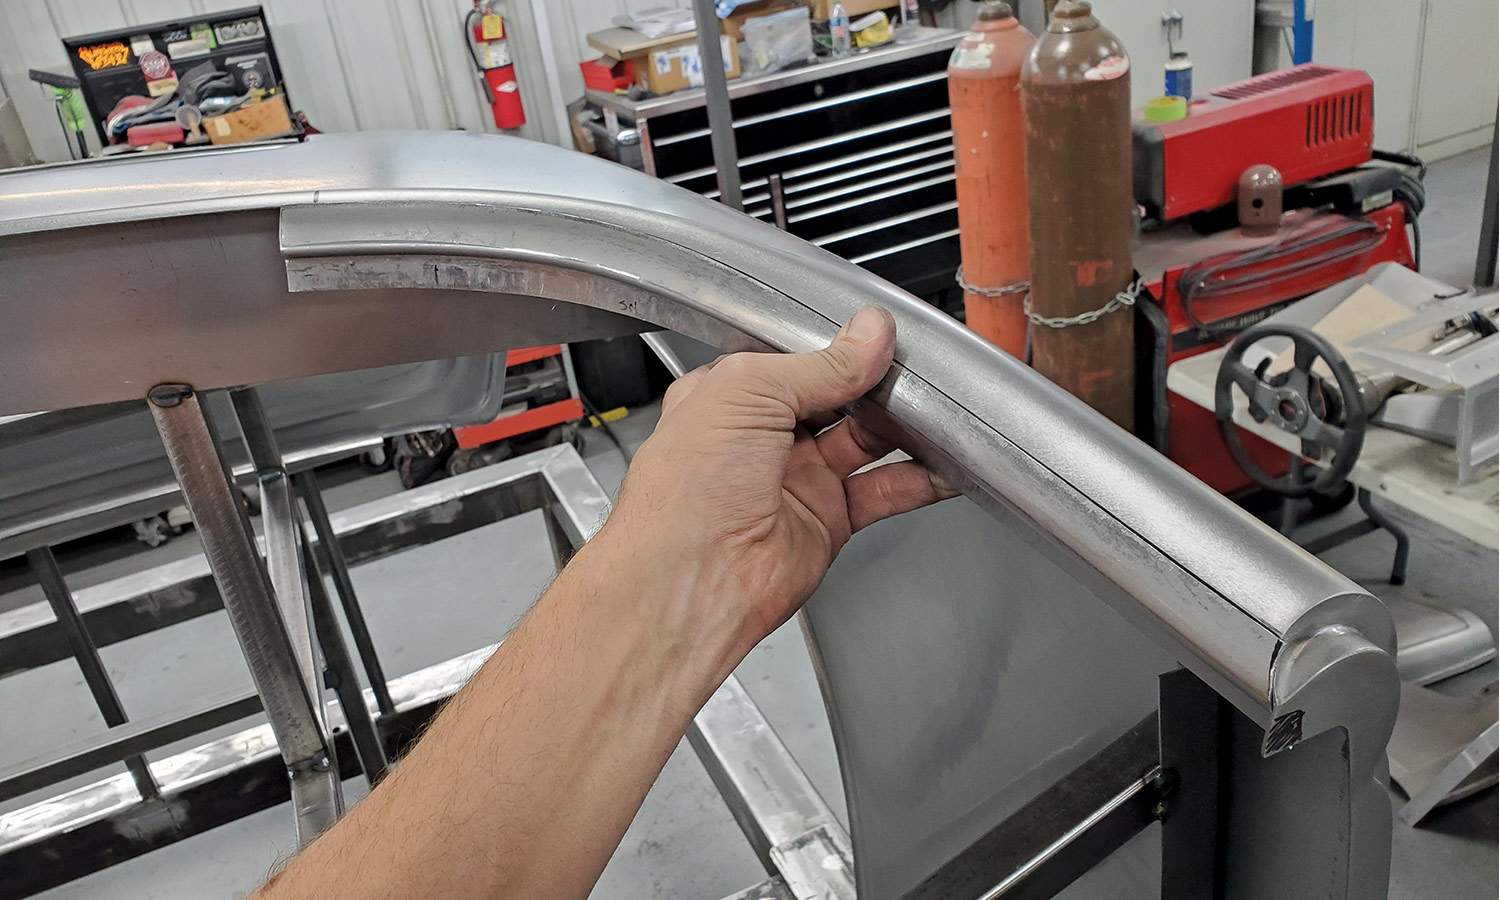
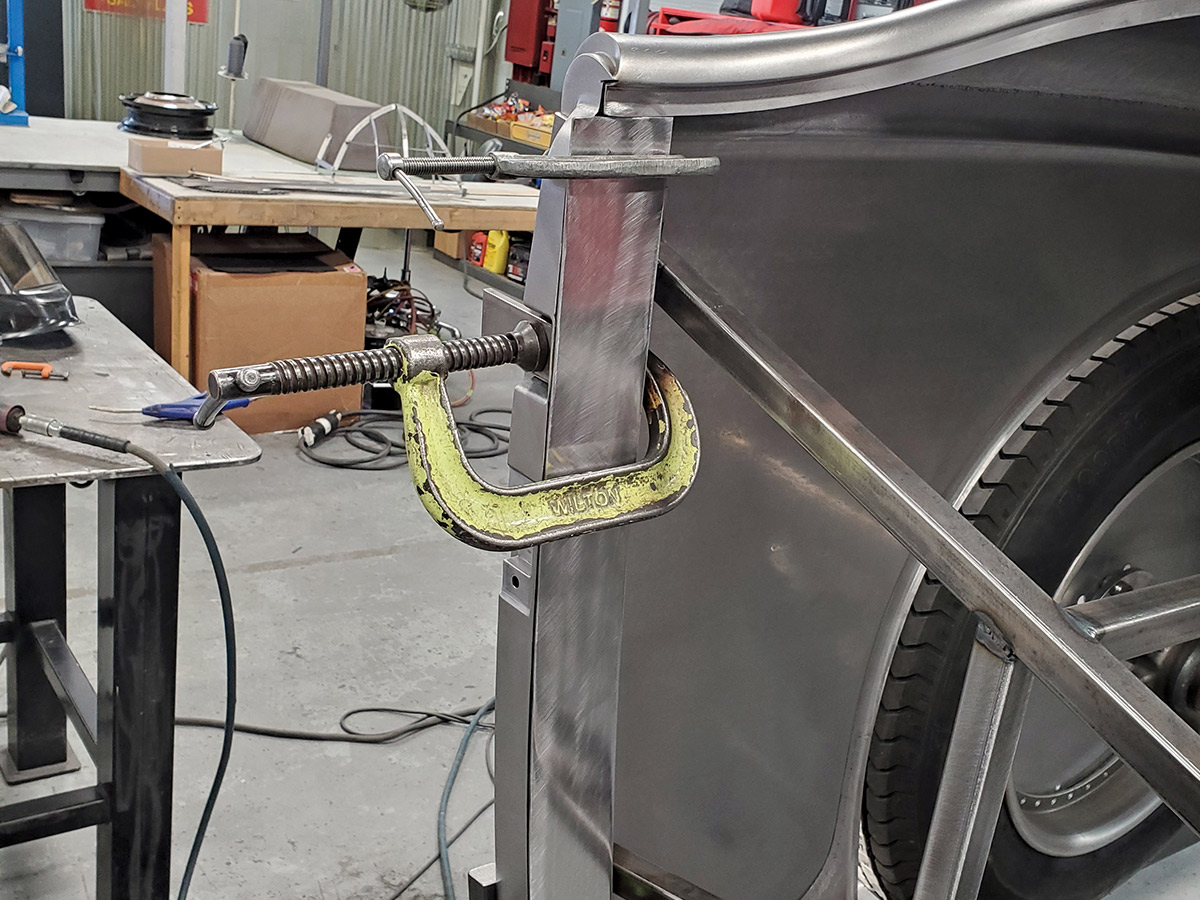
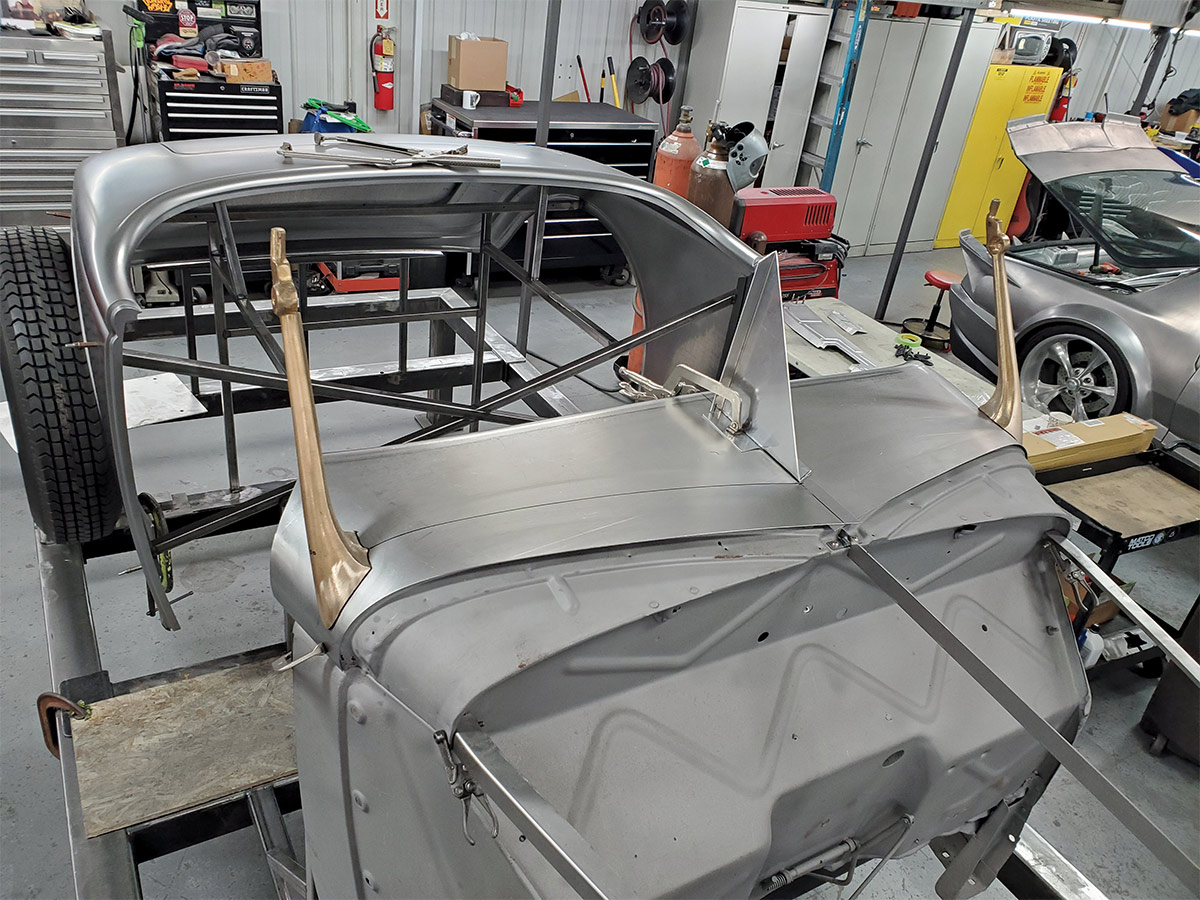
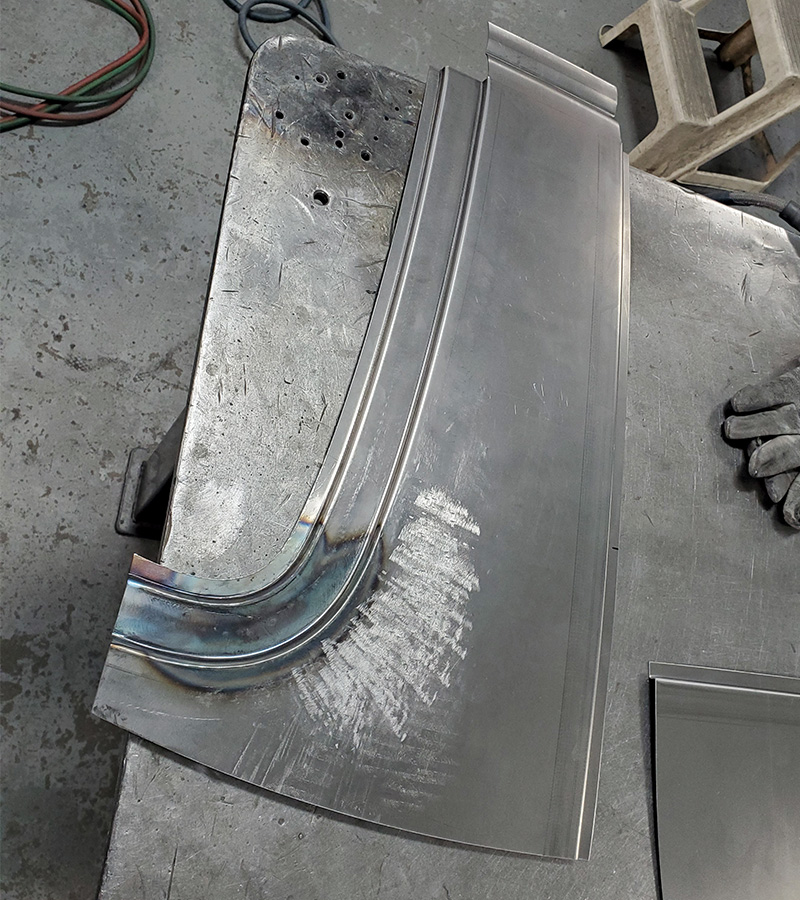
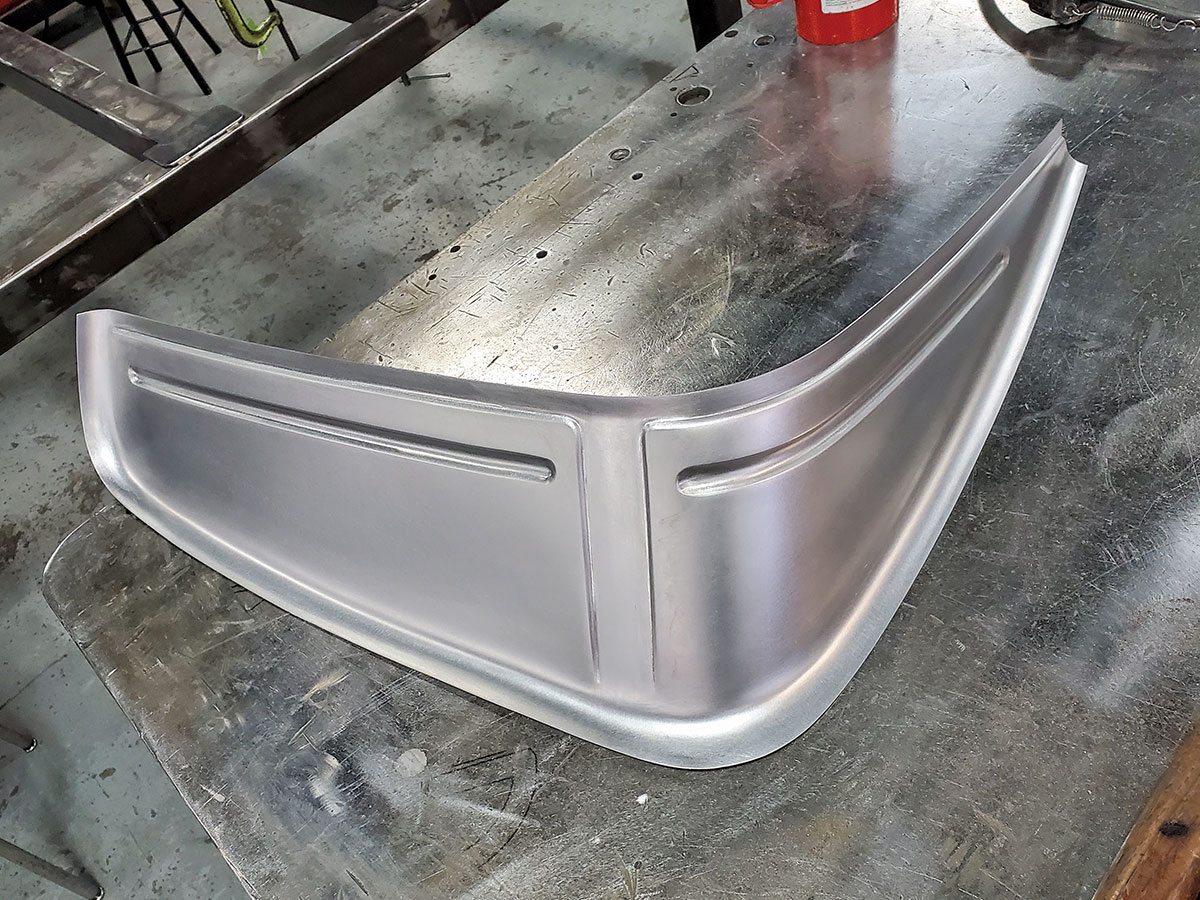
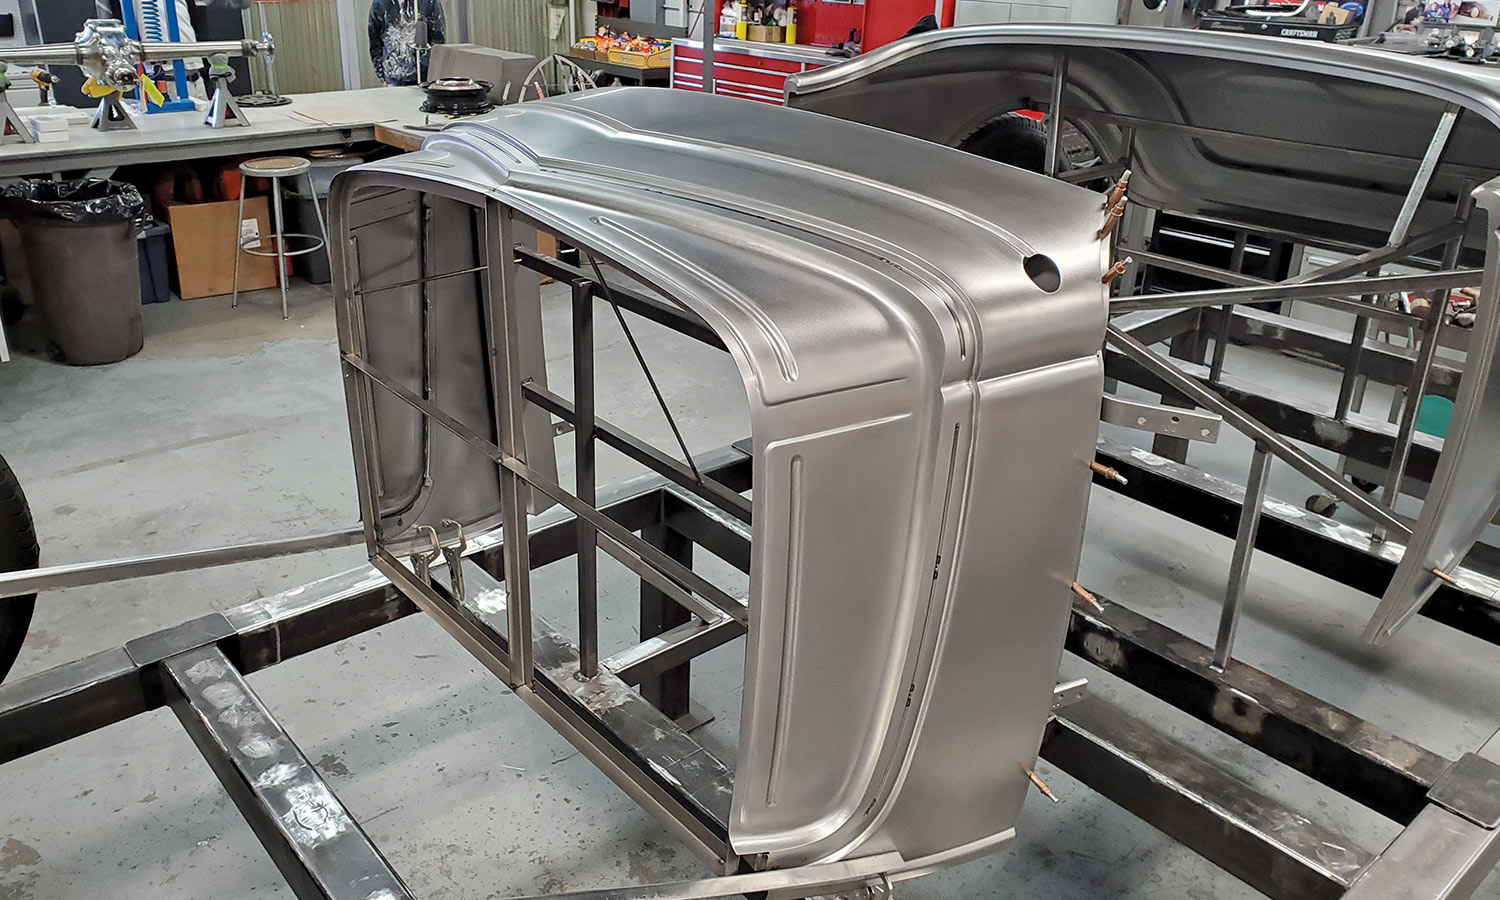
Ross supplied Trepanier with an original ’36 body but after calculating what it would take to refinish and reshape the original body panels, the team decided to use the original body only as a buck, and to form all-new sheetmetal for this project, including building a completely new frame. Because of the radical nature of the modifications, they decided to build the body first and then fit the chassis inside it—a very unconventional approach.

The photos tell the story of the start of this adventurous build, and there will be several more installments detailing other key stages in the car’s construction. Stay tuned, you won’t want to miss this one. It’s special, on many levels.

Bare rusty frame from a ford roadster
2. Ross Myers, the customer Troy Trepanier is building the car for, has a passion for ’36 Fords. To get the project rolling, he shipped this hulk from his collection.
Roadster cowl and tail section mounted on a chassis table
3. After removing the floor from the body and stripping all the sheetmetal, the cowl and tail section were mounted on a chassis table and fastened into place.
quarter-panel is mocked up with cardboard on frame
4. The team decided to build an entirely new body from scratch. Here the quarter-panel is mocked up at ride height and the cowl is moved back 10 inches.
new quarter-panel cut from steel laying on table
5. The new quarter-panel was rough-shaped from 18-gauge steel using an Eckold power shrinker, then refined with an English wheel, a planishing hammer, and hand tools.
male die beinge test-fitted against the original body
6. A set of dies is prepared for the Pullmax machine to duplicate the upper body line. Here the male die is test-fitted against the original body to check the contours.
New quarter panel installed on the frame
7. The top reveal was shaped with the tool shown in the previous photo and a similar set of dies was used for the reveal on the bottom of the body and around the wheelwell.
tops of the quarter-panels and the sail panel
8. The tops of the quarter-panels and the sail panel behind the cockpit are rough shaped on the Eckold machine and English wheel. Here they are being test-fitted before refining the surface finish.
driver side quarter-panel laying on table
9. Here the pieces for the driver side quarter-panel have been joined by welding and metal finished. The doorjamb was precisely formed from new metal, too.
tail section of the body on the bench
10. The tail section of the body retains a lot of the character of the original but is radically shortened and reshaped. It was made in two pieces, and they are test-fitted together on the bench.
metal panel that fits below the decklid tested on frame
11. Here the panel that fits below the decklid is rough shaped and tried for fit against the rest of the body. You can really get a sense of the allover proportions in this shot.
Adam Banks using an English wheel
12. Adam Banks is using an English wheel here to refine the finish on a panel. Rad Rides prides themselves on working to a very high level of craftsmanship.
Panels welded and smoothed
13. After welding, all the joints are smoothed and metal finished. From the outside, it’s impossible to tell where the seams are.
Hand holding a panel while checking the fit
14. The highly convoluted panels at the rear of the cockpit opening are shaped in several pieces. Here one piece is rough-shaped and the fit is being checked against the top of the quarter-panel.
Photo showing the quality of the welded and smoothed panels
15. After welding and metal finishing it looks like a new factory part. Trepanier’s shop works to a higher level of fit and finish than the original Ford bodies had.
Hand holding a panel while checking the fit
16. The continuation of the cockpit opening is shaped to fit. This complex metal shaping is done with the Pullmax, aided by shrinkers, stretchers, and a lot of handwork. Note how well the panels are fitted together at this stage.
new pillar being made to reinforce the rear doorjamb
17. A new pillar was made from 14-gauge steel to reinforce the rear doorjamb. Here it is being aligned for the final trimming prior to being welded into place.
cowl panels being tested on frame
18. Most of the rear body is shaped and work on the cowl can commence. The top two panels are rough-shaped here and tried for fit against the original sheetmetal. Reproduction windshield posts are standing-in for custom posts to be made later.
Hand holding a tool thats testing the detailing of a panel
19. The cowl has detailing on every edge. Here a tool is being made for the Pullmax to shape the recess where the base of the windshield will fit.
Cowl with a panel being added to the front
20. A new section is made to extend the front edge of the cowl, incorporating a recess for the hood.
Back edge of the cowl
21. Robust mounts were made for the ’jamb area of the cowl, which incorporate highly reworked hinges from a British car. They are configured to open about 90 degrees.
Cowl being shaped on a table
22. The cowl sides were particularly challenging to shape. Note the use of heat and a mechanical shrinker near the recesses for the hood. All this metal will be brought to a near-mirror finish.
Extension for the driver side of cowl sitting on table
23. This is the extension for the driver side of the cowl, which fits inside the hood. For convenience, this was made in two parts, which were joined after all the curling, beading, and detail work was done.
Most of the cowl installed on the frame
24. Here you can see most of the cowl completed. This is highly complex work but Trepanier and his crew take it all in stride.
Frame with installed rear portion and front cowl, with chipboard mock up of chassis
25. The cowl and the rear portion of the body are finally joined with a custom-fabricated sill plate. The chipboard below the body is the mock-up for the custom-made chassis, which we’ll look at next time.
SOURCE
Rad Rides by Troy
(815) 468-2590
radrides.com
Modern Rodding
VOLUME 5 • ISSUE 40 • 2024