Modern Rodding Tech
InTheGarageMedia.com
How to Build a Model A '32 Title
How to Build a Model A ’32
Part 2: Finishing the Swap
By Eric Geisert 
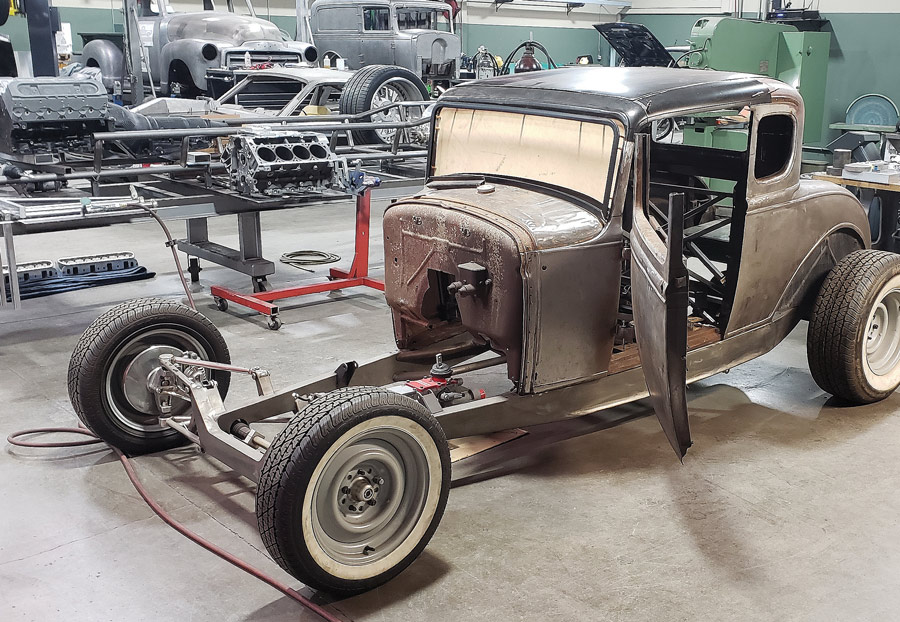
Photography by THE AUTHOR
I

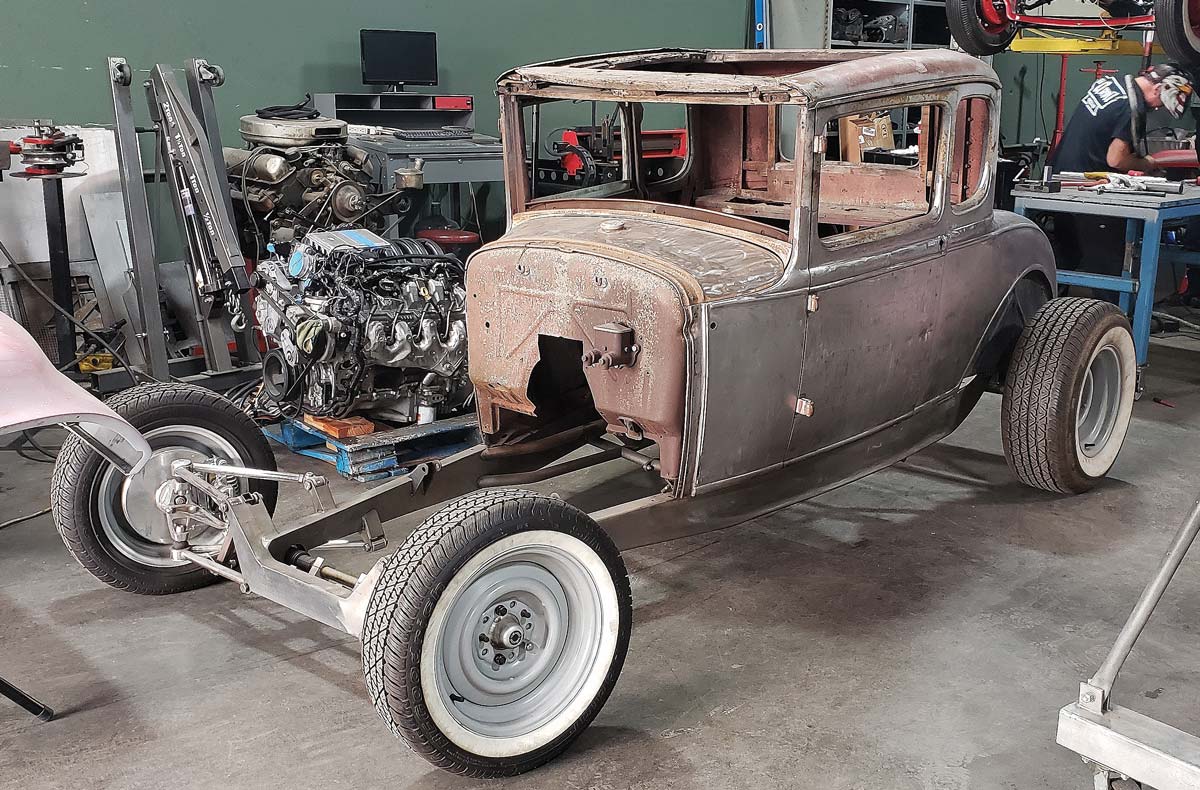
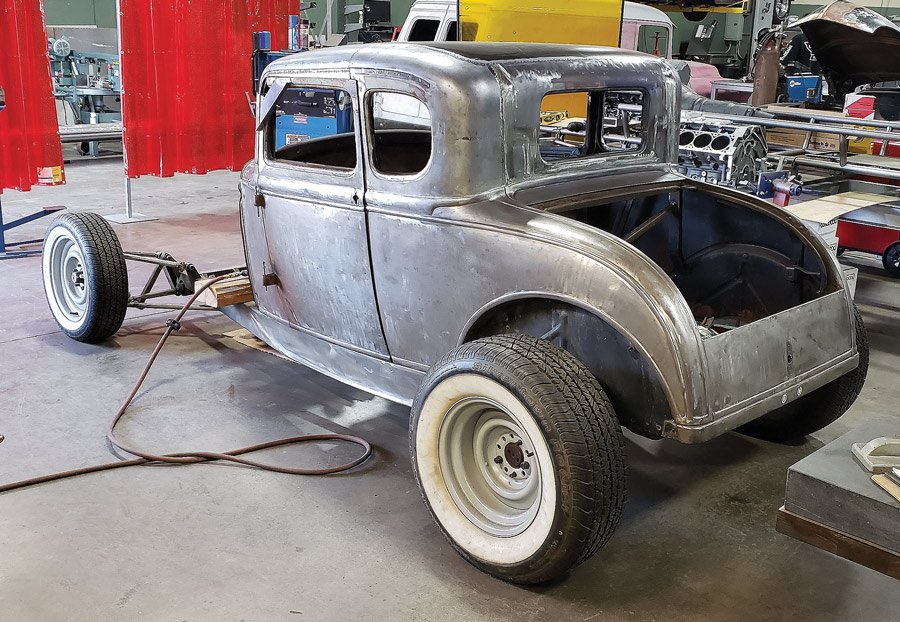
n the last issue of Modern Rodding we started the process of creating a Model A ’32—a ’31 Ford coupe with a ’32 five-window roof added and then chopped. The work was completed at Old Anvil Speed Shop in Orange, California, which is helmed by Paul and Jenna Bosserman.

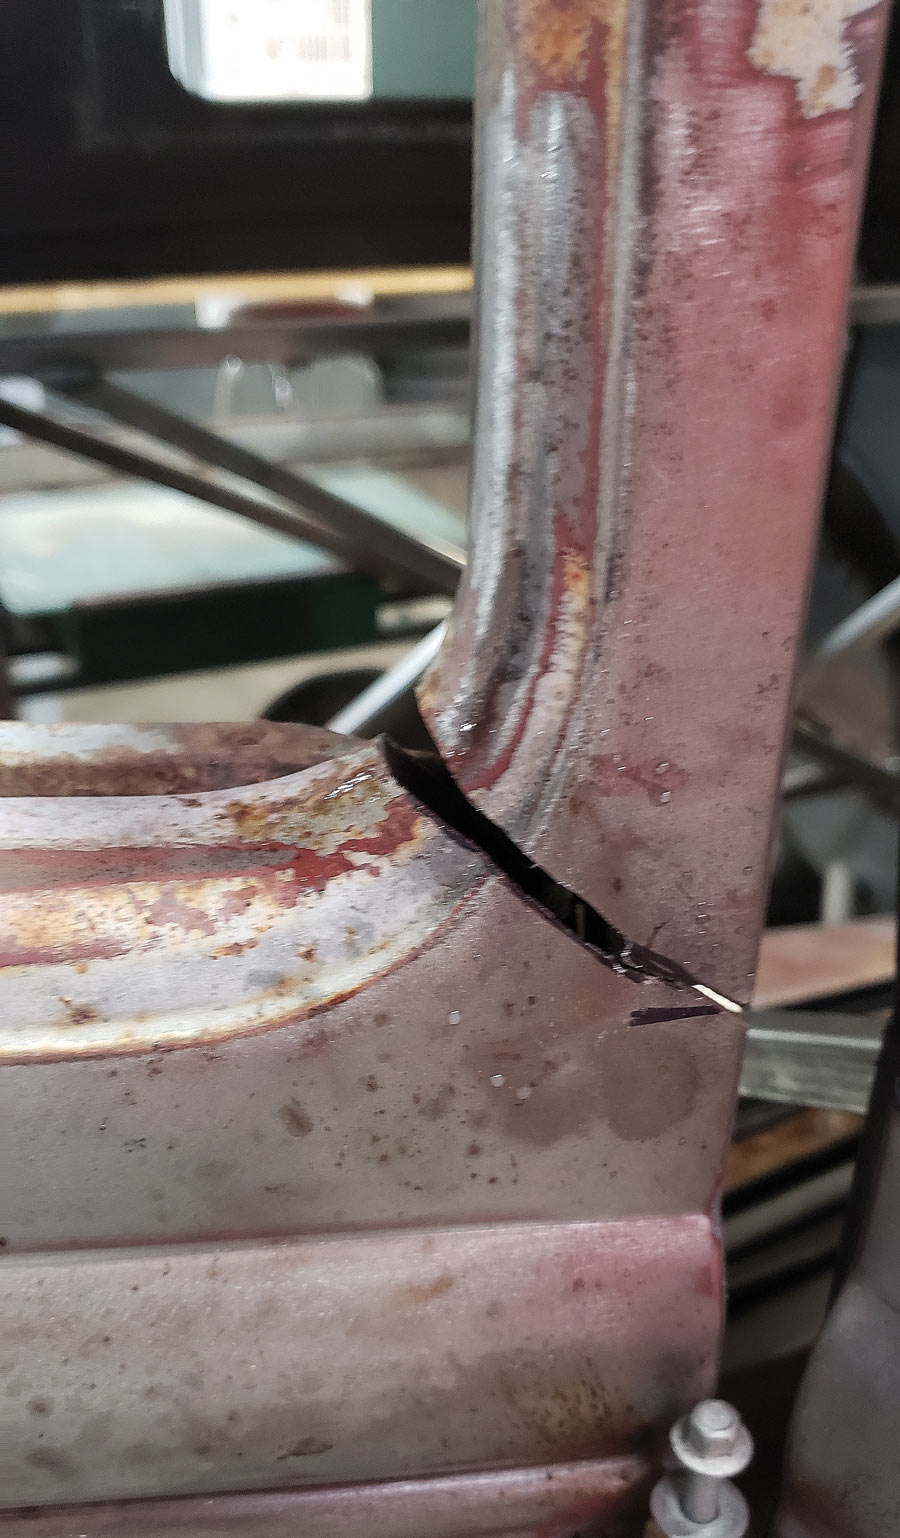
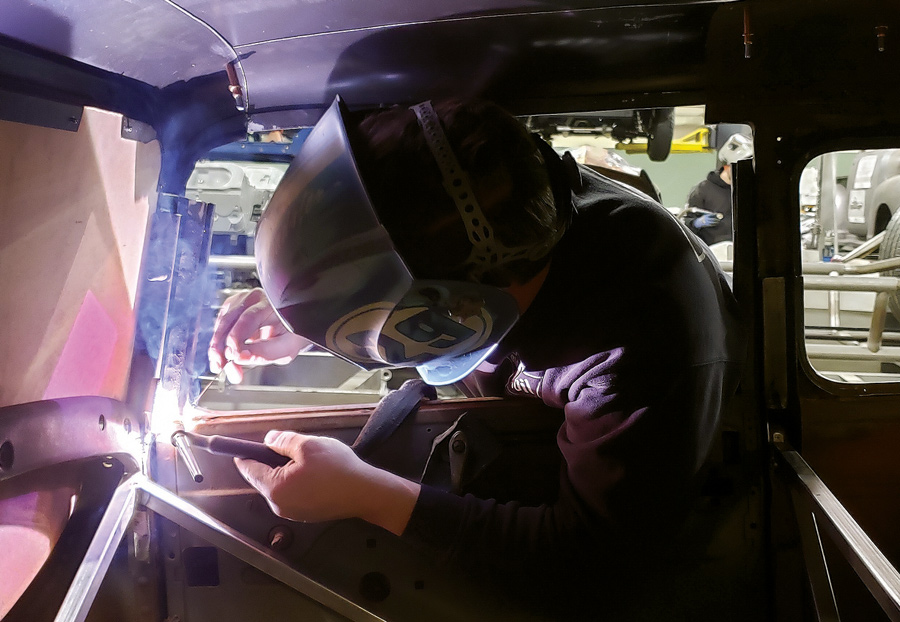
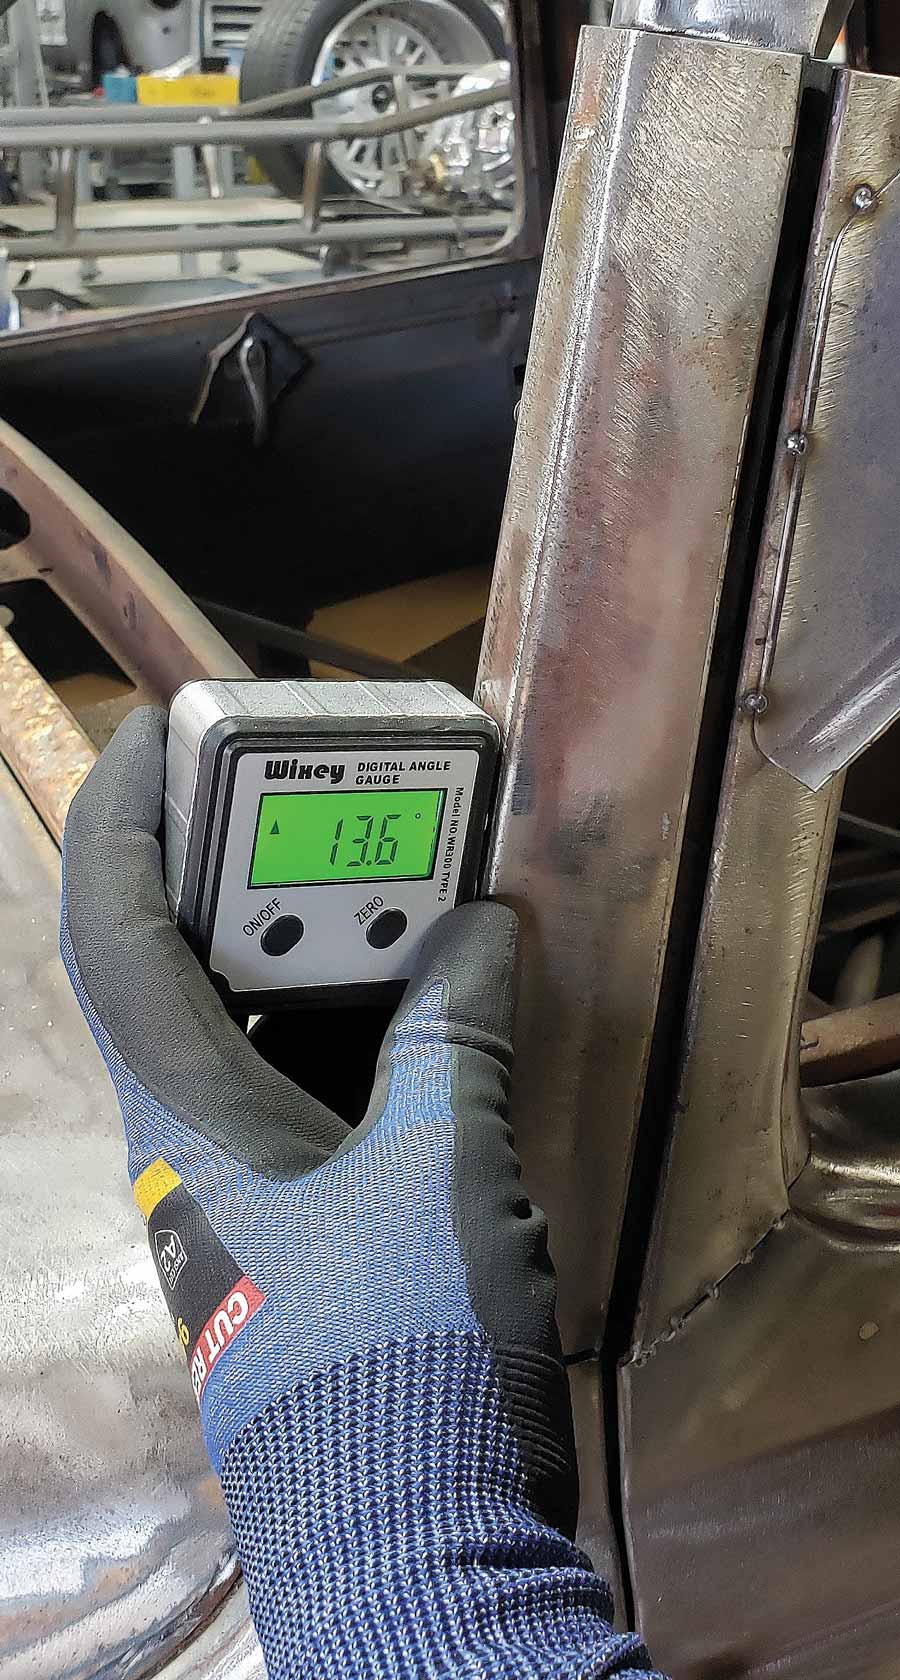
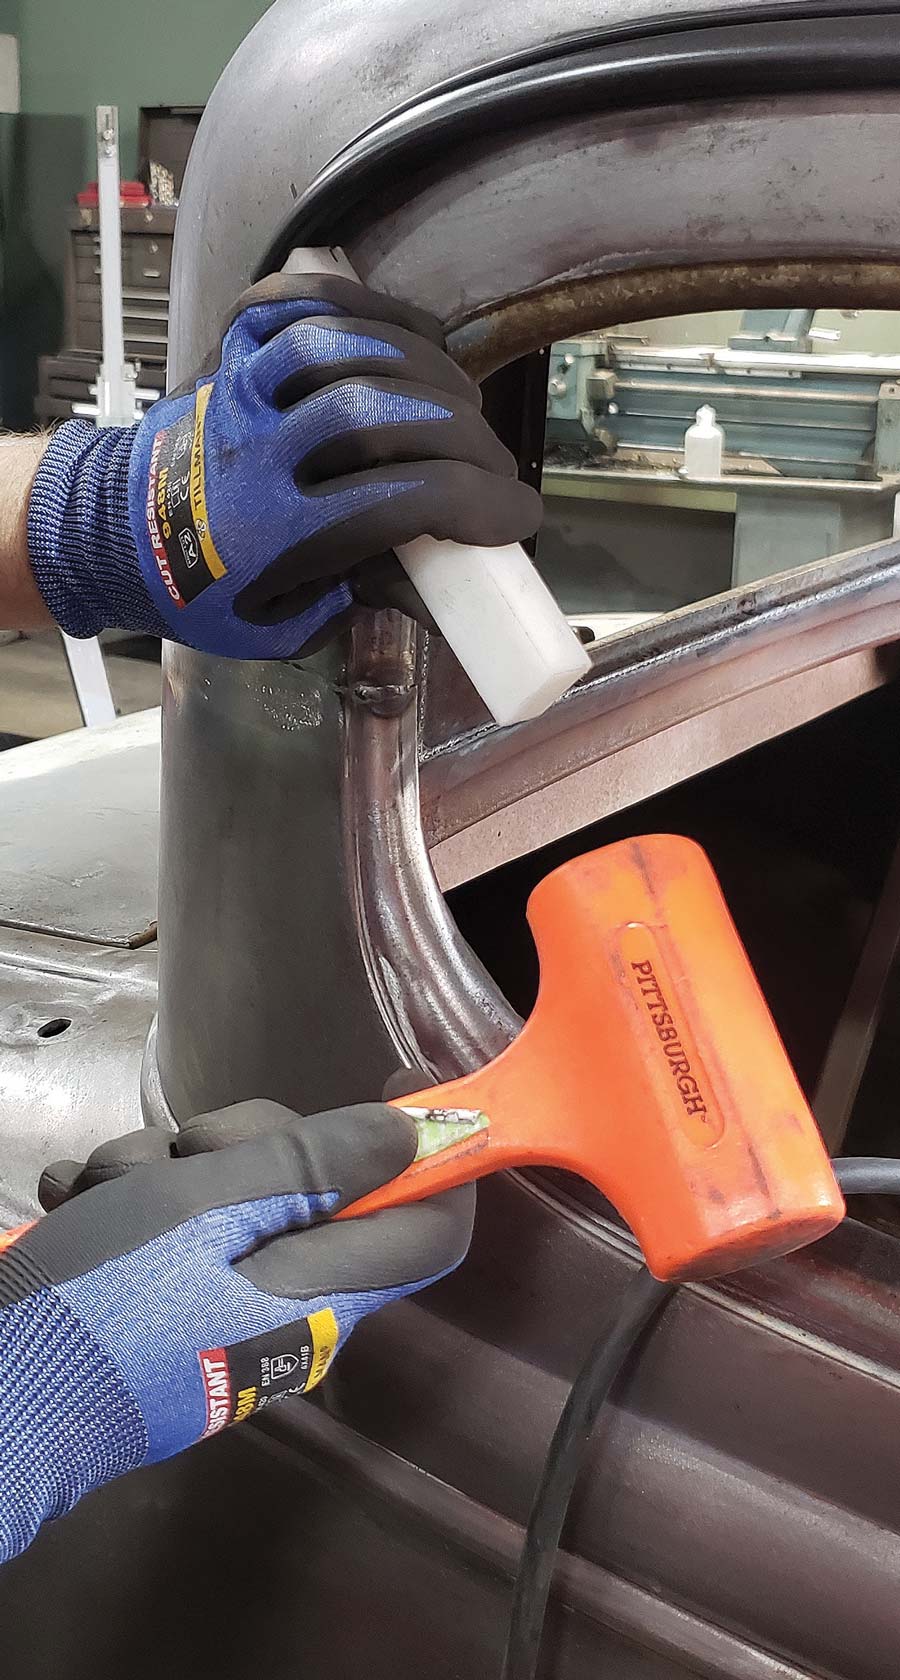
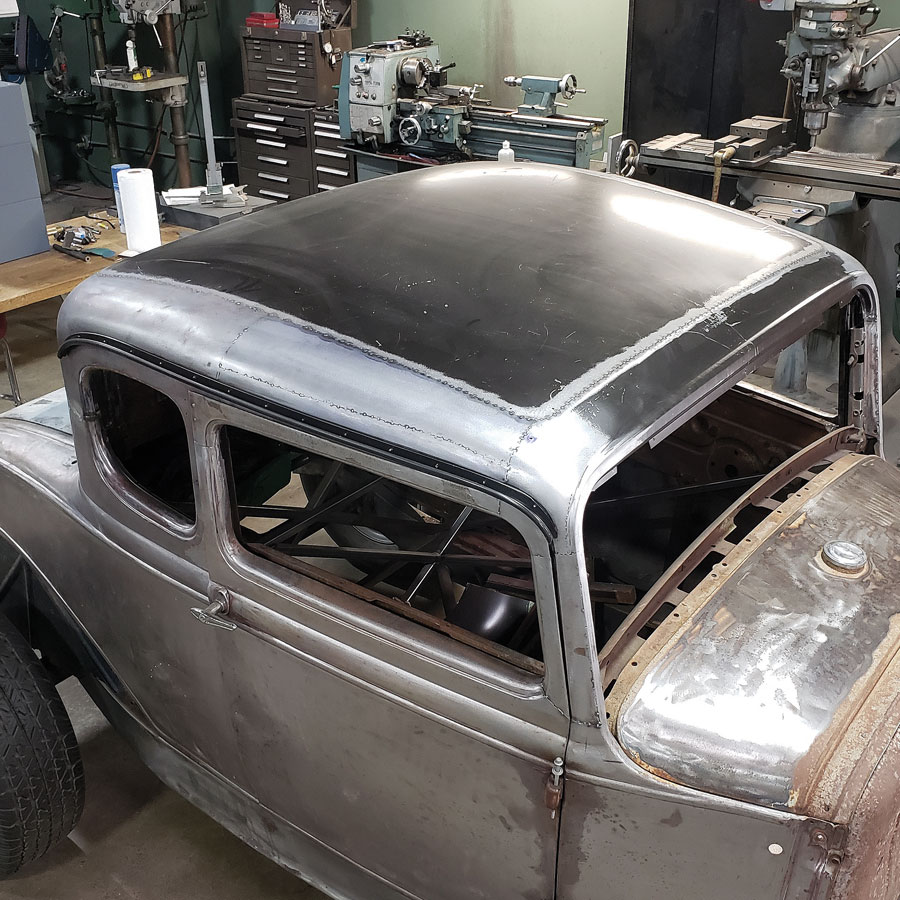
In the first part of this two-parter, we saw the initial roof cuts being made, the chop being figured out, and the beginning of how Paul was going to address the leaning A posts back to accommodate the roofline.

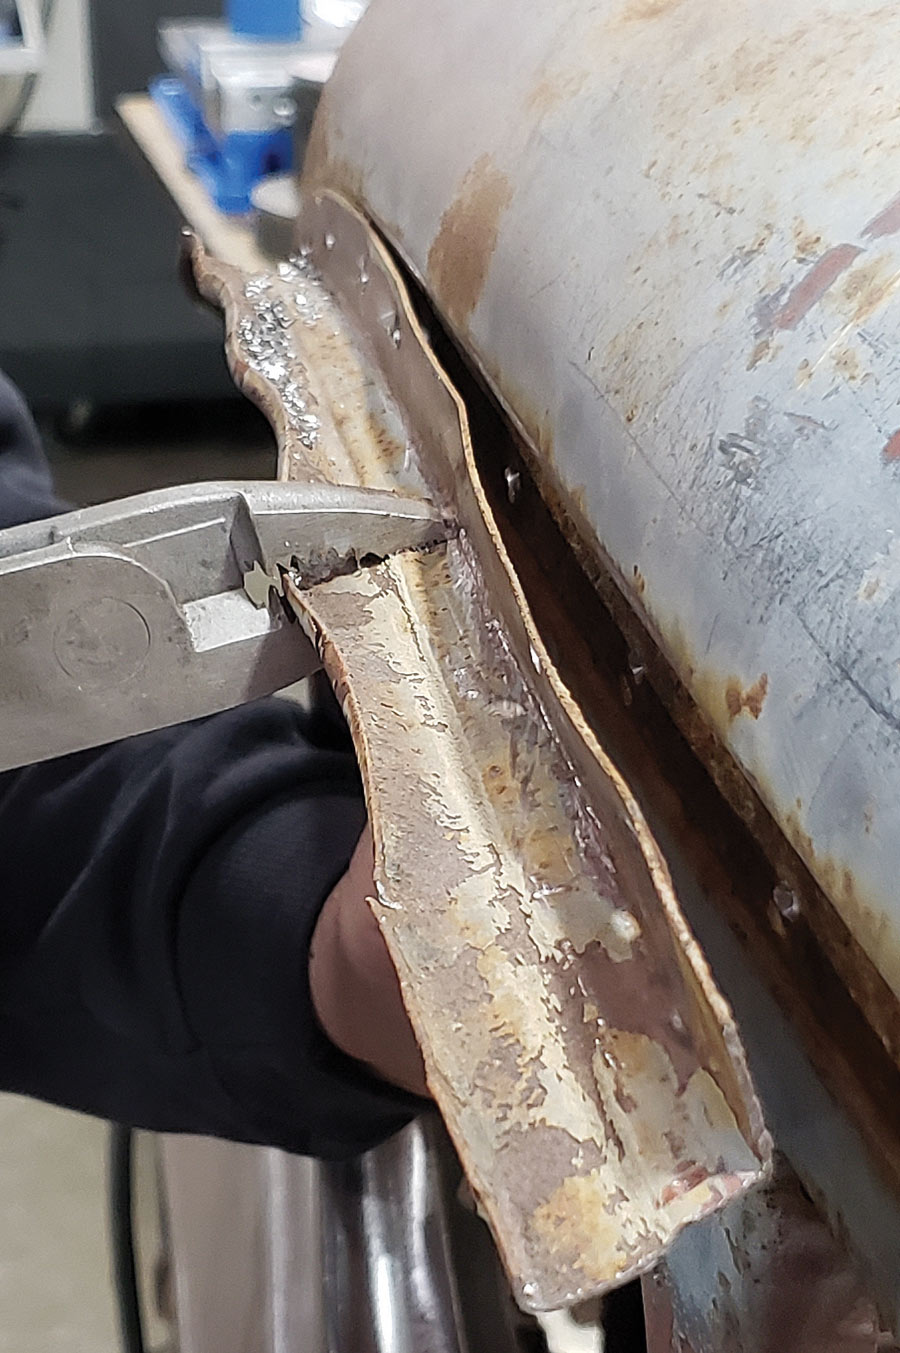
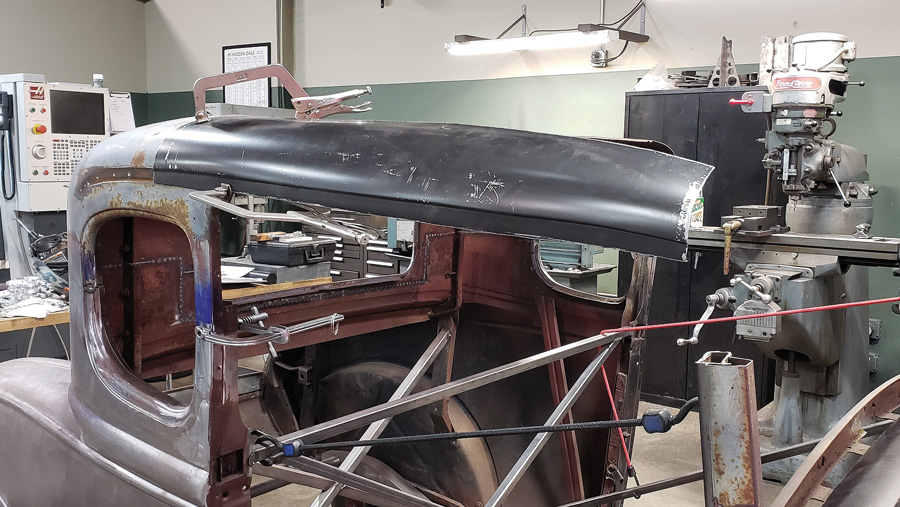
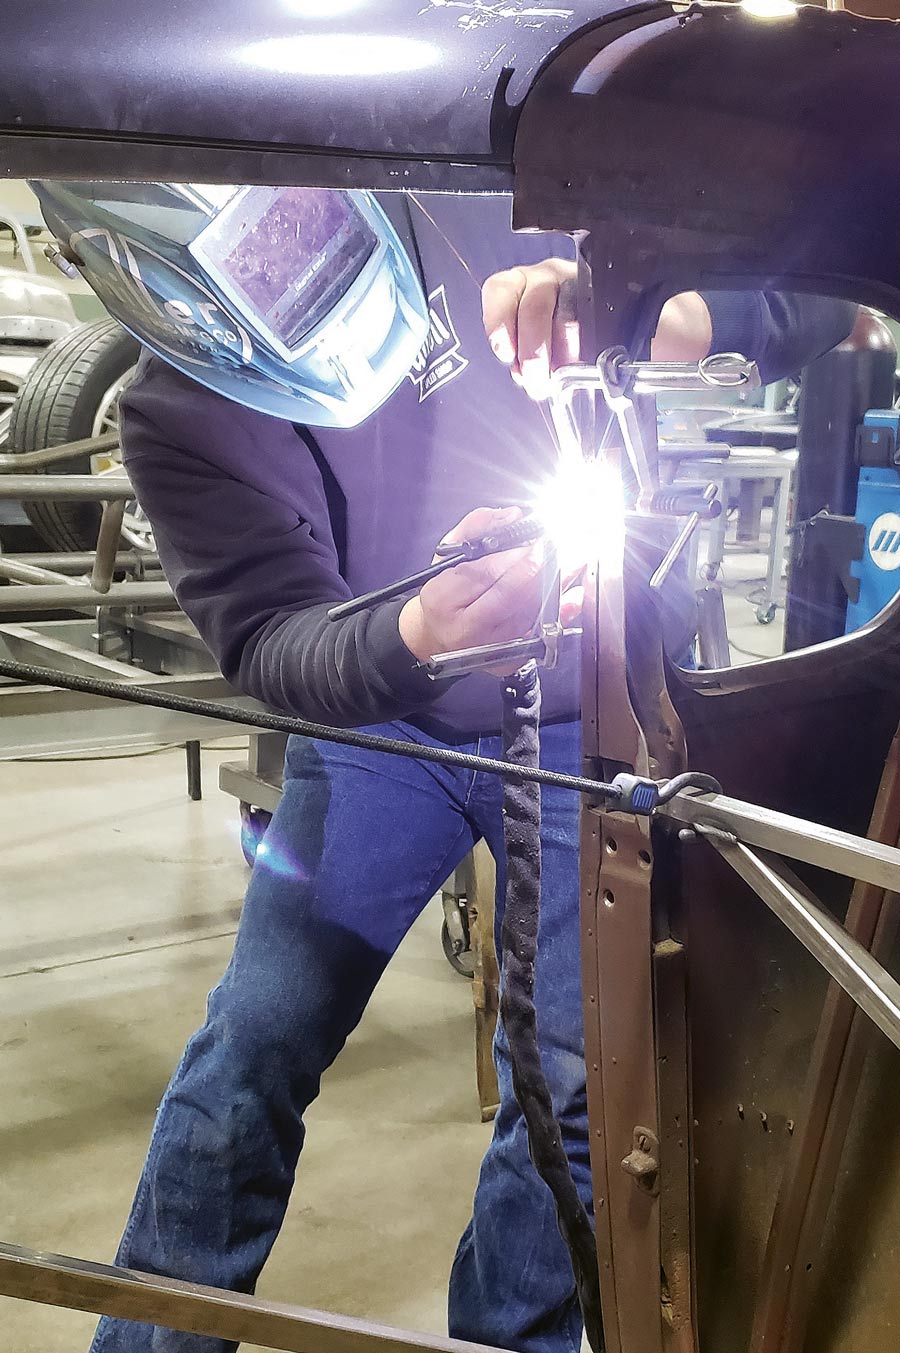
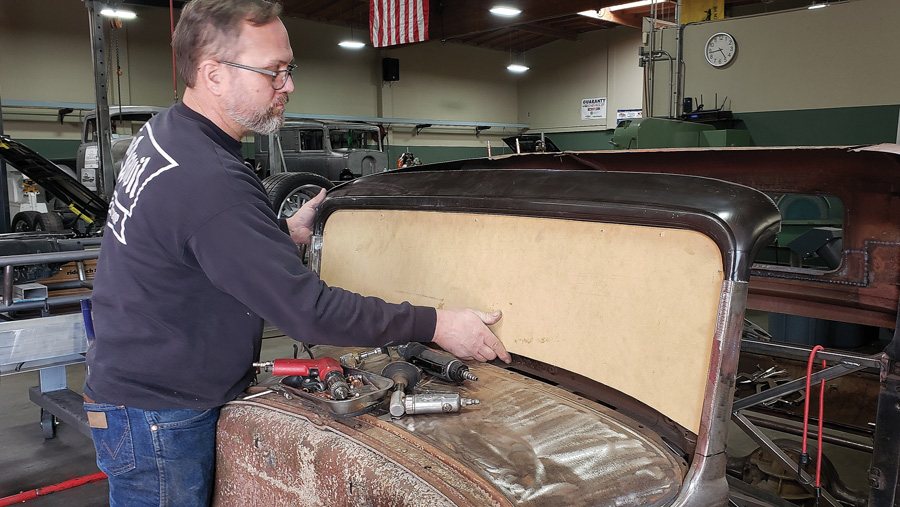
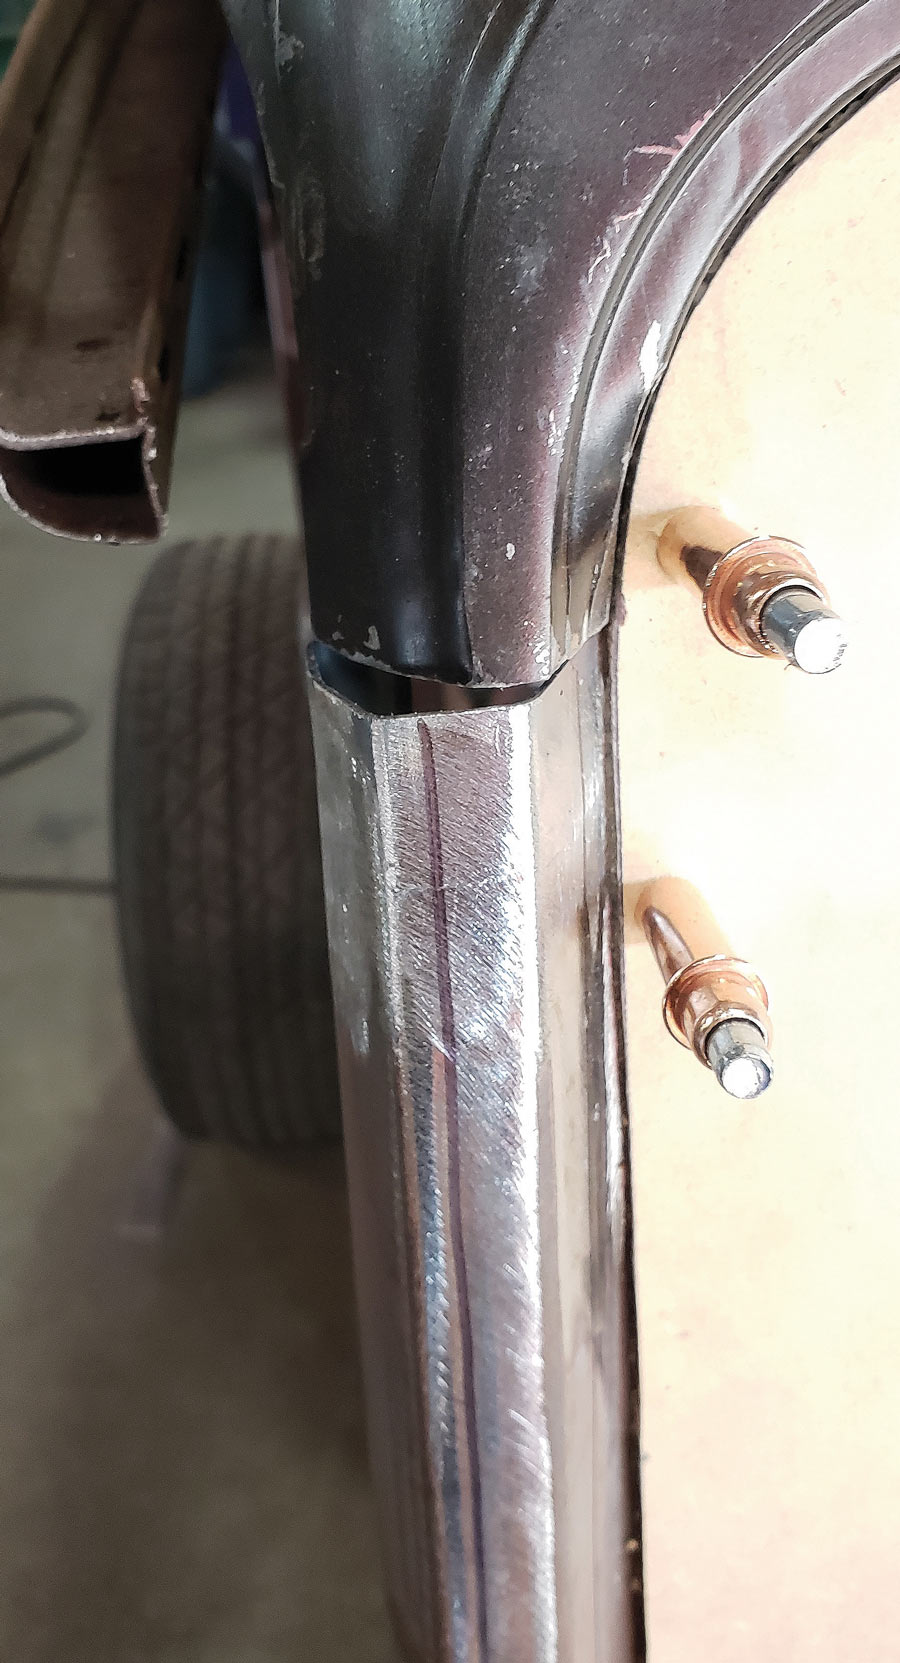
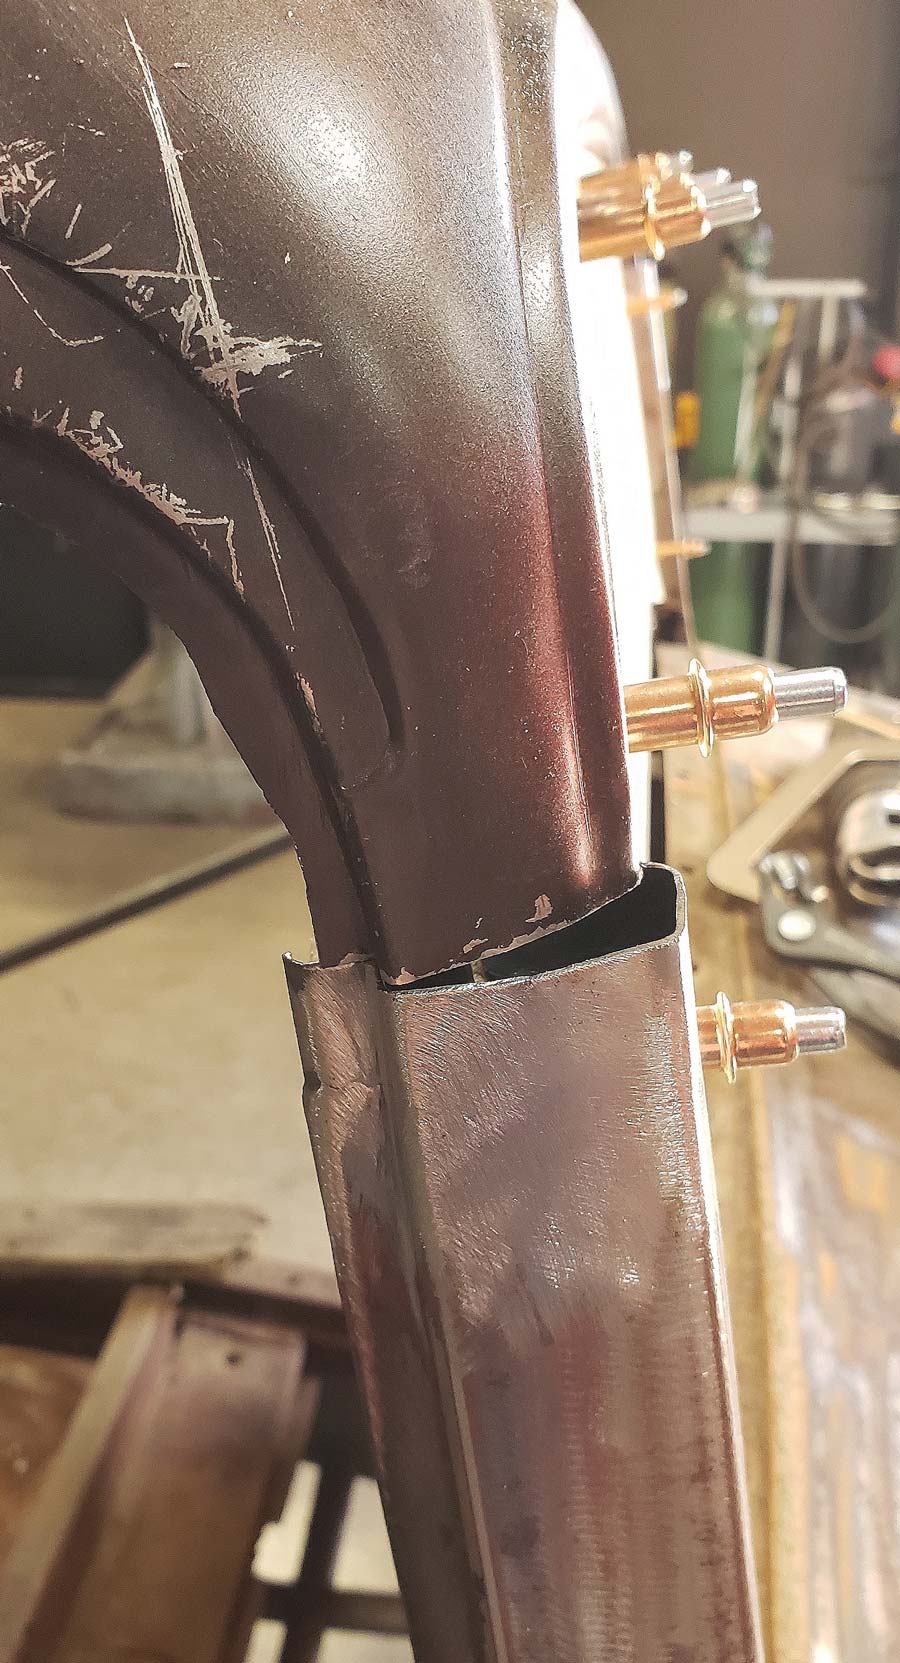
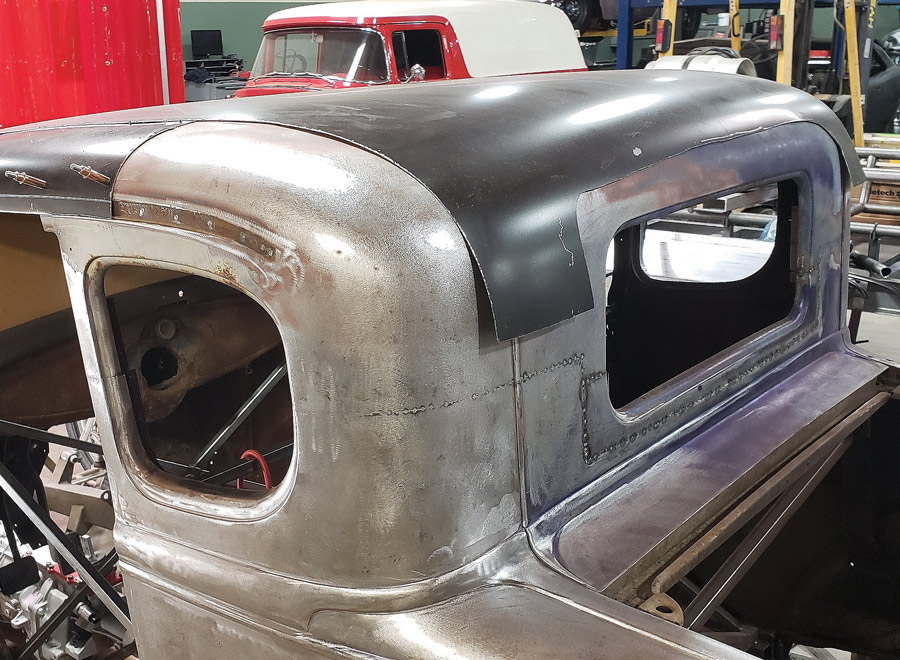
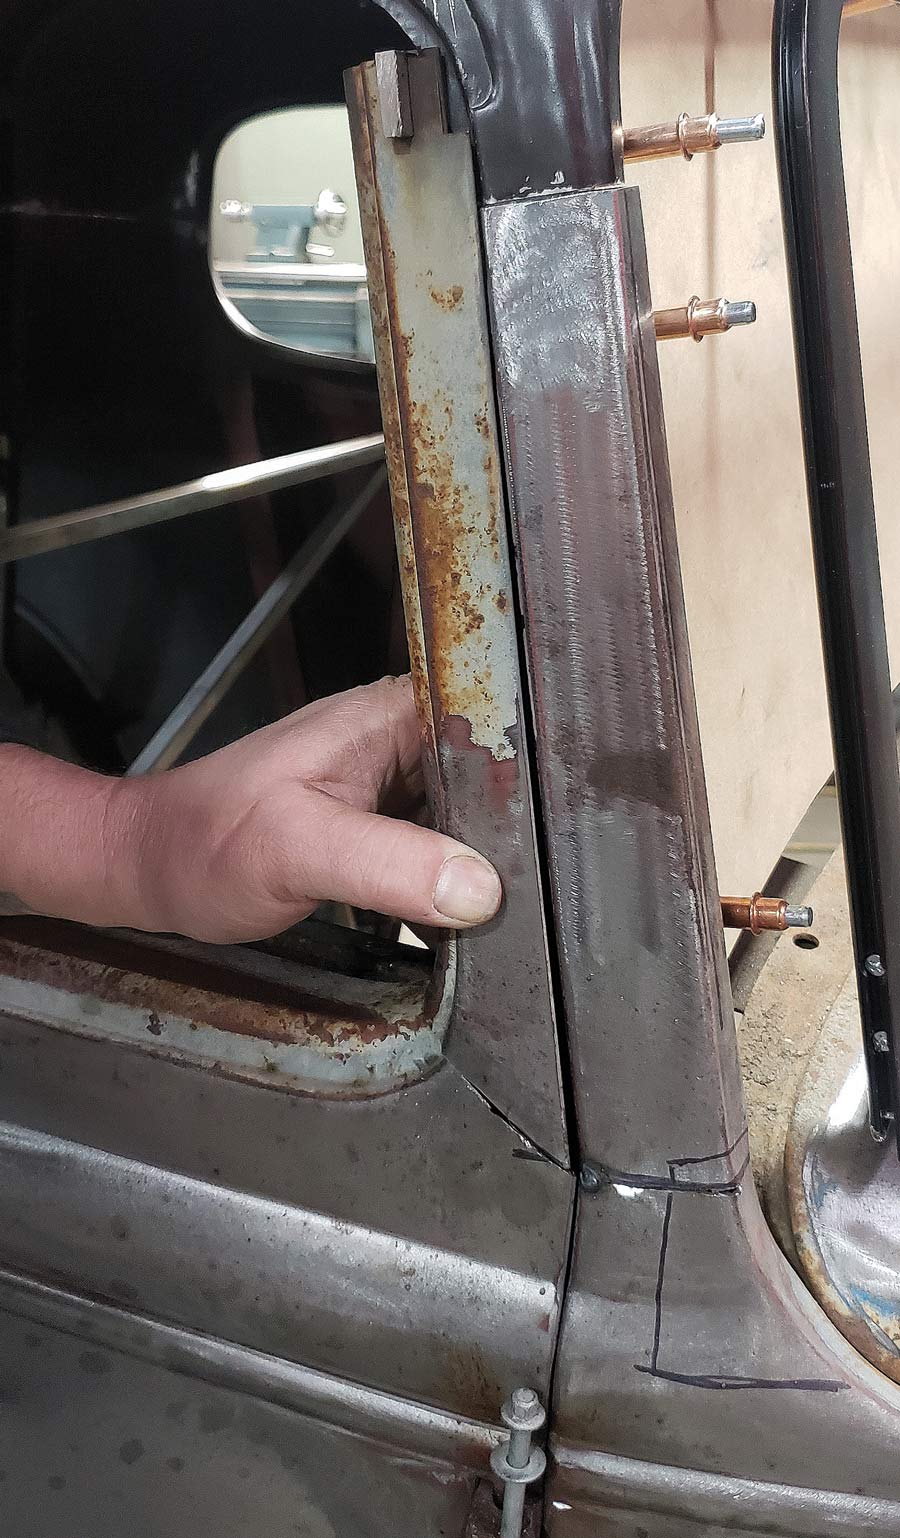
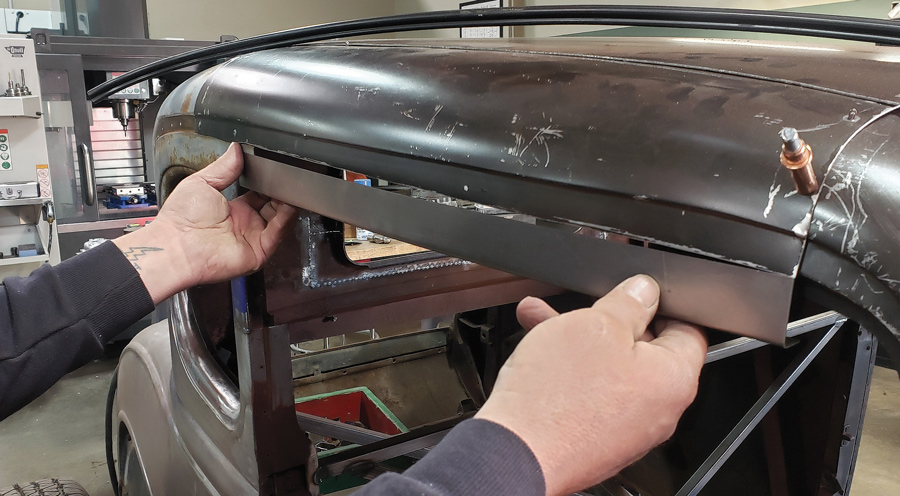
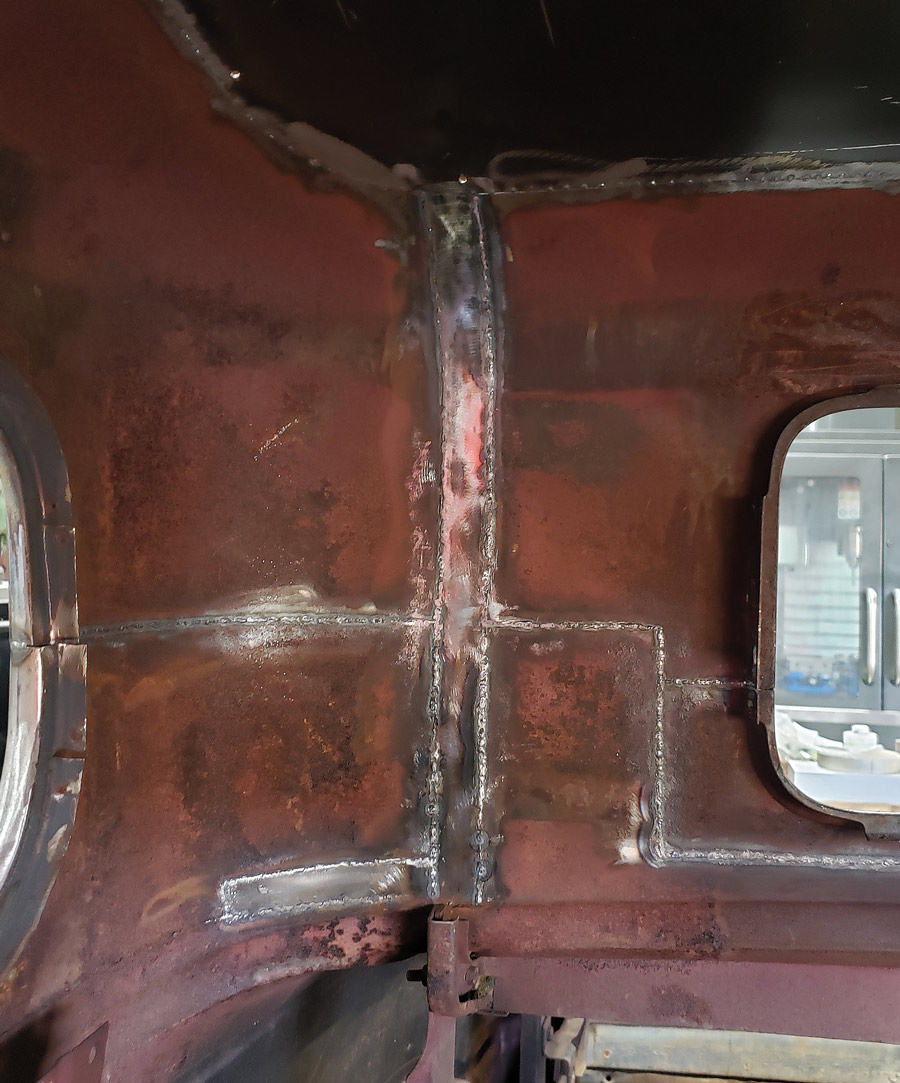
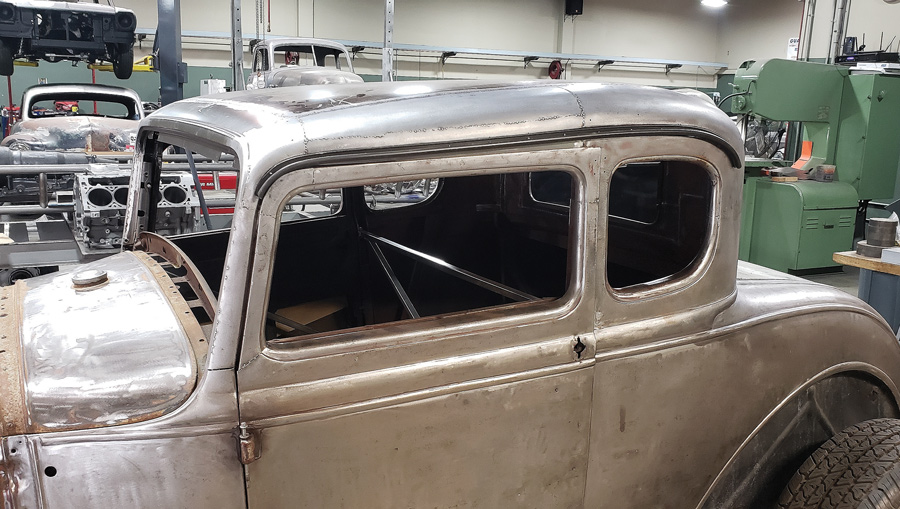
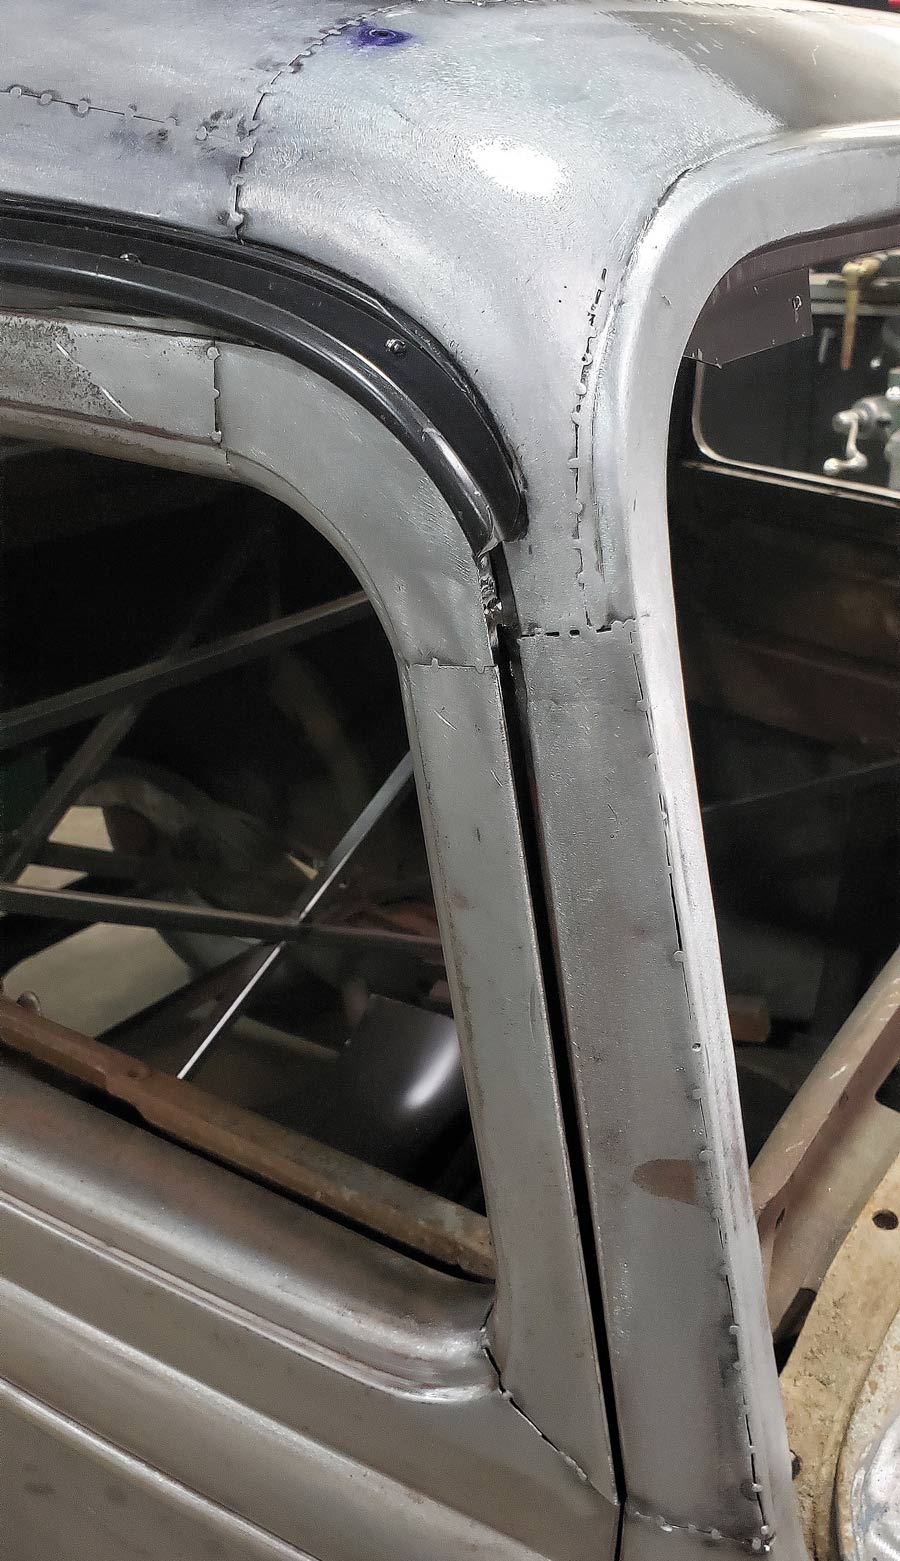
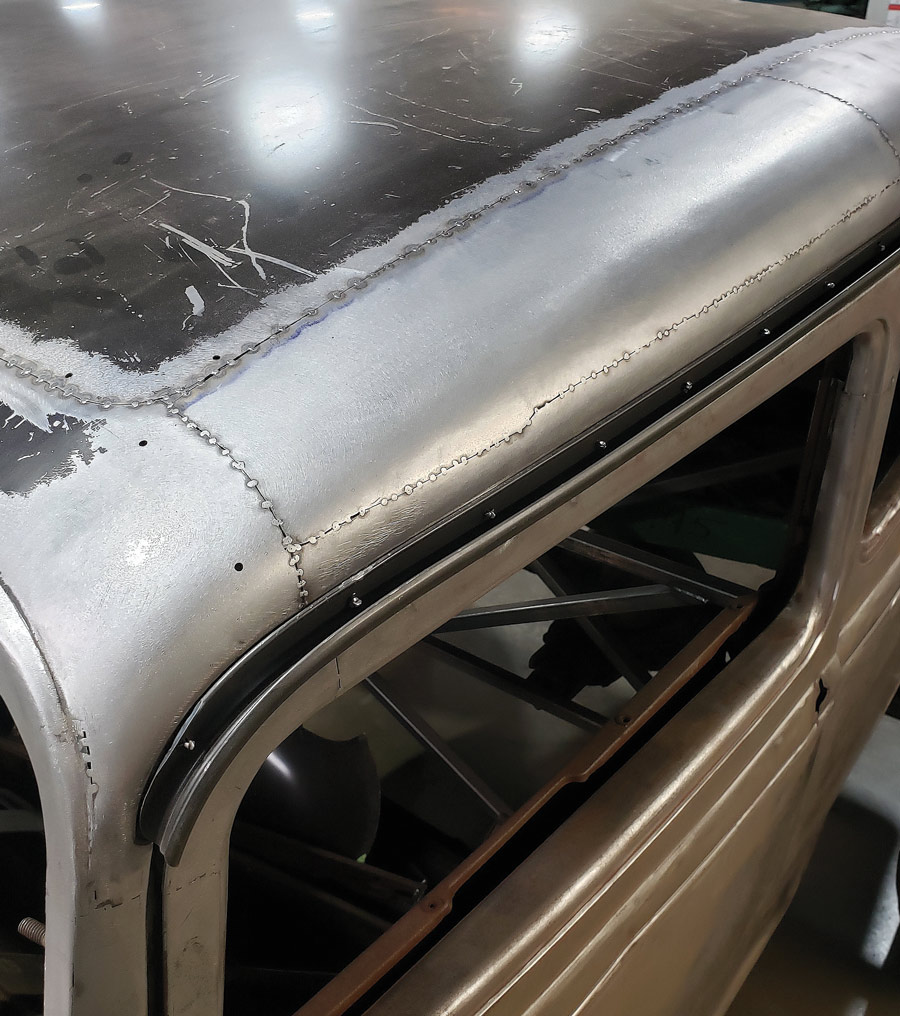
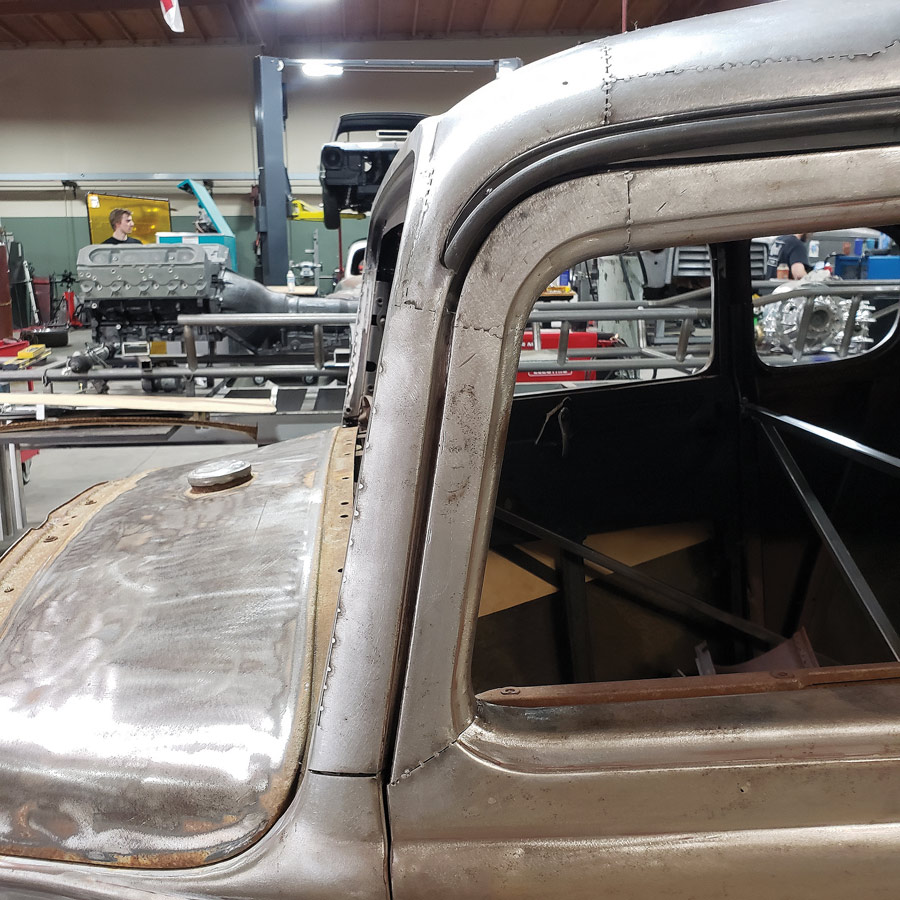
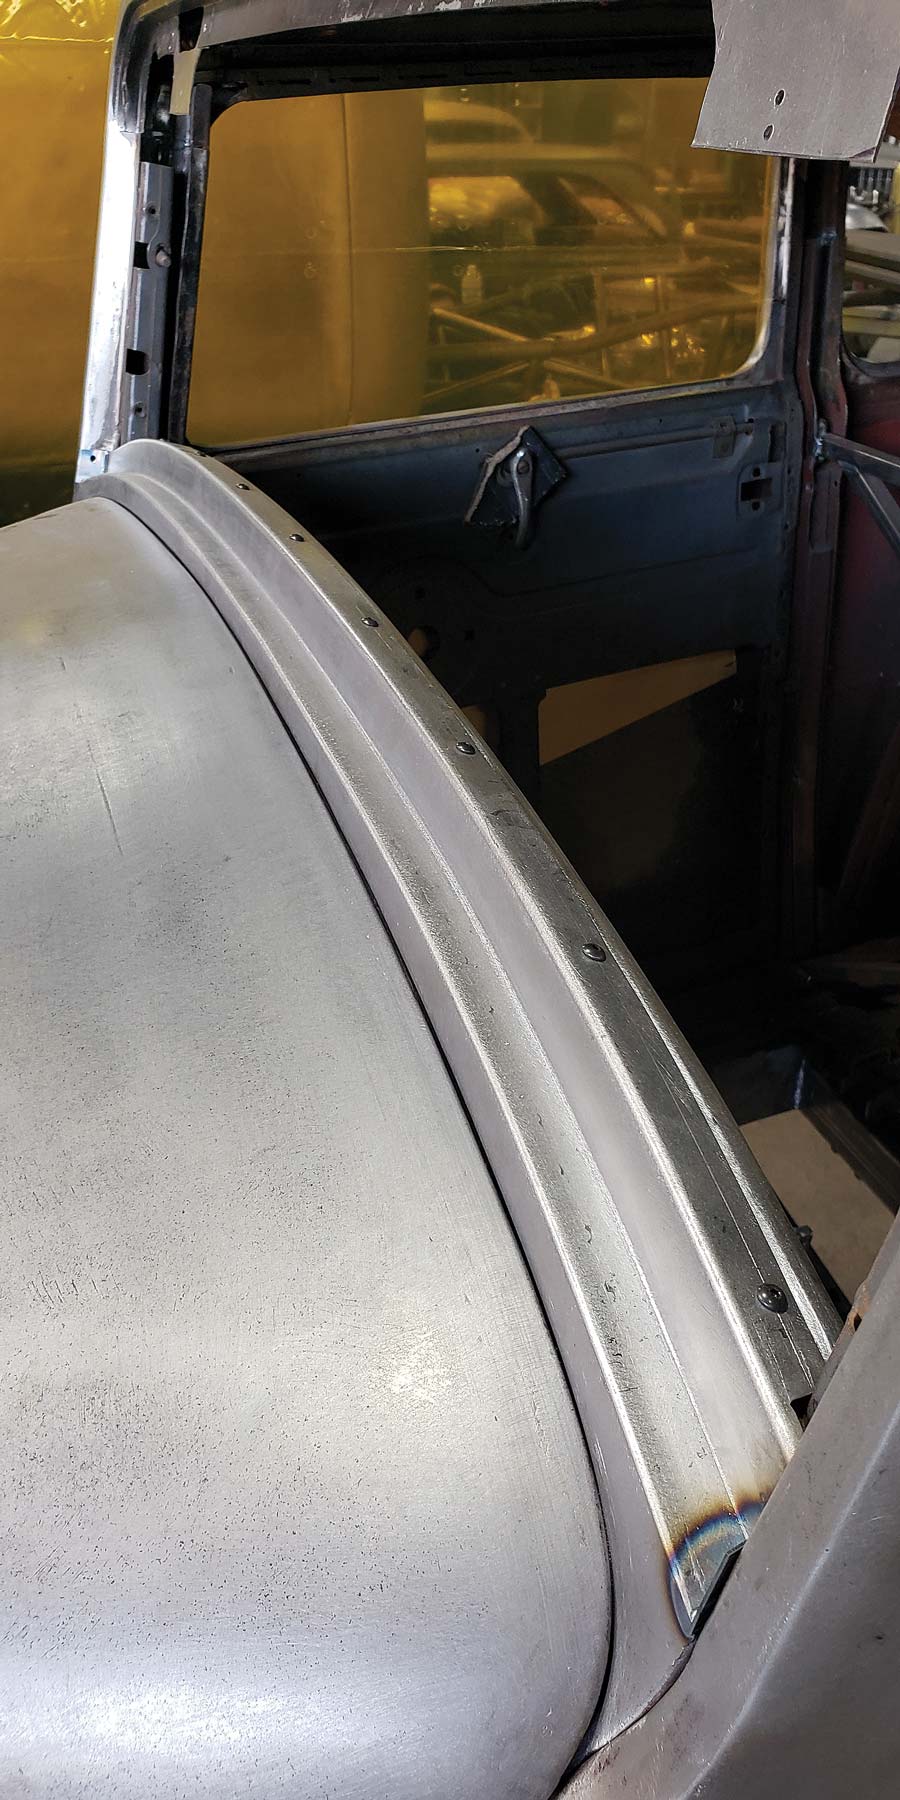
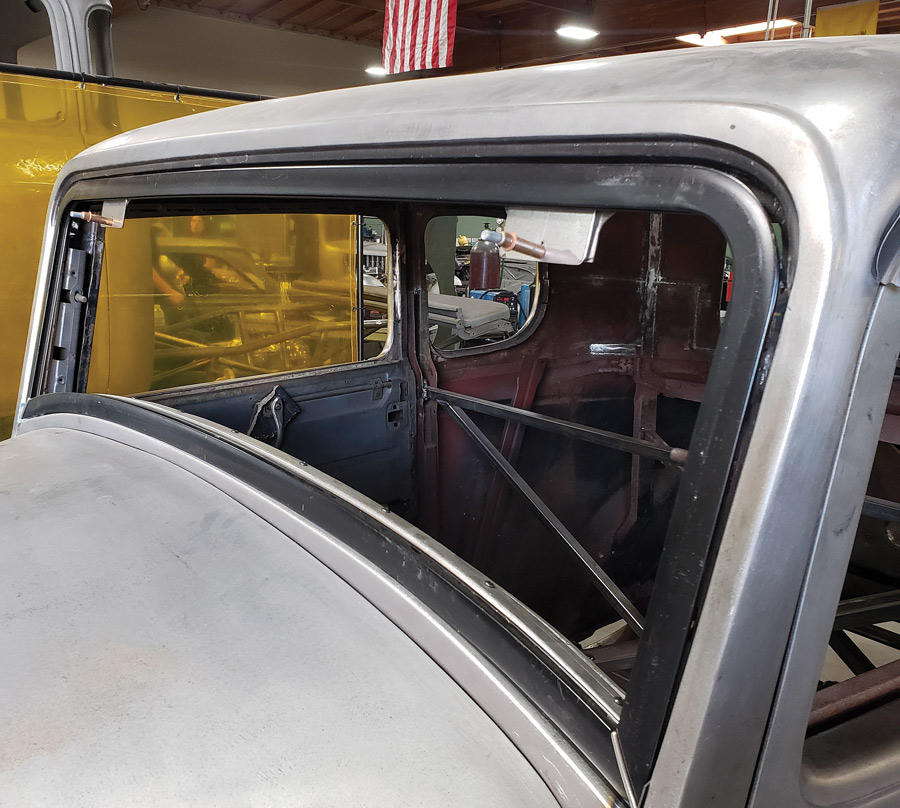
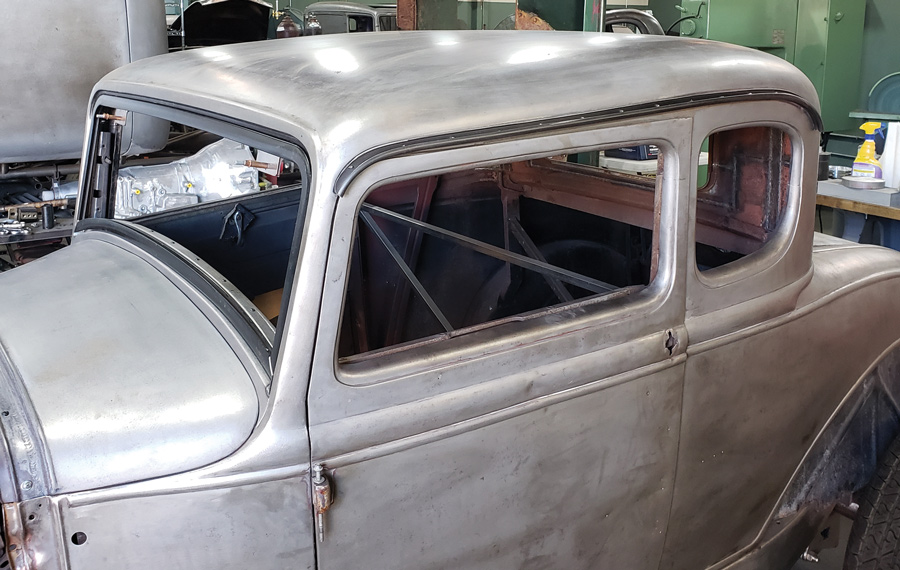
The entire reconstruction was done in three phases: first the rear section (from the B posts back) was chopped, which was a pretty straightforward task. But the tricky part was determining not only where the transition would be from the roof to the door top, but if it would be the Model A or the ’32 piece.

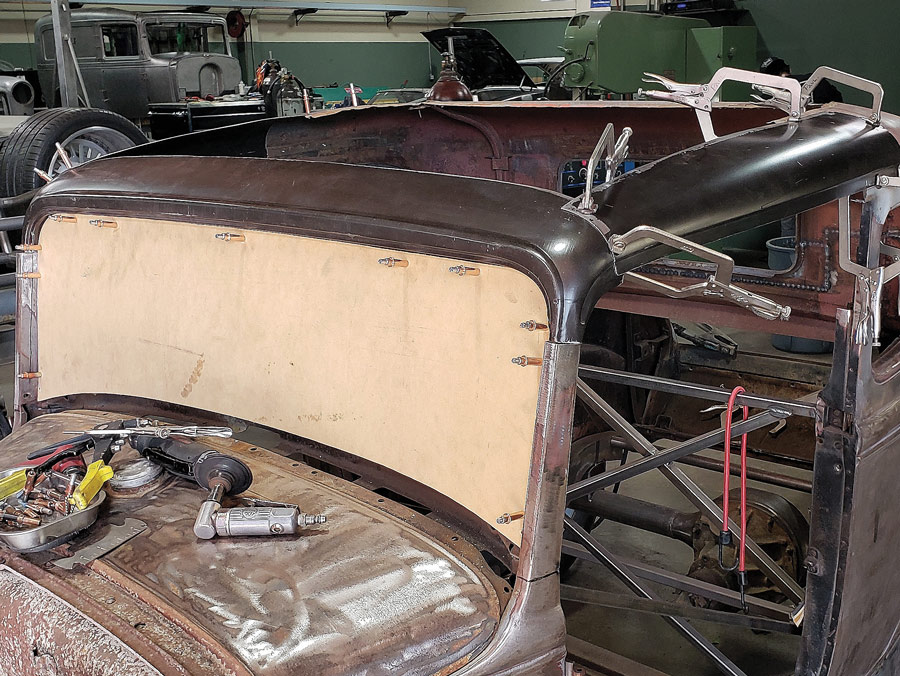
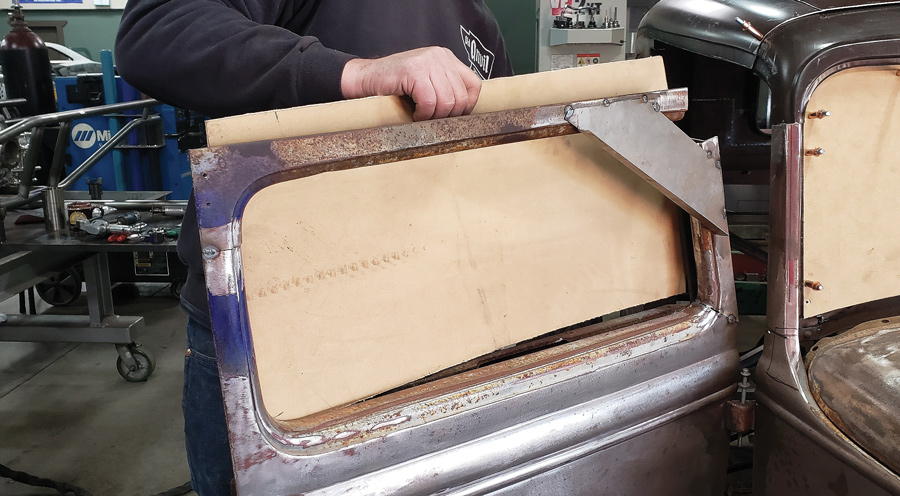
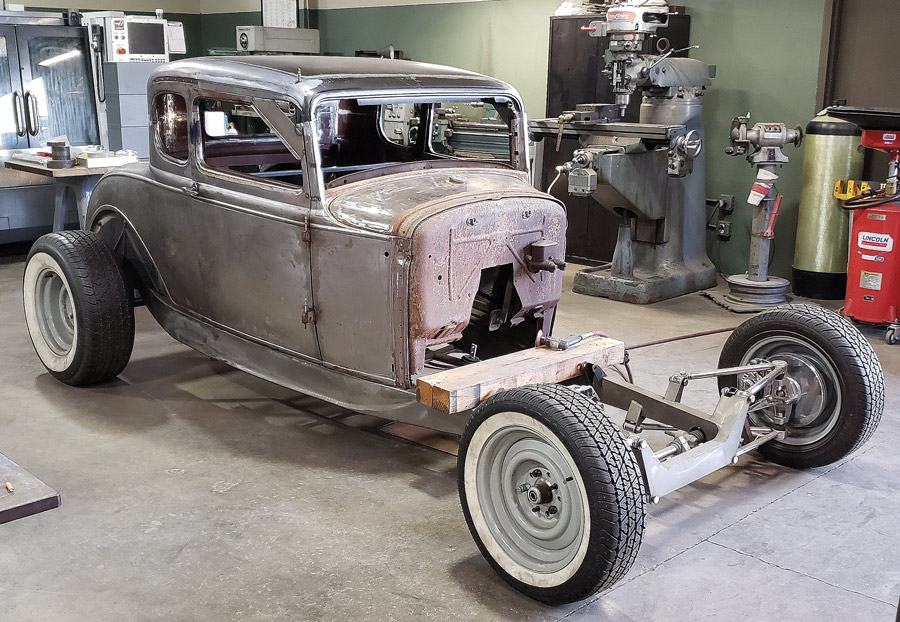
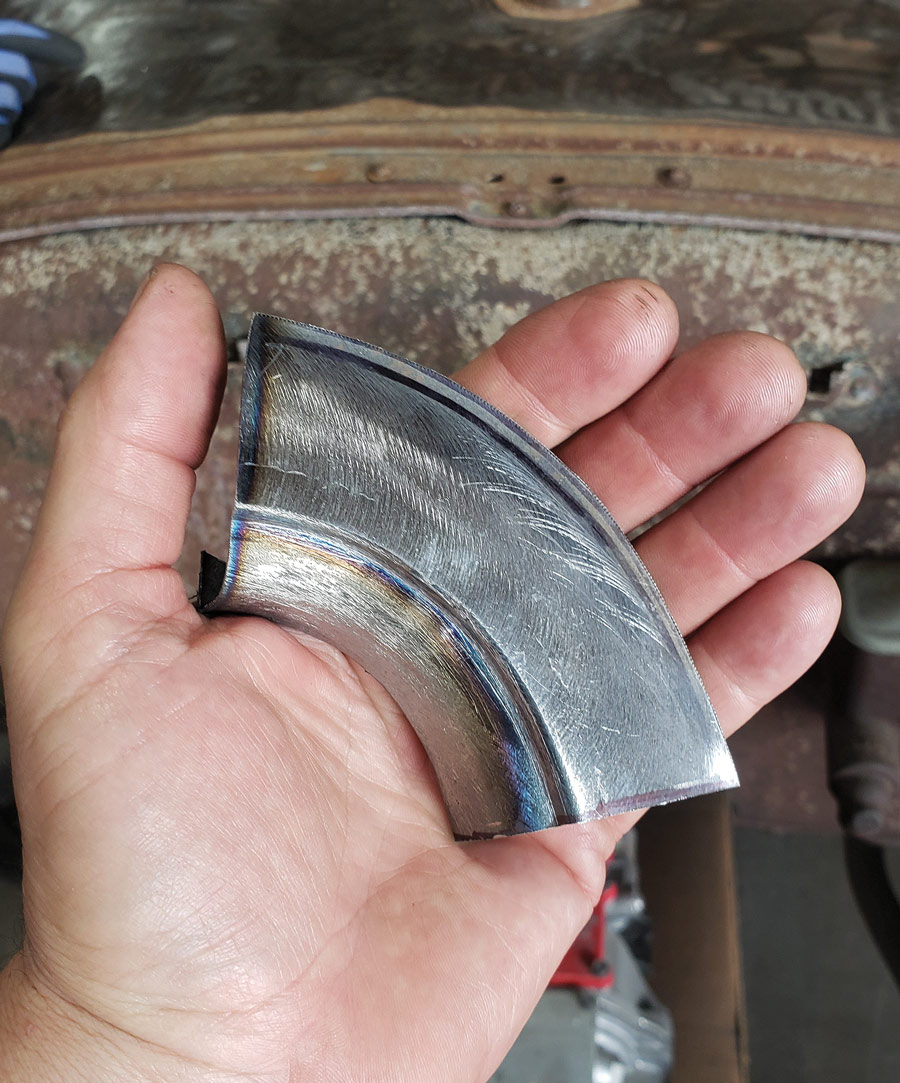
Paul was surprised on how close the ’32 roof fit to the old Model A roof, like hand-to-glove in many areas, and nearly all of this work was going to be done by eye—in other words what looked right to Paul. At first Paul thought he’d be using most of the new top section but, as work progressed, he discovered that much of the original Model A roof could be retained. It turned out the ’32 roof would be cut into four sections: the piece above the windshield, the left and right door top sections, and the middle section (the whole rear section of the ’32 with the window was not used at all).

What did turn out to be true is the amount of work it took to get this roof redo to look “right” might not yield the response from the general public it deserves. It’s so subtle only die-hard ’32 or Model A fanatics will get what happened, and chances are they’ll only see a portion of it—the work really is just that subtle.

The stock Late-A coupe was brought to Old Anvil with the roof’s visor section already removed.
1. The stock Late-A coupe was brought to Old Anvil with the roof’s visor section already removed.
The car’s design concept called for the Model A’s driprails to be removed (first by cutting out the spot welds) and the '32 to be added.
2. The car’s design concept called for the Model A’s driprails to be removed (first by cutting out the spot welds) and the ’32 to be added.
The door top section of the '32 is positioned so both driprail areas (from both the '32 and the Model A) line up.
3. The door top section of the ’32 is positioned so both driprail areas (from both the ’32 and the Model A) line up.
Paul, confident where the roof is being positioned so far, tack welds the B posts in place.
4. Paul, confident where the roof is being positioned so far, tack welds the B posts in place.
After making a 1/4-inch Masonite wood template of the windshield frame (chopping it 3 inches also) Paul can begin to clamp the windshield area pieces together.
5. After making a 1/4-inch Masonite wood template of the windshield frame (chopping it 3 inches also) Paul can begin to clamp the windshield area pieces together.
A close-up of how the Model A and '32 A post sections initially fit.
6. A close-up of how the Model A and ’32 A post sections initially fit.
The  thicker section of the Model A is evident here when compared to the '32 above.
7. The thicker section of the Model A is evident here when compared to the ’32 above.
The door top sections are being fitted to begin tying all the pieces together.
8. The door top sections are being fitted to begin tying all the pieces together.
Out back, you can see where the ’32 roof is pulling away from the Model A roof. This will be trimmed away as the back third of the car’s roof will only be Model A.
9. Out back, you can see where the ’32 roof is pulling away from the Model A roof. This will be trimmed away as the back third of the car’s roof will only be Model A.
This pie-cut will allow the door to be fitted to its new opening.
10. This pie-cut will allow the door to be fitted to its new opening.
The door sections are pieced together to follow the new A post location.
11. The door sections are pieced together to follow the new A post location.
You can see how well everything lays out with the roof insert section added, and now it’s beginning to look like a 31.5 Model A!
12. You can see how well everything lays out with the roof insert section added, and now it’s beginning to look like a 31.5 Model A!
The door pieces are being tack-welded together.
13. The door pieces are being tack-welded together.
Before the corner door piece could be fab’d, a brace was made so work can continue on the door. Another template allows Paul to figure out how the flat door glass will be installed.
14. Before the corner door piece could be fab’d, a brace was made so work can continue on the door. Another template allows Paul to figure out how the flat door glass will be installed.
Another tricky part was figuring out where the piece (which Paul fab’d) below the driprail will go and meet up with the Model A’s door edge and lip.
15. Another tricky part was figuring out where the piece (which Paul fab’d) below the driprail will go and meet up with the Model A’s door edge and lip.
The face of the backpiece section that will hold the new driprail needs to blend from the stepped reveal line (which Paul fab’d on the Pullmax) to fade away into the Model A’s squarish shape as the line runs forward into the corner.
16. The face of the backpiece section that will hold the new driprail needs to blend from the stepped reveal line (which Paul fab’d on the Pullmax) to fade away into the Model A’s squarish shape as the line runs forward into the corner.
The fabricated backpiece section behind the driprail is made a bit crisper.
17. The fabricated backpiece section behind the driprail is made a bit crisper.
Rear driver side view of car
Front passengers side of car
18-19. With the filled roof insert panel tacked in place it was decided the vertical accent seam between the rear window and the roof corners (on either side of the rear window) would be eliminated.
Since the Model A’s seam section was removed, a flat panel had to be added, and you can see where with this interior view of the roof’s corner section.
20. Since the Model A’s seam section was removed, a flat panel had to be added, and you can see where with this interior view of the roof’s corner section.
A digital protractor not only gives Paul the new angle of the post (13.6 degrees) but allows him to accurately adjust the opposite post to the same angle.
21. A digital protractor not only gives Paul the new angle of the post (13.6 degrees) but allows him to accurately adjust the opposite post to the same angle.
The fab’d door corner piece will finish up the work on the doors.
22. The fab’d door corner piece will finish up the work on the doors.
The driprail on the '32 needed to be “finessed” a bit to make it fit where it needs to go.
23. The driprail on the ’32 needed to be “finessed” a bit to make it fit where it needs to go.
The '32 driprail really helps sell the idea the car is a perfect blend of the two model years.
24. The ’32 driprail really helps sell the idea the car is a perfect blend of the two model years.
All the pieces of the door, A post, and driprail are in their  final spots. As small as this section of the car is, this was probably the hardest area to get right.
25. All the pieces of the door, A post, and driprail are in their final spots. As small as this section of the car is, this was probably the hardest area to get right.
With a bit of metal finishing the weld marks begin to disappear.
26. With a bit of metal finishing the weld marks begin to disappear.
The heaviness of the A posts goes away when blended up to the more svelte '32 shapes.
27. The heaviness of the A posts goes away when blended up to the more svelte ’32 shapes.
No extra shaping was needed on the roof section—it’s still the untouched '32 five-window roof piece.
28. No extra shaping was needed on the roof section—it’s still the untouched ’32 five-window roof piece.
 The transition area from the cowl to top of the Model A dash had to be fabricated from scratch.
29. The transition area from the cowl to top of the Model A dash had to be fabricated from scratch.
With the windshield frame in place, the design of the A posts belies the hard work that went into making them look so simple.
30. With the windshield frame in place, the design of the A posts belies the hard work that went into making them look so simple.
A perfect blending of two eras of ’30s Ford coupes: the Model A and the Deuce1
31. A perfect blending of two eras of ’30s Ford coupes: the Model A and the Deuce1
Old Anvil Speed Shop
(657) 223-9889
oldanvilspeedshop.com
Modern Rodding
VOLUME 3 • ISSUE 16 • 2022