
Modern Rodding Tech
1971 Plymouth Duster white body shell restoration project front three-quarter view
1. Here is the car as it looked when the project started. The paint was nice and shiny, but as you’ll soon see, there were a lot of issues hiding beneath the surface. Still, the crew at BBT will make it better than new.
Remove, Work, Replace
Fitting Fresh Sheetmetal Takes Know-How… and Patience
By Ron Covell Photography by BBT Fabrications
BBT

Fabrications has built quite a reputation for creating over-the-top performance car projects. For this project, they are building a car for their customer Jordan Dustin, featuring a Chrysler Hellcat engine that they squeezed into a 1971 Plymouth Duster.

They found a very clean-looking car to start with, which appeared great in its shiny white paint. It was only after beginning to strip the car down to bare metal that they discovered how little of the body was salvageable. Rust damage and poorly executed repairs were evident on most of the lower body panels. Fortunately, there is a good supply of aftermarket body panels available for this model, and they made careful decisions about which panels to repair, and which to replace with reproduction panels from Auto Metal Direct (AMD). The photos will give you a good idea of what it takes to properly repair a sad example like this one.

The original Duster had a unibody chassis design, meaning that only sheetmetal connects the engine and drivetrain to the rear wheels. While this worked fine for the original 340ci engine with 275 hp, it really isn’t up to the task of handling the blown Hellcat 6.2L engine pumping out 717 hp.

To answer the need for a solid foundation, a complete full-length G-Machine Chassis from Schwartz Performance was sourced. The front suspension features extra-long adjustable coilovers for a smooth ride complemented with needle bearing supported tubular upper control arms. A triangulated rear suspension secures a full floating rear end with adjustable coilovers.

A new AMD floor was installed in the body, and channels were added to fit the new framerails. At this point, the paint was stripped from the body, revealing just how much damage had been hidden beneath the shiny surface. Not only was there extensive rust damage, but the repairs were poorly done, with large amounts of plastic filler spread over the damage to make it look presentable on the outside.

Since AMD provides good support for this car, many new panels were installed, including the quarter-panels, rocker panels, rear doorjambs, and a new rear panel. Some original panels, such as the hood, roof, decklid, doors, and front fenders, were kept, but most required extensive reworking.

To ensure these repairs last, all the hidden panels were prepared and sealed with epoxy paint to prevent rust from forming inside. New bottoms were installed on the doors to fix rust damage, and a good amount of time was spent adjusting the doors to get perfect gaps.

When working on a car over 30 years old, you need to be prepared for issues like this. Fortunately, the team at BBT has extensive experience repairing this type of damage, so each problem area was expertly handled, meeting the high standards set for this build.
1971 Plymouth Duster restoration chassis stripped body shell suspension upgrades
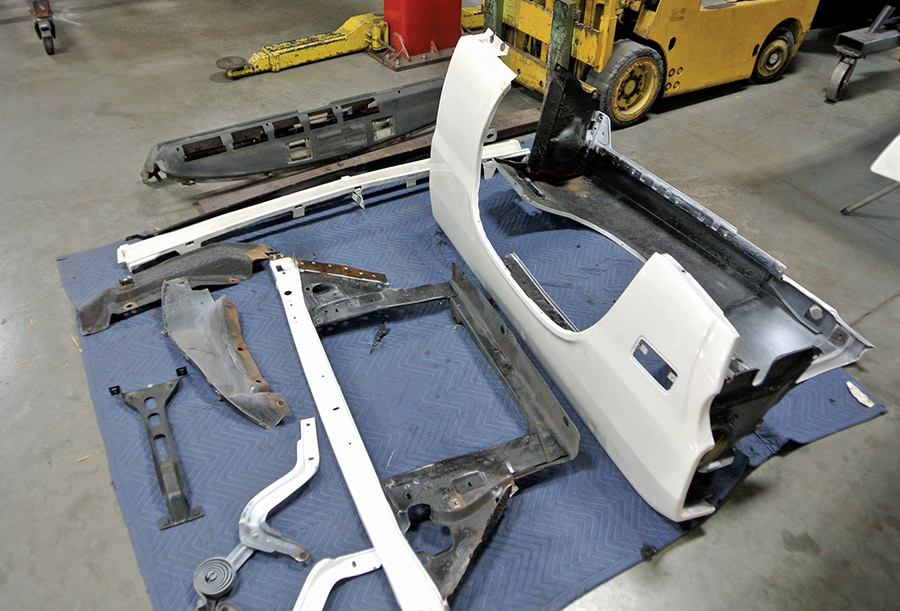
2. The front end sheetmetal was taken apart first. Not too many surprises here.
1971 Plymouth Duster AMD replacement sheetmetal components blue preparation mat fabrication shop
3. The body shell was mounted on a rotisserie as a plan was developed for the powertrain of the car.
1971 Plymouth Duster body shell rotisserie mount bare metal restoration frame rails exposed
4. A G-Machine chassis from Schwartz Performance was chosen to fit under the Duster Unibody, providing the strength needed to withstand the power delivered by the blown, 717hp Chrysler Hellcat engine.
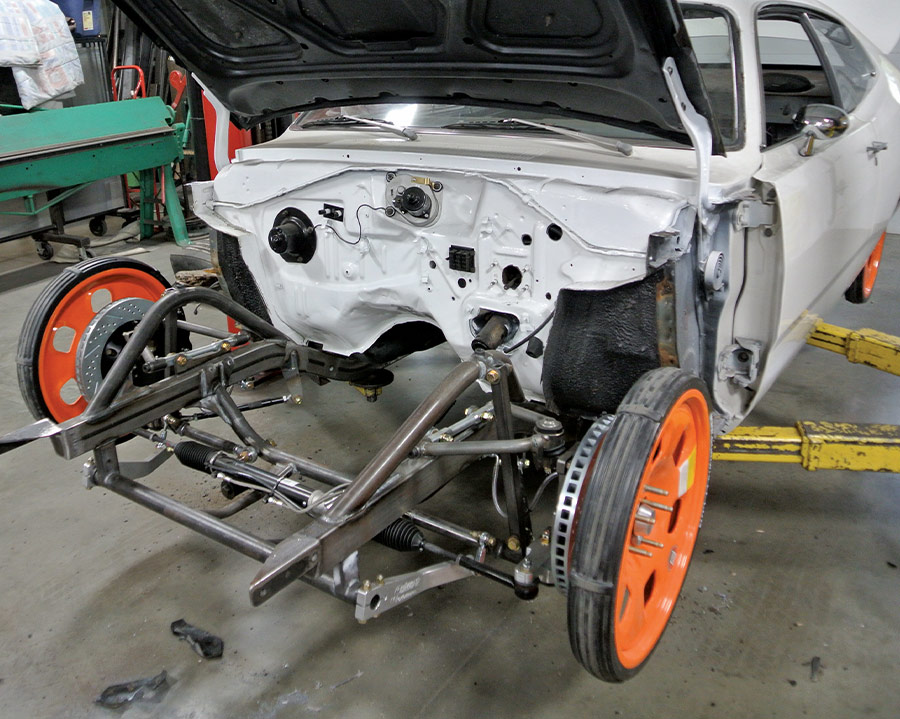
1971 Plymouth Duster chassis performance suspension orange wheels disc brake conversion rolling platform
5. With the G-Machine chassis in place, you can see how the Duster becomes a body-on-frame car rather than the weak, original unibody structure.
1971 Plymouth Duster body shell restoration AMD sheetmetal quarter panel replacement fabrication shop
6. With the preliminary fitting completed to connect the body to the chassis, the paint was stripped. This is when the project took on a new dimension.
1971 Plymouth Duster engine bay preparation metal reinforcement panel structural restoration
7. Looking at the front of the driver side wheelwell, you can see the poor-quality rust repairs that were lurking under the shiny paint.
1971 Plymouth Duster front frame rail replacement AMD sheetmetal restoration BBT Fabrications shop
8. The bottom of the quarter-panel was also in terrible shape.
1971 Plymouth Duster body on rotisserie undercarriage exposure floor pan restoration structural work
9. The most sensible way to fix the extensive damage on the quarter-panels was to cut them out and fit replacements.
1971 Plymouth Duster quarter panel installation rear wheel well AMD replacement sheetmetal fitment
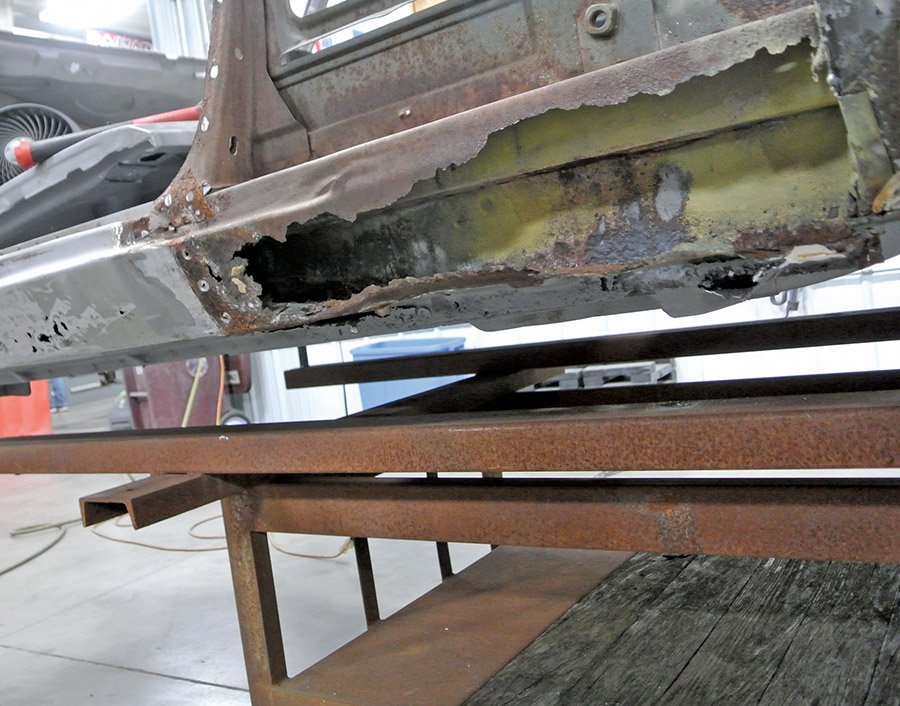
10. With the quarter-panels removed, even more rust damage was found in the rocker panels. These will also be replaced.
1971 Plymouth Duster stripped body shell structural framework bare metal restoration wooden work cradle
11. The rear panel was also removed, leaving only a few sections of the inner structure intact.
1971 Plymouth Duster side profile bare metal shell fabrication tools floor pan work professional restoration
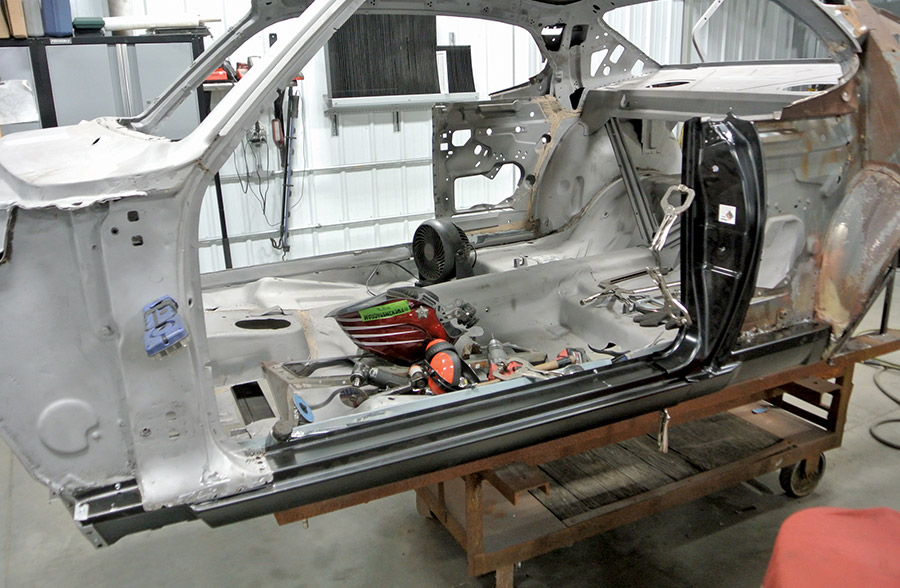
12. After cleaning the remaining metal, new rocker panels and rear doorjambs were installed.
1971 Plymouth Duster quarter panel masking plastic sheeting paint preparation blue tape professional bodywork
13. Before installing the new quarter-panels, the interior panels are thoroughly coated with epoxy paint to protect against future rusting.
1971 Plymouth Duster rear quarter panel AMD replacement panel fitment black primer professional restoration
14. New quarter-panels were installed on both sides. These are high-quality reproduction parts.
1971 Plymouth Duster rear quarter profile AMD sheet metal replacement black primer professional restoration
15. A reproduction rear panel was installed.
1971 Plymouth Duster rear quarter panels installation powder-coated frame AMD replacement metal fabrication
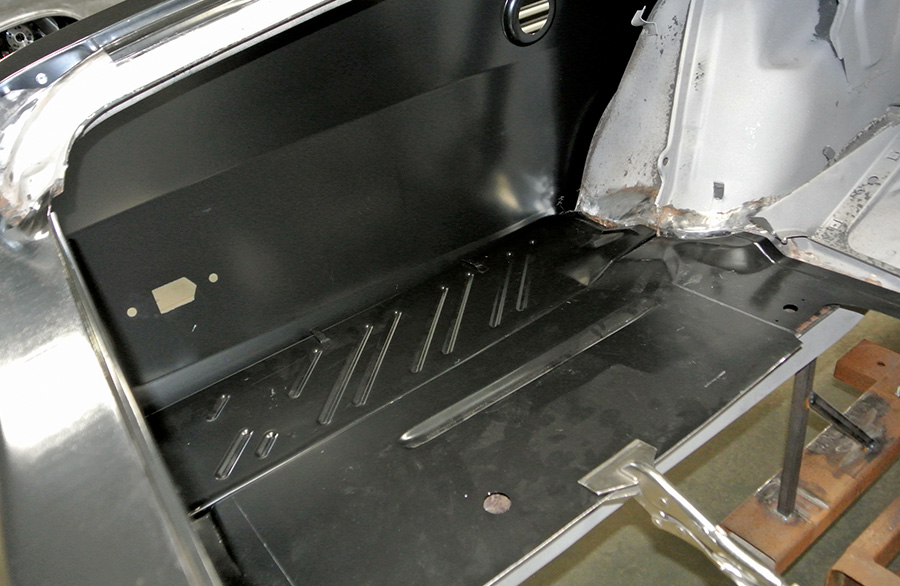
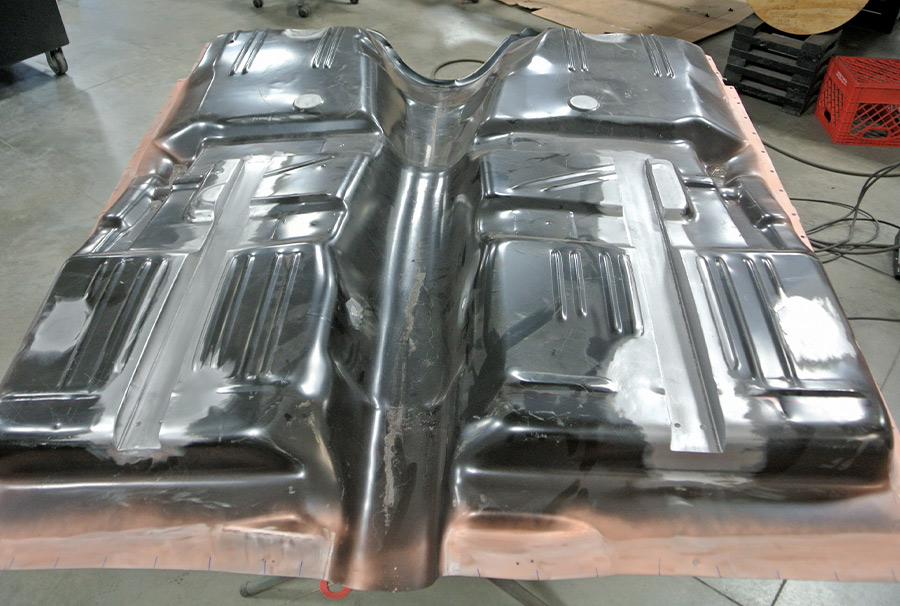
16. The entire floor will be replaced with new metal. Here, the trunk panels are being installed.
1971 Plymouth Duster trunk floor pan black finish ribbed panel structure AMD sheet metal replacement
17. Note the tunnels being fitted into the central floor to clear the beefy new framerails.
1971 Plymouth Duster floor pan new metal raw finish trunk panel structural reinforcement AMD replacement
18. The new floor has been installed and fully welded to the body structure.
1971 Plymouth Duster center console tunnel raw metal floor pan fabrication AMD replacement trunk detail
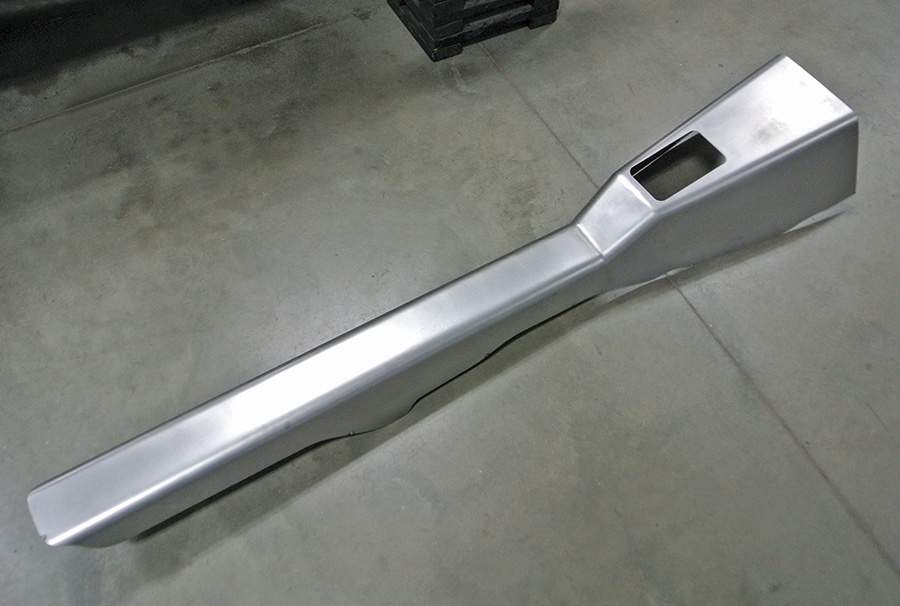
19. A sleek cover was crafted from new metal to enclose the transmission and driveshaft.
1971 Plymouth Duster transmission tunnel floor pan fabrication metal seam structural reinforcement AMD panel
20. The cover is attached to the floorpan and welded in place.
1971 Plymouth Duster spot weld detail quarter panel seam raw metal AMD sheet metal replacement
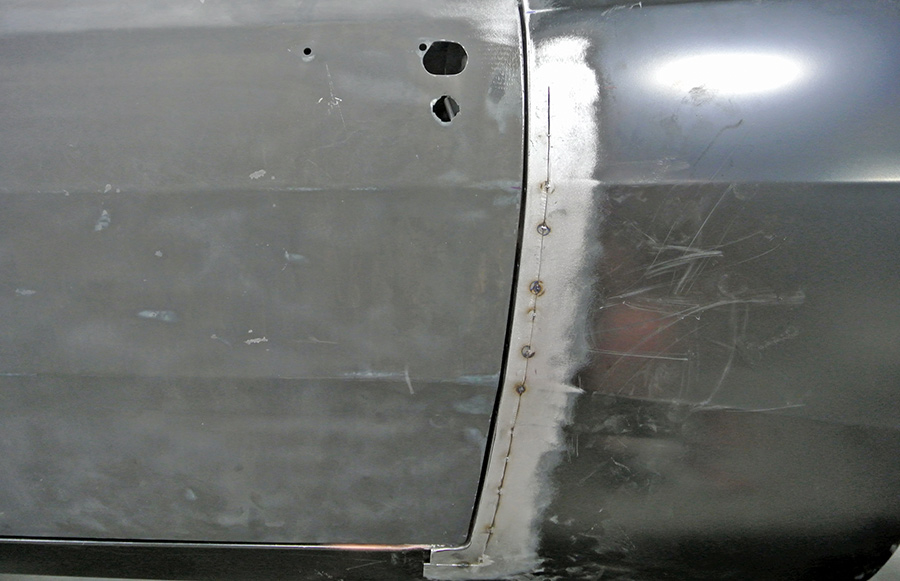
21. The door gaps weren’t quite right, so the leading edges of the new quarter-panels were cut, repositioned, and welded back into place.
1971 Plymouth Duster interior view spot weld preparation quarter panel seam factory shop environment
22. You can see the difference when the door gaps are uniform.
1971 Plymouth Duster roof line stitch weld detail bare metal seam professional restoration technique
23. The door bottoms also had rust damage, so new panels were shaped to replace them.
1971 Plymouth Duster bare metal body shell temporary wooden wheel mounts primer preparation BilletSpecialties banner
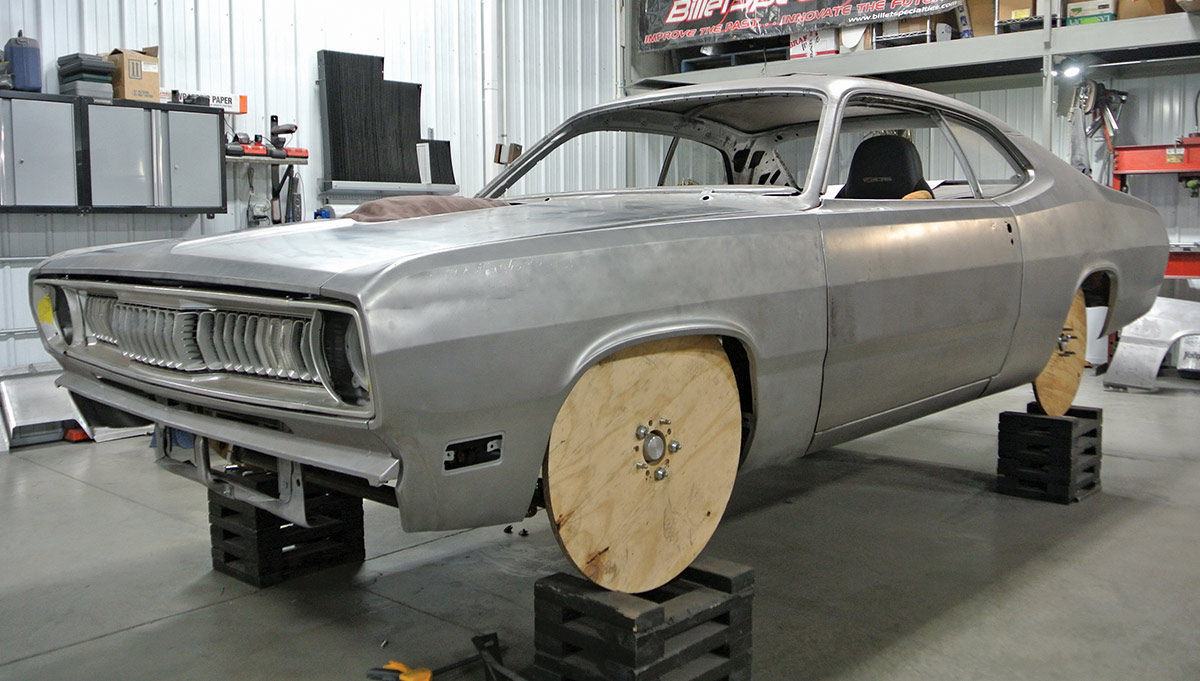
24. With the rust damage fixed and the door gaps adjusted, the car is ready for the modifications that will make it unique.

Modern Rodding
VOLUME 7 • ISSUE 65 • 2026