Modern Rodding TECH

InTheGarageMedia.com

CPP disc brake
1. This mostly-original Chevrolet gets added stopping power from a CPP disc brake conversion kit.
BEAT THE DRUM
How to Install a Disc Brake Conversion on a ’63 Impala
By Tommy Lee Byrd Photography by THE AUTHOR
I

n our last installment of brake system upgrades on this ’63 Impala, we swapped the single-pot master cylinder for a Classic Performance Products (CPP) power brake setup with a dual-reservoir master cylinder. While the booster and master cylinder provides safety and reduced pedal effort, the Impala’s owner wanted better braking performance. For this, he opted for a disc brake conversion from CPP to make simple work of the weekend project.

The drum brakes were still operational, but they would often cause the car to dart under hard braking. This can sometimes be the result of a swollen brake hose, but it was time for a brake overhaul to offer reliable service for many years to come. The kit used on the Impala is CPP’s front brake system (PN 5564WBK-SO), which includes brake rotors, wheel bearings, brake caliper brackets, calipers, pads, brake hoses, and all the necessary hardware to put it together. Regular hand tools were the only things needed for the install.

It’s important to note that disc brake conversions on old cars typically have a few side effects. First is track width, as most disc brake conversions will increase the track width. This is not an issue on a car that sits at stock ride height, but if your front suspension is lowered it can cause clearance problems. CPP makes several kits with different offsets. Second is wheel fitment due to caliper interference. The CPP kit will accept some 14-inch wheels, specifically ’70s passenger car wheels or ’80s S-10 truck wheels, but it will not accept original ’63 Impala wheels. Some aftermarket 14-inch wheels do not clear the calipers, so be cautious of that before you buy new wheels. For some, it’s as simple as upgrading to 15-inch wheels, but this owner wanted to retain the original 14-inch Super Sport hubcaps, so 14s were a must-have. Usually, you can pick up a good set of ’70s or ’80s steel wheels at a swap meet for a couple hundred bucks and pop the original hubcaps over them if that’s the look you’re trying to accomplish.

After a weekend of work, we buttoned up the Impala and took it for a testdrive. The nature of this kit is to bolt into place using the existing spindle, but it does require a front-end alignment due to the spacing of the steering arms. Overall, it was a simple kit with all the right parts to put this retired Impala back on the road safely, with excellent stopping power and easy parts replacement when it’s time for maintenance many miles down the road.
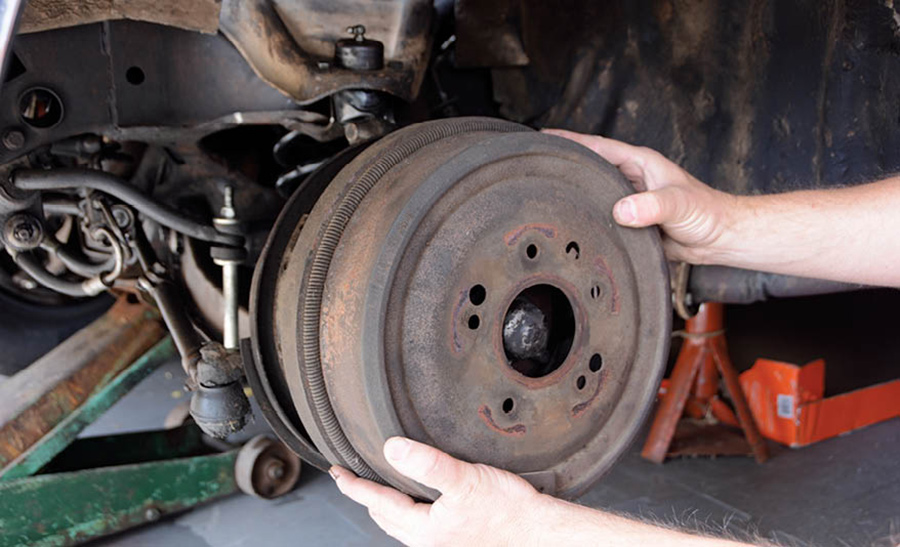
The car was in good working order but the brakes needed some attention. The first steps involve supporting the car with jackstands, removing the front wheels and brake drums.
2. The car was in good working order but the brakes needed some attention. The first steps involve supporting the car with jackstands, removing the front wheels and brake drums.
Next, we remove the cotter pin and castle nut that holds the hub into place. Then, the hub and wheel bearings can be removed from the spindle.
3. Next, we remove the cotter pin and castle nut that holds the hub into place. Then, the hub and wheel bearings can be removed from the spindle.
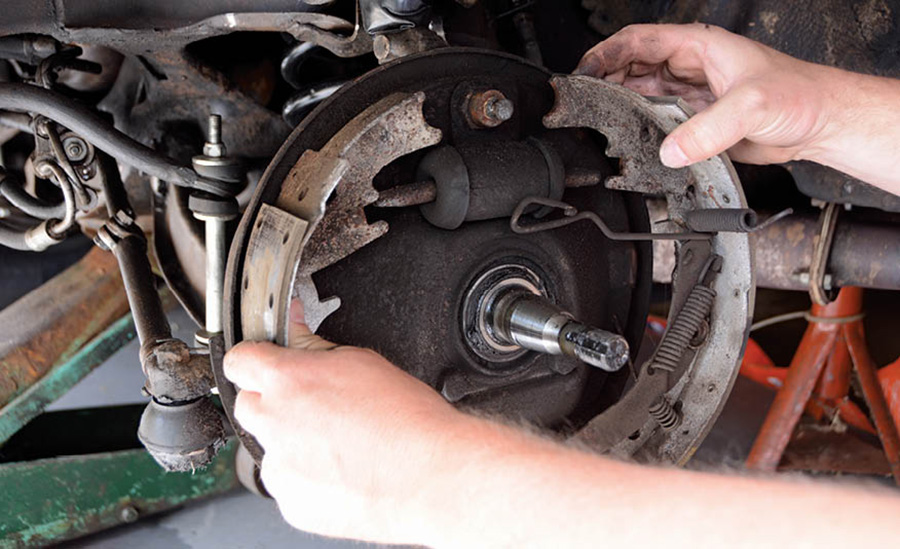
We remove the springs and pins to disassemble the drum brake internals. The shoes and adjuster mechanism are removed as one piece.
4. We remove the springs and pins to disassemble the drum brake internals. The shoes and adjuster mechanism are removed as one piece.
The backing plate is removed by loosening three bolts. The first is a large anchor pin that threads into the top of the spindle and then we’ll remove the two smaller bolts that attach to the spindle and steering arm.
5. The backing plate is removed by loosening three bolts. The first is a large anchor pin that threads into the top of the spindle and then we’ll remove the two smaller bolts that attach to the spindle and steering arm.
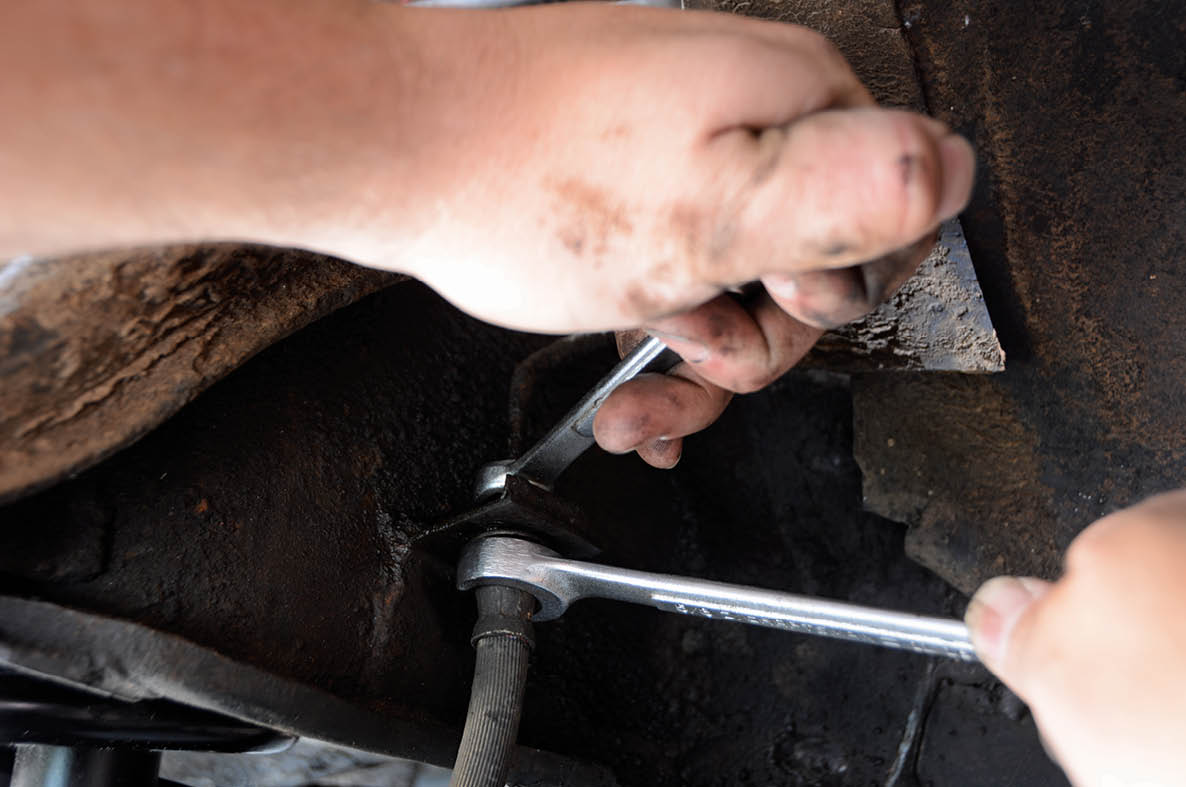
At this point, we can remove and discard the rubber flex hoses. The CPP kit comes with new hoses and hardware for easy plumbing.
6. At this point, we can remove and discard the rubber flex hoses. The CPP kit comes with new hoses and hardware for easy plumbing.
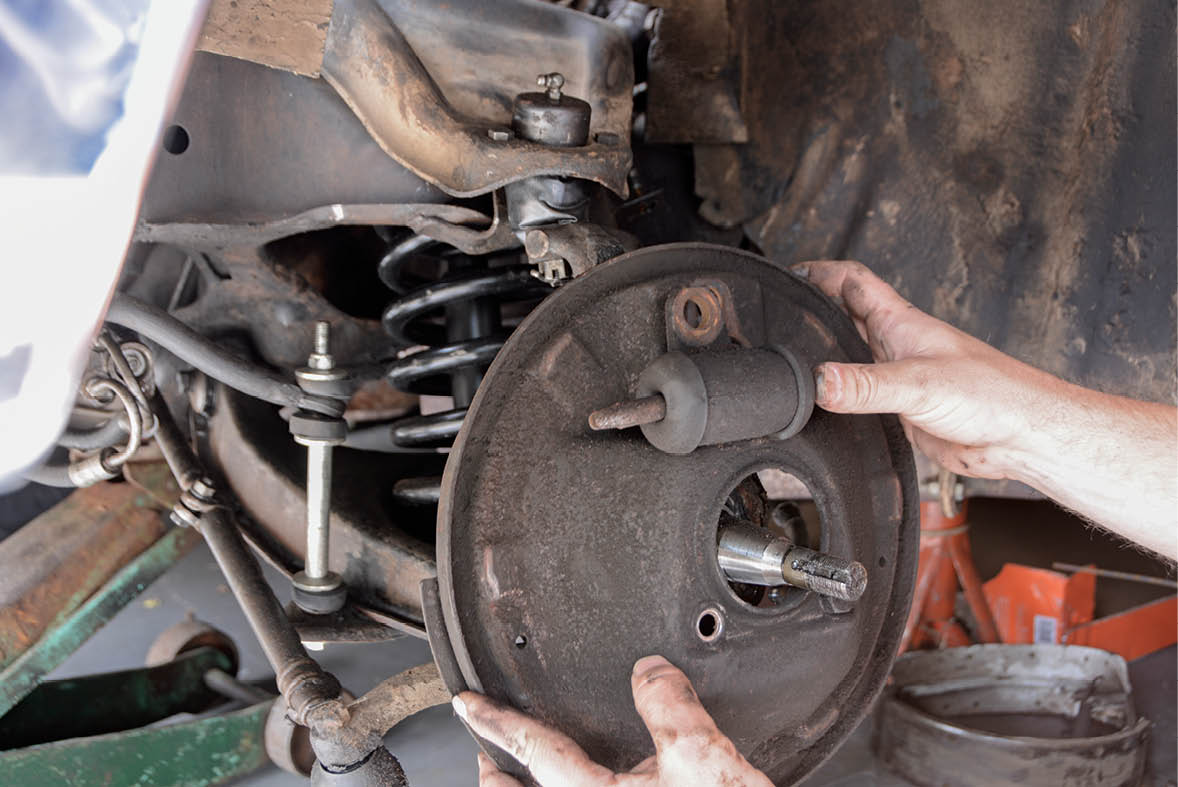
Now the backing plate and wheel cylinder can be removed and discarded.
7. Now the backing plate and wheel cylinder can be removed and discarded.
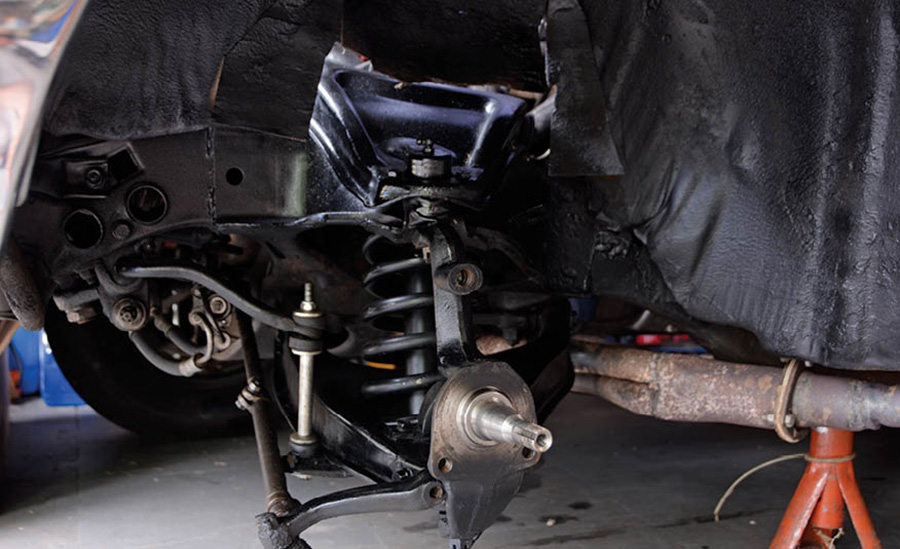
With the brakes disassembled, it was a good time to scrape and repaint the frame, suspension, and inner fenders to prevent rust.
8. With the brakes disassembled, it was a good time to scrape and repaint the frame, suspension, and inner fenders to prevent rust.
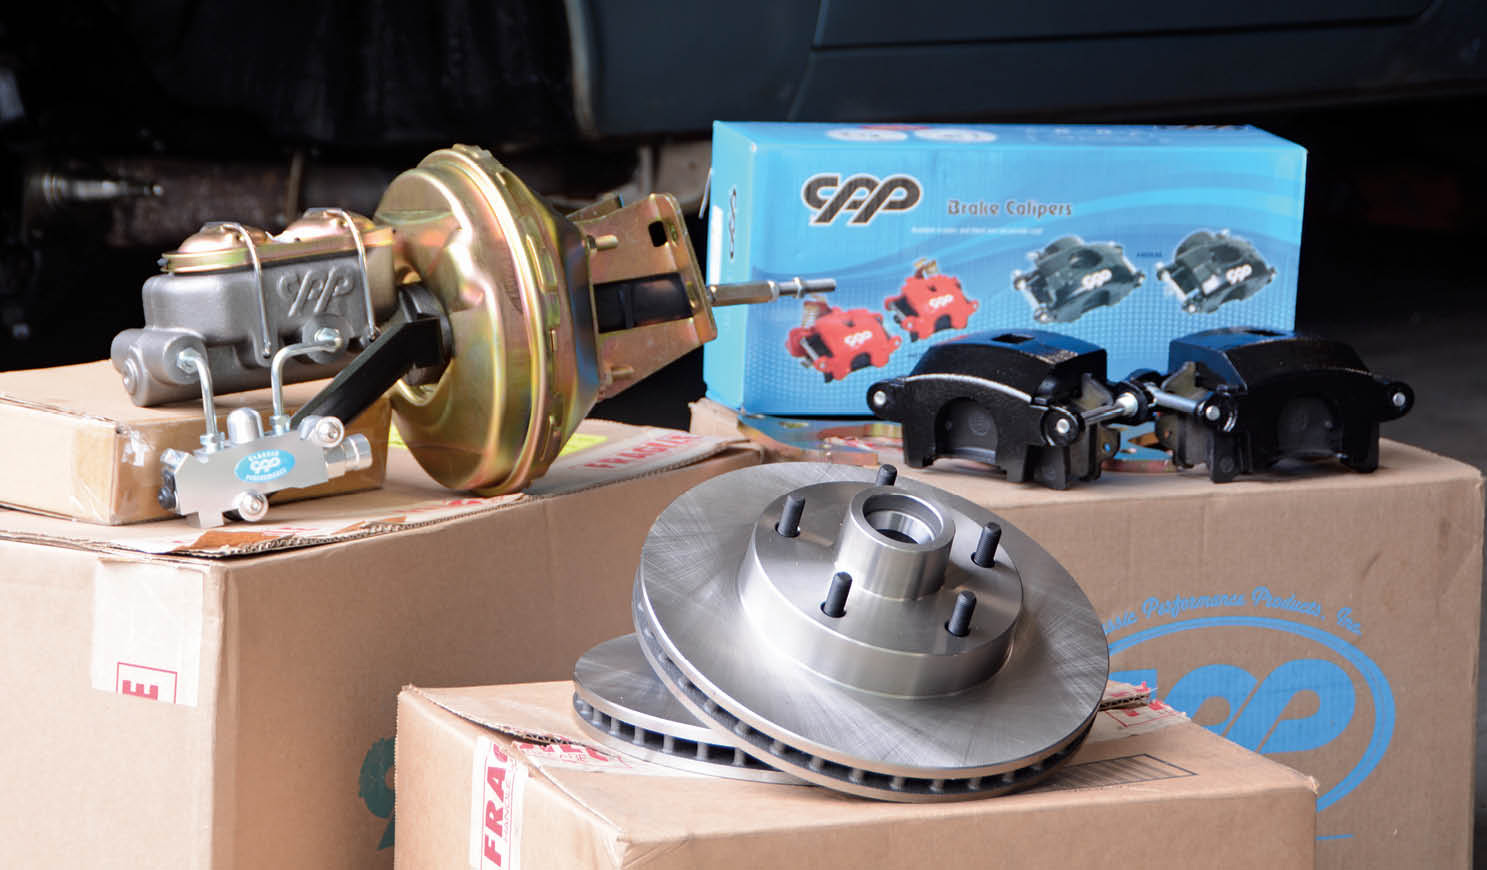
Our CPP order included a simple disc brake kit (PN 5564WBK-SO), which features the necessary rotors, calipers, brackets, and hoses for a complete installation. We also ordered a power booster and dual master cylinder.
9. Our CPP order included a simple disc brake kit (PN 5564WBK-SO), which features the necessary rotors, calipers, brackets, and hoses for a complete installation. We also ordered a power booster and dual master cylinder.
CPP makes disc brake conversion kits that include aftermarket spindles, but we opted to stay with the stock spindles. Here, we mock up the caliper brackets, which are reversible for various brake kits.
10. CPP makes disc brake conversion kits that include aftermarket spindles, but we opted to stay with the stock spindles. Here, we mock up the caliper brackets, which are reversible for various brake kits.
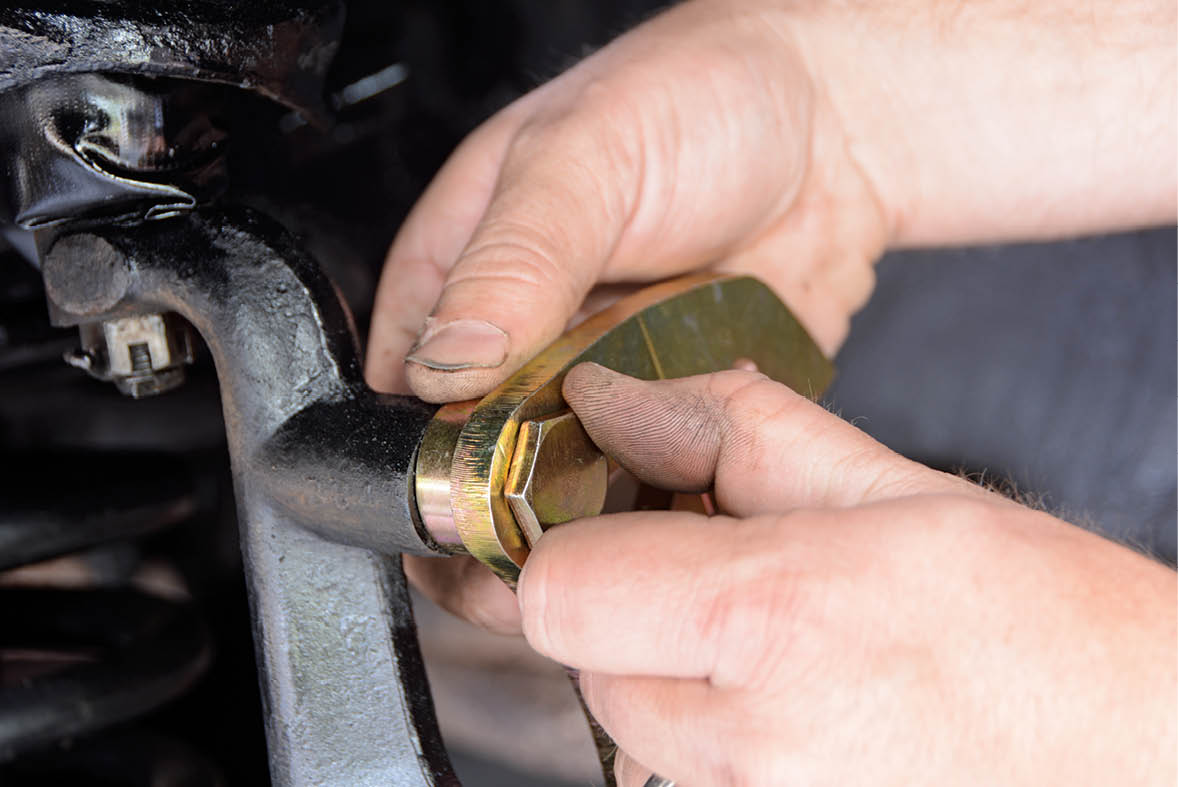
Hardware is included in the CPP kit, including this low-profile bolt for the upper mounting point. Also note the spacer that is placed between the bracket and spindle.
11. Hardware is included in the CPP kit, including this low-profile bolt for the upper mounting point. Also note the spacer that is placed between the bracket and spindle.
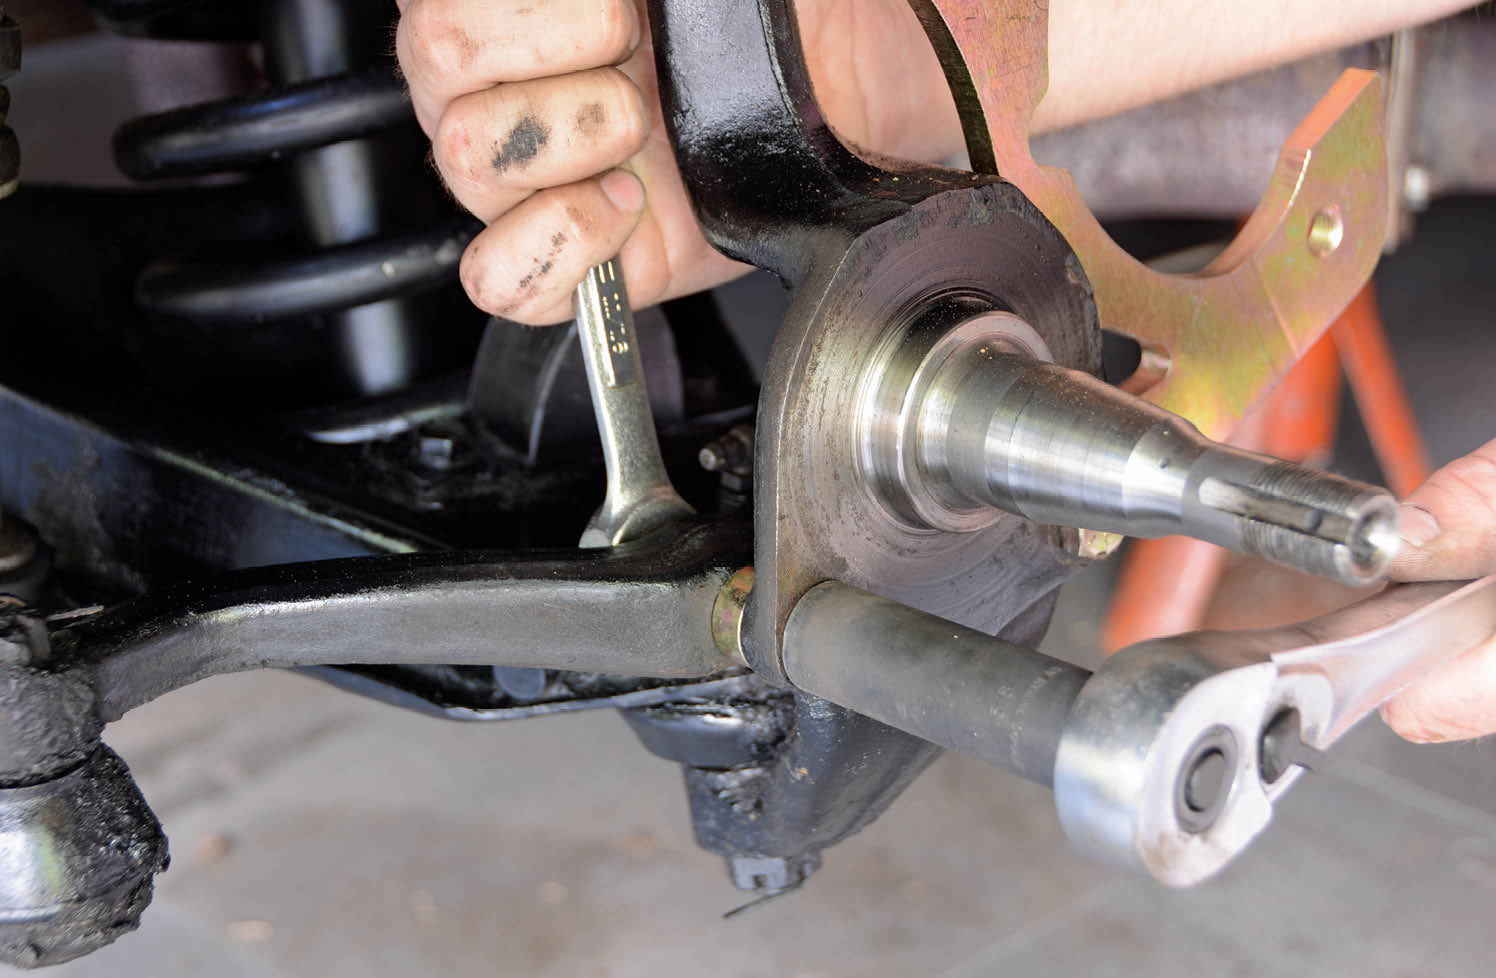
Hardware is also provided for the lower portion of the spindle. The caliper bracket sits between the spindle and steering arm, so a spacer is used on the front bolt to retain proper steering geometry.
12. Hardware is also provided for the lower portion of the spindle. The caliper bracket sits between the spindle and steering arm, so a spacer is used on the front bolt to retain proper steering geometry.
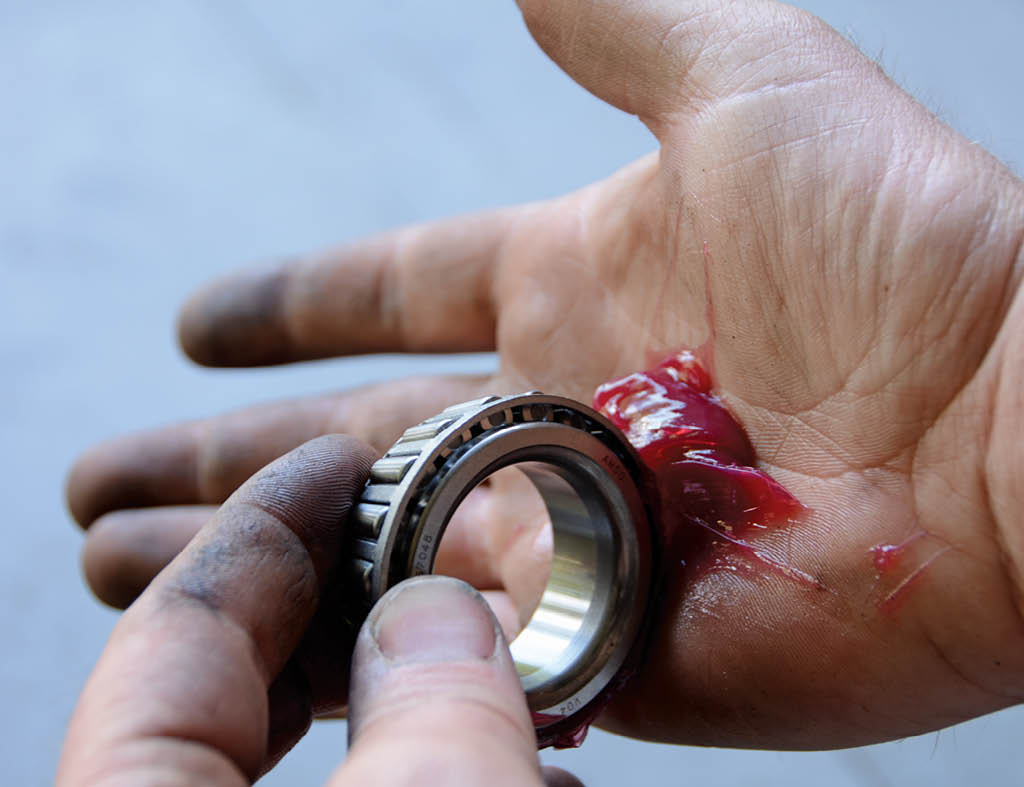
We pack the wheel bearings using the tried-and-true palm method, ensuring smooth operation for many years of driving.
13. We pack the wheel bearings using the tried-and-true palm method, ensuring smooth operation for many years of driving.
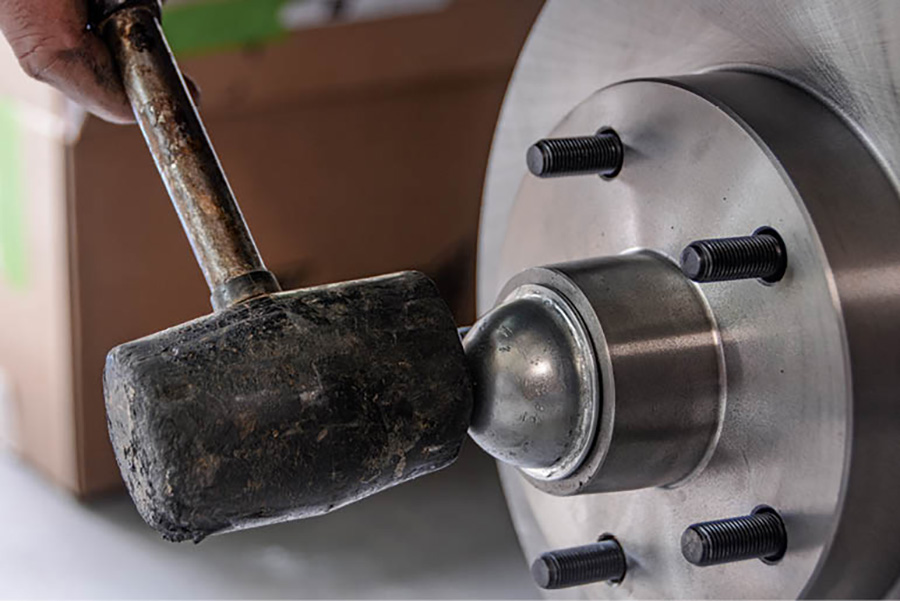
After the inner wheel bearing is placed into the new disc brake rotor, a seal is tapped into place.
14. After the inner wheel bearing is placed into the new disc brake rotor, a seal is tapped into place.
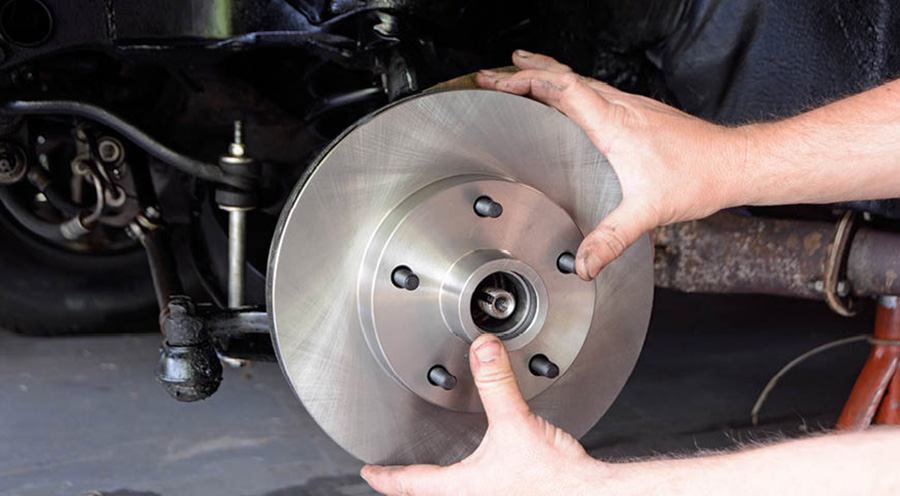
Now the brake rotor slides over the spindle and we can install the outer wheel bearing, washer, and castle nut.
15. Now the brake rotor slides over the spindle and we can install the outer wheel bearing, washer, and castle nut.
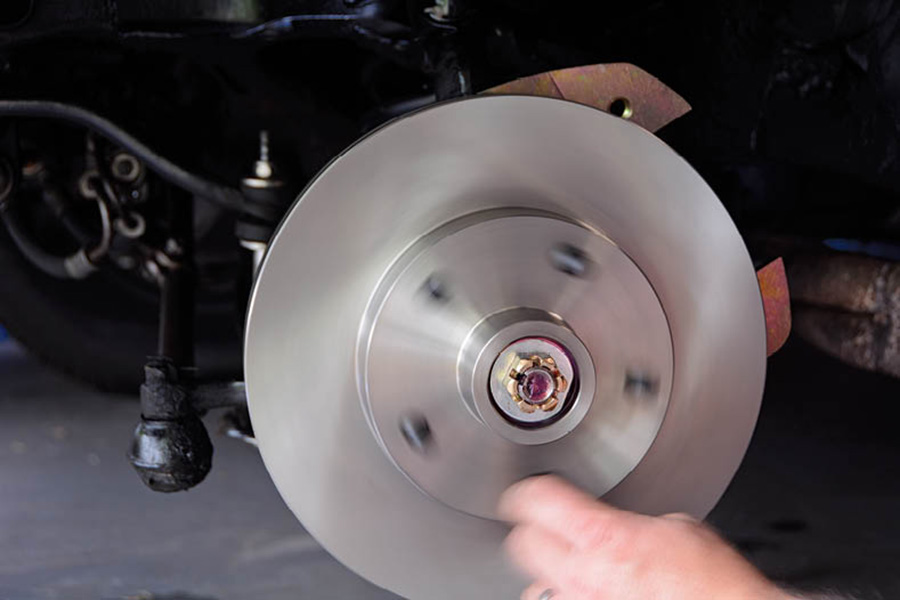
To adjust the wheel bearing, we tighten the castle nut until we start to feel tension. Then, spin the rotor a few times to make sure the bearing is seated, and back it off until the cotter pin hole is lined up with the castle nut.
16. To adjust the wheel bearing, we tighten the castle nut until we start to feel tension. Then, spin the rotor a few times to make sure the bearing is seated, and back it off until the cotter pin hole is lined up with the castle nut.
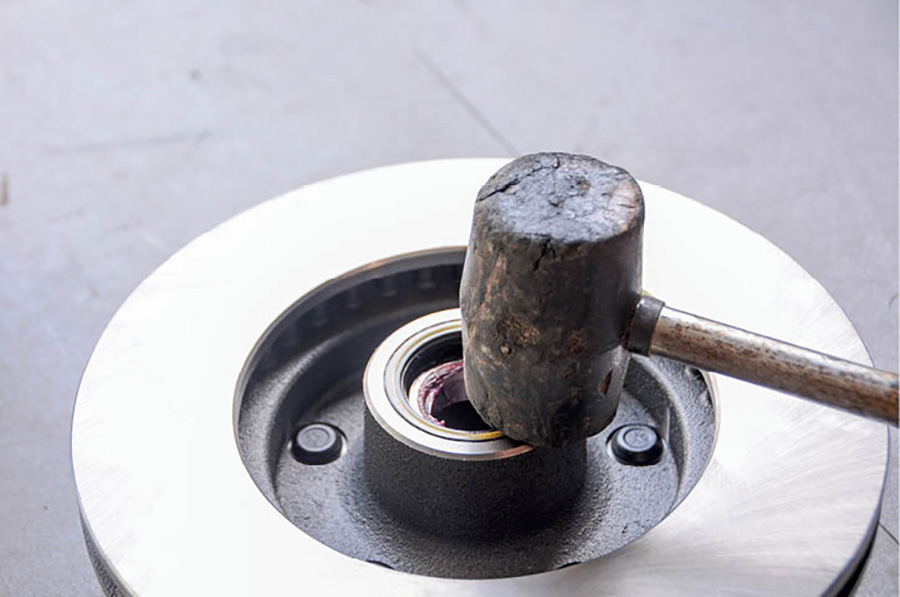
After the cotter pin is installed, we hammer the grease cap on the rotor. These can be tricky, so you may need something stronger than a rubber hammer to get it started.
17. After the cotter pin is installed, we hammer the grease cap on the rotor. These can be tricky, so you may need something stronger than a rubber hammer to get it started.
Next, we spray brake cleaner on the rotor to remove the packaging oil.
18. Next, we spray brake cleaner on the rotor to remove the packaging oil.
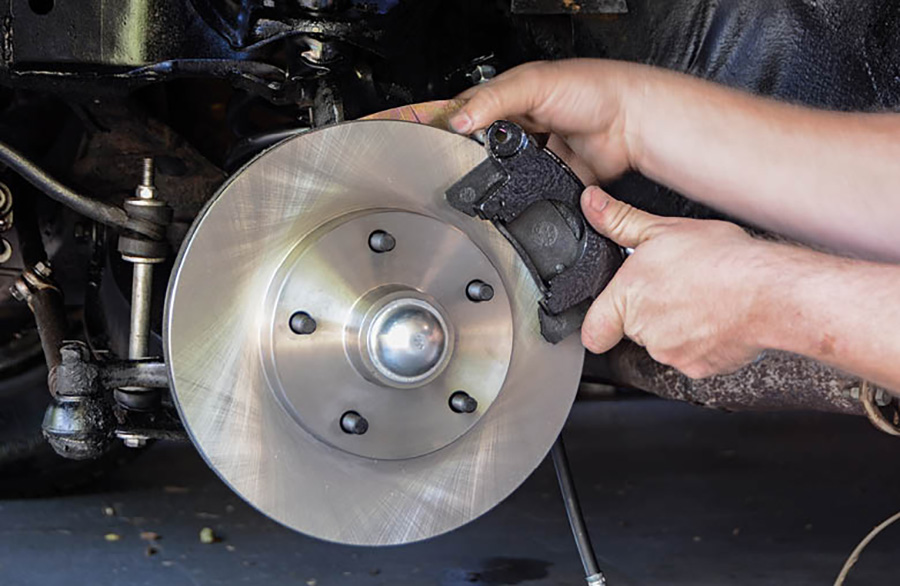
The CPP kit comes with brake pads that are placed in the caliper before sliding the assembly over the rotor.
19. The CPP kit comes with brake pads that are placed in the caliper before sliding the assembly over the rotor.
The provided bolts pass through the caliper and thread into the bracket. A 3/8-inch Allen wrench is used to tighten the bolts.
20. The provided bolts pass through the caliper and thread into the bracket. A 3/8-inch Allen wrench is used to tighten the bolts.
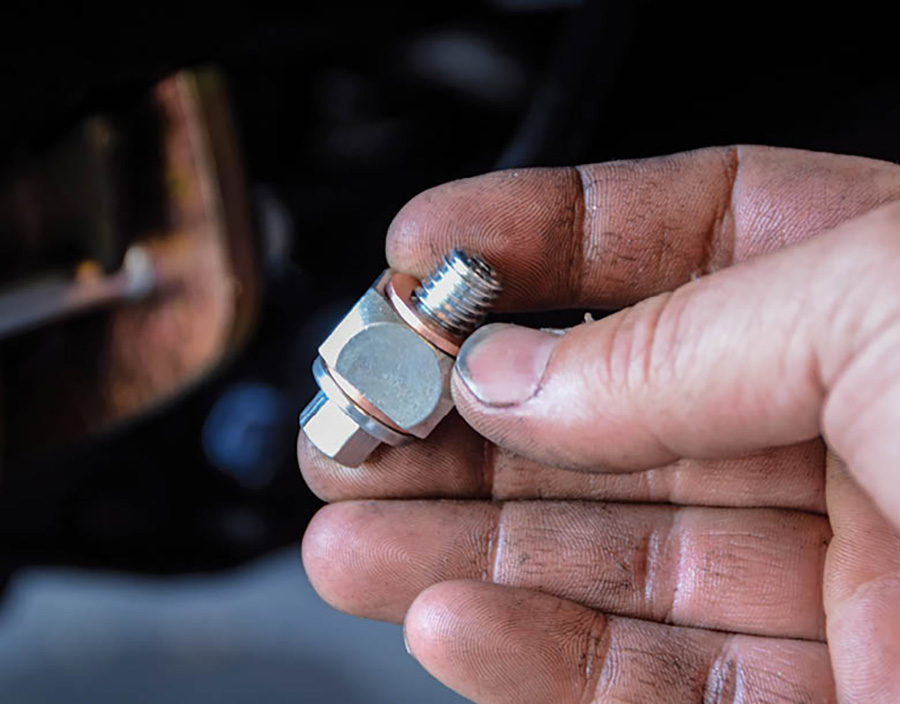
Banjo fittings are used on the new calipers, and CPP provides the correct rubber flex hoses and hardware in the kit. A brass washer is used on both sides of the fitting and the banjo bolt is tightened on the bottom side of the caliper.
21. Banjo fittings are used on the new calipers, and CPP provides the correct rubber flex hoses and hardware in the kit. A brass washer is used on both sides of the fitting and the banjo bolt is tightened on the bottom side of the caliper.
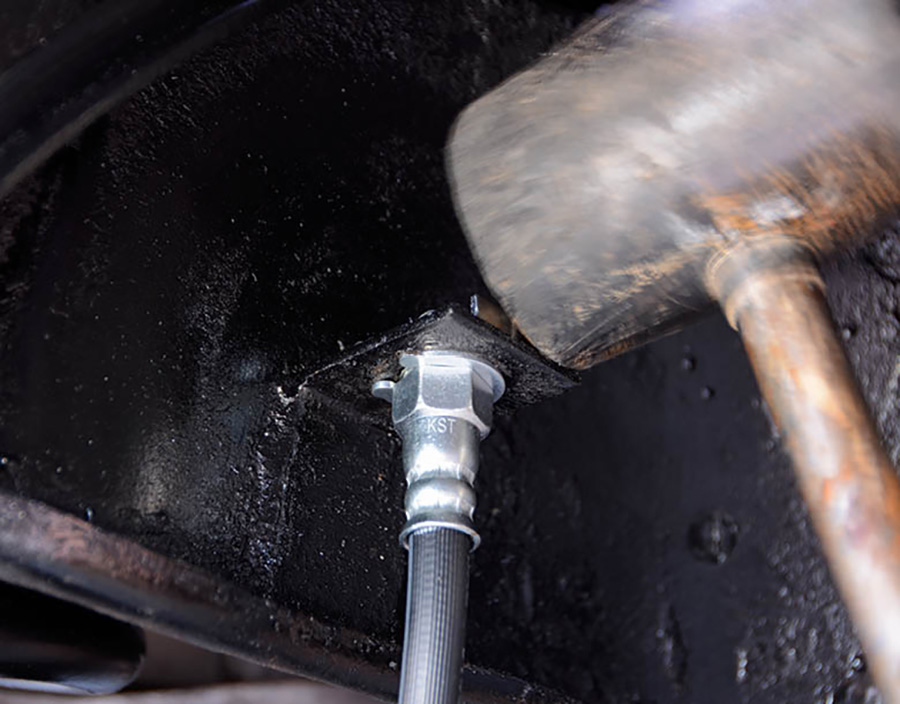
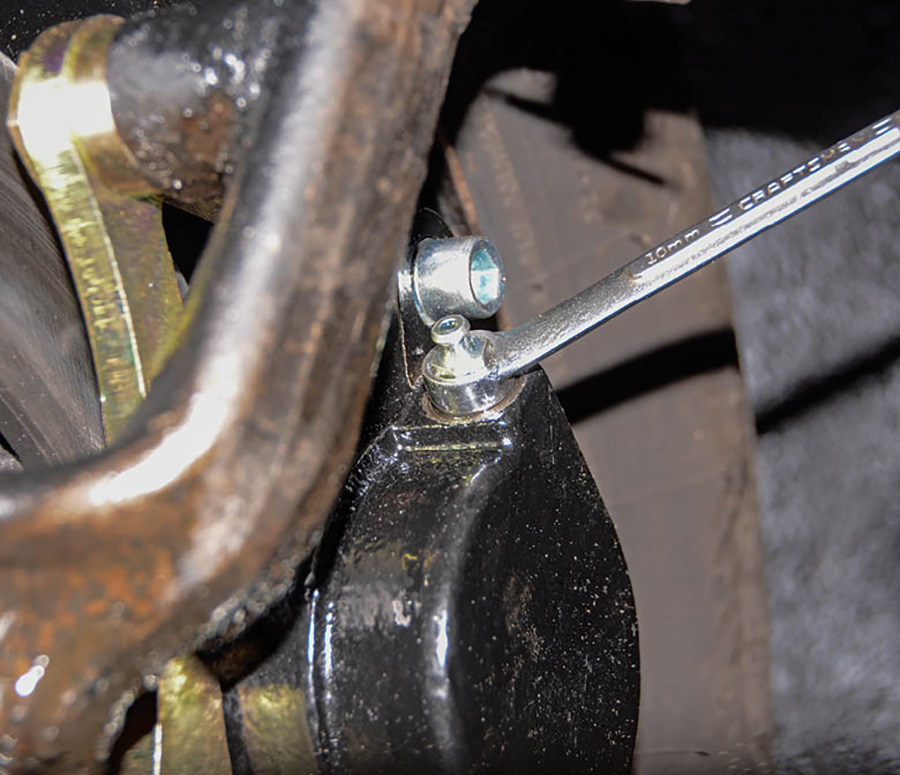
The other side of the flex hose is attached to the hard brake line and fastened to the bulkhead with a retaining clip.
22. The other side of the flex hose is attached to the hard brake line and fastened to the bulkhead with a retaining clip.
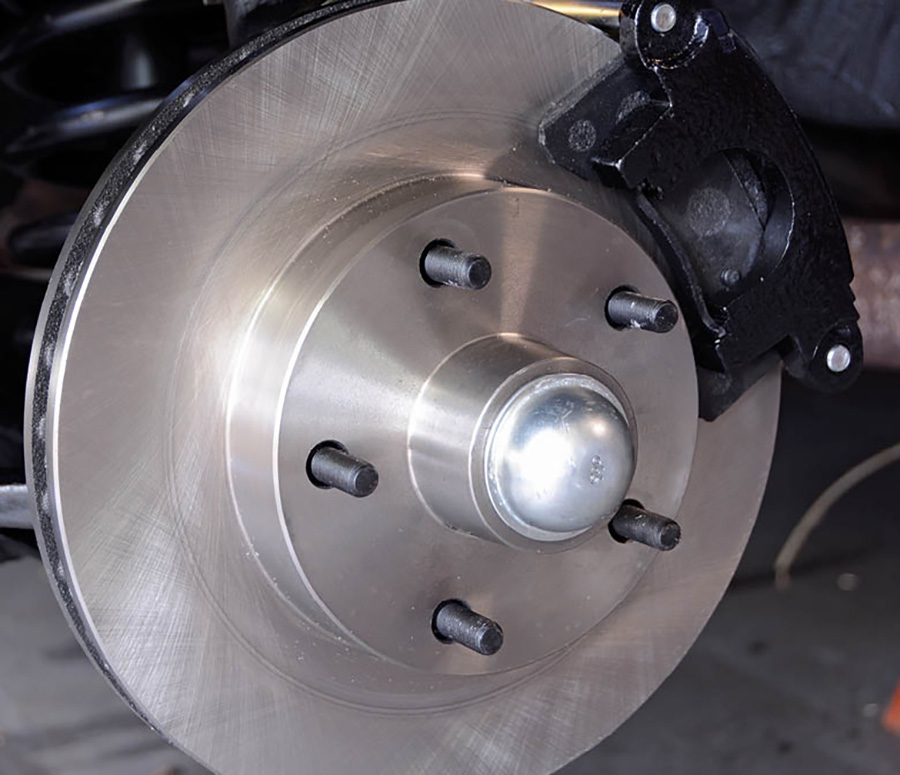
The new disc brake system is installed on the driver side, and we’ll repeat these steps on the passenger side to complete the install.
23. The new disc brake system is installed on the driver side, and we’ll repeat these steps on the passenger side to complete the install.
Finally, we bleed the brakes, starting with the passenger rear corner and working our way toward the master cylinder.
24. Finally, we bleed the brakes, starting with the passenger rear corner and working our way toward the master cylinder.
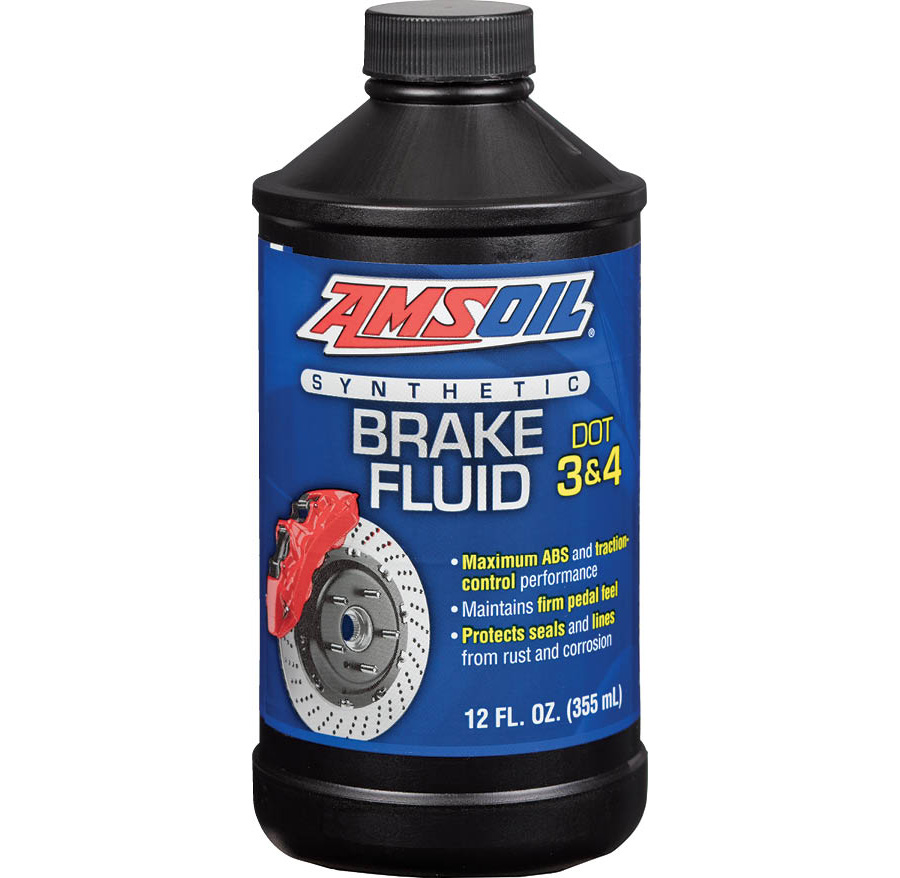
Then, we top off the master cylinder with DOT 3 fluid. In our case we opted for the latest from AMSOIL in their line of synthetic DOT 3 and 4 brake fluid. Remember always begin with a fresh container of brake fluid.
25. Then, we top off the master cylinder with DOT 3 fluid. In our case we opted for the latest from AMSOIL in their line of synthetic DOT 3 and 4 brake fluid. Remember always begin with a fresh container of brake fluid.
The first testdrive revealed that spacing the steering arms created a toe-out situation, which required a front end alignment. We were still able to bed-in the brakes and feel the power of the new CPP disc brake system.
26. The first testdrive revealed that spacing the steering arms created a toe-out situation, which required a front end alignment. We were still able to bed-in the brakes and feel the power of the new CPP disc brake system.
SOURCES
AMSOIL INC.
(800) 777-7094
amsoil.com
CLASSIC PERFORMANCE PRODUCTS
(866) 882-6882
classicperform.com
Modern Rodding
VOLUME 5 • ISSUE 41 • 2024