
Modern Rodding Tech
InTheGarageMedia.com
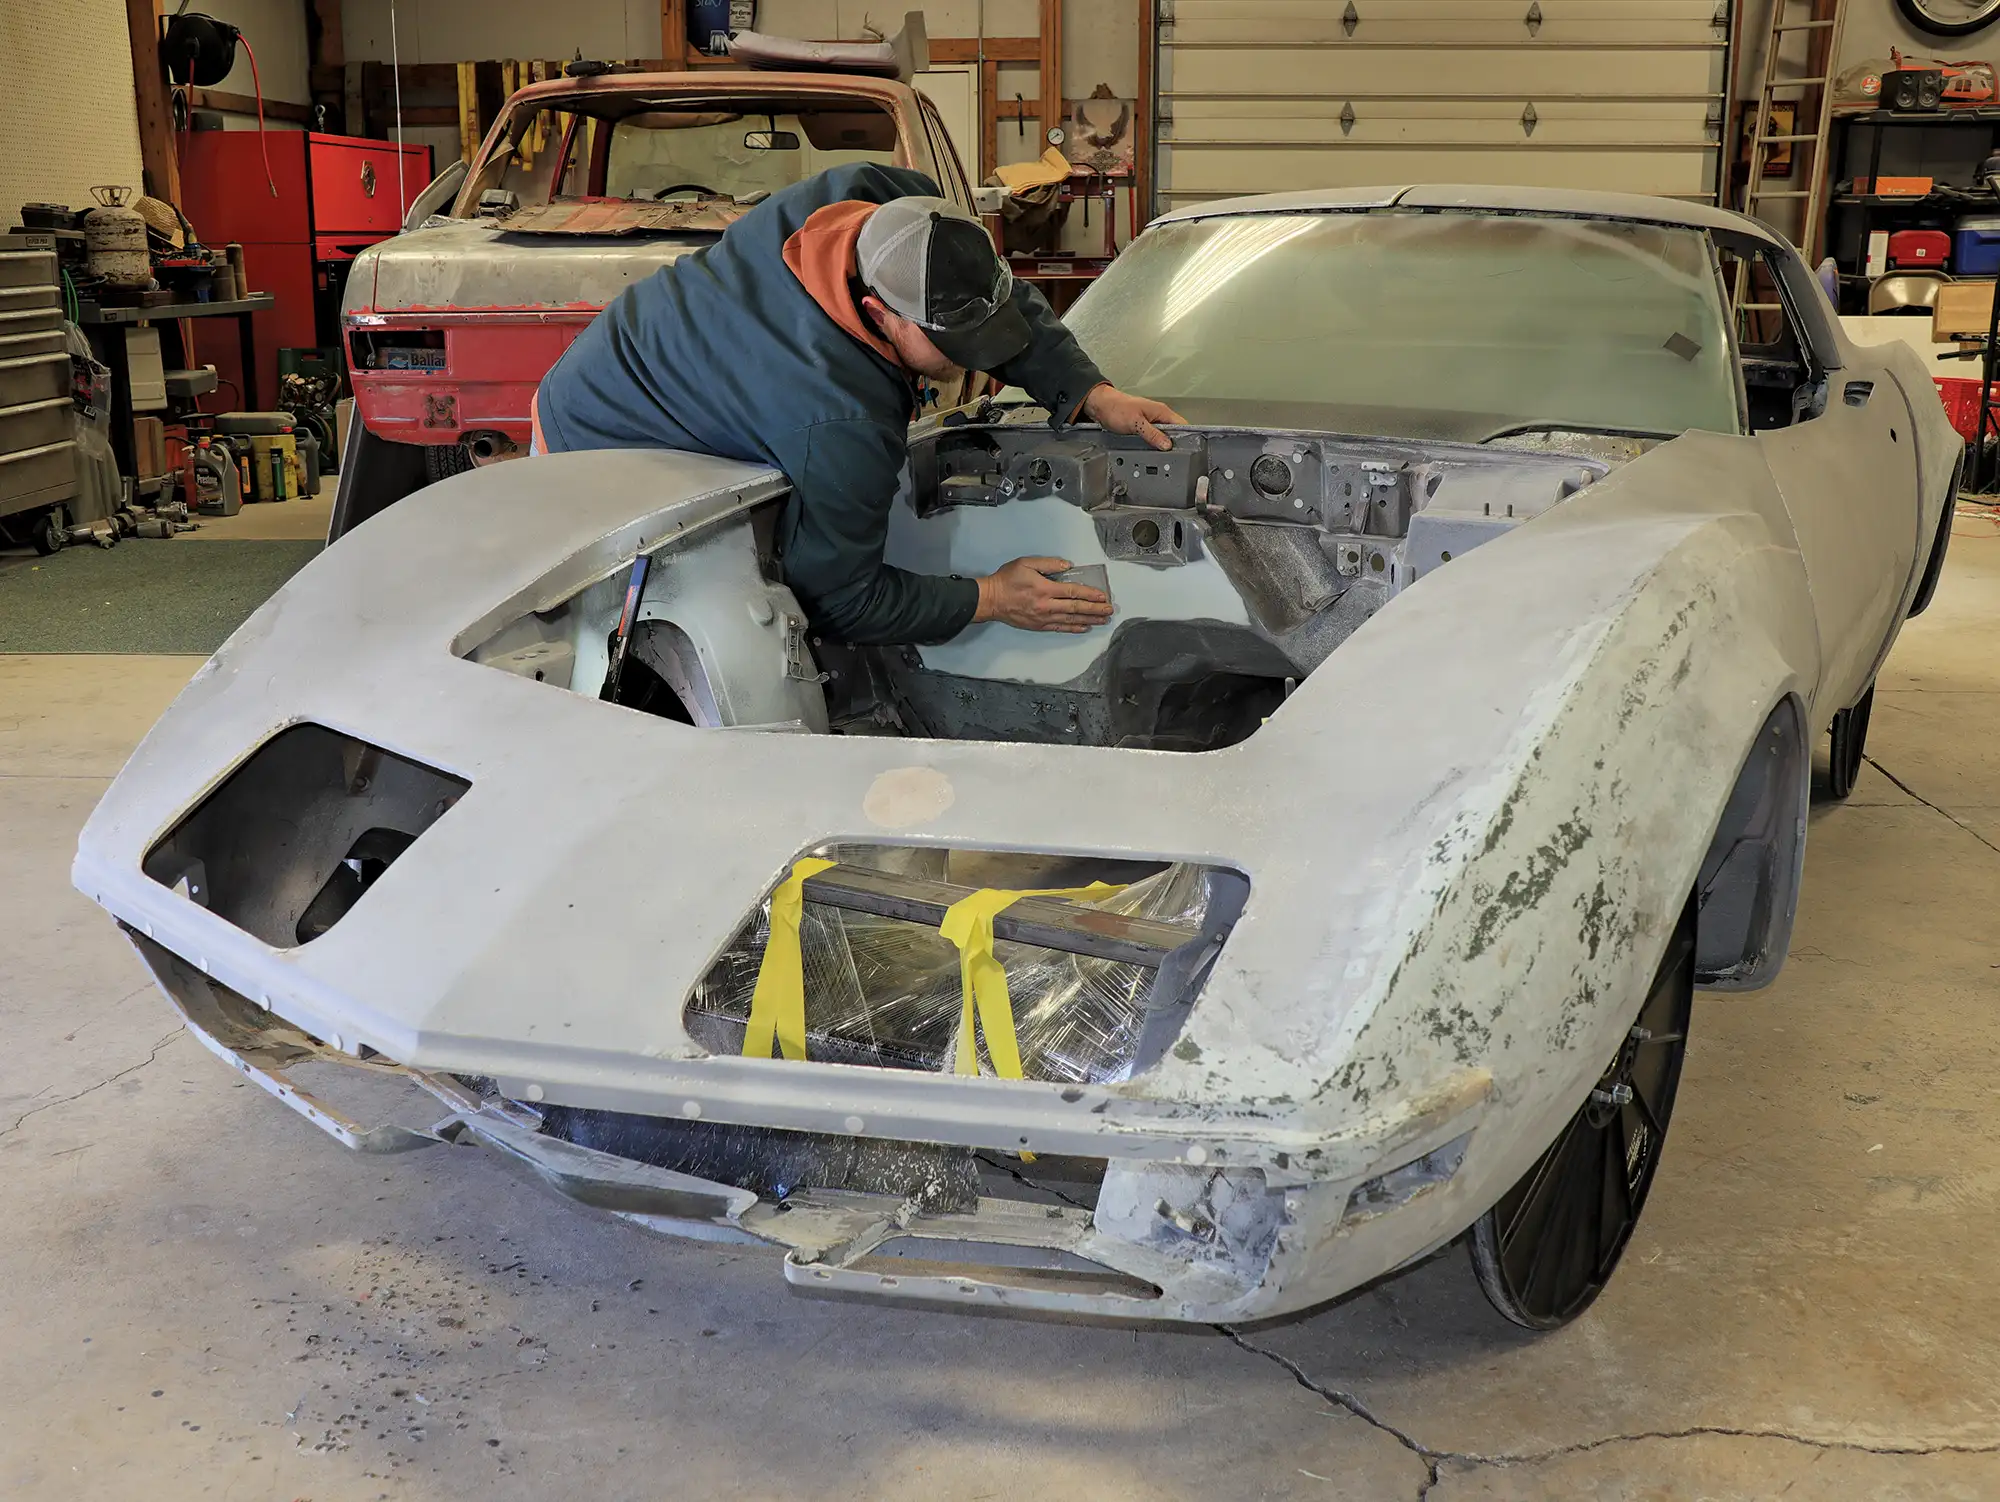
Corvette body with light coat of polyester filler
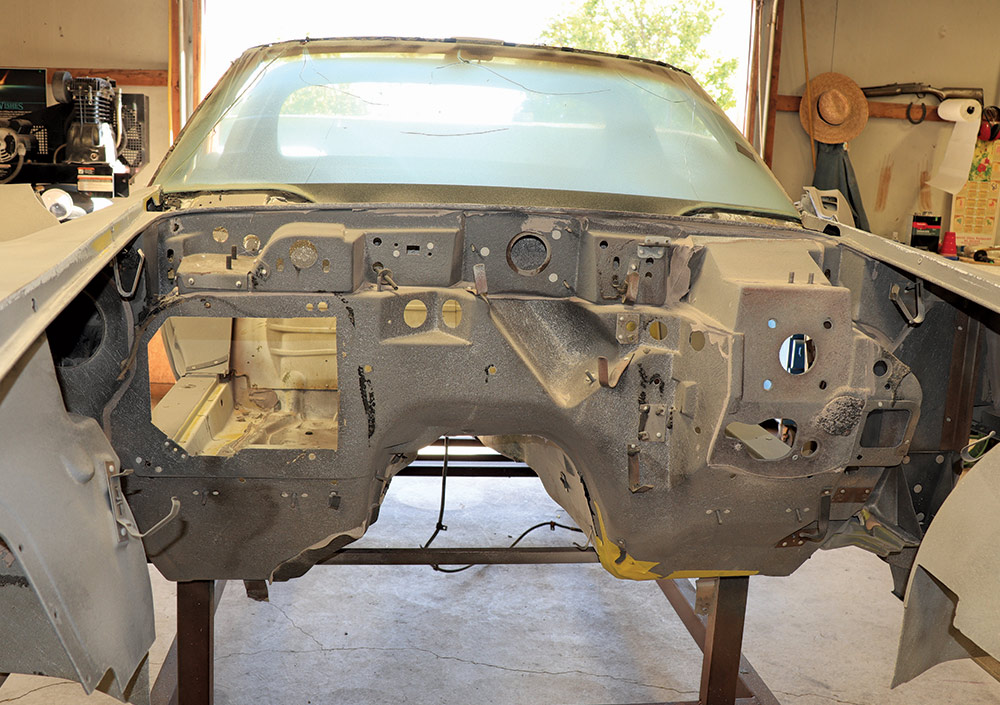
1. Harold’s Hot Rod Shop’s fiberglass guy, Max Heim, needed only a light skim coat of polyester filler to level and fill slight imperfections in the Corvette’s Vintage Air ready-filled fiberglass firewall.
Fiberglass Tricks of the Trade
How to Fill a ’Glass Firewall
By John Gilbert Photography by The Author
E

very builder in the customizing business has a knack. Whether they’re known or unknown, they’ll add their unique touch to set a car apart from the crowd. Somewhere along the way, identifiable styling cues will give away whose hand touched it.

In the example of Harold’s Hot Rod Shop, based in Enid, Oklahoma, all one must do is lift the hood and look for a shaved firewall where ordinarily a bulky factory air conditioner would be. For components like brakes, frames, or powertrain options, Harold’s Hot Rod Shop looks to a few select suppliers, but when it comes to air conditioning, Harold’s singular choice is always Vintage Air.

To equip a custom-installed air conditioning system, Harold’s begins at the engine with a Vintage Air Front Runner serpentine belt accessory drive. The Front Runner tucks all the ancillary components, including the power steering pump, alternator, and A/C compressor, tight and neatly adjacent to the engine.

For an experienced builder with a good eye for doing clean work, hiding the hoses running from the Front Runner’s A/C compressor into the rest of the system will be easy to make (hide) the A/C hoses nearly undetectable.

Both Vintage Air kits are installed and fully contained within the firewall’s interior side. The SureFit series and the Builder series Vintage Air climate-control systems do not require space on the firewall’s exterior side. Harold’s practice when installing Vintage Air is always to fill and shave the hole left in the firewall with a bulky factory air conditioning system.

For most vehicles, the firewall is always made of steel and requires metal fabrication and welding to complete this modification. However, our subject vehicle is a 1971 Corvette Stingray, and the firewall is made of fiberglass, so the process needed to fill and shave the firewall and prepare it for Vintage Air is entirely different.

Renowned for its concours-quality fit and finish, Harold’s has met with great success in building and having Corvettes featured in magazines. Harold’s last Corvette build was a 1961 that took First Place in its class at the 2019 Grand National Roadster Show. That said, owner Harold Clay has severe allergic reactions working with fiberglass and can’t get anywhere near it until it has primer sealing it.

Enter Max Heim, Harold’s Hot Rod Shop employee with an enviable large home shop and a bent for working with fiberglass. Before the highly brittle, battered, and broken 1971 Stingray body was transported to Heim, it was soda blasted at Harold’s shop through original factory paint and repainted down to the gelcoat. A word to the wise: Never use a liquid chemical paint remover to strip a Corvette body down to the bare gelcoat. A liquid chemical stripper permeates through the gelcoat into the fiberglass mat and will cause never-ending pimple problems from beneath the new paint.

It is not necessary for this Corvette because it is being built as a restomod street fighter with track abilities. Still, for exacting restorations where raw fiberglass should be exposed, there are tricks to making fiberglass repairs virtually undetectable by matching the color of St. Louis’ original fiberglass with resin tints.

A bright yellow Chevrolet Corvette coupe partially disassembled and resting on a rolling metal frame in a garage
2. Harold’s Hot Rod Shop accepts sublets from pro builders demanding concours fit and finish. Hot Rods by Dean commissioned this Corvette to lighten its workload.
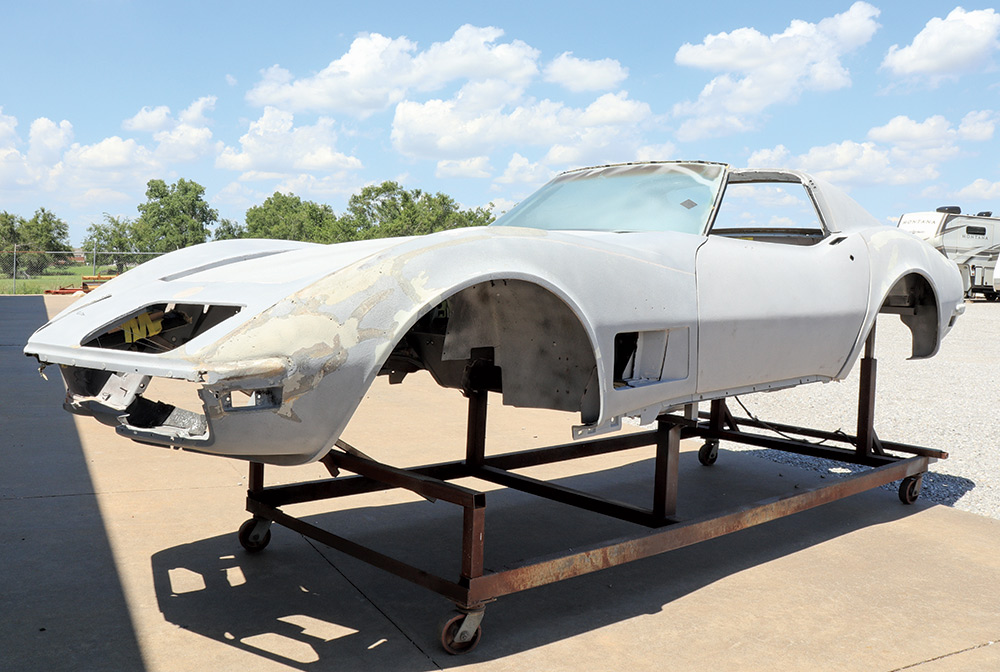
Chevrolet Corvette's fiberglass work exposed while sitting on a rolling metal frame in a sunny outdoor area
3. Soda blasting the paint down to the gelcoat and exposing substandard fiberglass work from previous repairs revealed the worst-condition Corvette body imaginable.
corvette body with hole in engine compartment
4. At left, the gaping holes left by factory A/C protrude far into the engine compartment, restricting access to the rear spark plugs on the passenger side bank.
container of fiberglass resin
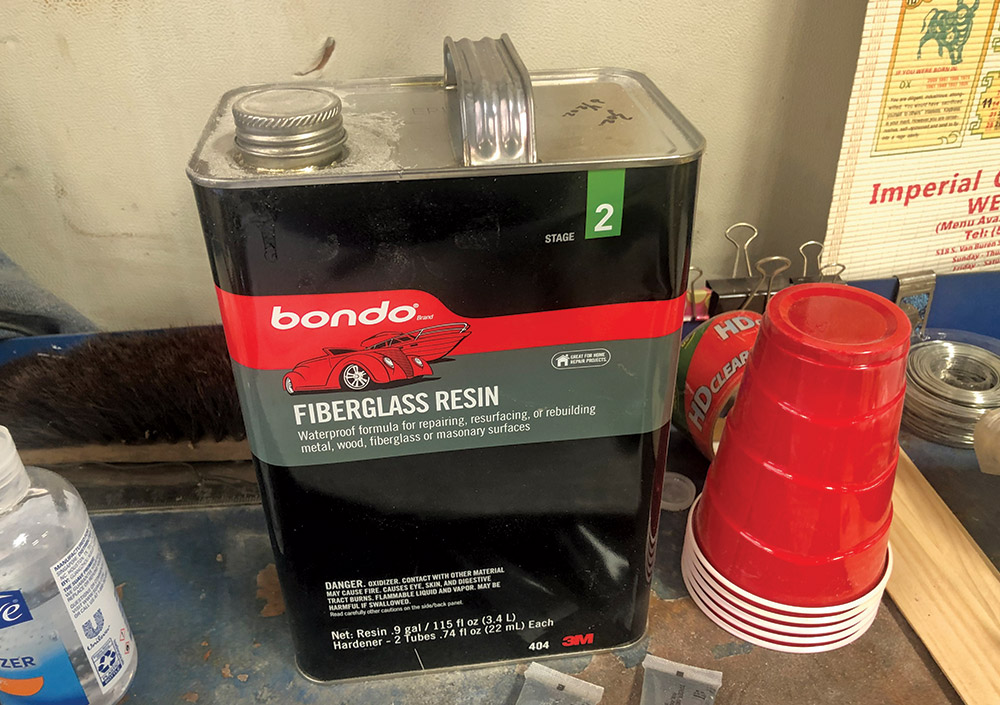
5. Summit Racing was the source of fiberglass resin, hardener, and fiberglass cloth mats. Keg party cups work OK when mixed with resin after fluid ounce levels have been marked on the cup.
multiple paint brushes sitting on workbench
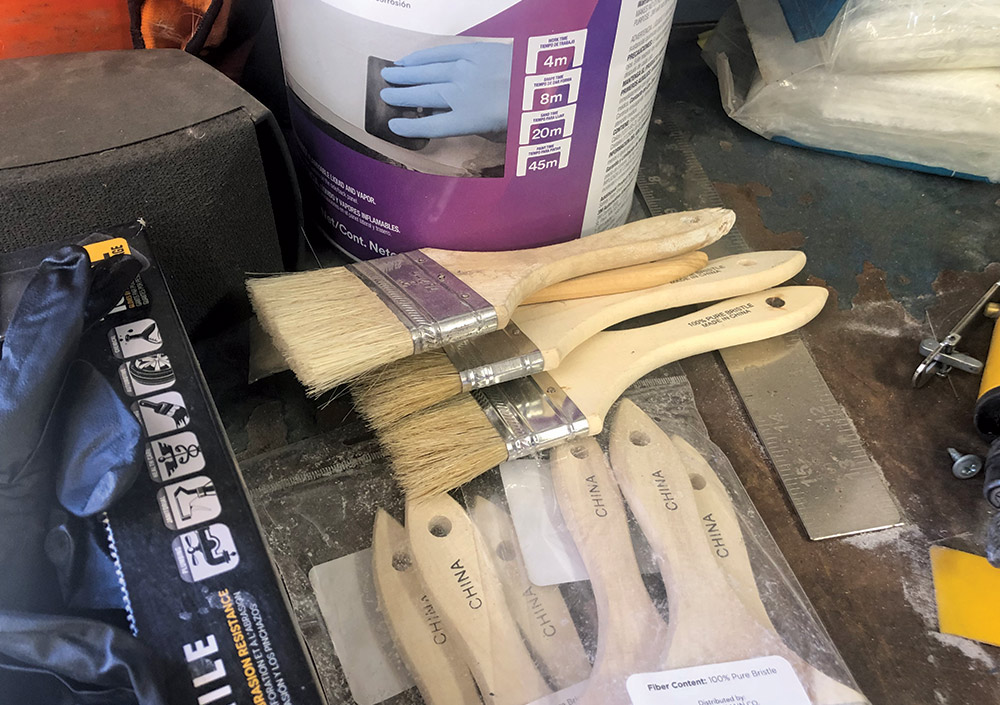
6. Buy in bulk. Finding the cheapest paint brushes available beats the added expense of buying MEK, acetone, or wash lacquer thinner to clean and repeat using the same brush.
fiberglass cut into different sizes laying on workbench
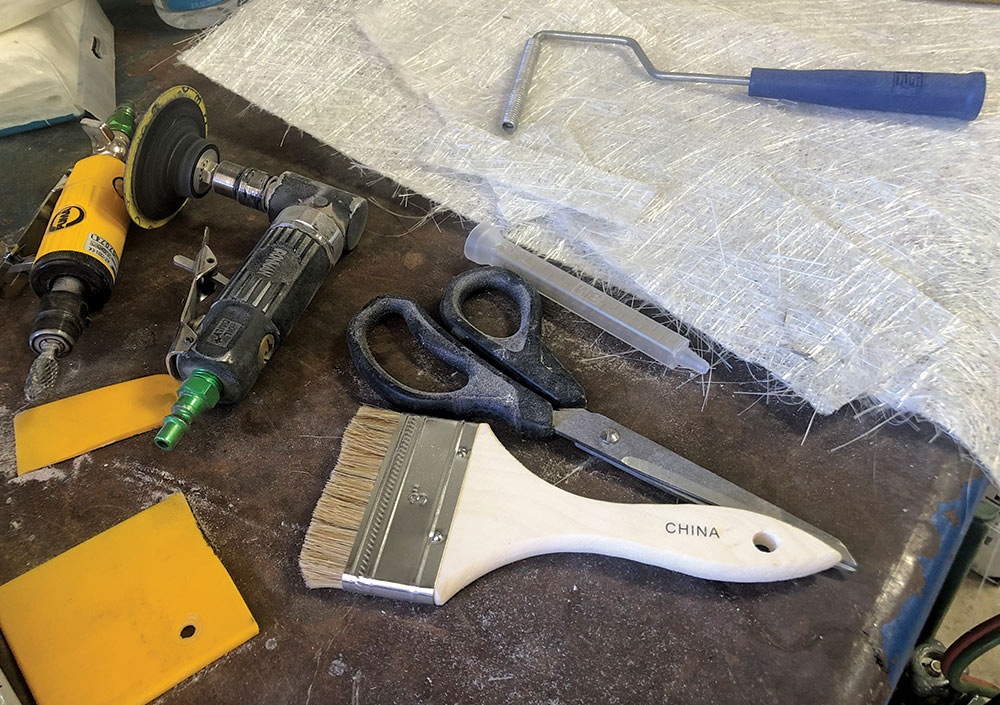
7. Sharp scissors work well to cut fiberglass cloth mats to size or to cut down a paint brush to better spread and work resin into the mat.
fiberglass mat laying on workbench next to bottle of resin and other supplies
8. Tech tip. Bubbles remaining in the fiberglass mat after the resin has been spread and worked in are squeezed out with a laminating roller, sometimes called a “bubble roller.”
closeup of holes left in engine compartment
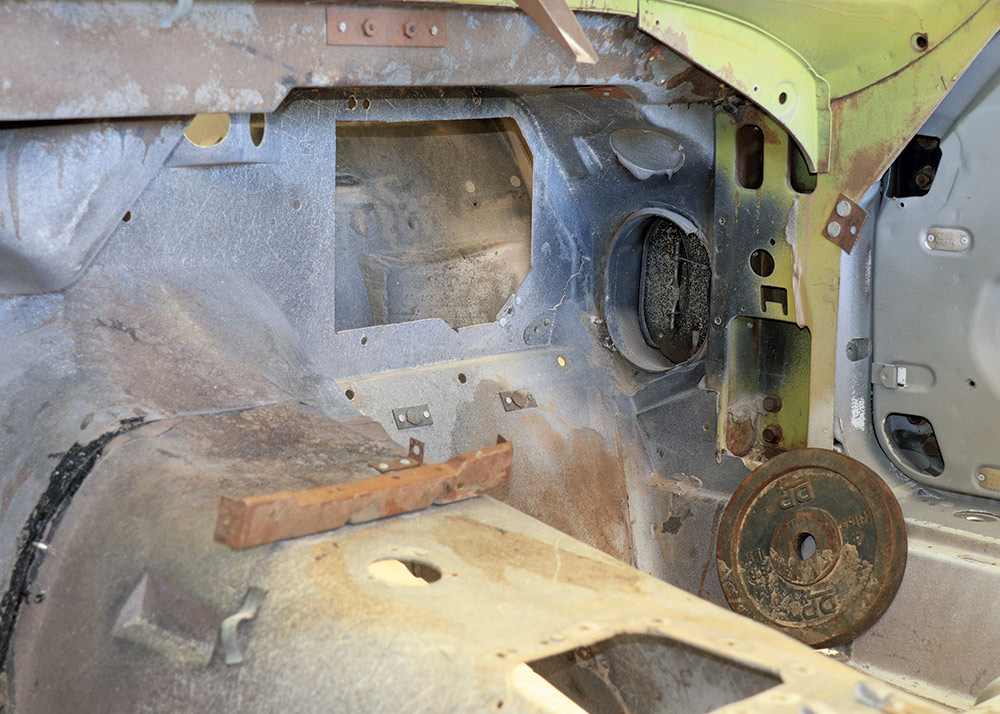
9. After the OE HVAC system has been removed, two holes (openings) remain to be filled. The large square hole and all the mounting studs’ holes were filled first.
view of the interior from the passenger side of the firewall
10. Here’s the view of the interior from the passenger side of the firewall. After completion, the interior and exterior sides will be finished to make it look like the square hole never existed.
yellow masking tape applied to inside of firewall
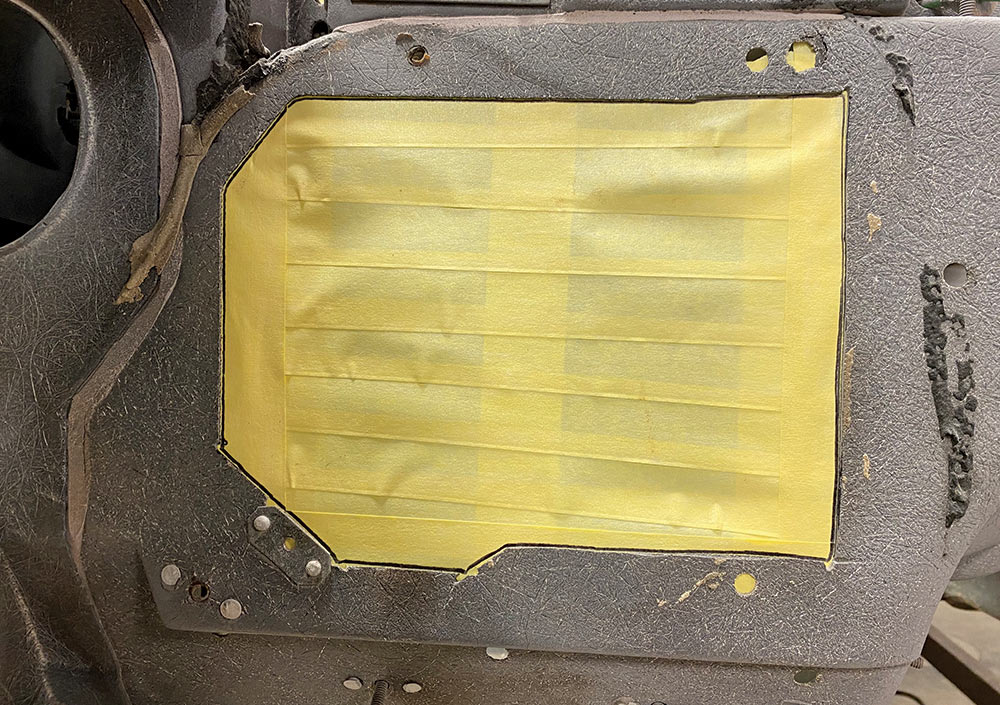
11. Step 1: Heim used high-visibility yellow solvent-free adhesive masking tape applied from the inside of the firewall to make a mold for the fiberglass firewall blanking plate.
firewall hole traced with black marker on yellow masking tape
12. Step 2: Heim traced the edge of the firewall’s square hole from the front with a black Sharpie to create a template for the flat piece of fiberglass molded for the blanking plate.
masking tape with engine compartment hole traced on it on workbench next to fiberglass mat
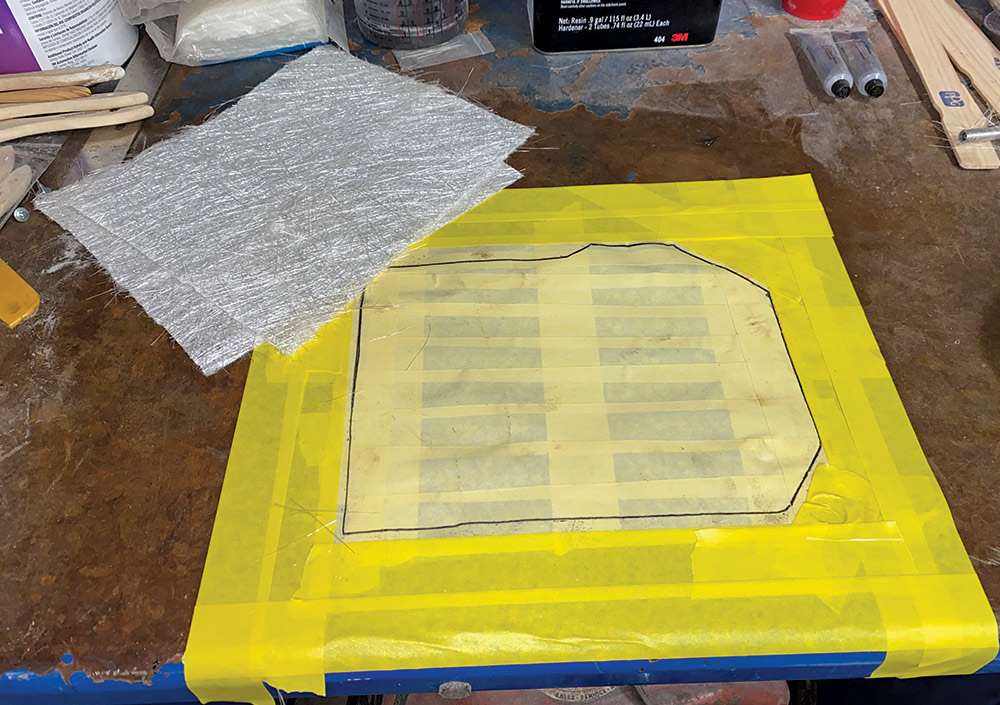
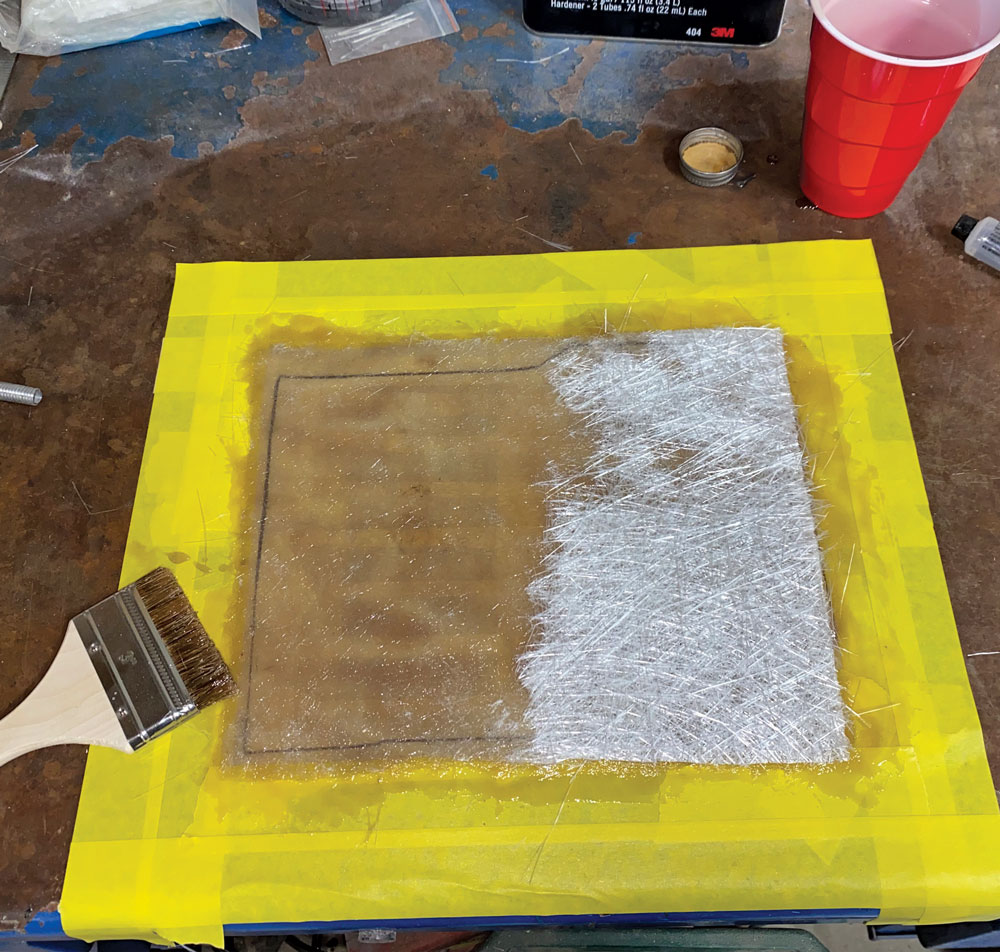
13. The template was removed from the firewall and taped down, sticky side up, flush to the flat surface of the bench top. Fiberglass mats were cut oversized to reach outside the cut lines.
fiberglass mats stacked on masking tape template with resin poured on top
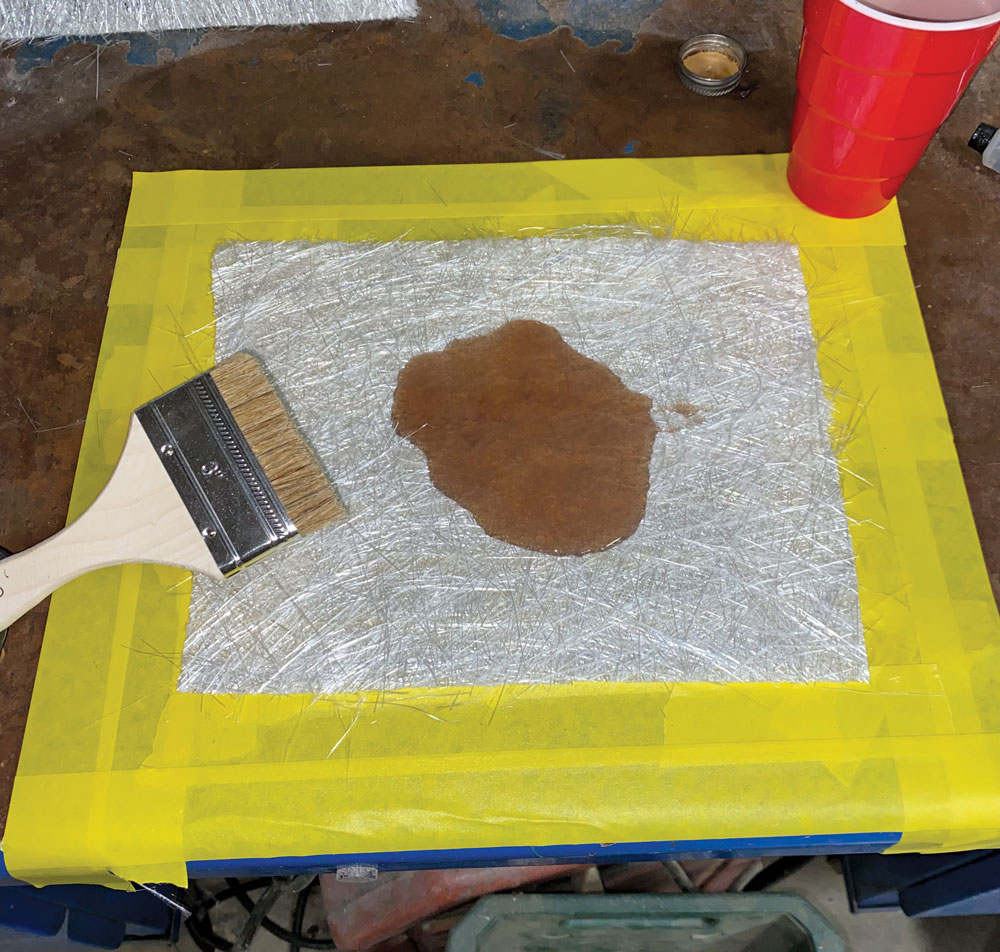
14. Squared up and stacked evenly, the two fiberglass cloth mats were liberally poured over with catalyzed resin. The cheap paintbrush was cut stubbier to create stiffer bristles.
resin spread over fiberglass on template with a paintbrush
15. It is essential to heavily soak the outer edges beyond the cut lines with resin. The stubby brush spreads and pushes the resin deep into the ’glass mat.
fiberglass soaked with catalyzed resin
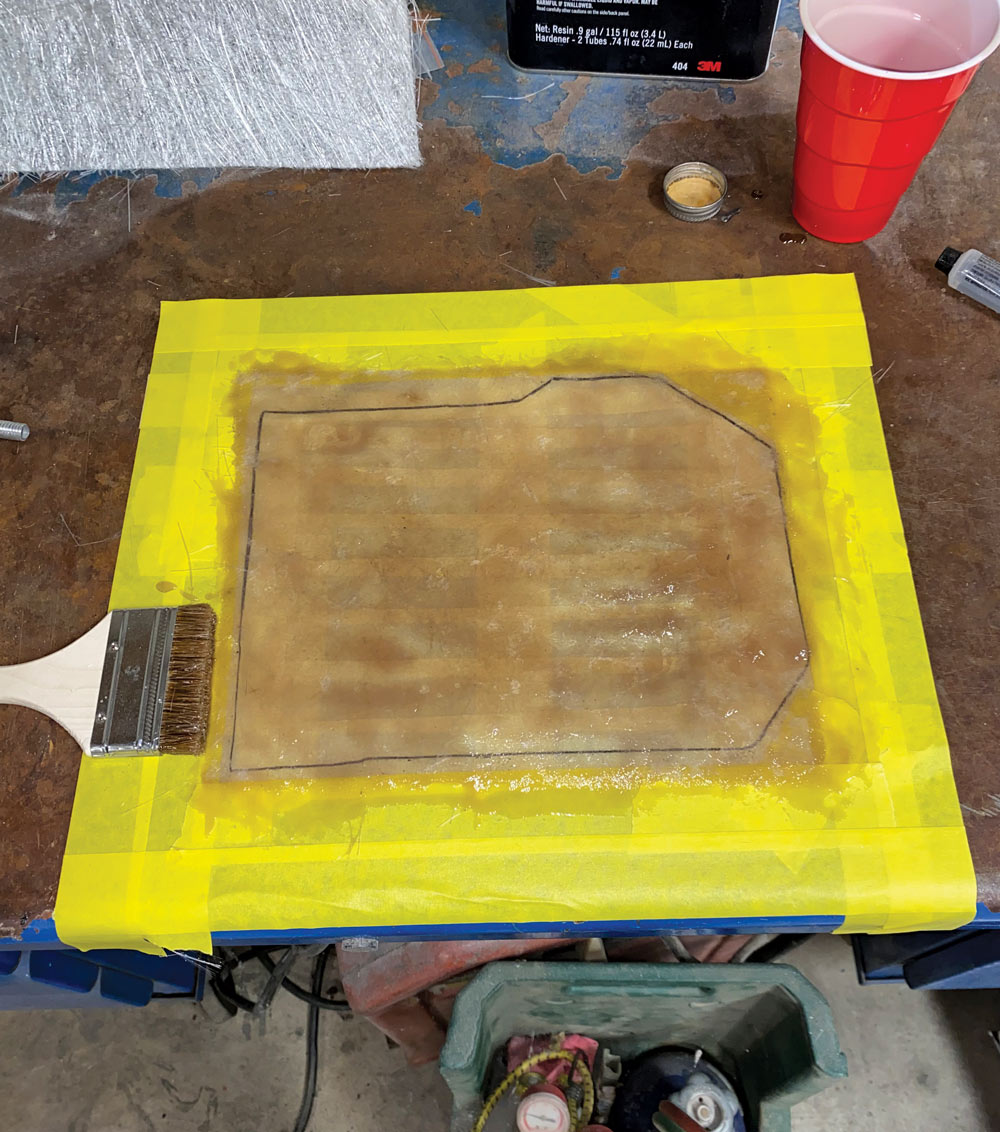
16. Properly soaked and worked in with catalyzed resin, the fiberglass cloth mat midway through the laminating process becomes transparent and the cut lines appear.
second layer of catalyzed resin poured over fiberglass
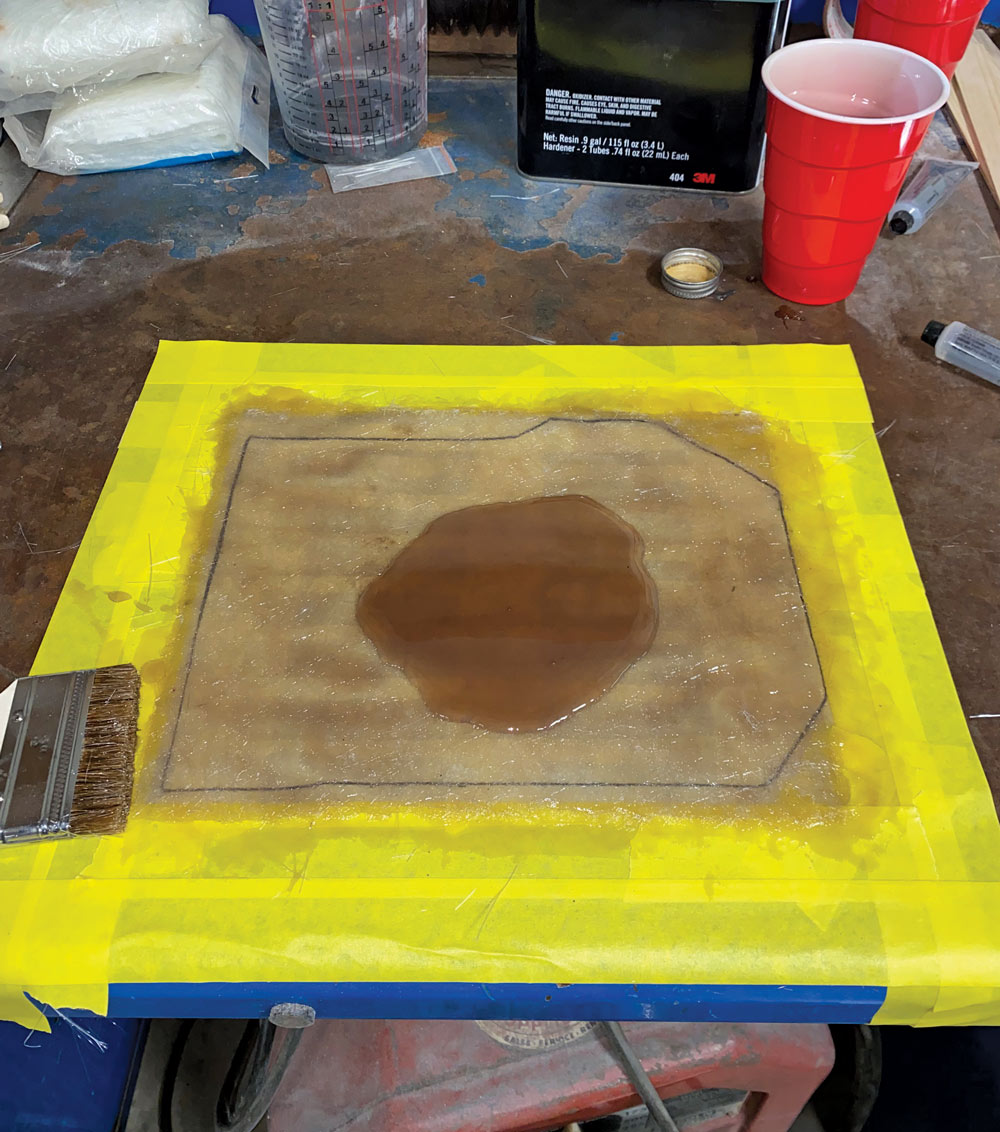
17. The initial resin pour was still curing when this additional pool was poured on to build a barrier between the glass mat and fiberglass mat.
fiberglass after second layer of resin is evenly spread on it
18. Leaving too thin a resin barrier on top of the laminated fiberglass mat will protrude strands of fiberglass cloth mat when the resin is ground and sanded flat.
aluminum foil laid over curing fiberglass
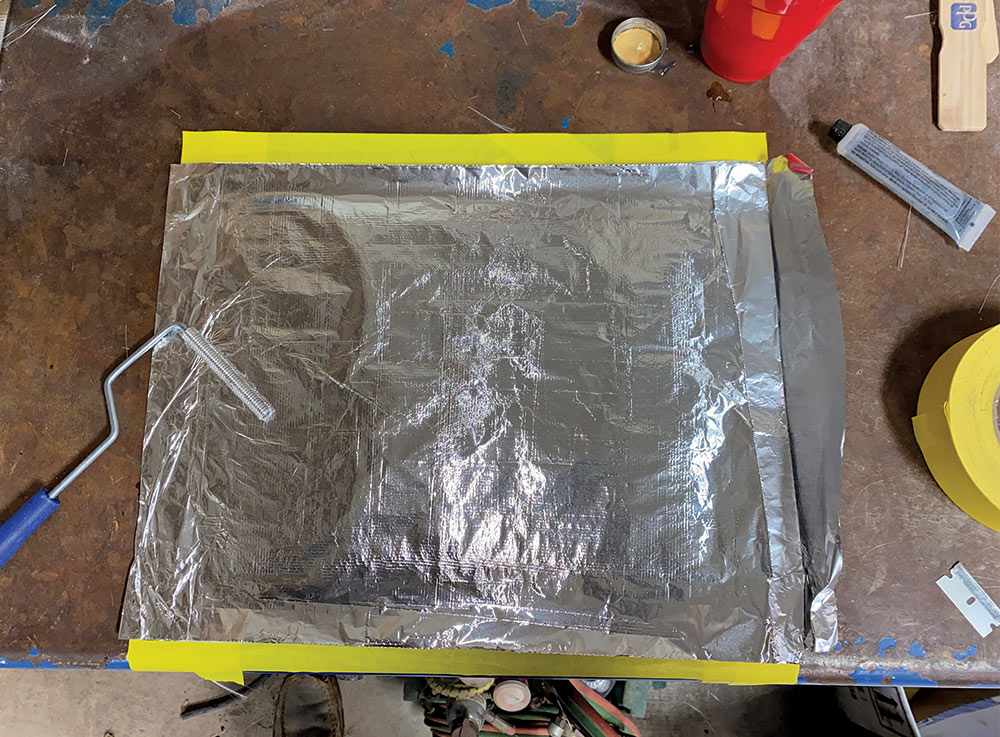
19. Heim laid aluminum foil over the wet curing resin to prevent clogging the threads of the laminating roller. The roller is aluminum and difficult to remove (clean) cured (dried) resin from.
fiberglass cutout of template
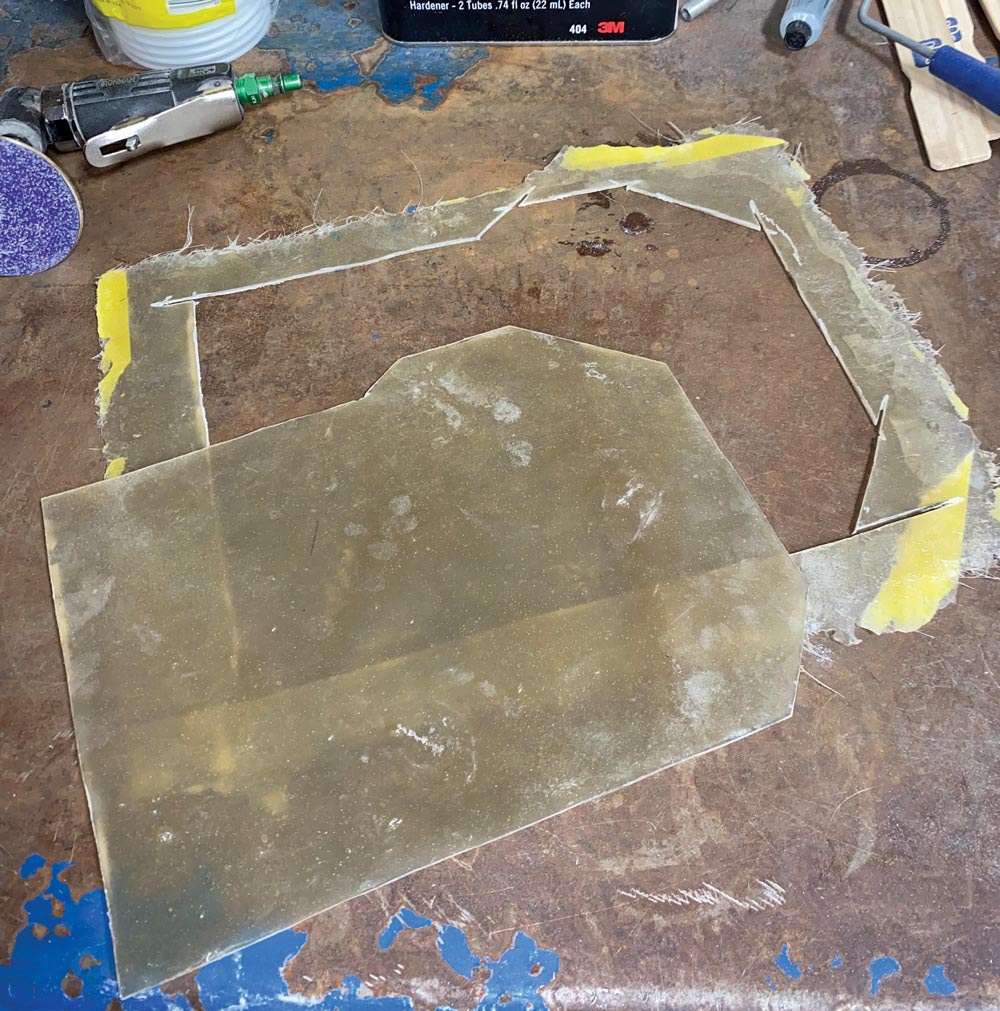
20. A 4-inch cutoff wheel on a die-grinder made short work of cutting (trimming) off the edges of the perfectly bubble-free fiberglass blanking plate.
hand holding up fiberglass showing the thickness of the corvette's firewall
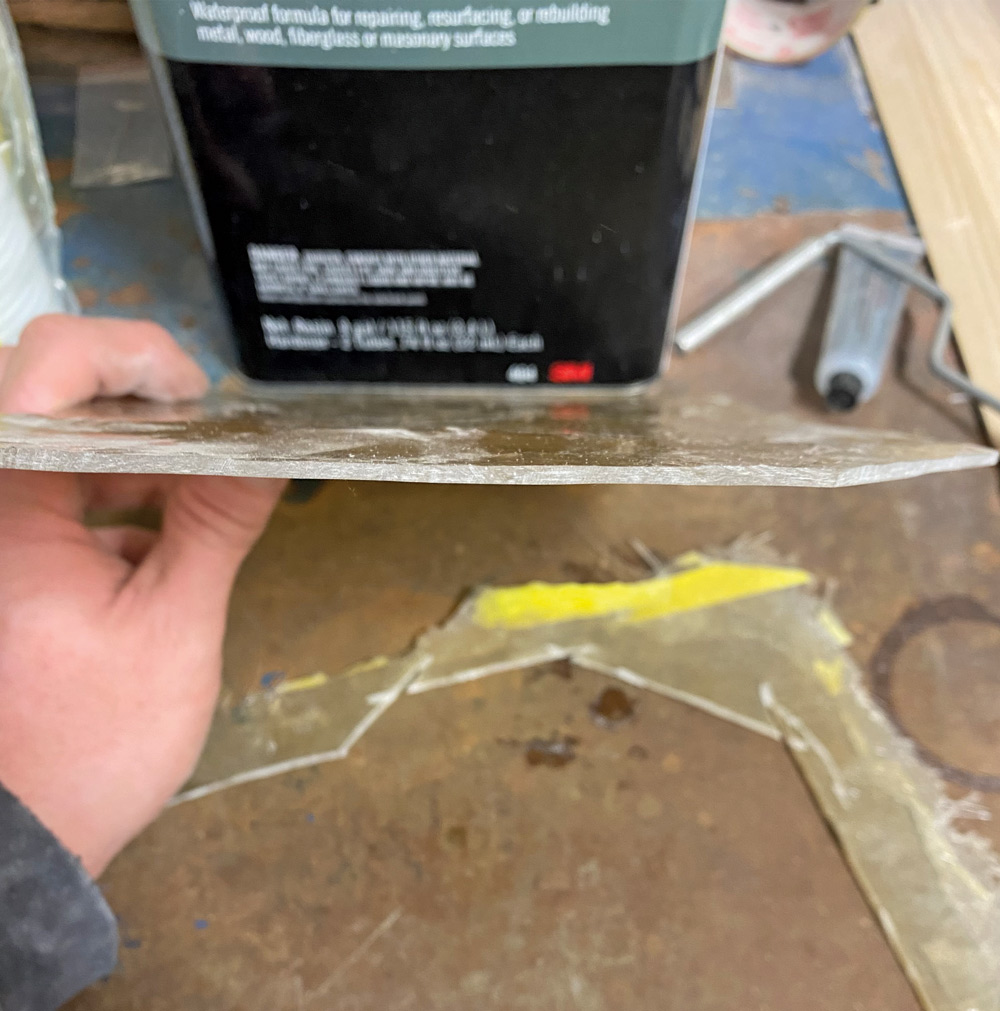
21. Two layers of fiberglass cloth mat buried in a thick barrier of fiberglass resin produced a firewall blanking plate that matched the thickness of the Corvette’s firewall.
fiberglass glued into hole in engine compartment
22. Butt-welding a steel plate in preparation for gluing the fiberglass blanking plate requires grinding a beveled edge and creating a slight gap to bridge in the new piece, analogous to butt-welding a steel plate.
circle the size of the circle holes in engine compartment traced onto yellow masking tape and placed on workbench next to fiberglass mats
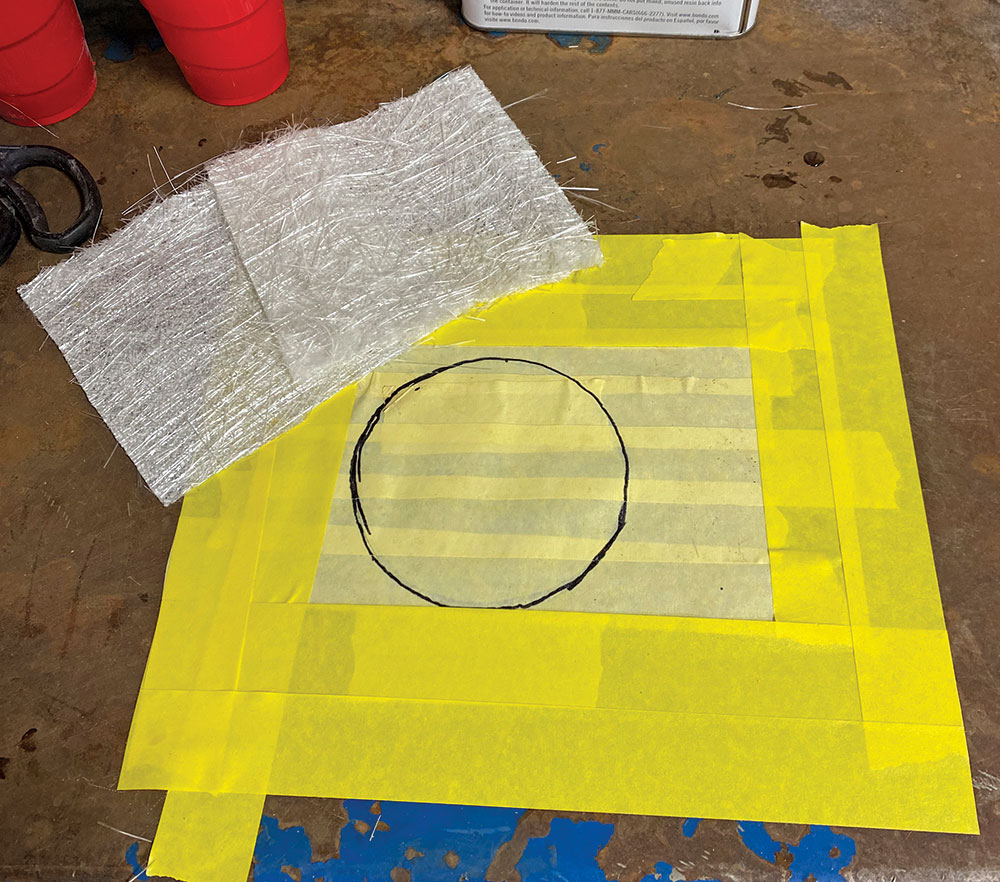
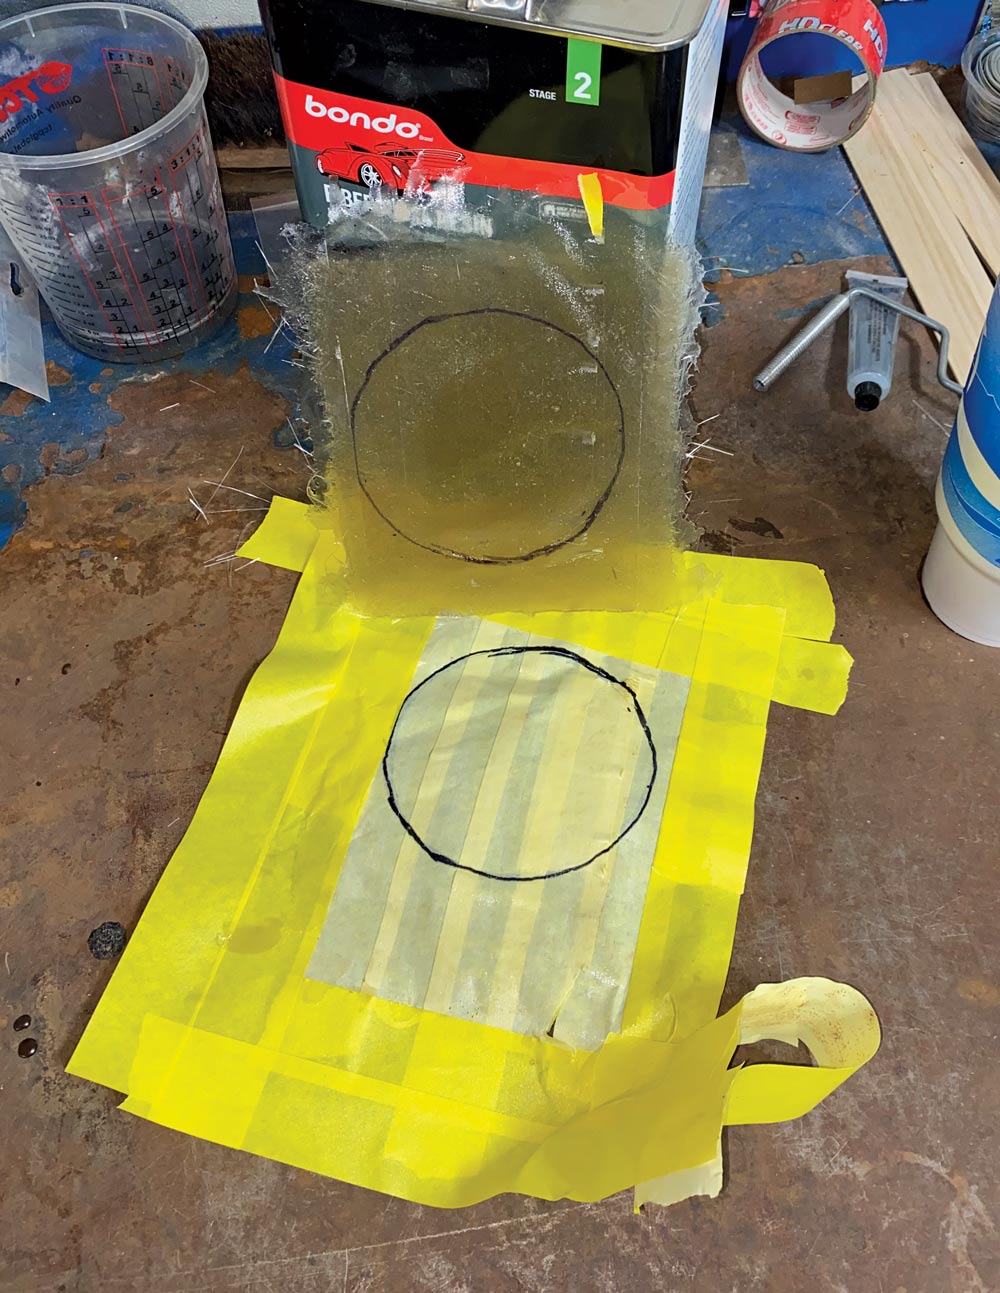
23. The same process is used for making the fresh air hole blanking plate, which is traced with a Sharpie. Two squares of fiberglass cloth mat that exceed the size of the blanking plate are needed.
fiberglass on template after coats of catalyzed resin have cured
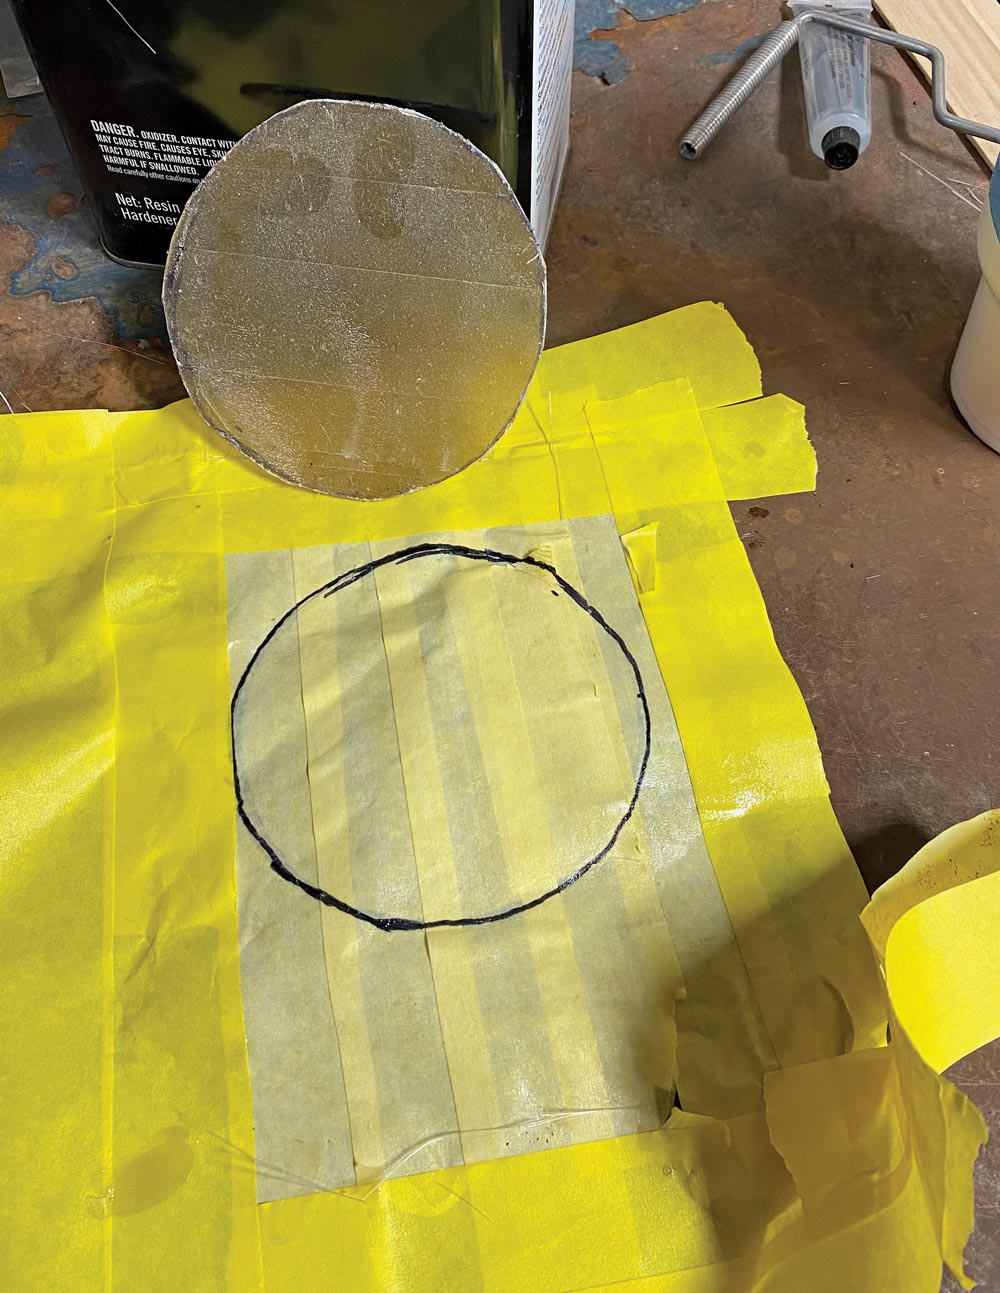
24. Skipping ahead of the steps explained and illustrated in photos 11-20, the thick bubble-free fresh air intake blanking plate part is ready to be final trimmed.
hand wearing glove peeling yellow masking tape template off of fiberglass
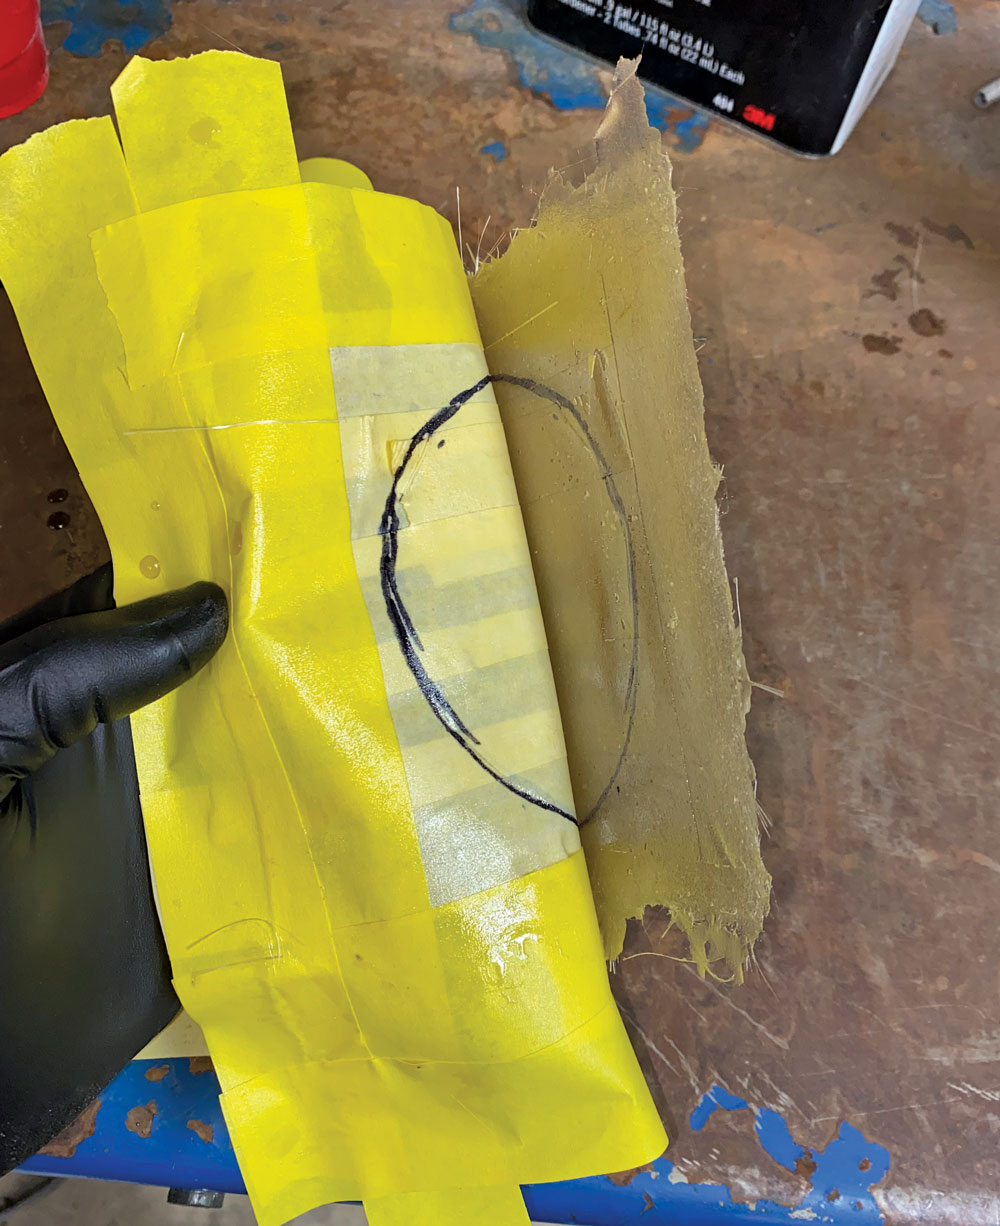
25. The mold/template of yellow solvent-free adhesive masking tape pulls away and separates easily from the completed part. Notice the Sharpie markings transferred onto the fiberglass from the tape.
fiberglass with circle of engine compartment hole traced on it
26. Cutting out a smaller-sized circle with a die grinder requires several passes. It was easier to cut it out with a saber saw.
circle cutout from fiberglass
27. Notice the edge of the part reveals it was cut slightly outside of the cut lines, leaving enough fiberglass meat to be ground into a perfectly shaped circle.
hand holding circle shaped fiberglass up to show thickness
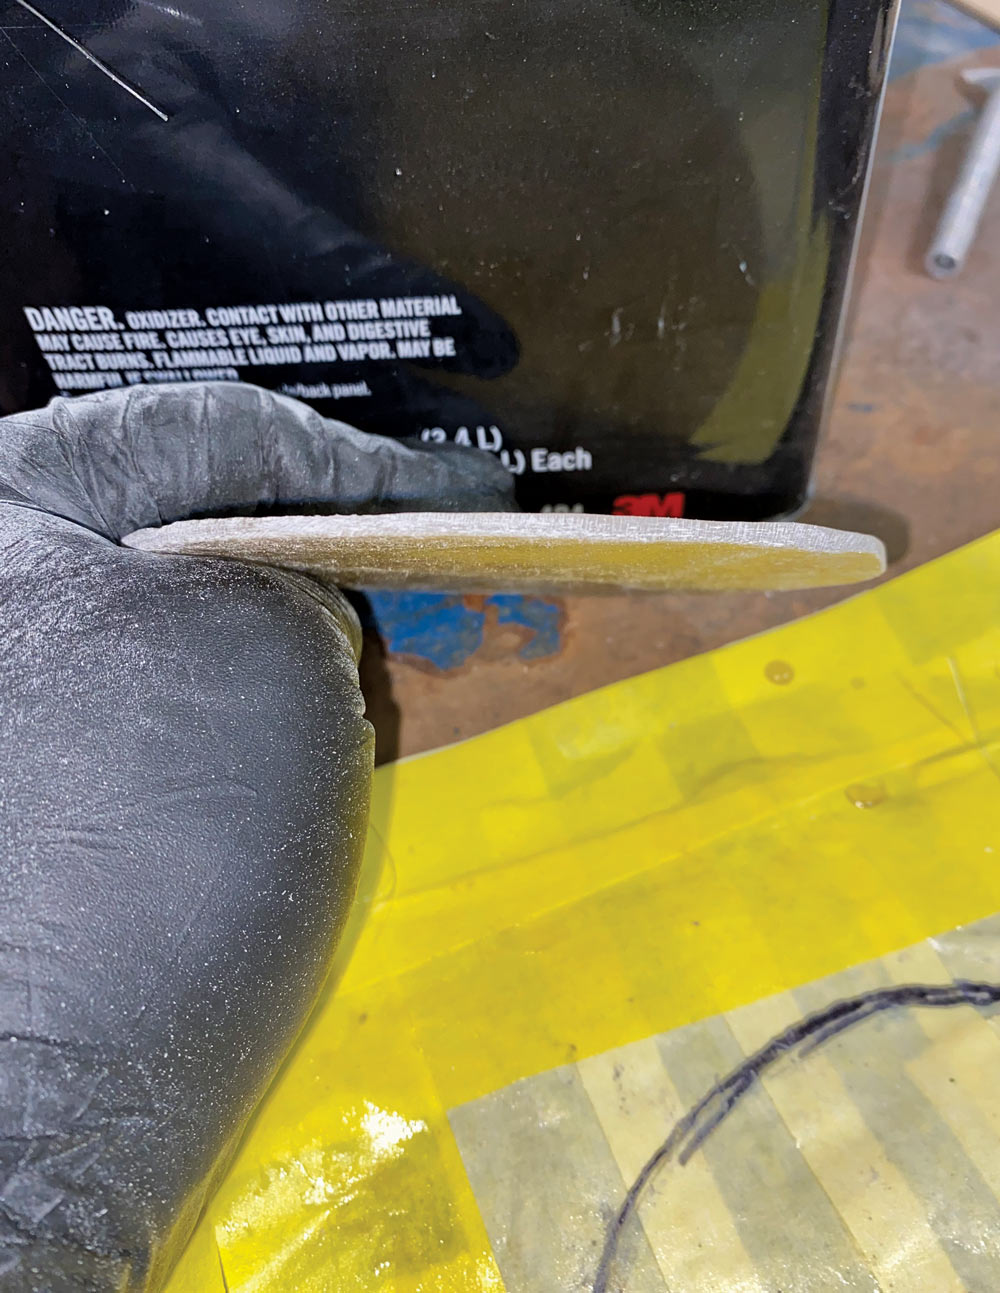
28. Using two sheets of fiberglass cloth mat stacked and laminated (buried) in resin with the bubbles rolled out produced a part of the exact thickness needed to match the firewall.
hand holding fiberglass circle cutout up to hole in engine compartment
29. Preparing to ’glass in, notice the edges of the hole in the firewall have been beveled to allow more resin to fill in and reinforce the butt-glued joint.
yellow masking tape holding fiberglass in place
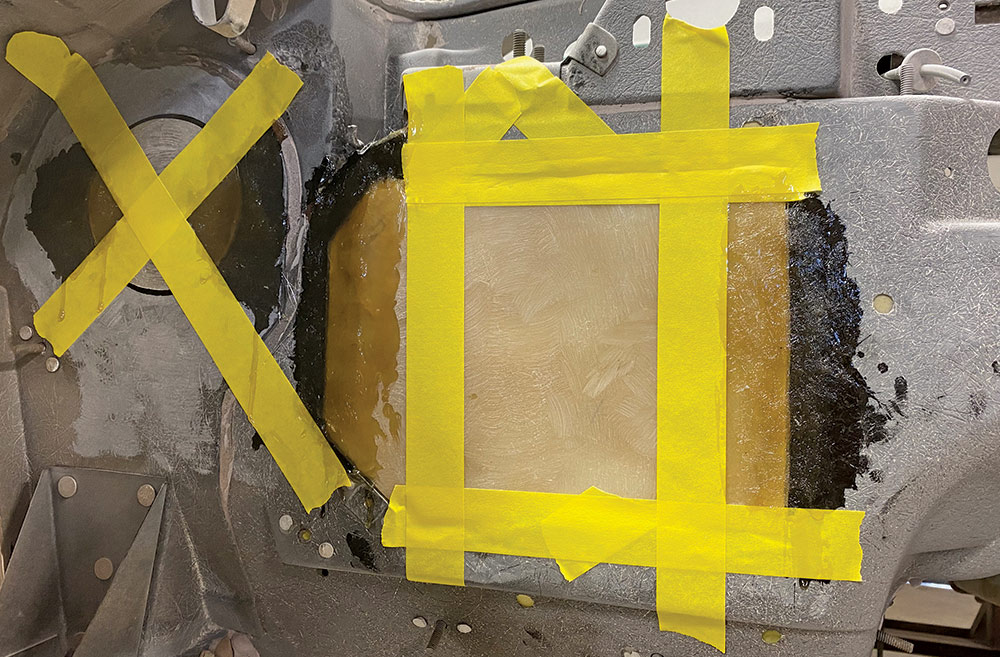
30. Yellow masking tape was used on both sides of the firewall to tack the fiberglass blanking plates securely into place. The resin was also applied to the interior side.
extra resin painted on edges of fiberglass to secure it in place
31. The last time resin will need to be mixed to fill the joints and brush a liberal coating over the entire area, including round and square blanking plates.
view of corvette body after holes have been patched with fiberglass
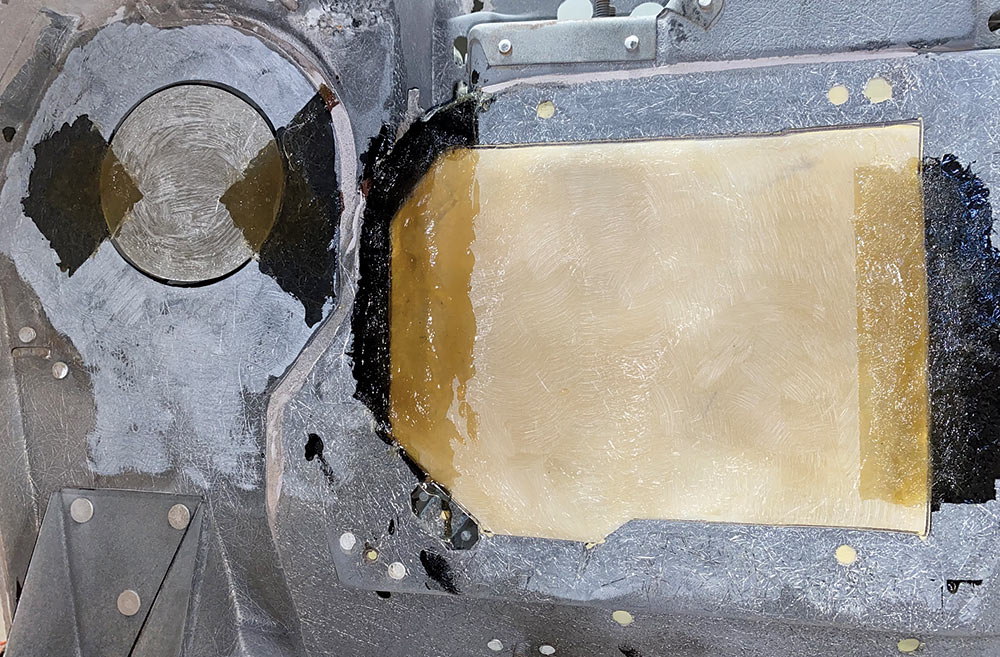
32. At this point, the area has been ground smooth and sanded flat, requiring only a minimal amount of polyester scratch putty. Block sanding before and after primer followed.
corvette body prepped for final coat of ppg epoxy primer
33. For the final coat of PPG epoxy primer, the entire face of the firewall was sanded with 220-grit dry sandpaper, and the finish with 320-grit dry sandpaper.
finished corvette body after ppg semigloss black urethane
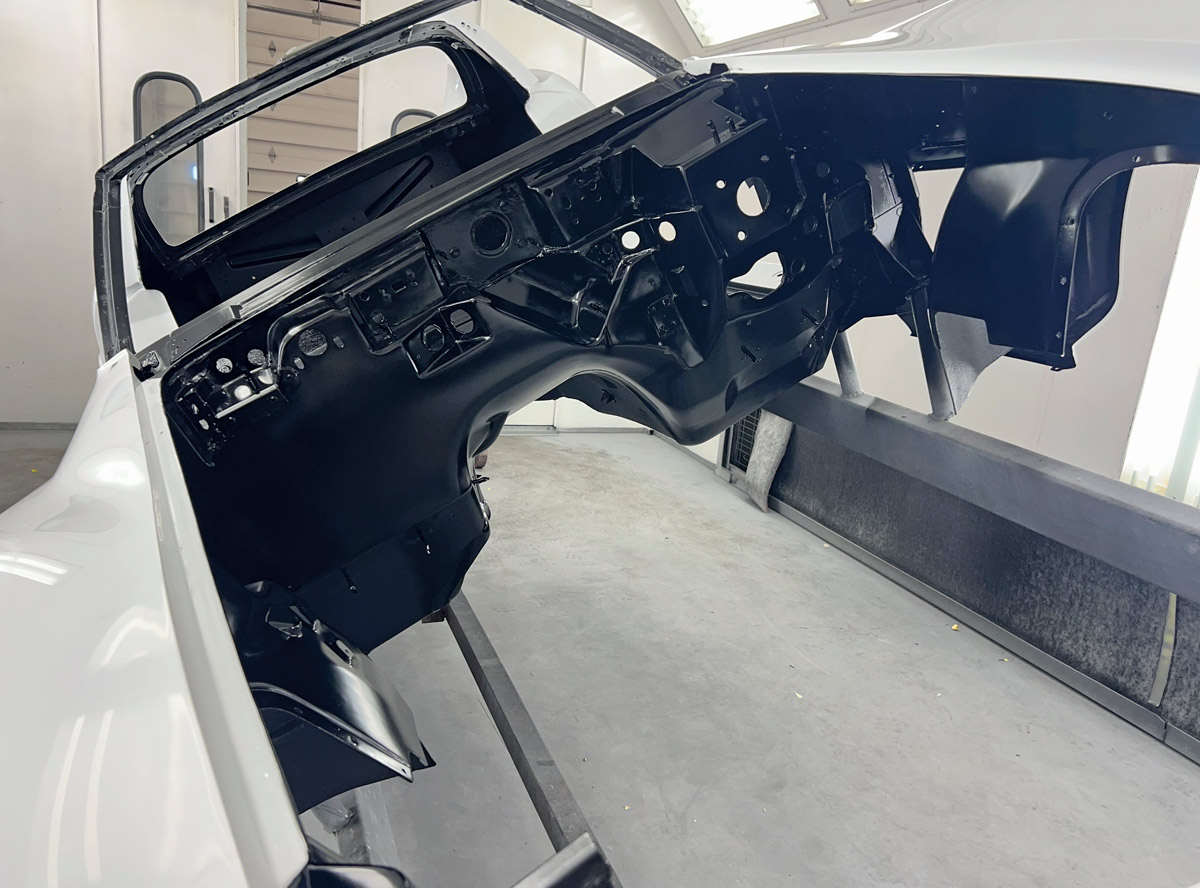
34. The firewall and inner fenderwells were finished with PPG semigloss black urethane, which goes on glossy and dries to a perfect satin black finish.
SOURCES
Modern Rodding
VOLUME 5 • ISSUE 51 • 2024