Modern Rodding Tech
InTheGarageMedia.com
car trim on a concrete floor
BBT Fabrications Builds a 1959 Chevy Impala typography
1. Cars from the 1950s had a lot of trim, and after 60 years of service most of it will usually require reworking to produce a top-quality car. This is a small sample of the trim removed from the 1959 Impala.
BBT Fabrications Builds a 1959 Chevy Impala typography
Part 3: It’s All About Stainless Trim
By Ron Covell
T

he 1959 Impala built by BBT Fabrications is exceptional in many ways. Some of the most sensitive work was perfecting the fit and finish of the car’s dozens of pieces of stainless trim. If you have ever worked with stainless trim, you can appreciate the difficulty of this task. Most trim is only about 0.025-inch thick, and thin stainless distorts a lot when it’s heated. The work done on the trim is a real testament to the crew’s talent at BBT, and we all can learn something from examining the steps they took to perfect the trim on this car.

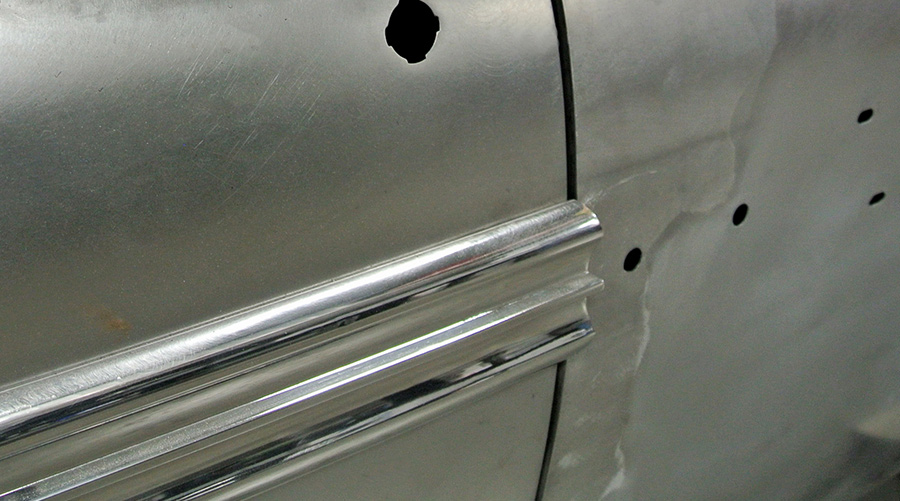
A decision was made to angle the joint at the rear of the doors to help mask the gap. The door trim needed to be extended, and an extra piece of door trim was sourced from a donor car. A short section of this was carefully added to the end of the door trim, and the joint was smoothed. Then, with the trim installed on the door, the location of the 45-degree cut was plotted, then the cut was made, and a filler piece was tack welded into place. The part was checked on the car again, and once satisfied with the fit the weld was finished and smoothed. A small reinforcement was added to the inside surface, and a threaded standoff was attached, providing a mounting point for the rear of the trim.

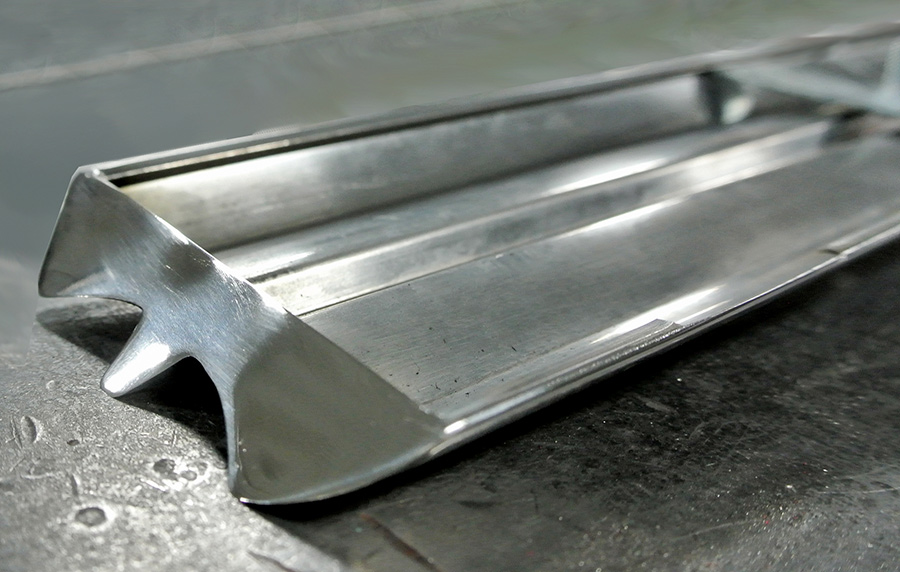
Every piece of stainless trim on the car was worked to perfection. We only have space here to cover a couple of examples, and we’ll closely examine one of the most challenging areas on the car, the windshield trim that wraps around the A-pillar. This is a complex part with an “S” shape, and the fit was never perfect, even when the car was new.

There was lots of “slicing and dicing” required on this part, using additional material from a donor car. The photos show how these parts were meticulously fitted and welded together and how beautifully the parts fit together in the end.

close up of trim along car door
2. Initially, the stainless trim on the door had a 90-degree return on the front and back edge. The plan for this car is to rake it back at around 45 degrees, which will help make it flow better into the trim on the quarter-panel.
close up of welding on car trim
3. To accomplish this goal, the strip of trim needs to be extended. Here, a section from an extra piece of trim has been carefully fitted and tack-welded to the door trim. Getting a tight joint is essential for delicate work like this.
trim piece being held up against the car door
4. Here is the trim piece, held temporarily in place on the door. Note how small and uniform the weld is. Thin stainless like this distorts easily with heat, so it’s essential to do everything possible to keep the heat to a minimum.
weld smoothed on the outside with the edge of the trim cut at a 45-degree angle
5. Once the weld is smoothed on the outside, the edge of the trim is cut at a 45-degree angle, and a small filler piece is tack-welded into place.
filler piece is welded and smoothed
6. After checking the fit, the filler piece is finished, welded, and carefully smoothed.
small reinforcement welded on the back side of the trim
7. For the finishing touch, a small reinforcement is welded on the back side of the trim.
inside of the trim
8. The trim on the quarter-panel must match the door’s trim. Looking inside the trim, you can see where the edge has been trimmed to 45 degrees and a filler piece is welded into place. Note how small and delicate the welds are.
reinforcement being added to the inside of the trim
9. A reinforcement is added to the inside, and a threaded fastener is attached, allowing the trim piece to be held tightly against the quarter-panel.
fit being checked against the trim piece on the door
10. The welds are sanded smooth, and the fit is checked against the trim piece on the door.
trim after being worked with ultra-fine sandpaper
11. The trim is worked with ultra-fine sandpaper once the fit is verified.
trim piece after the final polishing
12. Here’s the trim piece after the final polishing.
view of the inconsistent gap between the windshield and vent area
13. The trim around the windshield and vent window was among the most challenging areas. As you can see, the gap is very inconsistent.
more material added to the trim to strengthen and stabilize it
14. The trim wraps only partially around the A-pillar, so more material was added to strengthen and stabilize it.
narrow strip of stainless steel welded to the inner edge of the trim
15. A narrow strip of stainless is being welded to the inner edge of the trim. This weld will be metal-finished and polished.
extra piece of trim
16. An extra piece of trim was required to repair the original. The upper piece was removed from the piece to be saved and the lower piece was sourced from a donor car.
the remainder of the original piece being tweaked to fit the A-pillar properly
17. The remainder of the original piece is being tweaked to fit the A-pillar properly.
donor piece being checked for fit after the original piece was properly fitted
18. The donor piece was checked for fit after the original piece was properly fitted.
trim pieces being fit along the window
19. A lot of careful tweaking will be required to get these pieces to fit properly.
pieces tack welded together for hammer and dolly work
20. The pieces are tack welded together for hammer and dolly work. The finish welding and smoothing will come next.
seams have been welded, smoothed, and polished
21. The intricate seams have been welded, smoothed, and polished, and now the lower windshield trim will be adjusted to fit.
two pieces tack welded together with the edges properly finished
22. The two pieces are tack welded together and a little hammer and dolly work will be required to align the top edges properly before the finish welding is done.
closeup of trim where the joints are invisible
23. After fitting, welding, smoothing, and polishing, it’s impossible to see where the joints were.
view of finished trim
24. After the final tune-up, the gaps were worked to perfection.
SOURCE
Modern Rodding
VOLUME 5 • ISSUE 51 • 2024