Modern Rodding TECH
InTheGarageMedia.com
 Photography by Cody Walls
n our last installment on Doug Melson’s ’47 Dodge, we delved into the coupe’s history and the somewhat bumpy road it’s traveled en route to becoming a nicely restyled hot rod. Without recounting every gory detail, the old Dodge was shuffled between several shops (bearing the brunt of at least one less-than-skilled bodyman along the way) before finally getting back on track at Cody Walls’ Delaware shop, Traditional MetalCraft. Based on a subtle but complete design overhaul by Eric Black at e. Black Design Co., every panel of the coupe is being nipped and tucked to create a profile that’s significantly racier and more aggressive than anything Dodge produced at the time.
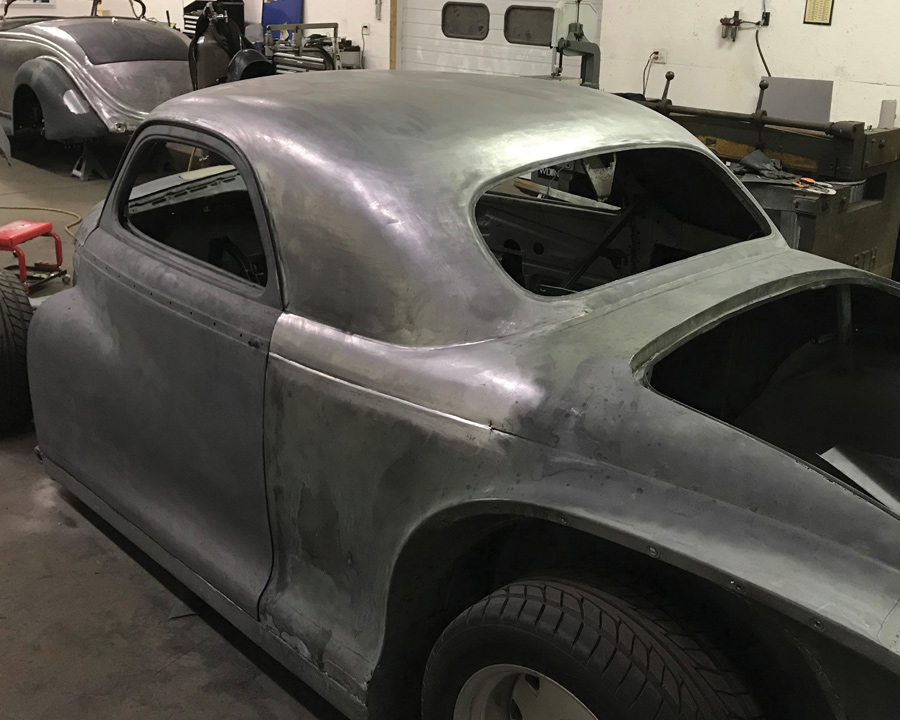
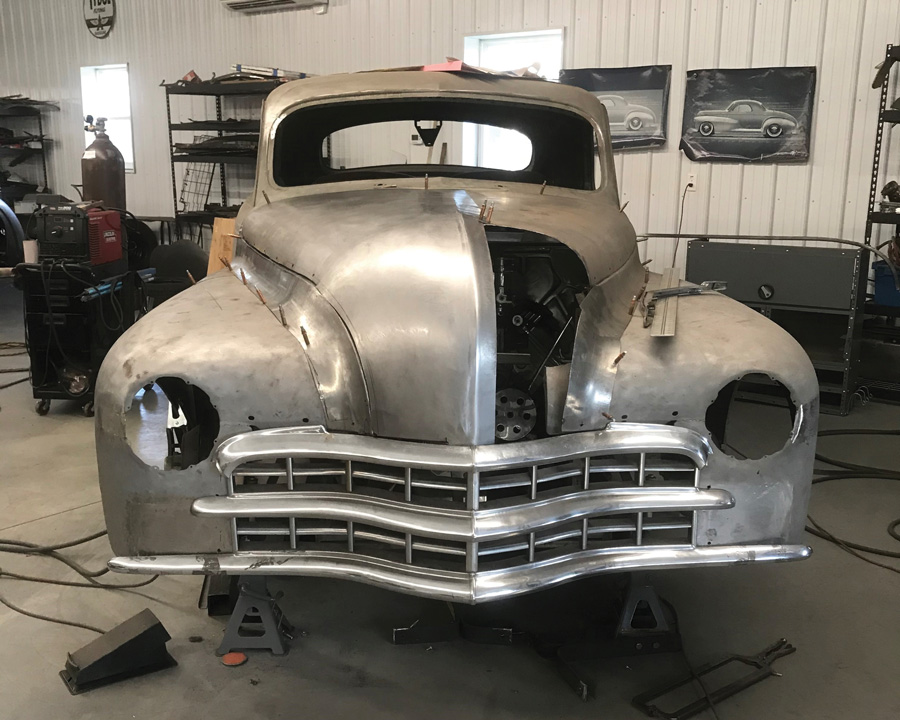
After tackling the tail end (the rear fender and decklid work we showed previously), Walls moved forward on the body, revising the roof modifications started by one of the earlier shops and reshaping the front fenders, hood, and grille opening. It’s a monumental amount of work. Dodge business coupes of the ’40s had a greatly abbreviated turret-top roof that some consider a little out of proportion with the rest of the body. When the car landed at Traditional MetalCraft the roof had already been lengthened, but it was lacking in finesse—and in fully welded seams (beneath the body filler it was simply tacked in place). Those issues had to be remedied, along with integrating a more shapely ’49 Dodge grille and one-piece hood as dictated by Black’s design.
The details of those modifications are covered in the accompanying photos and captions. Here we wanted to take a closer look at Walls’ process and the tools he uses to move metal. The cool thing about hot rodding is that there’s a place for enthusiasts of all skill levels, from home hobbyists just starting to learn how to work on old cars to professional builders and the guys who pay them to build cars. While learning the craft of metal shaping takes practice, patience, and the right tools, it’s a skill anyone can tackle at their own pace.
Walls’ arsenal of equipment runs the gamut from the simplest hand tools to some of the biggest and priciest pieces of metal shaping equipment available, and he uses all of them just about every day. “The best way to begin is by working on small pieces—little 4-inch square panels,” he says. “I bought a ’64 Impala when I was 14 and with a set of Harbor Freight hammers and dollies I started fixing the bottoms of the fenders. Then I needed to repair the window channels, so I got a cheap shrinker/stretcher and made these little pieces that I welded in. I was just learning to make basic shapes.”
We’re fortunate that we’re in an age when there are plenty of books, articles (like this one), and YouTube tutorials by amateurs and professionals alike to help guide the way through even the simplest metal shaping tasks. But it’s important to balance learning with doing by grabbing a hammer and a scrap piece of steel and doing some experimenting. “Some people read a lot or watch videos about how something’s done, and then they overanalyze it,” Walls says. “Sometimes you’ve got to jump in and do it, mess up a piece of steel, and learn from your mistakes. At the end of the day it’s just metal.”
These days the hammers and dollies Walls uses are primarily from Martin and Snap-On, but he’s quick to point out that those less-expensive tools he cut his teeth with will do the job, too. Especially when you’re starting out, any decent hammer and dolly will let you explore how metal behaves—how to raise low spots, smooth high ones, and form basic shapes. The more you work with those hand tools, the more you’ll hone in on the types or profiles of hammers and dollies that work best with your style. Then you can add to or upgrade your tool library as need and budget dictate.
Another tool Walls keeps in regular rotation is a ProLine planishing hammer built by the late Clay Cook (now available through Trick Tools). Planishing hammers can be used for shaping, but they’re primarily for smoothing expanses of metal and planishing welds. The latter, known as hammer welding, is the process of striking repeated blows (either with a planishing hammer or a hammer and dolly) along a welded seam to relieve the areas where the heat from the weld has caused the metal to expand and then shrink as it cools (commonly referred to as warping). With each blow of the hammer (with the dolly on the backside), the metal along the welded seam is stretched, smoothing the panel back into shape. Hammer welding can be done with TIG or gas welds, but not MIG welds. The MIG process results in a weld that’s too hard to be worked after it cools. With MIG welds, you simply have to manage the amount of shrinking that takes place by welding small sections at a time to minimize heat, and then use a grinder to blend the seam with the surrounding metal.
Beyond basic shaping tools it’s also helpful to have some means of cutting sheetmetal other than cut-off wheels. For straight cuts there are a variety of shears in different sizes that are available for most budgets. Just be sure to choose one that can handle the material thicknesses commonly used in autobody work. For more intricate shapes, a Beverly shear is tough to beat. They’re relatively compact, they can handle thicker material (in some cases up to 3/16 inch), and their throatless design allows for making intricate cuts in any size sheet.
With the aforementioned shaping and cutting tools, and perhaps a combination shrinker/stretcher (either floor- or vise-mounted), you can learn to fabricate a wide variety of patches and panels that will come in handy when working on hot rods and custom cars. At the other end of the spectrum are the bigger pieces of equipment designed to handle larger panels at a faster pace. “You can do a lot of metal shaping with those basic hand tools,” Walls says. “But when you’re charging by the hour, you must speed up the process. I really started getting bigger pieces of equipment because they save you time and let you work more efficiently.”
The first piece he bought was a ’59 Pullmax P-5, a versatile piece of equipment that can be used for everything from bending multiple edges to putting thick beads into heavier material like firewalls and heavy-gauge floor panels, as well as roughing in compound curves on larger sheets of metal. Walls often uses composite decking material from the home improvement store to create custom dies to create whatever profile he needs (like, for example, the profile of a hood peak to fill the gap where the emblem once was on this author’s ’41 Buick). The Pullmax is a workhorse that can handle about anything you can throw at it.
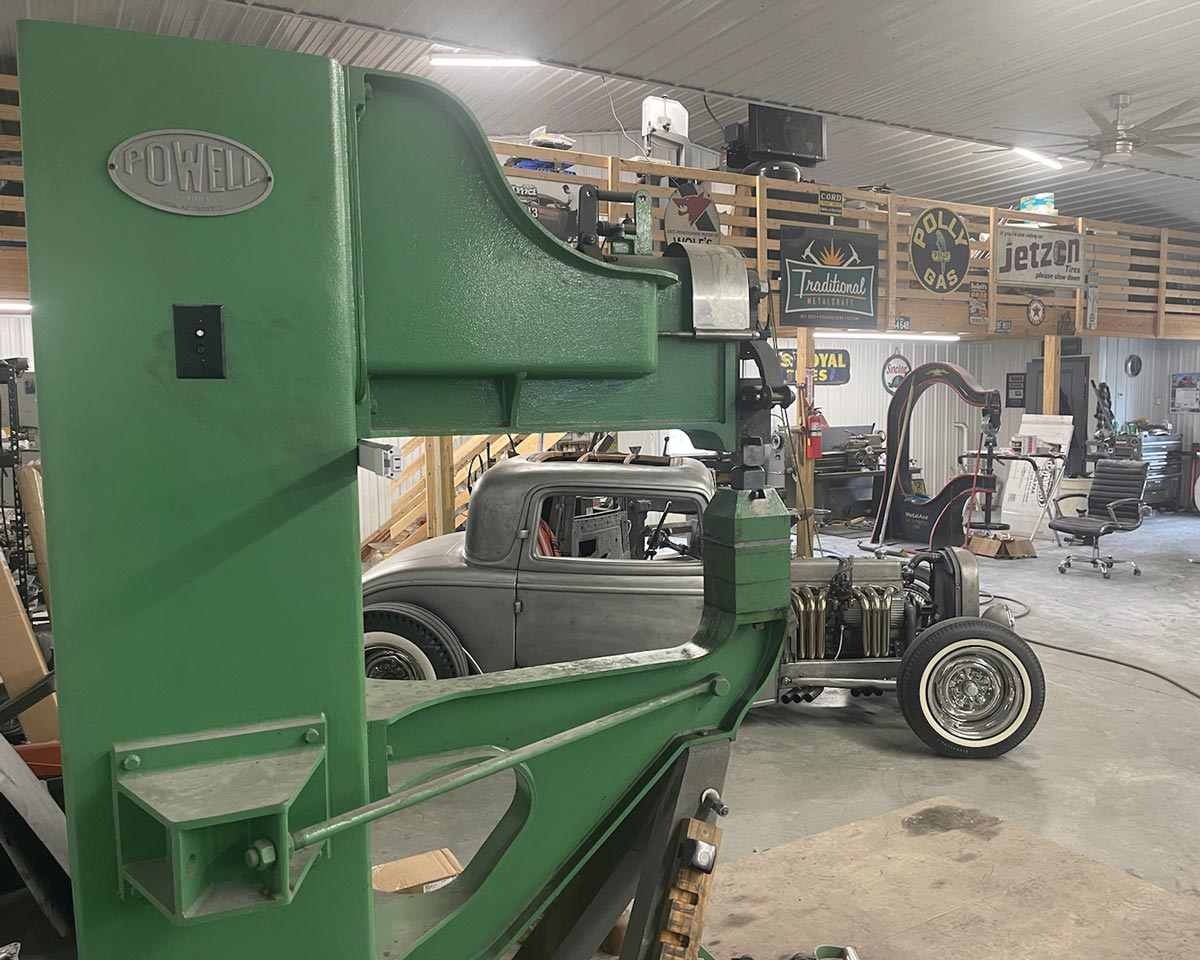
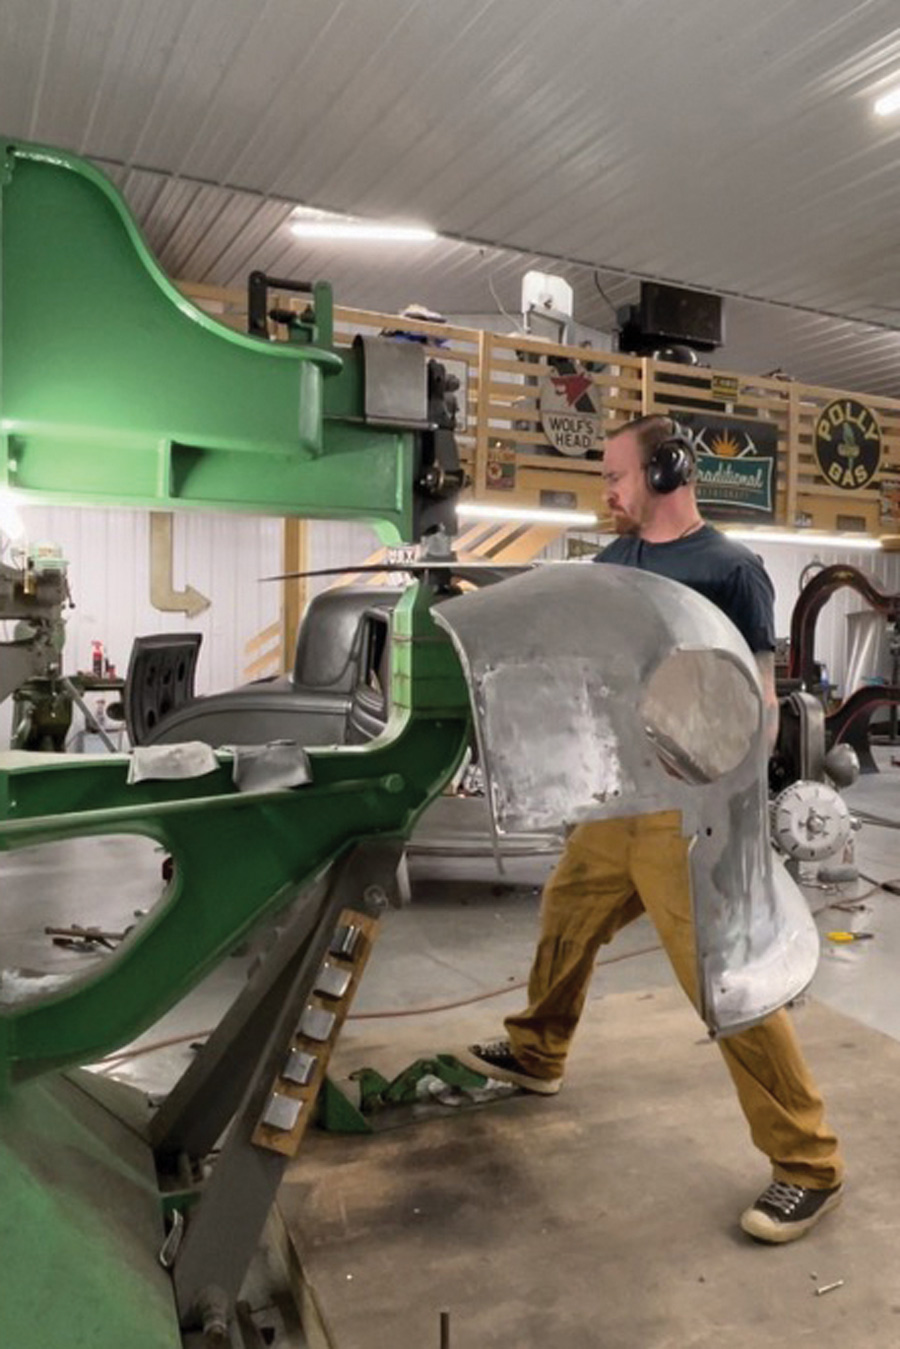
For shaping compound curves—especially in larger panels—a new Metal Ace English wheel, manufactured by Trick Tools, and a vintage Powell power hammer are pressed into duty. English wheels are available in a variety of sizes, from benchtop models to large, freestanding hulks like the one in Walls’ shop. The larger the wheel, the deeper the throat (and the larger the sheet of metal that can be formed with it). English wheels and power hammers both work on the same basic premise: they apply pressure that stretches the metal in a specific, focused area, creating crowns that form complex curves. The difference is that with the wheel the metal is fed between two roller dies that apply the pressure, whereas the power hammer uses the force of repeated blows to stretch the metal—not unlike an oversized planishing hammer.
“The English wheel is a great tool, but it’s time-consuming and you really need two people involved to form larger panels,” Walls says. “I made the decklid skin for the Dodge with the English wheel, and you can really do some nice work with them. But the wheel puts the metal under a lot of tension and it’s harder to get a nice, relaxed fit to the panel—at least for me. With the power hammer I can get a really nice finish, and I can get it faster—and by myself, which is important because I mostly work alone.”
Just remember that having bigger, professional equipment won’t instantly make you a better metal shaper. Each new tool you buy, from slap hammers to power hammers, will take time to learn and practice to master. “It’s definitely a misconception that these big pieces of equipment automatically make the process faster and easier,” he says. “In reality you can just mess stuff up faster! It took me six months to really learn that Pullmax, for example.”
Among the equipment at Traditional MetalCraft there are some pieces that are brand new and others that are over 50 years old, so we wondered if there was an advantage to buying older or newer tools. “If I can find a piece of old equipment that’s going to work really well, I get it,” Walls says. “But just because it’s old doesn’t mean it’s good, and the same can be said for new. You just need to do your research and ask questions. There’s a lot of information out there, especially online. And there are a lot of shops doing metalwork, so you can also pay attention to what tools they’re using.”
Metal shaping and welding are some of the most rewarding skills you can develop, and no matter what your level of experience is, there’s always more to learn. Right now, the most expensive part you’ll need to get started is the steel itself, but with a modest array of tools you’ll be forming panels and tackling more ambitious hot rod projects in short order. After all, saving as much vintage iron as we can is really the point of it all, right?
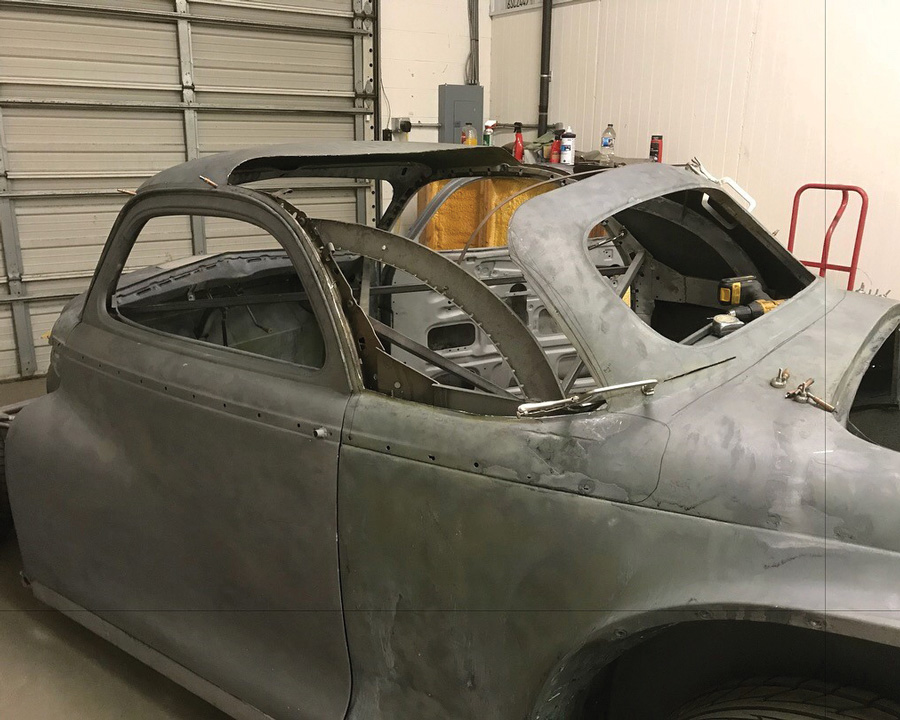

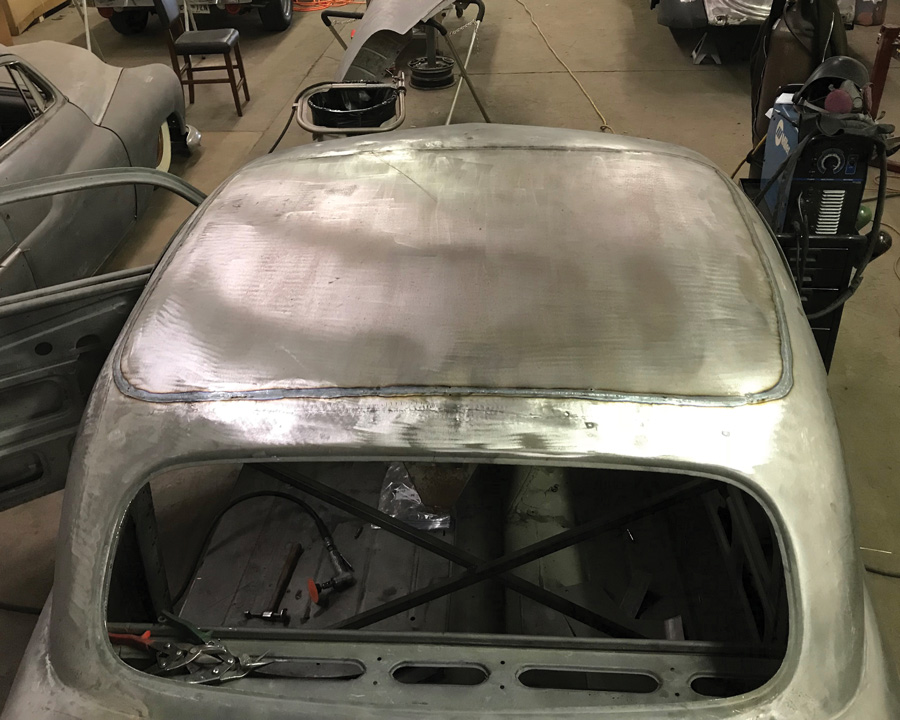
6. A junkyard ’54 Chevy donated its roof skin to form the Dodge’s new lid. Walls tacks larger panels every 1/2 inch, then welds one continuous bead all the way around.
7. Hammer welding the seams—striking repeated blows along the bead with a hammer on one side and dolly on the other—stretches the metal, smoothing expanses like this roof insert.
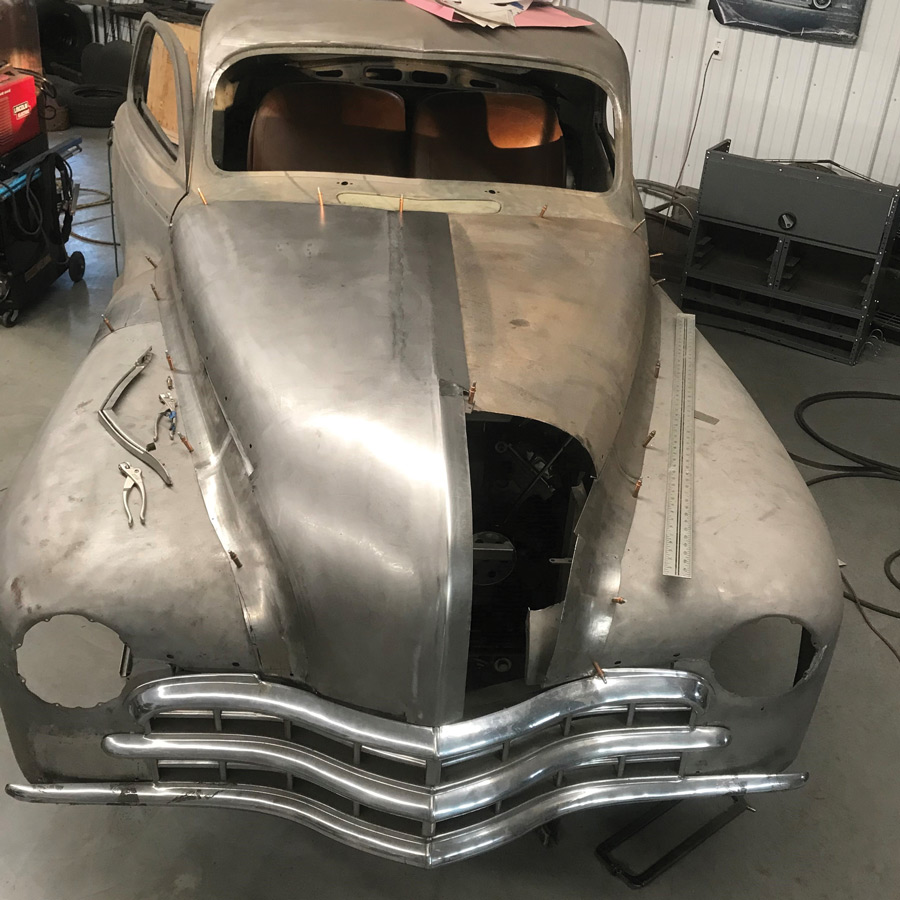
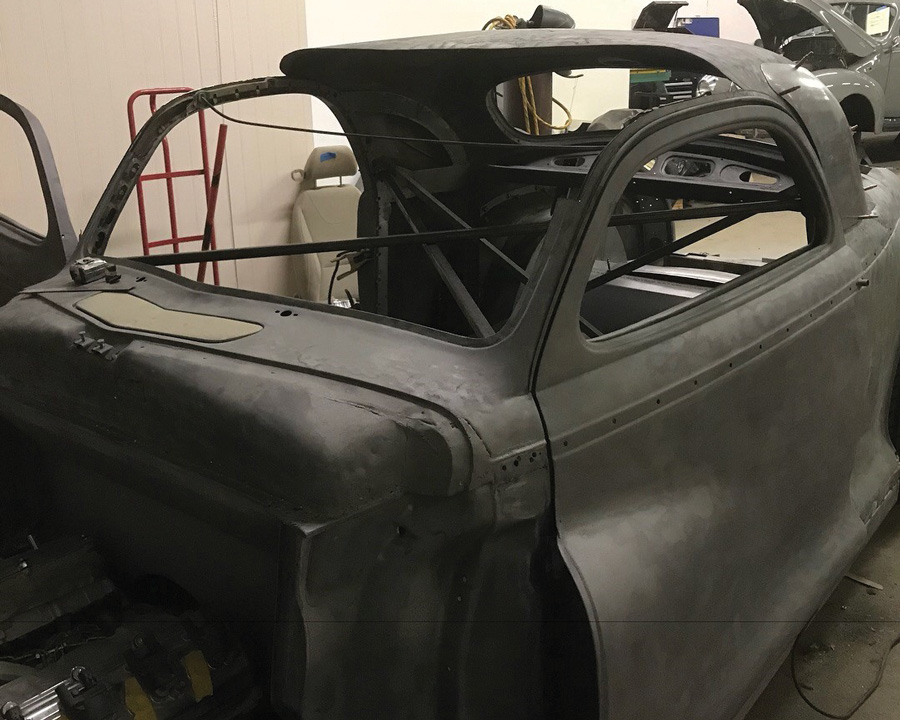
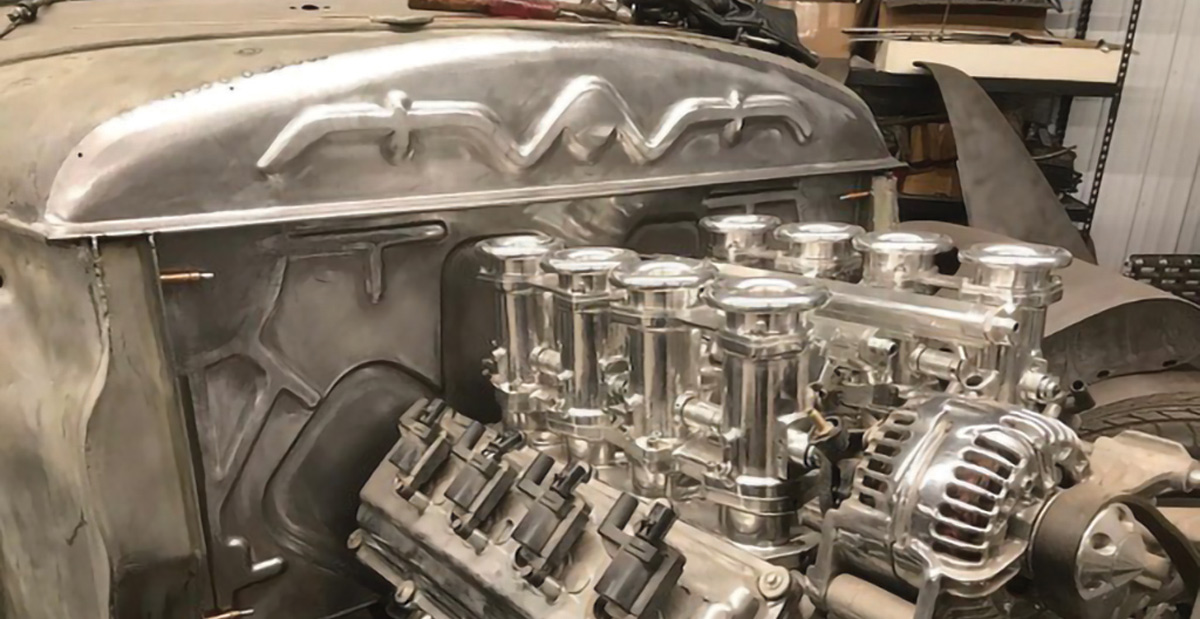
8. Walls one-pieced the hood and extended it down into the quarters, which necessitated fabricating the front half from scratch. A ’49 Dodge Wayfarer grille is also being mocked up.
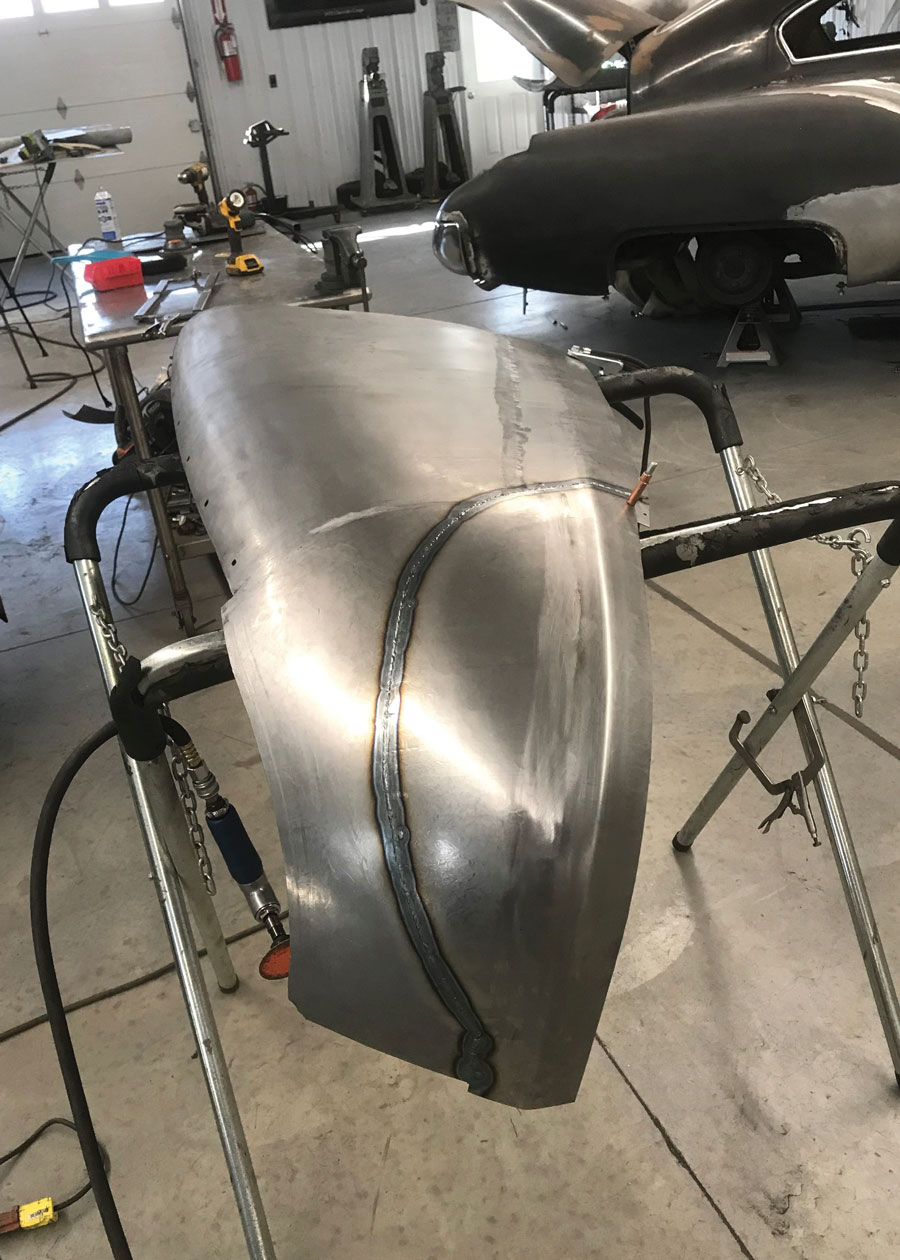


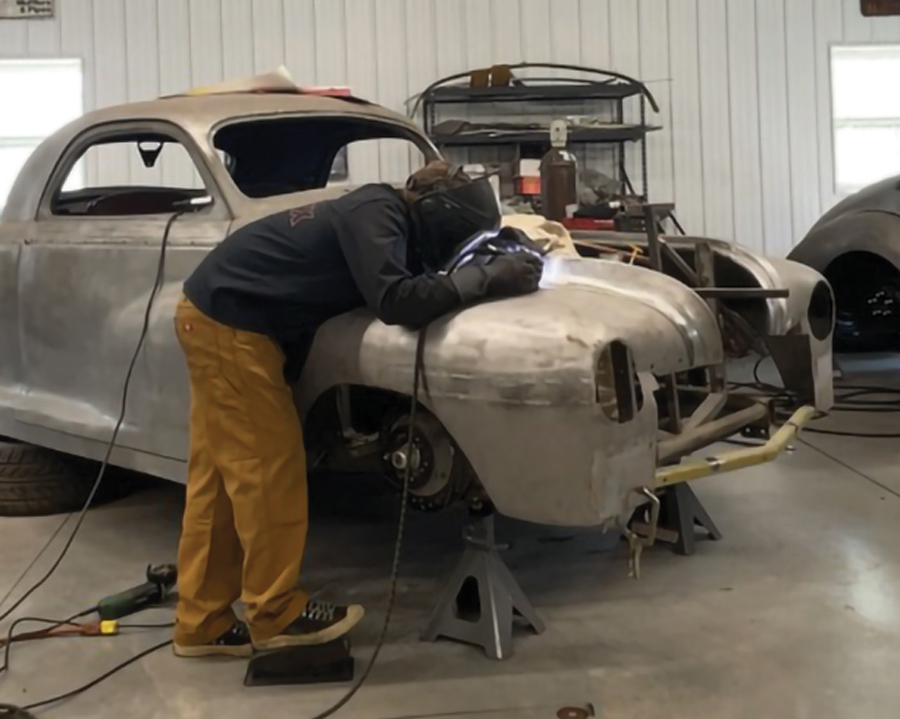

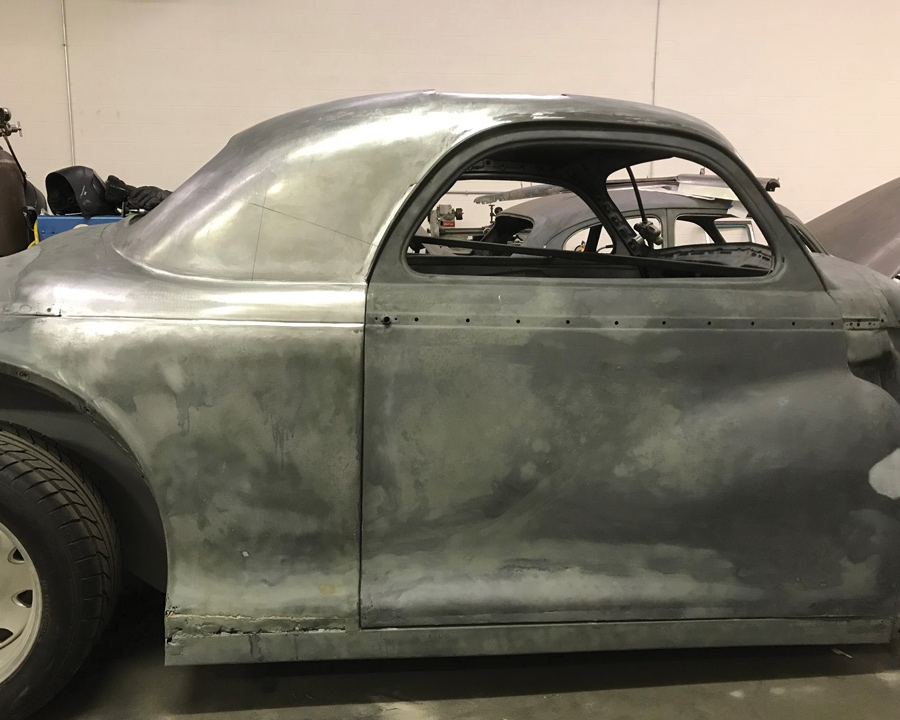
15. Both front fenders needed rust repair. On the passenger side Walls replaced the entire back half with new steel then used the power hammer to planish the welded seam.
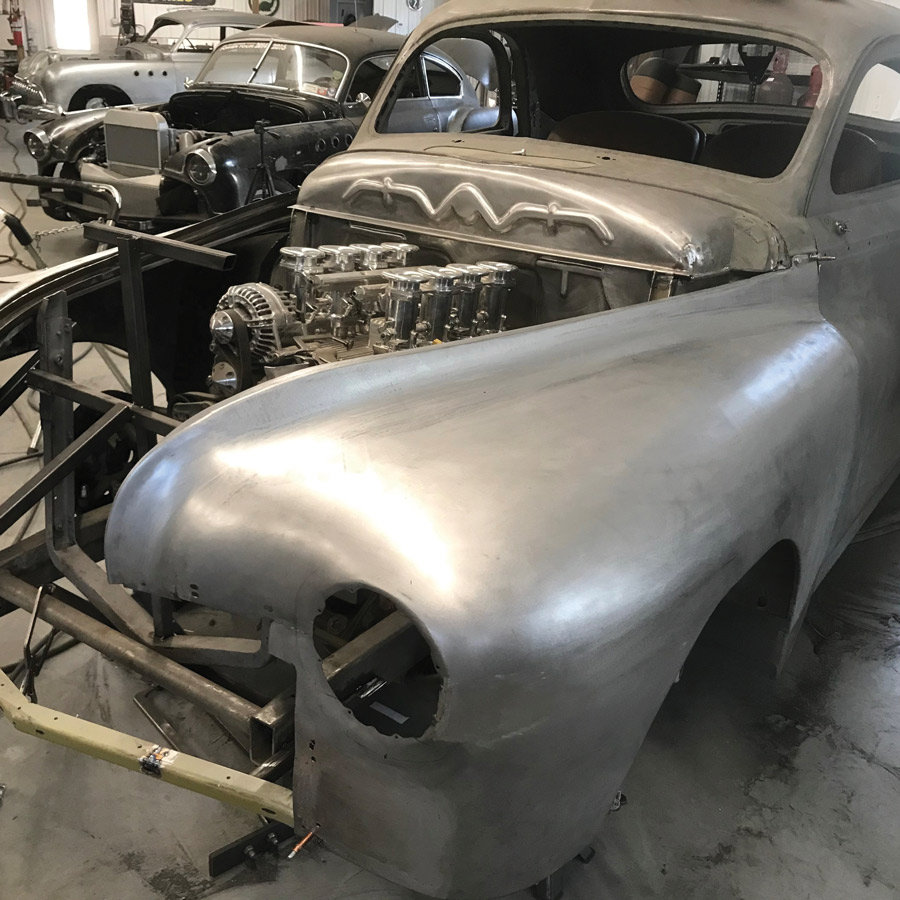
16. With one fender finished and hung, the front clip really started looking like something. Tucked between the rails is a modern 425hp crate Hemi with a Speedmaster EFI system.

17. The entire firewall was fabricated using the Pullmax to form the basic shapes and beads. Once installed, areas that need tweaking are planished with a hammer and dolly.
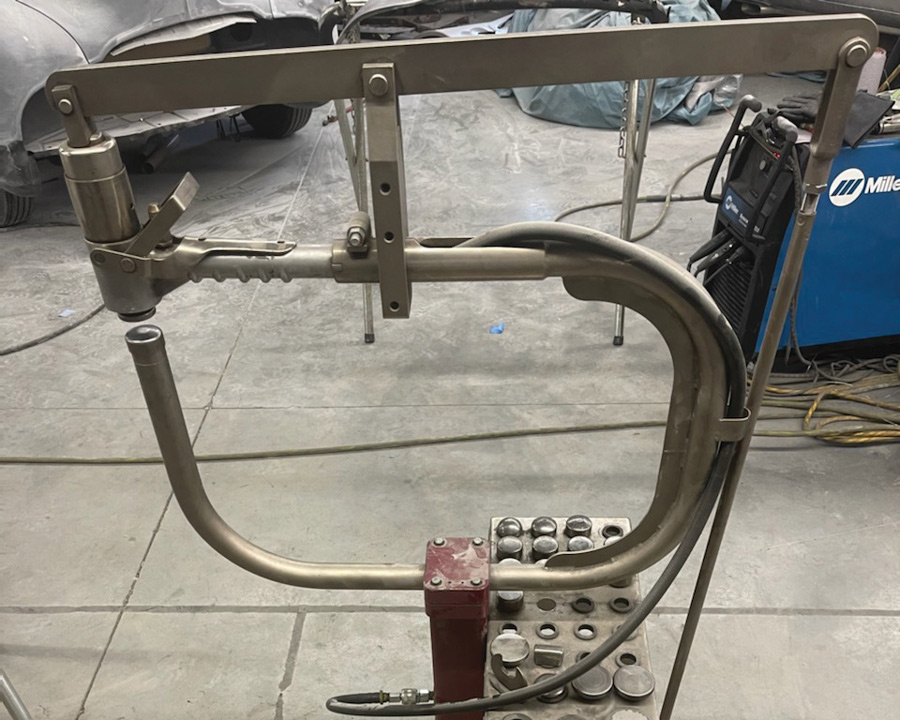
21. The portable ProLine pneumatic planishing hammer can be removed from the stand and taken to your work. This is helpful when planishing areas like roof panels that are welded in place.
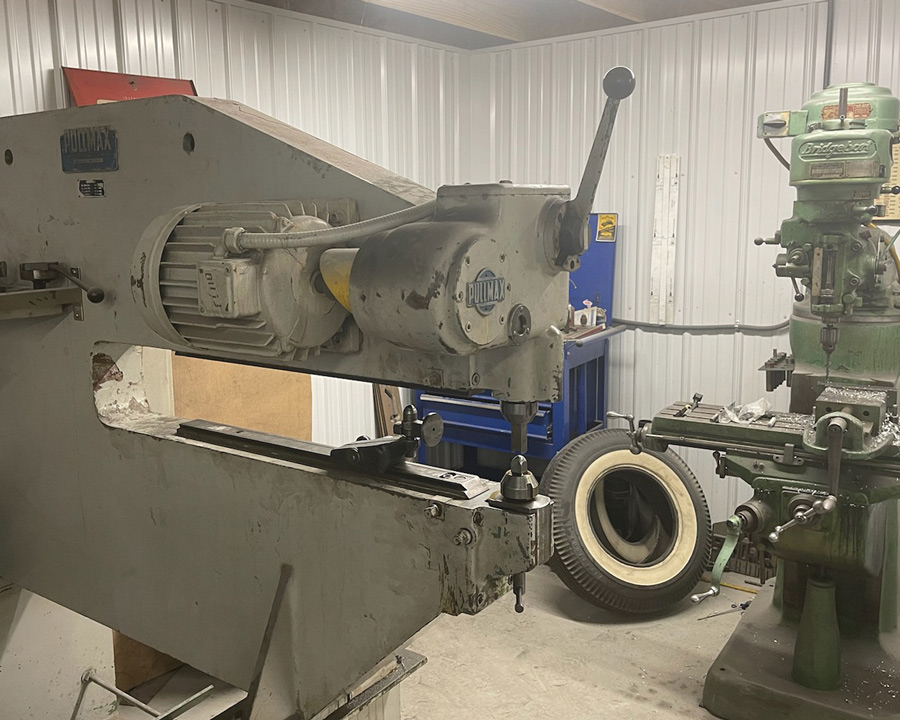
22. One of the most versatile of the large tools is the Pullmax P-5. Dies are available (or can be made) to form virtually any contour, and it easily handles heavy-gauge material.
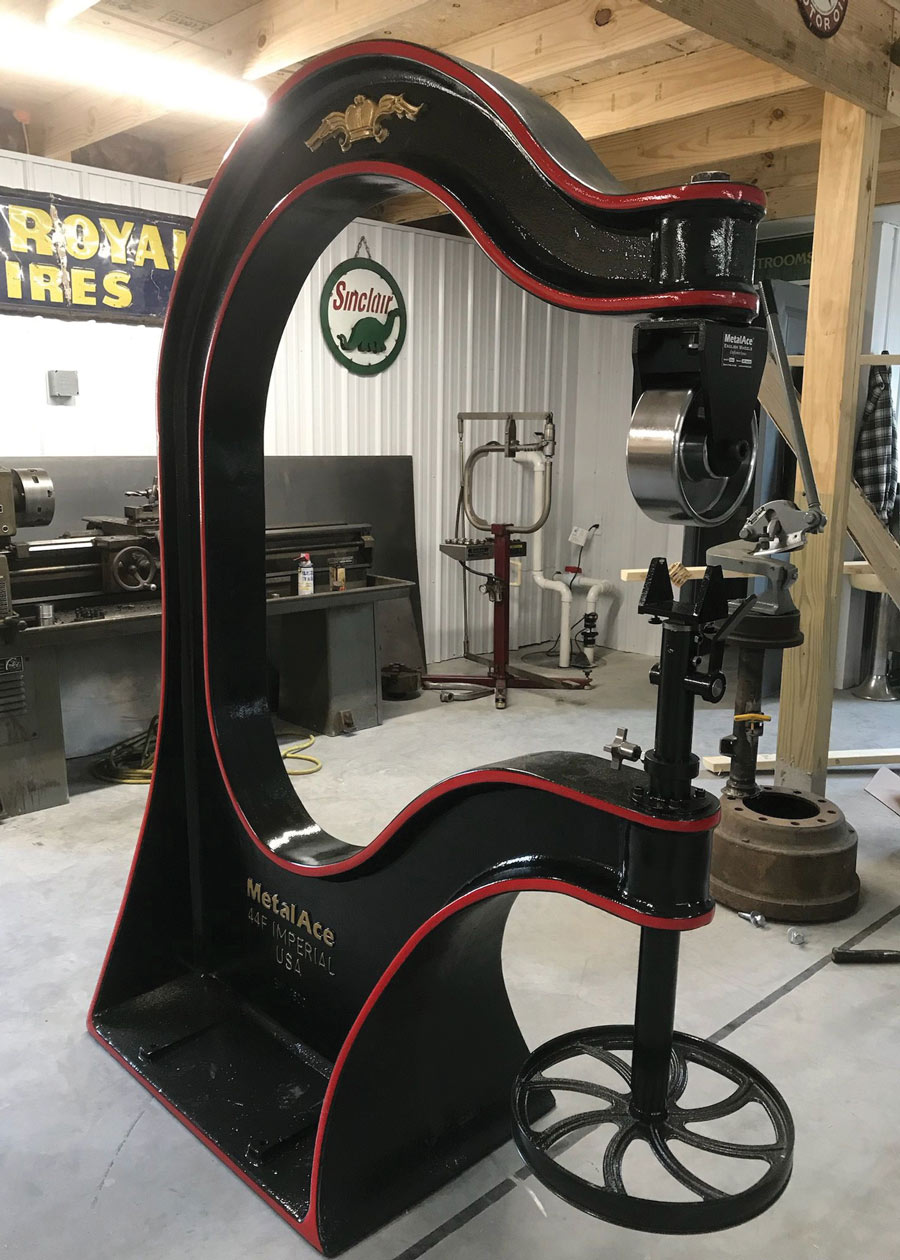
23. The deep throat of the Metal Ace English wheel allows for forming large panels like decklid skins, provided there’s an extra set of hands nearby to help guide panels.