Modern Rodding TECH

InTheGarageMedia.com

hand using marker to mark perimeter for trimming
1. The opening is adjusted until the gauge cluster is a nice fit all around. The edge band was intentionally made wider than needed so a decision could be made about how deeply to recess it into the dash. After finding the best depth, the perimeter is marked for trimming.
Traditional Gauge Panel & Taillights
Custom Metalwork Gives Our Highboy Roadster a Time-Honored Look
By RON COVELL Photography by JASON SCUDELLARI
A

dding a small detail to a car project, such as a recessed instrument cluster or taillight lens, will make a specific part of a car stand out from the crowd. These projects can be accomplished with basic fabricating equipment. Still, as with any job, the work needs to be done with a certain degree of care and precision since the human eye will quickly find any line that is even slightly crooked or out of alignment. In this episode, we’ll follow Jason Scudellari, part of the In The Garage Media team, as he adds these details to his Model A roadster project. Scudellari has many years of experience with metal fabrication, and there is much to learn with his no-nonsense techniques.

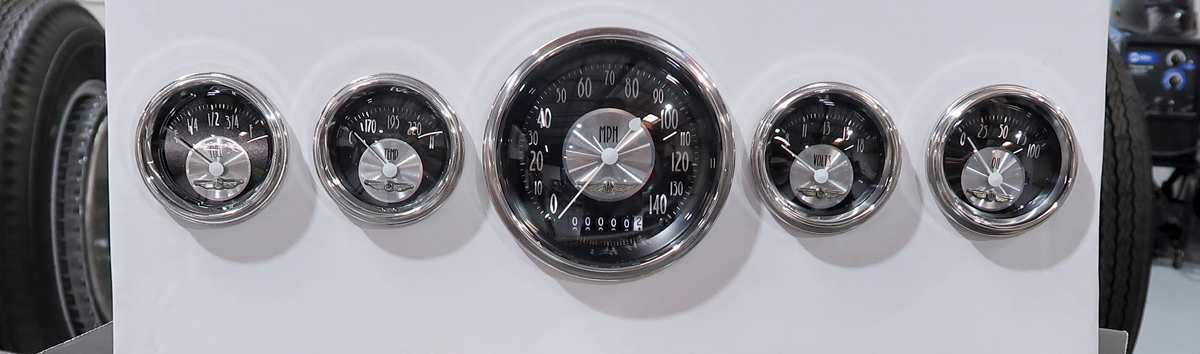
He selected a Classic Instruments five-gauge instrument set, and the first step was deciding how to arrange these instruments in the dashboard. He chose to cluster the four small instruments behind the steering wheel and position the speedometer on the right. Several layouts were made to find the best spacing, and once the layout was finalized, it was transferred to a piece of 16-gauge steel. Hole saws are the tool of choice for making round cutouts in sheetmetal, but the job could be done with a jig saw and a file in a pinch.

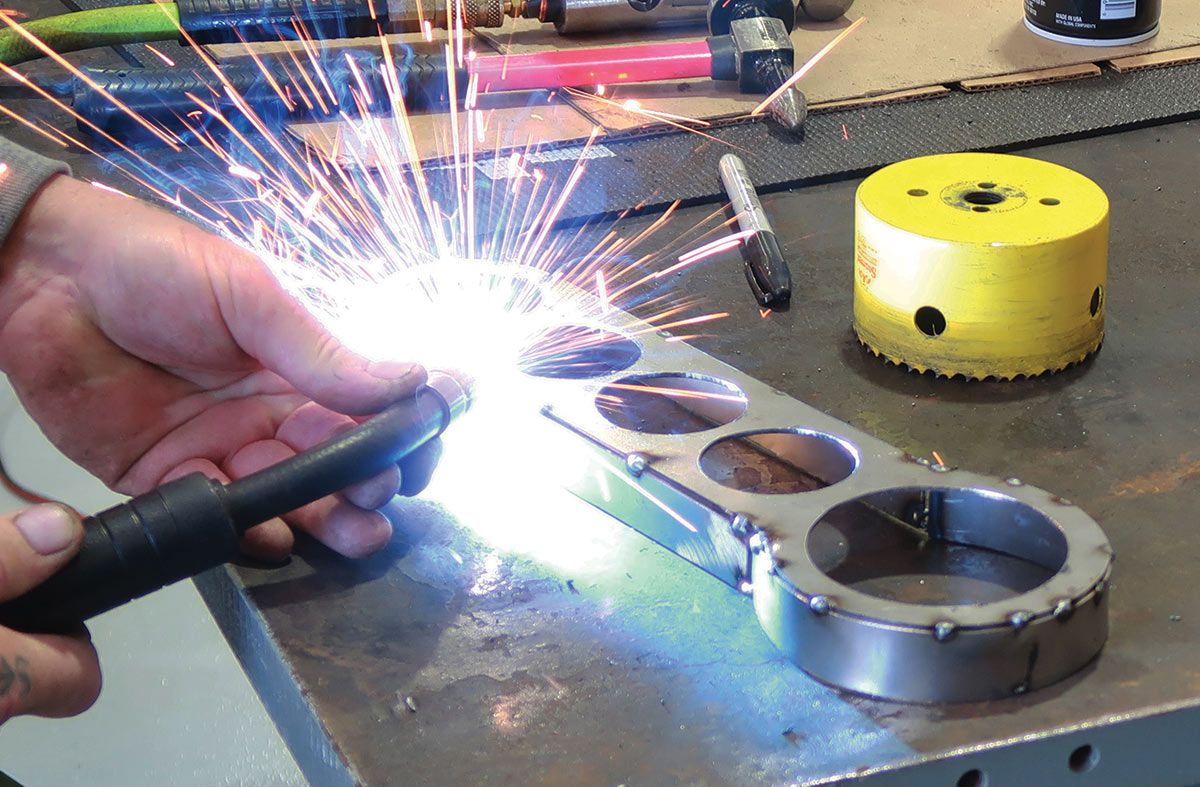
After the holes were made, the perimeter of the gauge cluster was cut and a strip of metal was fitted to the edge. Next, a hole was cut in the dashboard, the cluster was fitted into place, the depth was adjusted, and then it was welded and smoothed.

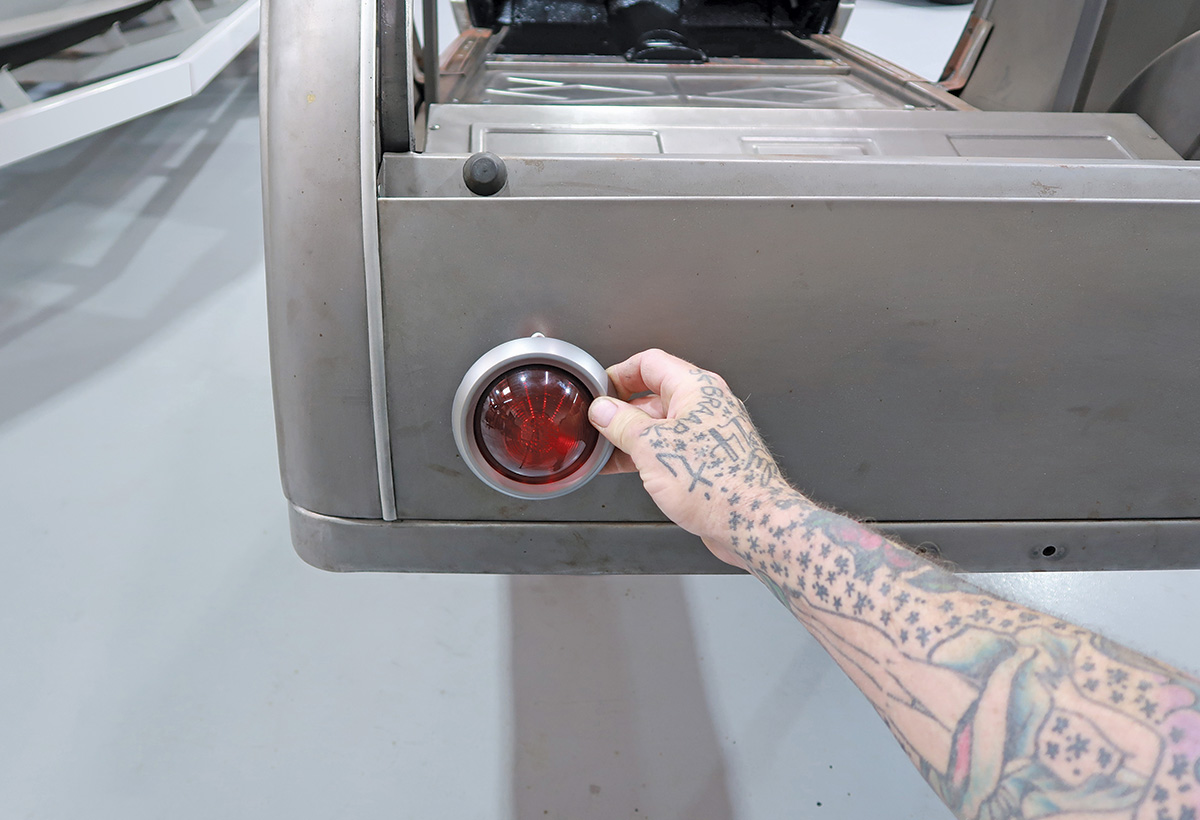
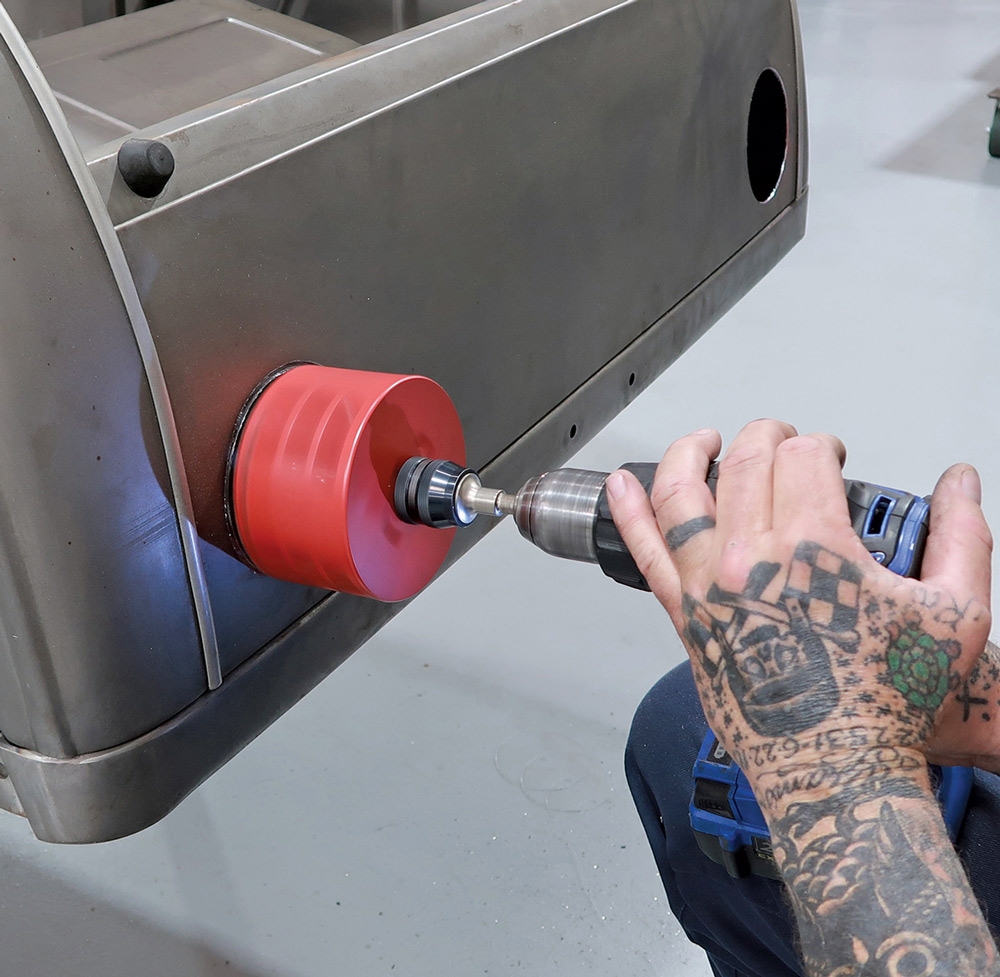
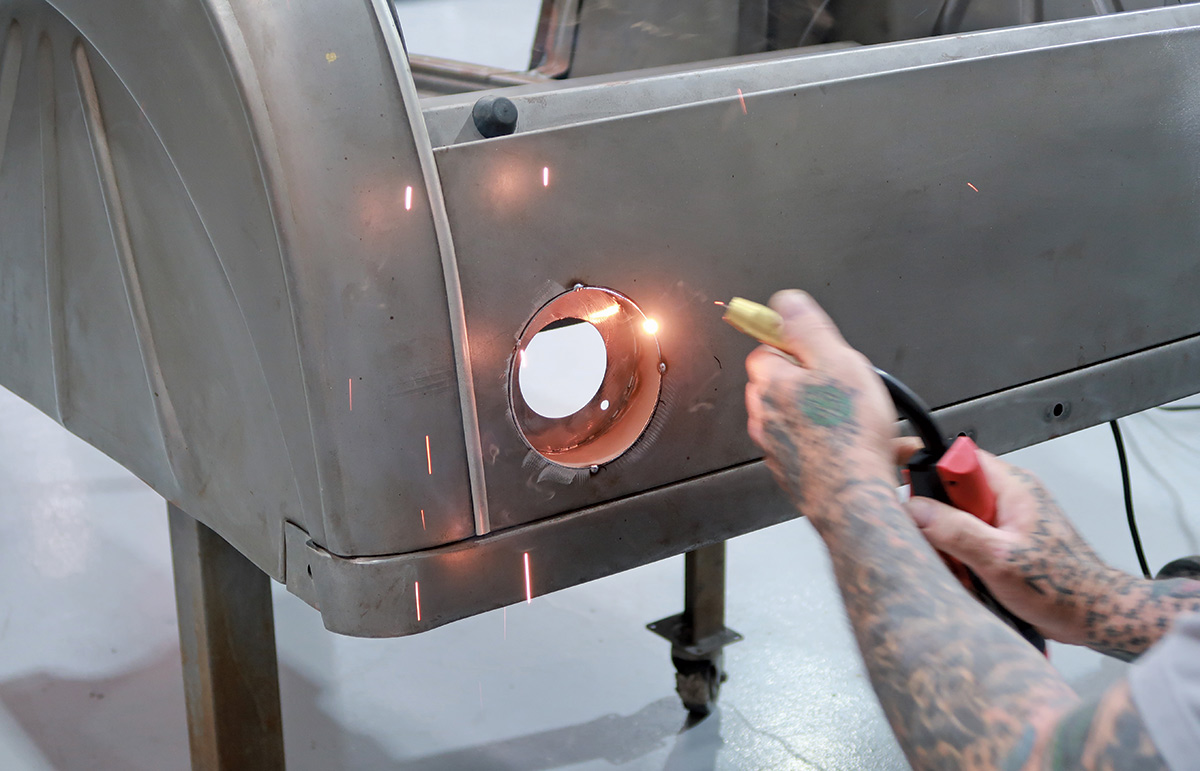
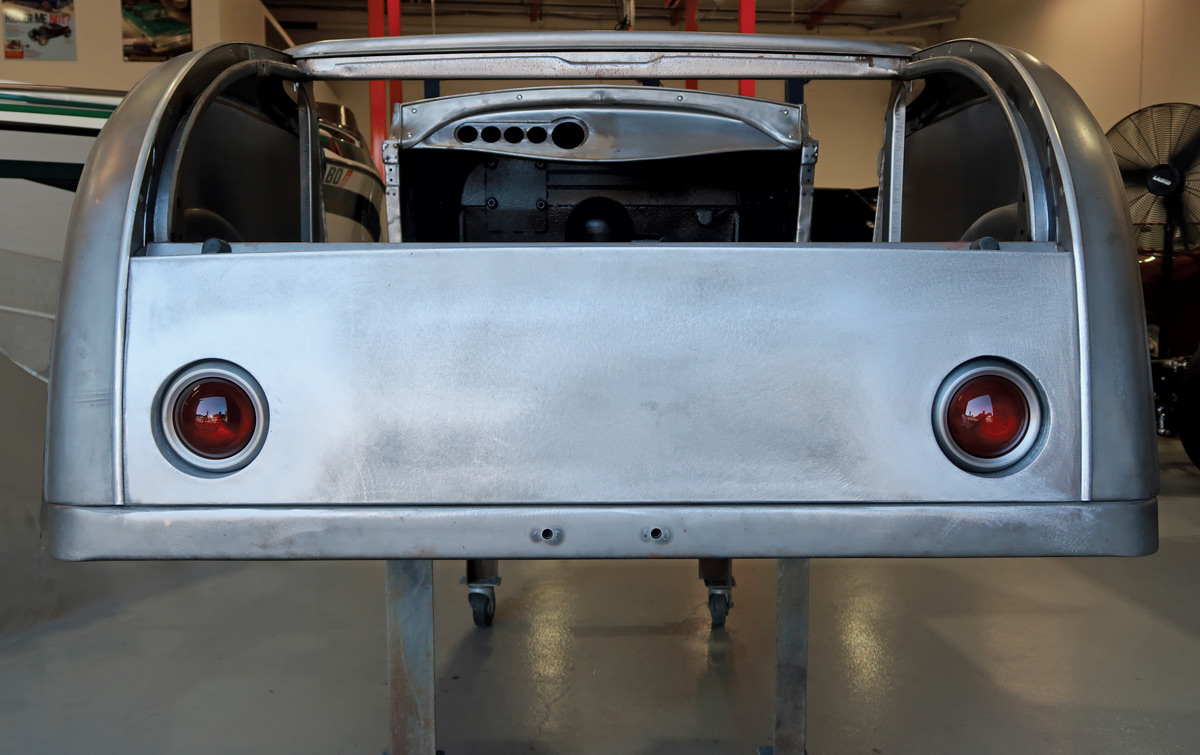
The taillights were done similarly, and Scudellari made buckets to recess them. Again, a layout is done to pinpoint the location of the taillights, then a hole saw is used to make the holes. Each bucket is carefully fitted in its hole, checked to ensure it’s plumb, then marked, trimmed, and welded into place.

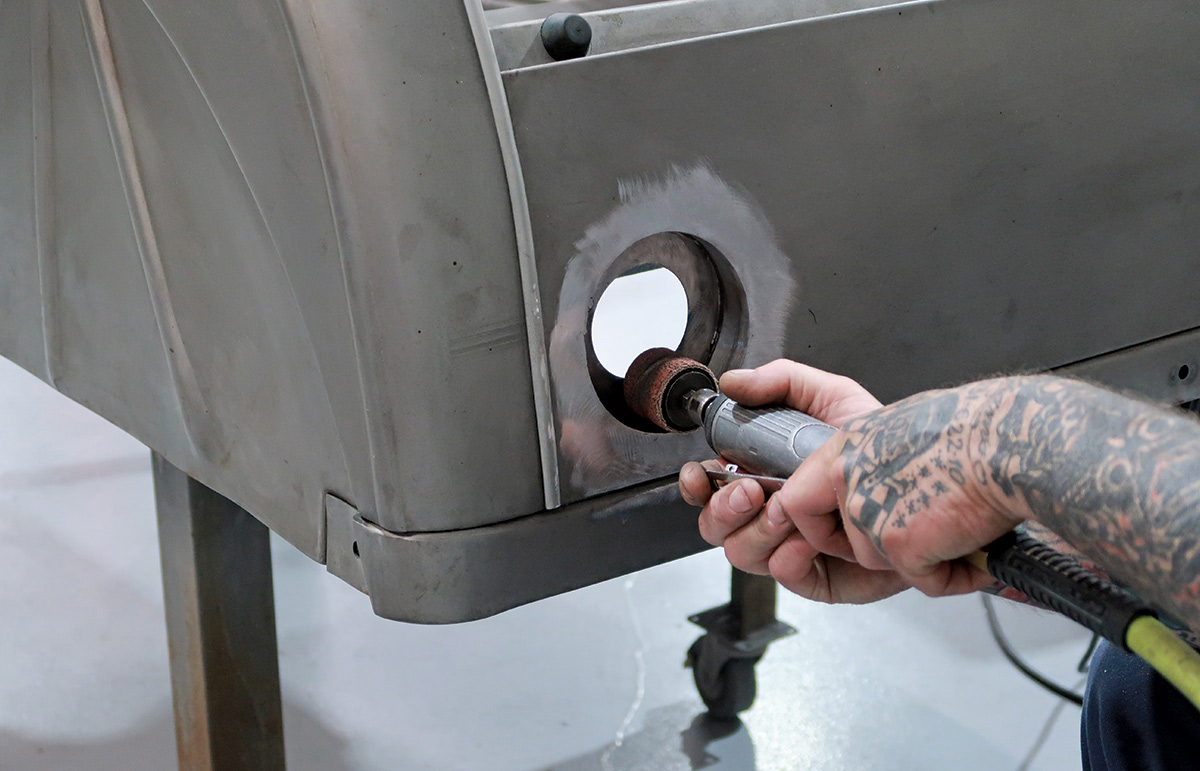
After smoothing the welds by sanding, the job is complete. As you look through the photos, you’ll pick up many small details that help ensure success with jobs like this.

Classic Instruments All-<br />
American Tradition five-gauge set
2. The place to start is by selecting the instruments you want to use. In this case, the Classic Instruments All-American Tradition five-gauge set
back of Classic Instruments All-<br />
American Tradition five-gauge set
3. Next is selecting the layout and spacing of the gauges. The speedometer will be located on the right, and the smaller gauges will be centered in front of the driver
gauge cluster layout
4. A layout is done on a piece of 16-gauge steel, showing the outline of the recess for the gauge cluster and the center for the holes needed for each instrument
hole saw cutting out openings for each gauge
5. Hole saws are excellent for making clean, accurate openings for each instrument.
hand using tool cut around gauge outline
6. After cutting all the holes, the perimeter is cut using an abrasive cut-off disc on a handheld grinder.
gauges being test fitted
7. Next, the gauges are test-fitted into the panel. Everything looks great at this point, but if any corrections are needed now is the time to make them!
hand using a cylinder to shape metal strip
8. A metal strip must be contoured to match the perimeter of the gauge cluster. The round sections can be bent around anything that’s the correct diameter.
metal strip tack welded to panel
9. After carefully fitting the edge band, it is tack-welded into place, carefully checked, and then finished welded.
panel after metal strip is tack welded to it
10. Here’s how the gauge cluster recess looks after sanding the welds flush.
hand using hole saw on dashboard
11. The perimeter of the gauge cluster is positioned on the dashboard, and the edges are marked. Hole saws are used to make the rounded cuts on both ends.
hand using cut-off disc on dashboard
12. A die grinder makes straight cuts with an abrasive cut-off disc. The rounded ends need to be opened a little more too, and this can be done with a carbide burr or sanding drums.
hand using cut-off disc on panel
13. An abrasive cut-off disc is used in a grinder to trim the edge band down to the desired width.
panel fitted to dashboard
14. The insert was welded and ground smooth After tack-welding and checking the fit one last time. Recessing the instruments slightly gives the installation a very professional look.
 ’50 Pontiac-style taillights from Speedway Motor
15. Moving to the roadster’s rear, the plan is to recess ’50 Pontiac-style taillights from Speedway Motors into the panel below the decklid.
hand holding up taillight to rear of vehicle
16. The location of the taillights is very important. They need to be spaced from the top, bottom, and side in a way that looks proper for the application, and of course the layout needs to be symmetrical.
hand using hole saw to make opening for tail lights
17. Once the centers of the taillights have been located, a hole saw is used to cut the openings.
hand using marker to mark where buckets need to be trimmed
18. Scudellari made buckets from 16-gauge steel, like he made the instrument cluster. These buckets are fitted into place, adjusted to be square and plumb, and marked for trimming.
bucket marked for trimming
19. Here, you can see the trim line on the bucket.
closeup of hand using cut-off disc where bucket was marked for trimming
20. A right-angle die grinder with an abrasive cut-off wheel is used to cut the bucket on the line.
bucket being tack welded into place
21. After checking the fit, the buckets are tack-welded into place.
hand using sanding drum to smooth bucket surface after tack welding
22. A sanding drum is used to smooth the finish weld on the inner surface.
taillight mounted into place
23. With the weld smoothed and the taillight mounted, you can see how great these classic lights look when slightly tunneled.
finished gauge and taillight job
24. With both lights mounted, you can see this treatment’s clean appearance on a Model A roadster.
SOURCES
Modern Rodding
VOLUME 5 • ISSUE 47 • 2024