Modern Rodding TECH

InTheGarageMedia.com

1. Geoff Jones of Hot Rods by Dean helped us with the Golden Star Classic Auto Parts front inner fender panels; both sides.
It’s What Lies Below That’s So Important Title
Inner Fender Panels Can Immediately Revive the Appearance of Your Project
By Brian Brennan Photography by THE AUTHOR
A

nyone working with vintage sheetmetal, something that is more than 30 years old, will most likely have to deal with corrosion, packed-on dirt, cracks, dents, and other impacts. Our ’65 Chevelle is no different. While swapping out powerplants it became obvious that the inner fender panels needed help. So, a quick call to Golden Star Classic Auto Parts was a great solution to quickly solving our problem.

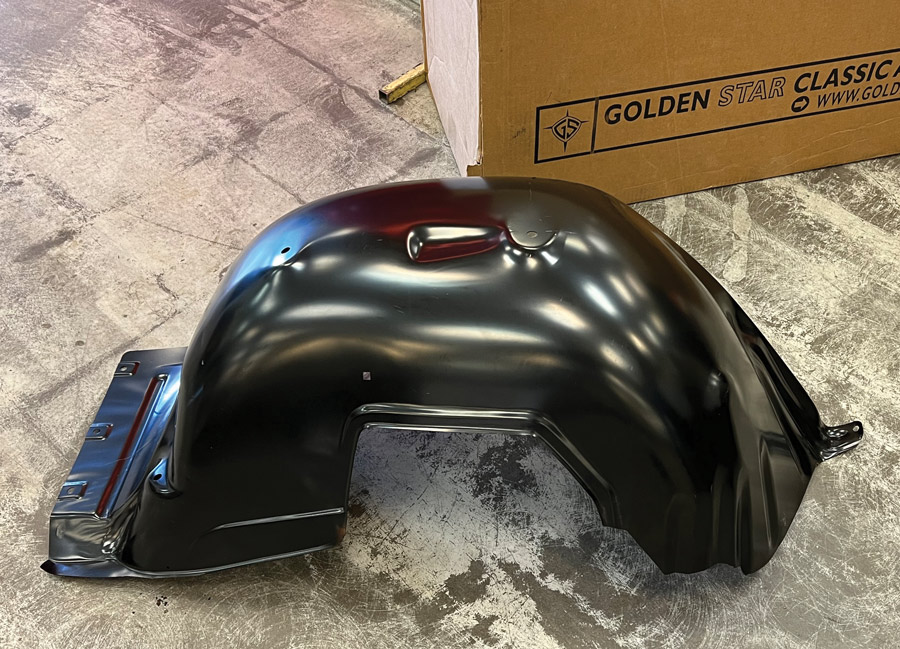
The Golden Star OEM-style inner fender panels (PNs IF03-64R-RH and IF03-64L-LH) are designed to protect the engine bay and other related sheetmetal from corrosion. These panels come stamped to match what was there from the factory and come with a protective coating that can be left as-is or can be prepped for painting.

In our ’65 Chevelle project we looked at fitting the inner fender panels while the sheetmetal fenders remained on the car. It didn’t take us long to realize that the removal of the hood and fenders would make the project go more smoothly. So, off came the factory sheetmetal, hood, and both front fenders. Our Chevelle, while sporting lots of patina, is in truly good condition. The factory inner fender panels did their job and have sacrificed themselves to save other components throughout.

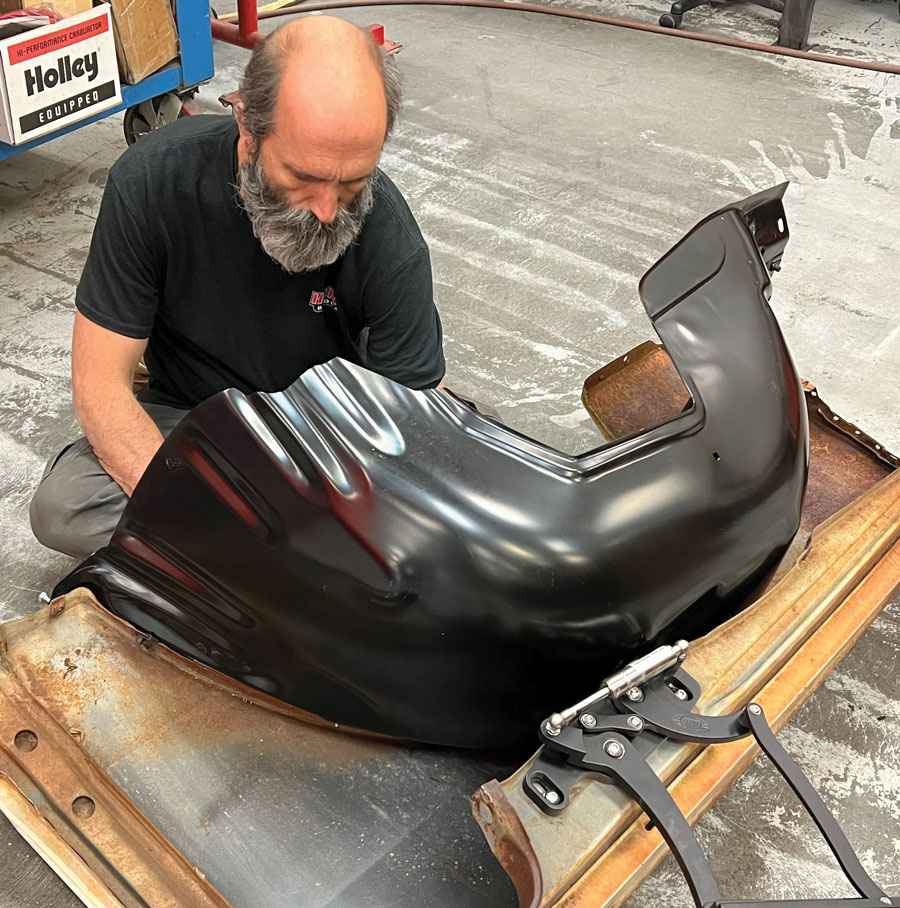
Once the hood and fenders were removed, we fit each inner fender panel to its respective fender. The initial fit was very good and required a minimal amount of fitment. Remember we are dealing with a car that is 57 years old and over time things change. It was to be expected that the mounting holes from the new inner fender panel to the original sheetmetal fenders matched up very closely.

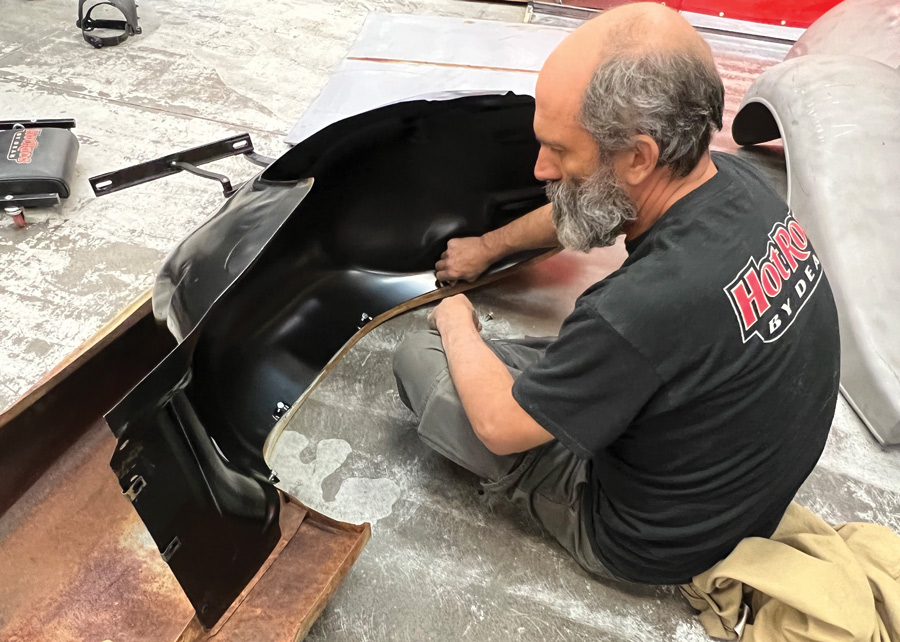
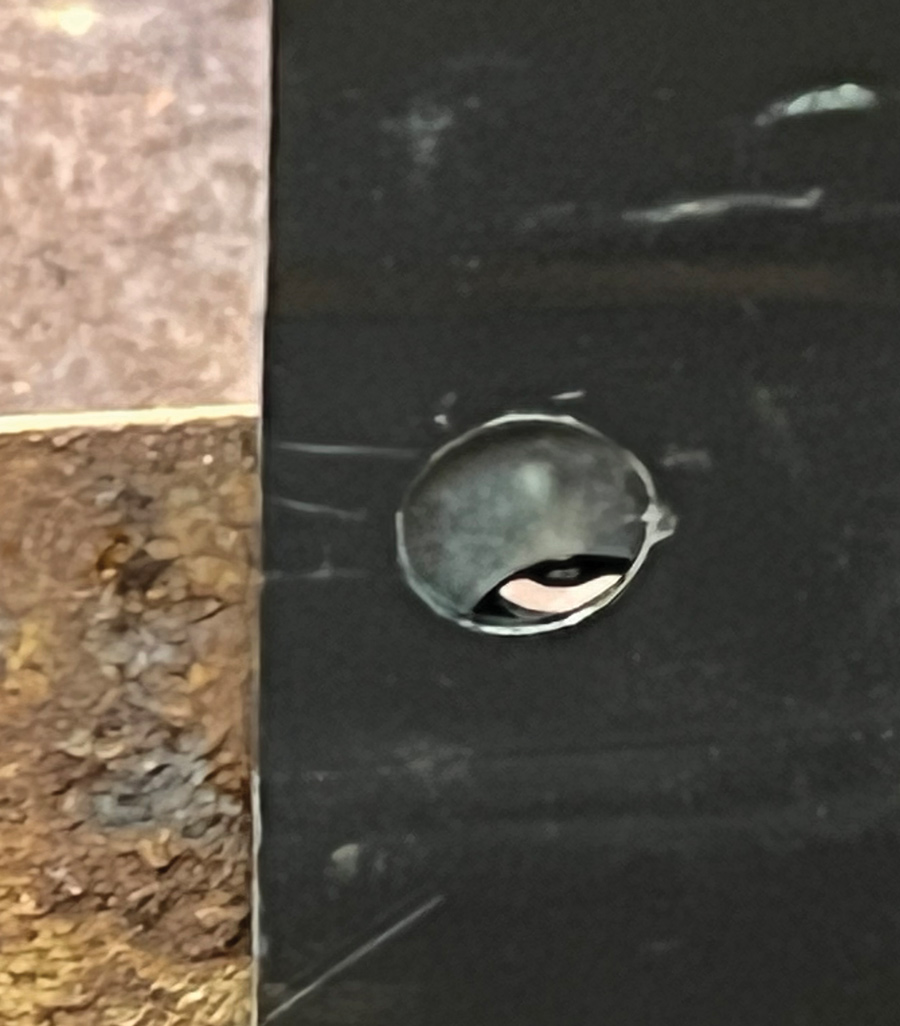
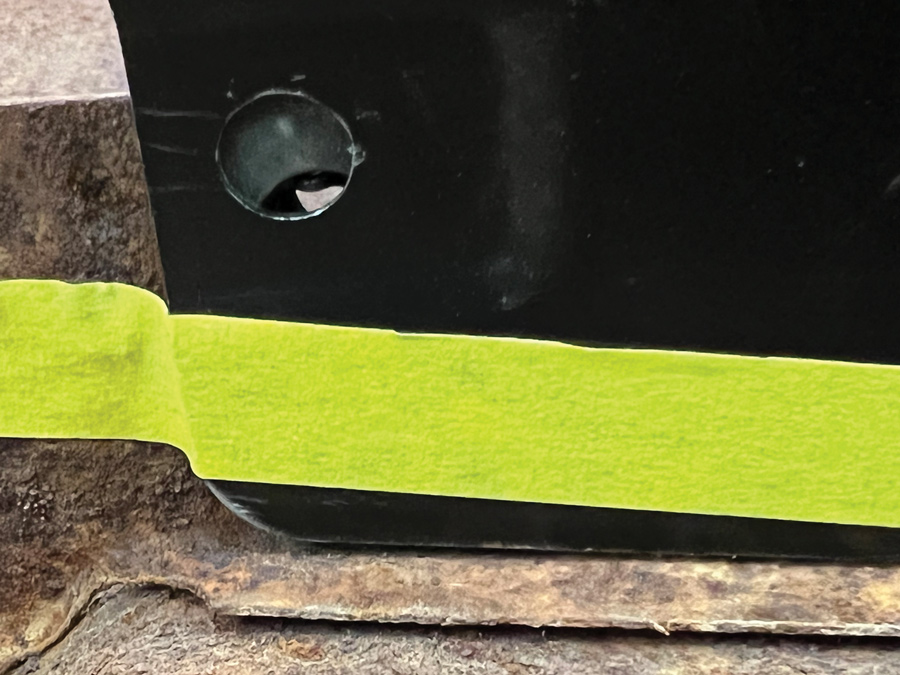
We did find that one hole needed a bit of massaging. Now, the first reaction might be to elongate the original mounting hole and possibly the new inner fender panel hole. Don’t. This can cause fitment and allow the panels to move on their own, introducing new fitment issues. As you go through the accompanying photos you will see how we trimmed a small portion of the new Golden Star inner fender panel, thus allowing the new hole to align with the factory original mounting hole. From here it was a simple matter of aligning and completing the project.

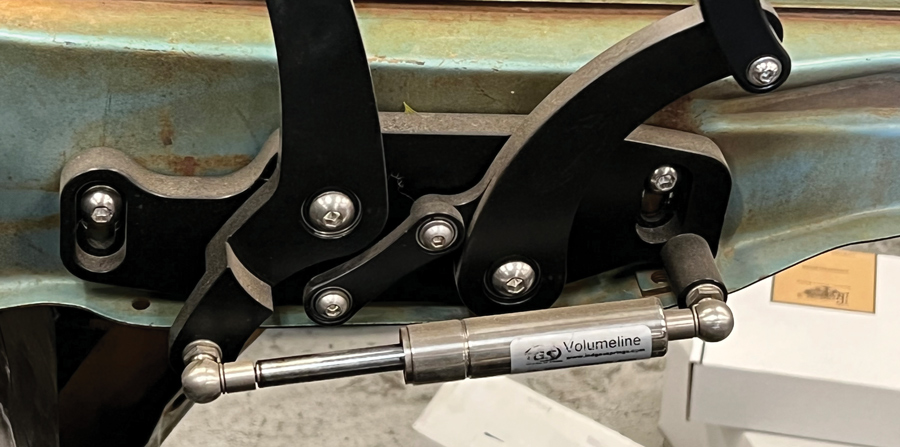
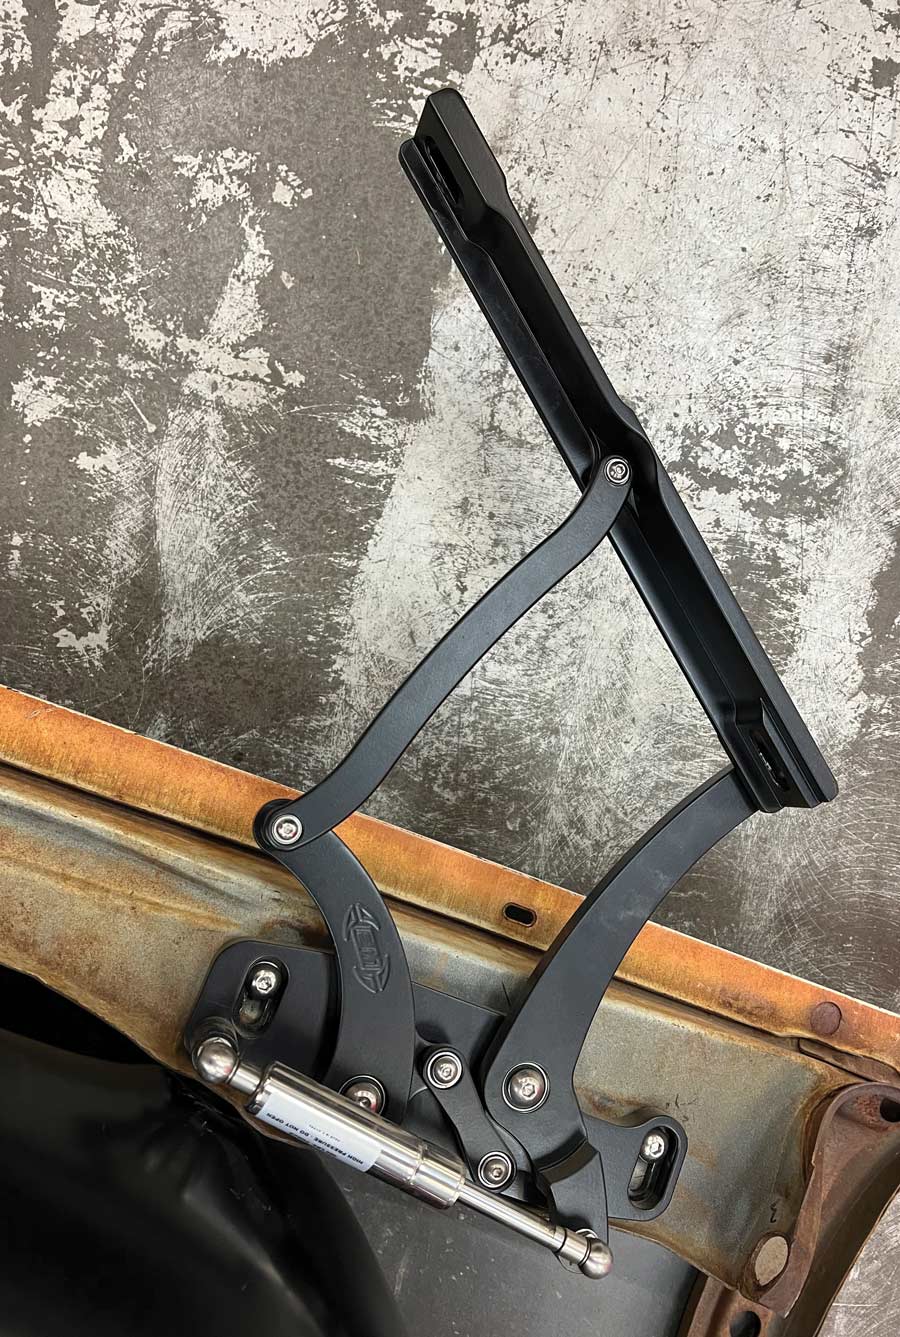
At this time, we also installed our new hood hinges that came directly from Eddie Motorsports. We opted for the billet aluminum hinges that utilize sealed bearings as well as stainless steel nitrogen gas struts. While these hinges come in an assortment of finishes, such as bright polish, raw machine, or anodized, we opted for the black anodized versions.

Well, there you have it. Follow along with the photos for this truly easy-to-perform inner fender replacement project on our ’65 Chevelle.

replacement inner fender panel
2. We ordered a driver side and passenger side replacement inner fender panel. They come coated and ready to use (PNs IF03-64R-RH and IF03-64L-LH).
’65 Chevelle engine bay with the old panels already removed
3. Here is our ’65 Chevelle engine bay with the old panels already removed. (Note we are dropping in a Chevrolet Performance LT1 for power.)
Here we have upgraded the IFS with the latest from Classic Performance Products: brakes, spindles, and control arms
4. With the original inner fender panel removed you can clearly see the suspension. Here we have upgraded the IFS with the latest from Classic Performance Products: brakes, spindles, and control arms.
fit and conform the new fender panel to the fender on the shop floor
5. After a little head scratching, we decided it was much easier to remove the respective fender and fit and conform the new fender panel to the fender on the shop floor.
We used fresh hardware, which included the Chevelle rocker kit (PN RP03-64MH).
6. We used fresh hardware, which included the Chevelle rocker kit (PN RP03-64MH). You want to test-fit to make sure all the original holes and new inner fender panel holes match up.
The two overlapping holes
7. The two overlapping holes; original factory hole (beneath) in the fender and the new hole (top) in the Golden Star inner fender panel were slightly off on one of the mounting holes.
The tape line shows what material could be easily trimmed off the new inner panel and both holes will then align.
8. We determined what we needed to do to make the holes align. The tape line shows what material could be easily trimmed off the new inner panel and both holes will then align. You don’t want to enlarge the holes to match as this will create alignment problems.
Using the new hardware from Golden Star we test-fit once to ensure our holes now properly align.
9. Using the new hardware from Golden Star we test-fit once to ensure our holes now properly align.
Part of the Golden Star rocker kit includes these clips that contain their own threads and will hold themselves in position.
10. Part of the Golden Star rocker kit includes these clips that contain their own threads and will hold themselves in position.
Here is a backside view of the rocker kit clip showing its “captured” threads.
11. Here is a backside view of the rocker kit clip showing its “captured” threads.
You can see the original factory fender sheetmetal (patina) and the new Golden Star sheetmetal (black) and how they bolt back together.
12. You can see the original factory fender sheetmetal (patina) and the new Golden Star sheetmetal (black) and how they bolt back together.
While changing the inner fender panels we performed several other projects, such as installing the new Eddie Motorsports hood hinges in black anodized.
13. While changing the inner fender panels we performed several other projects, such as installing the new Eddie Motorsports hood hinges in black anodized.
These billet aluminum hinges utilize sealed bearings and stainless steel nitrogen gas struts. They are available in raw machined or bright polished finish.
14. These billet aluminum hinges utilize sealed bearings and stainless steel nitrogen gas struts. They are available in raw machined or bright polished finish.
Here our original passenger side fender, Golden Star inner fender panel, and the Eddie Motorsports hinge are all bolted together for a test-fit.
15. Here our original passenger side fender, Golden Star inner fender panel, and the Eddie Motorsports hinge are all bolted together for a test-fit.
Another side project was to make an aluminum panel that will hold electronic engine control hardware.
16. Another side project was to make an aluminum panel that will hold electronic engine control hardware. It attaches to the new inner fender panel as well as the factory sheetmetal fender (driver side).
Overall view showing the new aluminum panel crafted by the Hot Rods by Dean staff is in position.
17. Overall view showing the new aluminum panel crafted by the Hot Rods by Dean staff is in position.
On the passenger side with the inner fender secured in position we can now install our new battery tray and continue with other projects.

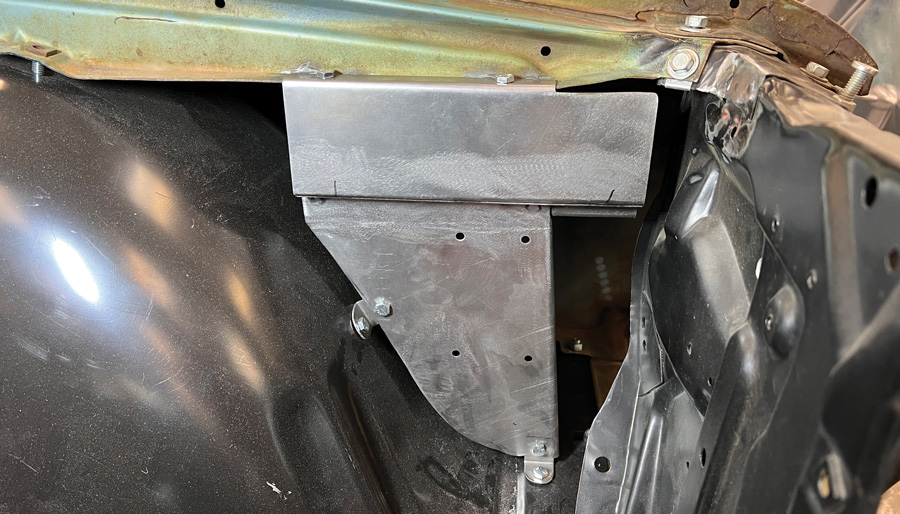
18. On the passenger side with the inner fender secured in position we can now install our new battery tray and continue with other projects.

Eddie Motorsports
(888) 813-1293
eddiemotorsports.com
Golden Star Classic Auto Parts
(972) 315-3758
goldenstarauto.com
Hot Rods by Dean
(800) 362-9709
hotrodsbydean.com
Modern Rodding

VOLUME 3 • ISSUE 23 • 2022