Modern Rodding Tech
InTheGarageMedia.com
Mechanic trims a strip of aluminum
We found a solution for transitioning from the body panel to the interior header from Clayton Machine Works (a Lokar Company). The aluminum trim proved to be the perfect solution.
Transitions typography
Clayton Machine Works Provides a Trim Solution
By Gerry Burger Photography by THE AUTHOR
B

uilding a hot rod is simply, or not-so simply, a series of challenges. While it definitely pays to plan ahead, sometimes you do things with the thought of “we’ll worry about that when ….” This is the tale of just such a postponement. Early on in our 1936 Ford phaeton build we decided the original top just had to go; we would be running topless in our tub (Author’s note: That didn’t come out just right.—BB … “It never seems to!”—GB) with plans of either a tonneau cover for the back seats or possibly a Carson-style top.

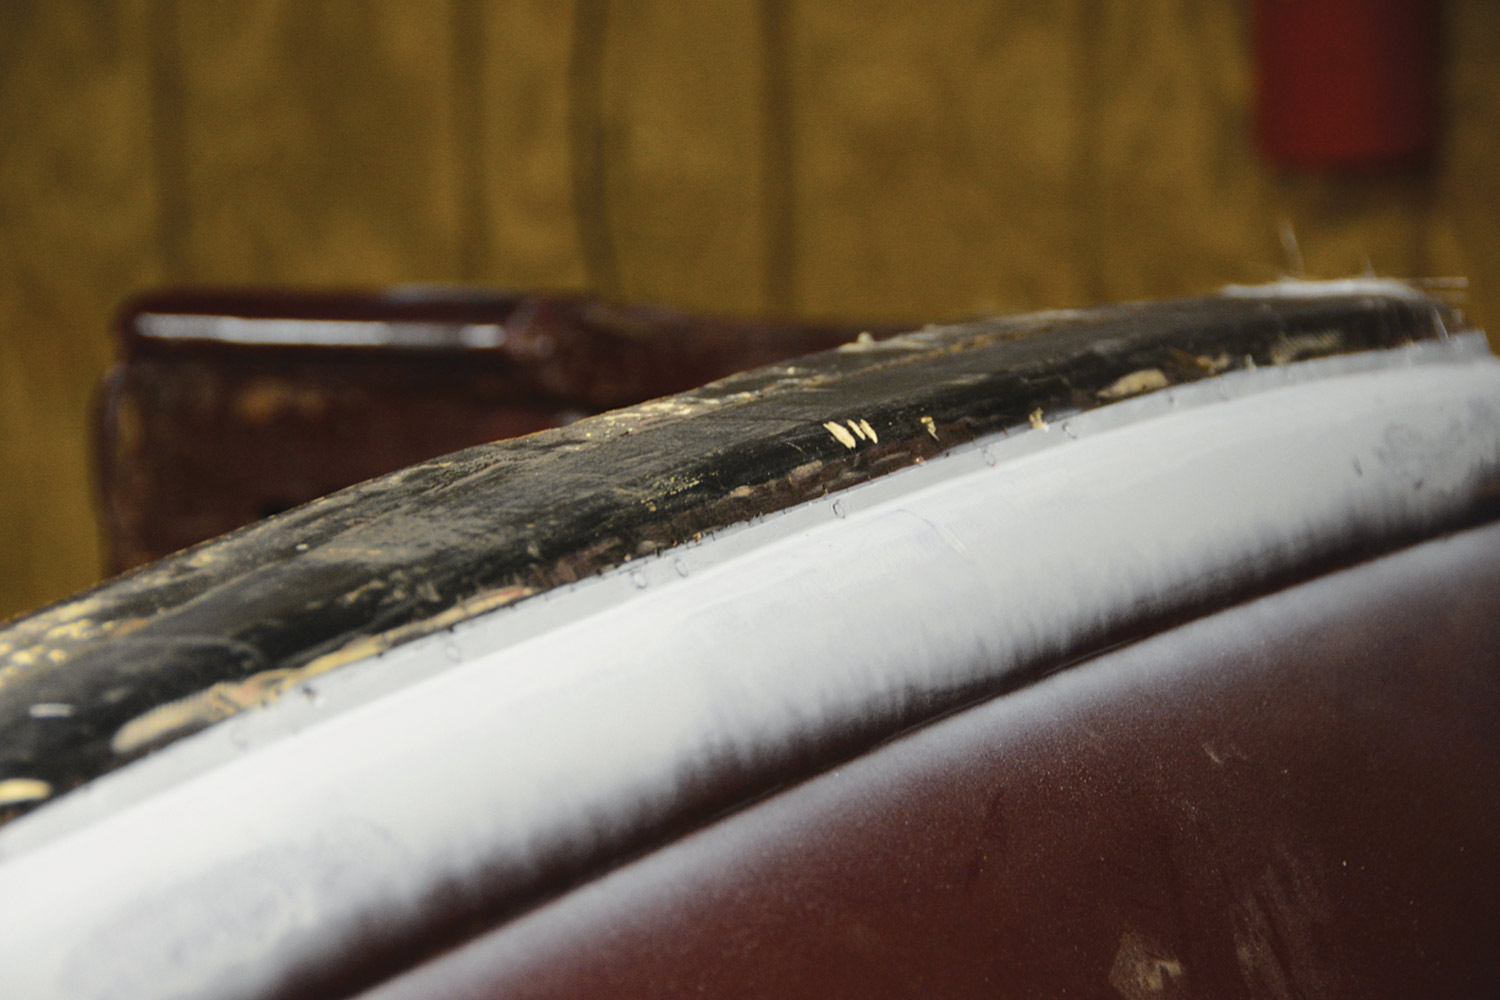
So, the top was removed and sold, leaving an unsightly seam where the original steel body panel was unceremoniously nailed to a wood header. Ah yes, they just don’t build ’em like they used to. At one time the top was also nailed to this header. While creating a reasonable transition from steel to wood was obviously a problem, we put the project off and now the time had come to address a solution.

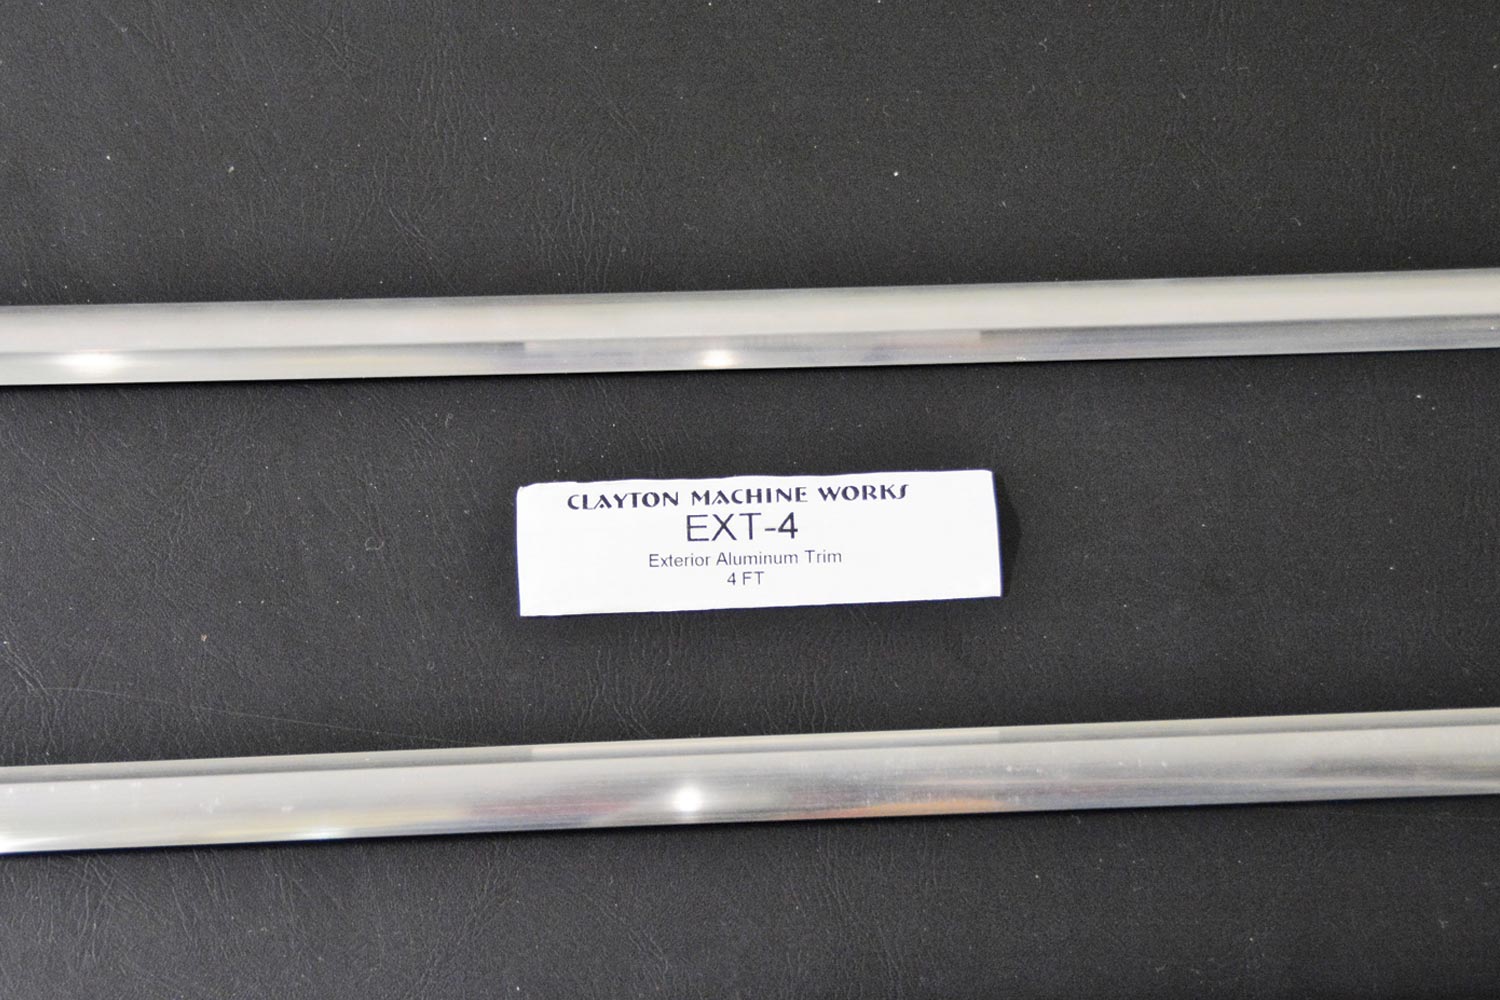
We considered a type of upholstery trim or even aftermarket vinyl door protector but decided while that would be easy it would also look like an inexpensive aftermarket door trim. And so we continued our search, which led us to the Lokar website to check out their Clayton Machine Works offerings. The offerings are varied and all very cool, from door handles to shifter handles or pedals, they all have a great sense of style. But we were looking for trim; sure enough, there it was, Aluminum Exterior Trim. A mill-finished 6063-T0 aluminum trim that could be mounted with 3M double-sided high-strength adhesive, it can be drilled and tapped for “blind fastener” installation or it can be drilled and screwed in place. The simple look of the trim was perfect for our hot rod, just two pleasant curves give the trim shape and even more important it would provide the perfect transition from body panel to the wood header. We contemplated using 3M adhesive to mount the trim but due to the uneven mounting surface we decided to screw the trim in place. We also felt some countersunk stainless screws would look more period correct on our vintage-style hot rod. If we were using this same material for side trim on a car we would definitely use the adhesive. A quick call to Lokar and we placed the order for two pieces 4 feet long (also available in 6- and 8-foot lengths). Several days later a heavy cardboard tube was delivered to our door.

Fitting the trim to the back of our 1936 Ford phaeton proved to be quite simple, but due to the curves involved it was important to work slowly and carefully. The 6063-T0 aluminum is butter-soft and will form to contours easily, but like any metal you must be careful not to bend it too far as metal will stretch and shrink as you ask it to conform to curves, particularly compound curves. Returning bent metal to straight often results in an irregular shape, so work carefully, adding to the curvature slowly.

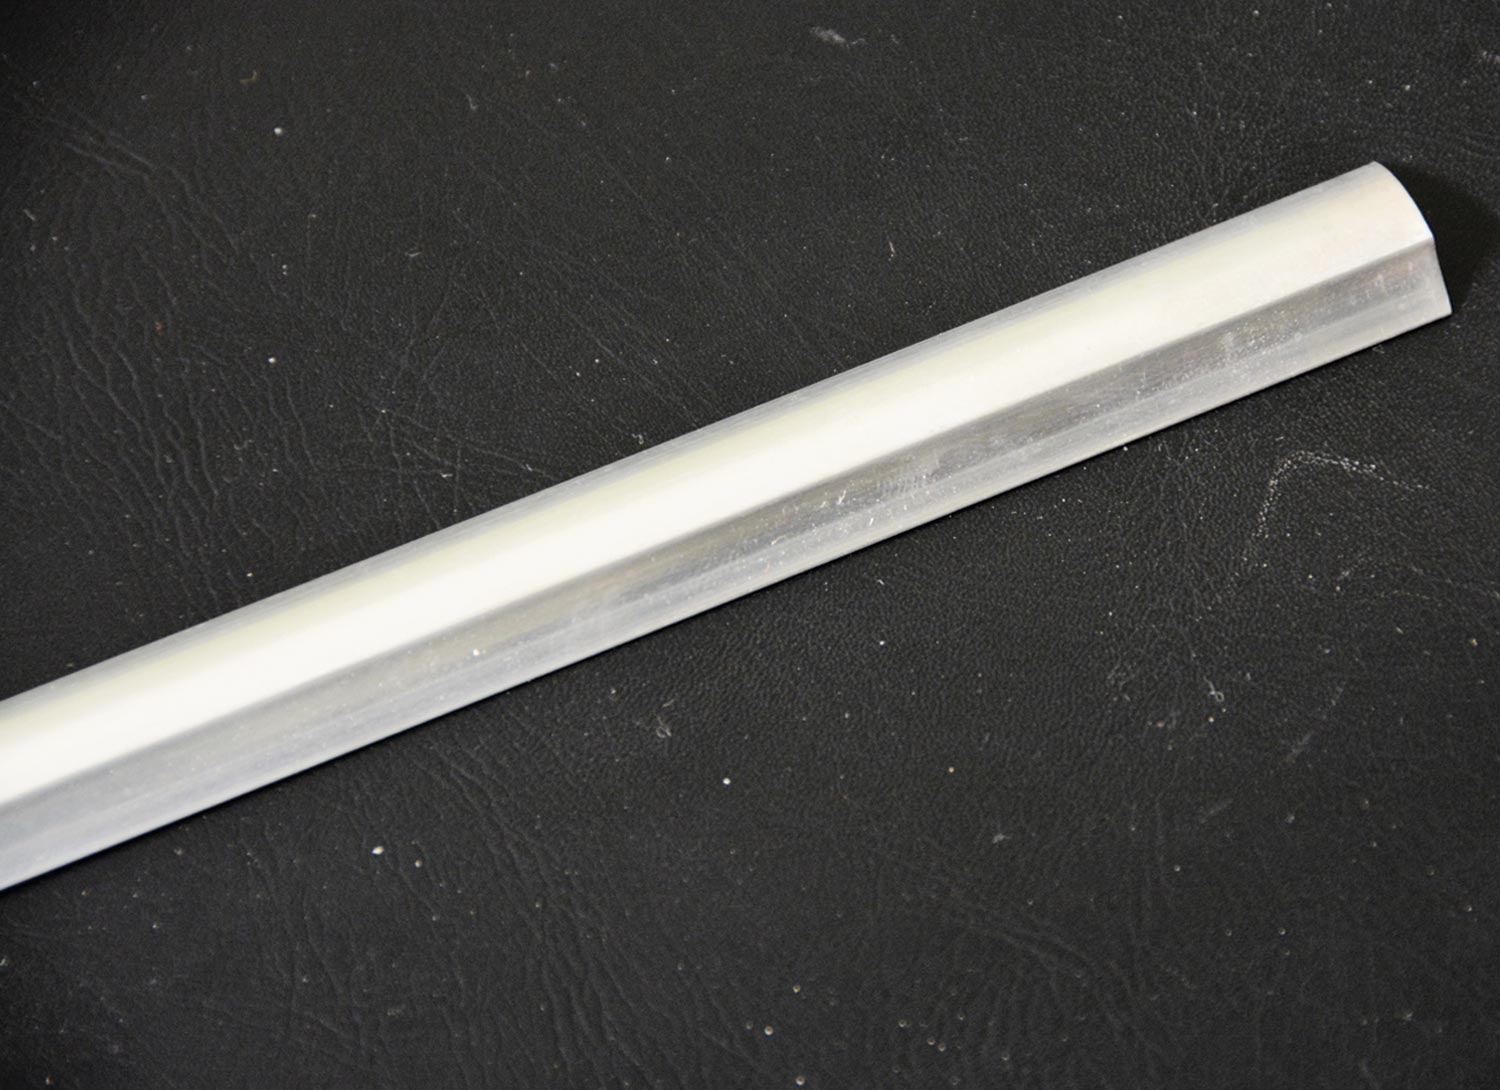
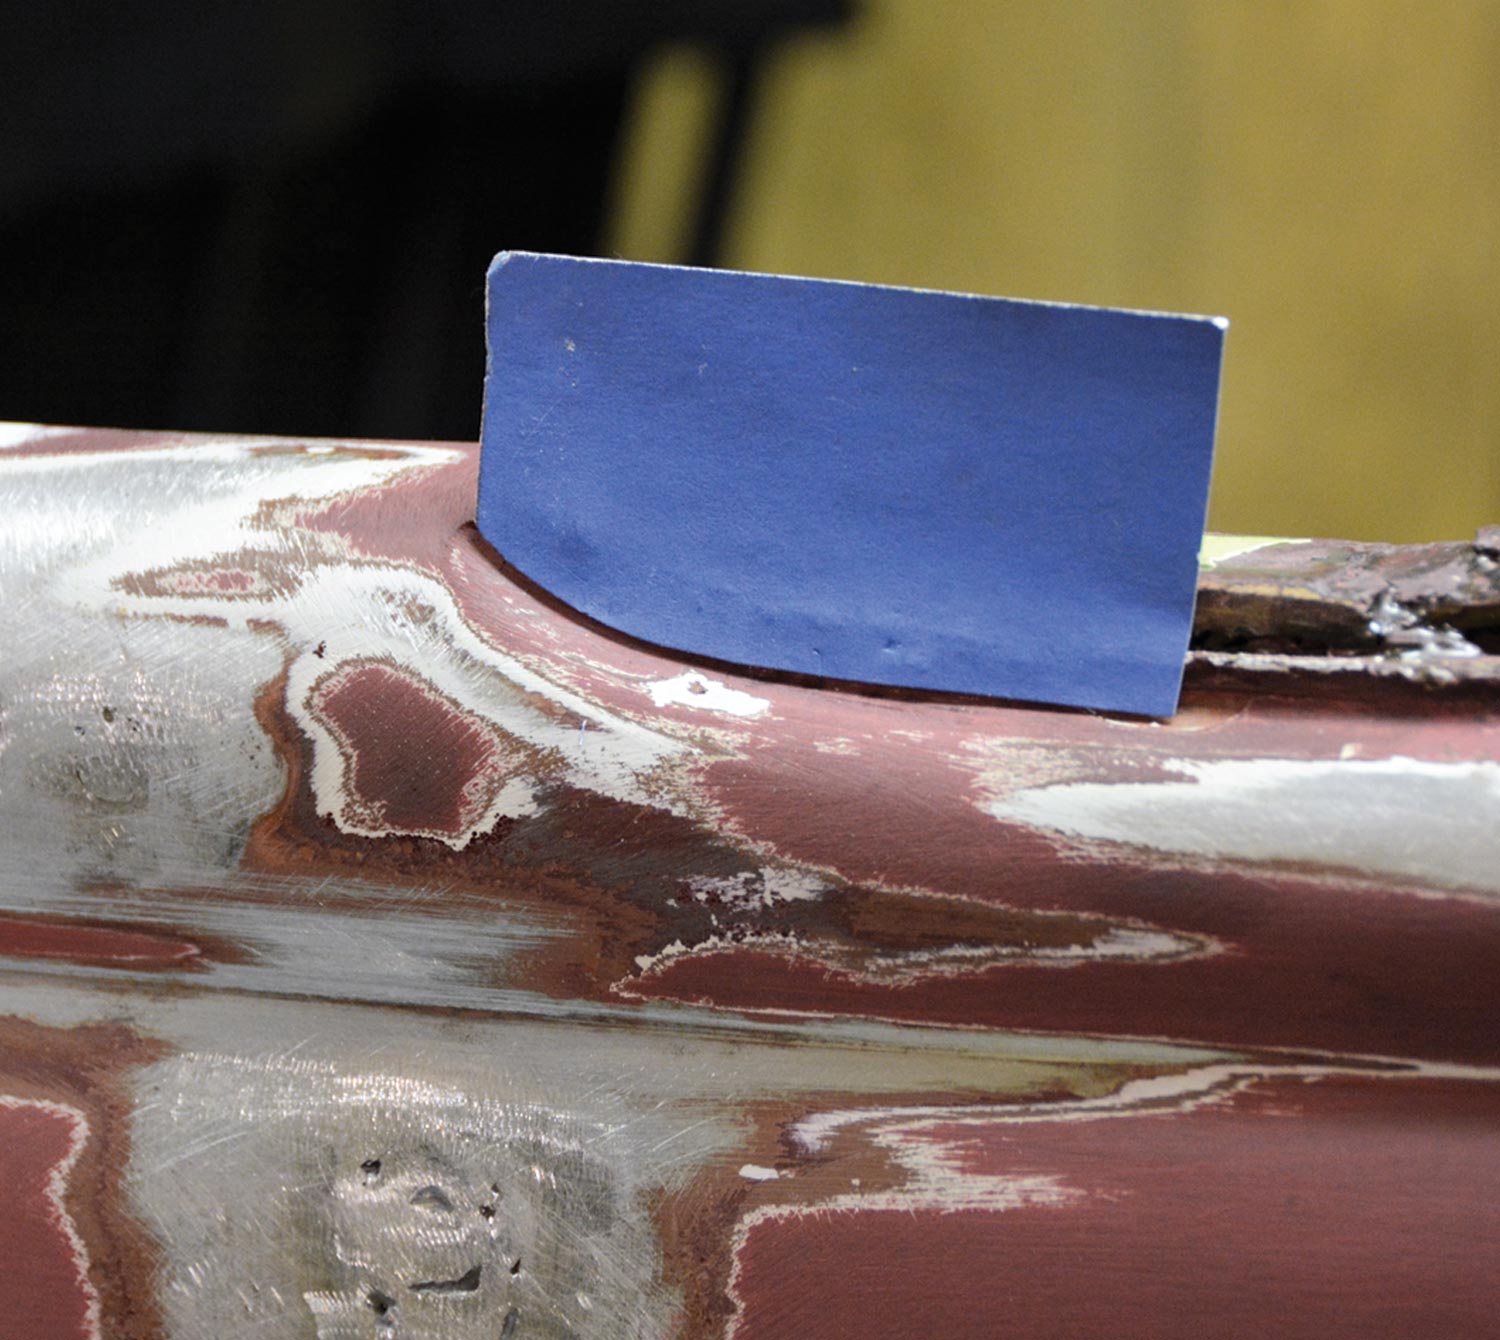
The first order of business was deciding whether to put the concave side of the trim up or down. It quickly became obvious for our application the concave side would go up. Next came shaping the leading edge, as the trim would have to be tapered to a point on the leading edge of the trim. A simple template helped us shape the trim, then careful filing and sanding netted the final shape.

With the leading edge shaped we used a series of clamps to hold the front edge of the trim in place, then we carefully formed the trim to follow the line of the body, adding more clamps as we shaped the trim. As we rounded the corner of the body, we needed the trim to climb upward and also go around a bend. This compound curve took some time and patience but the aluminum willingly formed to the contours. A C-clamp and a block of wood helped to gently push the trim down to seat properly on the body. We also made a small T-dolly out of round stock and used that to gently tap the trim down in places. We cannot emphasize the word “gently” enough; tapping too hard can result in a low spot in the trim that can be difficult to remove and few things look worse on a car than wavy trim.

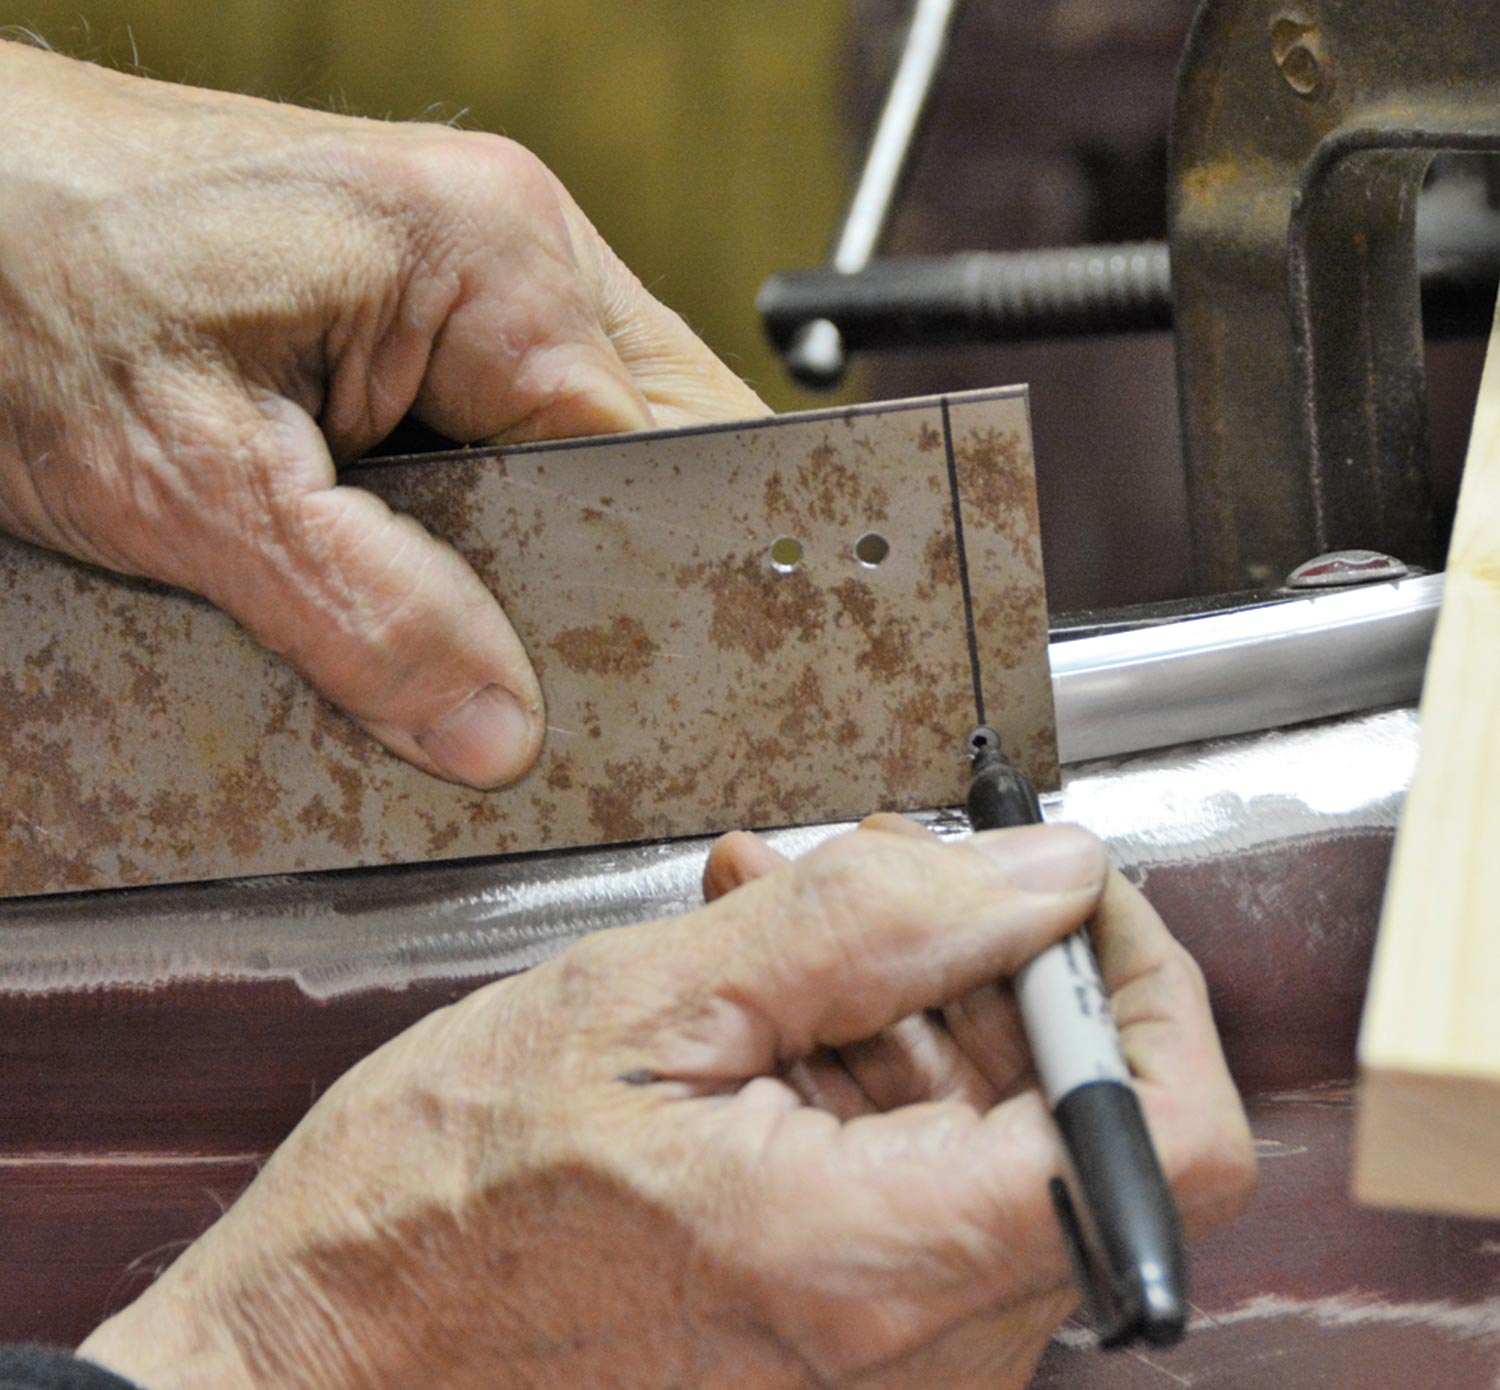
With the driver side piece of trim formed and clamped in place it was time to do the final fastening to the body. A wise man once told me, “Only measure things as a last resort.” He was referring to spacing holes, as he preferred templates to a tape measure. A quick template was made from 22-gauge mild steel, with two holes drilled 6 inches apart. We used the template to mark the holes; the sheetmetal was flexible enough to give us exact spacing as we marked holes around the bends. Working carefully from the front we drilled and countersunk a hole and attached the trim with a screw. Then we moved to the next mark and repeated the procedure until the entire piece of trim was attached to the body. The passenger side was a repeat of the driver side and then both pieces were cut so the single seam would be exactly in the center of the rear panel.

With the Clayton Machine Works trim formed and mounted to the body our next big decision was how shall we finish the trim? We could put a very nice brushed finish on the trim with a piece of Scotch-Brite, but decided that did not fit the theme of the car. We could also sand, prime, and paint the molding body color, and as nicely as the piece fit it would blend perfectly and make the trim appear to be a part of the body stamping. In the end we opted for option three and polished the aluminum trim to a chrome-like finish. In this polished finish it will provide a nice separation between body and the wood header that will be part of the interior. The header will be covered with leather grain vinyl and the screwed-on aluminum trim will work perfectly to hold that fabric in place.

The final piece of the puzzle was covering the single joint in the aluminum trim. I contemplated making a small aluminum cover that would snap over the joint for a factory look. Sometimes it pays to take the easy route. I had a roll of chrome tape on the shelf and since the aluminum trim polished to a chrome-like finish I simply cut a small piece of the tape to go over the trim seam. It worked out nicely and goes virtually unnoticed. Of course, the trim will have to be removed and stored until the bodywork and paint are complete but we feel like we have solved our transition problem in high style.
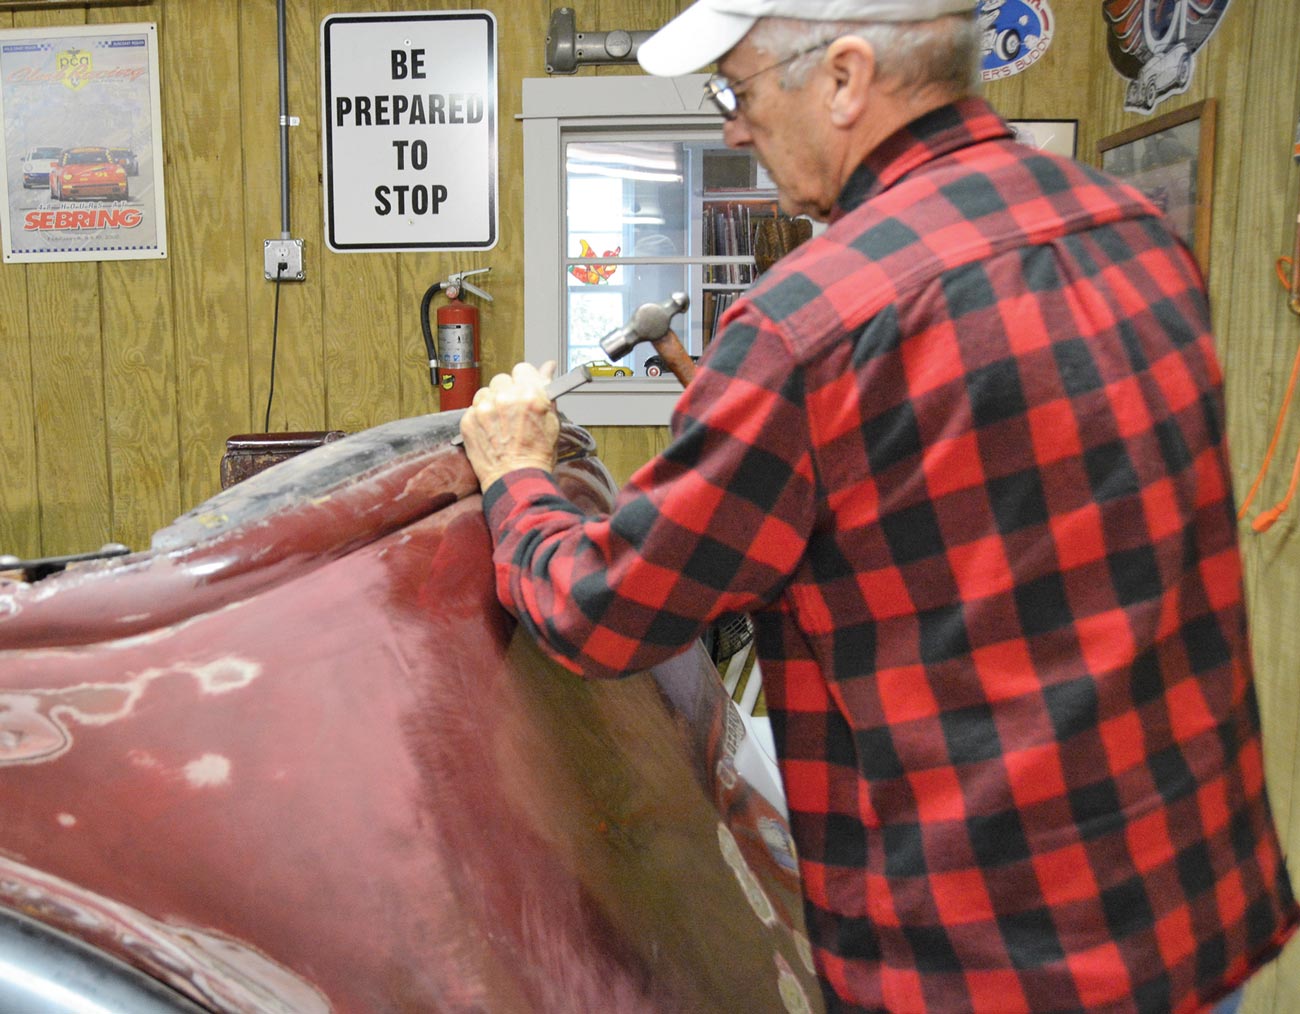
mechanic uses flat chisel to flatten sheet metal on car
1. Before we could fit the aluminum trim, we spent some time with a flat chisel to flatten the sheetmetal where it meets the wood header.
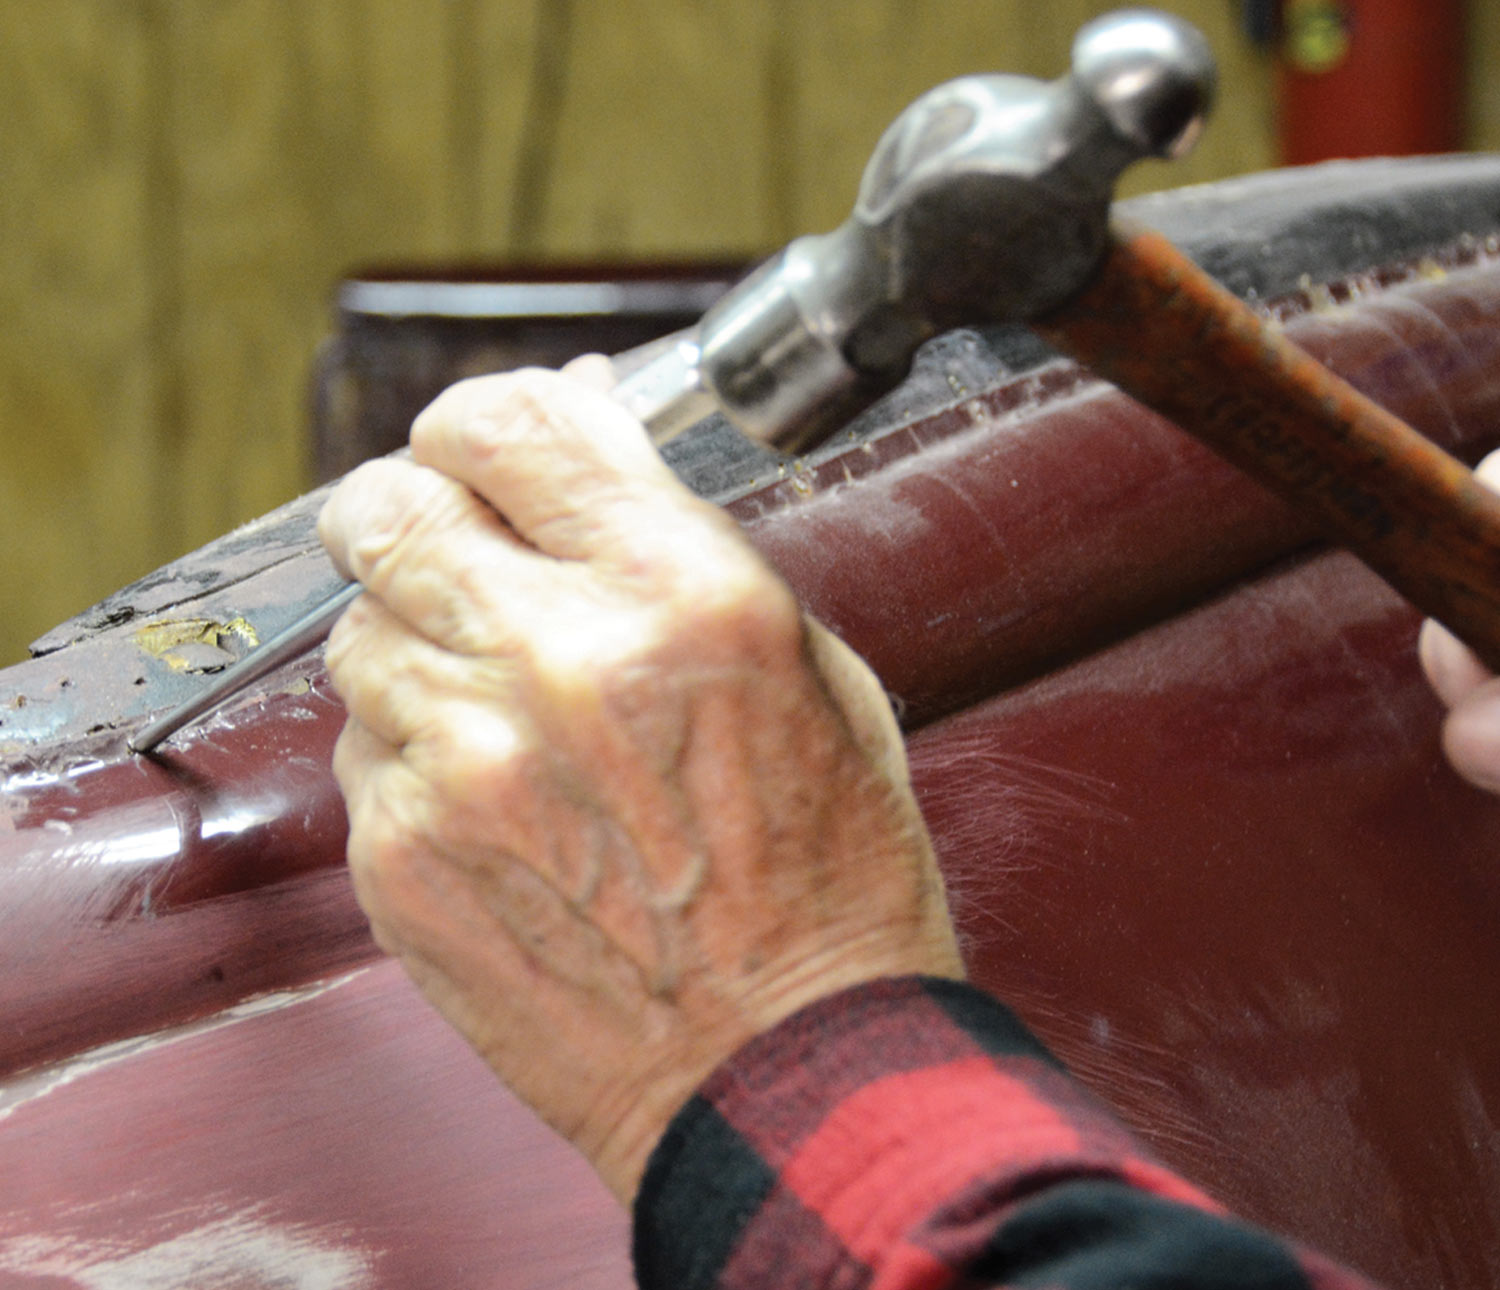
close view of mechanic using ball peen hammer to set small nails
2. After the sheetmetal was flattened with the chisel, we spent some time setting all the small nails that hold the metal to the wood frame. We also pulled out a lot of old upholstery staples.
view of bare sheetmetal after a quick 80-grit grind
3. A quick hit with a small 80-grit grinding wheel cleaned all the old paint off the sheetmetal. We put down a temporary light coat of spray can primer as temporary protection and to make the new trim installation easier to see.
Clayton Machine Works 4 ft. exterior aluminum trim
4. This is the trim from Clayton Machine Works that will provide a clean transition from sheetmetal to wood on our 1936 Ford phaeton.
close view of the contour along the Clayton Machine Works aluminum trim
5. Here you can see the contour; we opted to put the thin edge of the molding up. Once installed, the trim looks like it could have come from the factory.
a poster board piece is used as a guide for the trim
6. The leading edge of the trim must be shaped and contoured to fit the profile of the body. A simple poster board temple will be our initial guide.
the poster board template is applied to the aluminum trim
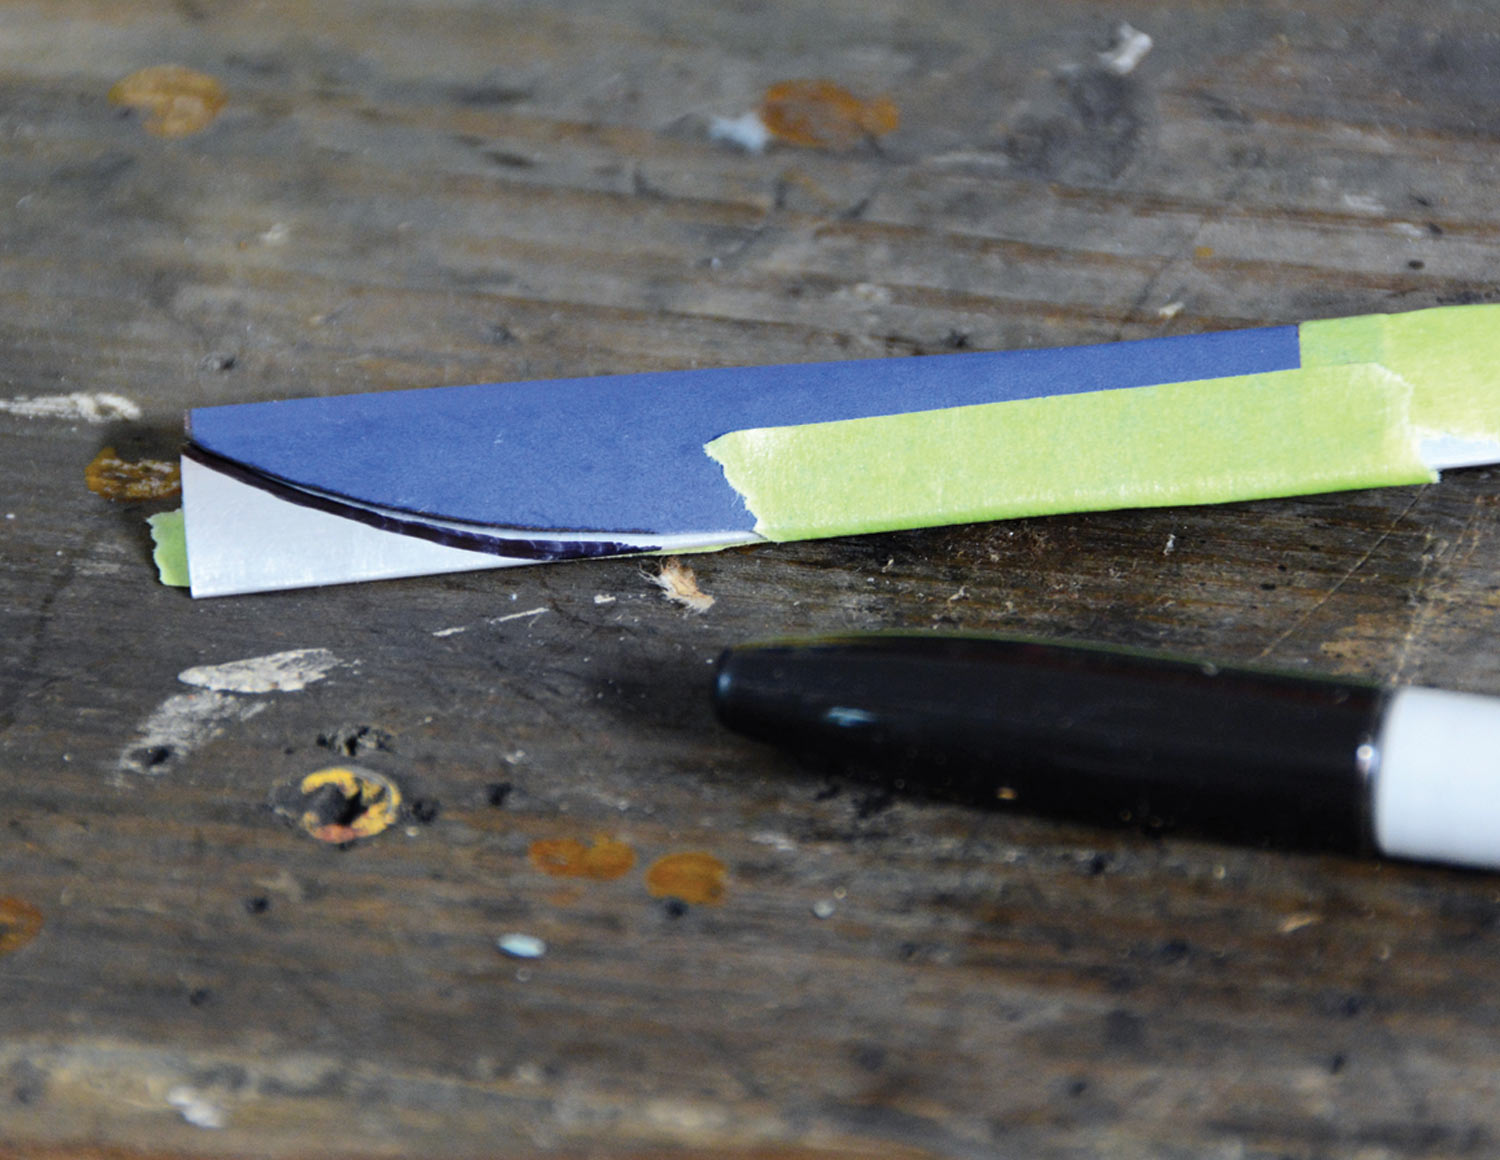
7. The template was taped to the end of the Clayton Machine Works trim and a Sharpie transfers the shape to the aluminum. The corner was then cut off with a hacksaw.
recently cut aluminum trim is held in place by "soft jaws" as mechanic finishes shaping trim with a file
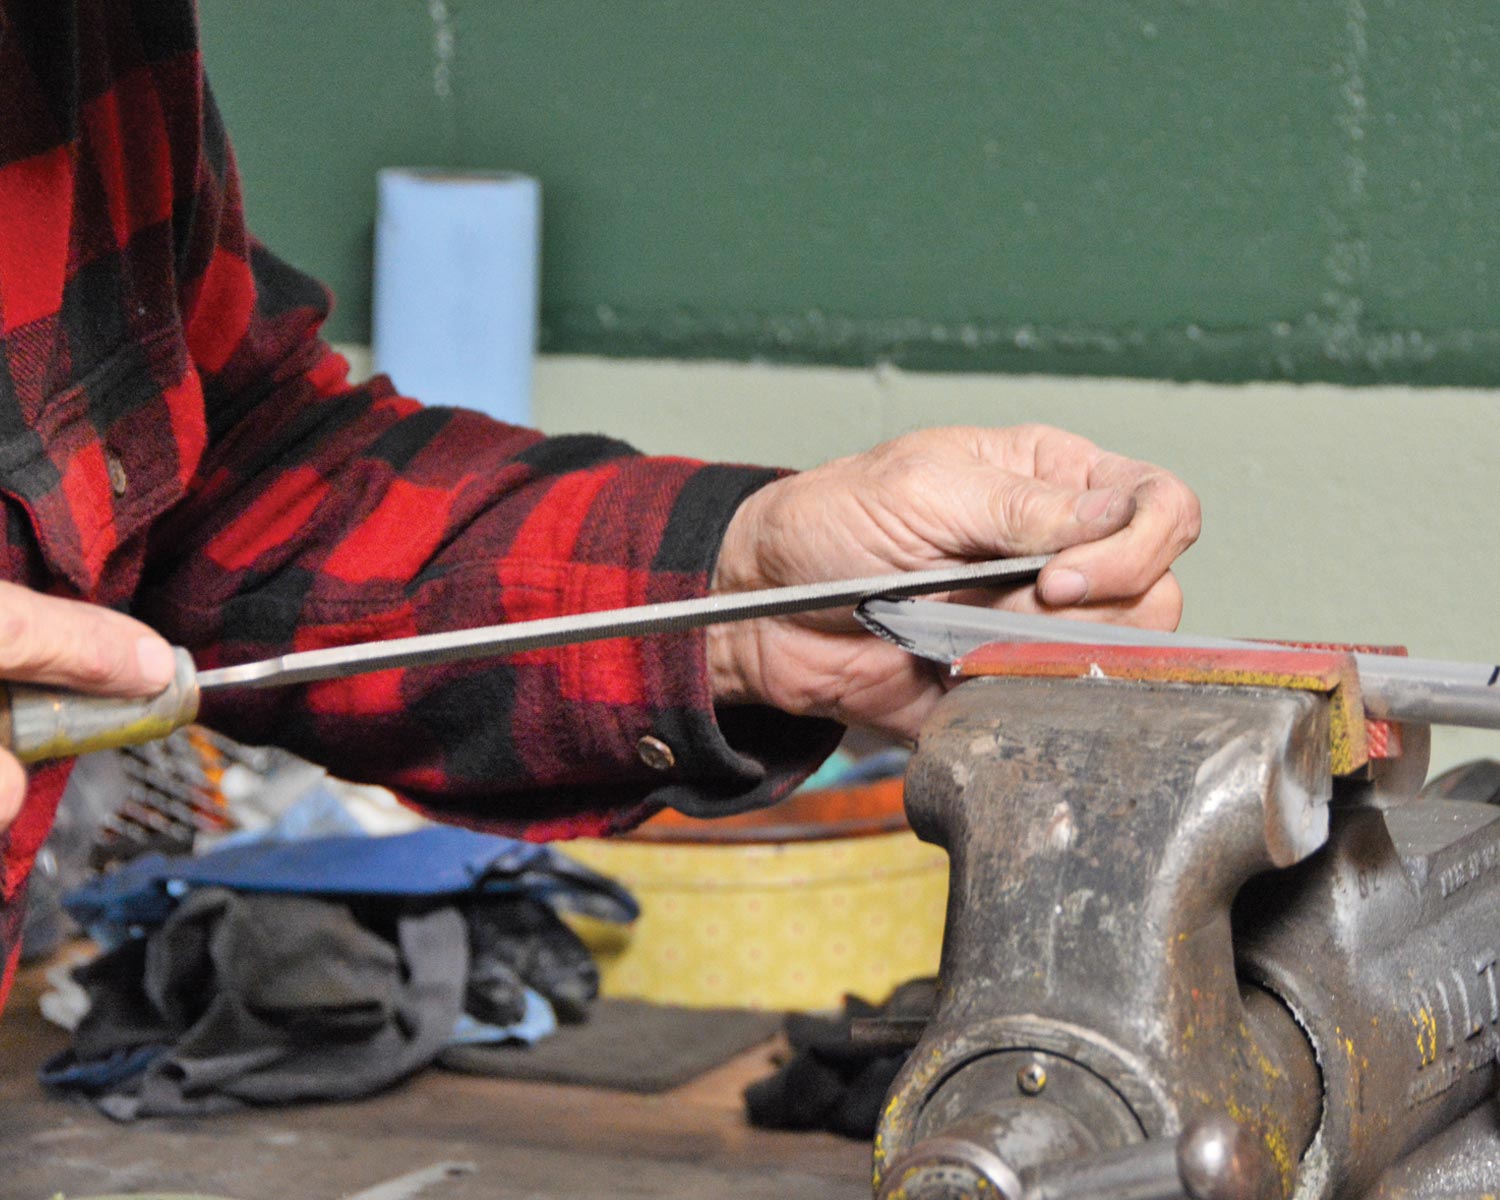
8. With our “soft jaws” in the vise we held the piece in place and did the finish shaping with a file, followed by sandpaper.
close up view of aluminum trim clamped to the car body
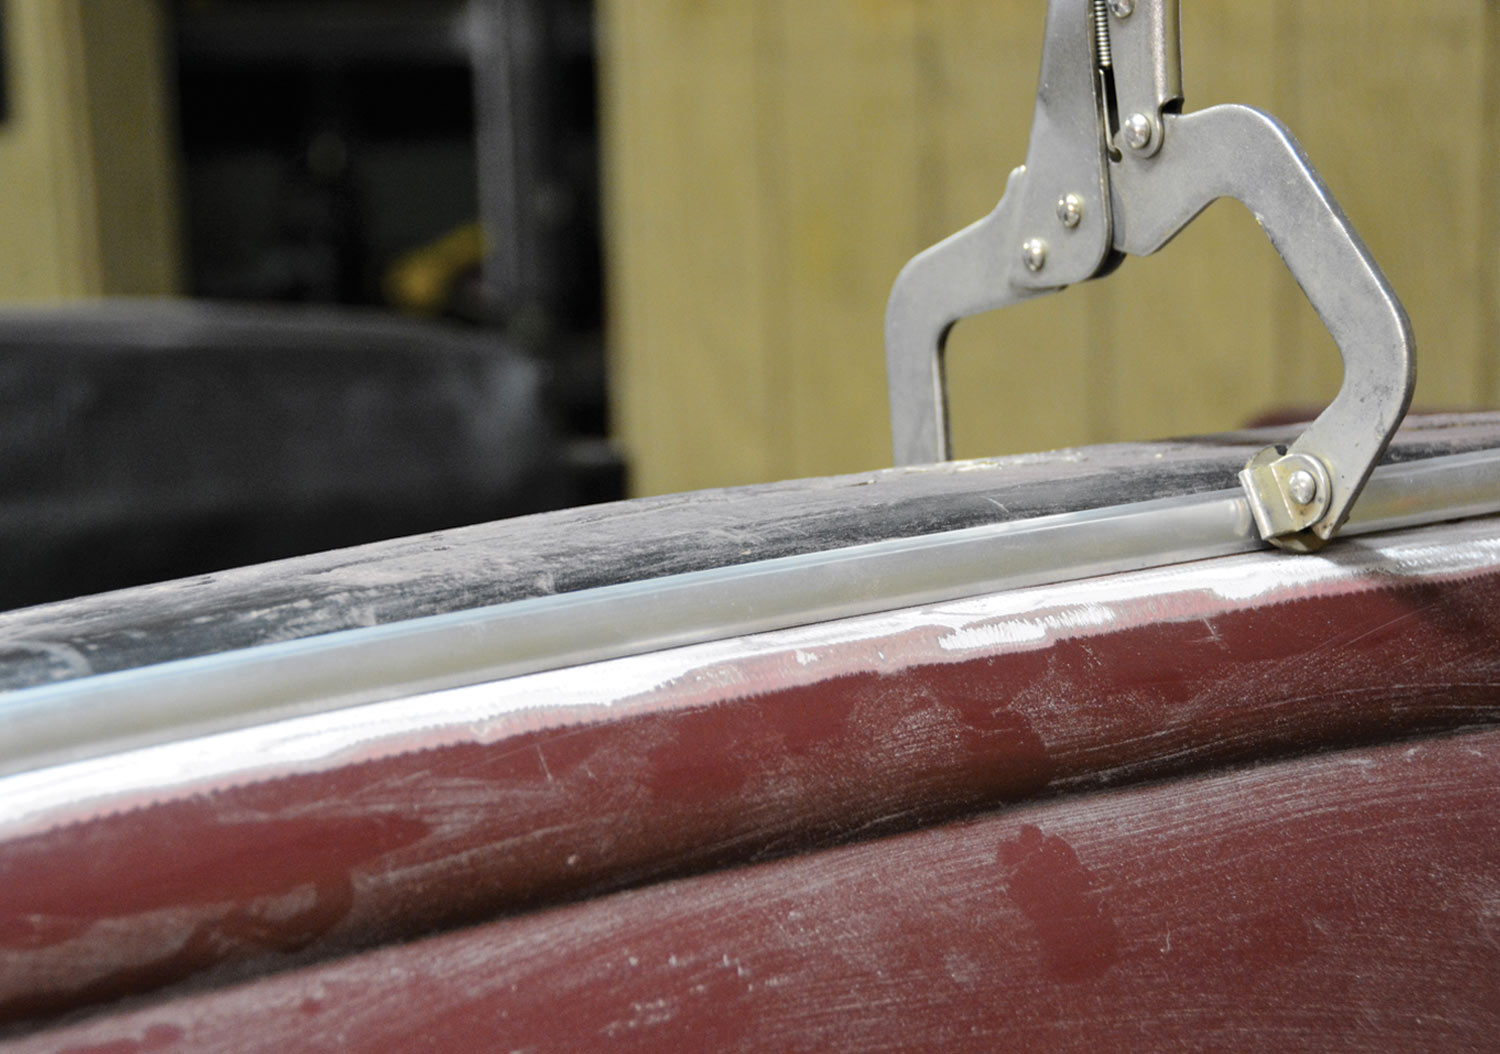
9. With the leading edge in its preliminary shape, we clamped the piece to the body to begin the forming process. Final shaping of the leading edge was performed after contouring the trim to the body.
close up view of leading edge of aluminum trim clamped to car body
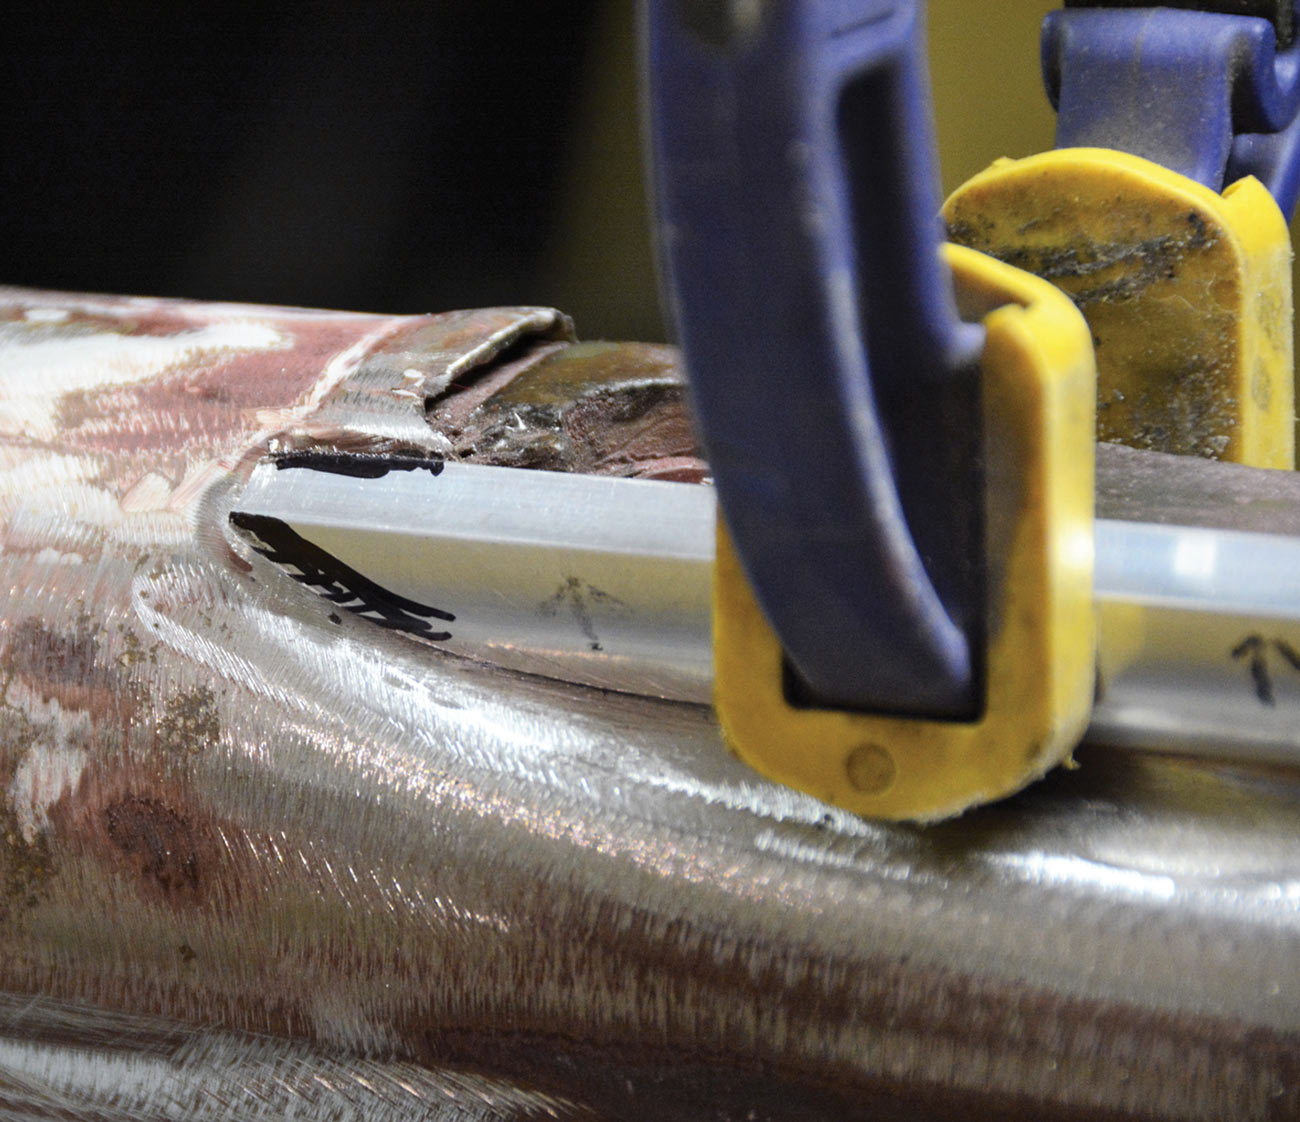
10. Careful marking, filing, sanding, and clamping again is required to fit the leading edge. File or sand a little, test-fit, then sand a bit more. This aluminum is very soft so you must take care not to remove too much material.
leading edge of aluminum trim held to car body with three clamps
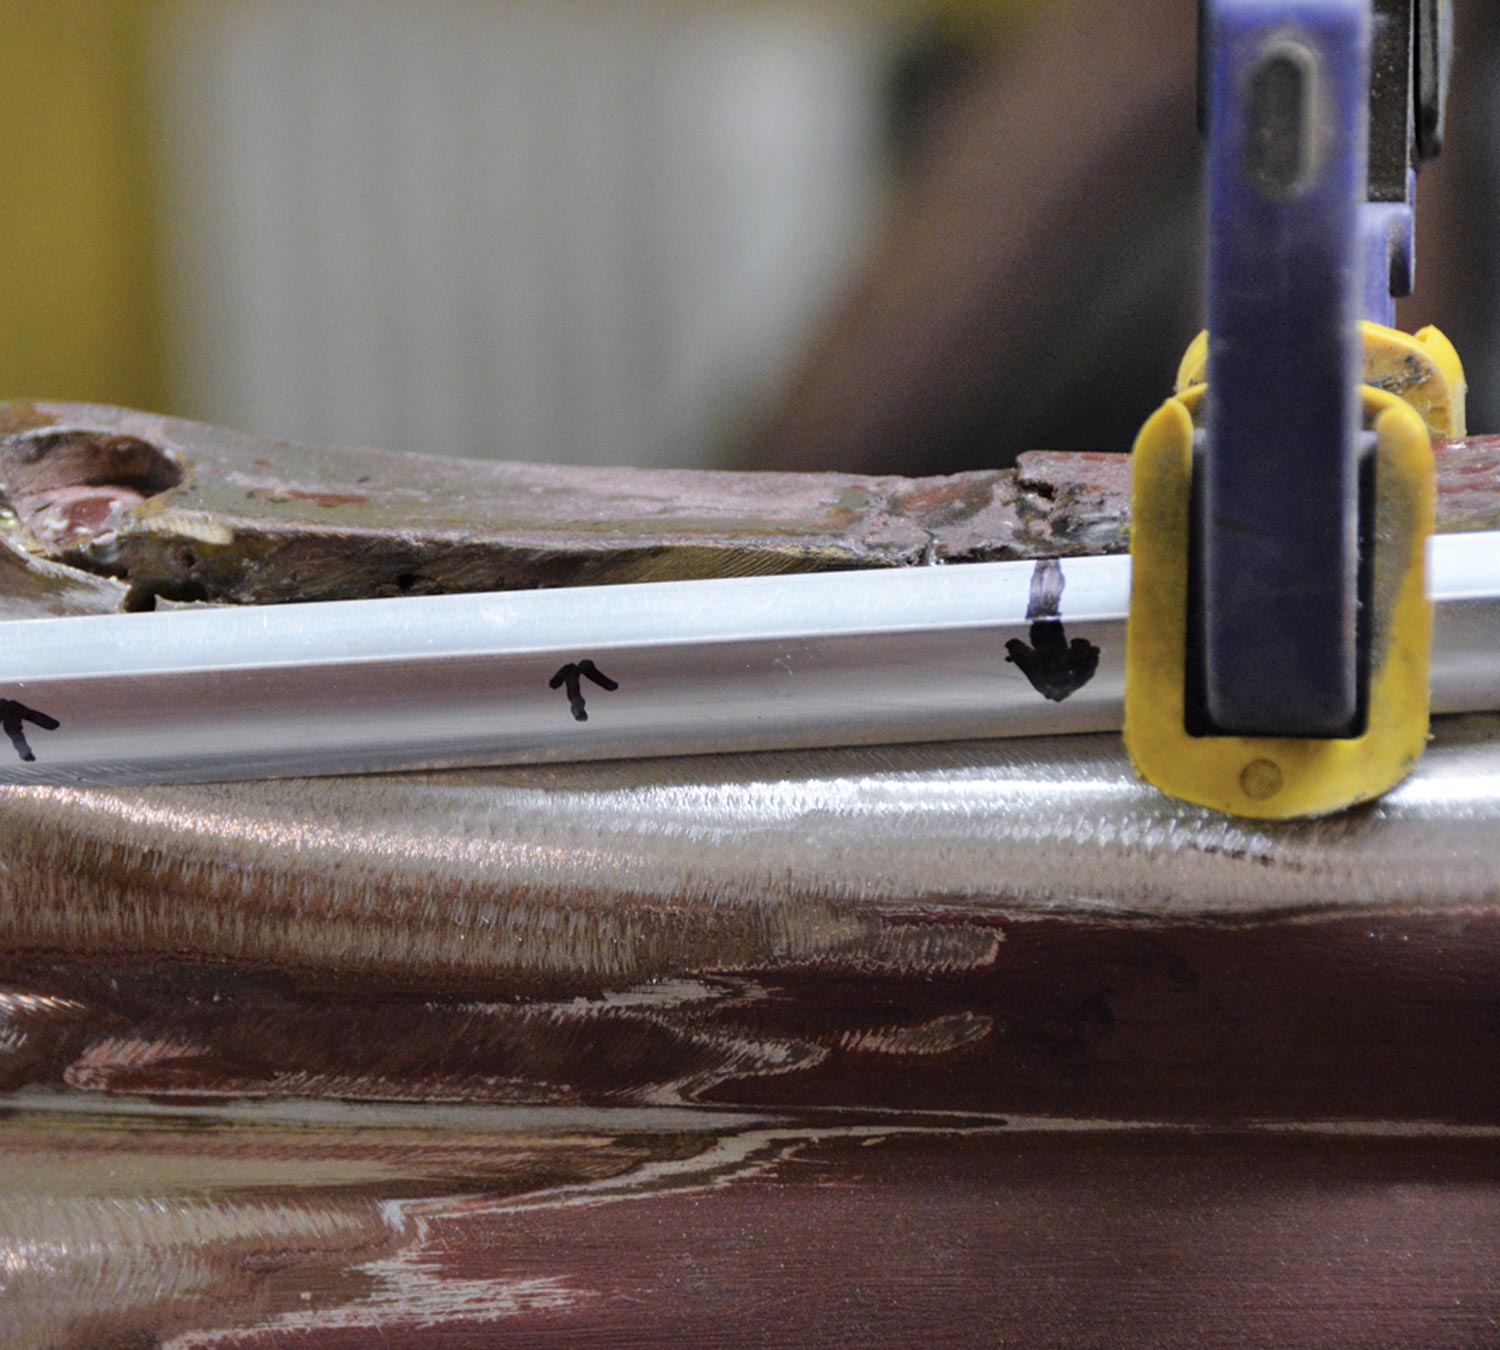
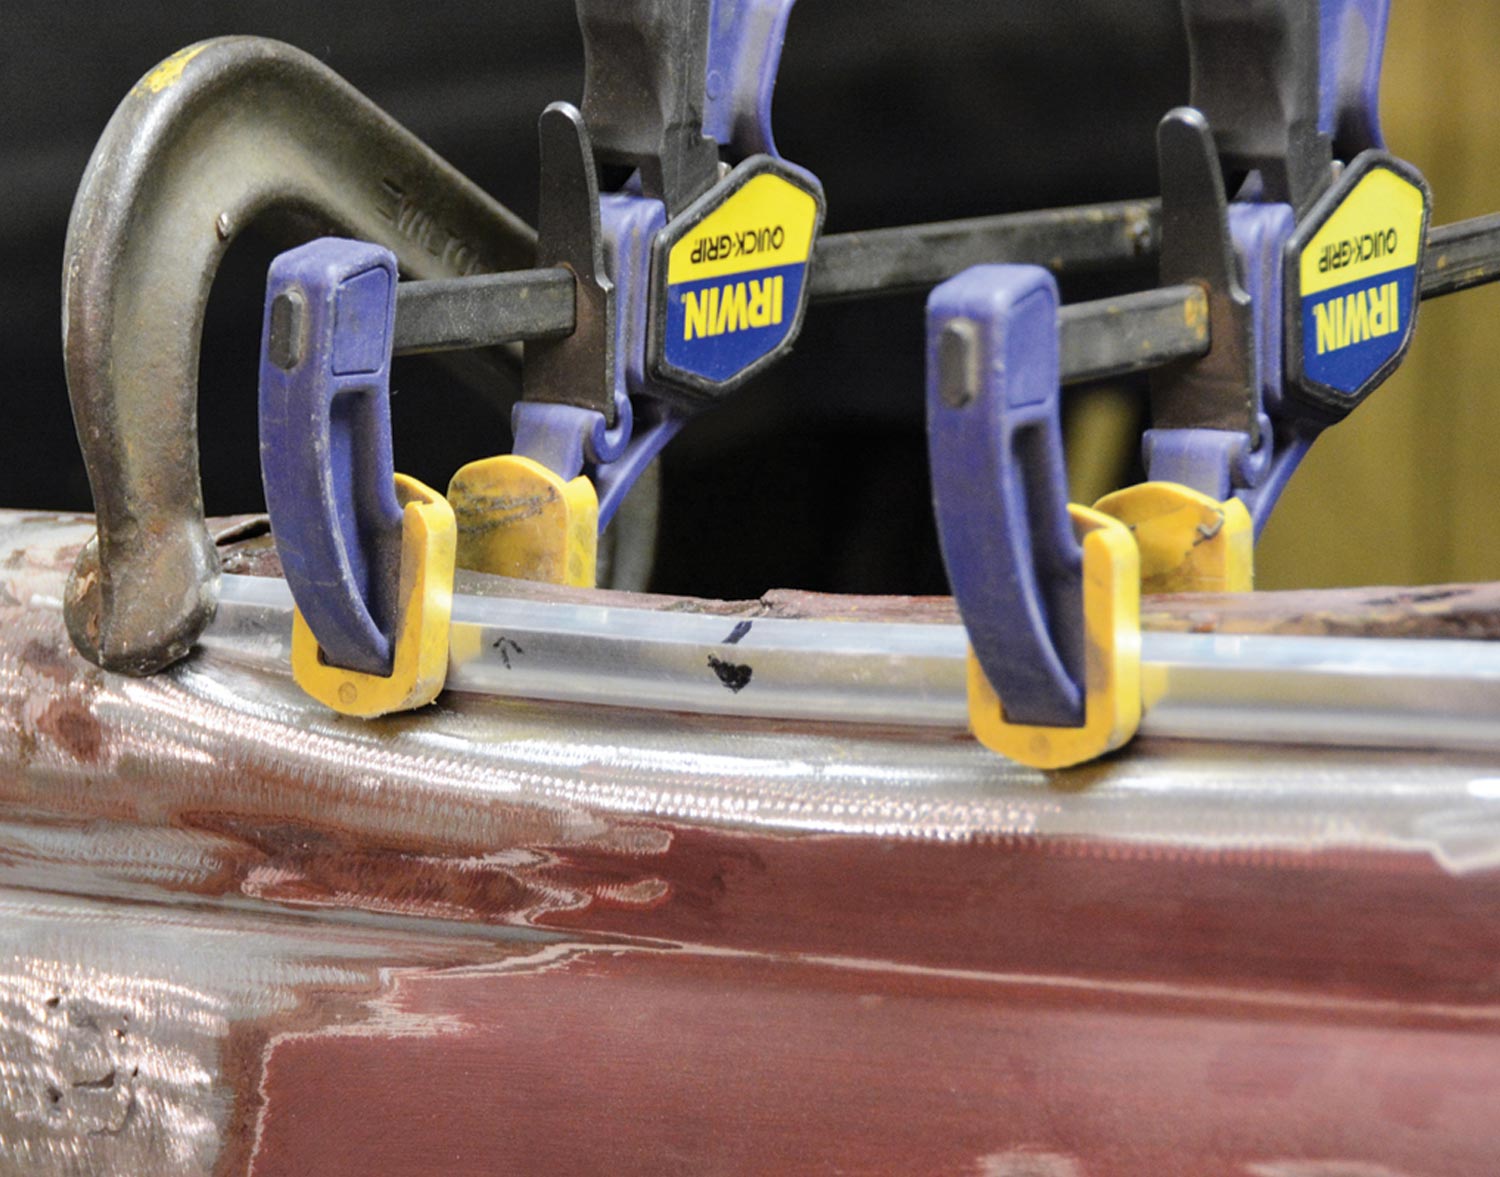
11. The leading point of the trim is now perfectly formed and we can begin shaping the trim to the body with clamps. The Sharpie arrow marks where the trim had to be pushed down.
back view of 1936 Ford phaeton with trim in process of being curved
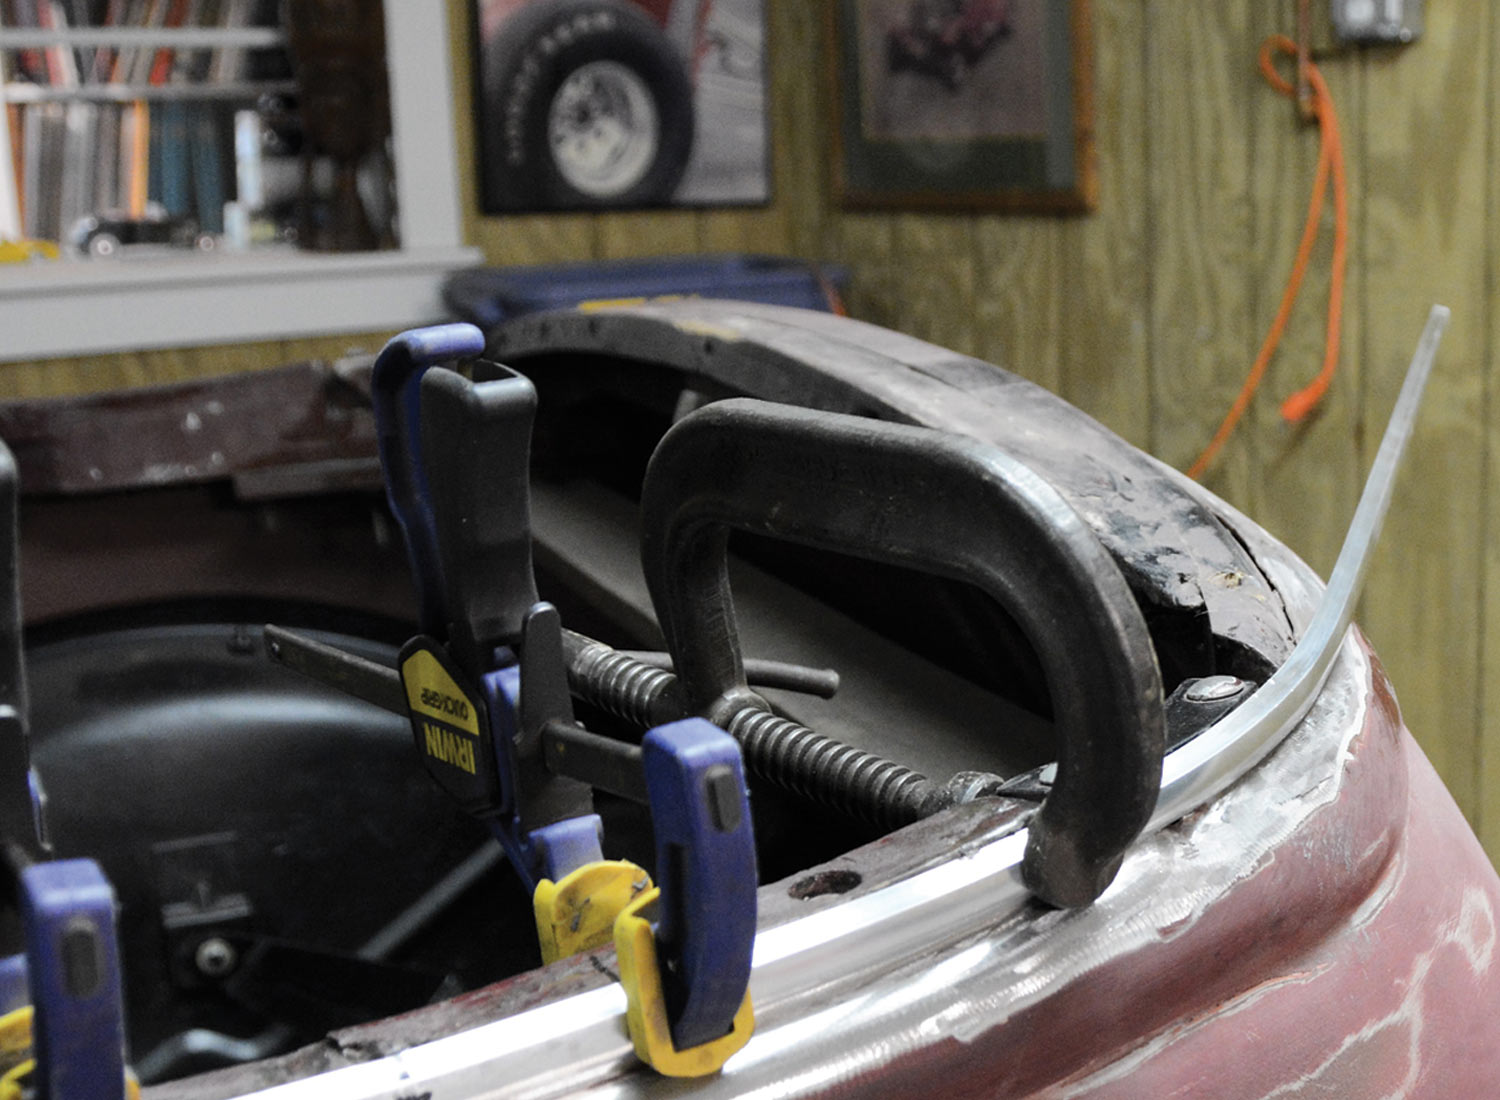
12. The back of a 1936 Ford phaeton is quite curvaceous. As the trim rounds the corner it becomes a compound curve where the trim must be very gently rotated so it stays flush with the body.
mechanic uses a pair of adjustable wrenches to gently rotate the trim
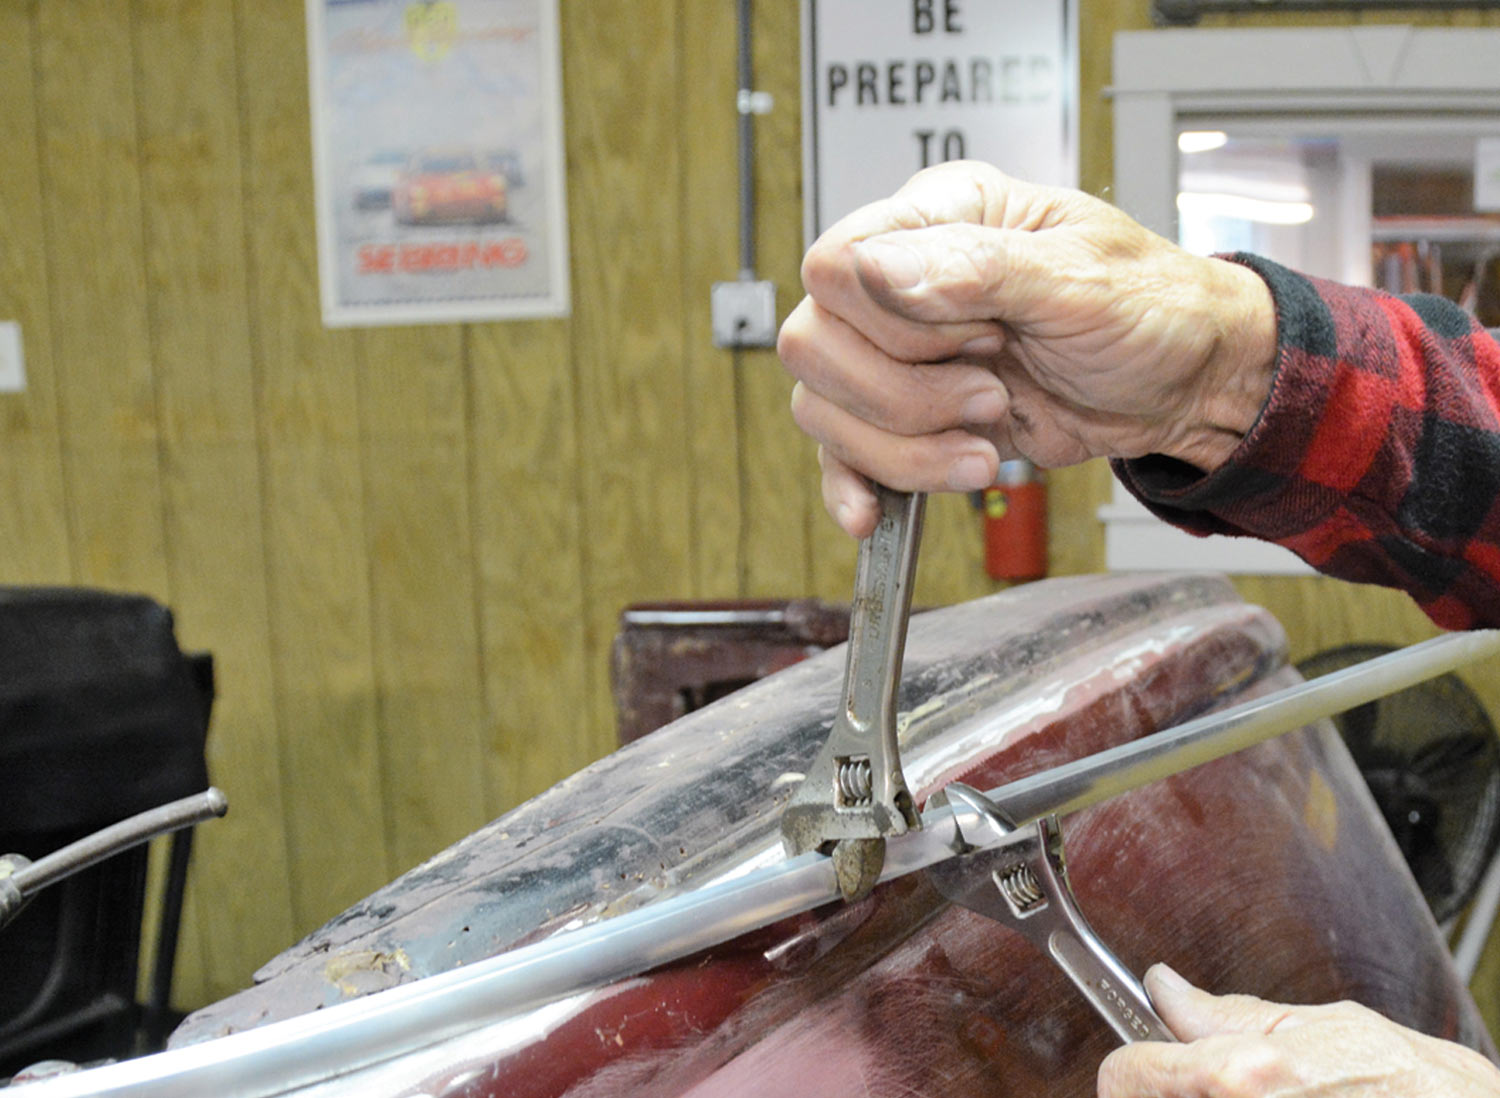
13. A pair of adjustable wrenches were used to ever-so-slightly rotate the trim. We should have put masking tape on the trim before doing this as the wrenches left marks on the trim that had to be sanded out later.
three quarter back view of Ford phaeton with aluminum trim held down with clamps
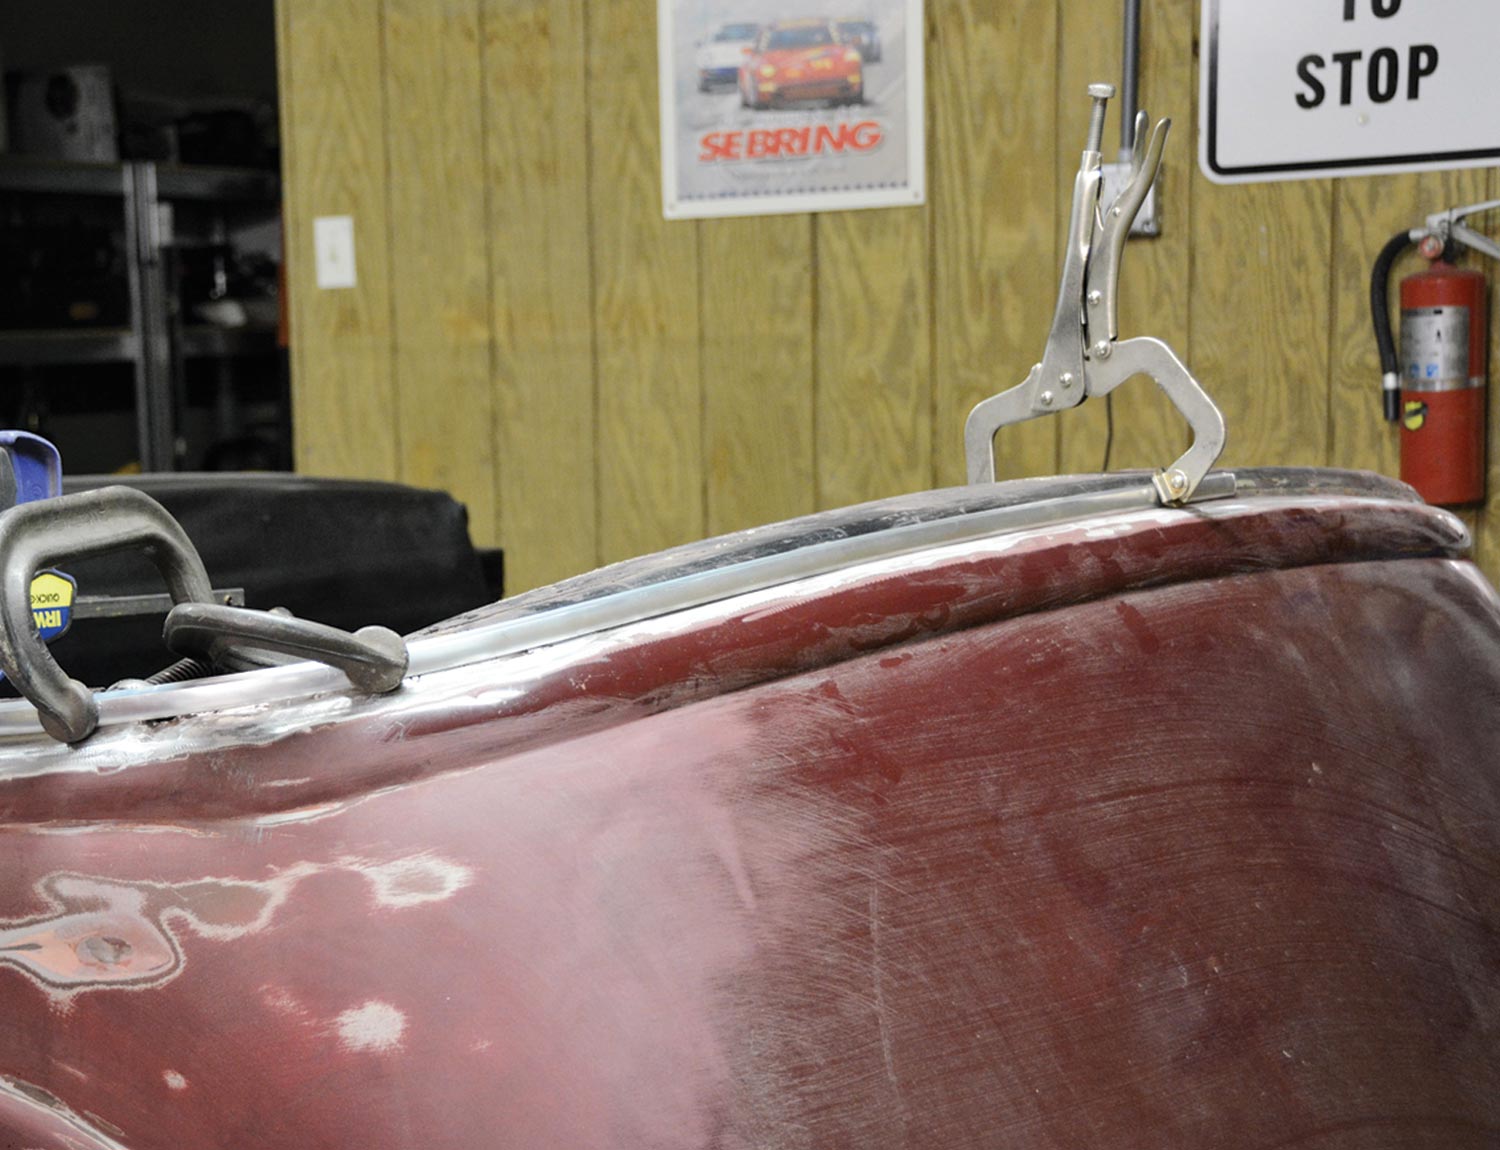
14. As you can see, we have accomplished the basic shape of the body and the trim is providing a very pleasing transition. There are still some adjustments to be made.
close up view of bottom of aluminum trim flush with car body panel
15. A closer look shows how nicely the trim fits up to the body panel. In some applications the trim can be held onto the body with 3M double-sided high-strength adhesive that is available when ordering the trim.
a C-clamp and block of wood are used to add downward pressure to trim as it rounds the corner of the car body
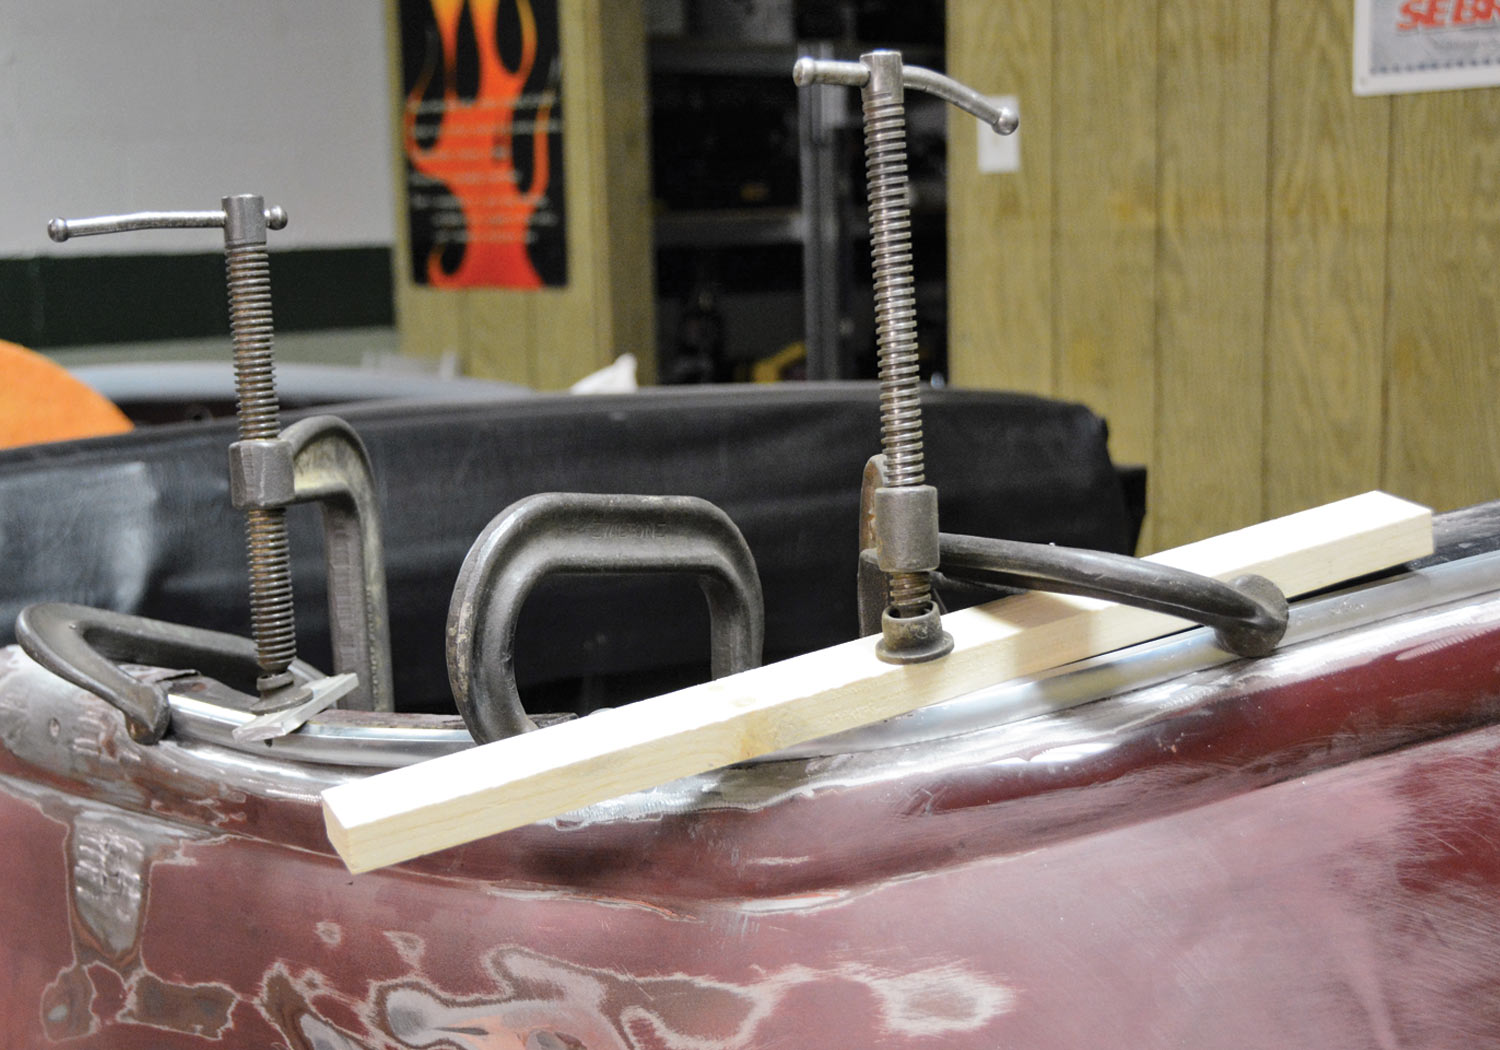
16. Some final adjustments were made with a C-clamp and block of wood to gently push the molding down as it rounds the corner of the body. Once again, slow and easy is the way to form aluminum.
a special tool is used to tap the trim to conform to the car body
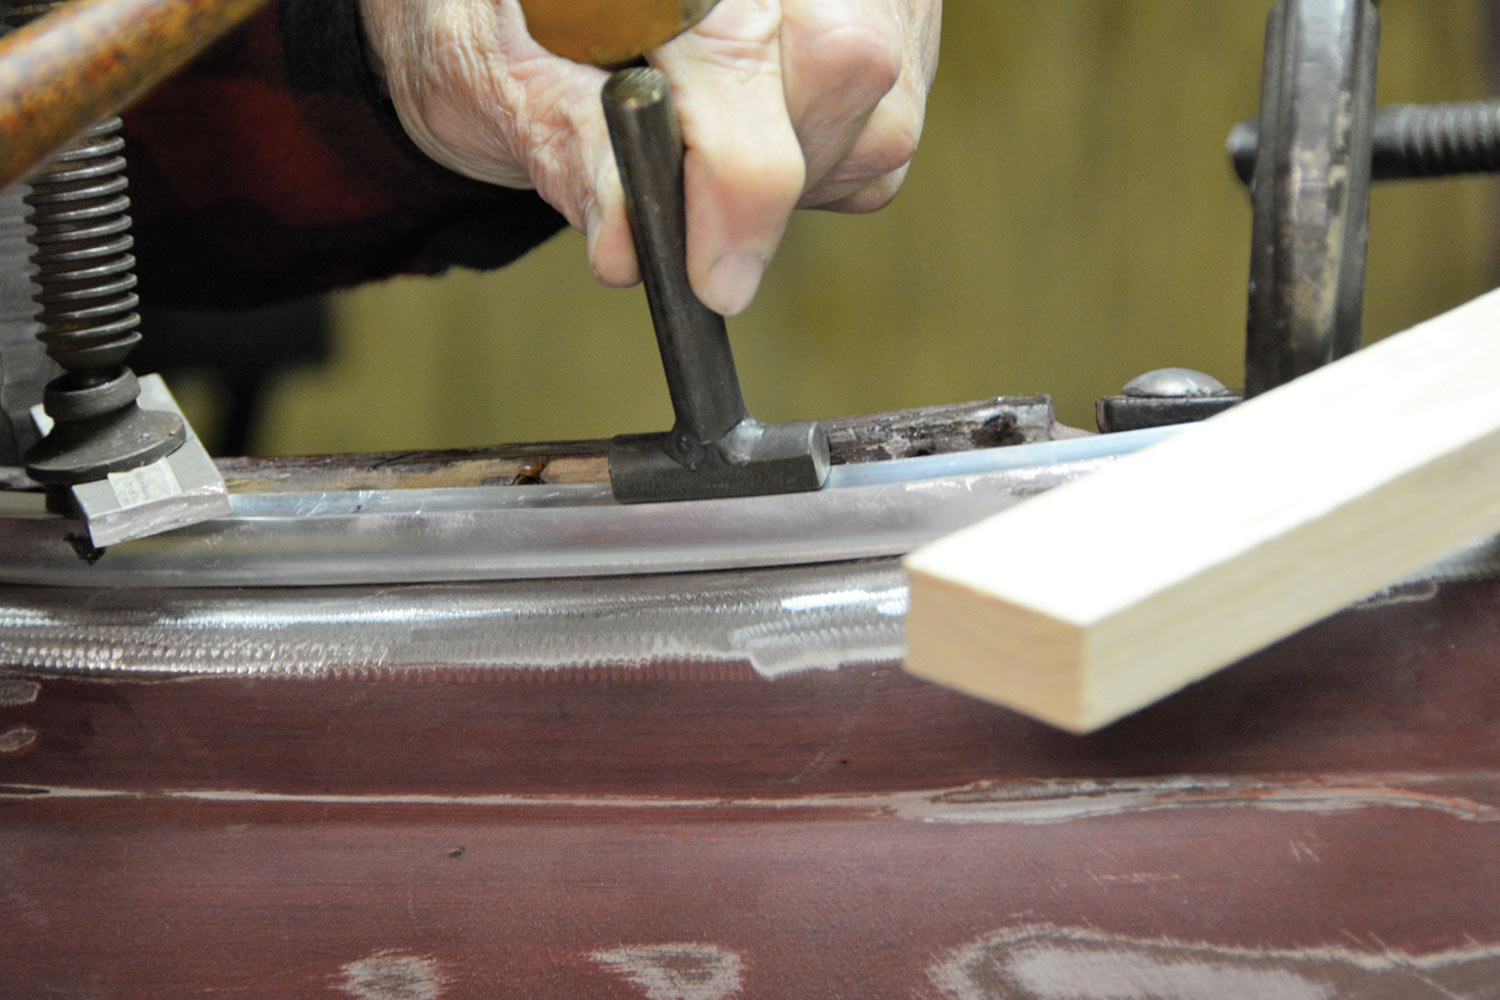
17. We had a couple of spots that needed to be tapped down to conform to the body. Gently tapping brought the trim down; we made this simple tool for the job. Be careful not to tap too hard in one spot or you will create a dreaded low spot in the trim.
a sheetmetal template is created with holes for the screws that will hold the trim
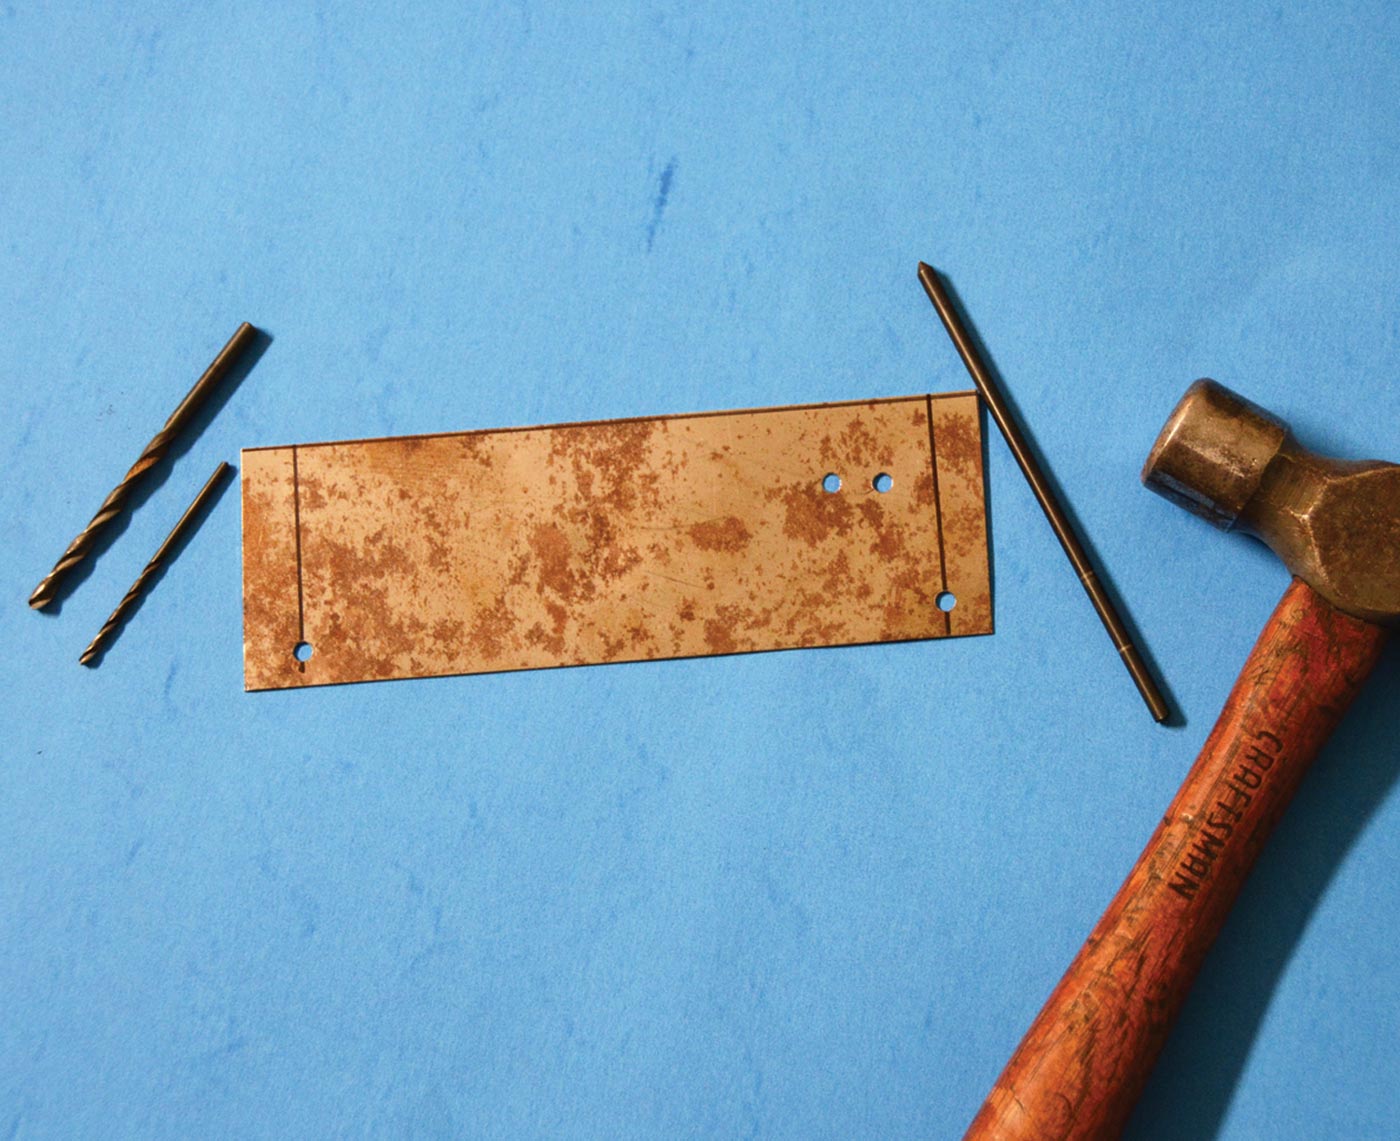
18. After the trim was formed to the body it was time to drill the holes for the stainless steel sheetmetal screws that will hold the trim in place. We made a simple template from 22-gauge sheetmetal to ensure the holes were perfectly spaced.
mechanic uses sheetmetal template to mark the placement of a screw on the trim
19. The sheetmetal template conforms to the radius of the trim, allowing us to keep the trim holes perfectly spaced.
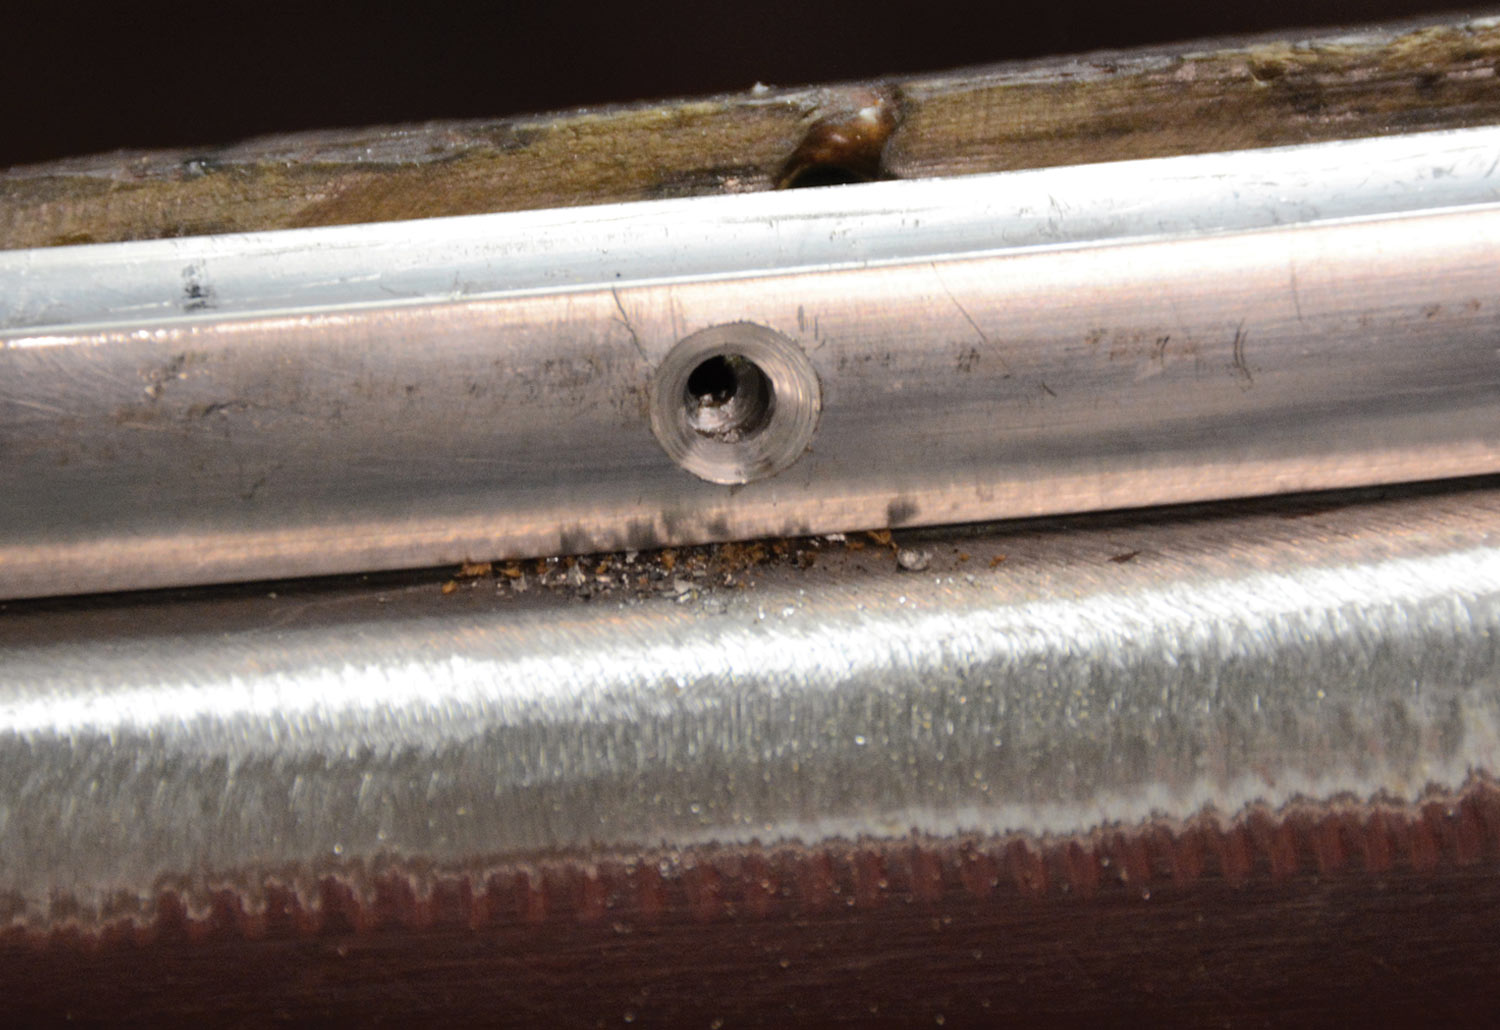
close view of a drilled and countersunk hole on the aluminum trim
20. We drilled and countersunk each hole and then installed the screw before moving onto the next hole. This ensured the trim would remain flat between screws.
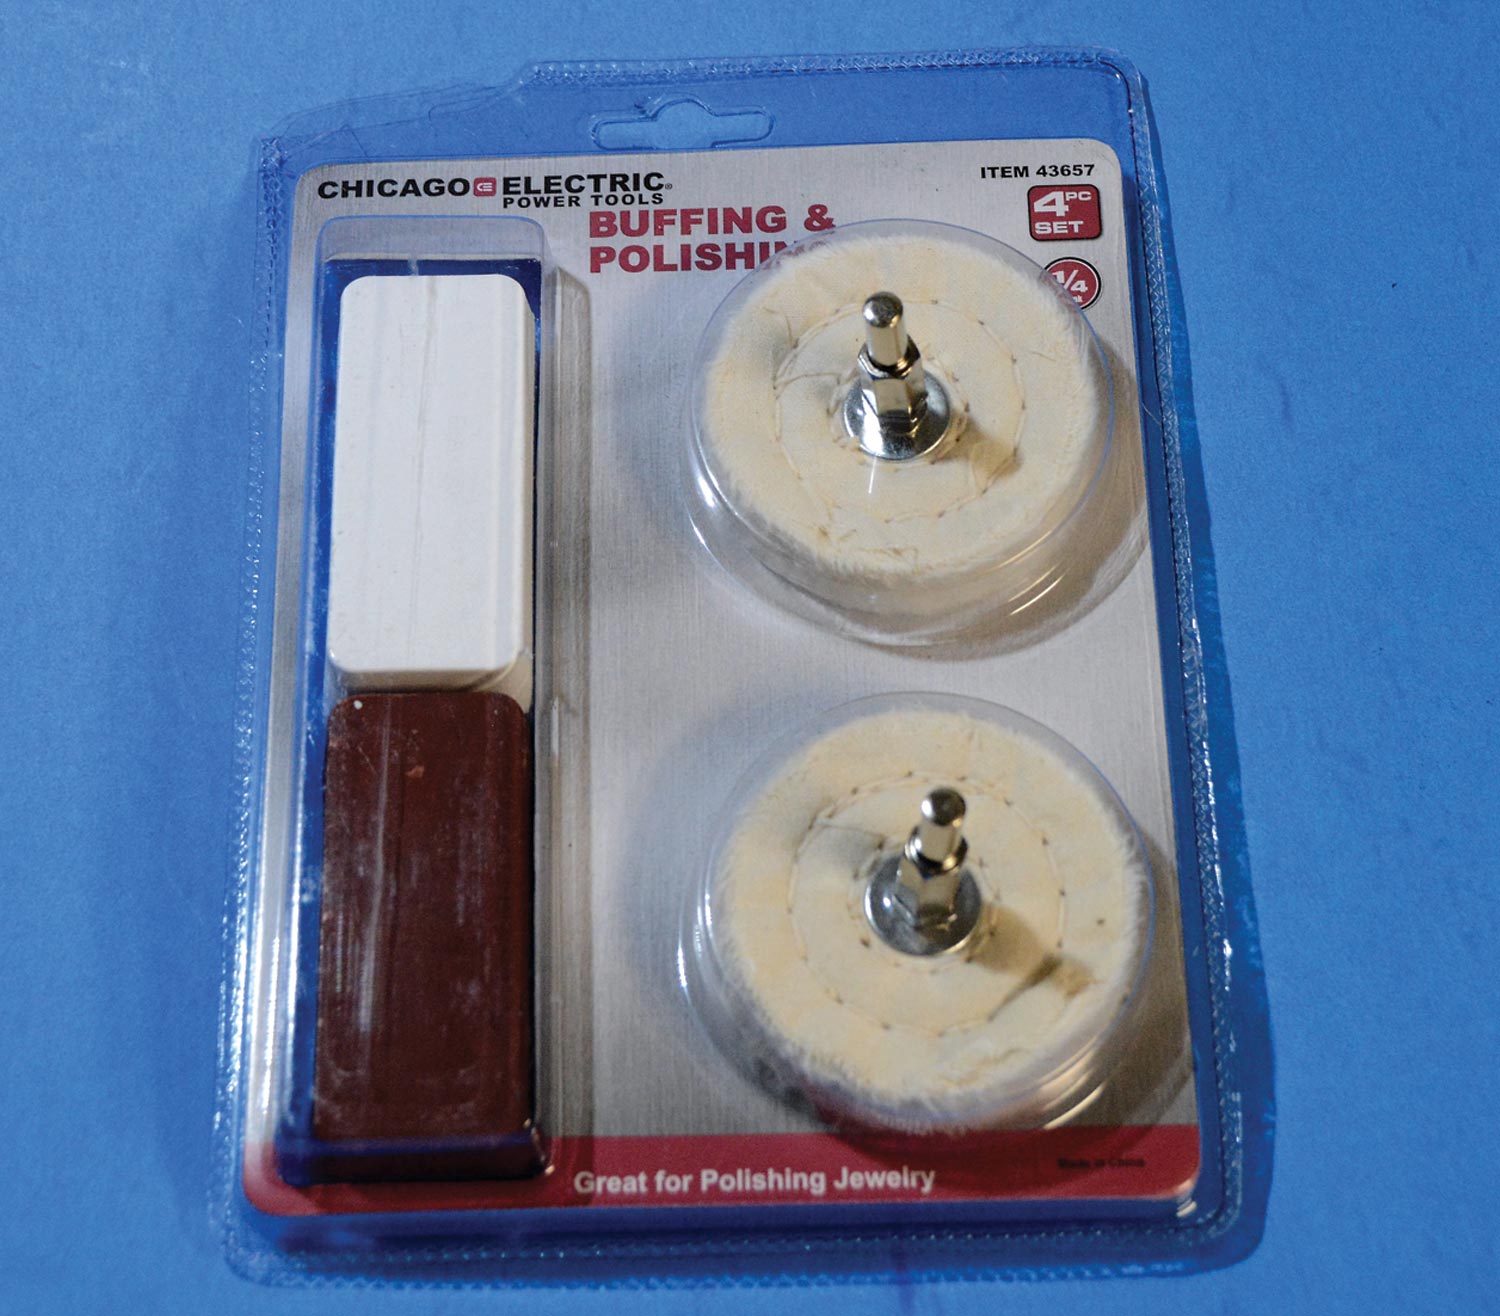
Chicago Electric brand buffing and polishing kit
21. After drilling all the holes and screwing the molding to the body it was time to polish the trim. A quick trip to Harbor Freight netted a couple of buffing pads for our drill along with two different buffing rouges.
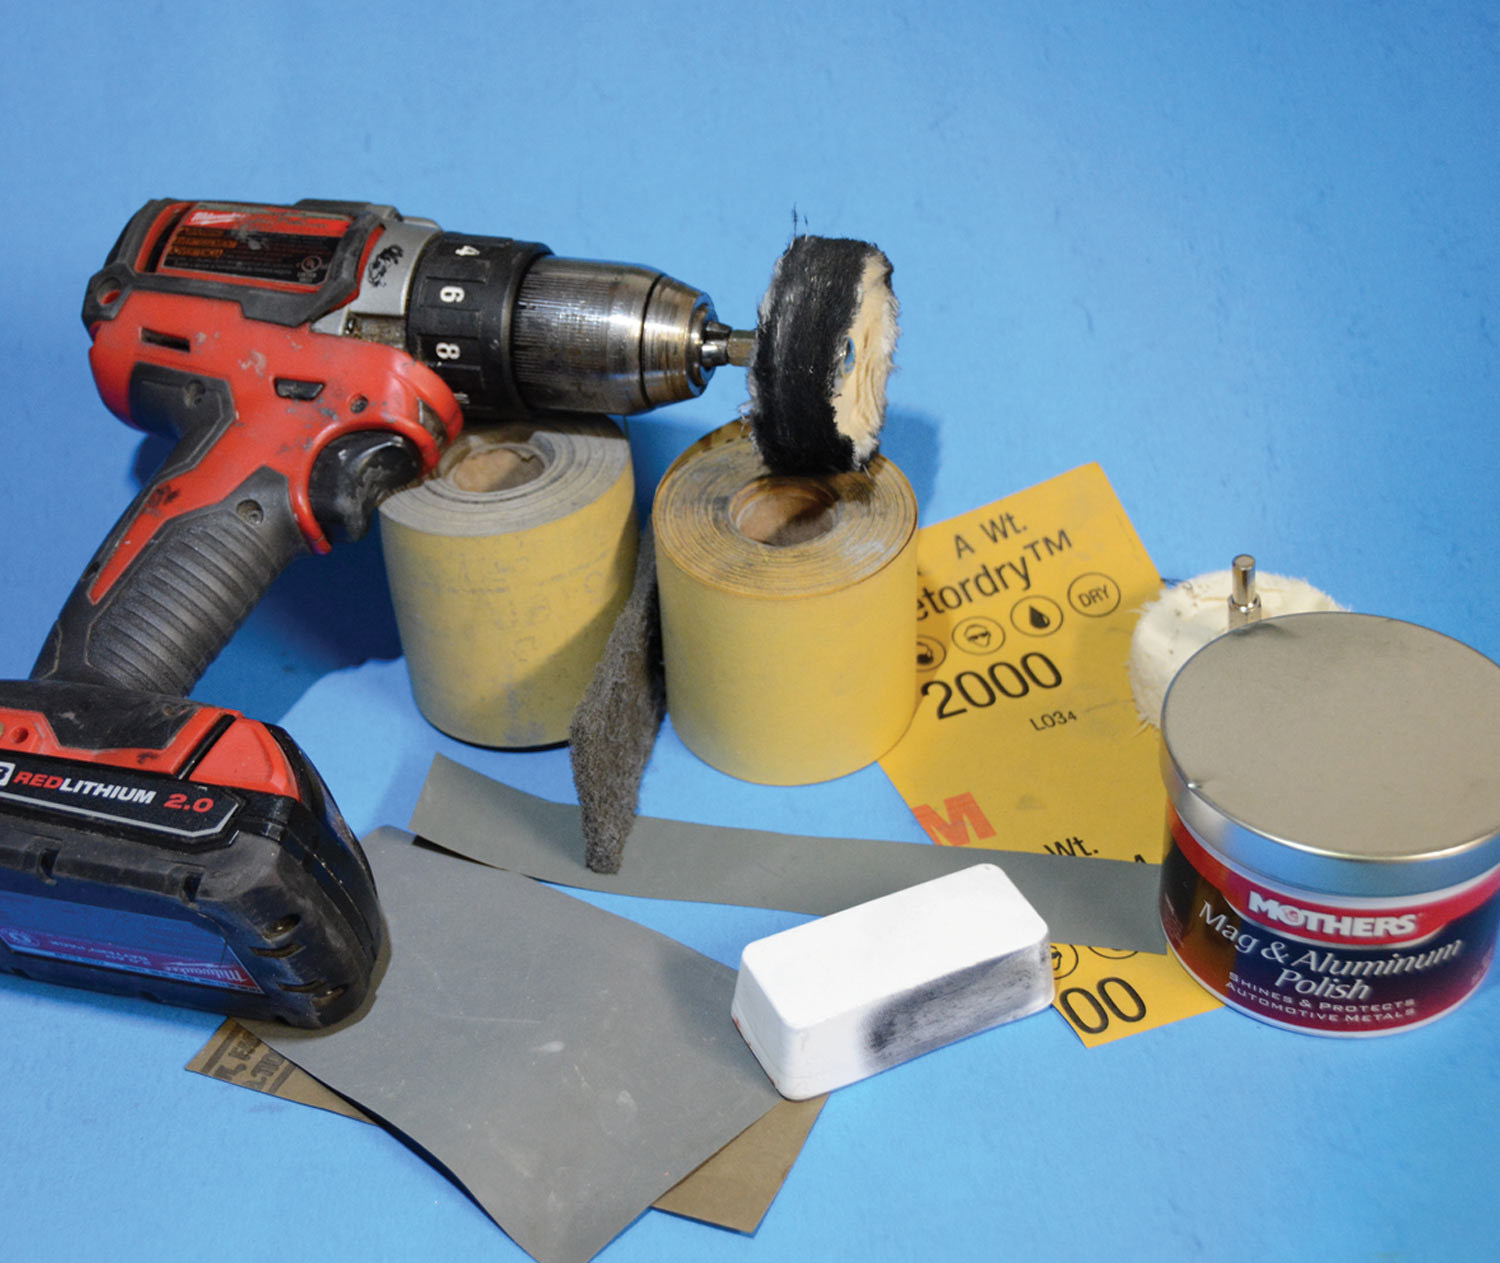
buffing and polishing tools on display
22. Finishing aluminum to a high gloss is much like buffing paint. We began by sanding the deeper scratches with 400- and then 600-grit paper. Then we sanded the entire piece with Scotch-Brite followed by 2,000- and 2500-grit sandpaper.
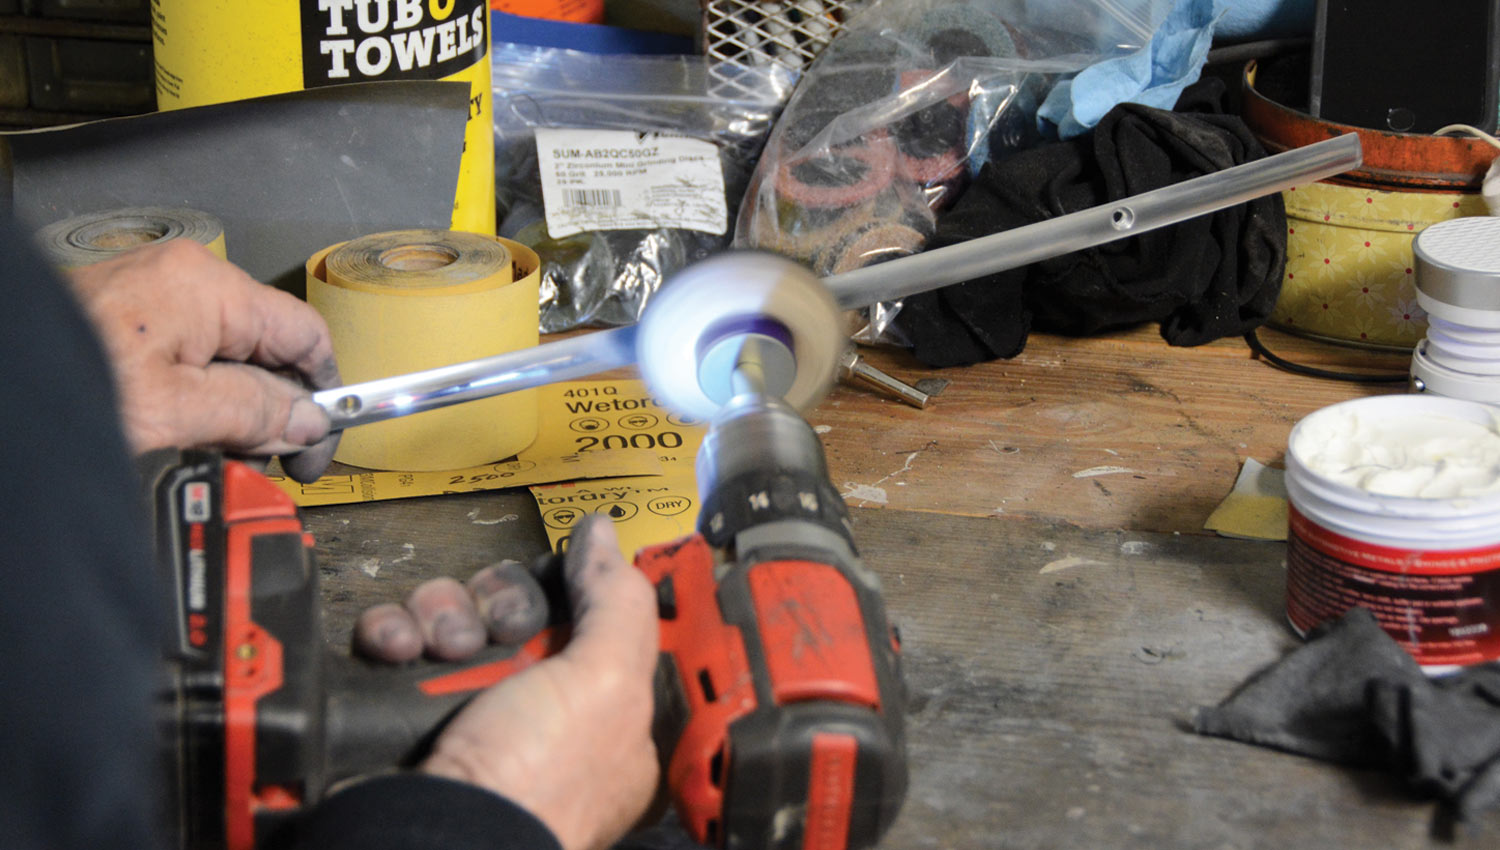
mechanic uses a handheld drill with cotton buffs for the final finish on the aluminum trim
23. We used a simple handheld drill and the cotton buffs for the final finish. One buff for the polishing rouge and the final buff using Mother’s Mag and Aluminum polish.
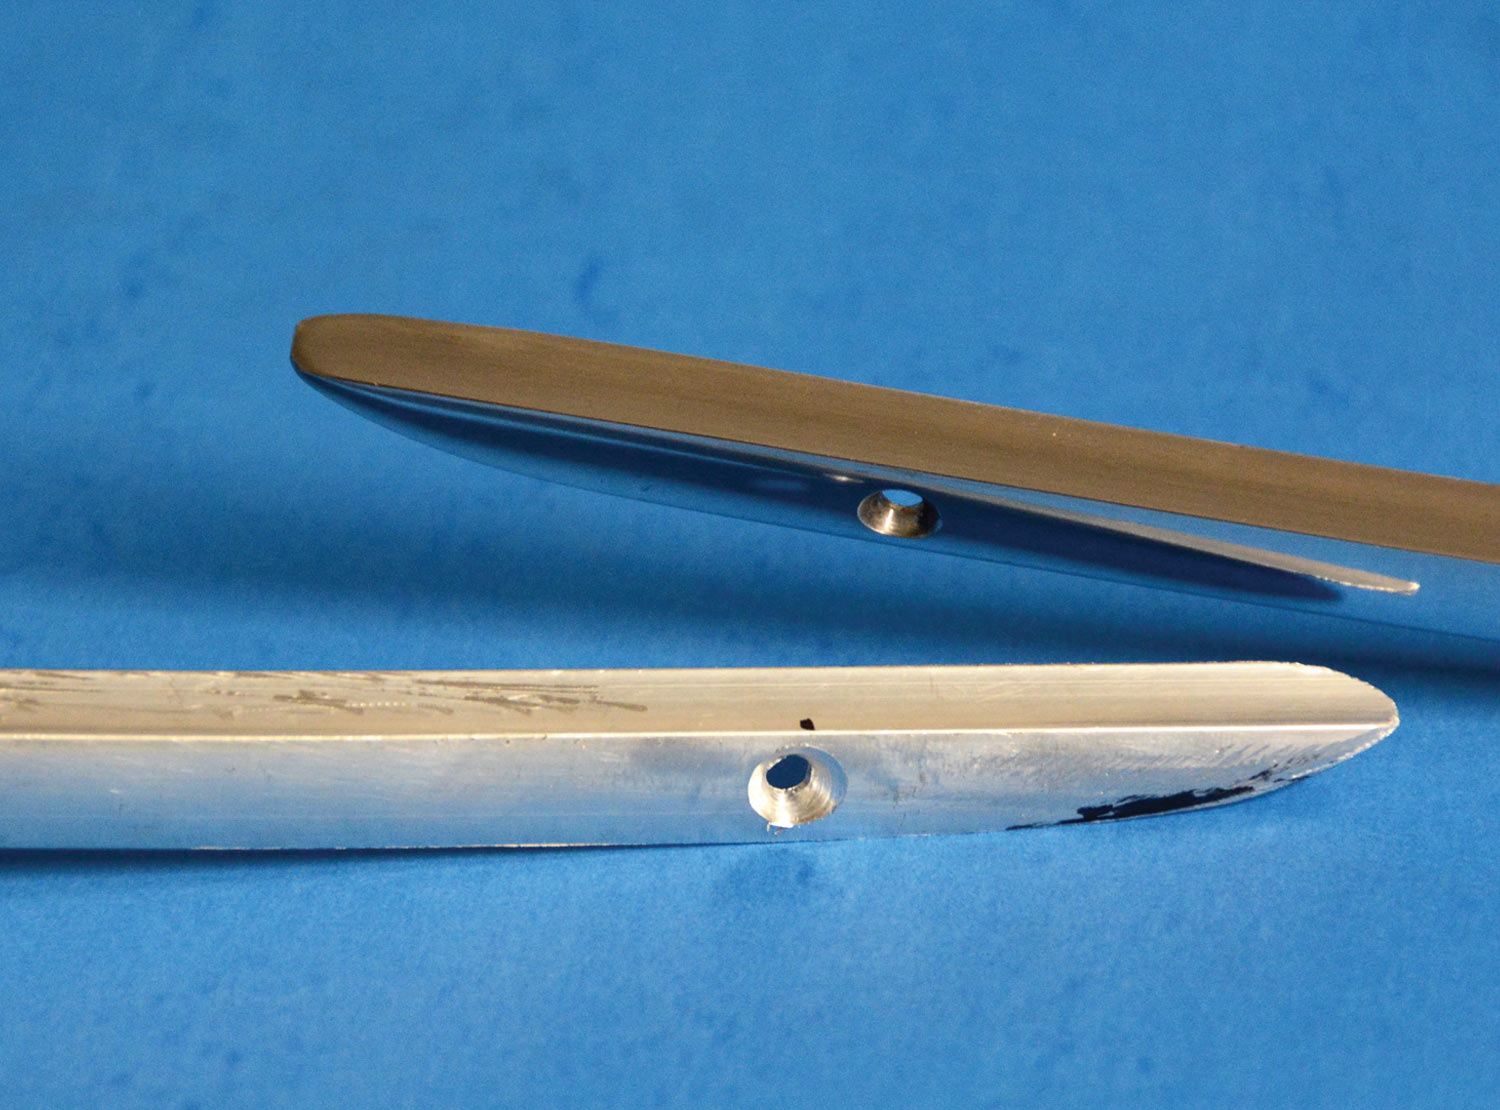
close up view of an unpolished trim and a buffed and polished trim
24. This is a good look at the before and after buffing and polishing process. This aluminum trim is such high quality it is just begging to be buffed to a chrome-like finish.
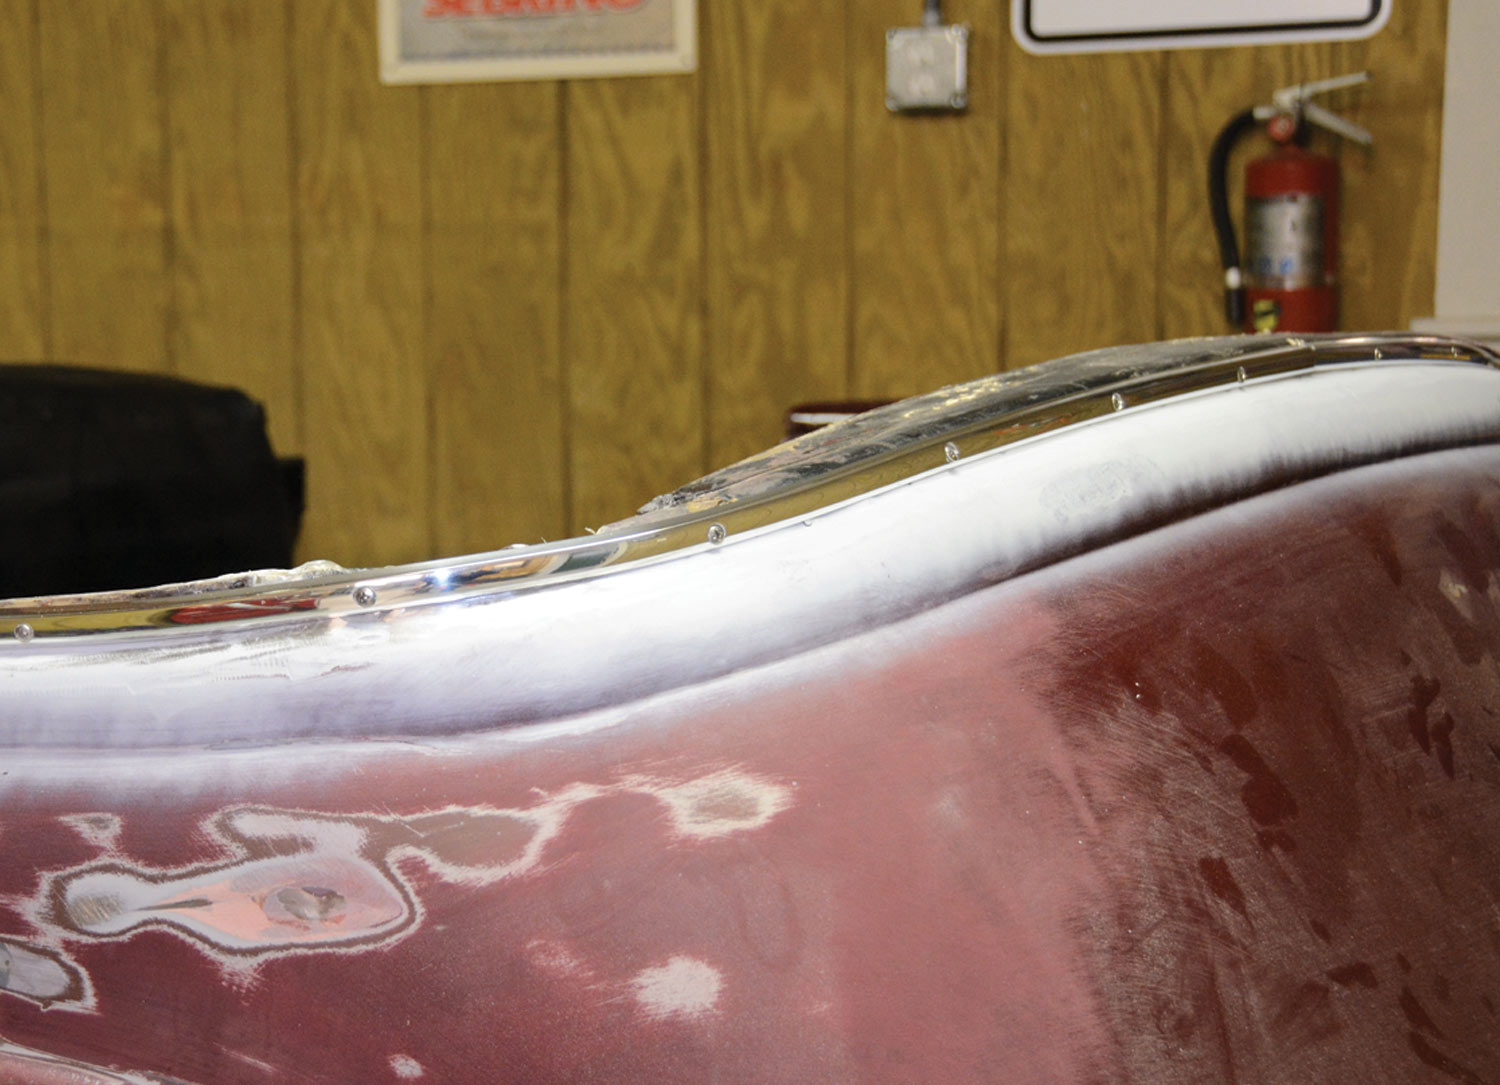
finished trim held to car body with stainless steel screws
25. And here is the finished trim polished and held in place with stainless steel screws. The back of the 1936 Ford phaeton has a certain roller coaster shape that provides a great-looking panel and also provides challenges for the trim-forming process.
closer view of the transition between the trim and the car body
26. This closer view shows how nicely the trim meets the body for a clean transition. The wood header will be covered with vinyl leatherette that will go down behind the trim, completing the transition.
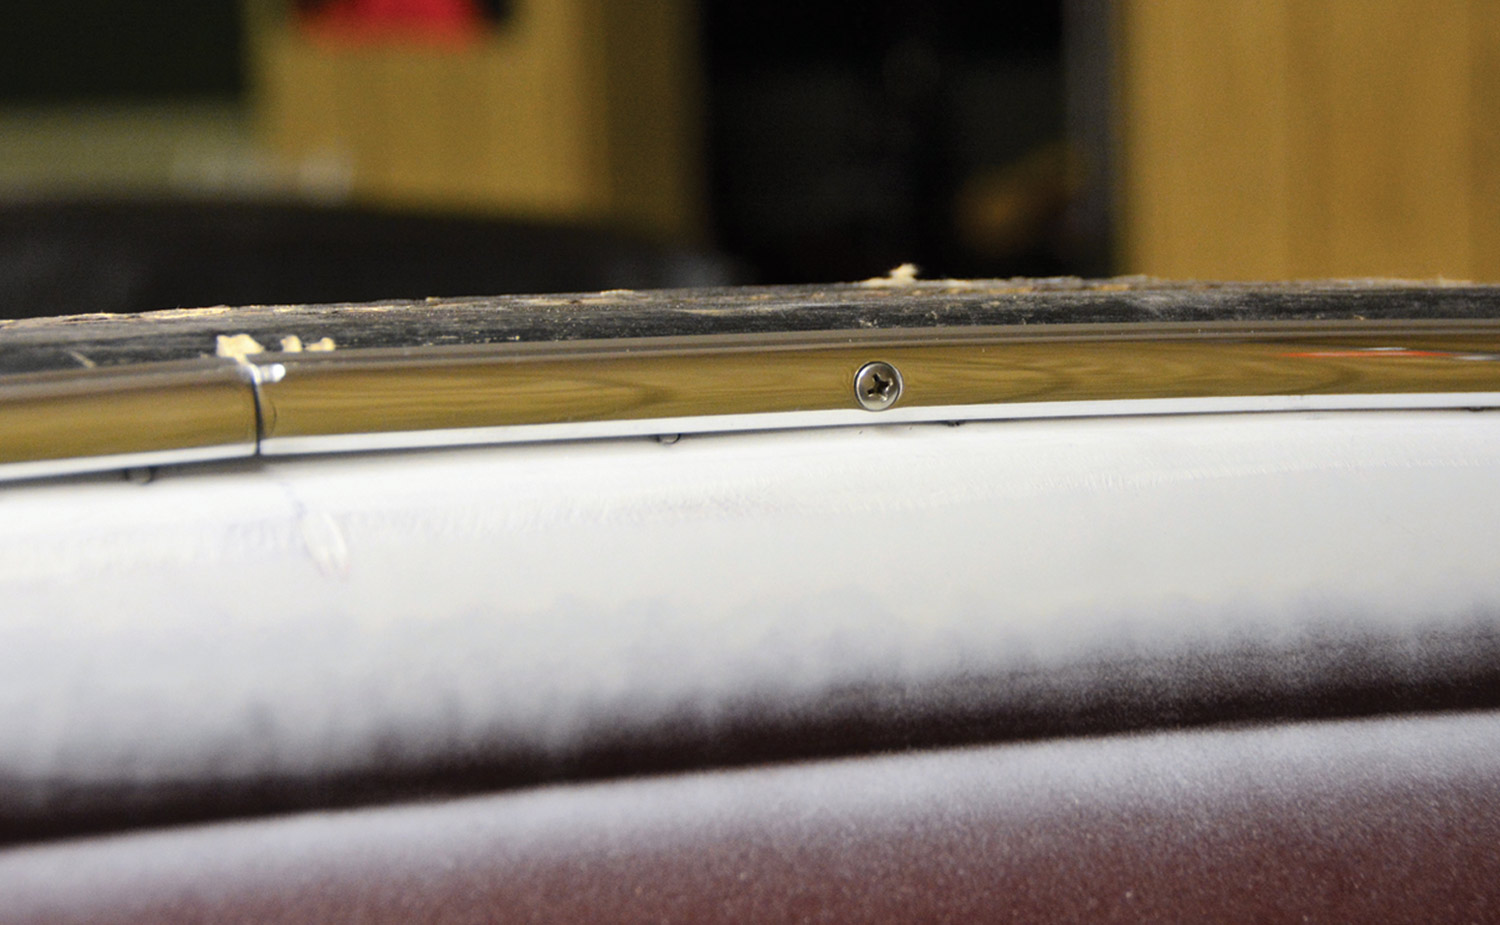
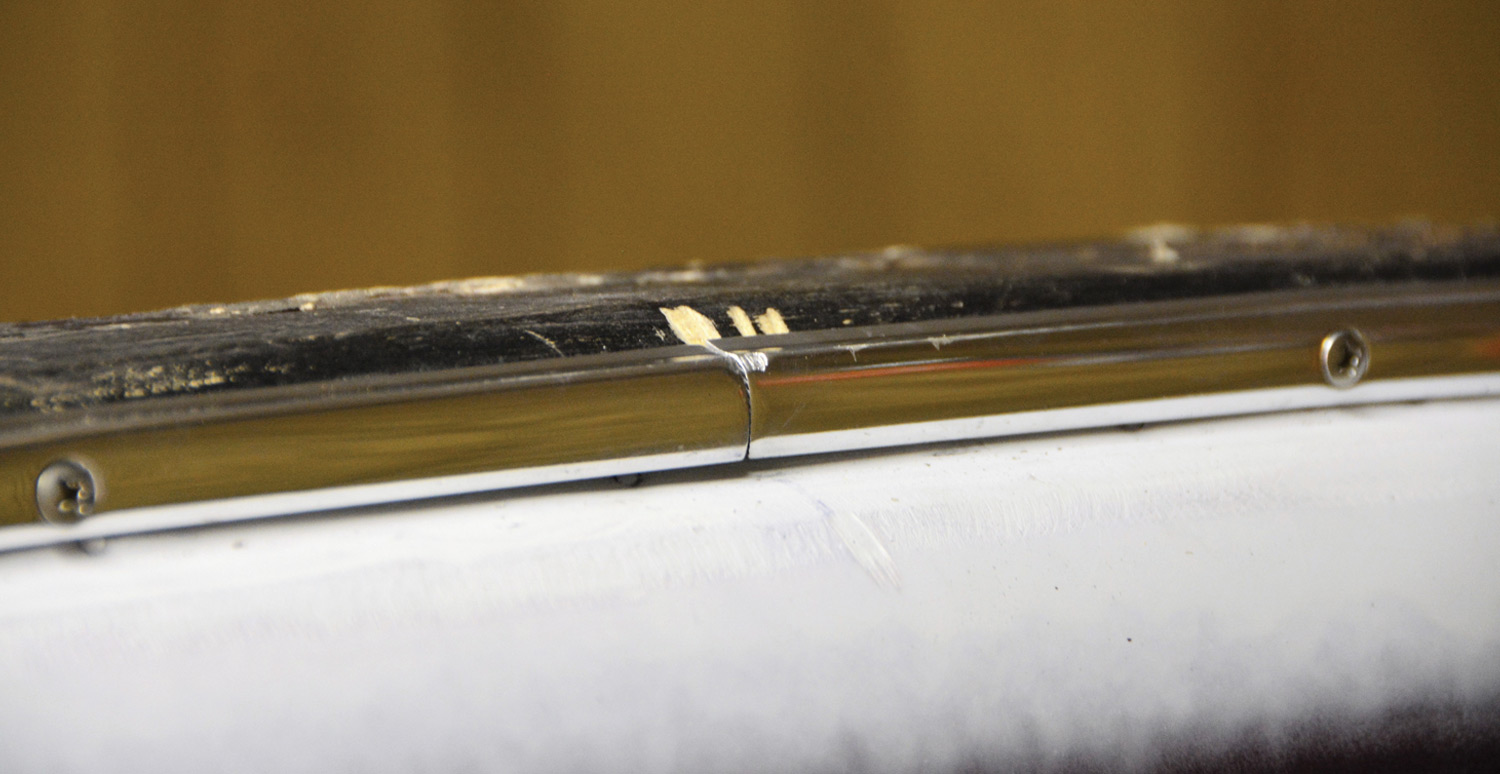
close up view of final center seem between the two aluminum trim pieces
27. We ordered two pieces of trim, 4 feet long to do our trim work. We ended up cutting about 6 inches off each piece to provide this final center seam. You may notice we managed to nick one piece with a file but luckily that will be covered with a center trim piece.
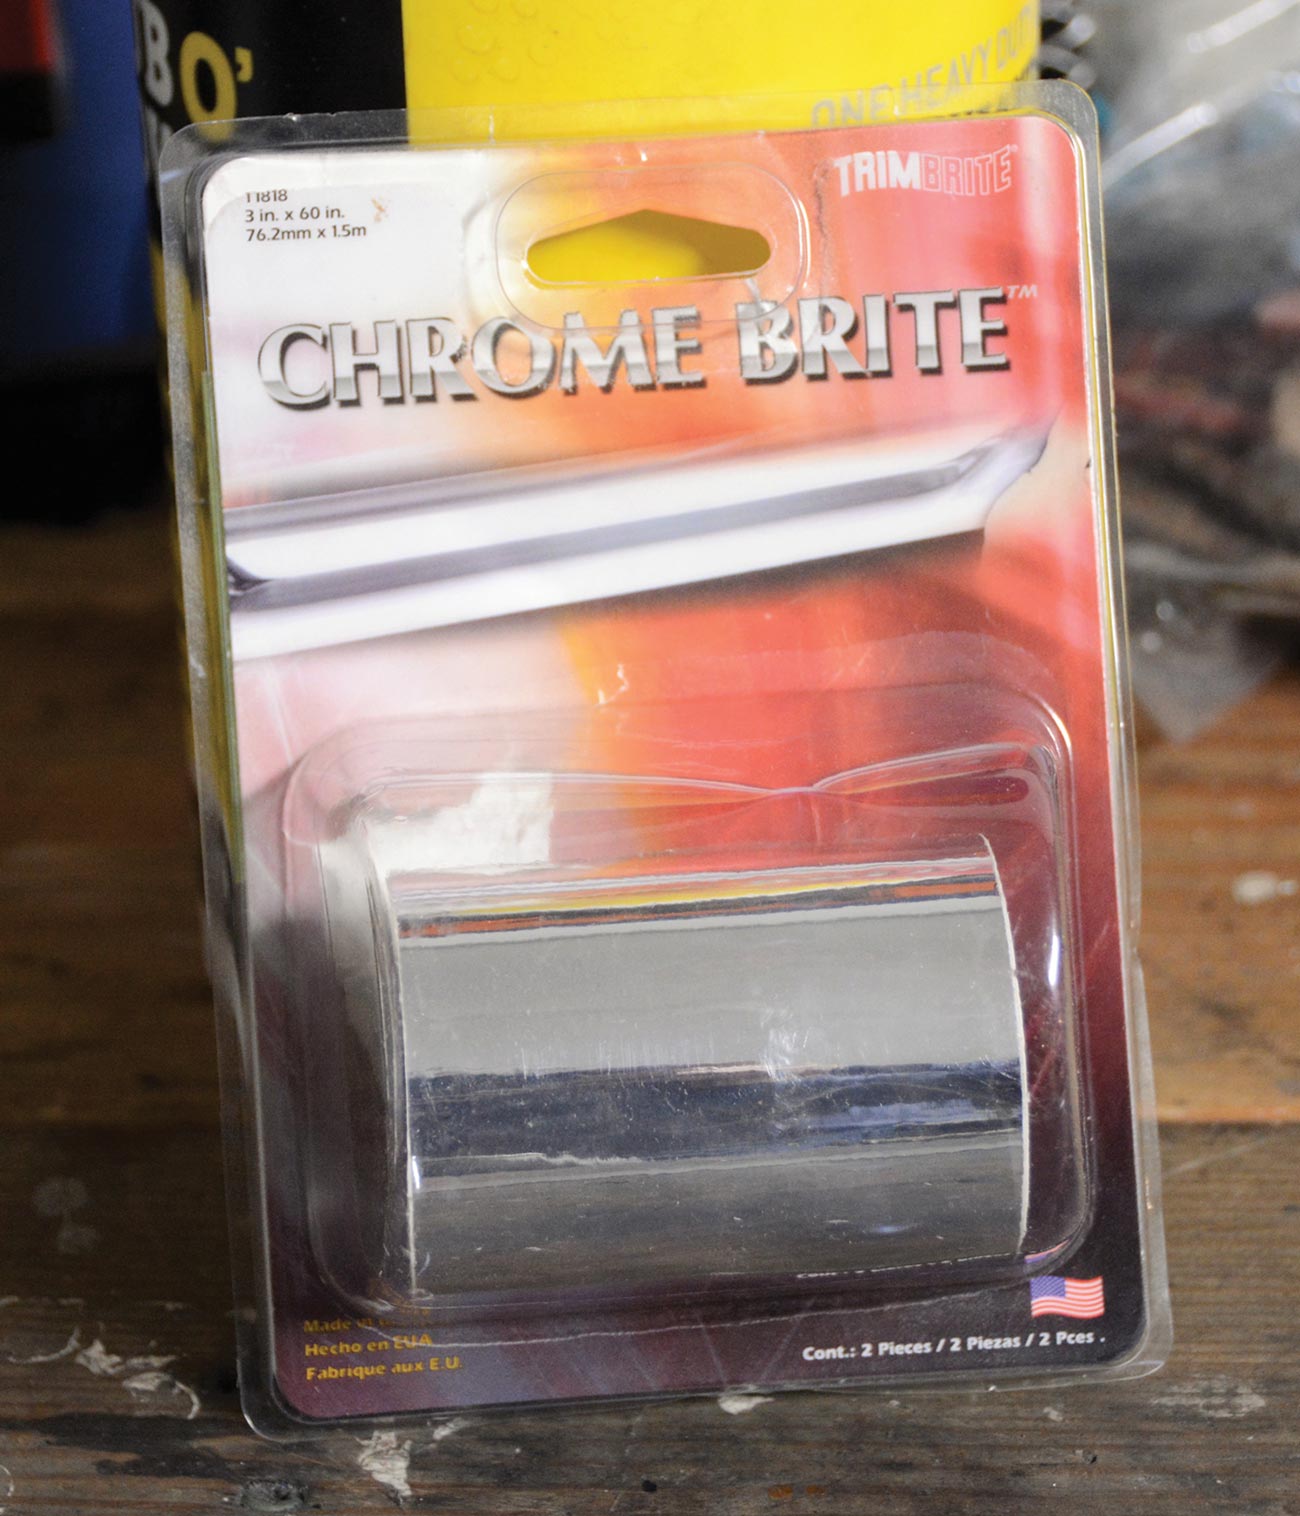
container of Trimbrite brand of chrome bright tape
28. We considered forming a center seam trim piece from sheet aluminum, but then we remembered we had a roll of chrome tape on the shelf that we sourced from a local auto parts store.
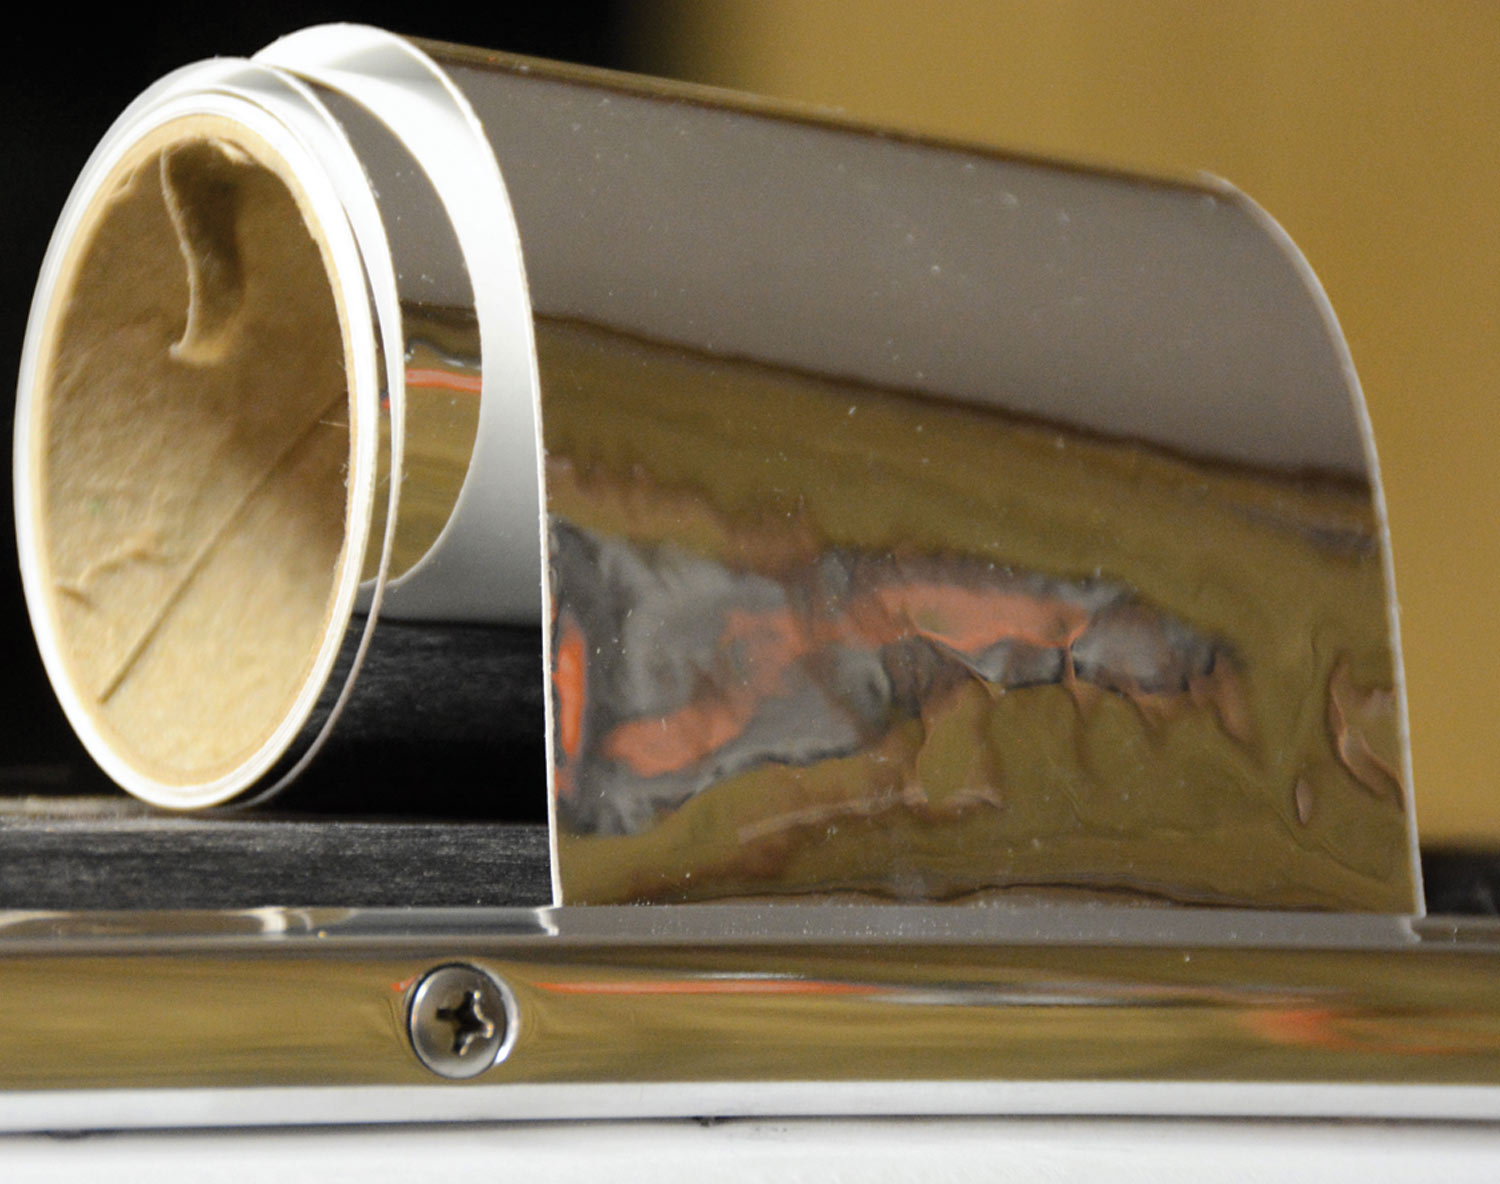
chrome tape is placed next to aluminum trim for visual comparison
29. The high-quality trim buffed to a chrome-like finish matching our chrome tape perfectly. Yeah, this may seem like cheating but sometimes easy is good.
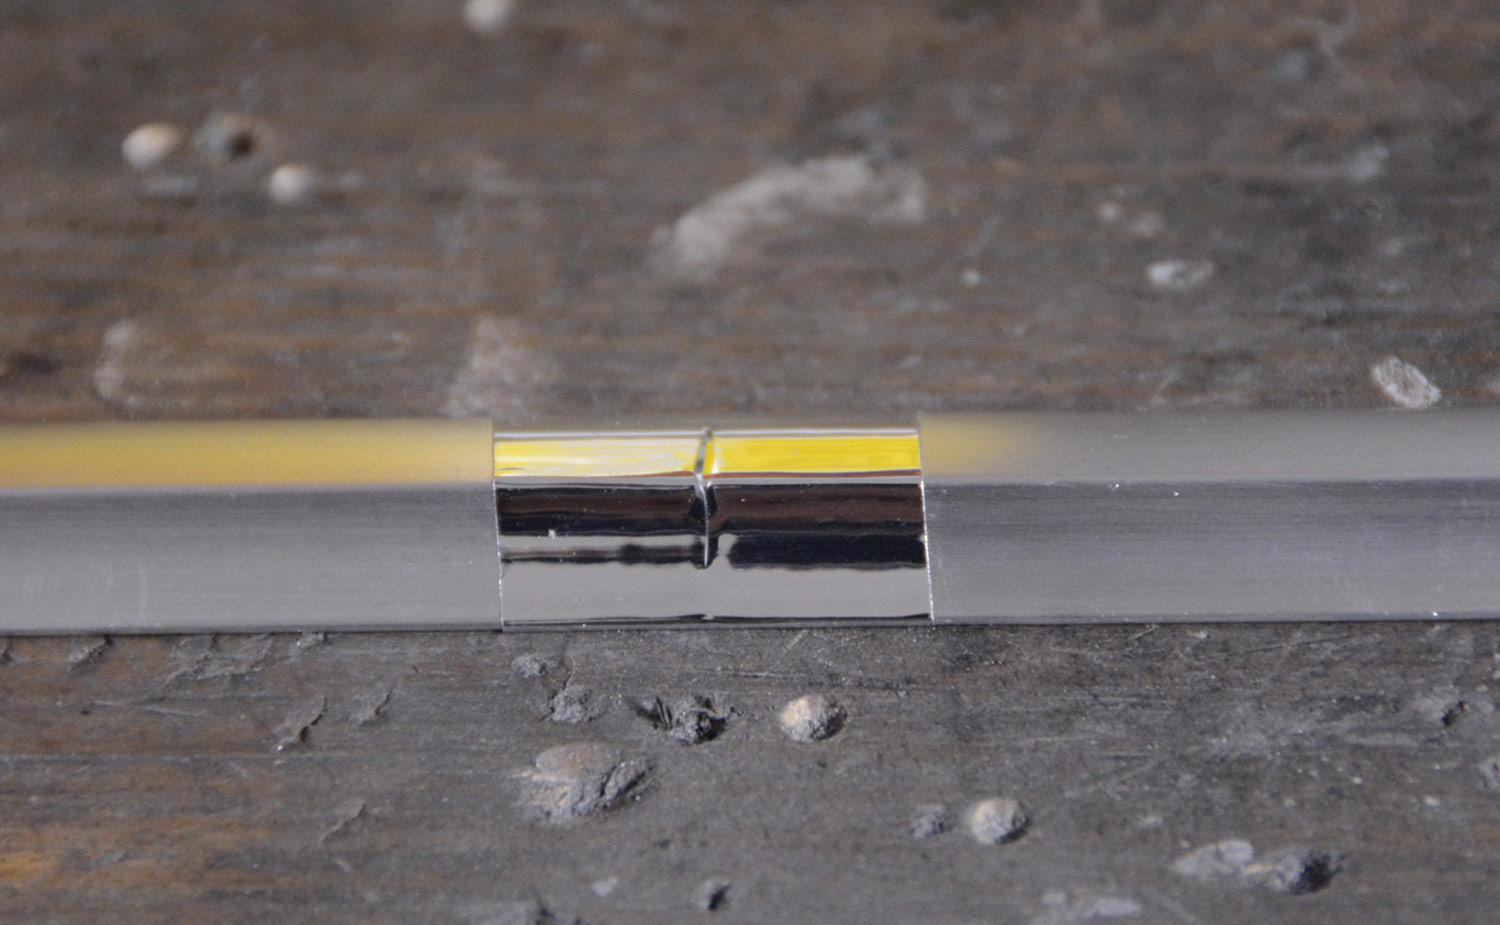
chrome tape is applied to two scrap trim pieces to test appearance
30. Since we would be removing the actual trim, we didn’t want to apply the chrome tape to the polished pieces. We did put a piece of the tape on the two scrap pieces left over to illustrate how it will look.
 SOURCES
Clayton Machine Works
(877) 469-7440
claytonmachine.com
Harbor Freight
harborfreight.com
Lokar Performance Products
(877) 469-7440
lokar.com
Modern Rodding
VOLUME 2 • ISSUE 11 • 2021