Modern Rodding Tech
InTheGarageMedia.com
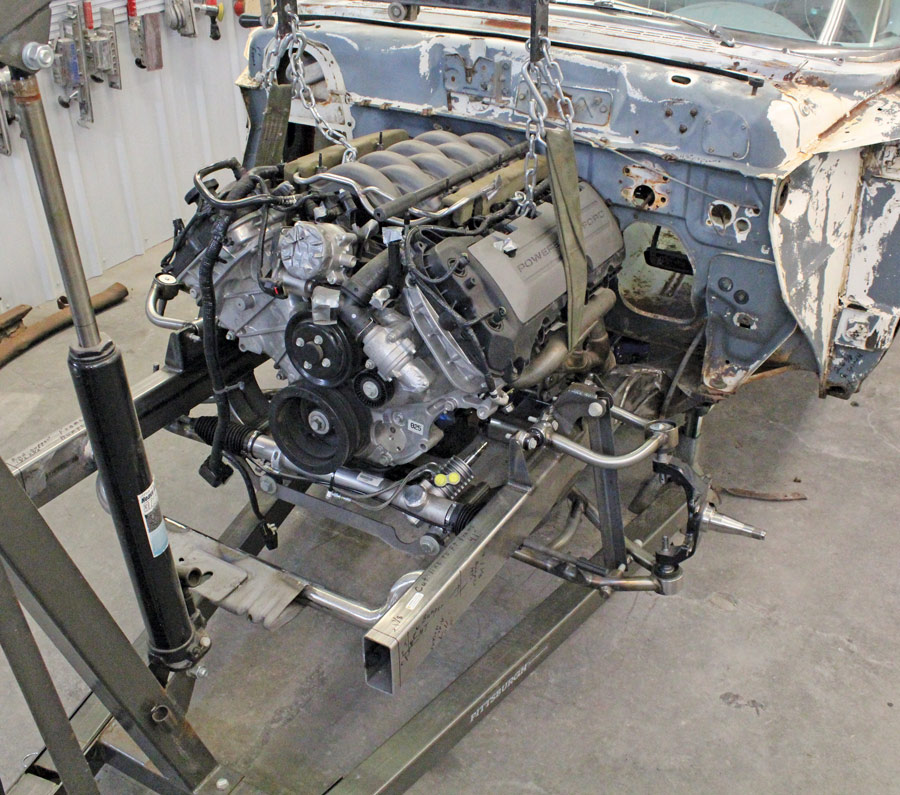
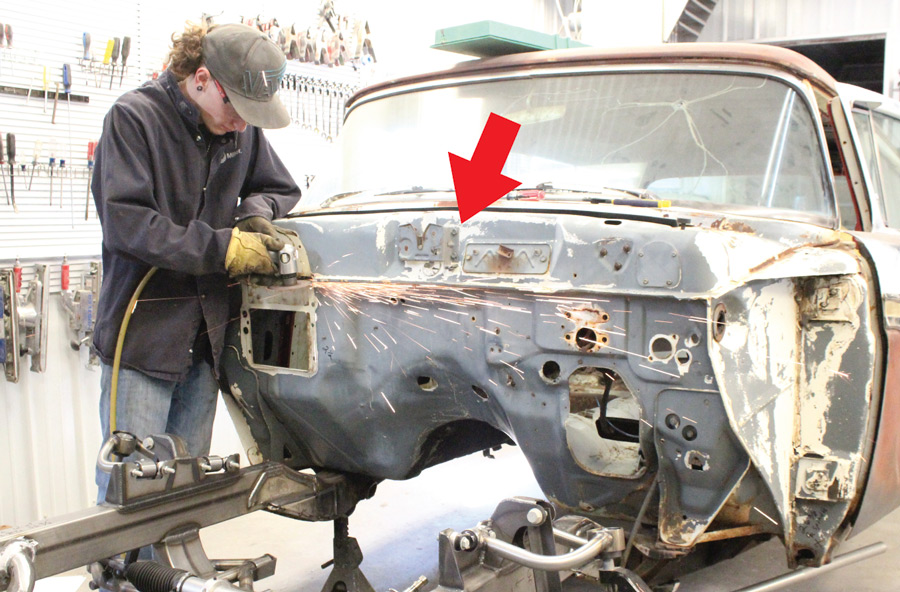
1. A family affair, Tate Radford (left), Caden Radford (right), and Colin Radford (kneeling) are situating a Ford Performance Coyote V-8 in a rare ’57 Ford two-door Del Rio Ranch Wagon.
1. A family affair, Tate Radford (left), Caden Radford (right), and Colin Radford (kneeling) are situating a Ford Performance Coyote V-8 in a rare ’57 Ford two-door Del Rio Ranch Wagon.

 Photography by Brian Brennan & Tate Radford
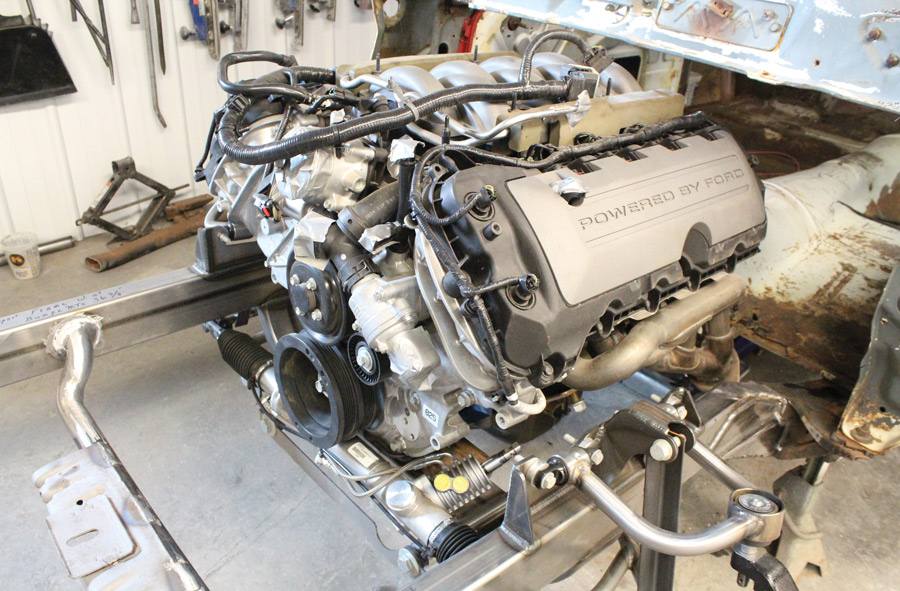
n the Nov. ’21 issue of Modern Rodding we introduced Colin and Sue Radford’s ’57 Ford Del Rio Ranch Wagon as he installed an Art Morrison Enterprises (AME) Bikini Clip. Over the years we watched the Radford Automotive crew as they have turned out a number of top-notch street rods, trucks, and their own record-holding Bonneville car, doing everything from chassis construction to body- and paintwork. This time around we followed Colin and grandsons Tate and Caden as they installed a Vintage Air Front Runner onto a Ford Performance Coyote V-8 in a Ford wagon where there was once a much-smaller Y-block.
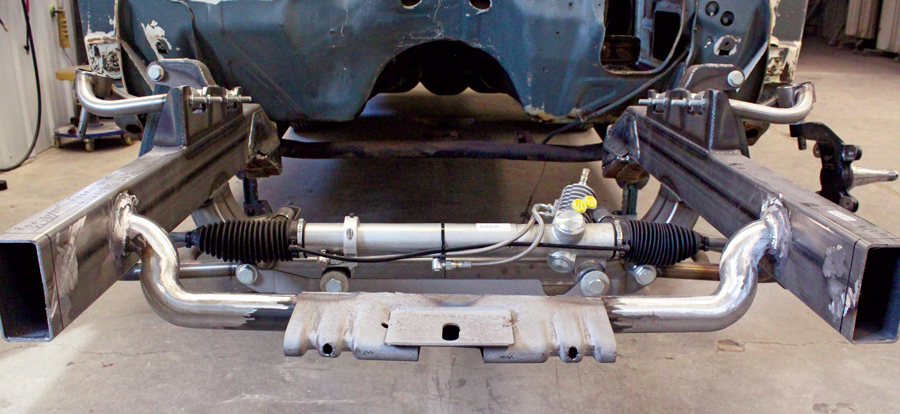
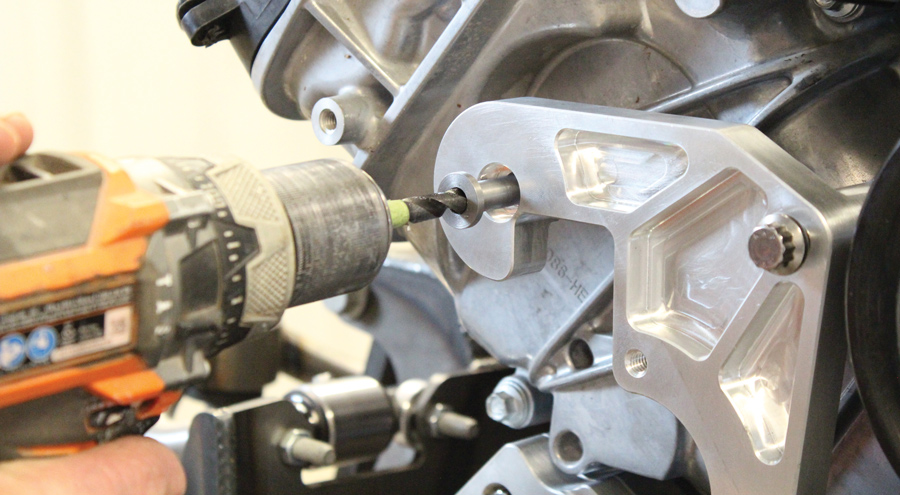
The Radford crew has a number of tips and tricks that have come from experience, not the least of which are to plan ahead and take lots of measurements. Before the Ford’s front suspension was replaced with the AME clip the car was placed on jackstands and all the critical points (chassis centerline, wheelbase, and so on) were recorded on the shop floor (see the first installment). Not only was that important to position the front suspension properly, prior measurements would also be used to position the core support bracket now that the new subframe is in place.
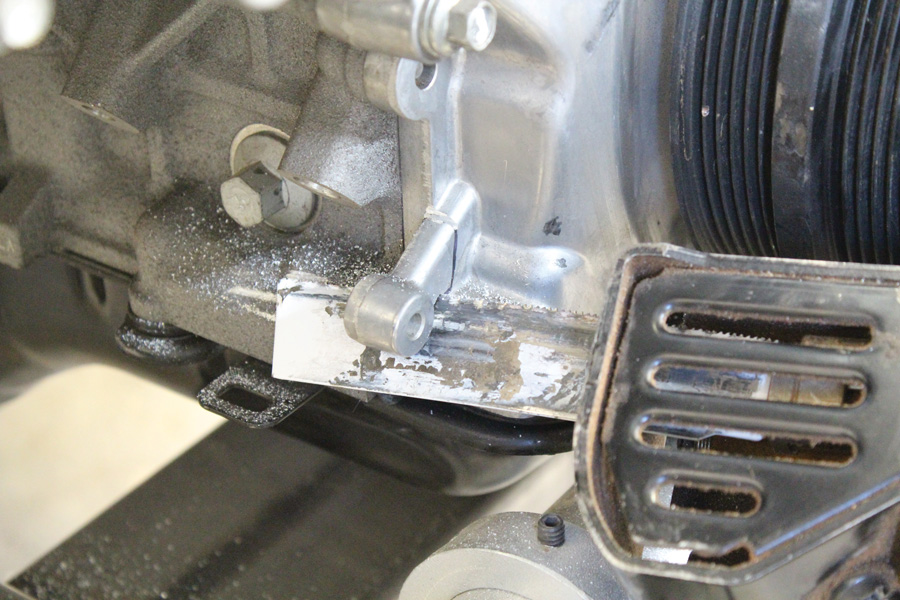
When swapping engines there are always a variety of problems that may appear, many of them are self-inflicted; radiator and fan clearance are probably the most common example. Again, measurements and planning are critical and in this case to provide the necessary room for the radiator and fan the Coyote would have to be moved further to the rear than the original Y-block, which meant the firewall had to be modified. Certainly, something better done now than later when it’s discovered there’s no room for a fan.
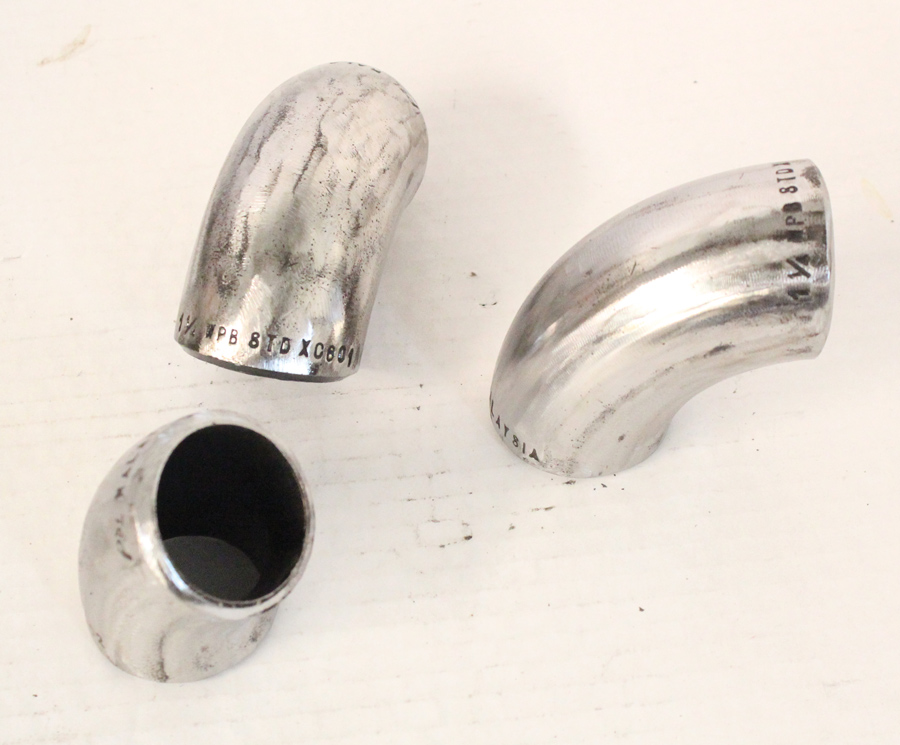
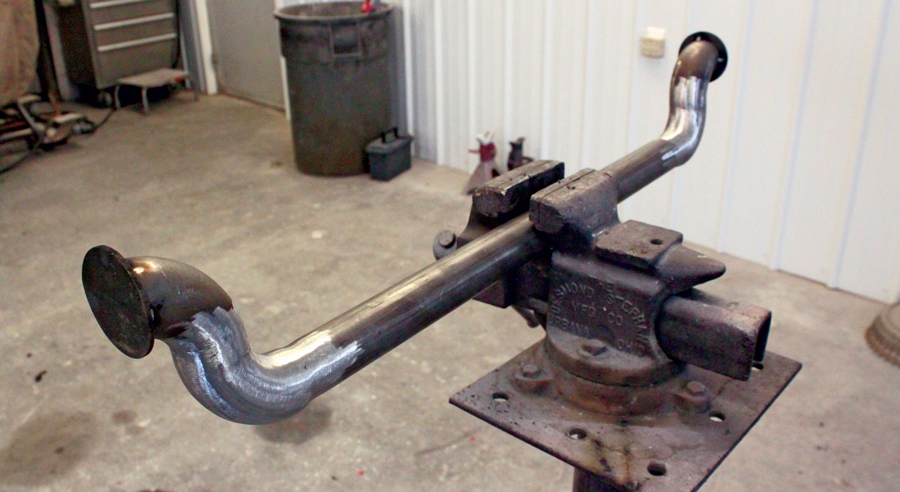
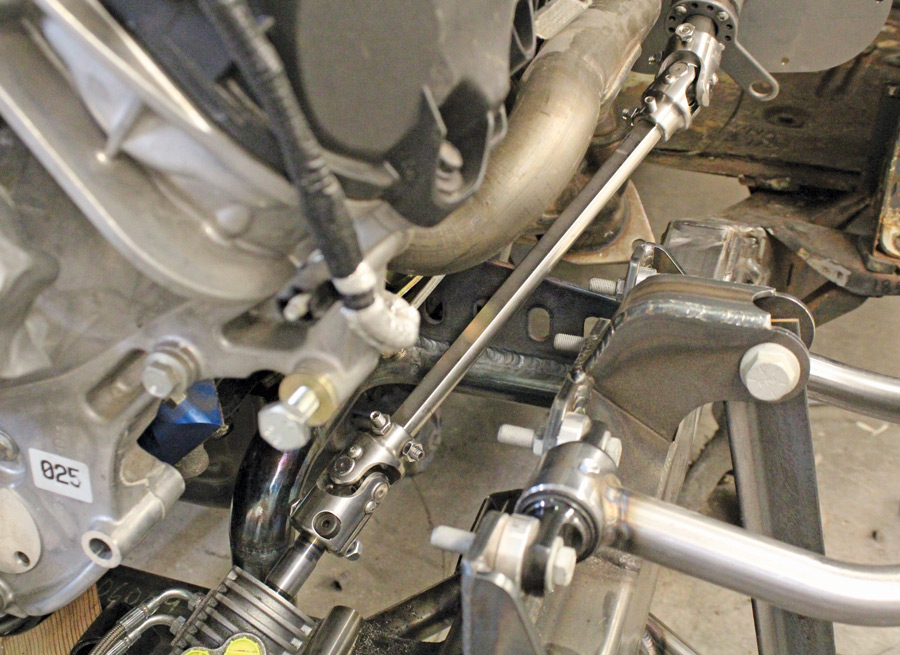
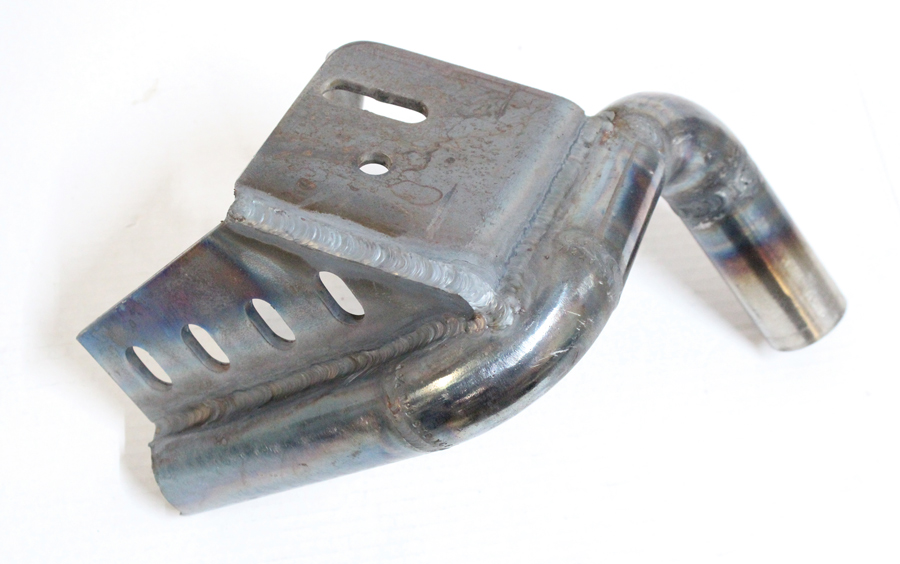
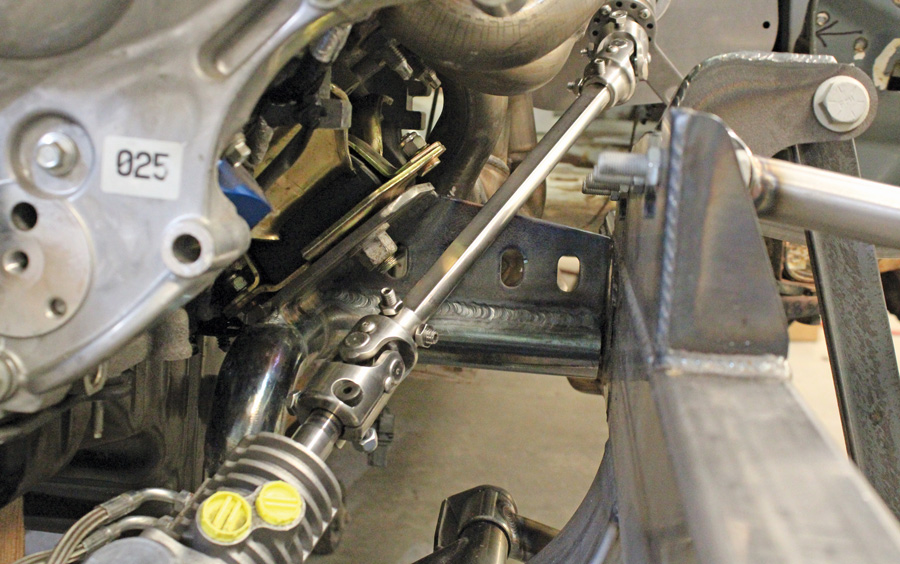
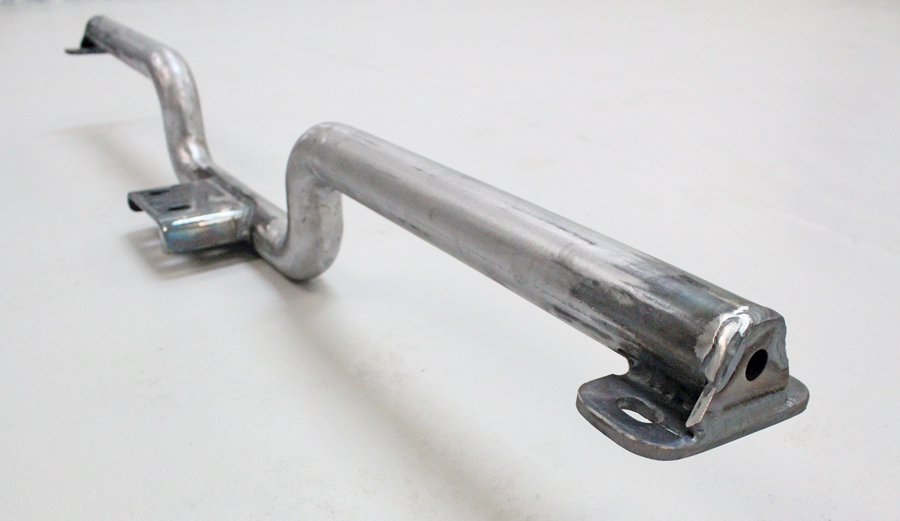
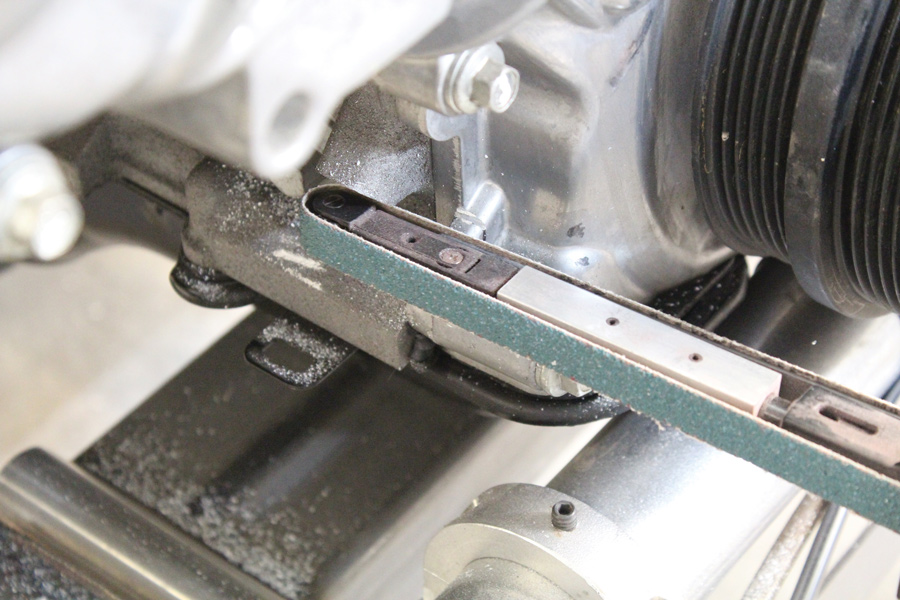
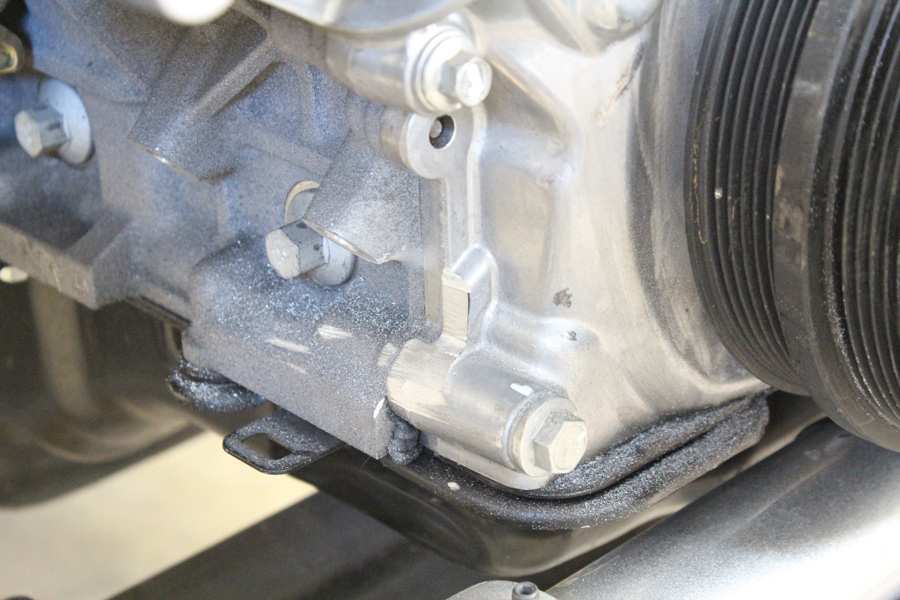
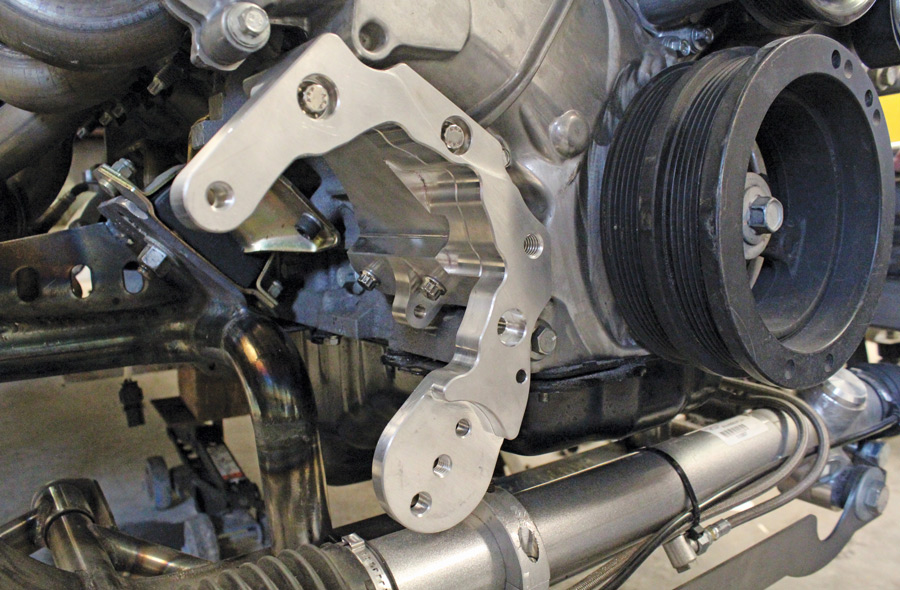
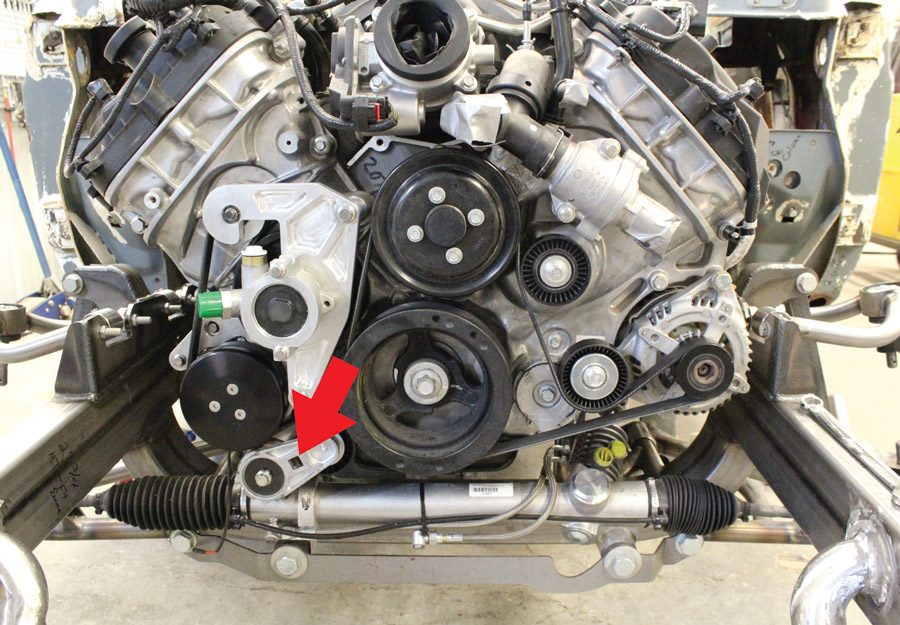
Additional considerations are the space for the steering and exhaust. In this case exhaust clearance on the passenger side wasn’t a problem, but it did take some creativity to fashion engine mount brackets on the left side that provided an unobstructed path for a shaft from the steering column, past the lefthand header, and onto the rack-and-pinion. Another issue that often pops up is oil pan to crossmember/steering component clearance. In this case in addition to the vastly improved handling, the AME clip with its front-mounted rack-and-pinion and contoured front crossmember provided much more room than the stock chassis configuration, so oil pan clearance wasn’t an issue.
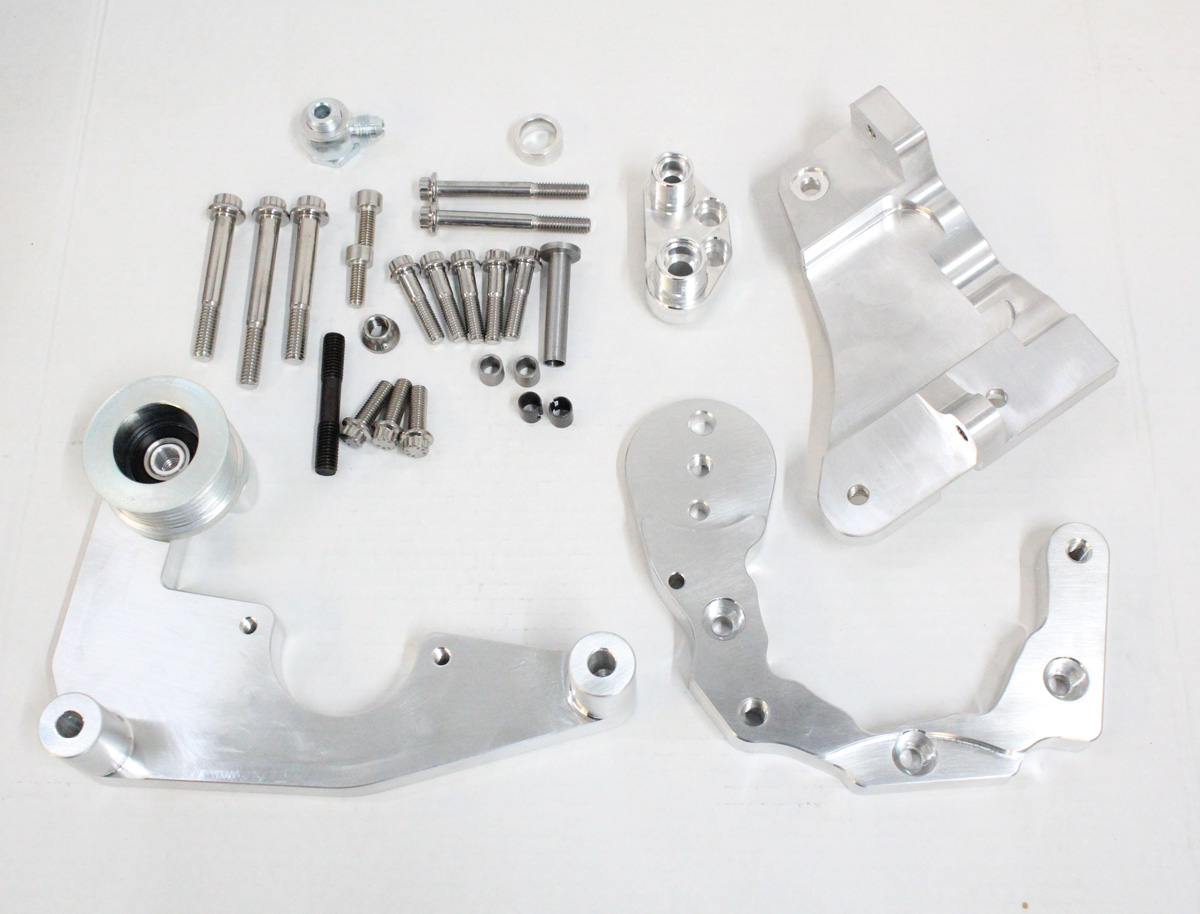
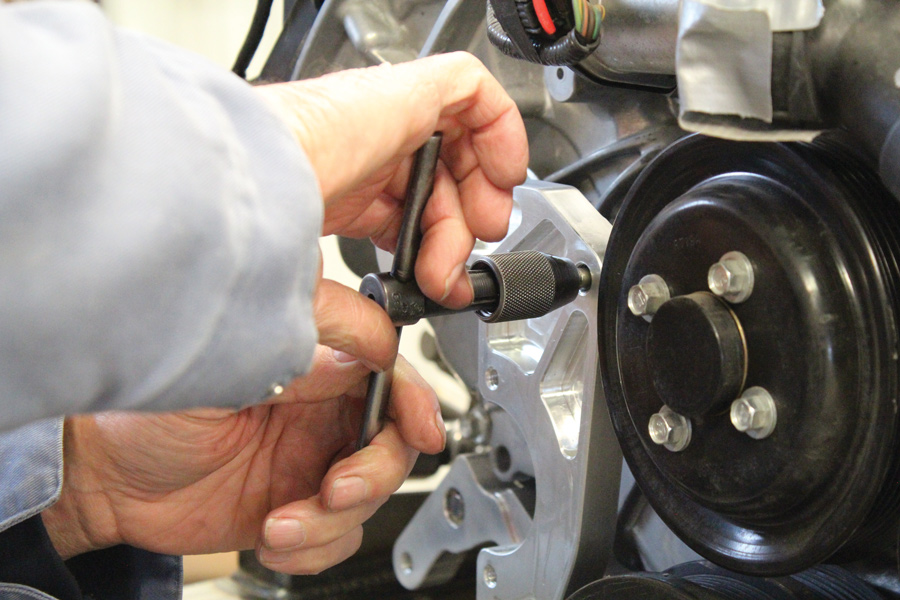
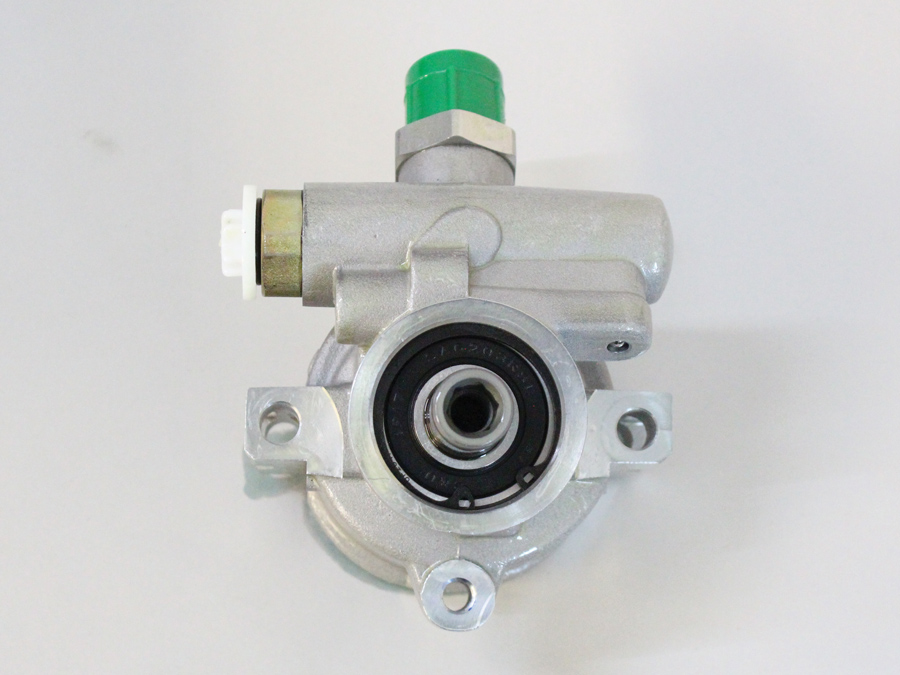
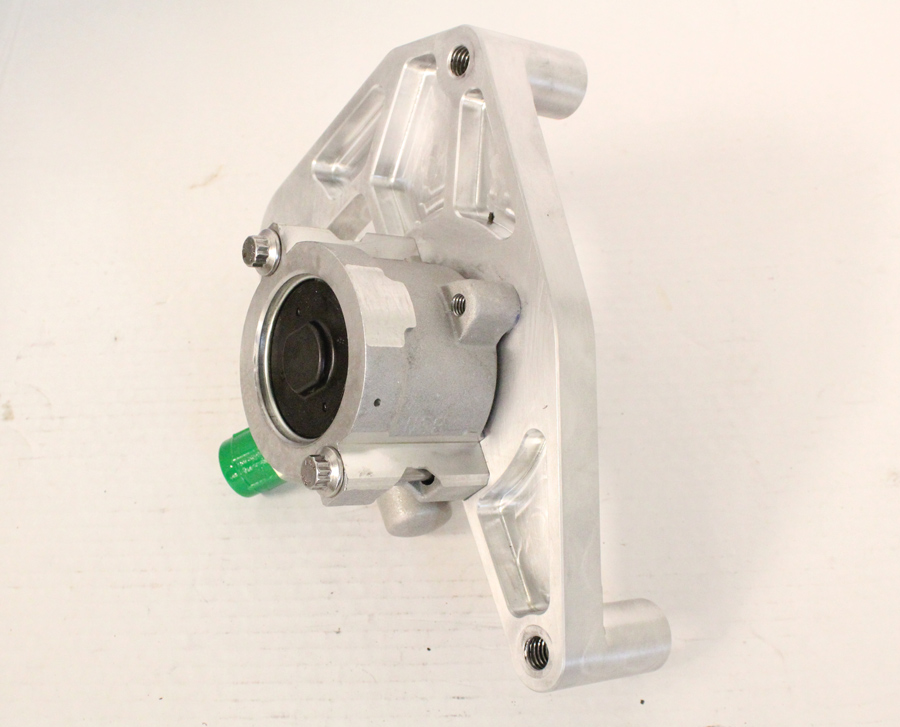
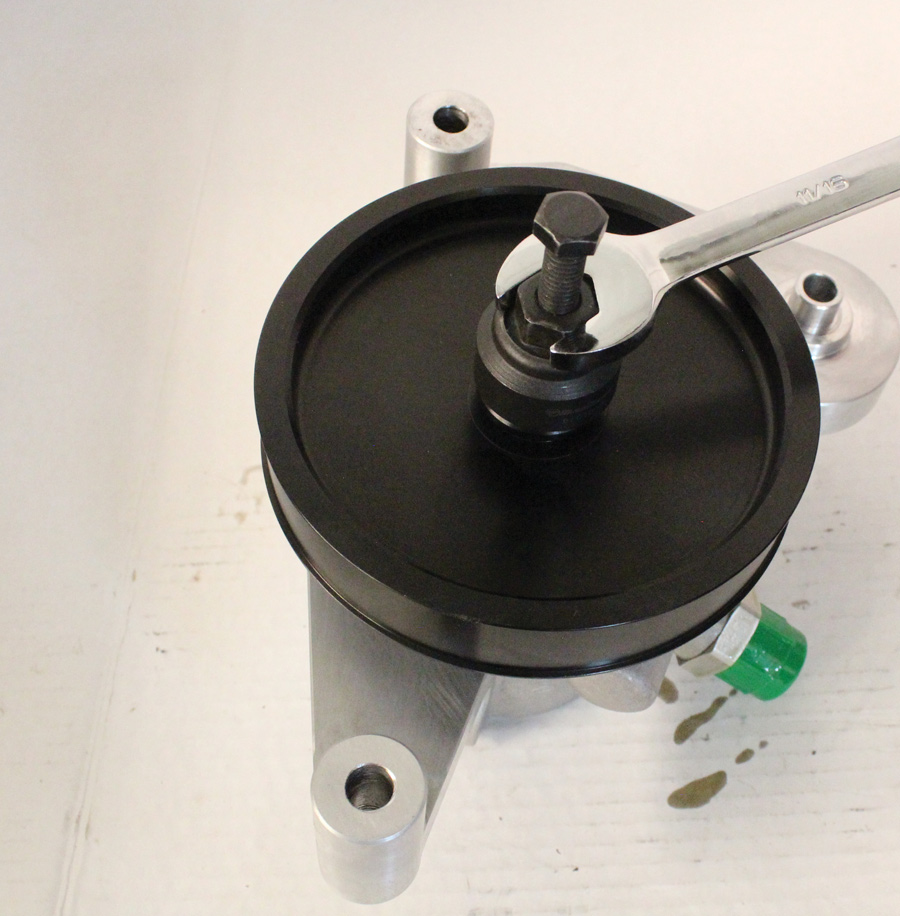
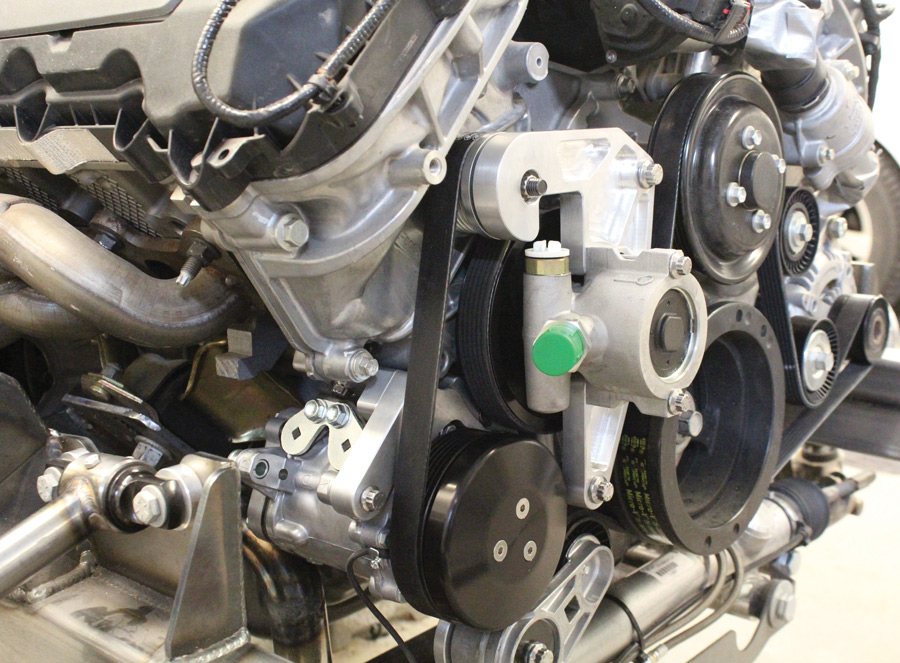
While the Coyote V-8 is a big engine, like most cars of the era the Radfords’ wagon engine bay could accommodate its width, and setting the firewall back the required 2 inches wasn’t a problem. The real issue with this installation was the engine itself. Coyotes don’t have a provision to mount the power steering pump that would be needed for the Flaming River rack-and-pinion as these engines came in vehicles equipped with electric power steering. The cure for that dilemma was a Vintage Air Front Runner kit. Well-engineered and beautifully executed, Vintage Air’s Front Runner is a compact drive system that is not only clean and simple but solid and strong. There are two versions of the Coyote Front Runner, one with a power steering pump and one without.
For this application a power steering pump was required, so a Vintage Air Front Runner (PN 174020) was ordered. The kit includes detailed installation instructions, along with the following items:
- Sanden SD-7B10 natural finish compressor
- Black-anodized compressor clutch cover
- Detroit Speed aluminum power steering pump
- Precision-machined power steering pump bracket
- Power steering pulley
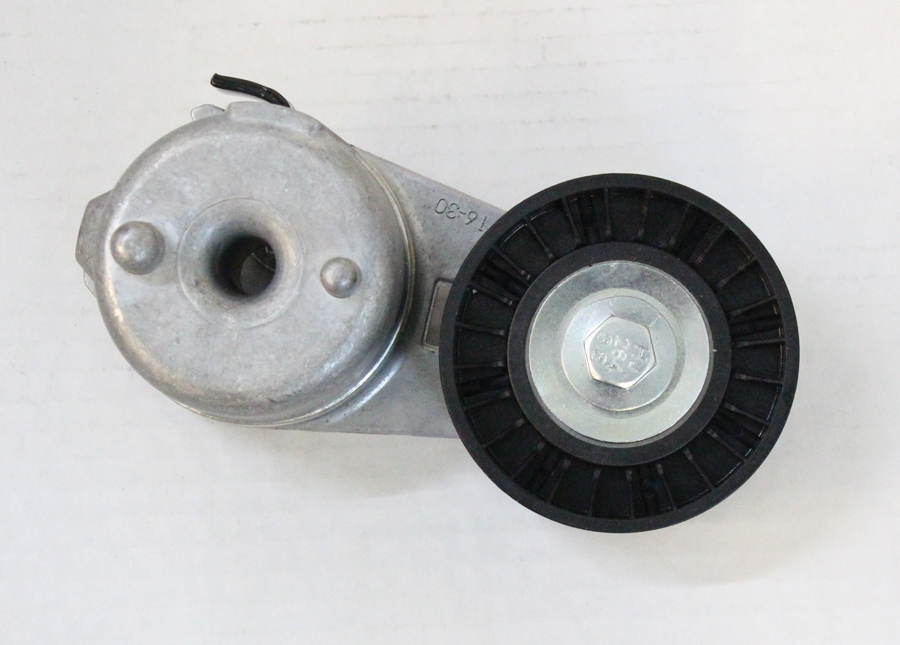
- Dayco Performance serpentine drivebelt
- Dayco OEM tensioner
- Idler pulley
- ARP stainless 12-point hardware kit
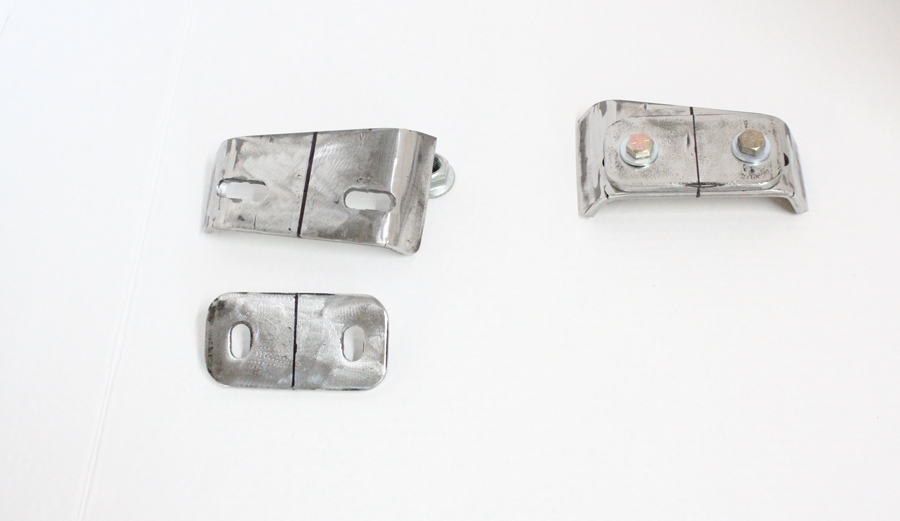
With the Front Runner installed the only concern was clearance for the A/C and power steering pump belt tensioner. Again, planning paid off as the engine was positioned so the tensioner cleared the Flaming River rack-and-pinion, the pan cleared the crossmember, there was enough room to route the exhaust, and there was a straight shot for the steering shaft from the column to the rack-and-pinion steering. With all those issues involved the engine and transmission mounts were fabricated and installed.
Building a hot rod often comes with challenges, and never think it’s unusual to have to tear out something that’s been built and installed because it didn’t work as planned. But learn to plan ahead and it won’t happen as often.


(208) 745-1350